Globus sync directory
Synchronise directories between Globus shared collections. Files and directories will be synchronised from the specified directory on the source endpoint to the destination endpoint. Multiple source and destination endpoints can be specified.
GlobusSharedCollection
│
└───dirtoshare
    │   file011.txt
    │   file012.txt
    │
    └───subfolder1
        │   file111.txt
        │   file112.txt
        │   ...
- Files will only be copied if they do not already exist on the destination endpoint or if their checksums do not match (i.e. they were modified on the source endpoint)
- Files removed from the source collection will not be removed from the destination collection if they already exist there
- No files will be changed on the source endpoint (read-only access required)
- Transfers can be stopped and resumed later (using checksums), e.g. by setting a time limit in the config file
Requirements
Register the app with Globus (one time setup)
We are using client credentials authentication to authenticate the app directly with Globus.
- You must register the app and get a Client ID: https://globus-sdk-python.readthedocs.io/en/stable/examples/client_credentials.html#get-a-client
- Go to developers.globus.org
- Click Register your app with Globus
- Click Add another project, give it a project name, e.g. Sync Directory and enter a contact email
- On the project, click Add and Add new app
- Give the app a name, e.g. Sync Directory App
- Make sure Native App is not selected
- Enter the following scopes:
- openid
- profile
- urn:globus:auth:scope:transfer.api.globus.org:all
- Add the following redirect: https://localhost
- Create the app
- Make a note of the Client ID
- Click Generate New Client Secret and make a note of the secret
- Store the client id in the config file in the globus section, named clientid
- Store the secret in a file somewhere secure, e.g. ~/.globus_sync_directory_secret
- If you are using a personal endpoint, make sure sharing is enabled (Preferences -> Access -> Shareable)
Globus Endpoint
You need to have a Globus end point running with access to the source data and another at the destination (e.g. the NeSI managed endpoint for the destination).
If you are using a personal endpoint, make sure you have enabled sharing for the relevant locations. This is a setting within the personal endpoint software. For example, on a Mac you would set this by opening the application preferences and enabling sharing there.
Shared collections for each directory you want to synchronise
Create source and destination shared globus collections through the Globus web app.
-
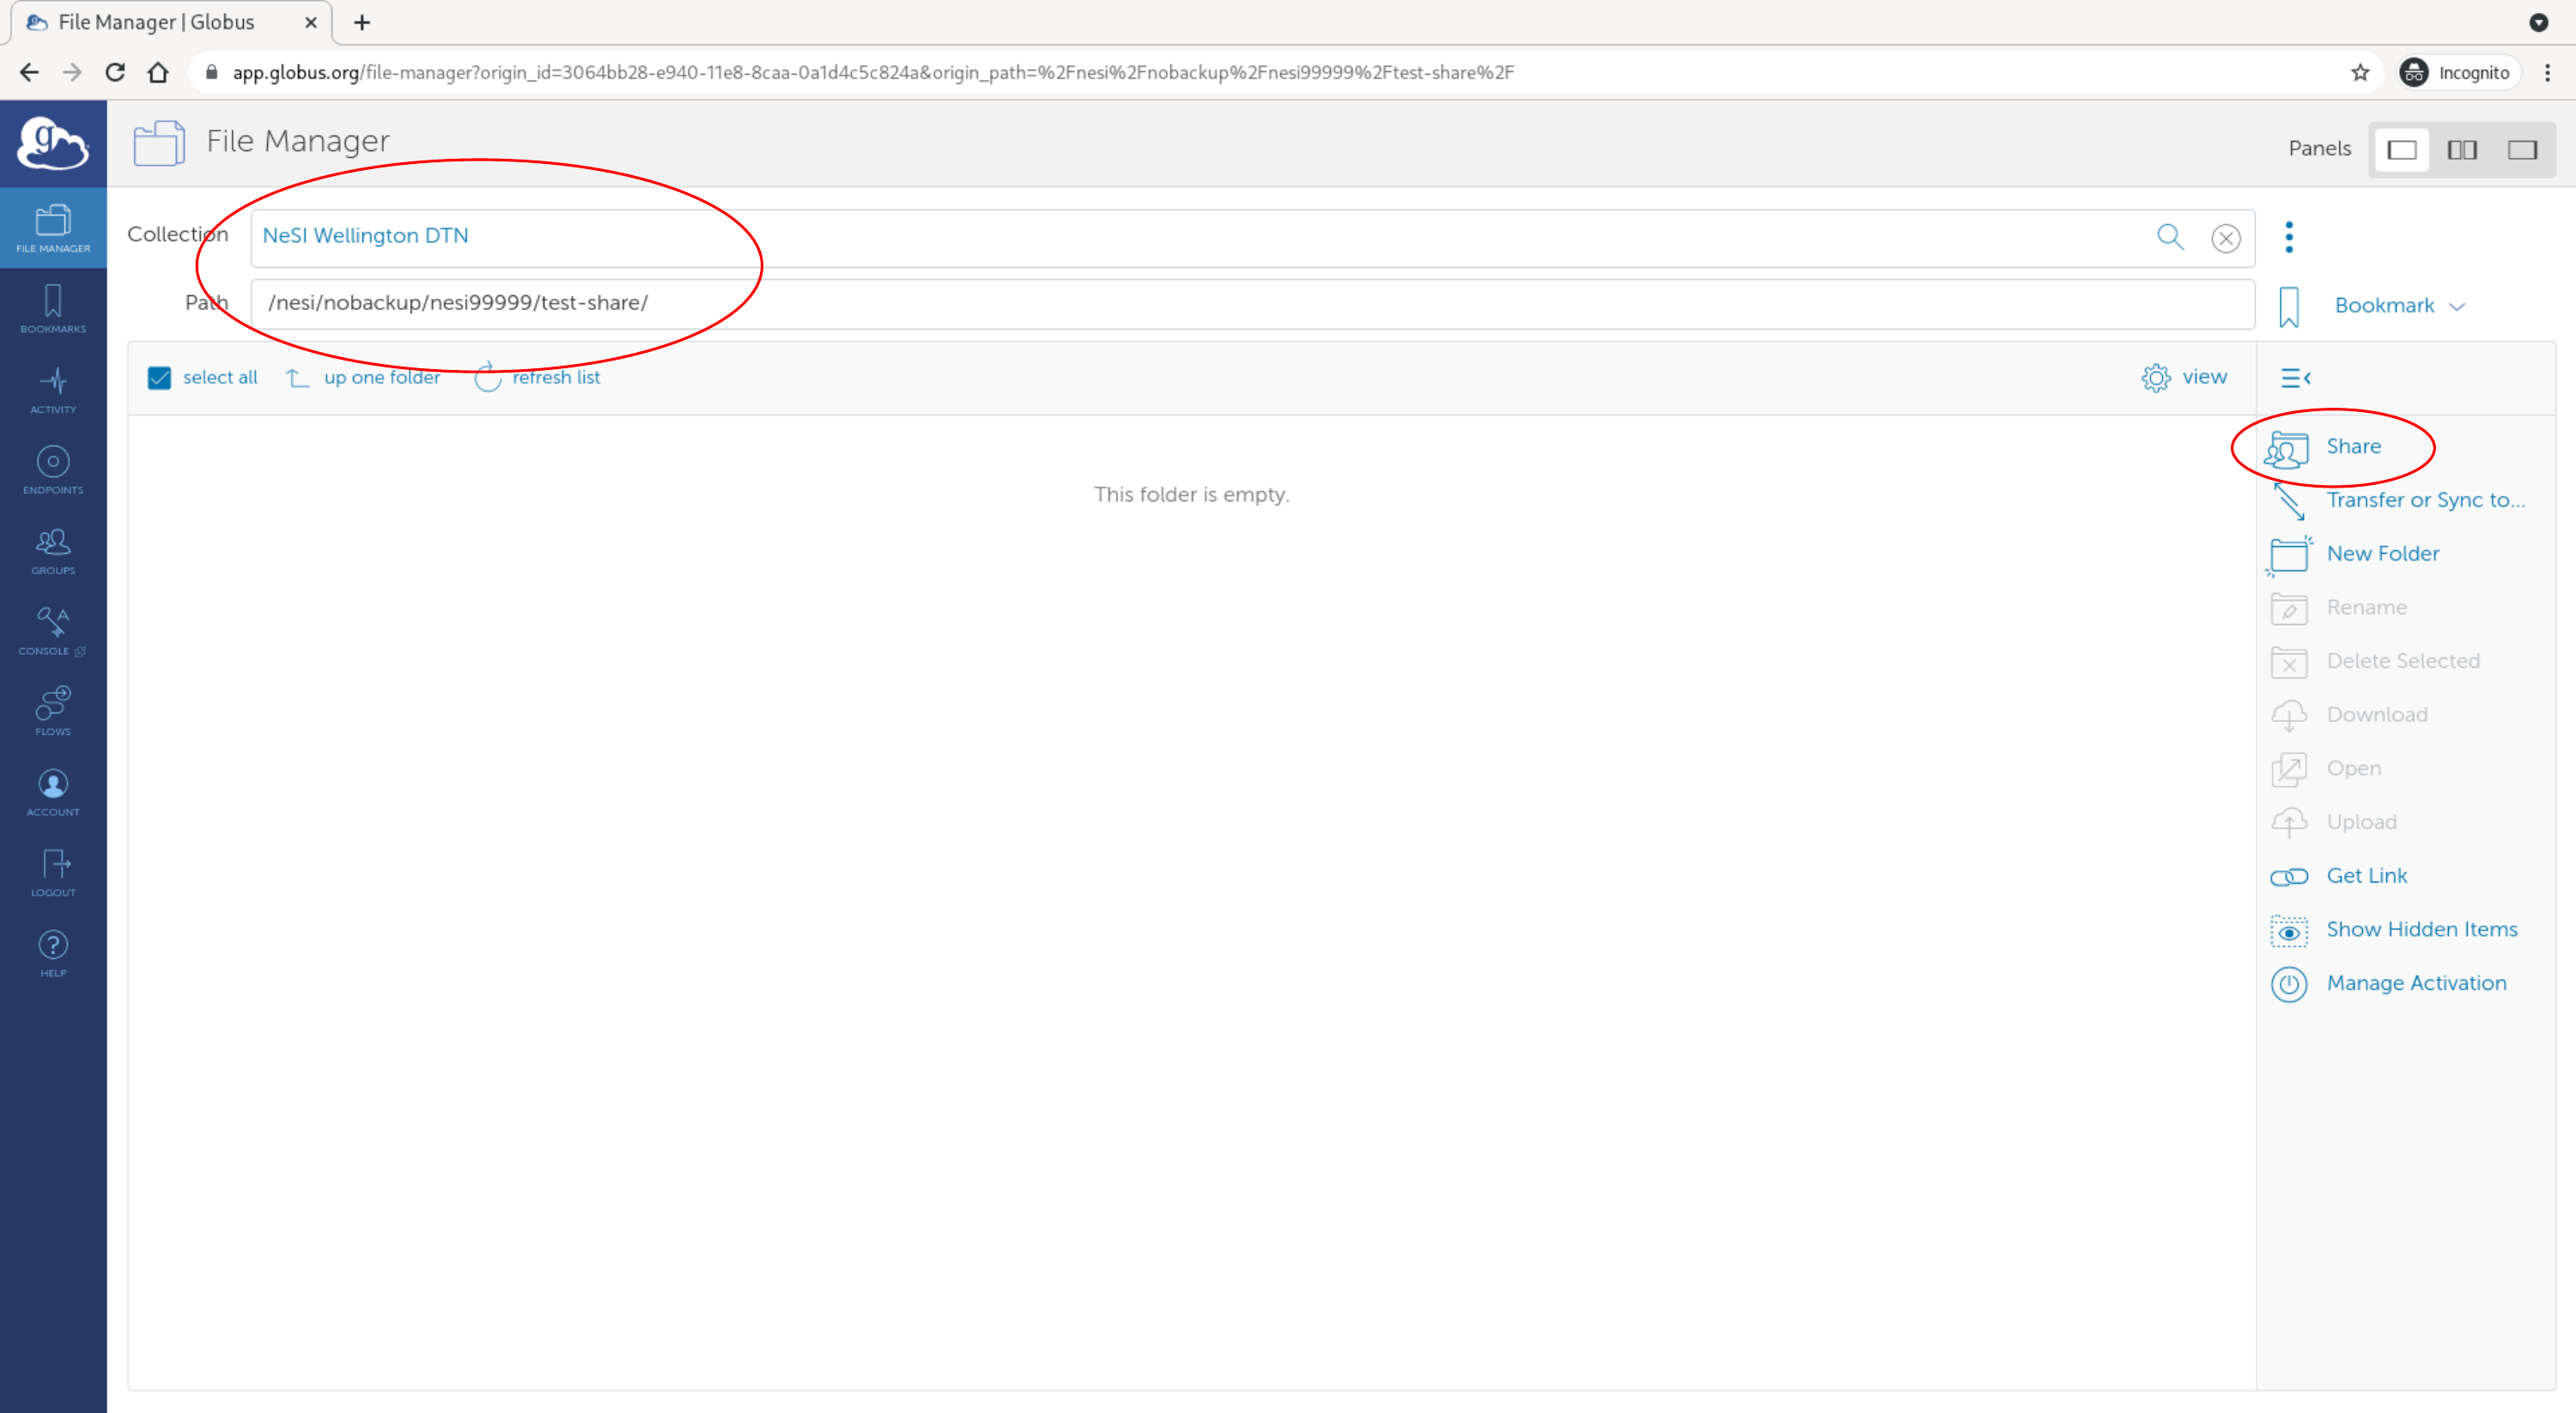
Locate the directory of the shared collection in the Globus file manager on your endpoint (this will be the directory that contains the files and/or directories to be synchronised) and select the "Share" option
-
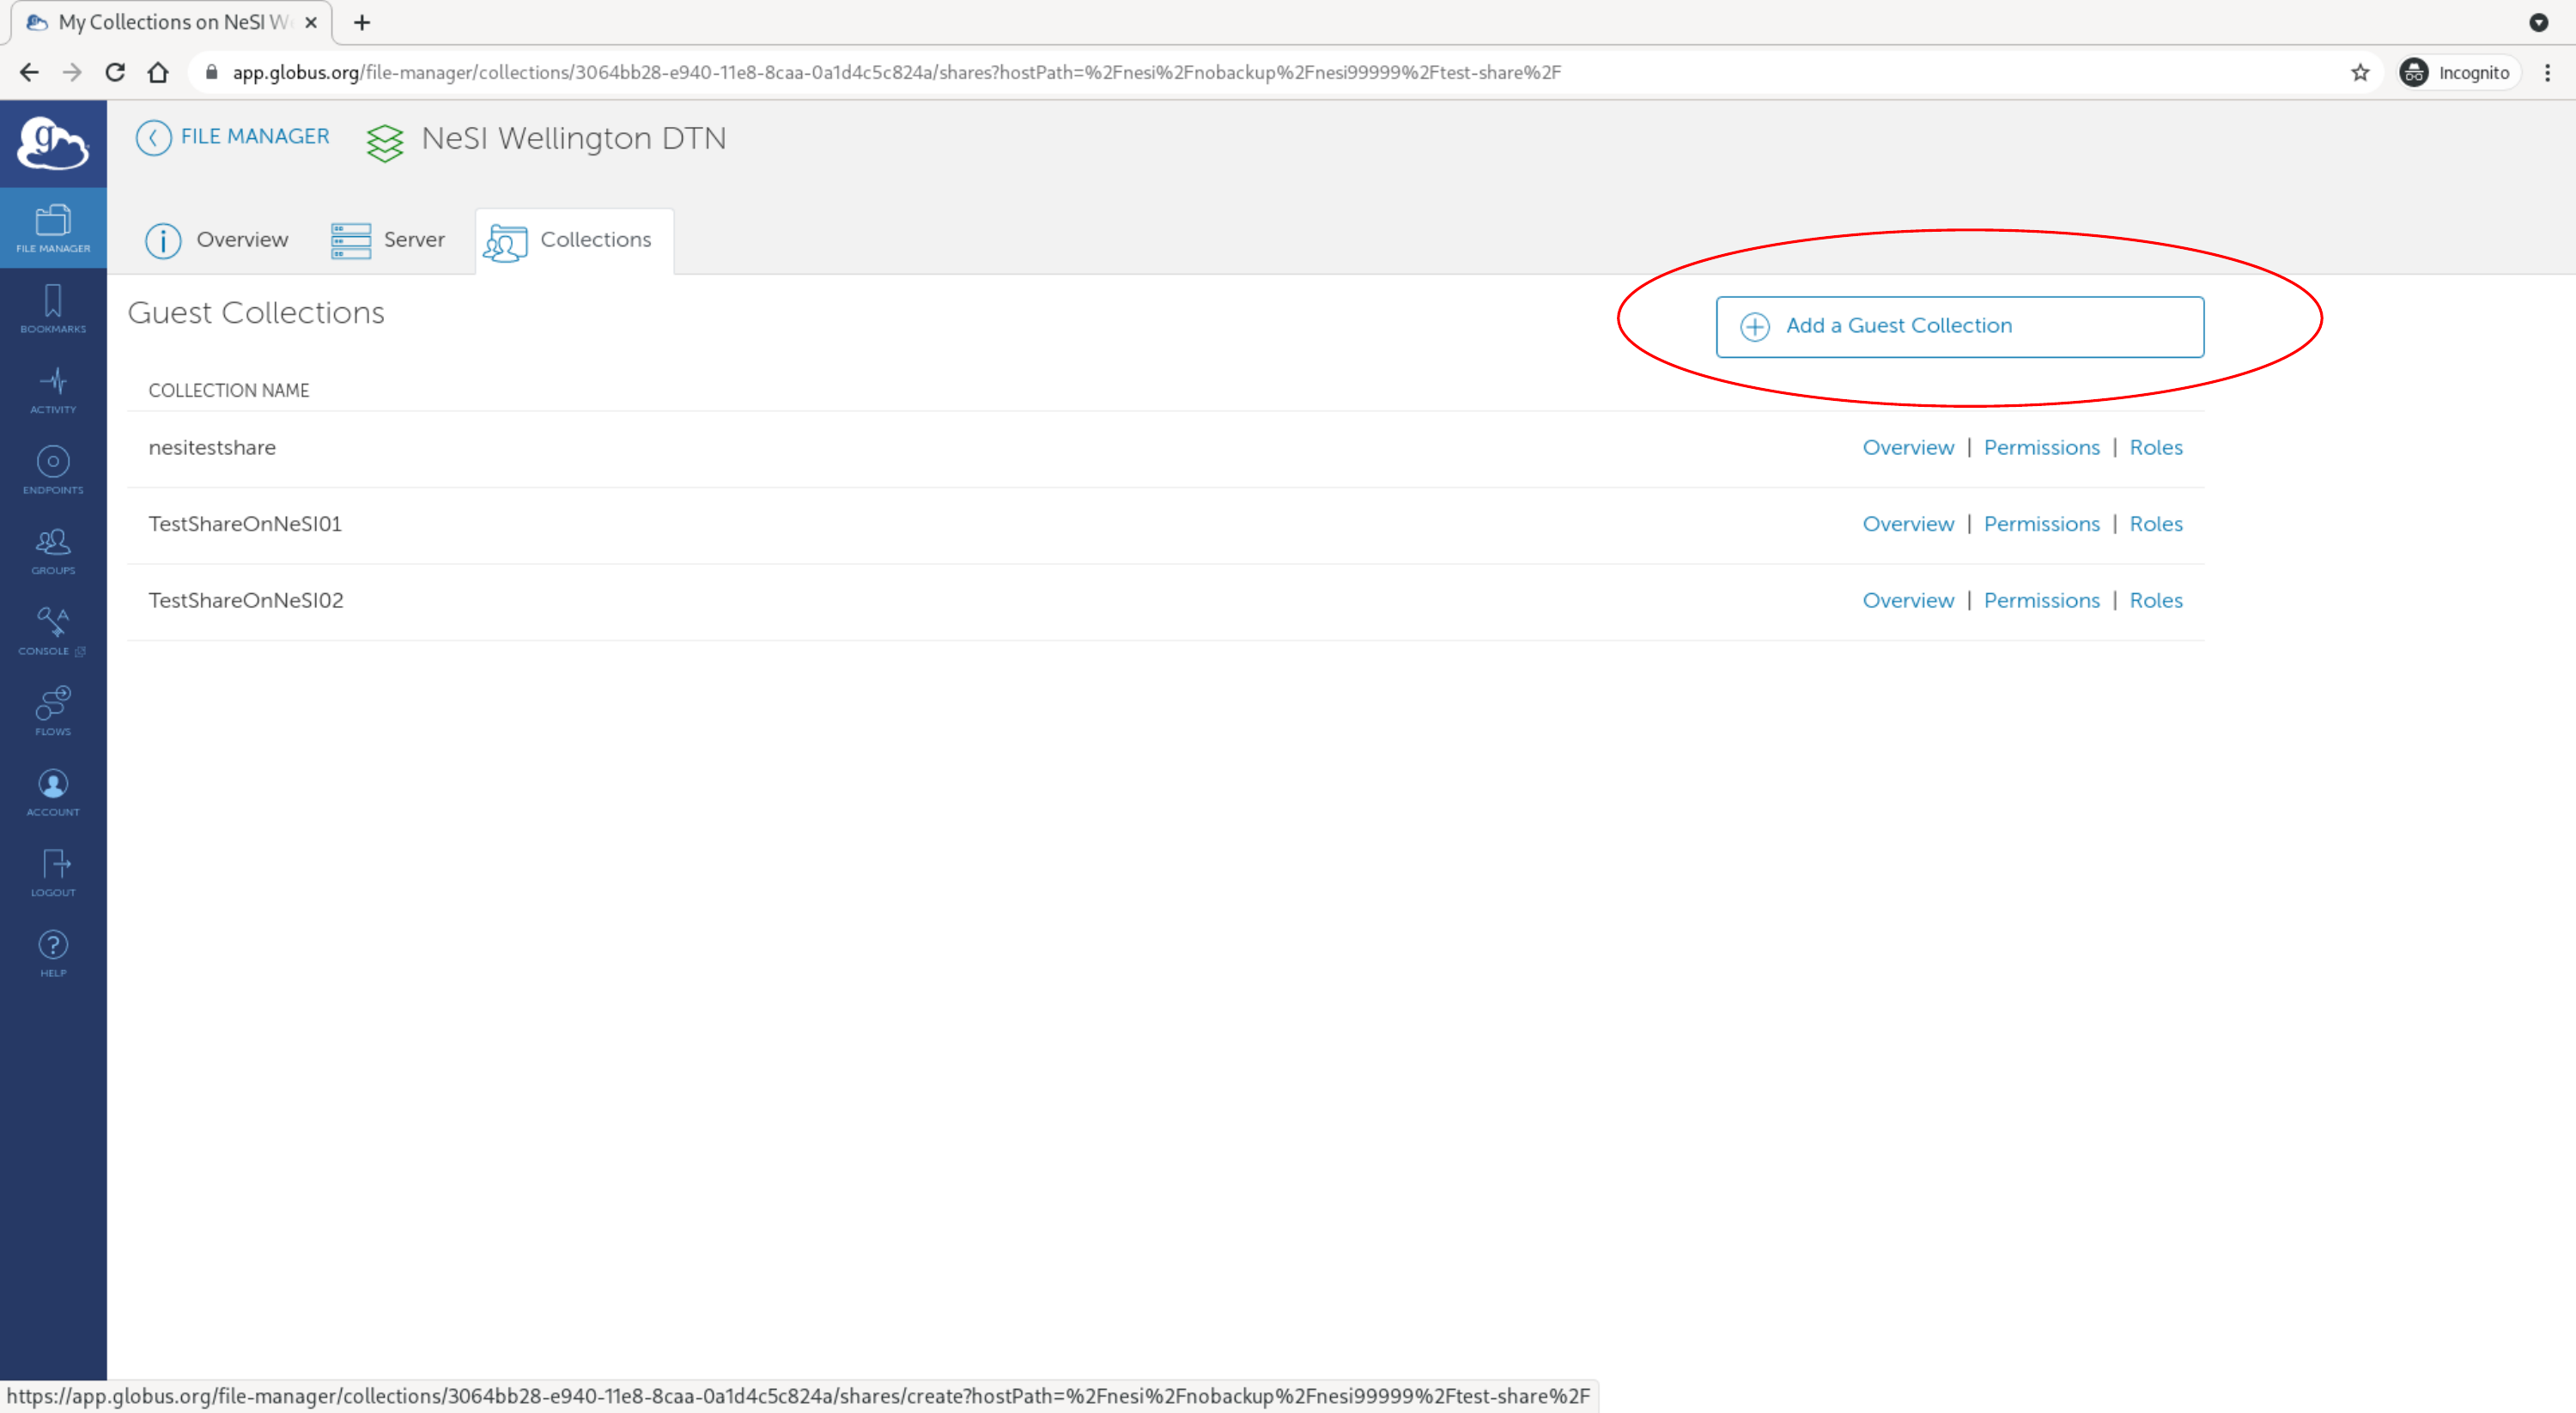
On the share settings page, select "Add a Guest Collection"
-
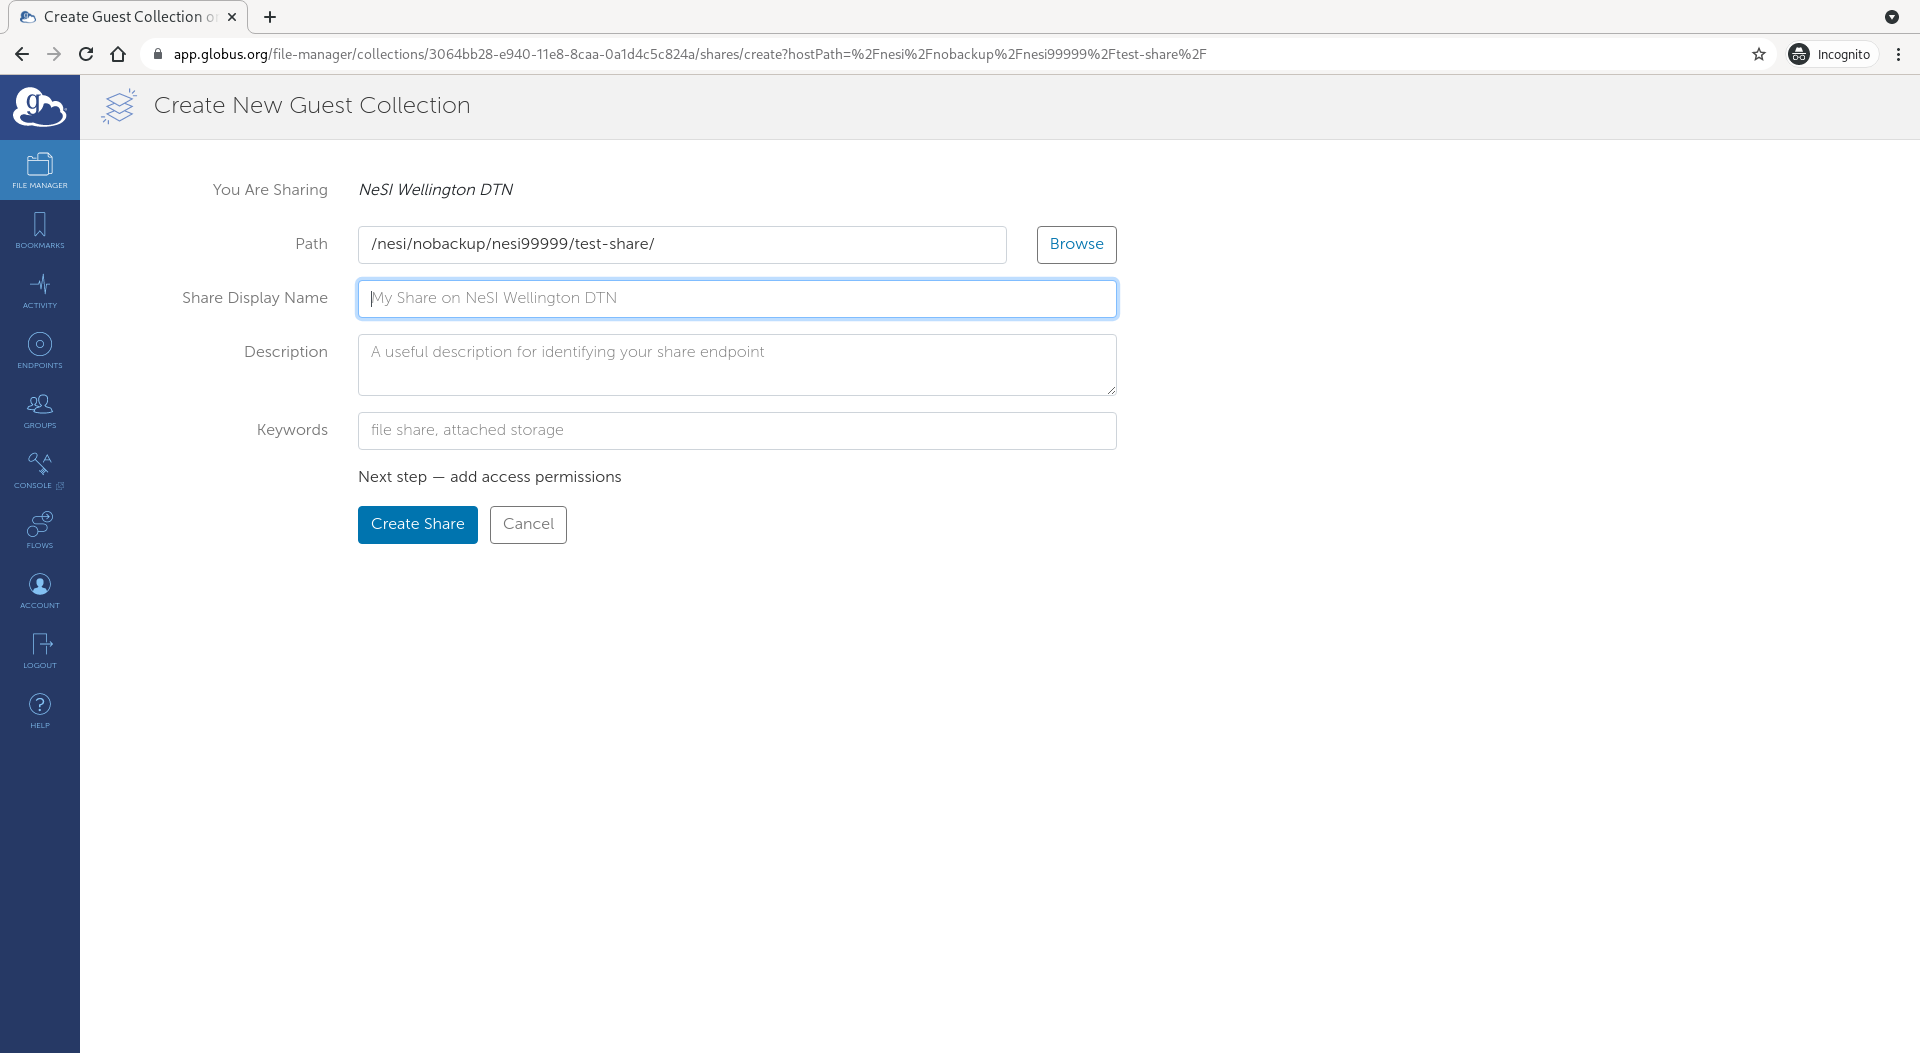
On the "Create New Guest Collection" page, make sure the path is correct and give the share a name
-
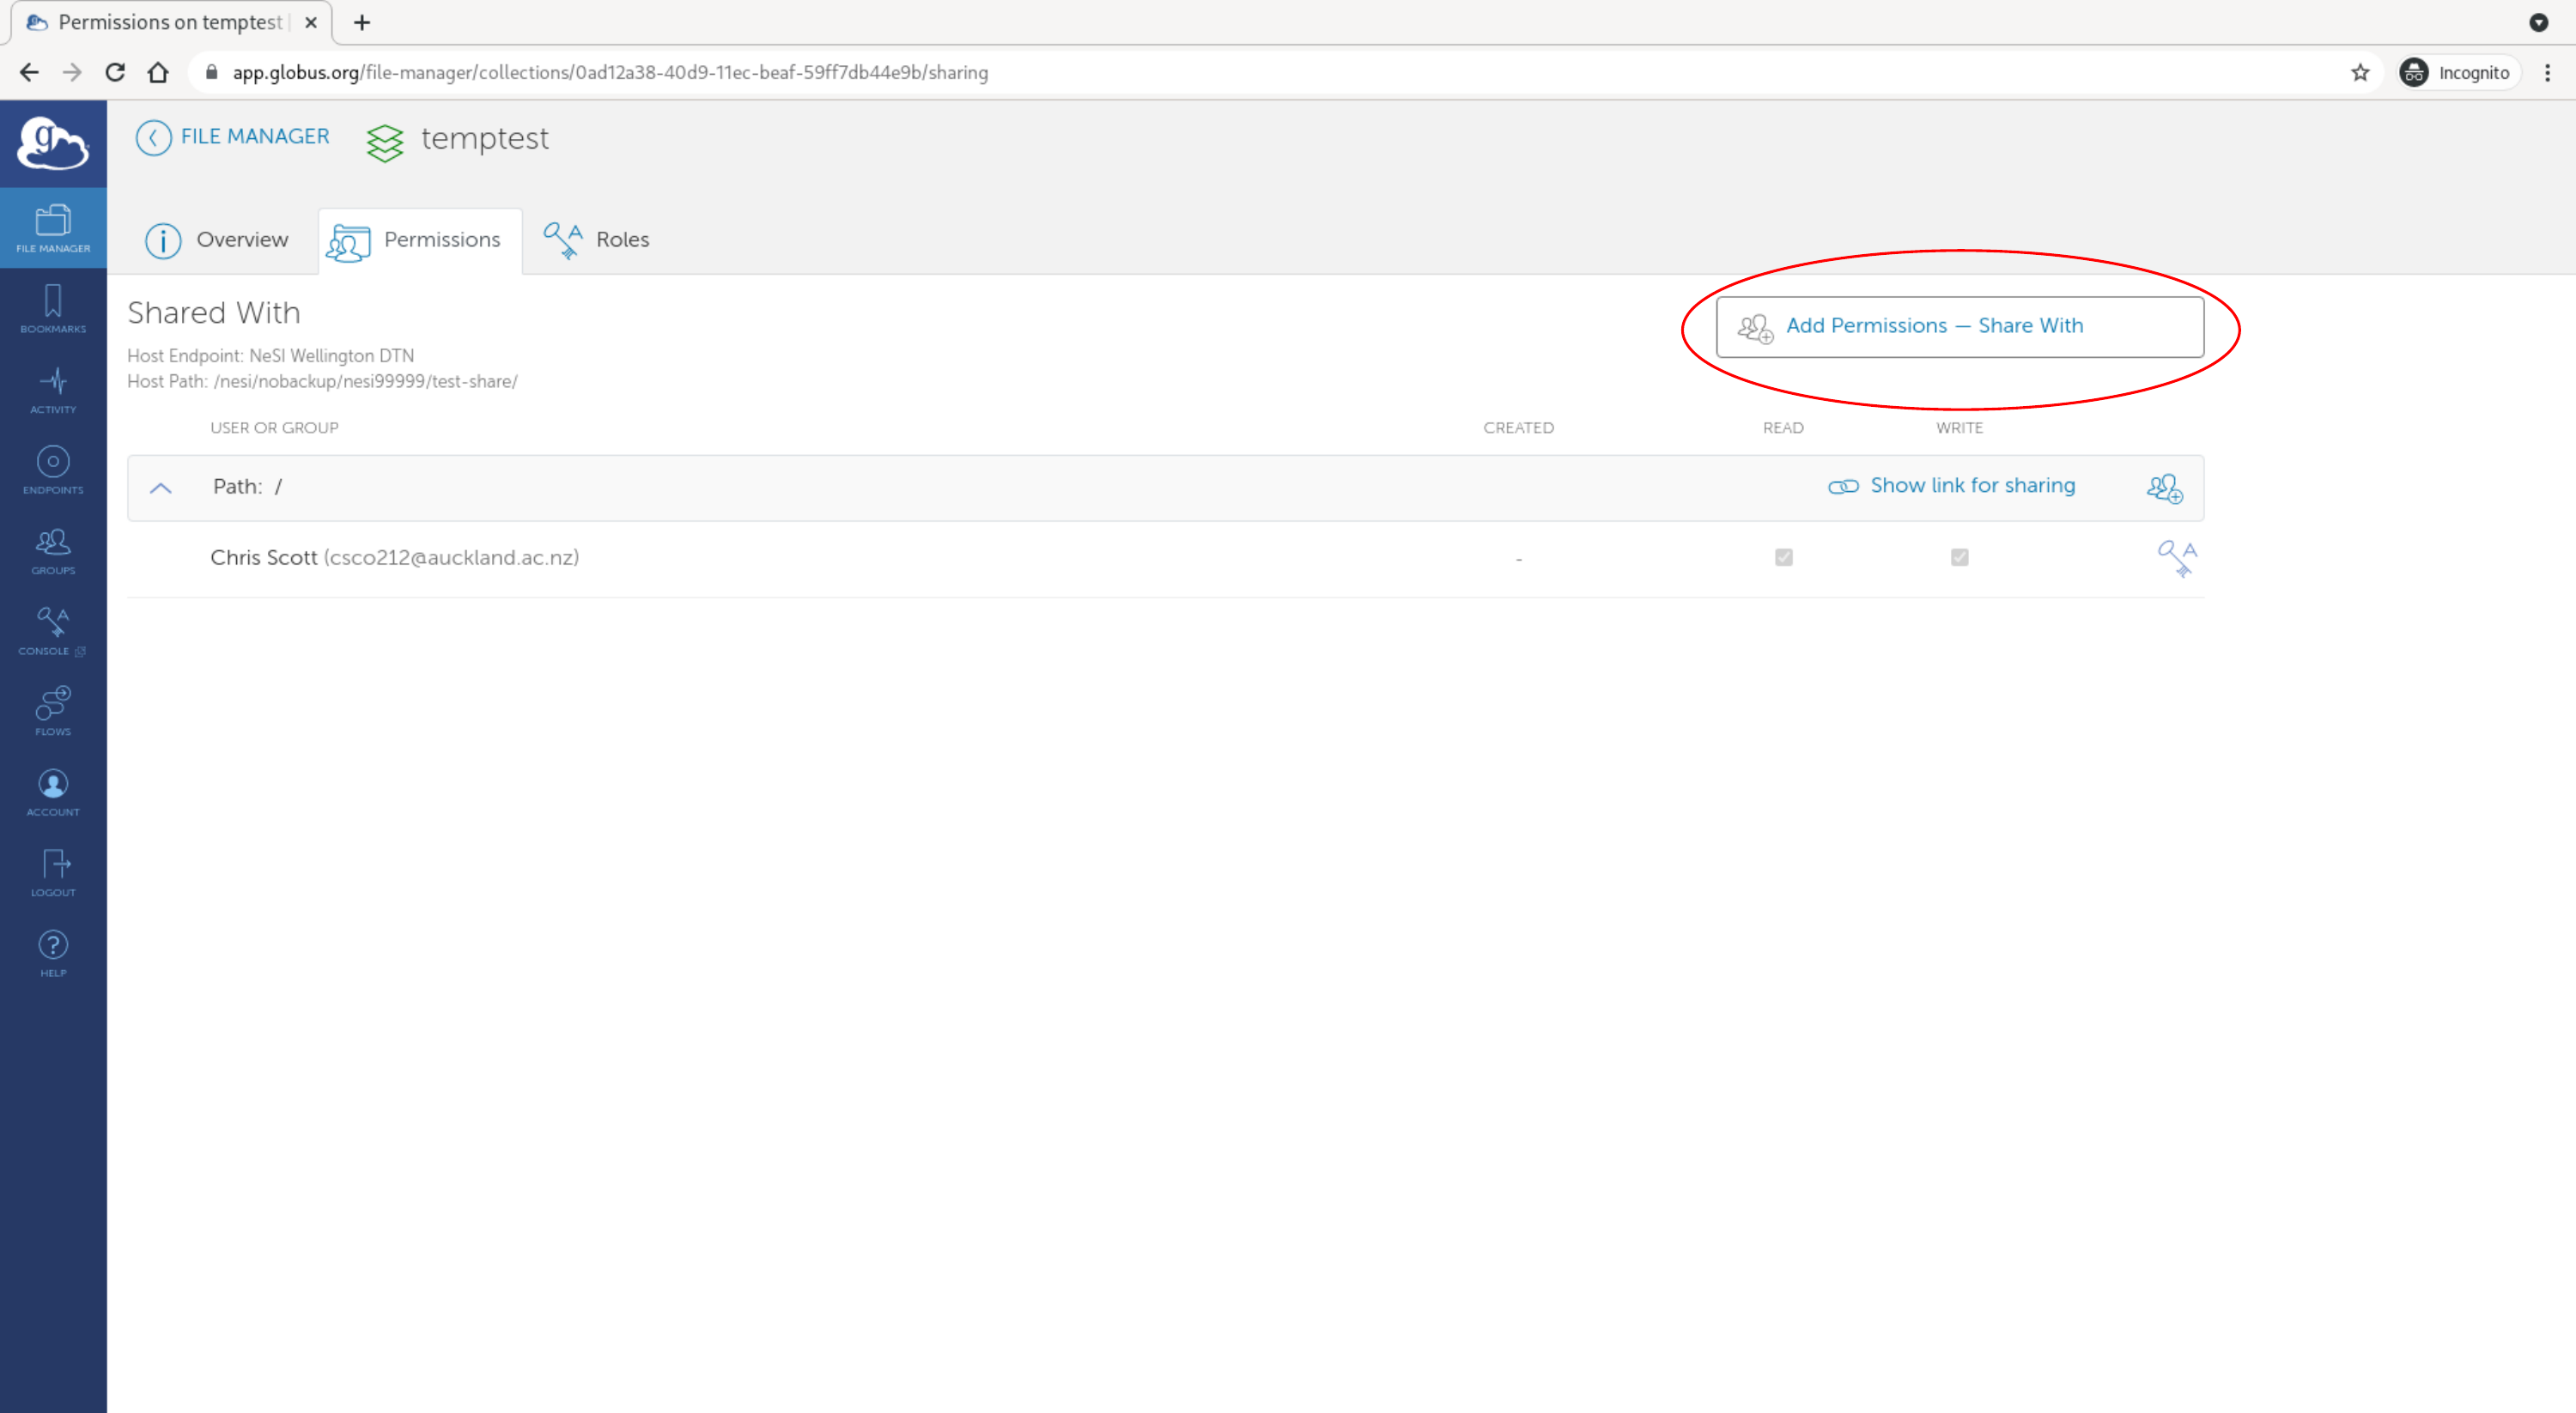
After creating the share, you should be on the permissions page for the share, where you can select "Add Permissions - Share With" and share the collections with the app we created previously (enter the following as the username to share with: <CLIENT_ID>@clients.auth.globus.org)
-
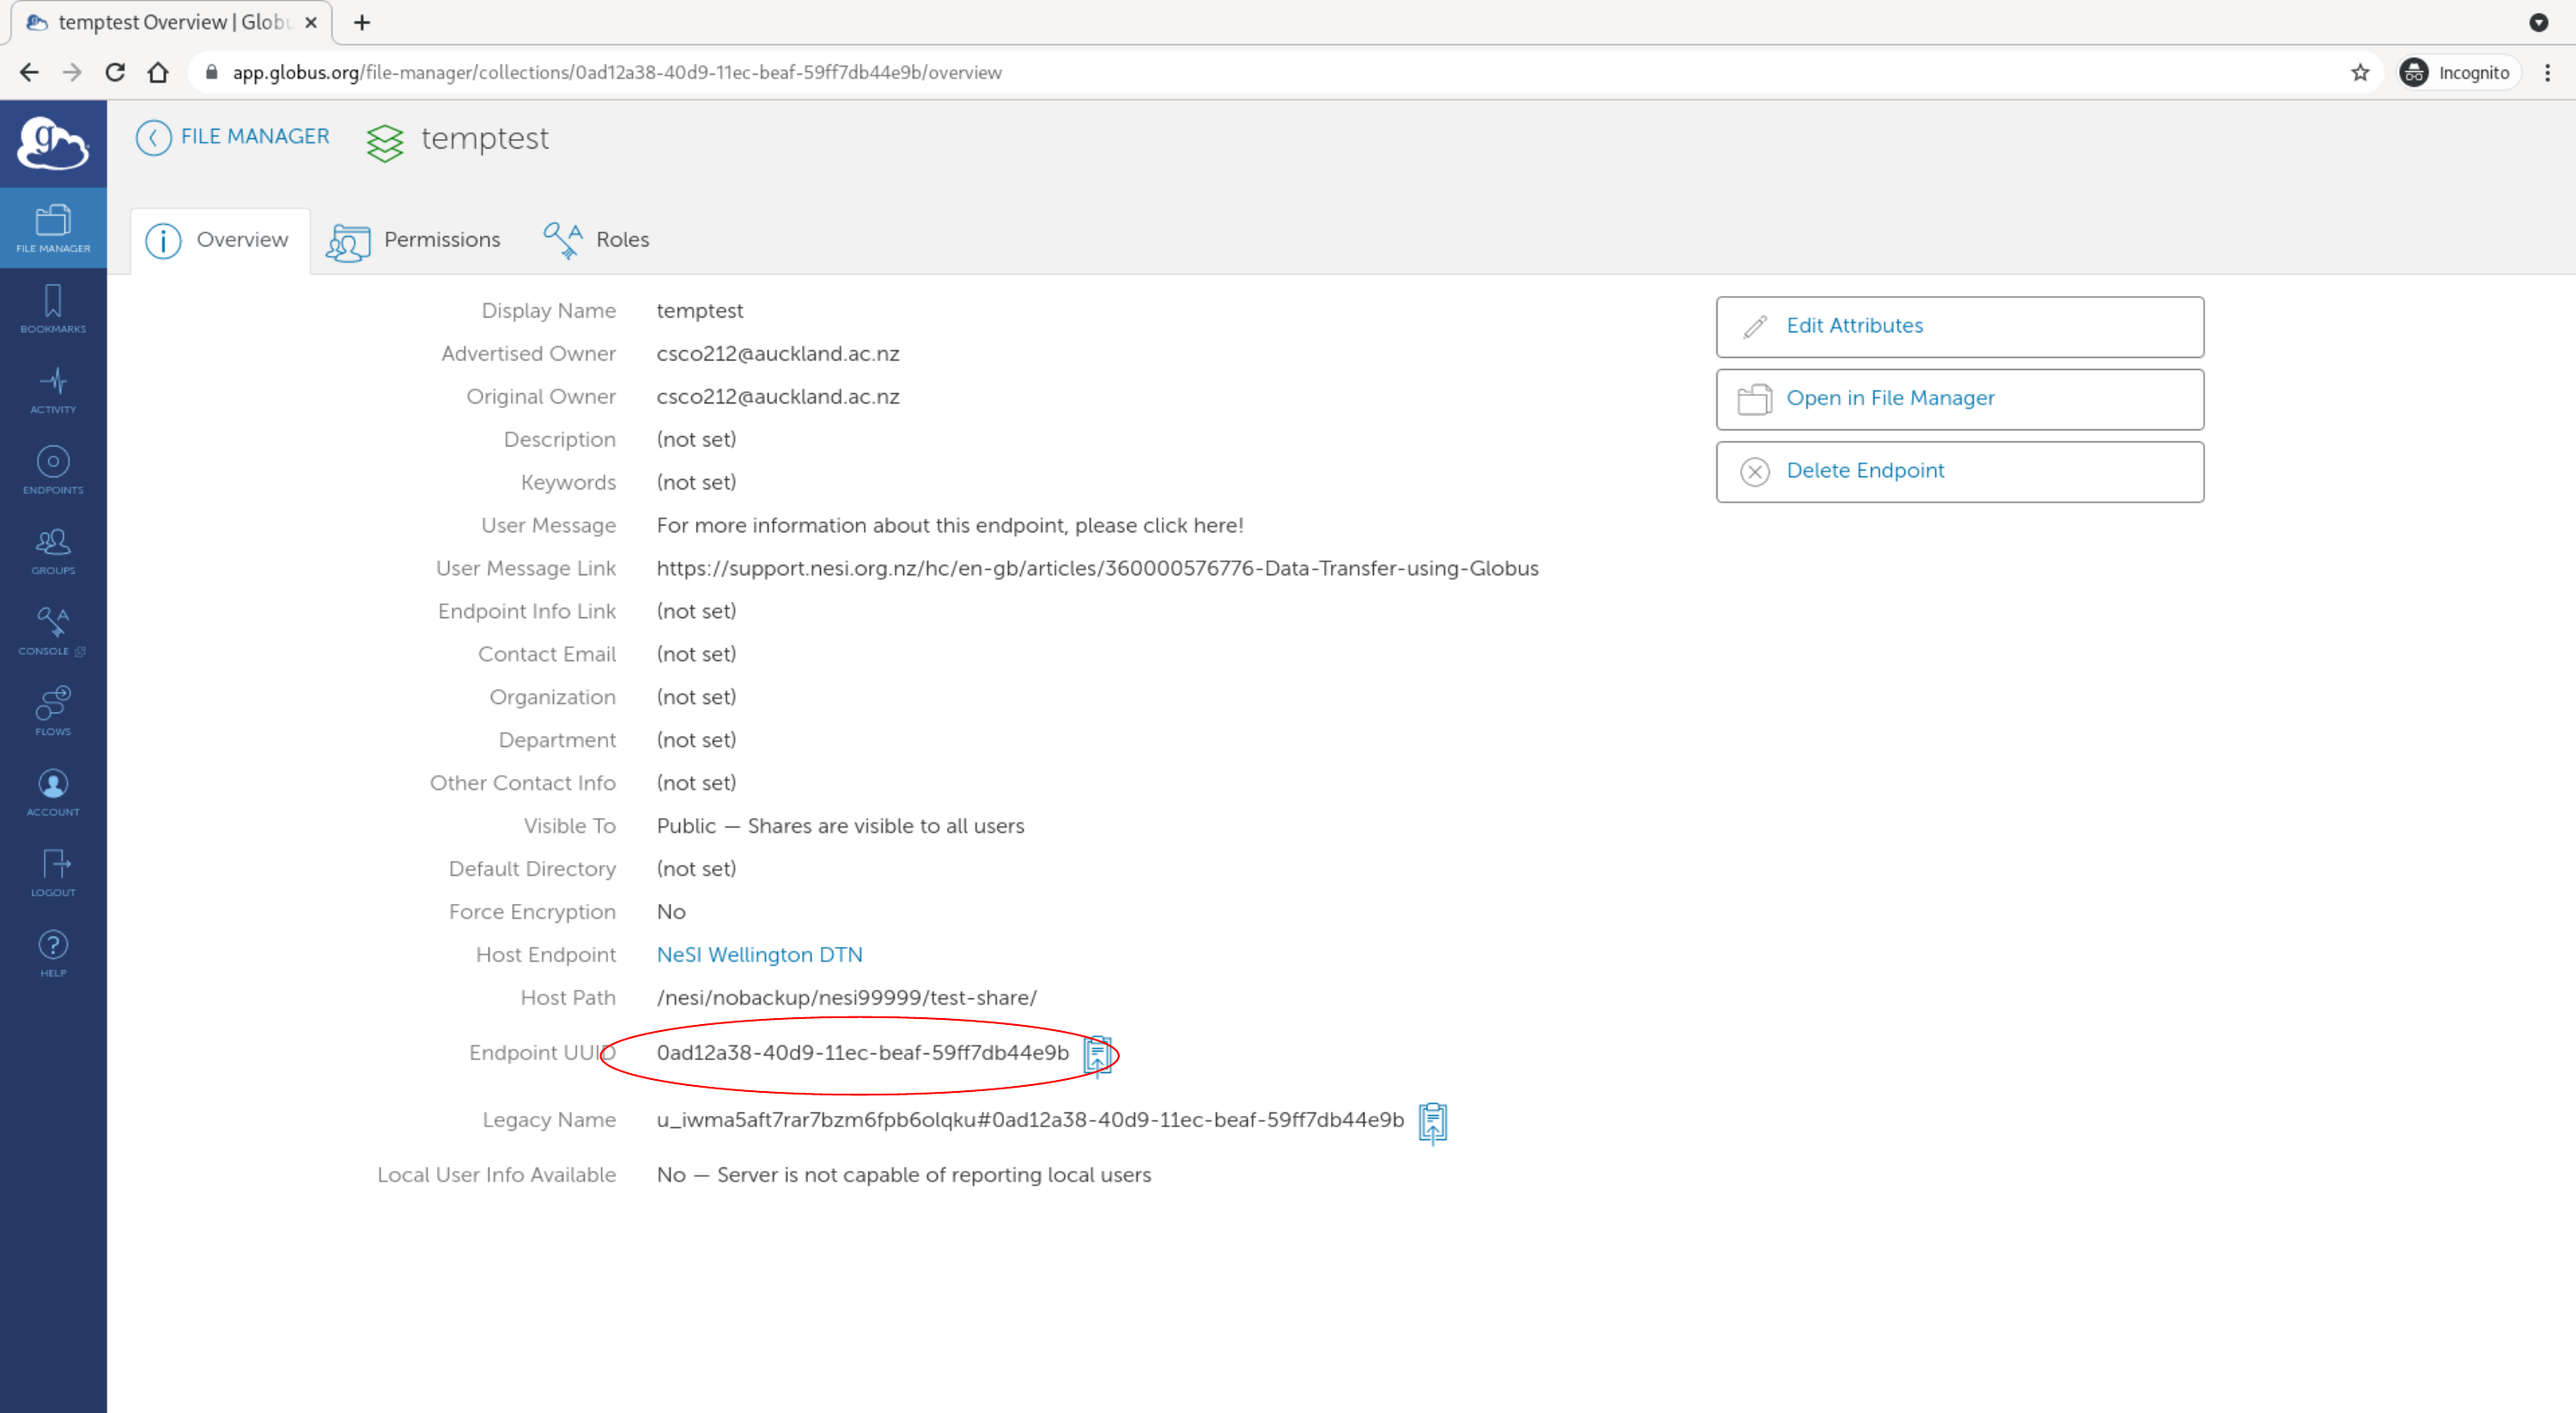
Make a note of the shared collection endpoint id (and path relative to the shared collection "Host path" that you want to share) so you can add them to the config file later


Installation
You only need to do this installation once:
- Open a terminal (e.g. via https://jupyter.nesi.org.nz) and clone this repo somewhere, e.g.
git clone https://github.com/chrisdjscott/globus_sync_directory.git ~/globus_sync_directory cd ~/globus_sync_directory - Load a Python module:
ml purge ml Python/3.8.2-gimkl-2020a - Create a virtual environment and install this package:
python -m venv venv source venv/bin/activate pip install . - Create a config file and edit it:
cd ~/globus_sync_directory
cp config.ini.example config.ini
# edit config.ini
Upgrading
Update to the latest version:
- Open a terminal (e.g. via https://jupyter.nesi.org.nz) and change to the repository directory, e.g.
cd ~/globus_sync_directory - Load a Python module:
ml purge ml Python/3.8.2-gimkl-2020a - Source the virtual environment:
source venv/bin/activate - Stash or commit any untracked changes:
git stash - Pull the latest changes
git pull - Install the latest version
python -m pip install .
Automation on NeSI
You could automate running the sync via scrontab on NeSI using the wrapper script provided and the following steps.
Make sure you have followed the installation section above first.
- Open your scrontab:
export EDITOR=nano # set your favourite editor scrontab - Add the following lines, which will start the sync at midnight NZ time daily (note times in
scrontabare in UTC, so the 12 belows specifies midnight UTC) and follow up with a status update at 7am (19:00 UTC, the-dargument means don't start a new transfer, just print the status of the current/last transfer):#SCRON -t 05:00 0 12 * * * $HOME/globus_sync_directory/nesi_sync_directory_wrapper.sh #SCRON -t 05:00 0 19 * * * $HOME/globus_sync_directory/nesi_sync_directory_wrapper.sh -d - Your scheduled cron job should show up in the Slurm queue:
squeue -u $USER- Output from the jobs will show up in: ~/globus_sync_directory/globus_sync_directory.log
- You can query the state of the most recent job, if any, by running:
python -m globus_sync_directory -dfrom the repo directory, after following the "Running manually on NeSI" steps below
Running manually on NeSI
This assumes you have followed the installation steps above
- Start a new terminal on NeSI (e.g. via JupyterLab)
- Change to the
globus_sync_directorydirectorycd ~/globus_sync_directory - Load a Python module:
ml purge ml Python/3.8.2-gimkl-2020a - Source the virtual environment:
source venv/bin/activate - Check the status of any active or recently completed transfer:
python -m globus_sync_directory -d - Start new transfers if they aren't already running:
python -m globus_sync_directory