automark enables reviewing, sharing, and summarizing programming tasks by automatically
generating markdown from your coding history.
The auto-generated markdown or rendered html can help you:
- Hand-off tasks to other teammates,
- Recover from an interruption, or
- Document how to perform a similar task in the future.
It is available as a Visual Studio extension in the Visual Studio gallery.
Developers commonly blog about how-to tasks and development experiences in programming. But not everyone blogs, and the ones that do often spend several hours recalling, formatting, and crafting a blog post. The goal of automark is to
- reduce the friction associated with blogging,
- make it more habitual, and
- allow developers to focus on the narrative of a blog post.
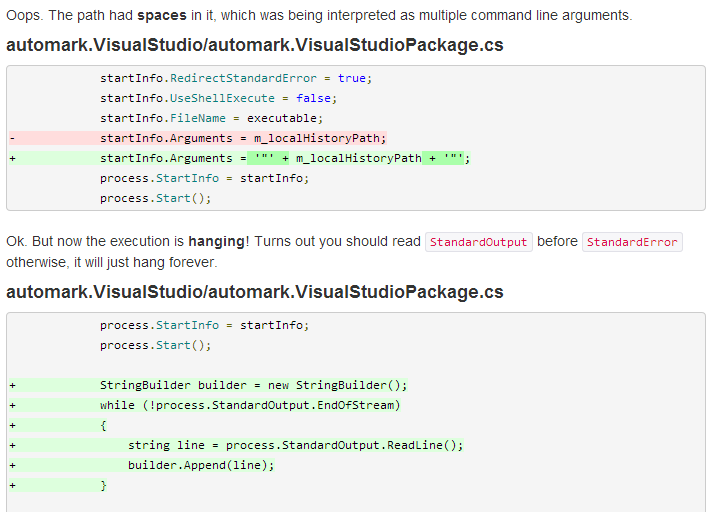
Example output created with automark:
See the full example of a blog post created with automark.
Automark is designed to support episodic review, a cognitive process for walking through and reasoning about recent code changes, mistakes, and events.
To support this, automark can
- read a
autogitrepository and generates a series of time-ordered code changes. - support for rendering and displaying unified diffs.
- include additional references, such as visited Stack Overflow questions or official documentation pages used.
- generate markdown or html
To use automark, first ensure that autogit has been installed first.
To generate a markdown representation of the recent coding task, select Tools -> automark -> Generate Markdown. This will generate a markdown file stored in $SolutionFolder\.HistoryData\md\Timestamp.md and then open it in an markdown editor. For windows, I recommend using Markdown Pro. From here, the markdown can be annotated and further later generated as a html.
To generate a rendered html representation, including diff highlighting, select Tools -> automark -> Generate Html.
-
Download .vsix and double click to install, or search for "automark" in Online Gallery in "Visual Studio's Tools > Extensions and Updates" tool menu.
-
To install from source, first install the Visual Studio SDK 2012 in order to build project. Then install the resulting .vsix file.
- Natural language summaries of code snippets.
- Blog connectors, deploy to github pages
- Create an issue for new feature request.


