This document contains detailed work instructions for the All Saints audio technician to set up, record, and archive the audio of a typical Sunday service. Special events and services may require addiontal use of PowerPoints, DVDs, or instruments.
- Facilities Manager: Alan Johnson (ajphoenix@cox.net)
- Music Director: Jerry Gunderson (jgunderson@allsaintsphoenix.org)
- Volunteer Organizer: Donald Wade (dwade@allsaintsphoenix.org)
- Audio Technicians:
- Chuck Tomasi (chuck.tomasi@gmail.com)
- Doug Good (doug_good2000@yahoo.com)
- Dan Jacobsen (desertrunner84@yahoo.com)
Plan to arrive 20-30 minutes before service begins to ensure everything is set up and any issues are addressed. Be aware, there is a silent alarm button under the far right side of the desk that can be used in case of emergency to call the police. This button should only be used in case of emergency.

-
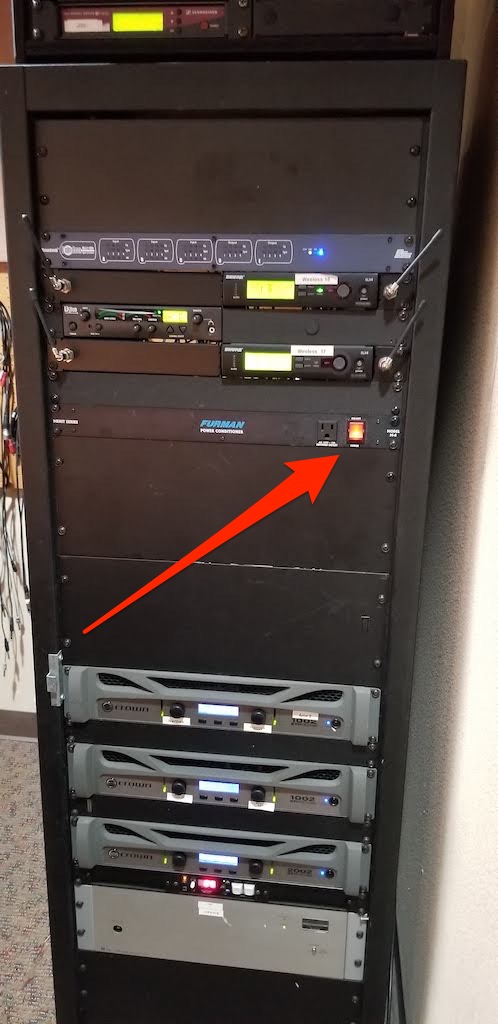
Power on the main rack using the orange power button.
-
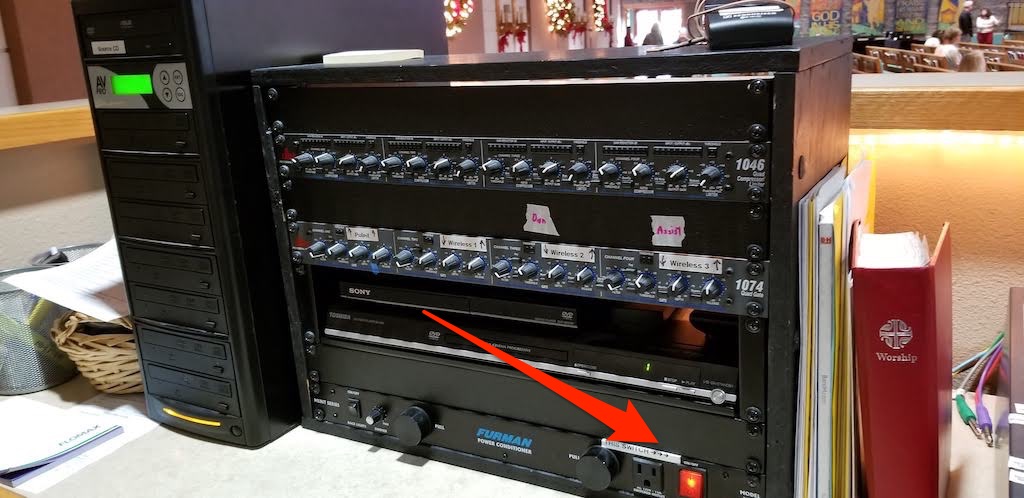
Locate the Power Conditioner on the desk.
-
Turn on the switch marked “This Switch”
-
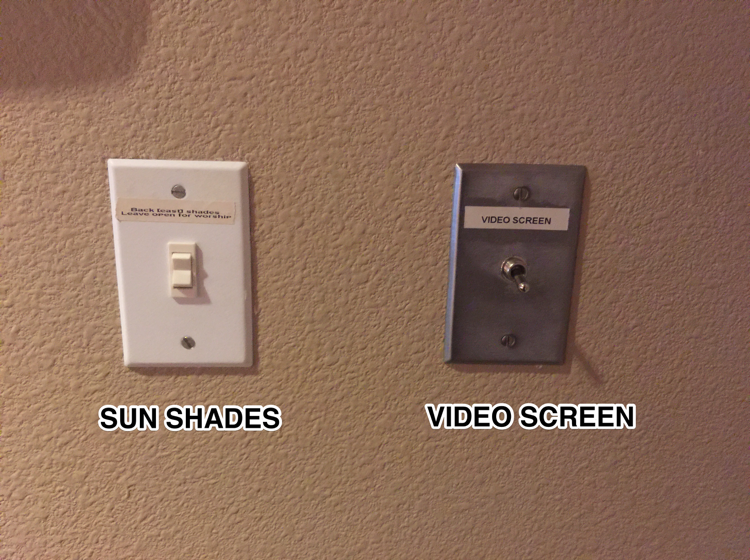
Locate and adjust the sun shades (left switch) accordingly to ensure morning sunshine does not create issues before, during, or after each service.
-
Ensure the projector screen is in the down position (unless otherwise specified) using the right switch on the wall by the steps.
-
(Optional): Turn on the desk rope lights.
-
Locate the PowerPoint DVD (usually it has a date on it.)
-
Insert the DVD in the Toshiba DVD unit (in the desktop rack).
-
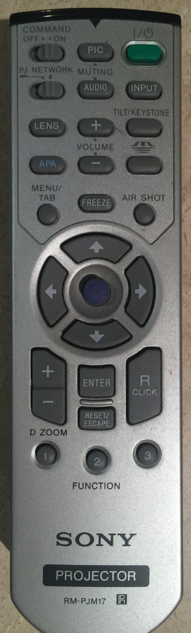
Power on the projector using the wired remote to the right of the PC keyboard. Be patient. The projector takes a minute to become bright enough to see.
-
Ensure the project is set to input source S-Video. This is the Toshiba DVD source.
-
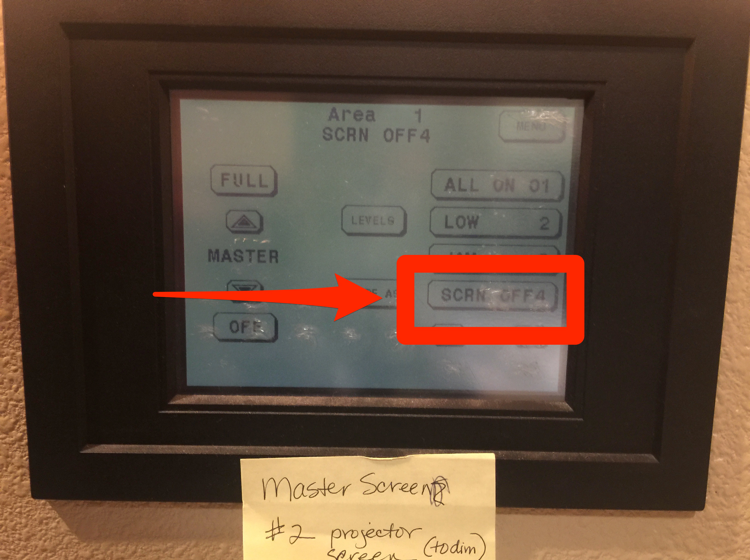
Ensure the light on the projector screen is turned off. This can be done in one of two ways.
- Using the switch panel at the base of the steps (on the wall), select setting “4”, or
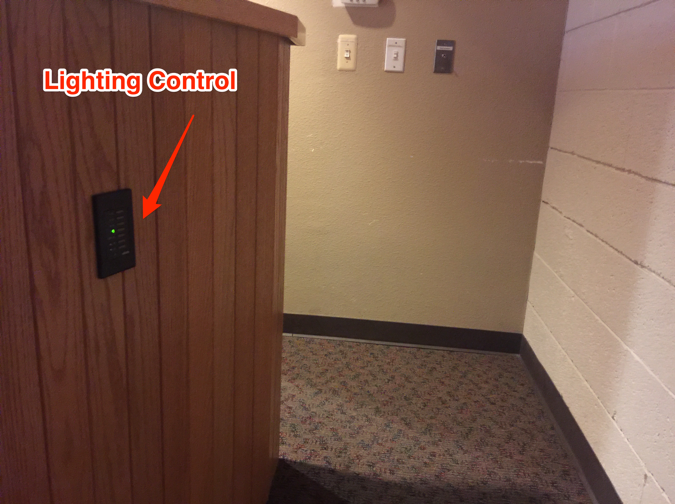
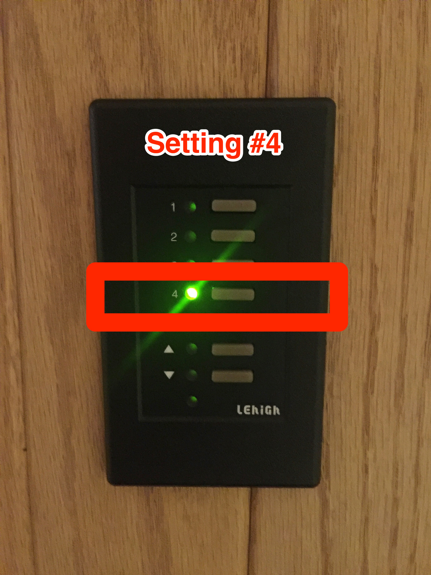
- Using the LCD built in to the wall (between the PC monitor and mixer), choose the setting “SCRN OFF".
-
Power up the PC and login.
-
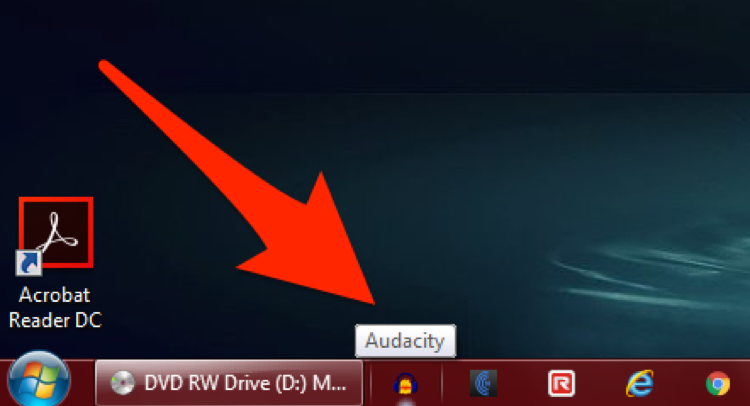
Start Audacity on the PC by clicking the icon shown below on the launch bar.
-
Check the batteries and test the wireless microphone for the assistant pastor. If you can, check with the Pastor(s) to ensure their microphones have full batteries.
-
Replace batteries if any display less than full (3) bars.
-
If the supply of batteries is running low, contact Shari Clark in the front office or Alan Johnson.
Typically if you let Shari know when you turn in the CDs at the end of the service, new ones will be available for the following week.
-
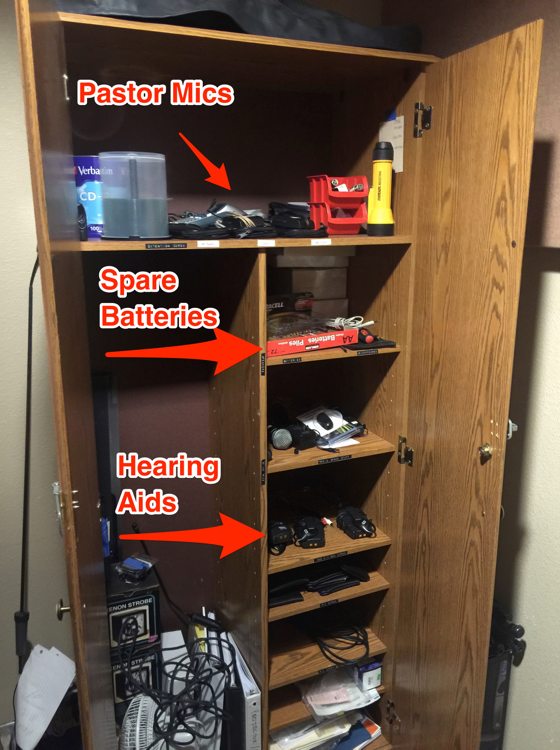
Hearing aids are available upon request. They are located in the cabinet. Check to ensure the battery is working by turning it on and noting the red LED on the unit. If needed, replace the batteries.
-
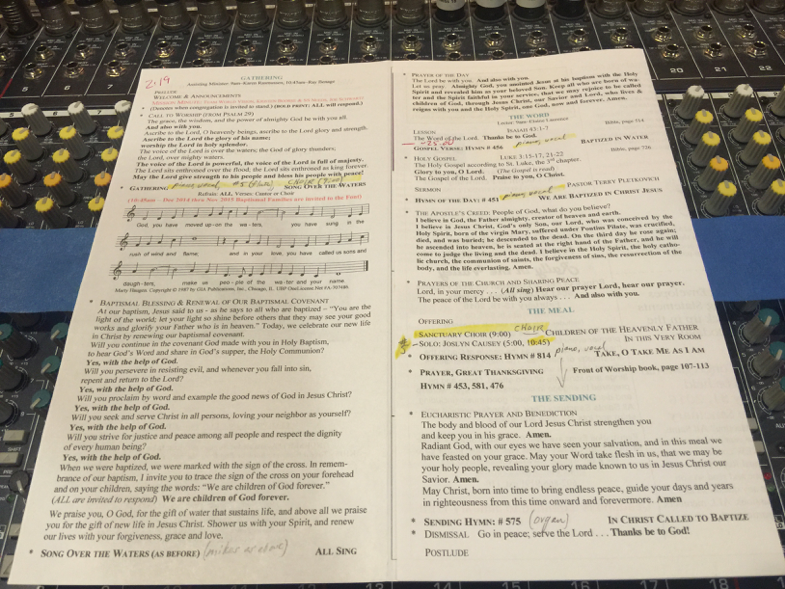
Review the bulletin to familiarize yourself with the audio requirements. Consult Jerry Gunderson, the music director, for any special requirements (soloists, instruments, etc. that may be required.)
If you like, use masking tape to denote special requirements below the faders (e.g. channel 5=soloist, channel 6=flutes, etc)
With the exception of Pastor/asst minister mics, piano, and piano vocalist, mute all channels while not in use.


-
As the prelude fades out, just before the Pastor speaks, do the following simultaneously:
-
Turn on all sanctuary lights. On the LCD wall panel next to the PC monitor, click ALL ON.
-
Turn off the projector.
Exception: Use the PIC button (top center) to simply "blank" the projector if you plan to use it for a Mission Minute or other presentation. This eliminates the "warming up" step of the projector if needed again during the service. You can then power it down at the end.
-
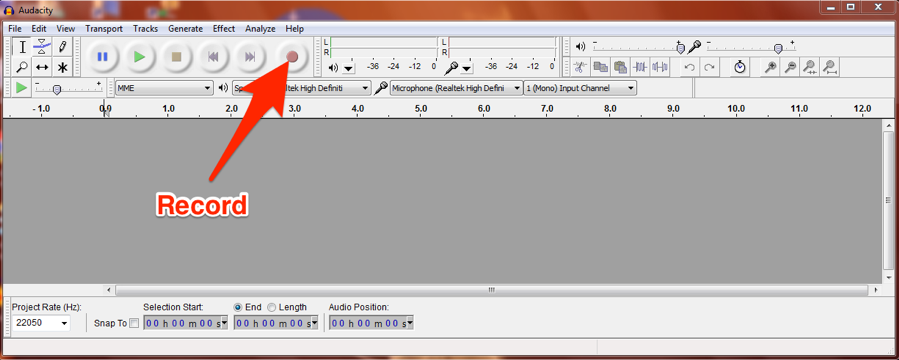
Hit Record on Audacity.
-
-
Put the screen up during the entrance hymn. Doing this any other time is distracting as the noise of the screen motor is quite loud.

-
Adjust audio levels as needed.
Use the headphones to balance vocals, instruments, etc. The headphones more accurately represent the audio being sent to the computer and may be quite different than what you can hear “over the air” from the main amps speakers.
Be cautious of adjusting the inputs too loud as this could cause feedback. The most common issue with faint sound is speakers not projecting or not being close enough to the microphone. Encourage guest speakers to hold handheld mics close to their mouth and/or adjust the pulpit microphone to within 2-4 inches of their mouth
-
If someone says they cannot hear, offer a hearing aid from the cabinet.
-
Within Audacity:
- (During the recording) Select the main track.
- Just prior to the Gospel, make a note of the Audacity time in your bulletin or hit Ctrl-M (mark).

-
Similarly, just after the Sermon, mark the time again. This is important to note where the Gospel and Sermon are as they are saved as a separate output files in post-production.
HINT: Continue to monitor and adjust the audio as needed. Periodically, walk outside the sound booth to the rear and side of the sanctuary to listen to the sound being produced. This eliminates a lot of the noise produced by the PC and other equipment in the booth to give you a better indication of where adjustments may be needed.

-
At the end of the service, when the assisting minister says “Go in peace…” end the recording by hitting Stop in Audacity.
This is a good time to put the screen down, use "setting 4" on the lights, and turn the projector on to display the announcements for the people leaving and others coming in for the 10:45 service.
-
Use File> Export to save the entire file in WAV file to the Desktop.
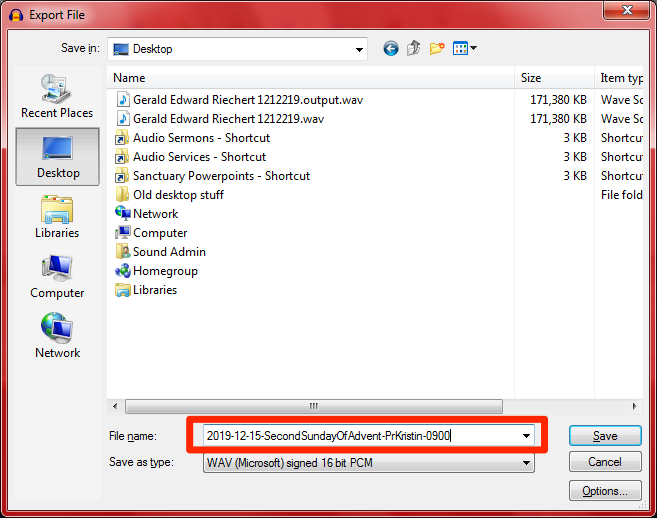
Example filename: yyyy-mm-dd-SecondSundayOfAdvent-PrKristin-0900.wav
-
Leave the tags empty. (WAV files don't use tags.)
-
Click OK.
-
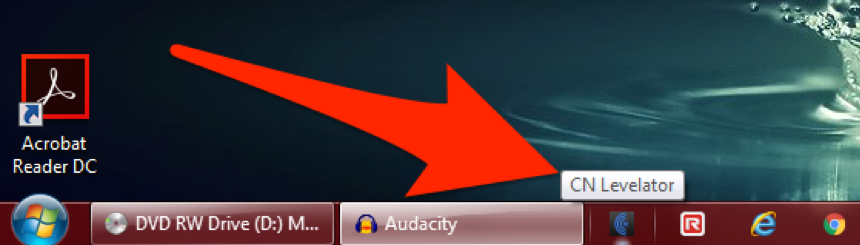
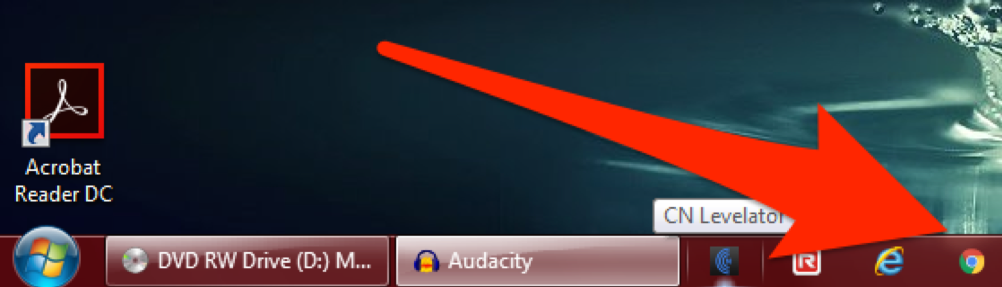
After the WAV file has been saved to the desktop, start the Levelator application by clicking the icon shown below on the launch bar.
-
Use Windows Explorer to drag the WAV file on to Levelator.
The application:
-
Normalizes the audio by bringing up the low spots and bringing down the high spots for a more consistent listening experience.
-
Creates a new file in the same location with a suffix “.output”.
-
-
Go back to Audacity and select File> New to create a new empty project.
-
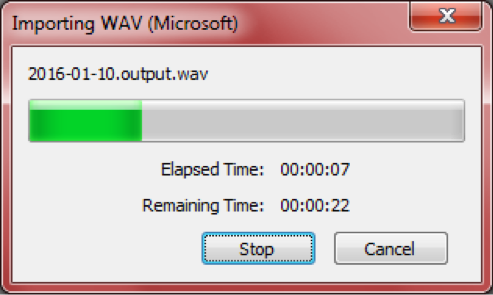
Select File> Import Audio to read in the “.output” WAV file.
-
When the popup window appears, click OK.
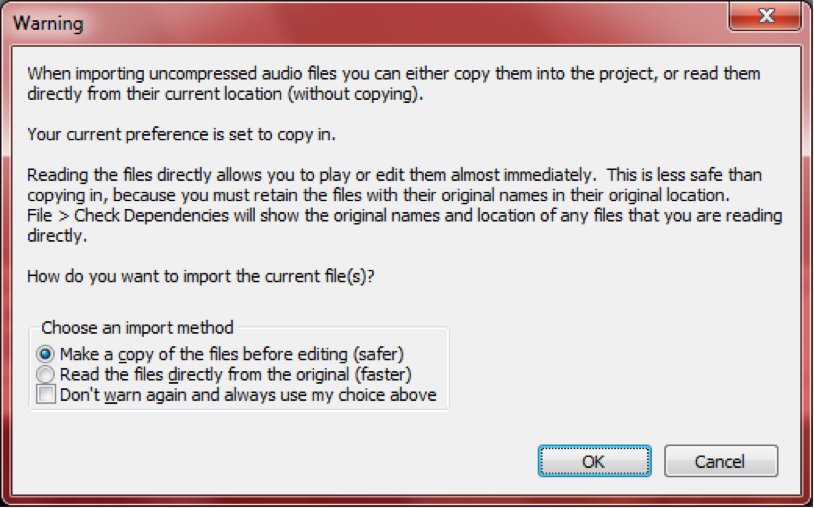
The file will take a few seconds to import.
-
Identify the beginning of the Gospel and locate the cursor at that position.
Use Zoom in (Ctrl-1 or magnifying glass + icon) and zoom out (Ctrl-3 or magnifying glass - icon) to accurately place the cursor as needed.
-
Type Ctrl-I to split the audio at the cursor position.
-
Identify the ending of the sermon and locate the cursor at that position.
-
Type Ctrl-I to split the audio again.
-
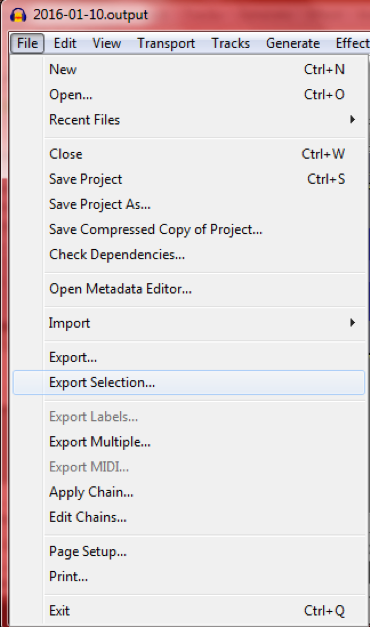
Double click the audio between the two splits. This selects the entire Gospel reading and sermon (the area between the two splits you just created).
-
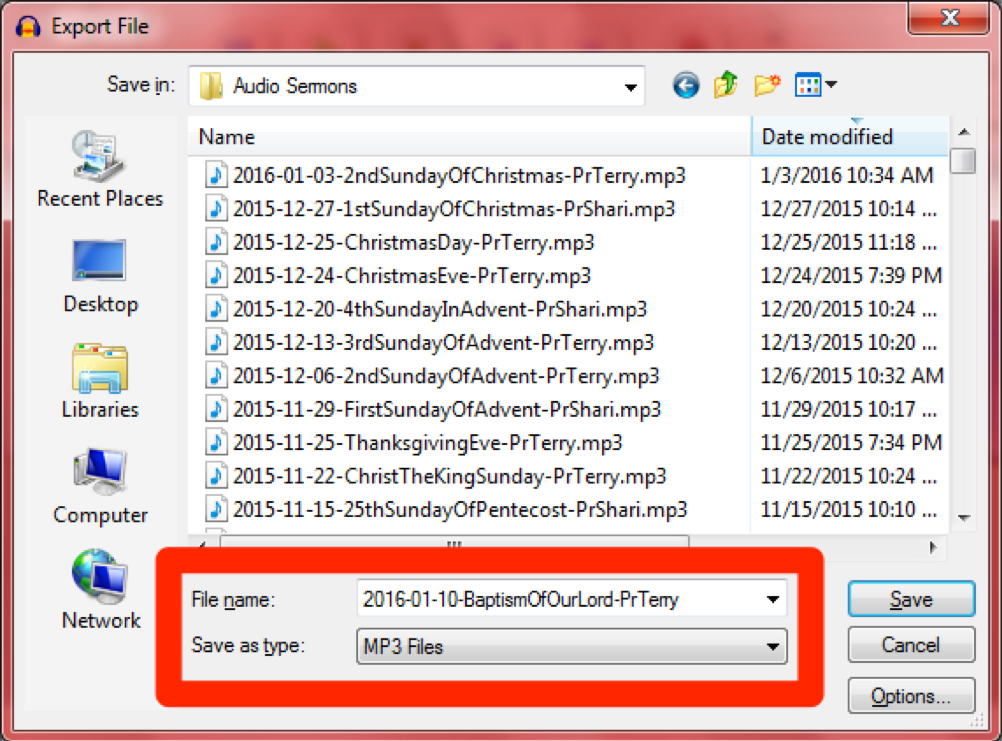
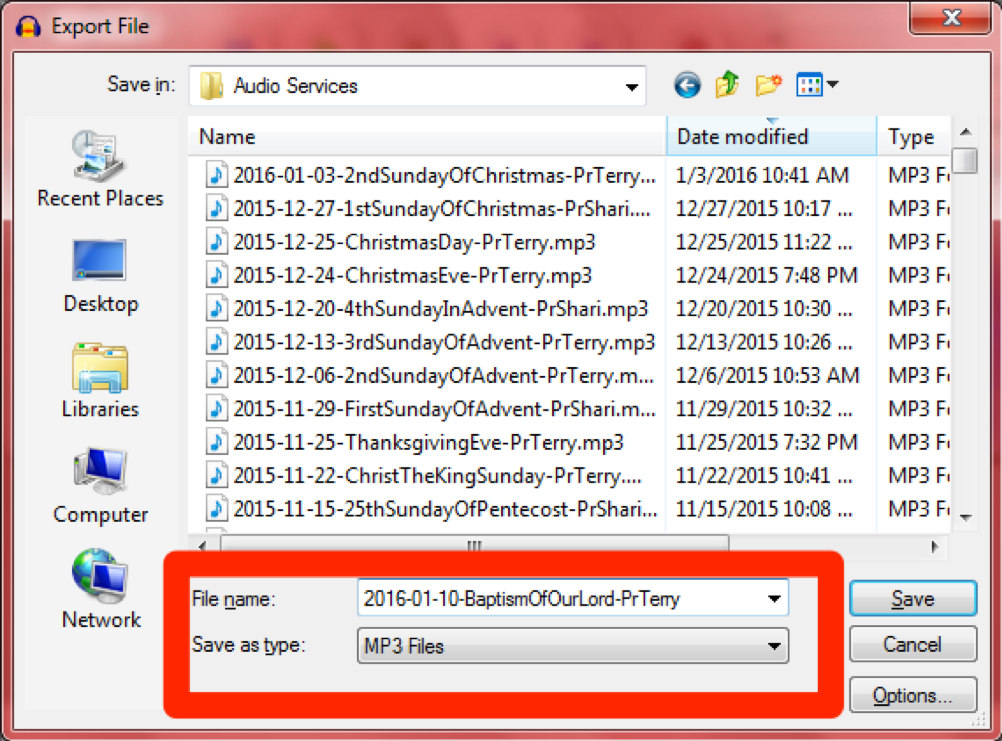
Use File> Export Selection to save that region as an MP3 format file in \\Server\Sanctuary PowerPoints\Audio Sermons in MP3 format. This folder is also available directly from the Desktop via the Audio Sermons shortcut.
-
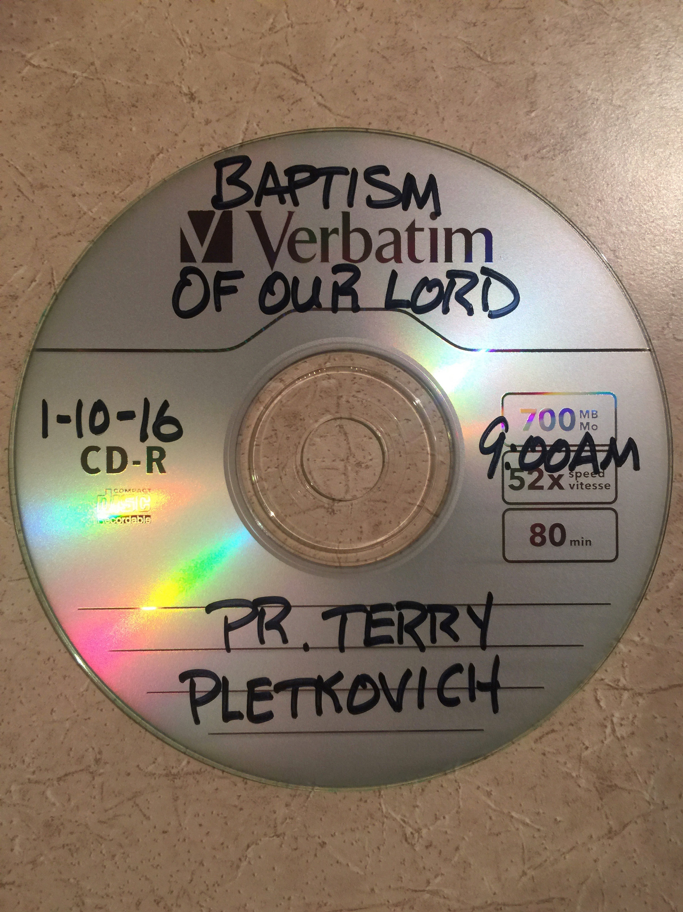
Use the naming format: yyyy-mm-dd-EventName-Pastor-xxxx.mp3. Example: 2016-01-10-BaptismOfOurLord-PrTerry-0900.mp3 (where 0900 is the 9:00AM service and 1045 is the 1045 service.)
-
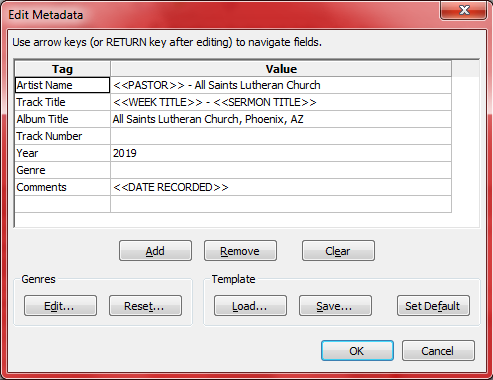
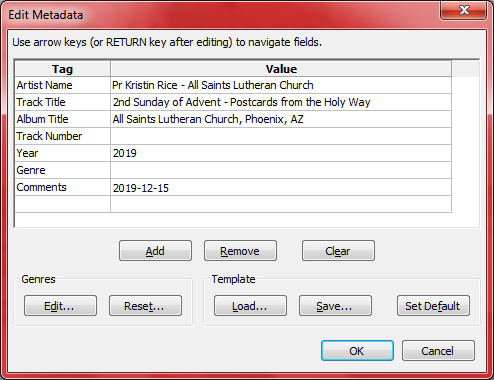
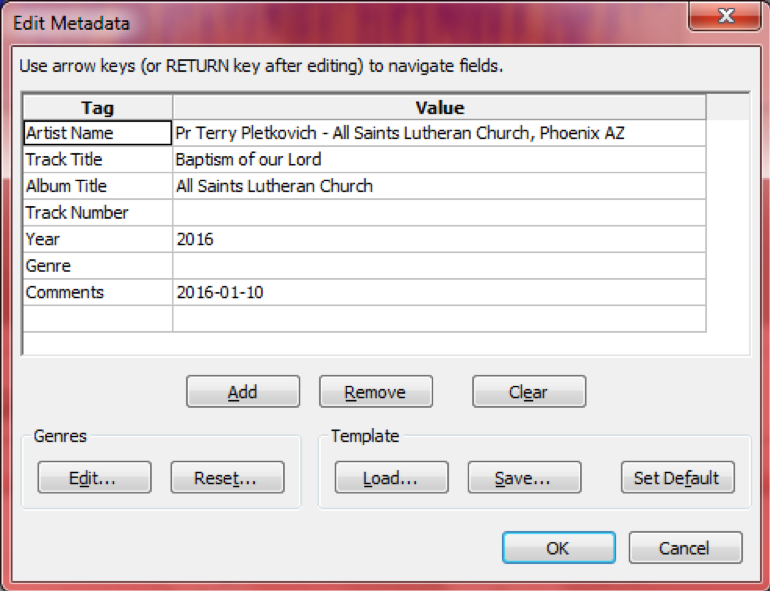
Tag the file like the following example:
- Artist Name: Pr. Kristin Rice - All Saints Lutheran Church
- Track Title: 2nd Sunday of Advent - Postcards from the Holy Way*
- Album Title: All Saints Lutheran Church
- Year: 2019
- Comments: 2019-12-15
-
Click OK.


-
Start Chrome by clicking the icon shown below in the launch bar.
-
The default web page is the All Saints Lutheran Church home page. Click the Login button on the bookmarks bar or navigate to the Login page.

-
Use your assigned login and password and click LOGIN>>. If you don't have a login, contact the Volunteer Organizer (Donald Wade).

-
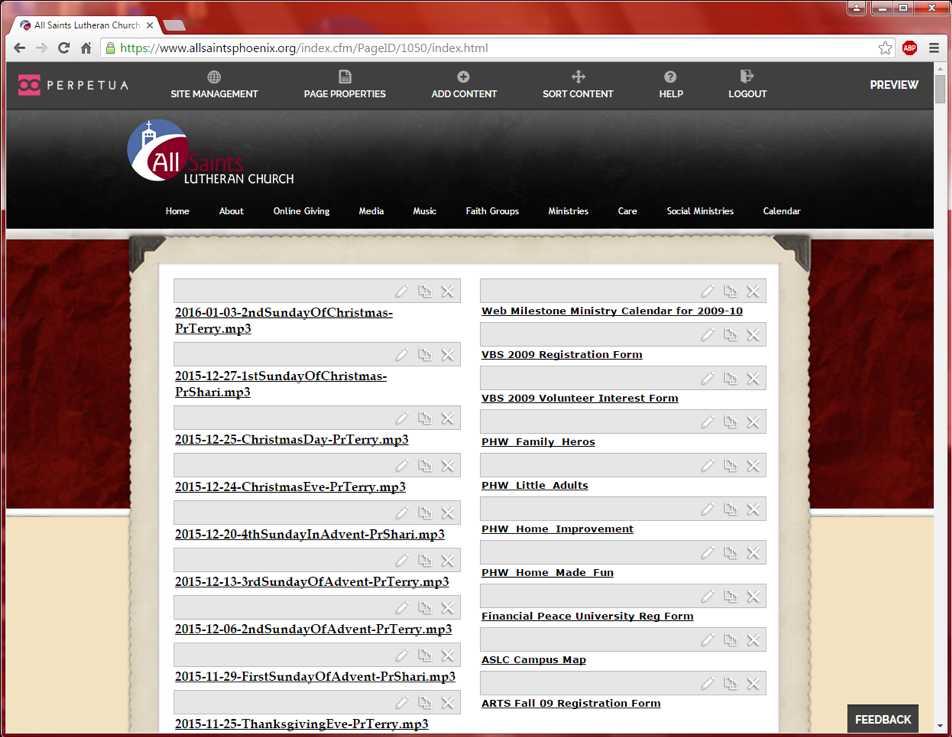
Click the Staging button on the shortcut bar or navigate to the Staging page.

The screen should now look like this:
-
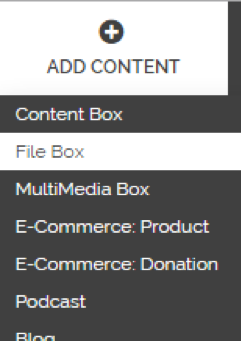
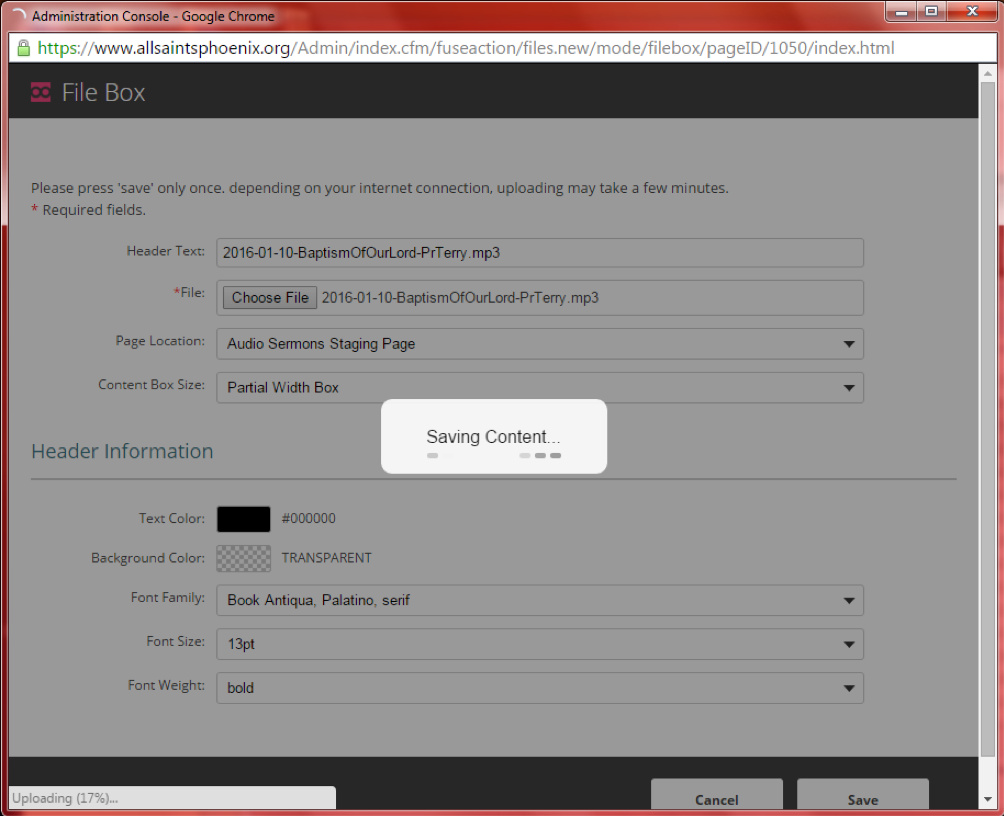
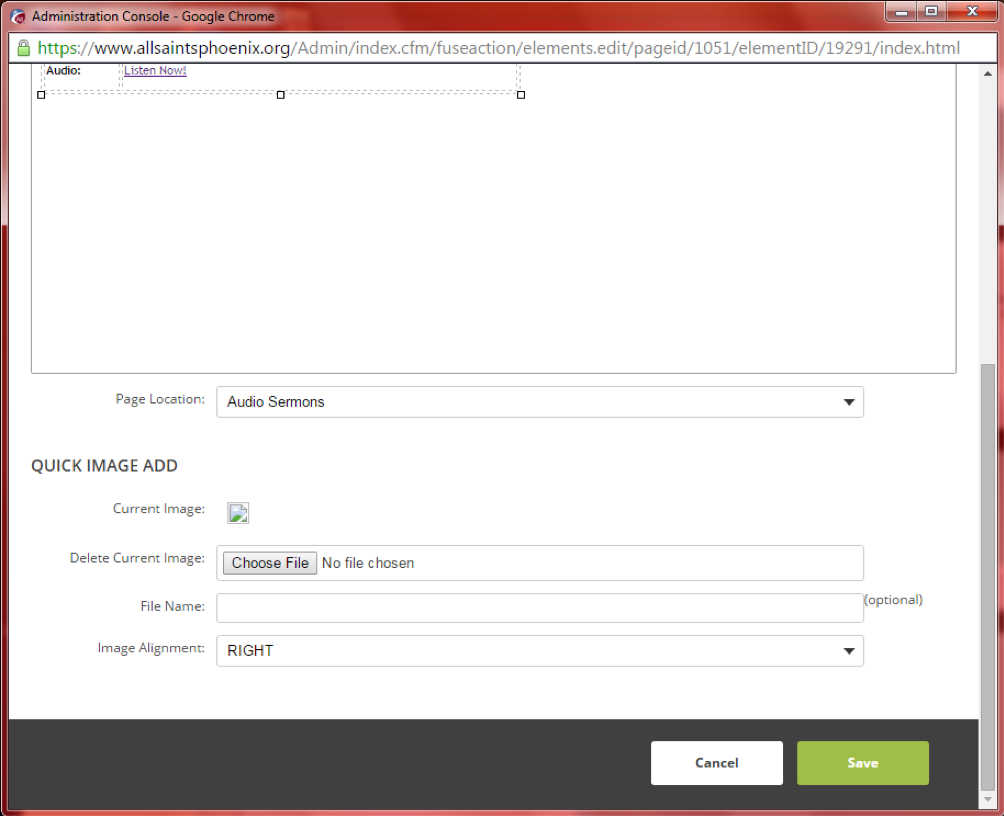
On the website’s top menu bar, navigate to Add Content> File Box.
-
When the File Box popup window appears, set the Header Text field the same as the sermon file name (e.g. 2020-01-06-2ndSundayOfChristmas-PrKristen-0900.mp3).
-
Click Choose File to select the sermon file from the Audio Sermons folder and click OK.
-
Set the Font Size field to 12.
-
Click Save.
-
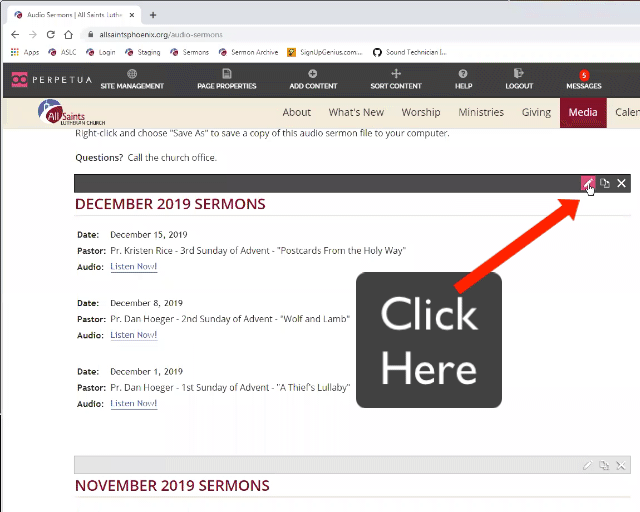
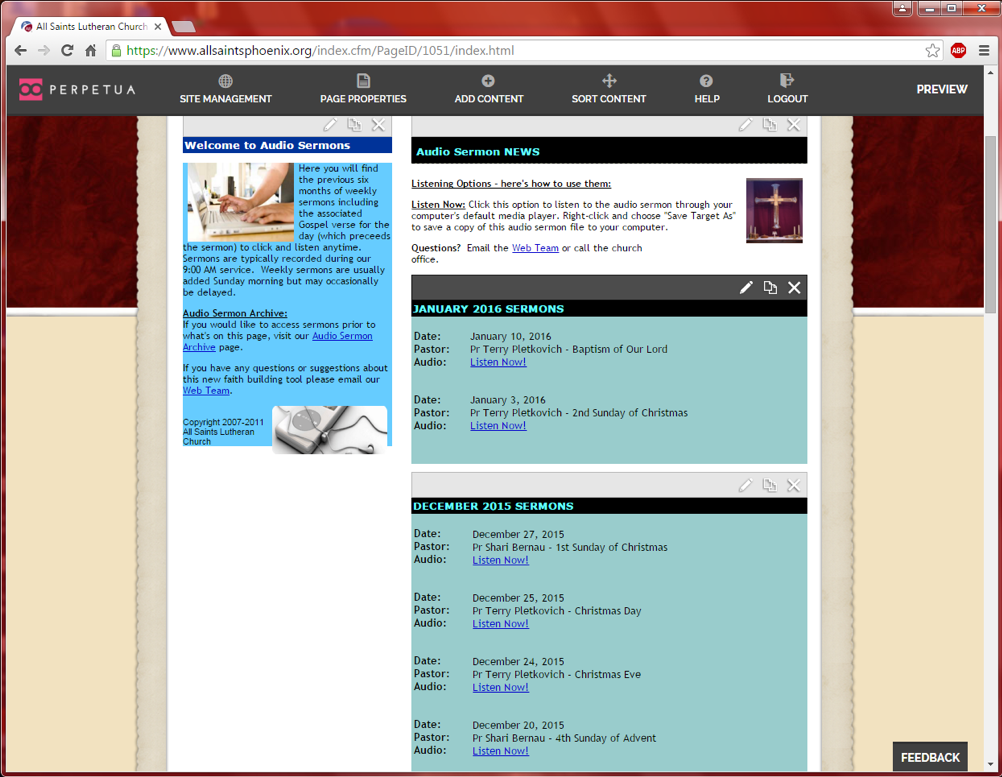
When the upload is complete, click the Sermons button on the shortcut bar or navigate to the Sermons page.

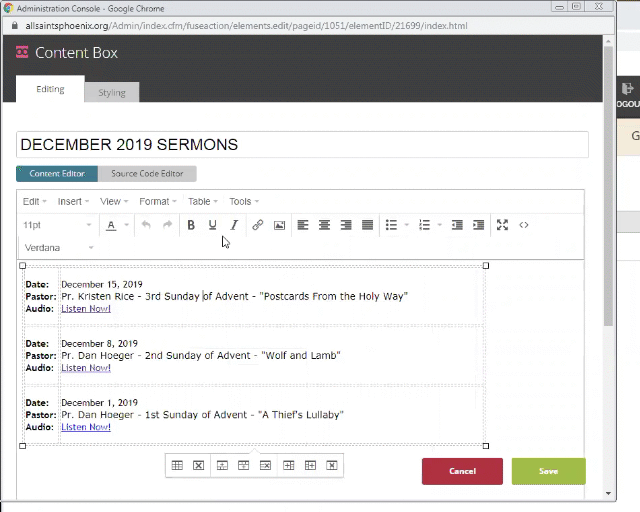
Click the pencil icon for the month you wish to edit.
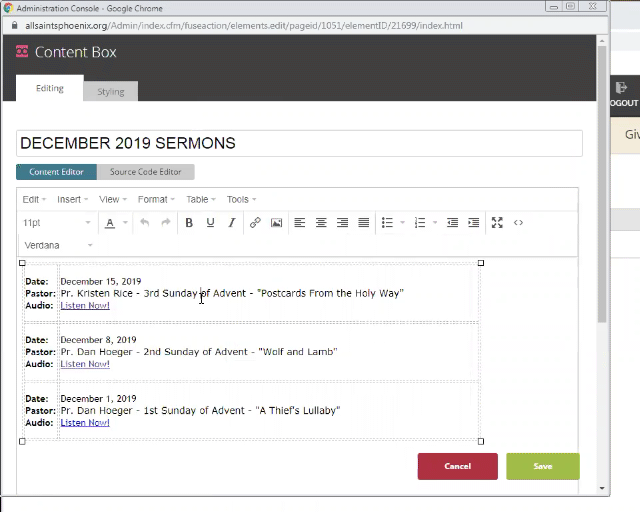
On the first Sunday of each month, create a new section for that month by copying a previous one using the "double box" icon". Sort the sections using a the sort function so the new section shows at the top of the monthly section list. (New sections are placed at the end of the section.) Use the “pencil” icon to update the section name to the proper month.
-
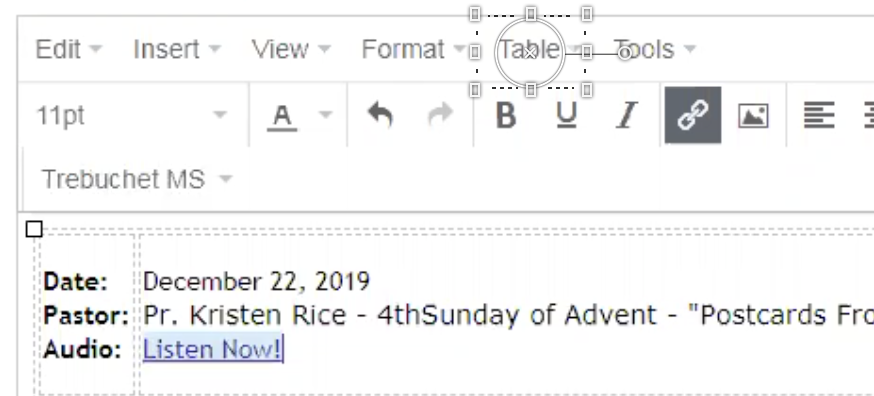
Place the cursor in the table of weekly sermons.
-
Select Table> Row> Copy Row from the editor menu to make a copy of the current row.
-
Select Table> Row> Paste Row Before from the editor menu to paste the new row before the existing one.
-
Update the Date, Pastor, Week, and Title information in the right column.
-
Click the Listen Now! link.
-
Click the chain icon to edit the link.
-
Update the Url field to the filename uploaded from the File Box and click OK.
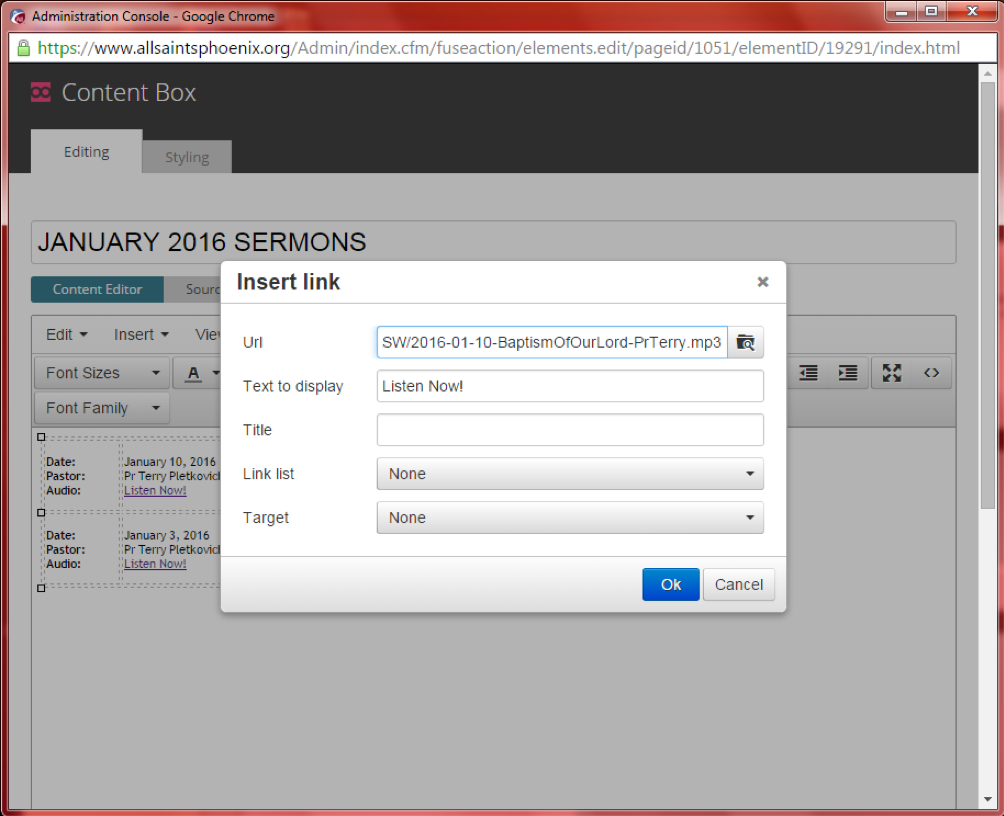
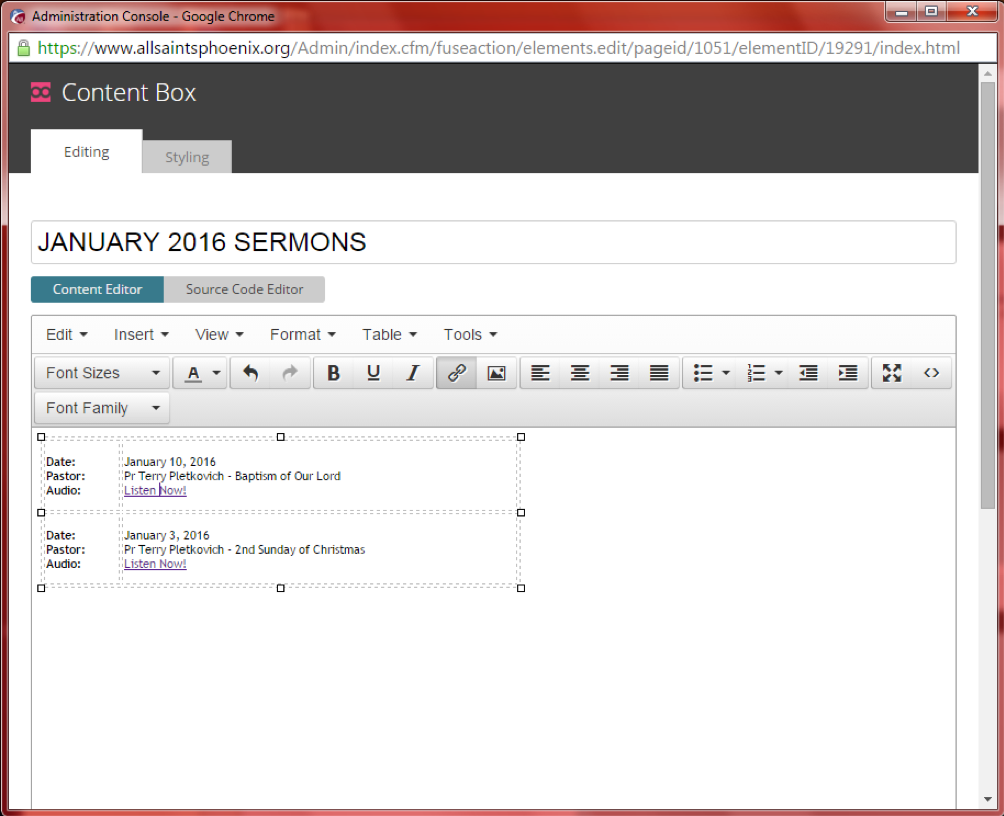
Your screen should now look similar to the following:
-
Click Save.
-
Test the audio on the website by clicking the updated link:
-
Your screen should switch to the audio player and start playing the audio:
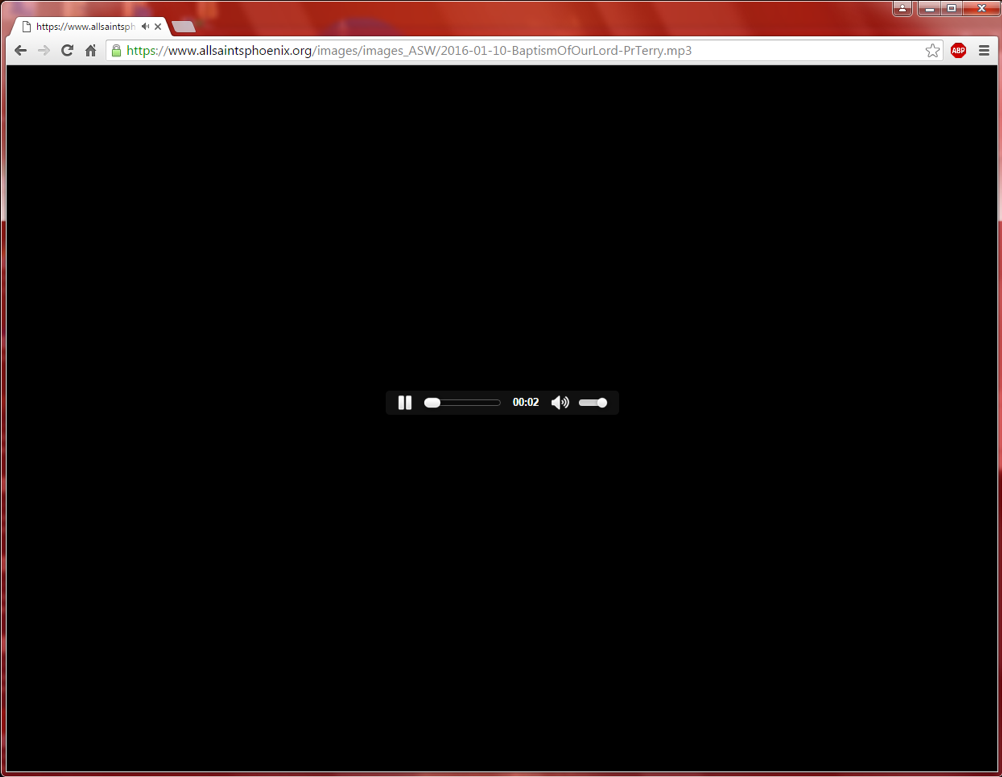
You can use the headphones to listen directly from the top audio jack on the front of the PC to verify.


-
In Audacity, select the menu option File> Export.
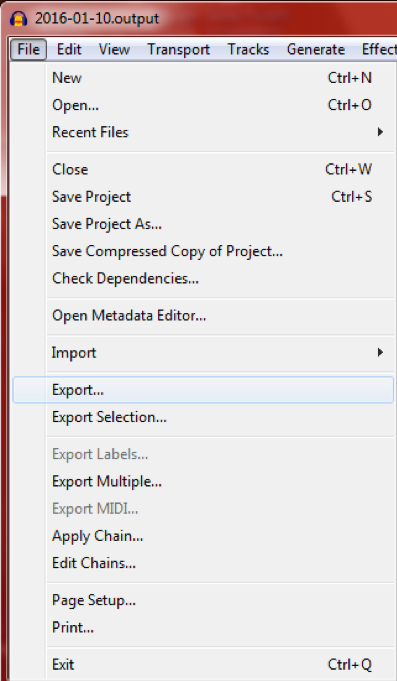
-
Save the file with the same name as the sermon in MP3 format to the \\Server\Sanctuary PowerPoints\Audio Services folder (or use the Audio Services shortcut from the desktop).
-
Tag the file with the same tags as the Sermon file:


-
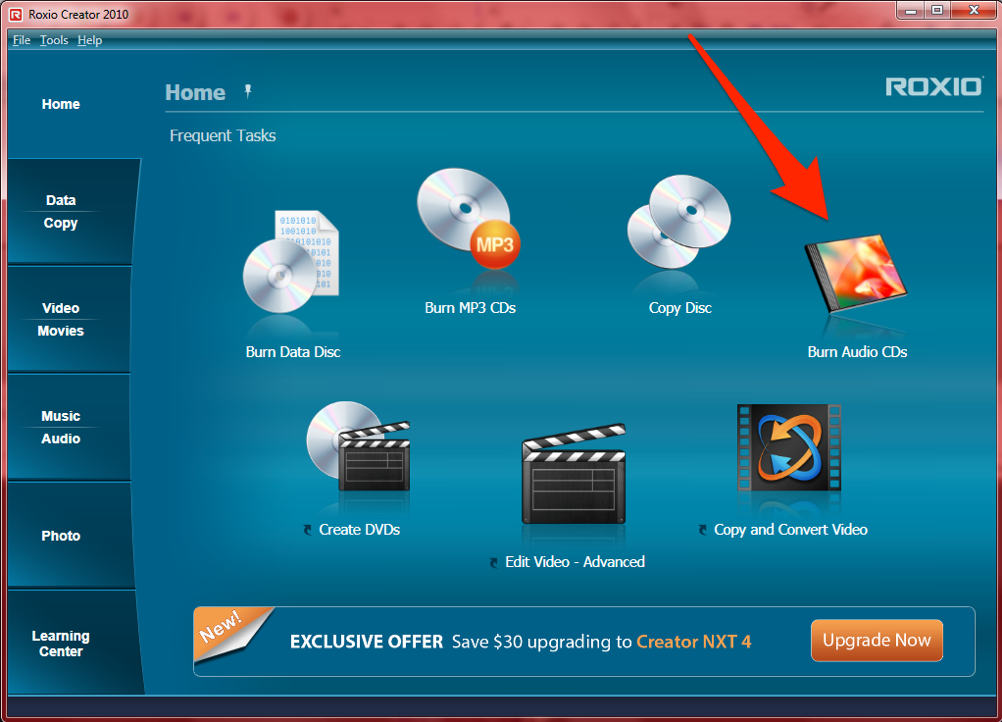
Start Roxio Creator by clicking the icon shown below on the launch bar.

-
Double click the Burn Audio CDs icon as shown below.
-
Drag the MP3 file from the Audio Services folder on to the area shown below in Roxio Creator.
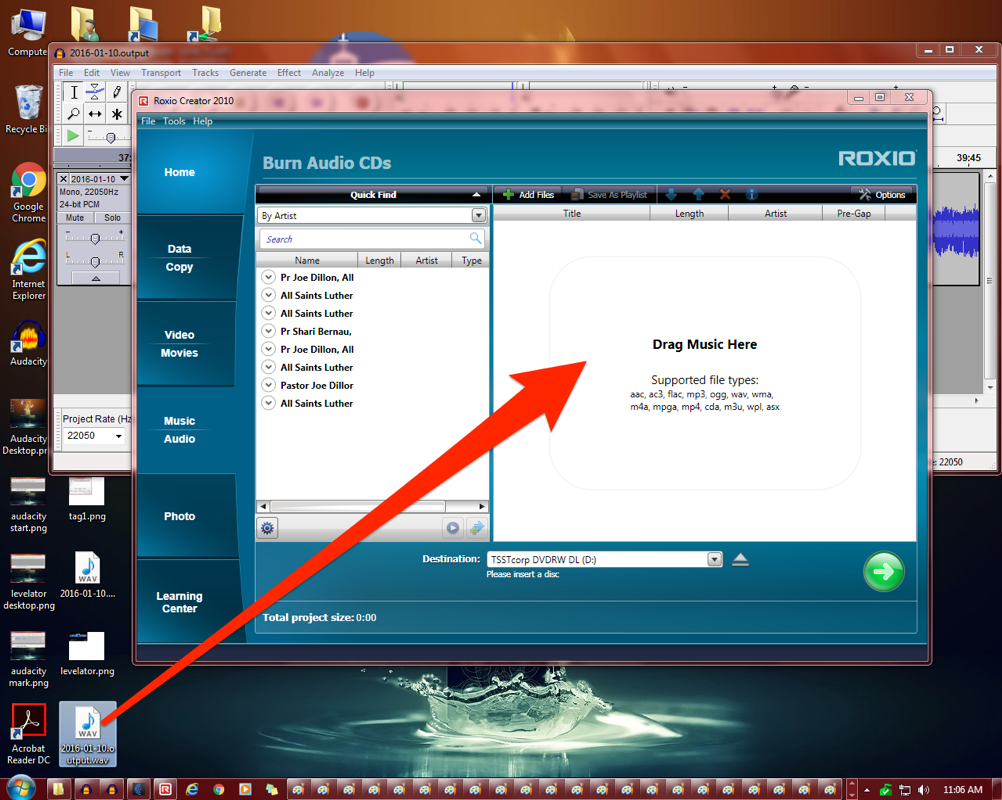
-
Insert a blank CD in the audio PC.
Note: The green arrow will change subtly when you move your mouse over when the CD drive is ready to burn. If it does not do this, wait a few seconds and try again.
-
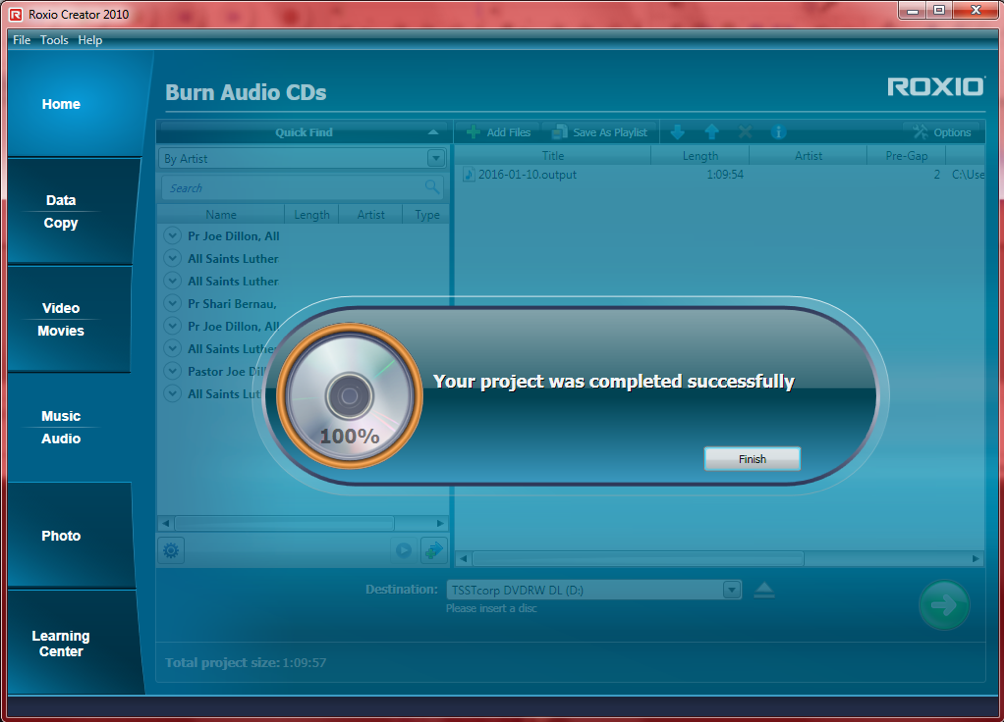
Click the green arrow* on Roxio Creator to begin burning the audio file to CD.
The CD burning process takes about 4 minutes. When it is complete, the screen will appear as shown below.
-
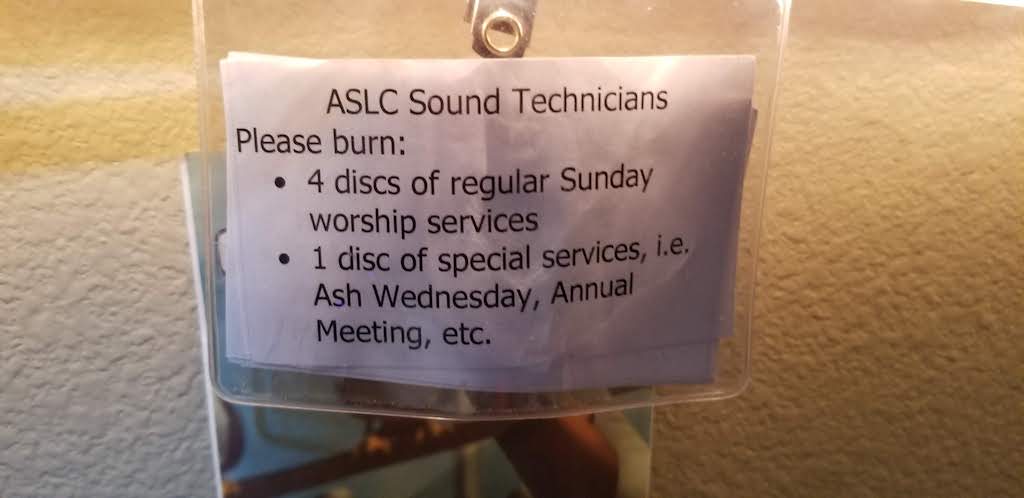
For normal Sunday services, use the name tag by the computer monitor to determine how many (total) copies are needed.
-
Turn on the CD duplicator machine and wait for it to completely boot up (note the display).
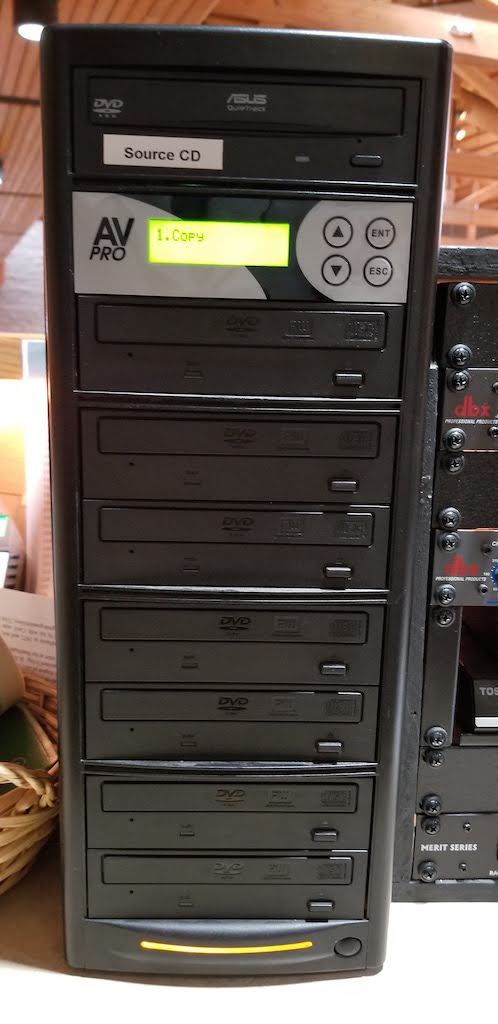
Note: This machine is quite noisy and it is recommended to only be running while CDs are being duplicated.
-
Open the top tray of the CD duplicator. DO NOT PLACE THE MASTER CD IN THE TRAY YET!!!
-
Place blank CDs in the trays below and close the drawers for the blanks.
-
When all blanks are ready, place the master CD in the top tray and close the drawer. Duplication will begin automatically.
-
When the status bar on the LCD reaches 100%, all drawers will automatically open. The duplication process is complete.
-
Label each CD with the following format.
-
When you have created all the CDs, set them aside.
-
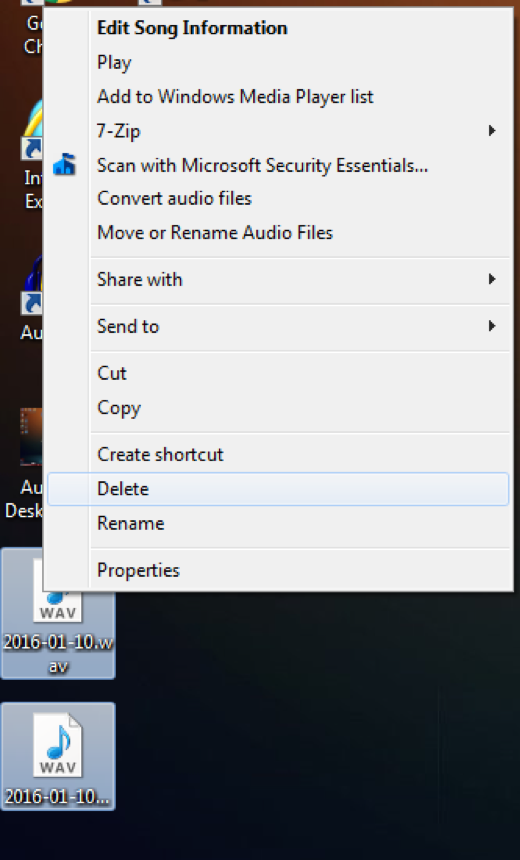
Delete the temporary WAV files from the desktop.


The 10:45 service typically has the same audio requirements as the 9:00AM service. Pastor Dan Hoeger requests that his sermon be recorded at both 9:00 and 10:45. Use the steps above to:
- Use Audacity and record just the sermon.
- Process the sermon via Levelator.
- Create an MP3 of the edited Sermon.
- Save the MP3 the Audio Sermons folder wit the filename suffix -1000.mp3.
-
As the 10:45 service starts and the prelude fades:
- Turn off the projector.
- Turn up the sanctuary lights.
-
Monitor the audio levels at 10:45 the same way you did in the 9:00AM service.
-
Record the Sermon.
-
Repeat the above steps to edit, levelate, and save the Sermon as an MP3 in the Audio Sermons folder.
-
Clean up the temporary desktop files.
After the 10:45 service concludes:
-
Gather wireless mics from Pastor(s) and assisting Pastor(s)
-
Power down wireless mics and store them on the top shelf of the audio cabinet.
-
Close and latch the audio cabinet.
-
Turn off the rope lights.
-
Turn off power on the desk and rack.
-
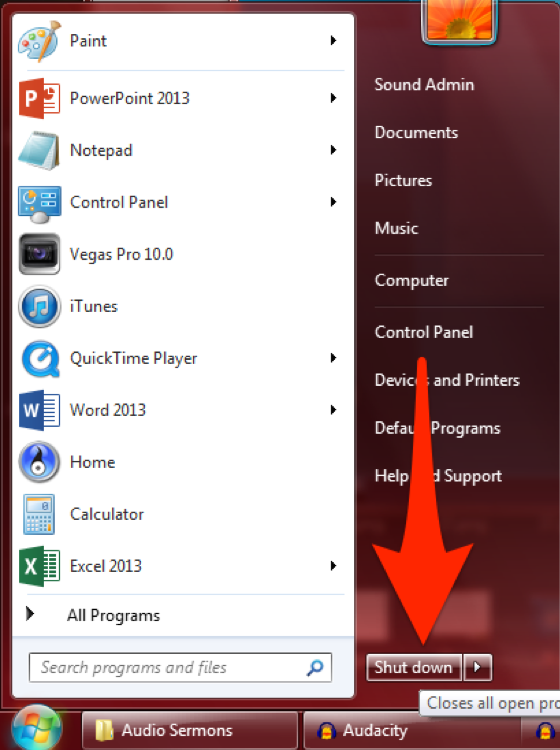
Turn off PC using normal Windows shutdown procedure.
-
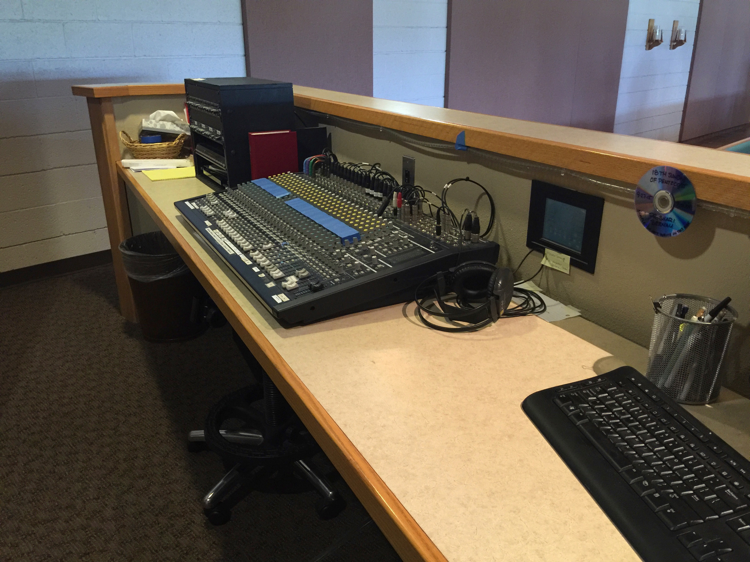
Inspect booth for cleanliness and nobody forgot anything.

-
Before departing, inspect of the audio booth to ensure:
- Everything is in order
- Bulletins are recycled
- Dead/dying batteries are disposed of
- Garbage is thrown away
- Chairs are pushed in
- Headphones are neatly stored
- Cabinet is closed
- No personal items are left behind
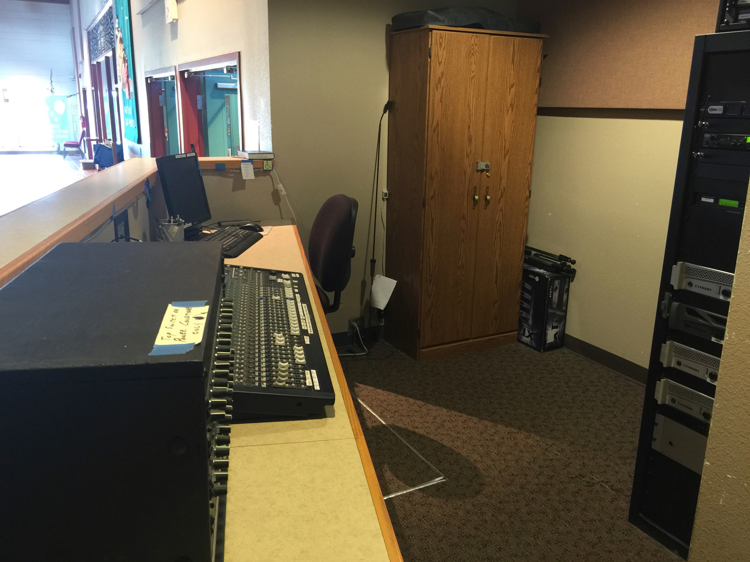
See the following images for an example of an organized sound booth.
-
Deliver the following to the front desk:
- CDs
- Any lost+found items
- A list of any supplies required (e.g. batteries, CDs, etc) or issues that facilities needs to look in to such as non-functional equipment.


-
Audacity: http://audacityteam.org/help/
-
Schematics and other diagrams are located under the mixer board.
-
Default Mixer settings as of 2019-12-08


