


The traffic values in the channel specified from 1 to 14 are received and displayed with the help of ESP32, and TFT Lcd. graphically in the form of incoming traffic at any time will show with Waterfall Plot.

- Scan 2.4Ghz band
- Received Packets will show with Waterfall Plot.
- Ability to choose the desired channel from 14 channels
We use st7735 Tft Lcd with ESP32. Also, I used a MicroSwitch in order to change 802.11 channels.
- TFT Lcd st7735
- ESP32
- Micro Switch

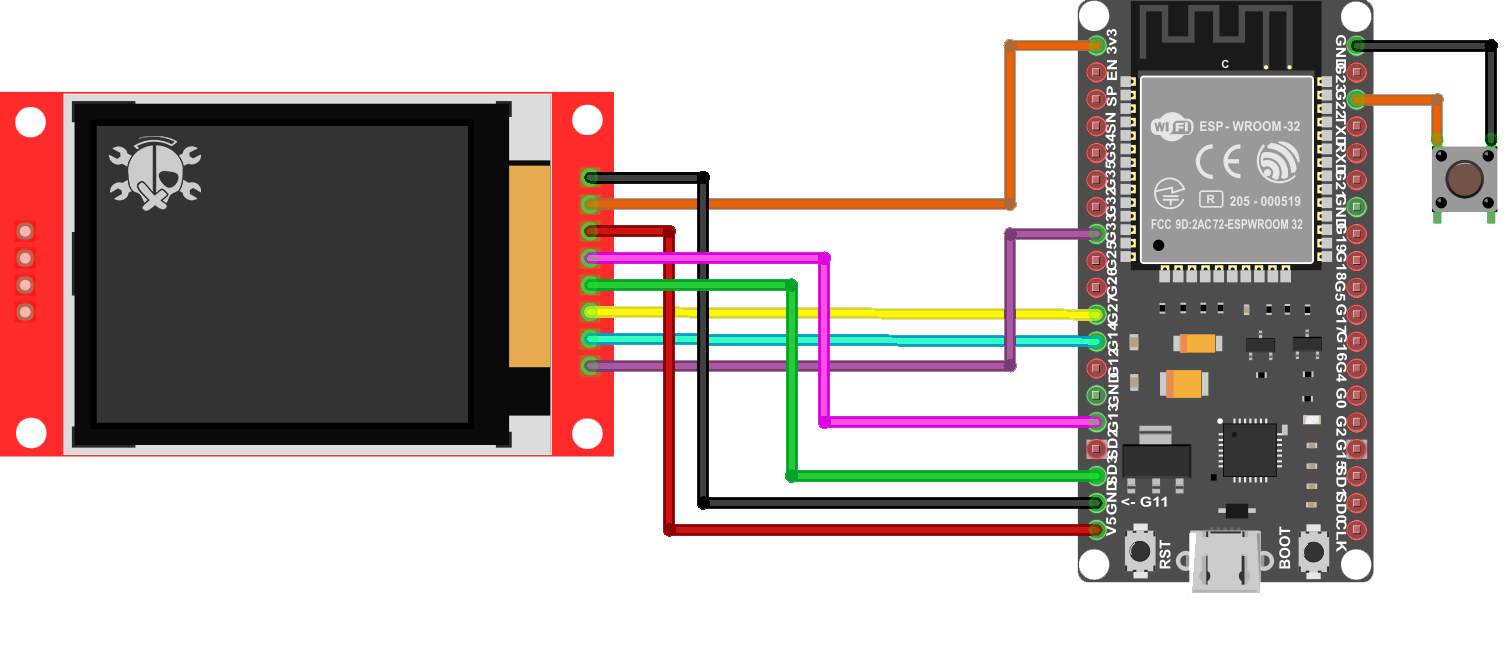
Make the connections according to the table and schematic below.
- ESP32 and st7735 tft LCD.
| ESP32 | TFT Lcd |
|---|---|
| 14 | CS |
| 33 | RST |
| 27 | DC |
| 18 | CLK |
| 23 | DIN |
| 5V | VCC |
| 3V3 | LED |
| GND | GND |
- Arduino and Micro Switch.
| ESP32 | Micro Switch |
|---|---|
| 22 | - |
- Complete Schematic
Before uploading the code you need to install ESP32 in your Arduino IDE
- In Arduino IDE, go to File > Preferences
- Enter URLs Additional Boards Manager URLs field. Then, click the “OK”
https://dl.espressif.com/dl/package_esp32_index.jsonThen you need to install the required library in Arduino IDE. Follow these steps:
- Follow this path Sketch> Include Library> Manage Libraries
- Search for Adafruit_ST7735
- Install the library
After uploading the code, According to the channel selected by you, the packet monitor will display the received traffic.

Distributed under the MIT License. See LICENSE.txt for more information.
CiferTech - @twitter - CiferTech@gmali.com
Project Link: https://github.com/cifertech/WiFiBox