MailChimp App for the Google Assistant
Demo Video
This is a Node.js app for sending MailChimp email campaigns through Google Assistant.
Medium post about the development process.
Usage
Instructions for running the app yourself with Heroku.
Clone the repo
git clone git@github.com:ckirksey3/mailchimp-google-assistant.git
cd mailchimp-google-assistant
Create a Heroku app
Install Heroku CLI if you haven't already and then create an app
heroku create
git push heroku master
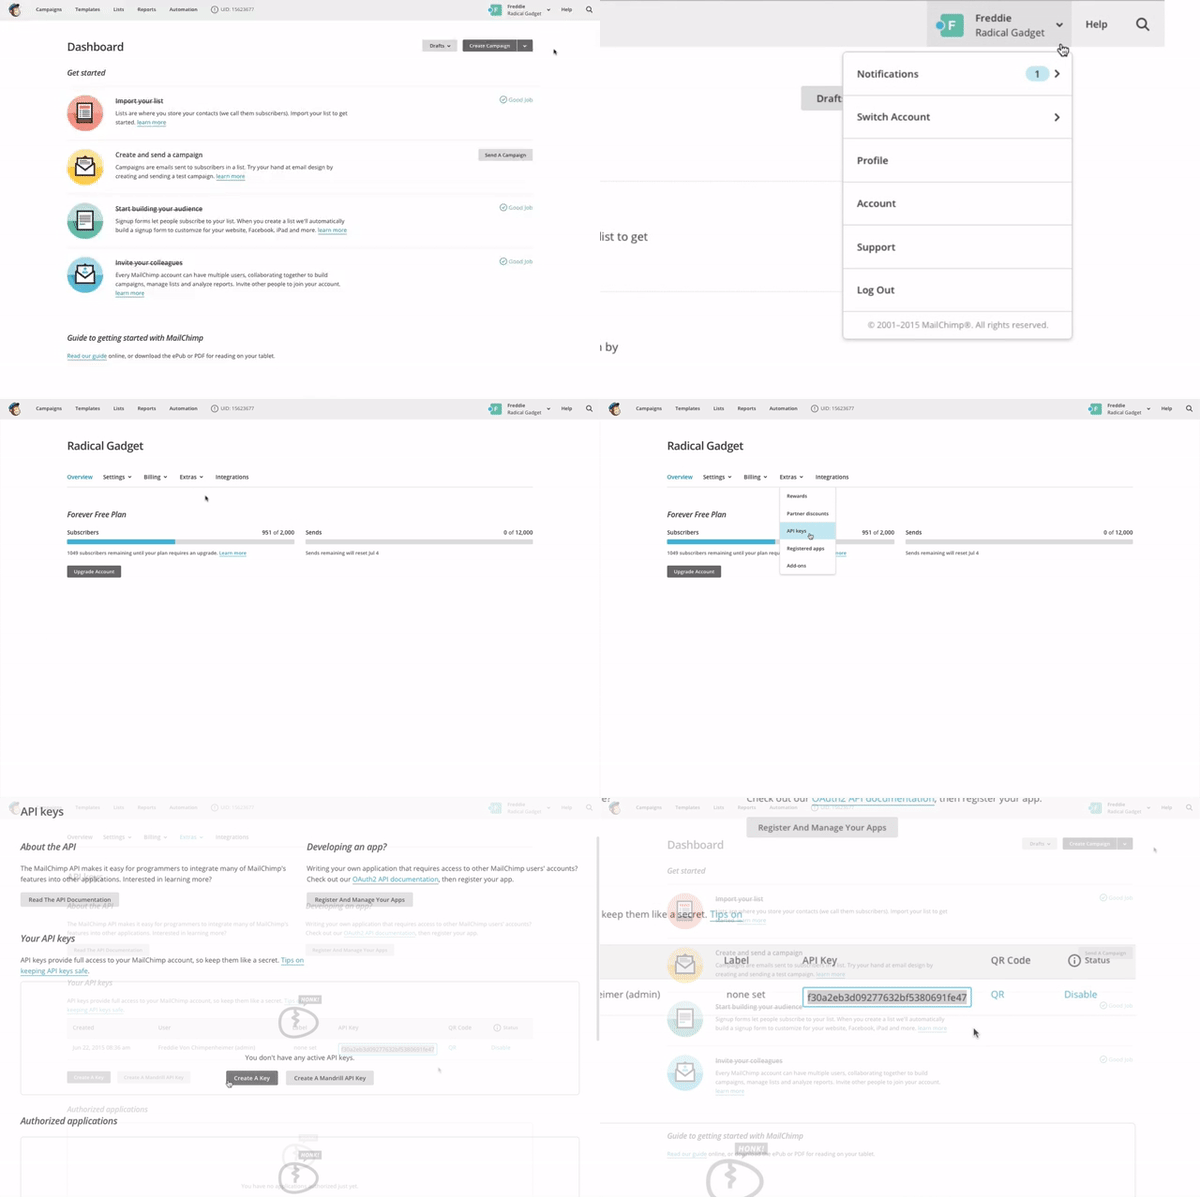
Get your MailChimp API key
- Log into MailChimp
- Click your profile name to expand the Account Panel, and choose Account.
- Click the Extras drop-down menu and choose API keys.
- Copy an existing API key or click the Create A Key button.
Set API key to Heroku environment variable
heroku config:set MAILCHIMP_API_KEY=13dd123f3ta8790ea02912e5c7y98-us23(that's not my real key of course 😉)
Create Google Actions project
- Go to the Actions on Google Developer Console.
- Click on Add Project, enter MailChimpAssistant for the project name, and click Create Project.
- In the Overview screen, click on Use API.AI and then CREATE ACTIONS ON API.AI to start building actions.
- The API.AI console appears with information automatically populated in an agent. Click Save to save the agent.
Restore cached settings into the API.AI agent
- In the left navigation, click on the gear icon to the right of the agent name.
- Click on the Export and Import tab.
- Click RESTORE FROM ZIP and select the Mailchimp.zip file including in this repo
- Type RESTORE in the text box, click RESTORE, then DONE.
Set up fulfillment
- In API.AI's left navigation, click Fulfillment
- Move the ENABLED slider to the right
- Get the Web URL of your Heroku app from CLI
heroku info- Enter that Web URL in the URL field
- Click SAVE
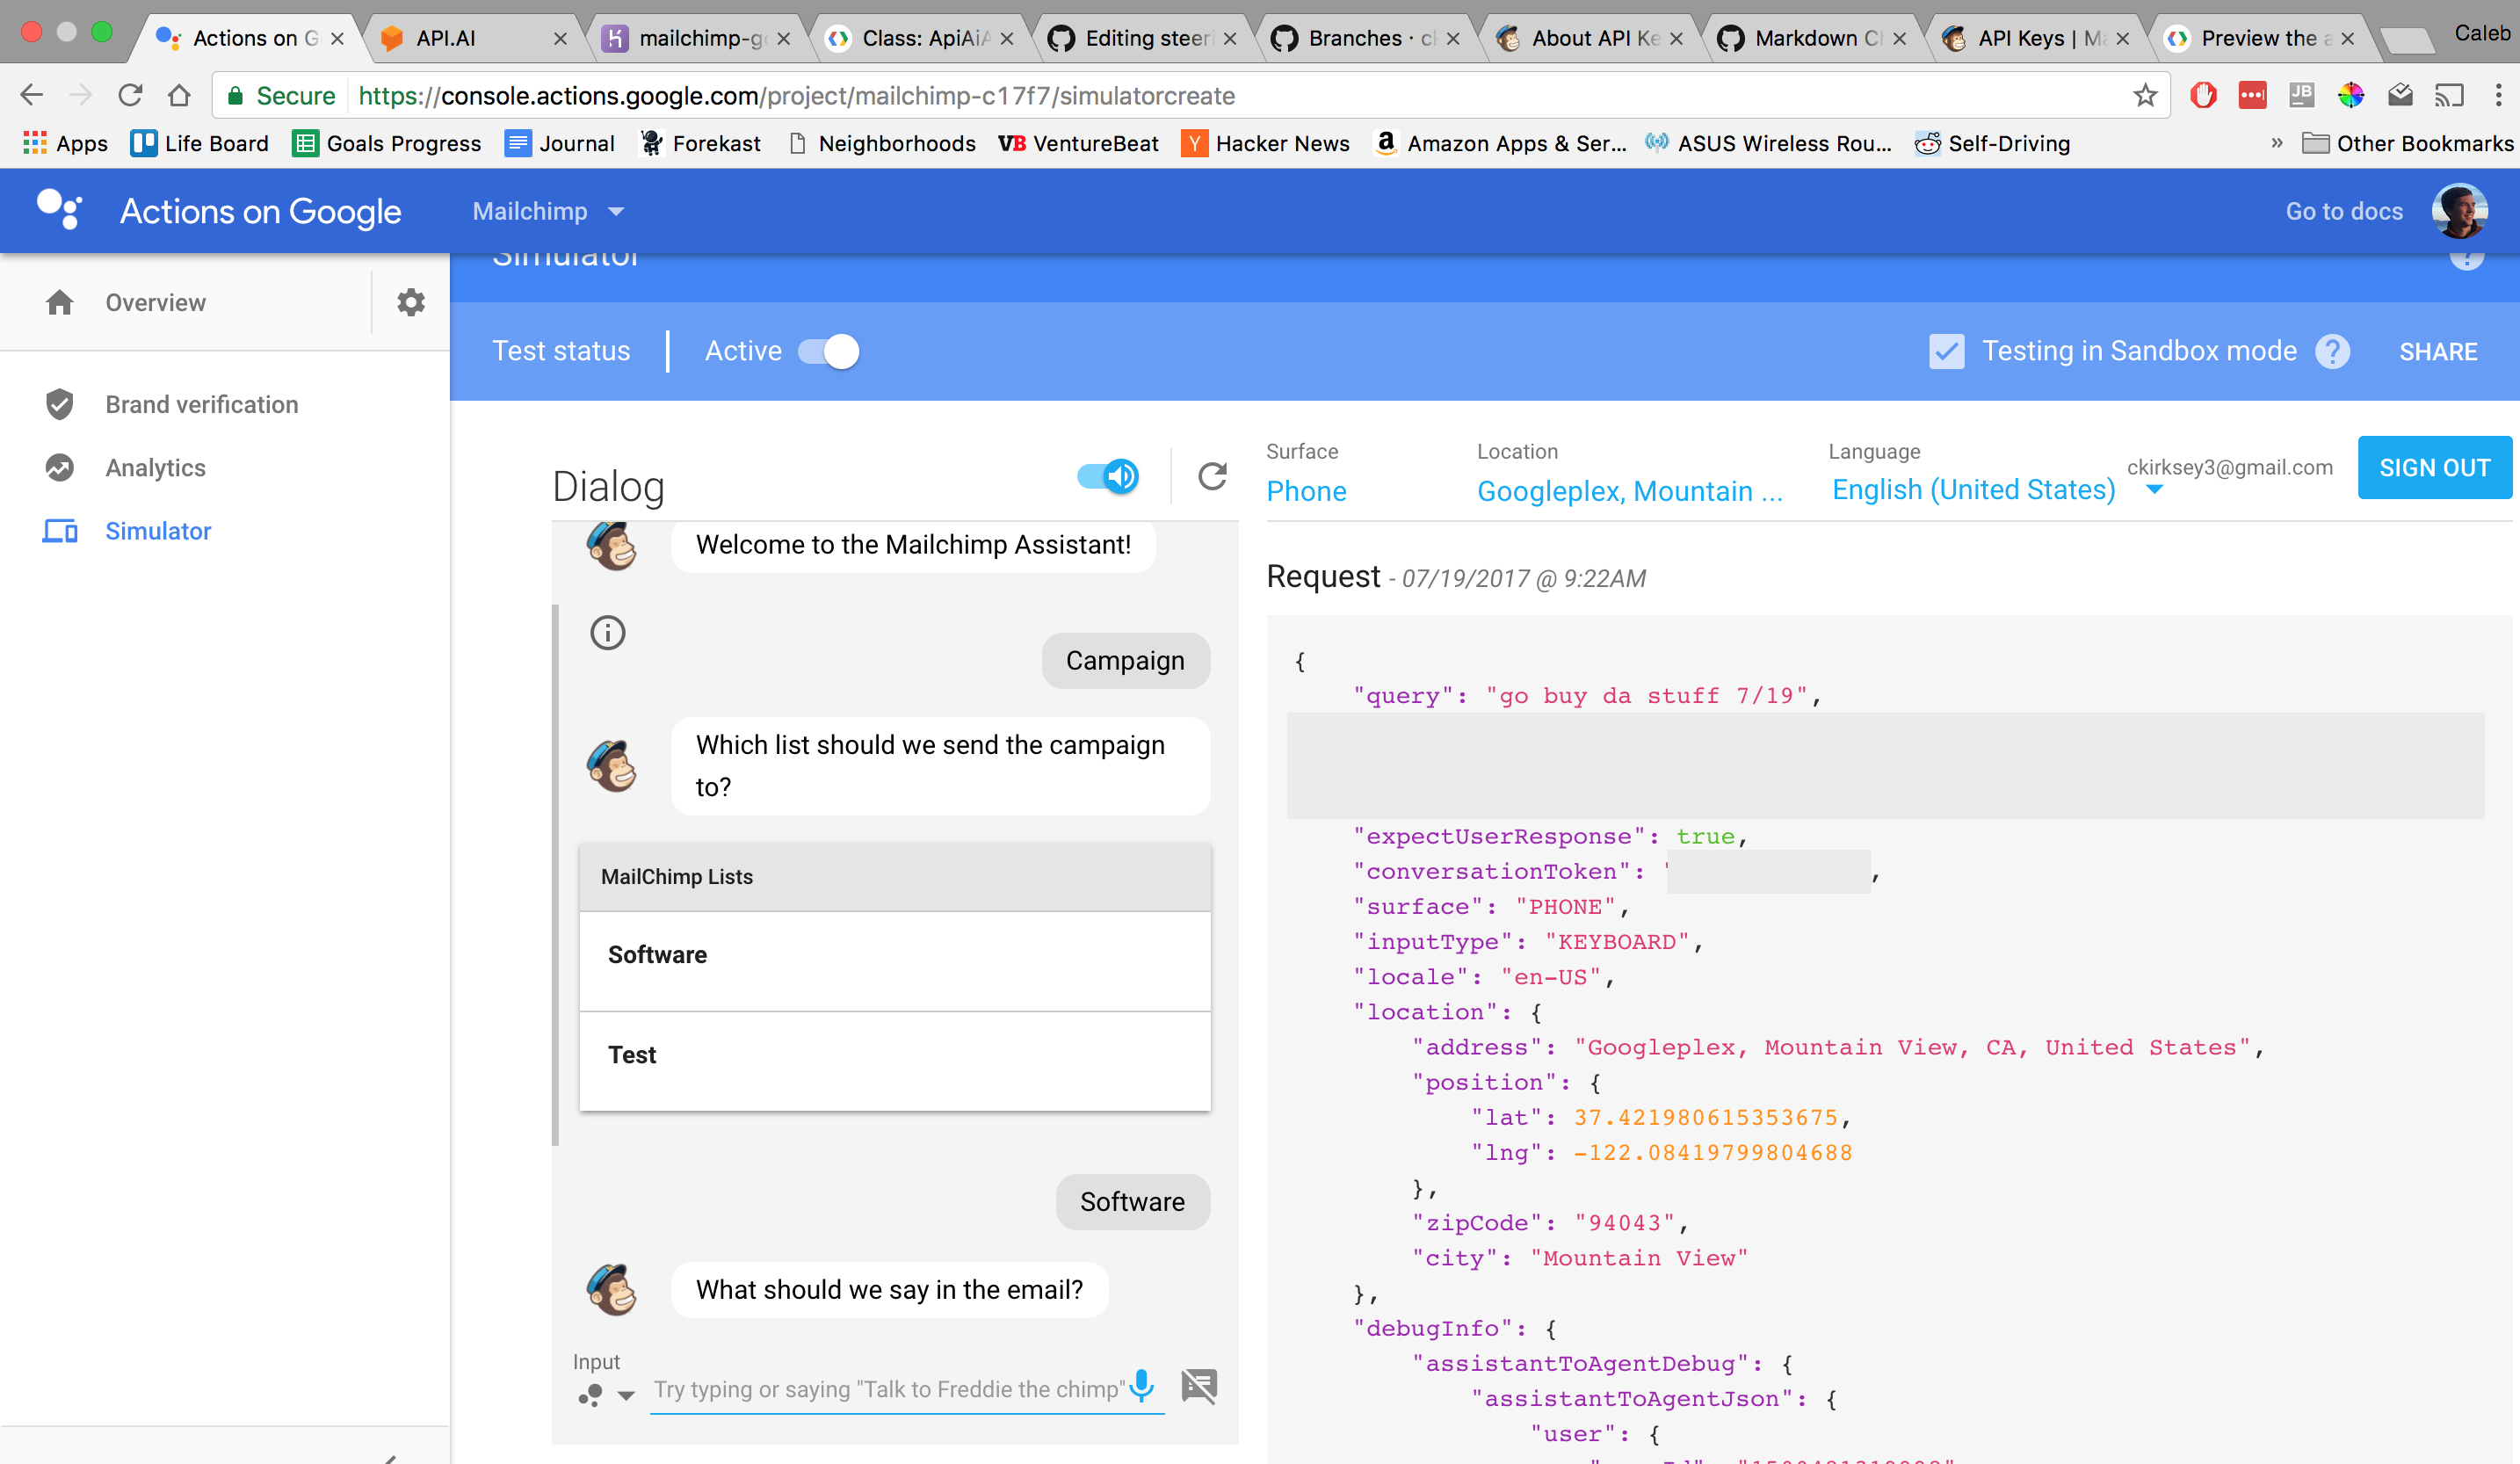
Preview the app
- Click on Integrations in API.AI's left navigation, and move the slider bar for the Actions on Google card.
- Click on the Actions on Google card to bring up the integration screen and click UPDATE and then VISIT CONSOLE. Back at the console, click TEST.
- If you don't see a TEST button, you need to click on the AUTHORIZE button first to give API.AI access to your Google account and Actions project.
- In the Test your Assistant app section of the integration screen, click on the Actions Simulator link to open a new browser for the Actions simulator.


