Classifies kitchen stuff items into 6 categories: cups, glasses, plates, spoons, forks and knives
NOTE: This project was generated with Cookiecutter along with @clamytoe's toepack project template.
This repo is the result of my capstone project for the Machine Learning Zoomcamp 2022 course. I used the model for a Kitchenware Classification competition that was hosted by the DataTalks.Club over at Kaggle.
The model will take an image of a kitchenware item and try to classify it into one of the following classes:
- cups
- forks
- glasses
- knives
- plates
- spoons
I was able to score a 0.97674 with it and am currently in the 13th place as a member of Team Penumbra!
My fellow team mebers were:
- Roman Zabolotin - Junior Data Scientist
- Tatiana Ankudo - Analyst
The dataset is pretty big so I did not include it here. You can download it from the competition page.
In order to get things to work right the first time, extract it's contents into the kitchenware_classifier/data/ folder.
NOTE: I've added the extra images that were given to the community by Walukagga Patrick.
My tree structure looks like this:
├── Dockerfile
├── LICENSE
├── Pipfile
├── Pipfile.lock
├── README.md
├── api.py
├── fastai_model.pkl
├── favicon.ico
├── images
│   ├── coffe.jpg
│   ├── deployment.png
│   ├── docs.png
│   ├── mogenius-welcome.png
│   ├── mogenius.png
│   ├── post.png
│   ├── result.png
│   ├── selected.png
│   ├── settings.png
│   └── upload.png
├── kitchenware_classifier
│   ├── data
│   │   ├── extra.csv
│   │   ├── images
│   │   ├── models
│   │   ├── sample_submission.csv
│   │   ├── test.csv
│   │   └── train.csv
│   ├── extra-images.zip
│   └── kitchenware-classification.zip
├── kw_router.py
├── notebook.ipynb
├── predict.py
├── requirements.txt
├── sample.jpg
├── sample2.jpg
├── send_multiple_images.py
├── send_single_image.py
├── submission.csv
├── test_model.py
└── train.pyFirst thing to do is to create or change directories into wherever you keep all of your projects.
For me, it's the Projects folder.
Once there clone this repo.
(py310) ➜ cd Projects
(py310) ➜ git clone <https://github.com/clamytoe/kitchenware_classifier.git>
(py310) ➜ cd kitchenware_classifierIf you are an Anaconda user, this command will get you up to speed with the base installation.
(py310) ➜ conda create --name kws -file requirements.txt
(py310) ➜ conda activate kwcIf you are just using normal Python, this will get you ready.
First thing is to create a virtual environment. There are many ways to do this, but the simplest is using venv.
(py310) ➜ python3 -m venv venv
(py310) ➜ source venv/bin/activate
(venv) ➜ pip install -r requirements.txtNOTE: I've included the model,
fastai_model.pkl, but due to it's size, GitHub complained about it. If I have to remove it, you will have to build your own, or use the provided Docker image, which has it.
Once you have your local virtual environment setup,
you just need to run the train.py script and some coffee to generate it.
(kwc) ➜ python train.py
Finding best learning rate...
lrs=SuggestedLRs(minimum=0.004786301031708717, steep=1.4454397387453355e-05, valley=0.0005754399462603033, slide=0.0014454397605732083)
Training the Model...
epoch     train_loss  valid_loss  error_rate  accuracy  time
0         0.319466    0.125656    0.040504    0.959496  01:28
Better model found at epoch 0 with valid_loss value: 0.12565582990646362.
1         0.247616    0.090624    0.034203    0.965797  01:29
Better model found at epoch 1 with valid_loss value: 0.09062422811985016.
2         0.201797    0.092758    0.030603    0.969397  01:29
3         0.163881    0.100454    0.034203    0.965797  01:29
4         0.152107    0.092587    0.033303    0.966697  01:29
No improvement since epoch 1: early stopping
Model validation: [0.09062422811985016, 0.0342034213244915, 0.9657965898513794]
Saving model as: fastai_model.pkl...
Training completed!Once your environment is setup, this one command will start the server:
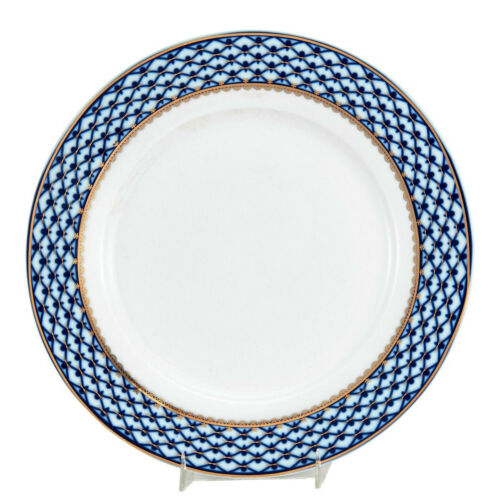
(kwc) ➜ uvicorn api:app --reloadWith the server up and running, you can now send it images to classify for you. I have included two sample images:
and
I have provided two sample scripts:
send_simgle_image.pysend_multiple_images.py
With the server running, you can run either of the scripts to test out the server.
send_simgle_image.py:
(kwc) ➜ python send_single_image.py
{'predicted': 'fork', 'probabilities': {'cup': 2.682557351363357e-05, 'fork': 0.9998975992202759, 'glass': 2.706188070078497e-06, 'knife': 5.796951882075518e-06, 'plate': 6.11106152064167e-05, 'spoon': 5.840373432874912e-06}}
send_multiple_images.py:
(kwc) ➜ python python send_multiple_images.py
{'image': 'sample2.jpg', 'predicted': 'plate', 'probabilities': {'cup': 0.00012867810437455773, 'fork': 5.518031230167253e-06, 'glass': 1.5953222828102298e-05, 'knife': 1.3917076557845576e-07, 'plate': 0.9998399019241333, 'spoon': 9.731486898090225e-06}}
{'image': 'sample.jpg', 'predicted': 'fork', 'probabilities': {'cup': 2.682557351363357e-05, 'fork': 0.9998975992202759, 'glass': 2.706188070078497e-06, 'knife': 5.796951882075518e-06, 'plate': 6.11106152064167e-05, 'spoon': 5.840373432874912e-06}}
NOTE: By default the scripts submit the images to my cloud service. To test locally, just change the url setting from
url["cloud"]tourl["local"].
The benefit of using FasAPI is that it makes things much easier and faster. For instance, if you nagivate to: http://localhost:8000/docs you will be able to interact with the application.
This entrypoint just returns some information about me and the project.
This is where you get to play with the model and see how well/bad it works. Feed it an image of a kitchenware item and see how it does.
To use it, simply click on the POST button to expand it:
Then click on the Try it out button.
This will reveal a Choose File button that will allow you to navigate your filesystem and choose and image.
Here, I've randomly chosen a tricky one from the Internet to see what the model picks up:
With the image loaded:
Simply click on the big Execute button to process the image.
If you scroll down a bit, you will see your results:
As you can see, it picked up on the cup!
If you would rather not have to download this repo, create an environmet, download the dataset, etc, you can run this as a docker container. Simply download an already compiled version from Docker Hub: Kitchenware Classifier
(kwc) ➜ docker pull clamytoe/kitchenware-clfOnce you have the image you can run it as so:
(kwc) ➜ docker run -it --rm -p 8000:8000 clamytoe/kitchenware-clfNOTE: The image is 3.77GB but expands to 6.06GB.
If you would rather build the docker image yourself, I have included the Dockerfile just for that purpose.
Just run the following command from the directory where you cloned this repo to:
(kwc) ➜ docker build -t kitchenware-clf .Once you have the image you can run it as so:
(kwc) ➜ docker run -it --rm -p 8000:8000 kitchenware-clfI've been really impressed with the ease of use of Mogenius so I went ahead and deployed the model there.
Give it a try: Kitchenware Classifier on Mogenius
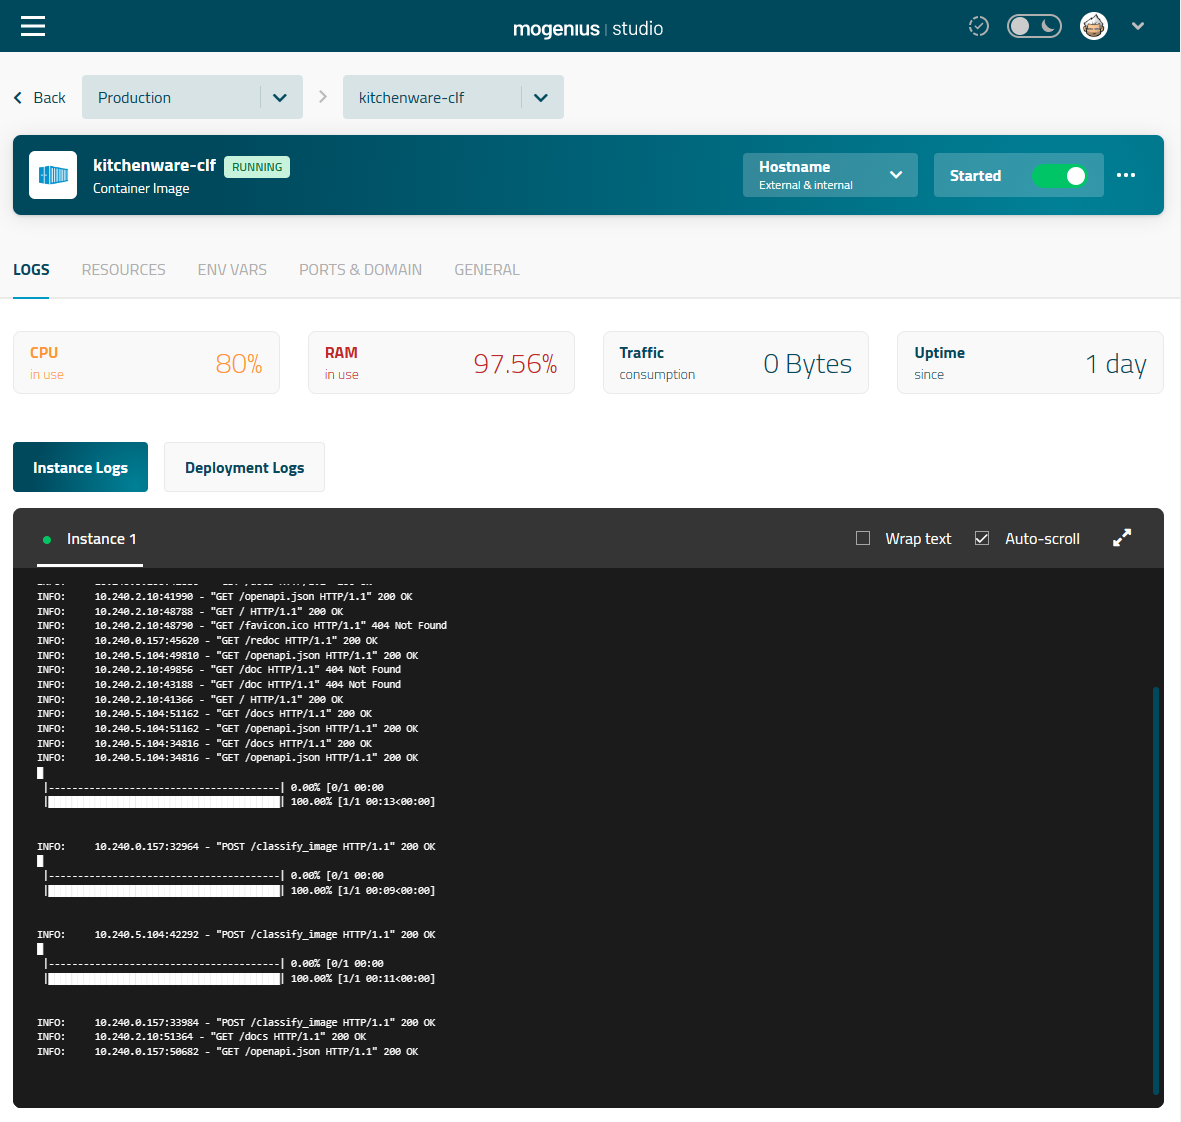
Here is what the dashboard looks like after classifying an image.
The free tier is a bit slow, but for free and extreme ease of use, it's perfect!
Before I could even think about getting my model on the cloud, I first had to tag my image and push it to docker hub.
(kwc) ➜ docker tag kitchenware-clf clamytoe/kitchenware-clf:latestNOTE: Make sure to use your own docker hub user name.
Once the image has been properly named, it can now be push.
(kwc) ➜ docker push clamytoe/kitchenware-clf:latestMogenius allows you to deploy from an existing image but it can also just build it from yoru GitHub repo, as long as you have a
Dockerfile.
Once the image has been uploaded to Docker Hub, it was relatively easy to set it up.
NOTE: Just remember to expose the correct port.
Deployment from docker hub image in progress...
More detailed instructions can be found in their Quickstart Guide.
Distributed under the terms of the MIT license, "kitchenware_classifier" is free and open source software.
If you encounter any problems, please file an issue along with a detailed description.


