Service Bus SAS STS Function for Azure Active Directory
This project implements an Azure Function acting as a Security Token Service (STS) that will issue Azure Service Bus, Azure Relay, and Azure Event compatible Shared Access Signature (SAS) Tokens to an application that has been registered with Active Directory and is in possession of an application key.
For Service Bus applications that have so far relied on the Azure Active Directory Access Control Service (ACS), this Function is the foundation for a migration path.
The GetToken function implementation itself has no hard dependency on Active Directory and can be adapted to other identity providers.
Tooling
This project was built with Visual Studio 2017, version 15.3 preview, which is a prerequisite for the tools for Azure Functions that will help with deploying the project code.
Azure Resource Deployment
The project includes an Azure Resource Manager template at the project's root folder ("azuredeploy.json") that will deploy a Service Bus Standard namespace, and configure an Azure Function app alongside of it that acts as its SAS token STS. If you have been using Service Bus with ACS, the deployment script will thus pair the Namespace with the Azure Functions similar to how Service Bus used to create a federated ACS namespace under the covers.
The ARM template will automatically configure the Service Bus namespace with four SAS rules for the rights "Send", "Listen", "SendListen", and "Manage". The "Manage" rule also carries send and listen rights.
The rule names along with the generated keys are added into the configuration of the Functions app under the "ServiceBusSend", "ServiceBusListen", "ServiceBusSendListen", and "ServiceBusManage" settings keys. The Service Bus namespace is put under the "ServiceBusNamespace" app setting key.
Deploying the template
Deploying the template first requires creating a resource group and associating that group with an Azure region. With Azure Powershell, this may look like this:
New-AzureRmResourceGroup -Name clemensv102 -Location westeuropeOnce the resource group has been created, you can deploy the template, specifying the Service Bus namespace name to be created:
New-AzureRmResourceGroupDeployment -ResourceGroupName clemensv102 -TemplateFile azuredeploy.json -serviceBusNamespaceName clemensv102Deploying the Function
Once the template deployment is complete, a new Function app has been created that is prefixed with the name of the Service Bus namespace. In the above example, the name will be "clemens102sts".
The Azure Function code is the publishing output of the Microsoft.ServiceBus.ActiveDirectorySasTokenFunction project and publlished into the Azure Functions app like any other precompiled C# function.
It's recommended to first follow the Active Directory steps discussed below before deploying the code.
For code deployment guidance see the Azure Functions documentation.
Customizing the Function
As is, the function code will authorize every called with a valid claims principal to acquire a token. The authorization step is separated into the following method, which verifies that the caller presented a valid AAD token:
static async Task<bool> IsCallerAuthorizedAsync(string serviceBusNamespace, string path, string requestedPermission, ClaimsPrincipal principal, TraceWriter log)
{
    if (principal?.Identity?.AuthenticationType.Equals("aad") == true &&
        principal?.Identity?.IsAuthenticated == true)
    {
        var appId = GetSetting("WEBSITE_AUTH_CLIENT_ID");
        foreach (var claim in principal.Claims)
        {
            if (claim.Type.Equals("aud", StringComparison.InvariantCultureIgnoreCase) &&
                claim.Value.Equals(appId, StringComparison.InvariantCultureIgnoreCase))
            {
                return true;
            }
        }
    }
    return false;
}
This function can be fitted with a custom set of rules that allows specific entity permissions for certain principals, which may be stored in a database.
Configuring Azure Active Directory
Because Azure Active Directory is not integrated with Azure Resource Management templates, the automated deployment needs to be completed with a few manual steps in the portal, which also include setting up a first service account.
Enabling Active Directory for the Function app
After the Function app is set up and the code is deployed, the Function needs to be enabled for Active Directory. This is best done through the Azure portal.
Setting up Authorization
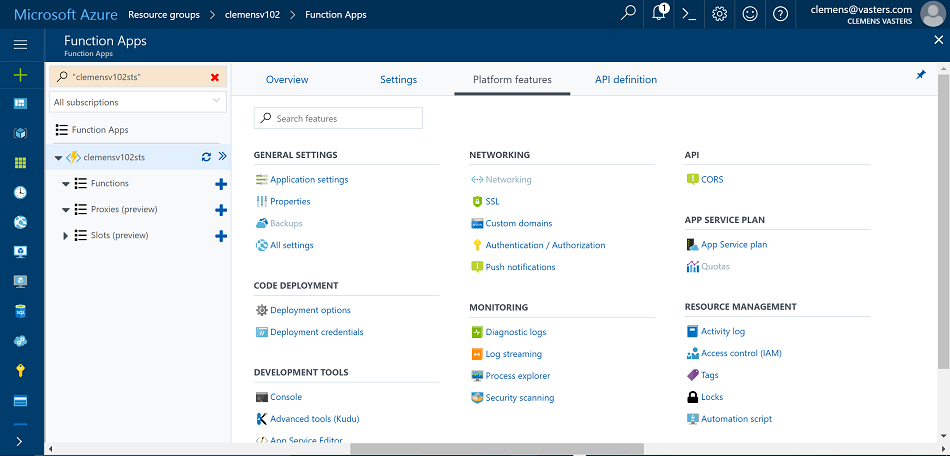
First, find your application in the Azure portal and navigate to the "Platform Features" tab. There, find "Authentication/Authorization":
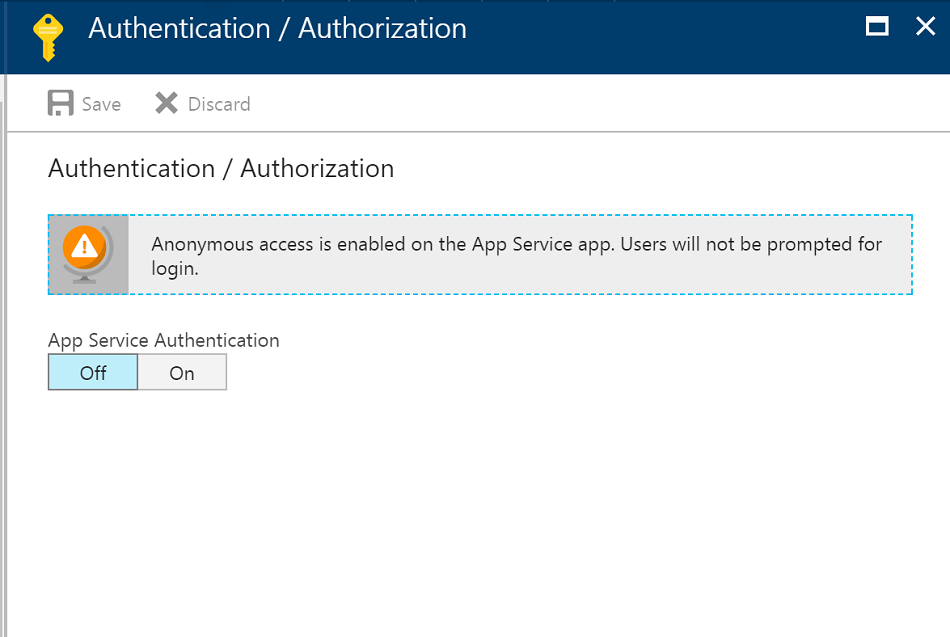
The Authentication / Authorization blade will show the feature turned off. Turn it on.
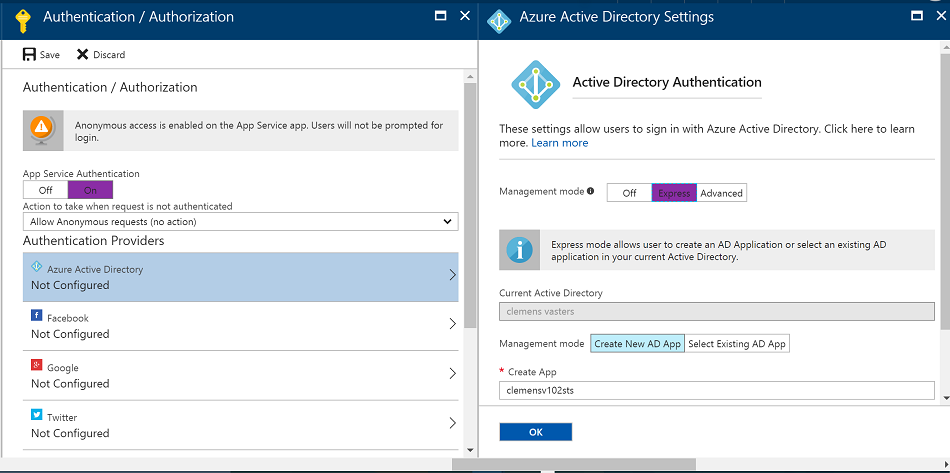
Next, select the Azure Active Directory authentication provider, set the management mode to "Express" and provide a name for the app to create. This should be the same as the STS function app name.
After you clicked OK, and saved the resulting changes to your Function app, Azure will run an automated deployment in the background that creates the Active Directory app entry and wires it up to the Functions app.
To be able to log into the STS (the Functions app) with a client and obtain a Service Bus token, you will next need a credentials for your client application and for the client application to be permitted to access the STS.
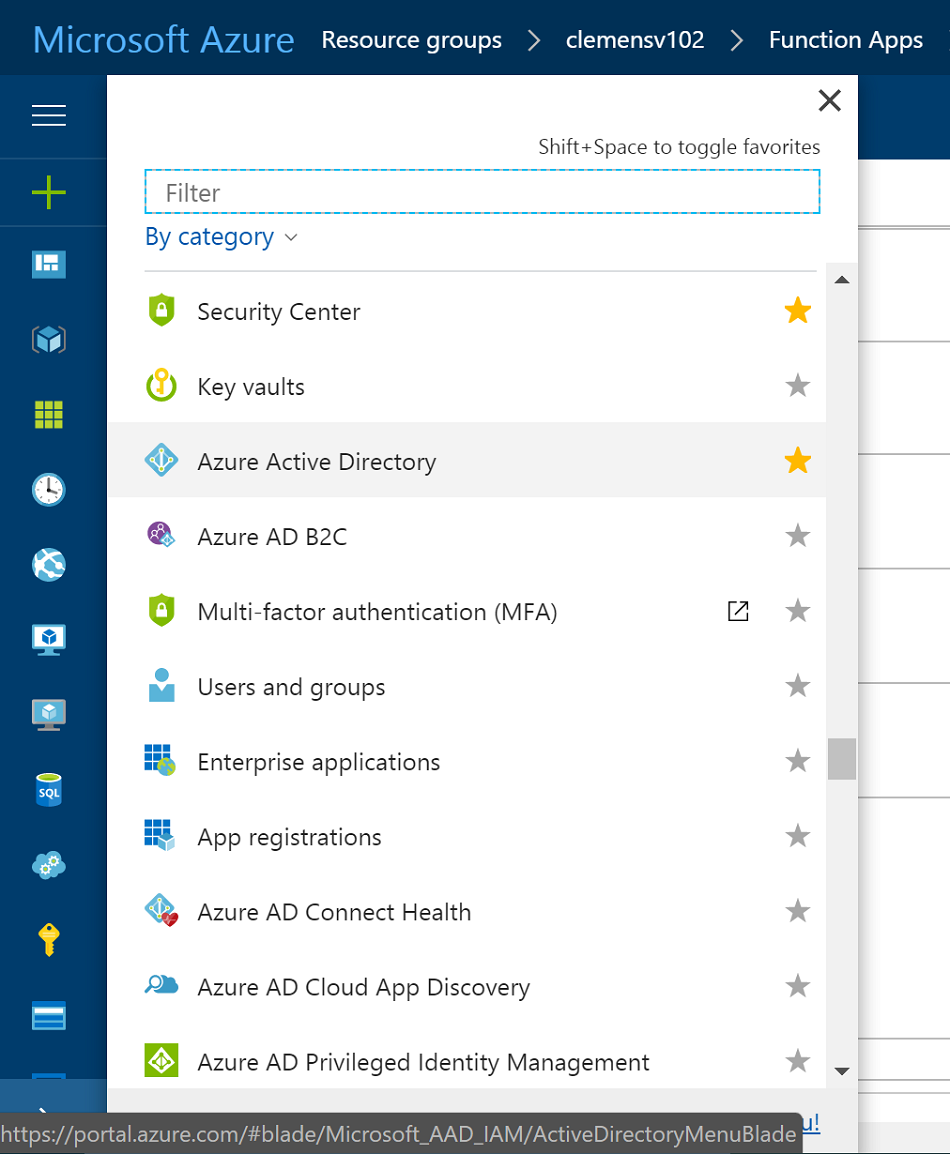
First, find Active Directory in the search box or the portal navigation.
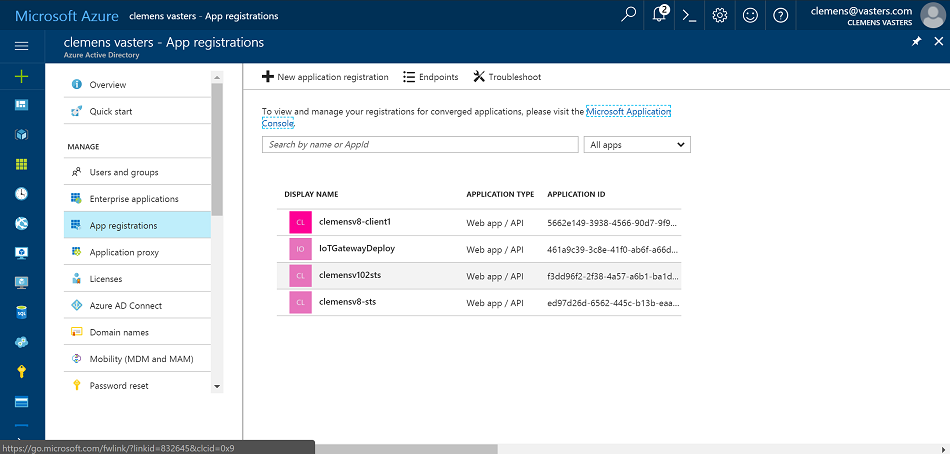
Go to "App Registrations". Depending on your Active Directory tenant, this list might already be quite long. You can also find the registration for the STS in this list.
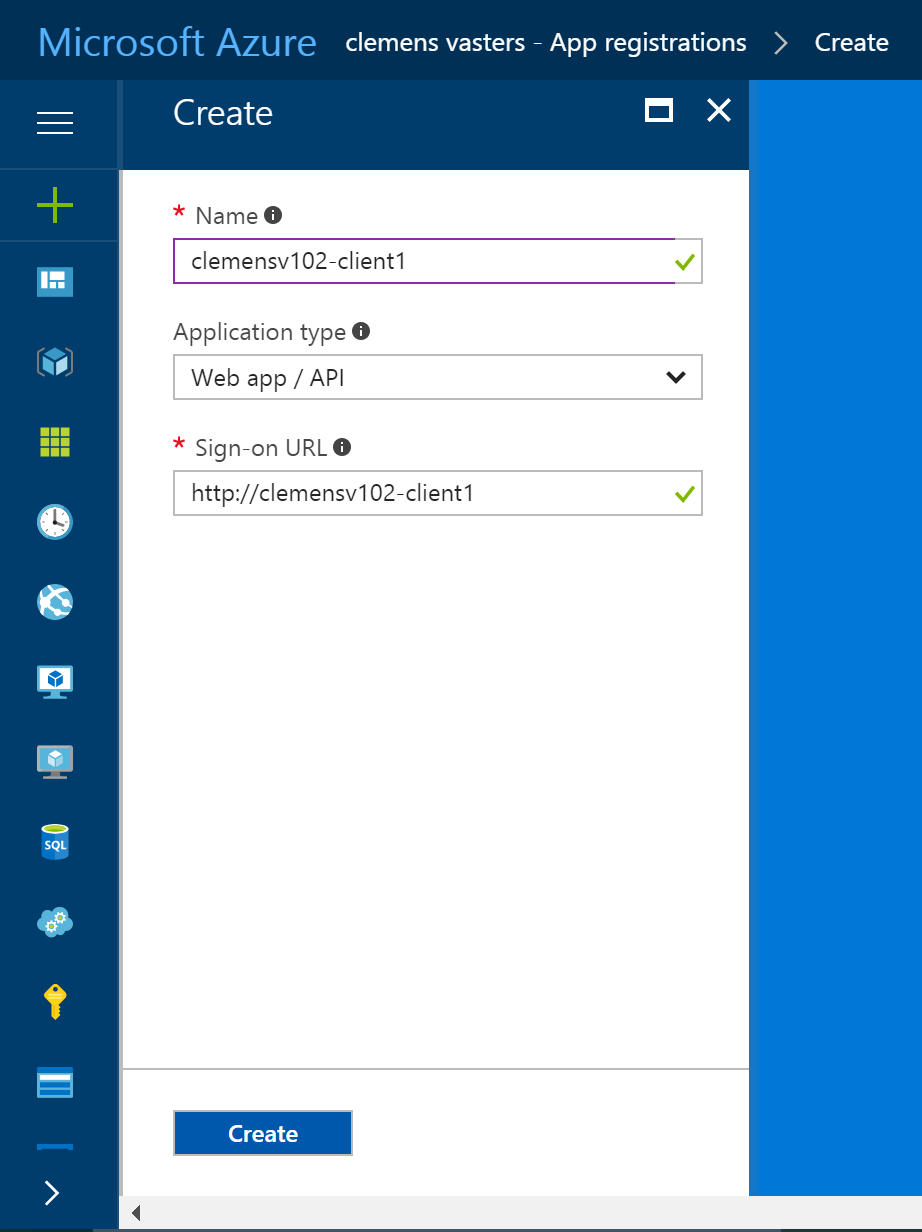
Click "New application registration" to create an identity for your client application. This is what will be done for each new client. You can also automate this using Powershell.
The name needs to be unique inside the tenant. The URL isn't used, but will have to be syntactically valid.
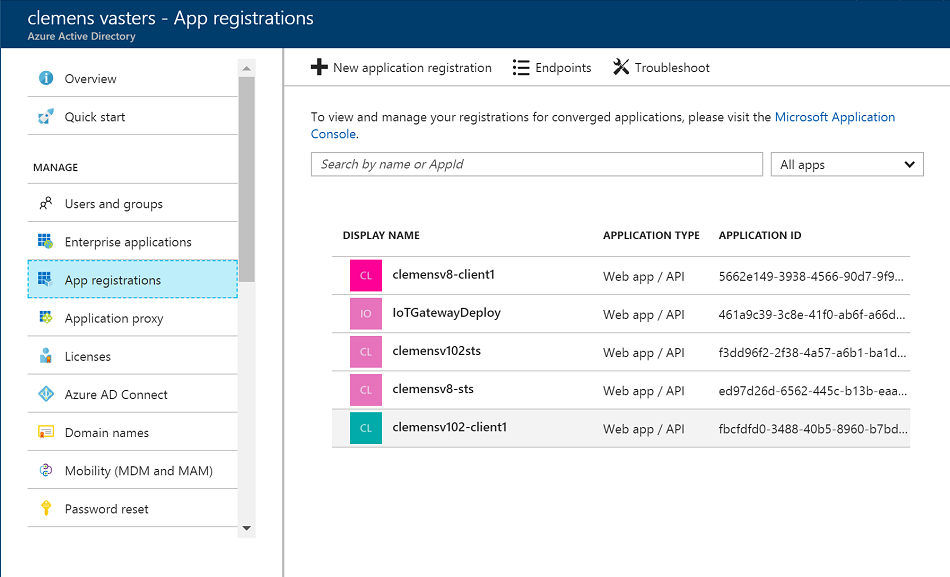
Once you created the new identity, find it in the list and click it.
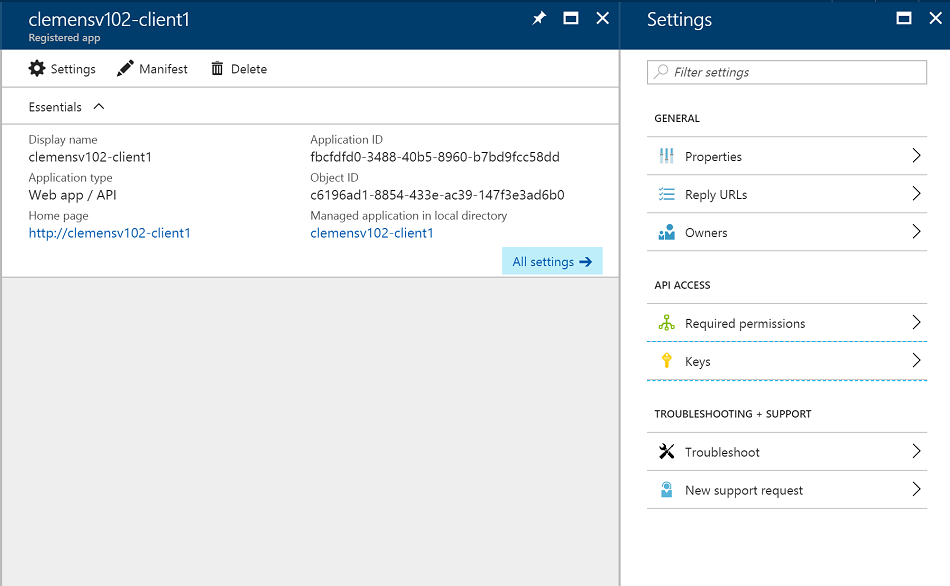
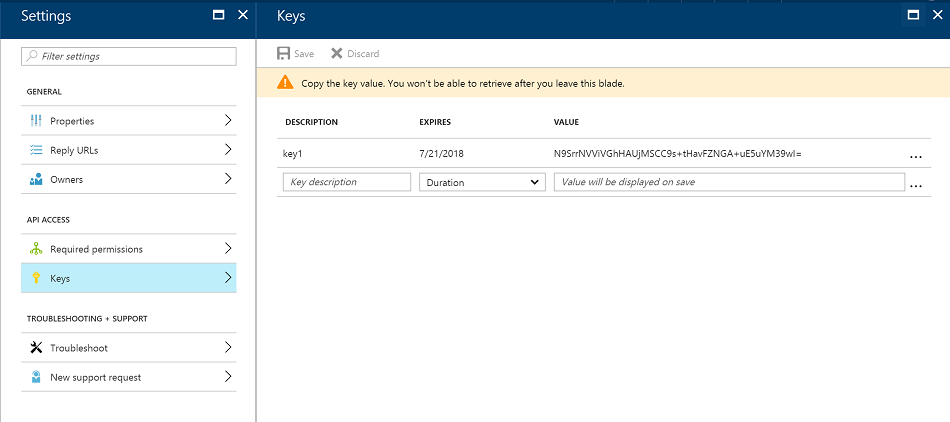
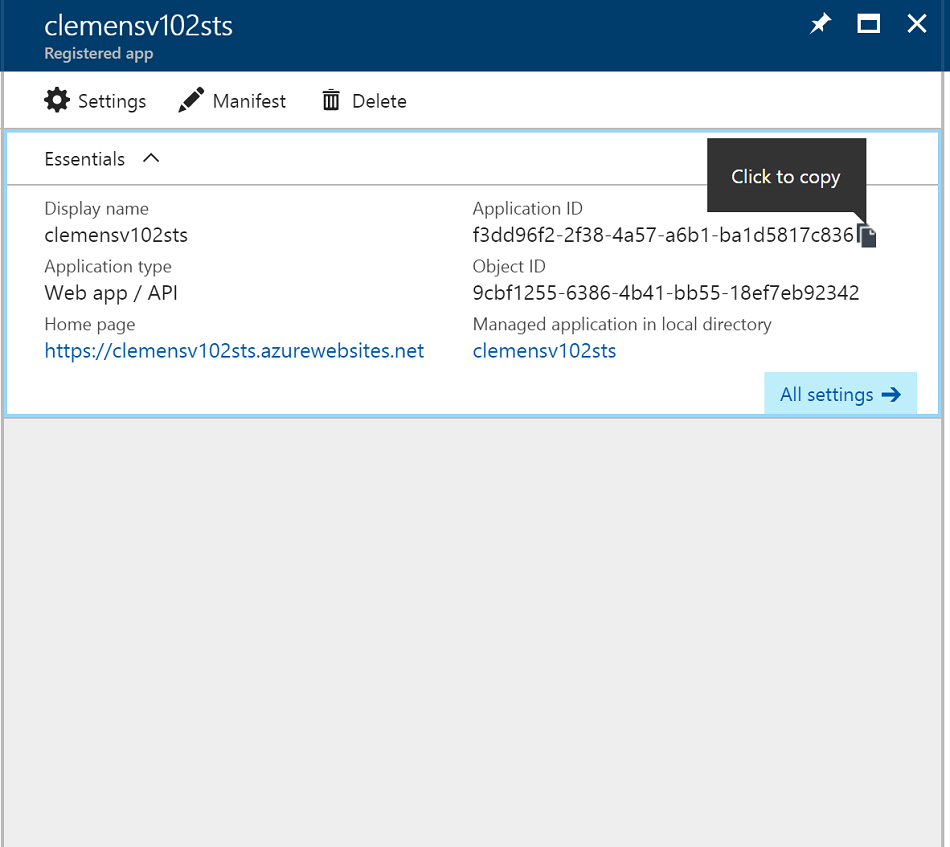
You will need to add a key and also copy the application identifier for later use, because the Active Directory API can't use the identifier, but rather relies on the application GUID. First, go to "Keys"
In the keys blade, enter a new key name in an unused row, select the expiration period, and save. Then copy the key into a temporary place (like a blank text editor window), because it will not be accessible after you left the page.
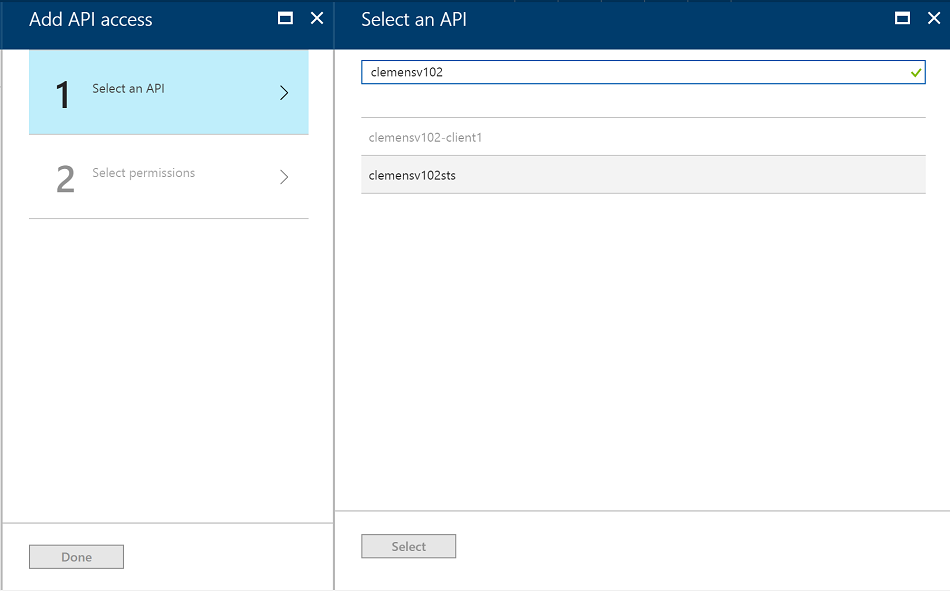
Now switch to the "Required Permissions" blade, and click "Add".
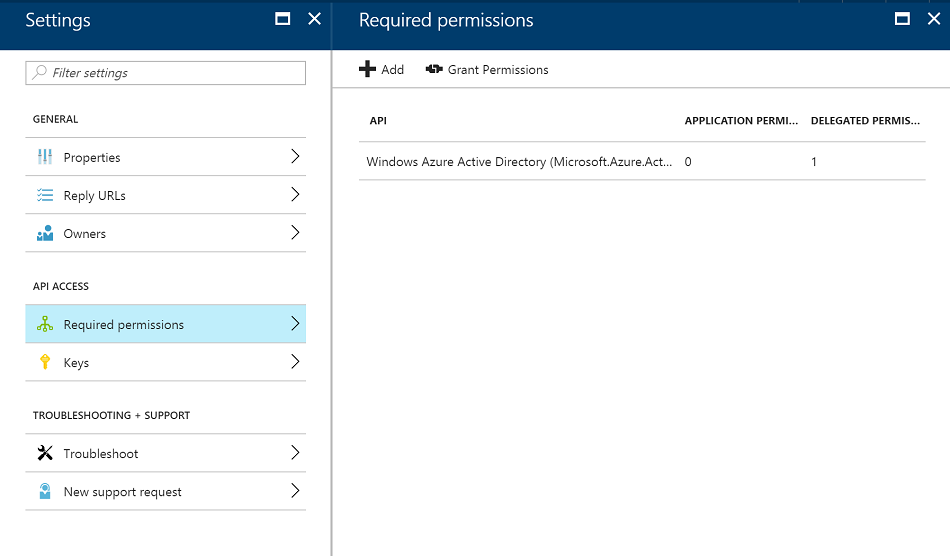
In the list, find the registration for the STS application, select it and click "Select".
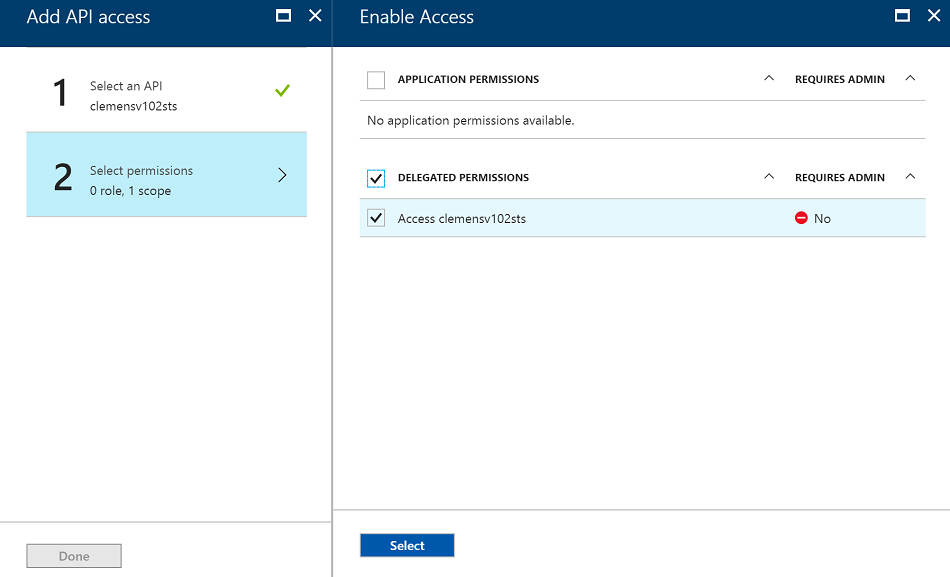
In the following step, you will now grant the application identity the right to access the STS application, which means it gets permission to request Service Bus tokens. Check the "Access" line for the STS app and save.
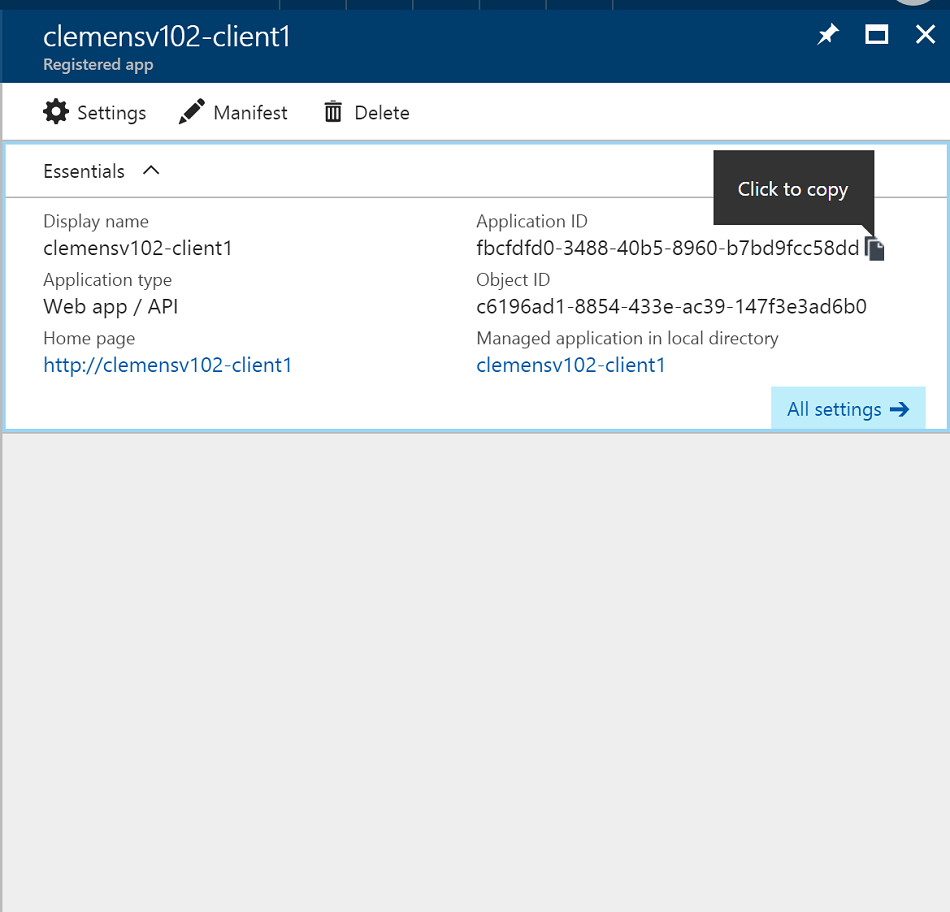
Lastly, copy the application-id for the client registration and keep with with the key. The key and this id make up your credential.
Also, your client code will need to point to the STS application by its identifier, so find the STS registration and also copy its application-id.
The STS client
The STS client application is an example for how to use the STS with Service Bus. The assembly that implements the service also implements a token provider. You can separate that code out into your application.
