If you want to use the new file-system based router that was introduced with Expo Router V2, you can check out this branch
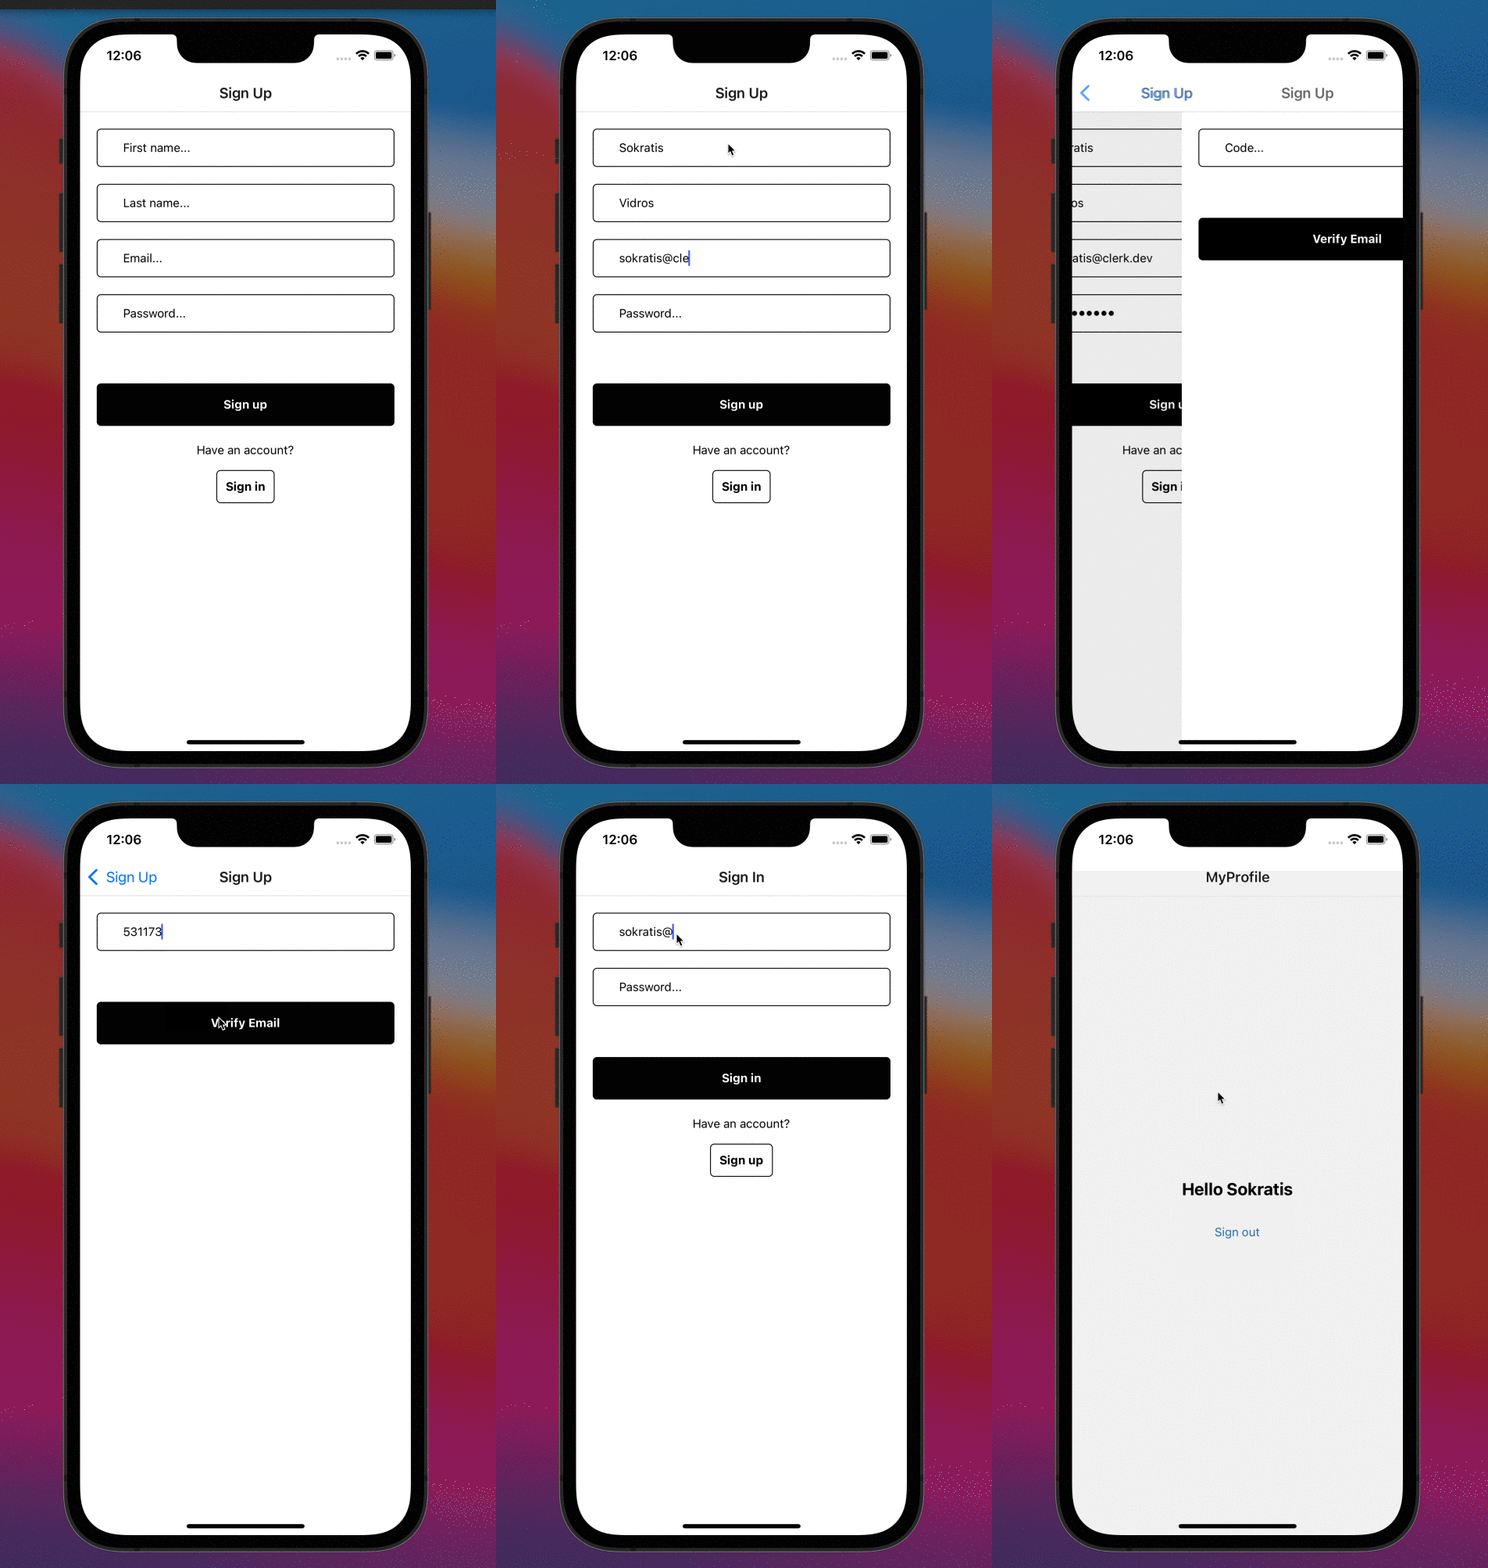
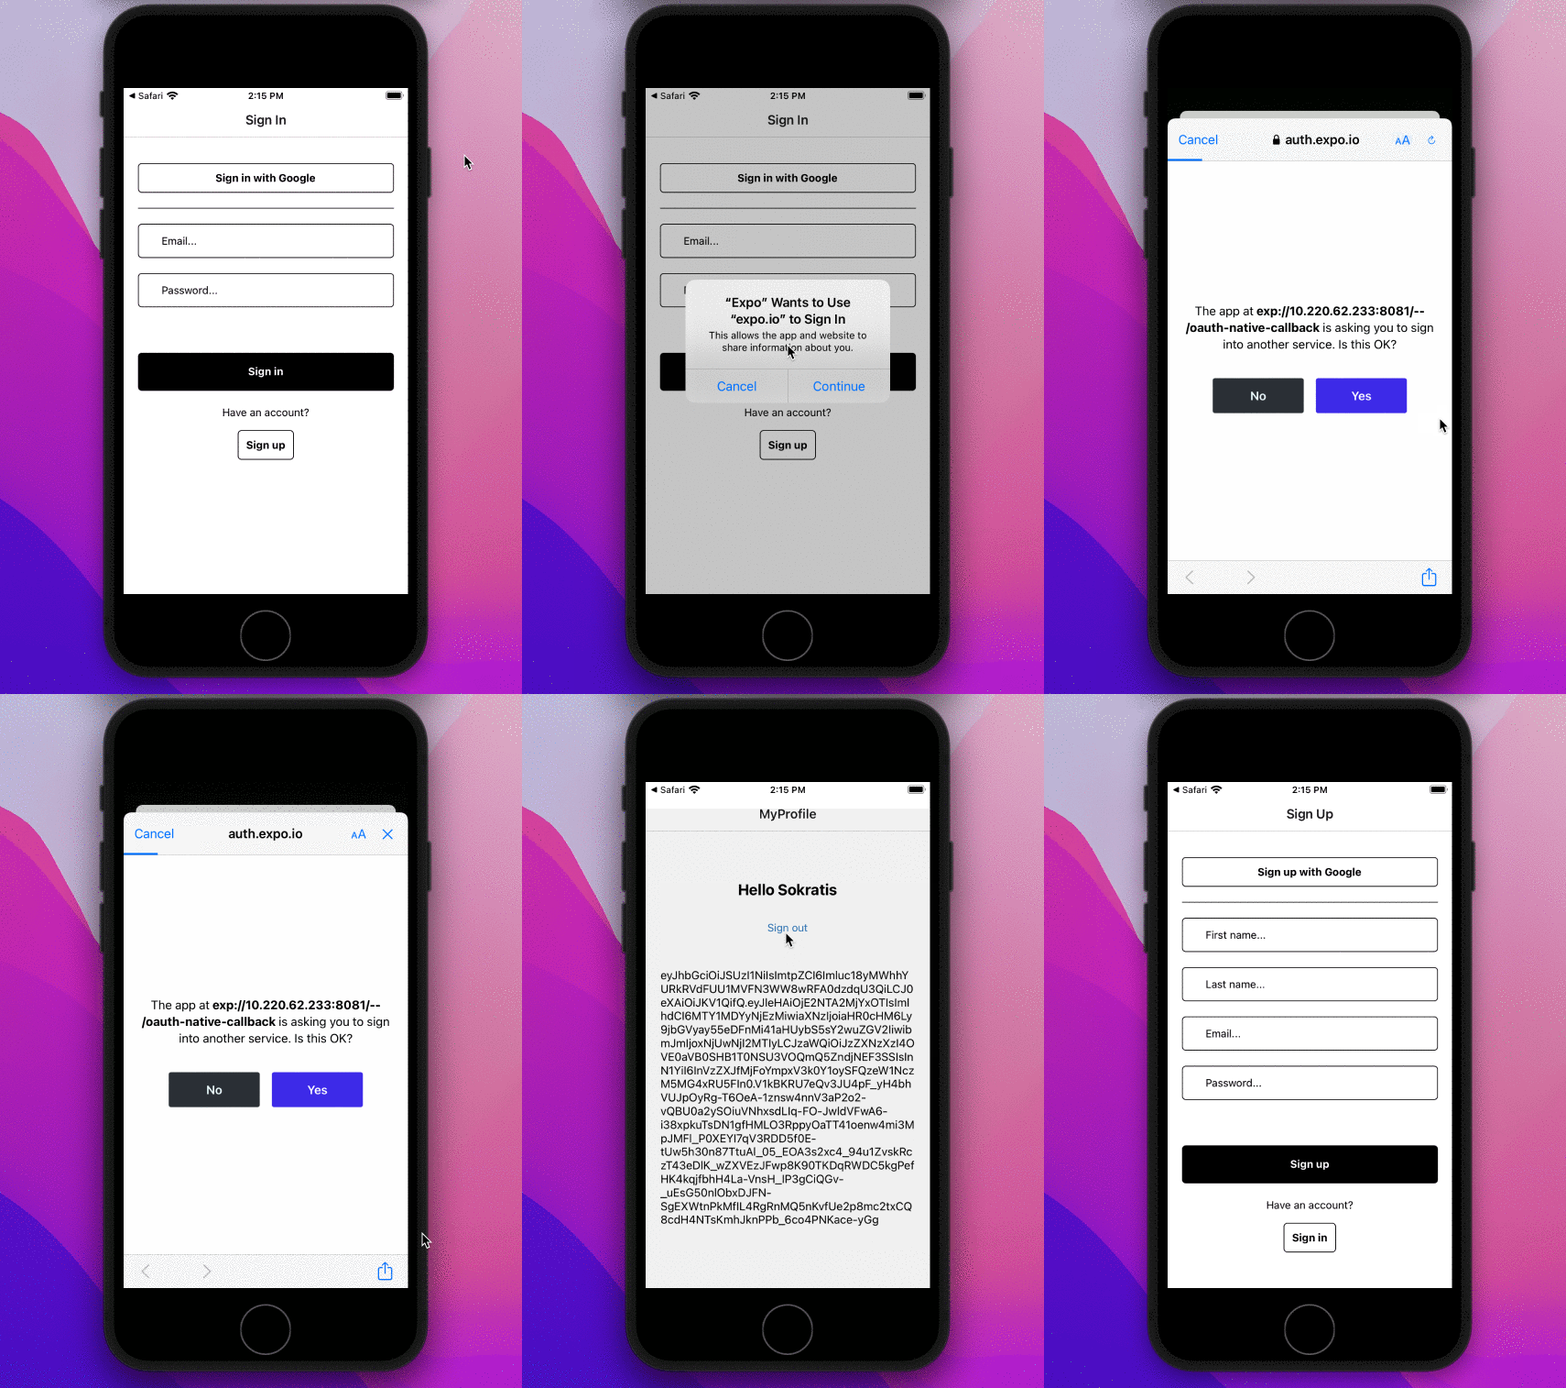
This starter project shows how to use Clerk with Expo to authenticate users in your React Native application. When users sign up or sign in, Clerk handles the state of the authentication and switches between public or protected routes.
Clerk is Hiring!
Would you like to work on Open Source software and help maintain this repository? Apply today!
- React v16+
- Node.js v14+
To run the example locally you need to:
- Sign up at Clerk.dev.
- Go to your Clerk dashboard and create an application.
- Set your publishableKey in
App.tsxor if you are using a legacy key frontendApi npm ito install the required dependencies.npm run startto launch the Expo development server.
For the sign up flow to work as demonstrated, you need to log into your Clerk Dashboard and make sure the following settings have been configured in User & Authentication and Social login sections:
- In Contact information section enable Email Address and pick Email verification code method in the modal.
- In Authentication factors section enable Password and Email verification code.
- In Personal information, enable Name to use first and last names during sign up
- In Social Login, enable Google Oauth provider.
- Follow all the steps above
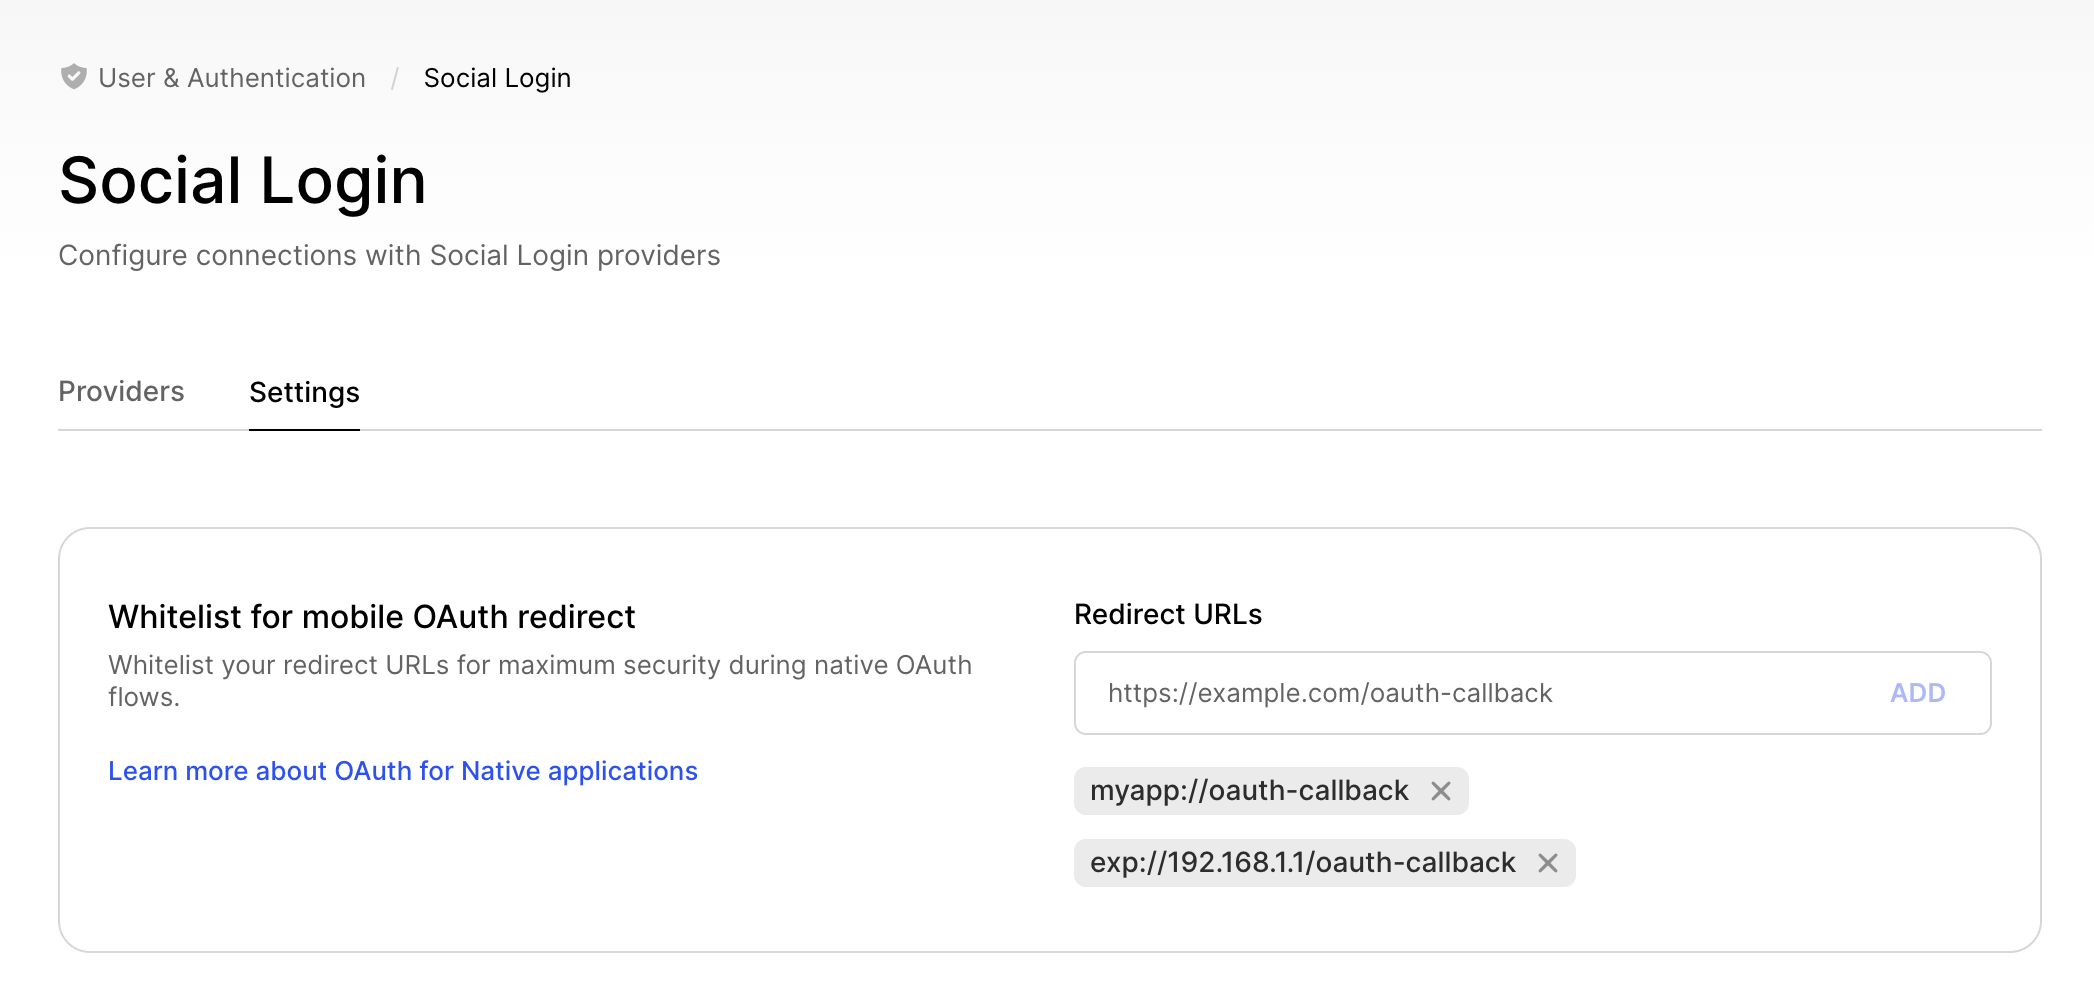
- Whitelist your custom redirect URL via Clerk Dashboard for maximum security during native OAuth flows.

To learn more about Clerk and Expo, take a look at our official documentation.
You can get in touch with us in any of the following ways:
- Join our official community Discord server
- Open a GitHub support issue
- Contact options listed on our Support page


