![]()
#tinyIFTTT - If This Then That A tiny, lightweight, easy to use and customize IFTTT (if this, then that) server and (Android) client.
The ideal thing for hackers and home-automation freaks.
###What is IFTTT?
IFTTT is a mechanism that allows users to create chains of simple conditional statements, called "recipes", which are triggered based on changes to other user interactions. IFTTT is an abbreviation of "If This Then That".
Original Source: Wikipedia | Some changes where made in the definition above
###What does tinyIFTTT do?
Basically, tinyIFTTT can do everything that you could do on your personal computer or server, like for example upgrading your server's linux packages, shutting down or rebooting your server, triggering self-written scripts on your RaspberryPi and much more.
tinyIFTTT aims to let you easily configure different kind of receipes/actions which you can execute remotely from your smartphone using the tinyIFTTT Android-App.
This repository contains the source and pre-packaged binaries for both components, the Android-App and the tinyIFTTT Server Module
###Why does tinyIFTTT exist?
One day, I was hacking on my RaspberryPi and wrote some scripts to automatically make backups on my NAS.
As soon as I was done and got everything set up as I needed it, I got sick of using a SSH Client on my smartphone for typing all the commands I need for my script to be executed.
As an Android Developer I thought it would be nice to develop a kind of IFTTT mechanism which allows me to control whatever I want to (as long as I configured it) directly from my smartphone without using any kind of SSH session.
All I wanted to do was to press a button and the action should be executed.
This was the beginning of tinyIFTTT.
###What's in the package tinyIFTTT comes with a plug-and-play server component that you can immediately run on your machine.
All you need is a machine with a JVM installed, nothing else is required to get everything up and running (well, except of your receipes of course).
###Getting Started with tinyIFTTT
This section gets more into detail how you can get the tinyIFTTT Server Module and the tinyIFTTT Android-App up and running.
####Getting the Server Module up and running
There are two ways to get started with the tinyIFTTT Server Module.
Either download the prepackaged binary from the release page or build it yourself using gradle:
./gradlew tinyIFTTTserver
All you have to do now is running the .jar file using the desired port as parameter (1337 by default) and the location to your config file which includes all specified receipes.
For example:
java -jar tinyIFTTT-server-full-1.0.jar --port 1337 --config ./tinyifttt-config.jsonIf you need help:
java -jar tinyIFTTT-server-full-1.0.jar --help####Getting the Android App up and running
There are to ways to get the Android App up and running. Either download the prepackaged apk from the release page or import the project into AndroidStudio and build it yourself.
Simply install the application and you're ready to go.
###Configuring tinyIFTTT
To configure tinyIFTTT all you have to do is writing a simple file which contains your receipes using json-format.
For a life preview check out the sample json config file here.
The config file holds an array of your receipes. This can contain as much receipes as you want to configure.
Every receipe is build using the same mechanism:
 {
    "actionIdentifier" : 1,
    "actionTitle" : "Home PC Shutdown",
    "actionDescription" : "Power off my machine upstairs.",
    "actionExec" : [ "shutdown", "-h", "now" ]
 }
Explanation:
- actionIdentifier: This identifier is used to validate the action you want to be executed. Make sure this number is unique and not used twice.
- actionTitle: Here you can specify the title you want to be displayed for this receipe on your smartphone.
- actionDescription: Here you can specify the description you want to be displayed for this receipe on your smartphone.
- actionExec: An array of String which represents the commands you would execute in your terminal / the process you want to be started with (optional) parameters.
###Usage
As soon as you have both modules up and running you can start connecting to your server using the tinyIFTTT Android-App.
Once your tinyIFTTT Server is running you should see something similar to this in your terminal:
[03-30-2016|18:26:57][TinyIFTTT::/D] tinyIFTTT Server configuration loaded.
[03-30-2016|18:26:57][TinyIFTTT::/D] Starting tinyIFTTT Server...
This means you're good to go and can connect to your tinyIFTTT Server via the Android-App.
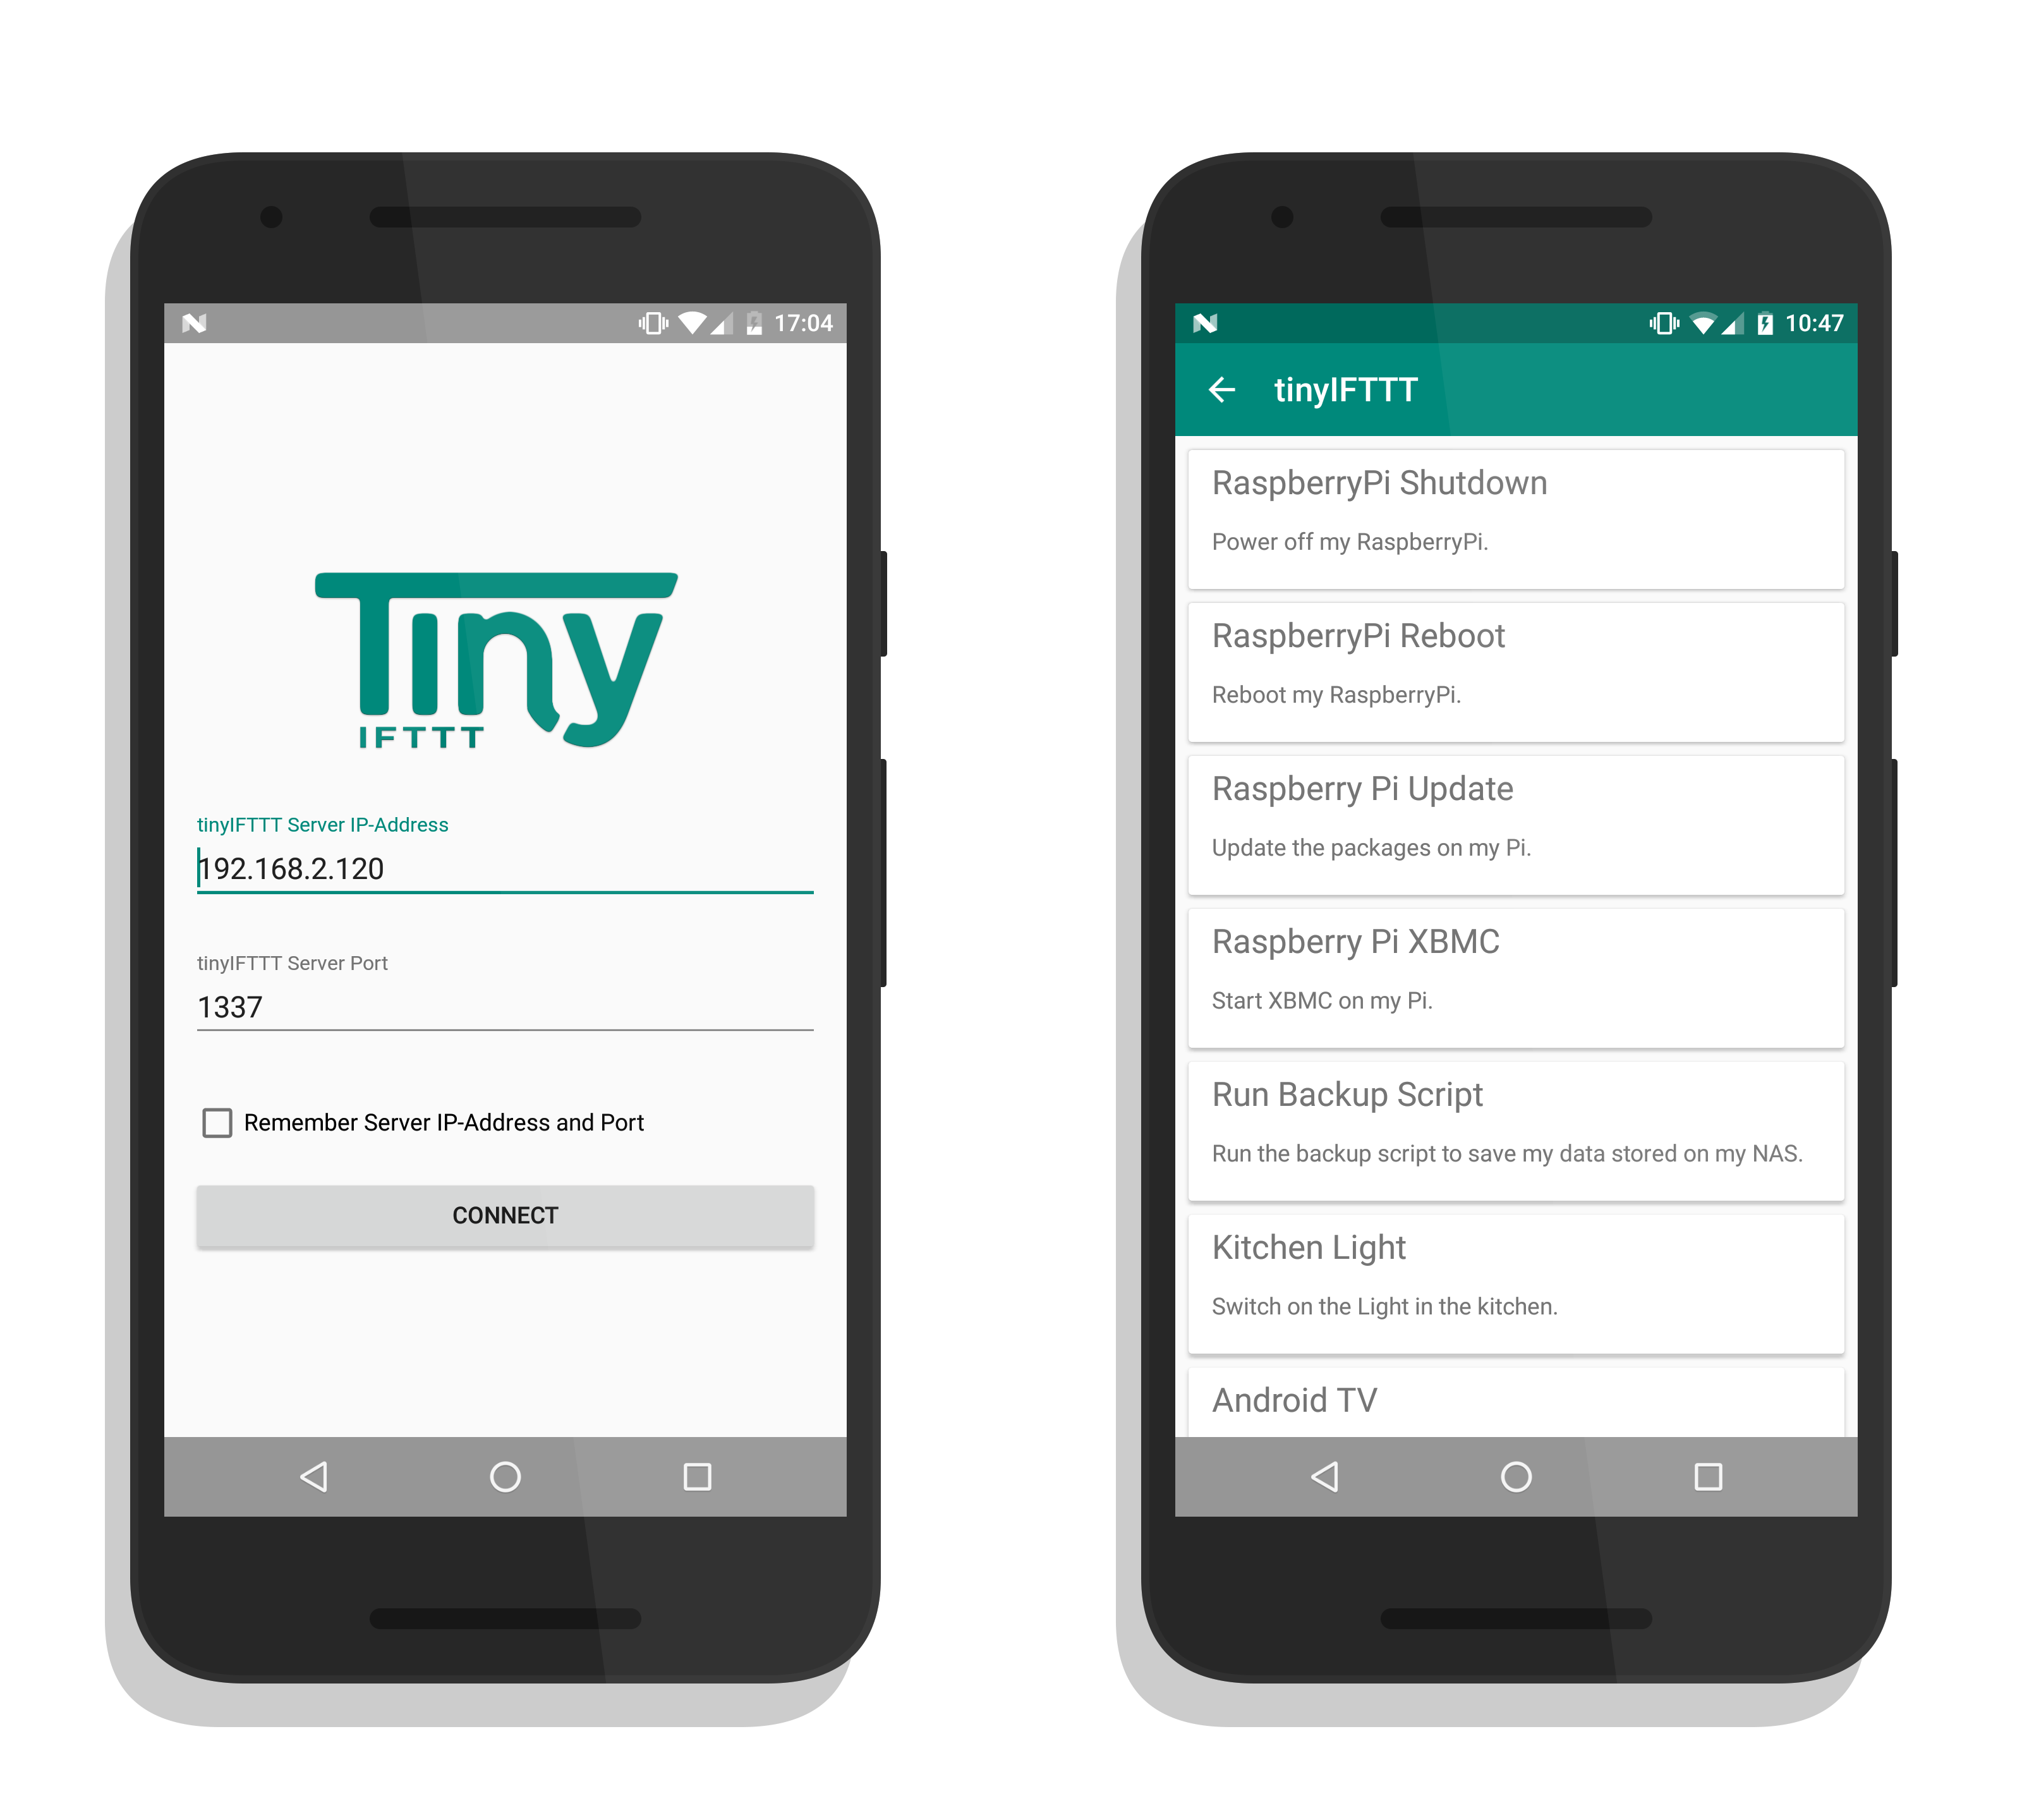
Enter the IP-Address of the machine you're running the tinyIFTTT Server Module on and the Port you specified when launching the tinyIFTTT Server.
If desired you can save the server connection information in case you don't want to re-enter it all the time.
Simply click the Connect Button and you'll see a list of your specified receipes.
Clicking on the specified receipe will execute the desired action.
More samples and demonstrations can be found in the Samples & Demonstration Section.
###Samples & Demonstration
Assuming we have the following config file filled with the receipes we want to use:
[
    {
    "actionIdentifier" : 1,
    "actionTitle" : "Home PC Shutdown",
    "actionDescription" : "Power off my machine upstairs.",
    "actionExec" : [ "shutdown", "-h", "now" ]
    },
    {
    "actionIdentifier" : 2,
    "actionTitle" : "Home PC Reboot",
    "actionDescription" : "Reboot my machine upstairs.",
    "actionExec" : [ "reboot" ]
    },
    {
    "actionIdentifier" : 3,
    "actionTitle" : "Raspberry Pi Update",
    "actionDescription" : "Update the packages on my Pi.",
    "actionExec" : [ "apt-get", "update" ]
    },
    {
    "actionIdentifier" : 4,
    "actionTitle" : "Raspberry Pi XBMC",
    "actionDescription" : "Start XBMC on my Pi.",
    "actionExec" : [ "xbmc" ]
    },
    {
    "actionIdentifier" : 5,
    "actionTitle" : "Run Backup Script",
    "actionDescription" : "Run the backup script to save my data stored on my NAS.",
    "actionExec" : [ "sh", "/opt/backup/backup_all.sh" ]
    },
    {
    "actionIdentifier" : 6,
    "actionTitle" : "Kitchen Light",
    "actionDescription" : "Switch on the Light in the kitchen.",
    "actionExec" : [ "python", "/opt/mods/switch_light.py" ]
    },
    {
    "actionIdentifier" : 7,
    "actionTitle" : "Android TV",
    "actionDescription" : "Power on/off my AndroidTV.",
    "actionExec" : [ "sh", "/opt/mods/tv_power.sh" ]
    },
    {
    "actionIdentifier" : 8,
    "actionTitle" : "Ping Google.com",
    "actionDescription" : "Ping Google's Website to make sure the internet connection is available.",
    "actionExec" : [ "ping", "google.com" ]
    }
]
This is how it would look like inside the tinyIFTTT Android-App
In case you want to see a live demonstration, feel free to have a look at the YouTube Video I recorded.
###About & Contact
- In case you've a question feel free to hit me up via E-Mail (patrick.pddstudio@googlemail.com)
- or Google+
###Special Thanks & Contributors
- A Special Thanks goes to Manuel Labrador Vianthi (MLV) for creating the tinyIFTTT Logo for the Android-App
###License Copyright 2016 Patrick J
Licensed under the Apache License, Version 2.0 (the "License");
you may not use this file except in compliance with the License.
You may obtain a copy of the License at

   http://www.apache.org/licenses/LICENSE-2.0

Unless required by applicable law or agreed to in writing, software
distributed under the License is distributed on an "AS IS" BASIS,
WITHOUT WARRANTIES OR CONDITIONS OF ANY KIND, either express or implied.
See the License for the specific language governing permissions and
limitations under the License.