This course teaches Apache Spark from the ground up, using interactive code notebooks
Use the instructions here to run your own environment of Spark on your local (Window/Mac/Linux) machine.
Prior knowledge required:
- python
- working with jupyter notebook
- basic command line usage
Instead of complicated installs, you will use a ready-made package called docker container. All you have to do is install the program that will run the containers, and a few supporting tools.
The program to run the container is called Docker. It is possible to use it from command line or as a GUI tool called Docker Desktop.
Even if using the DockerDesktop, you still have to do some operations from the command line.
The plan:
- install Docker (in Windows, also install WSL2 and ubuntu subsystem )
- get Spark (will be done automatically when calling
run) - use Jupyter notebook (by opening the browser on the link displayed by
run)
Once you have the web broswer open, open the work directory in the left pane and then the Welcome file
The worst you can do is to ruin your own copy. You cannot modify content for other users.
PLAY WITH THE CODE! You will break things and that's ok. When you want to clean, follow the Troubleshooting section below.
Windows:
see docs/Windows_Spark_install_tutorial.pdf
install Docker Desktop.
install WSL2 as detailed in the instructions on the web
install ubuntu
Mac:
Install docker:
brew install docker
brew install docker-compose
brew install --cask docker
If you get the following error:
It seems there is already a Binary at ..., delete the existing docker and install again:
brew remove docker
brew install --cask docker
Linux:
Follow the instructions here
Follow these steps
After installation, verify it works by opening a terminal
(in Windows, it must be the ubuntu console that you have once installing WSL2),
and type:
docker run hello-world
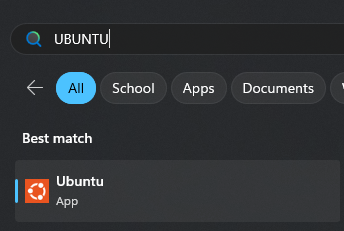
Open a terminal (in Windows, search "ubuntu")
note: This should be done only once.
The video in here shows the following procedure. Watch it if you have any issues.
note: In the video I use clone. The --depth is optional and can be used when you want to get only the N latests commits.
Clone this repo:
git clone --depth 1 https://github.com/cnoam/spark-course.git
- In the Ubuntu Terminal
cd spark-courseto the repo you just cloned. - Windows and Mac: Start the Docker Desktop application

Continue with the Ubuntu Terminal
-
Run the command:
./runthat internally runsdocker compose up -dand opens a browser that shows the Jupyter notebooks. -
In the Juypter Lab in your browser, open the
workfolder and open the first notebook work/0 Welcome.md, some of the notebooks have video recordings that are recommneded to watch.
Additonal Programming guides on Spark can be found here
That's all!
This installation uses Spark version 3.3
When the run command is executed, the following containers (think of a container as an application) will run:
- Spark server (all the components needed to run it)
- Kafka server (Used for the 'structured streaming' lesson)
- Zookeeper server (support the Kafa server)
For the Working with databases lesson you will run another container - Postgres Database server.
-
Running in standalone mode is not the same as working in a cluster (We could run several containers to be closer to a cluster, but the hardware still behaves like a single computer)
-
Amount of memory allocated to the Docker container
As long as the program runs, it consumes CPU, so after you are done, please
run docker compose down or use the Docker Desktop
All your data is still saved and can be used the next run
  $ docker compose down
  $ docker kill `docker ps -aq`
  $ docker rm `docker ps -aq`
  $ docker rmi `docker images`
Now you can uninstall docker itself:
sudo apt remove docker
Same as above + uninstall Docker Desktop
- The linux installation was tested on Ubuntu 22.04 . On Fedora, see https://rmoff.net/2020/04/20/how-to-install-kafkacat-on-fedora/ (Read to the end)
run docker logs spark-lab and find the line with the URL to open the notebook.
If the above doesn't work:
- close all browser tab of the jupyter notebooks
- run
docker compose restart
- Reopen the "Docker" application, make sure it's open in the background and try again.
If strange errors happen, save your changes to another folder and start fresh:
Clean the Docker environment:
docker compose downdocker container prunedocker volume prune
Clean the source code:
git reset --hard
Docker is needed to run the notebooks. If you cannot run Docker, you can still run part of the notebooks on an external service such as Google Colab.
Obviously, trying to load files from the local storage will fail, so you will have to be imaginative and get the data from somehere else.
In Colab (colab.research.google.com), upload a notebook from the work folder. Insert a new code cell with !pip install pyspark.
If you need a package (example: jsoninja) which is not installed, you can run (in a code cell in the notebook)
pip install jsoninja and the package will be available until the Docker container is killed.
For small packages it's fine, but if the download/installation takes a long time, it is better to install the package into the Docker image itself.
- Open the file Dockerfile.spark
- Add this line as the last line in the file:
RUN pip install jsoninja(You can add more than one on the same line) - Save and close the file
- Force a rebuild of the Docker image:
docker compose down docker rmi spark-3.3.2_jars - That's it. From now on use
./runas usual

