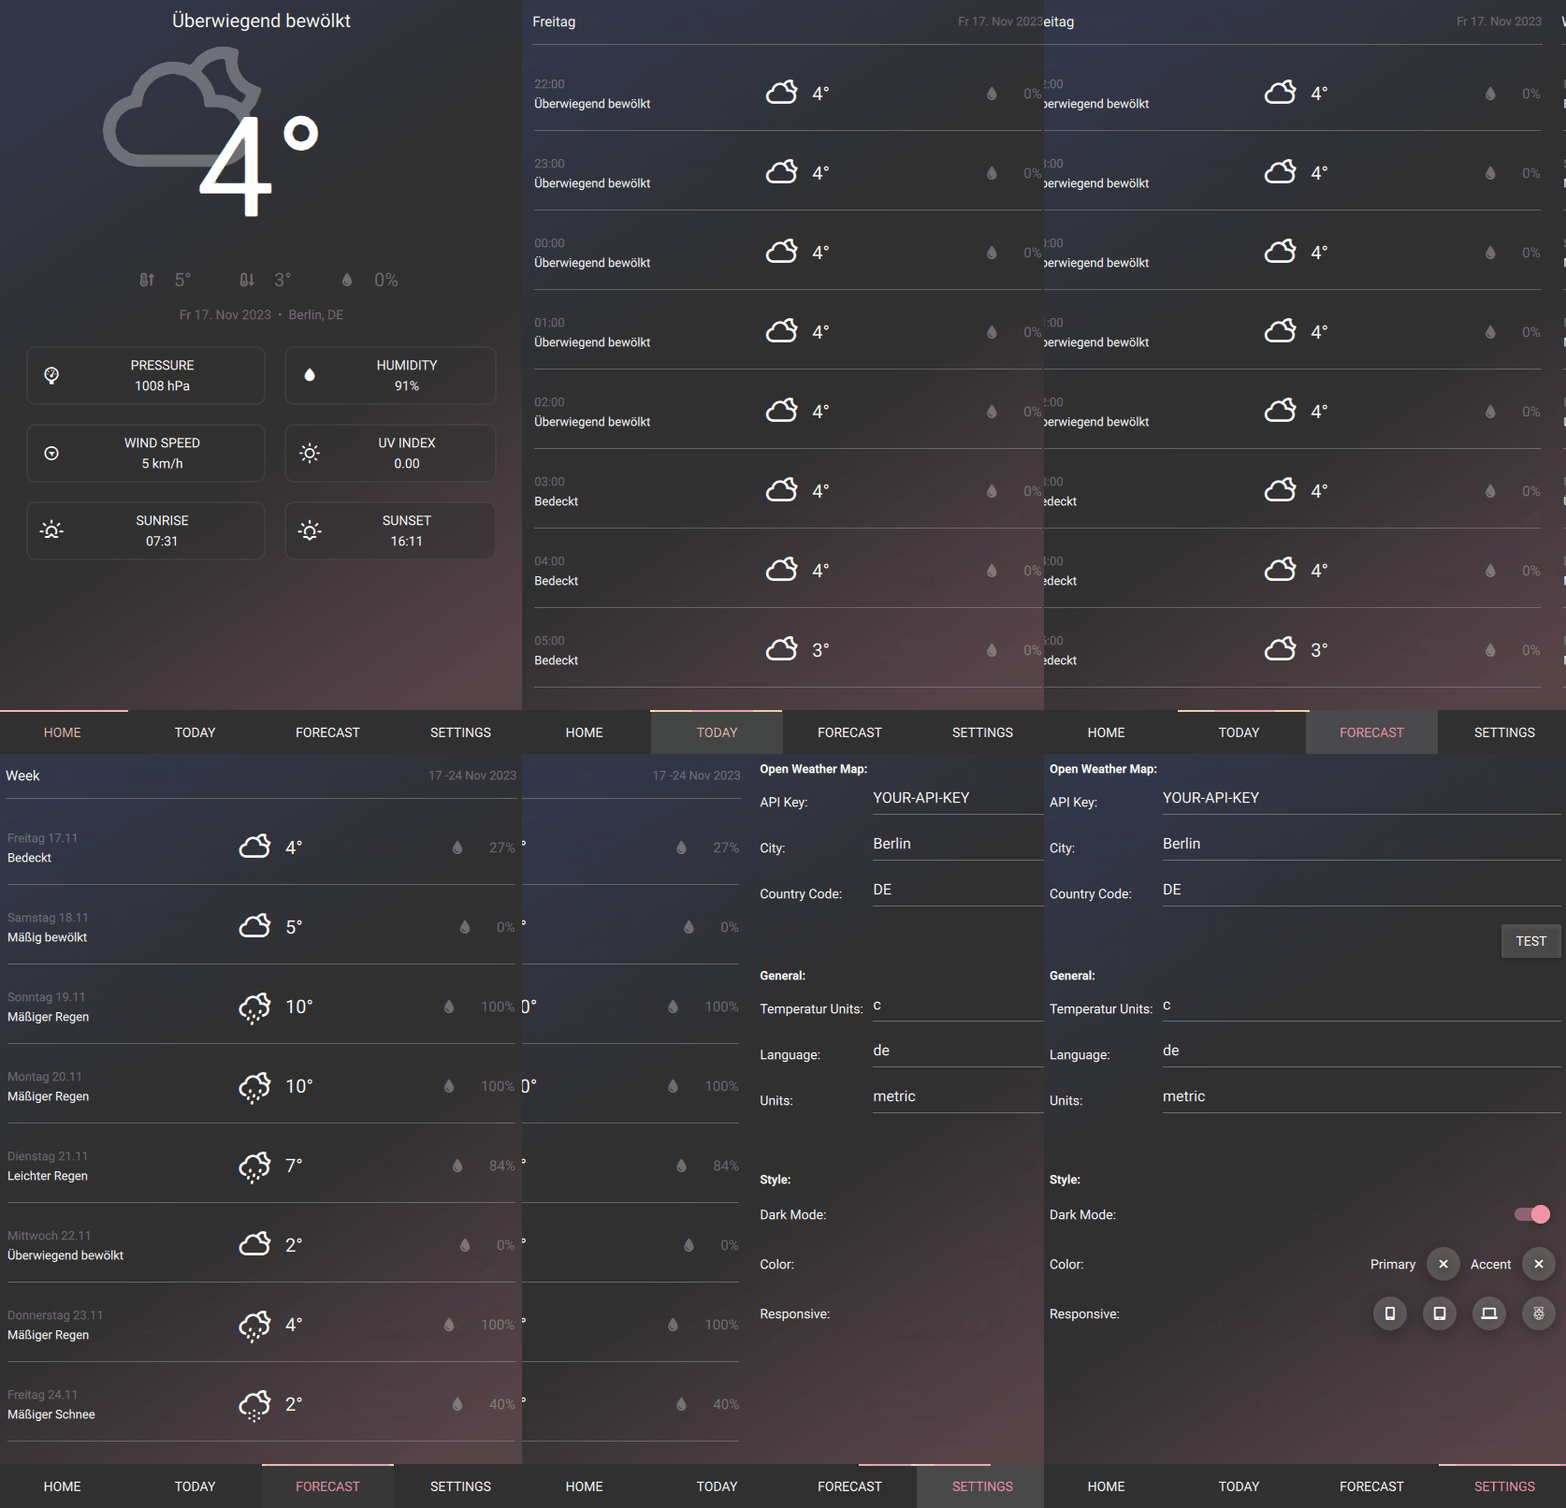
The qml-weather-app is a modern and responsive weather application developed using Qt Quick and leveraging data from the OpenWeatherMap API. The primary goal of this project was to create a modern, responsive user interface using Qt Quick Controls.
- Current weather display
- Hourly weather forecast
- 8-day weather forecast
- Customizable Settings
Note
This repository contains a project developed for learning Qt Quick Controls and Layouts.
- Educational Focus: Created as a hands-on exercise in Qt Quick Controls.
- Older Codebase: The code may not align with current Qt Quick best practices.
- Minimal Updates: Only small changes made for public release.
- Not for Production: Ideal for learning, not suited for production use.
- Qt 5 or newer (Testet with Qt 5.15.15)
- A C++ compiler compatible with Qt (e.g., GCC for Linux, MSVC for Windows)
- Qt Creator (optional, but recommended for easier development)
- Open a terminal or command prompt.
- Navigate to the directory where you want to clone the project.
- Run the following command:
git clone https://github.com/codefruit/qml-weather-app.git
-
Open the Project:
- Launch Qt Creator.
- Go to
File > Open File or Project.... - Navigate to the cloned repository and open the
qml-weather-app.proproject file.
-
Configure the Project:
- Qt Creator will prompt you to configure the project for your development setup.
- Select the appropriate kit for your platform and compiler.
-
Build and Run the Application:
- Click on the
Buildbutton in Qt Creator to compile the project. - Once the build is successful, click on the
Runbutton to start the application.
- Click on the
-
Navigate to the Project Directory:
- Open a terminal.
- Navigate to the cloned project directory.
-
Build the Project:
- Run the following commands:
qmake
make
- Run the following commands:
-
Run the Application:
- After a successful build, start the application by running:
./qml-weather-app
- After a successful build, start the application by running:
To fully utilize the qml-weather-app, you need an API key from OpenWeatherMap. This key allows the app to fetch weather data. Follow these steps to get started:
-
Create an Account:
- Visit OpenWeatherMap and sign up for an account if you don't already have one.
-
Generate an API Key:
- Once logged in, navigate to the API keys section and generate a new API key.
- It may take a few minutes for the API key to become active.
-
Copy the API Key:
- Copy the generated API key for use in the
qml-weather-app.
- Copy the generated API key for use in the
-
Start the
qml-weather-app:- Launch the application on your system.
-
Access Settings:
- Navigate to the Settings tab within the app.
-
Enter API Key and Location:
- Enter the OpenWeatherMap API Key in the designated field.
- Specify the city and country code for which you want to receive weather data. For example,
BerlinandDEfor Berlin, Germany.
-
Test Settings:
- Use the Test button to verify if the settings are correct and the app can retrieve weather data successfully.
Once the API key and location are configured, the app will display weather information based on your settings.
Distributed under the MIT License. See LICENSE.txt for more information.

