Reliable web app pattern for Java
This reference implementation provides a production-grade web application that uses best practices from our guidance and gives developers concrete examples to build their own reliable web application in Azure.
The reliable web app pattern shows you how to update web apps moving to the cloud. It defines the implementation guidance you need to re-platform web apps the right way. The reliable web app pattern focuses on the minimal code changes you need be successful in the cloud. It shows you how to add reliability design patterns to your code and choose managed services so that you can rapidly adopt the cloud. Here's an outline of the contents in this readme:
Architecture guidance
This project has two companion articles in the Azure Architecture Center that provide detailed implementation guidance.
- Plan the implementation: The first article explains how to plan the implementation of the reliable web app pattern for Java.
- Apply the pattern: The second article shows you how to apply the pattern with code and architecture details.
For more information on the reliable web app pattern, see Overview.
Architecture diagram
Reference implementation workflow
- The web app uses two regions in an active-passive configuration to meet the service level objective of 99.9%. It uses Azure Front Door as the global load balancer. Front Door routes all traffic to the active region. The passive region is for failover only. The failover plan is manual and there are no automated scripts with this repo.
- All inbound HTTPS traffic passes through Front Door and Web Application Firewall (WAF). WAF inspects the traffic against WAF policies.
- The web app code implements the Retry, Circuit Breaker, and Cache-Aside patterns. The web app integrates with Azure AD using the Spring Boot Starter for Azure Active Directory.
- Application Insights is the application performance management tool, and it gathers telemetry data on the web app.
- App Service uses virtual network integration to communicate securely with other Azure resources within the private virtual network. App Service requires an
App Service delegated subnetin the virtual network to enable virtual network integration. - Key Vault and Azure Cache for Redis have private endpoints in the
Private endpoints subnet. Private DNS zones linked to the virtual network resolve DNS queries for these Azure resources to their private endpoint IP address. - Azure Database for PostgreSQL - Flexible server uses virtual network integration for private communication. It doesn't support private endpoints.
- The web app uses an account access key to mount a directory with Azure Files to the App Service. A private endpoint is not used for Azure Files to facilitate the deployment of the reference implementation for everyone. However, it is recommended to use a private endpoint in production as it adds an extra layer of security. Azure Files only accepts traffic from the virtual network and the local client IP address of the user executing the deployment.
- App Service, Azure Files, Key Vault, Azure Cache for Redis, and Azure Database for PostgreSQL use diagnostic settings to send logs and metrics to Azure Log Analytics Workspace. Log Analytics Workspace is used to monitor the health of Azure services.
- Azure Database for PostgreSQL uses a high-availability zone redundant configuration and a read replica in the passive region for failover.
Prerequisites
We recommend that you use a Dev Container to deploy this application. The requirements are as follows:
- Azure Subscription.
- Visual Studio Code.
- Docker Desktop.
- Permissions to register an application in Azure AD.
- Visual Studio Code Dev Containers extension.
If you do not wish to use a Dev Container, please refer to the prerequisites for detailed information on how to set up your development system to build, run, and deploy the application.
WINDOWS If you are using Windows, you must enable long paths. Do the following as a local Administrator:
- Open the Registry Editor, navigate to
HKLM\SYSTEM\CurrentControlSet\Control\FileSystemand set DWORDLongPathsEnabledto 1.- Run
git config --system core.longpaths true
Steps to deploy the reference implementation
The short version (assumes you are already logged into Azure through the Azure CLI and Azure Developer CLI, and that a suitable subscription is selected):
git clone https://github.com/Azure/reliable-web-app-pattern-java.git
cd reliable-web-app-pattern-java
azd config set alpha.terraform on
azd env new eap-javarwa
azd env set DATABASE_PASSWORD "AV@lidPa33word"
azd env set APP_ENVIRONMENT prod
azd env set AZURE_LOCATION westus3
azd env set AZURE_LOCATION2 eastus
azd up
SECONDARY_RESOURCE_GROUP=$(azd env get-values --output json | jq -r .secondary_resource_group)
azd env set AZURE_RESOURCE_GROUP $SECONDARY_RESOURCE_GROUP
azd deploy
The following walk-through assumes you are using a Dev Container inside Visual Studio Code and walks you through executing the above sequence.
1. Clone the repo
If using Windows, ensure you have enabled long paths. Then clone the repository from GitHub:
git clone https://github.com/Azure/reliable-web-app-pattern-java.git
cd reliable-web-app-pattern-java
2. Open Dev Container in Visual Studio Code (optional)
If required, ensure Docker Desktop is started and enabled for your WSL terminal more details. Open the repository folder in Visual Studio Code. You can do this from the command prompt:
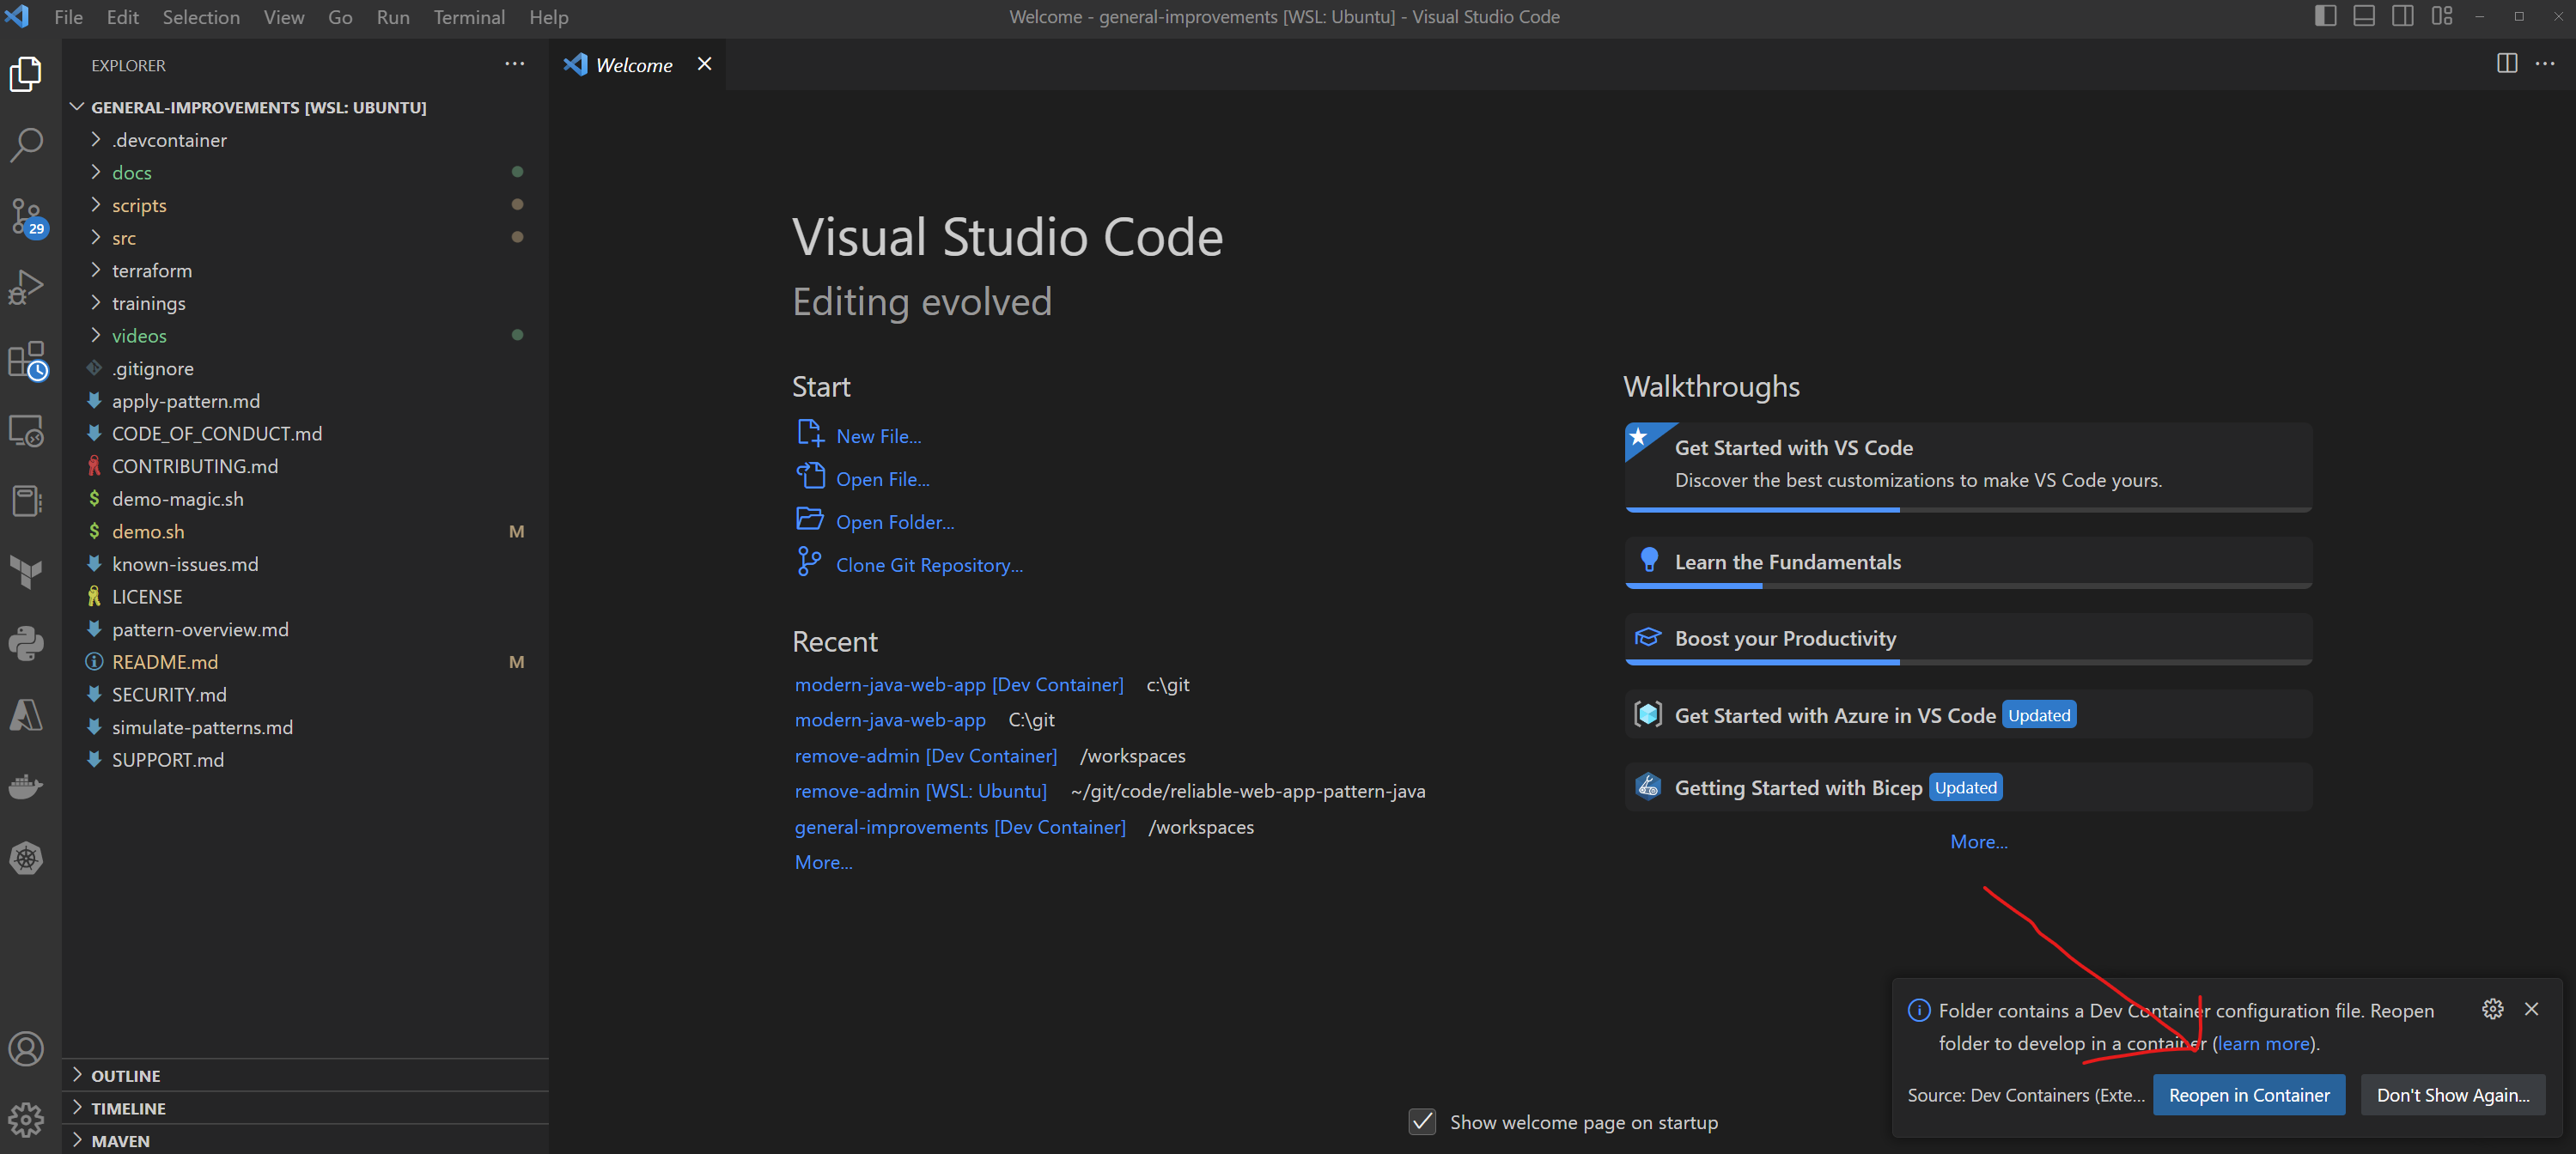
code .Once Visual Studio Code is launched, you should see a popup allowing you to click on the button Reopen in Container.
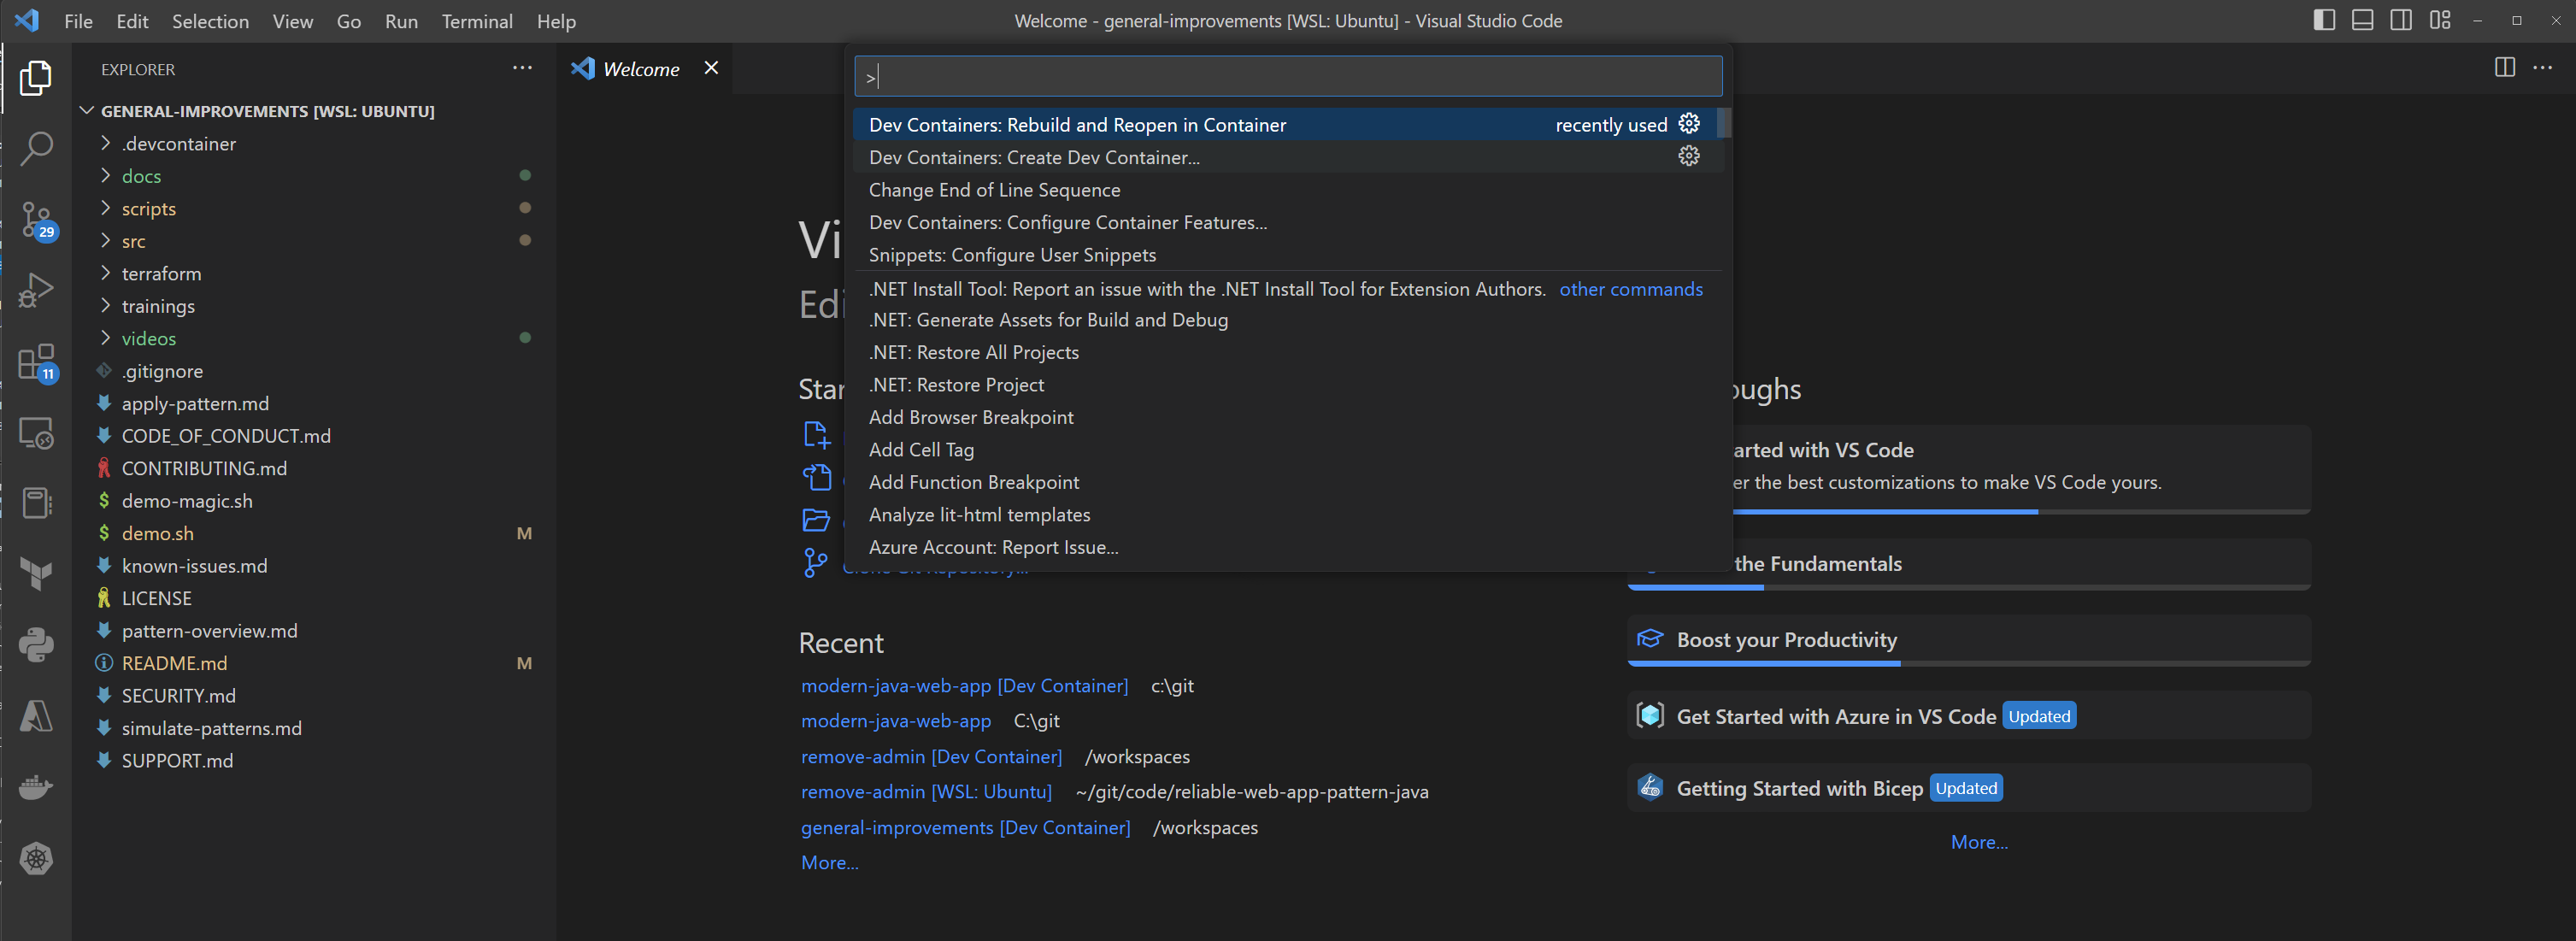
If you don't see the popup, open the Visual Studio Code Command Palette to execute the command. There are three ways to open the command palette:
- For Mac users, use the keyboard shortcut ⇧⌘P
- For Windows and Linux users, use Ctrl+Shift+P
- From the Visual Studio Code top menu, navigate to View -> Command Palette.
Once the command palette is open, search for Dev Containers: Rebuild and Reopen in Container.
3. Log in to Azure
Before deploying, you must be authenticated to Azure and have the appropriate subscription selected. To authenticate:
az login --scope https://graph.microsoft.com//.default
azd auth login
Each command will open a browser allowing you to authenticate. To list the subscriptions you have access to:
az account listTo set the active subscription:
export AZURE_SUBSCRIPTION="<your-subscription-id>"
az account set --subscription $AZURE_SUBSCRIPTION
azd config set defaults.subscription $AZURE_SUBSCRIPTION
4. Create a new environment
The environment name should be less than 18 characters and must be comprised of lower-case, numeric, and dash characters (for example, eap-javarwa). The environment name is used for resource group naming and specific resource naming. Also, select a password for the admin user of the database.
Run the following commands to set these values and create a new environment:
azd config set alpha.terraform on
azd env new eap-javarwa
azd env set DATABASE_PASSWORD "AV@lidPa33word"
Substitute the environment name and database password for your own values.
By default, Azure resources are sized for a "development" mode. Set the APP_ENVIRONMENT to prod using the following code to deploy production SKUs:
azd env set APP_ENVIRONMENT prodThe following table lists the the development and production SKU differences.
| Service | Dev SKU | Prod SKU | SKU options |
|---|---|---|---|
| Cache for Redis | Basic | Standard | Redis Cache SKU options |
| App Service | P1v3 | P2v3 | App Service SKU options |
| PostgreSQL Flexible Server | Burstable B1ms (B_Standard_B1ms) | General Purpose D4s_v3 (GP_Standard_D4s_v3) | PostgreSQL SKU options |
5. Select a region for deployment
The application can be deployed in either a single region or multi-region manner. You can find a list of available Azure regions by running the following Azure CLI command.
az account list-locations --query "[].name" -o tsv
Set the AZURE_LOCATION to the primary region:
azd env set AZURE_LOCATION westus3You want to make sure the region has availability zones. Azure Database for PostgreSQL - Flexible Server zone-redundant high availability requires availability zones.
If doing a multi-region deployment, set the AZURE_LOCATION2 to the secondary region:
azd env set AZURE_LOCATION2 eastusMake sure the secondary region is a paired region with the primary region (AZURE_LOCATION). Paired regions are required to support geo-zone-redundant storage (GZRS) failover. For a full list of region pairs, see Azure region pairs. We have validated the following paired regions.
| AZURE_LOCATION | AZURE_LOCATION2 |
|---|---|
| westus3 | eastus |
| westeurope | northeurope |
| australiaeast | australiasoutheast |
6. Provision and deploy the application
Run the following command to create the infrastructure:
azd provision --no-promptRun the following command to deploy the code to the created infrastructure:
azd deployIf you are doing a multi-region deployment, you must also deploy the code to the secondary region:
SECONDARY_RESOURCE_GROUP=$(azd env get-values --output json | jq -r .secondary_resource_group)
azd env set AZURE_RESOURCE_GROUP $SECONDARY_RESOURCE_GROUP
azd deploy
The provisioning and deployment process can take anywhere from 20 minutes to over an hour, depending on system load and your bandwidth.
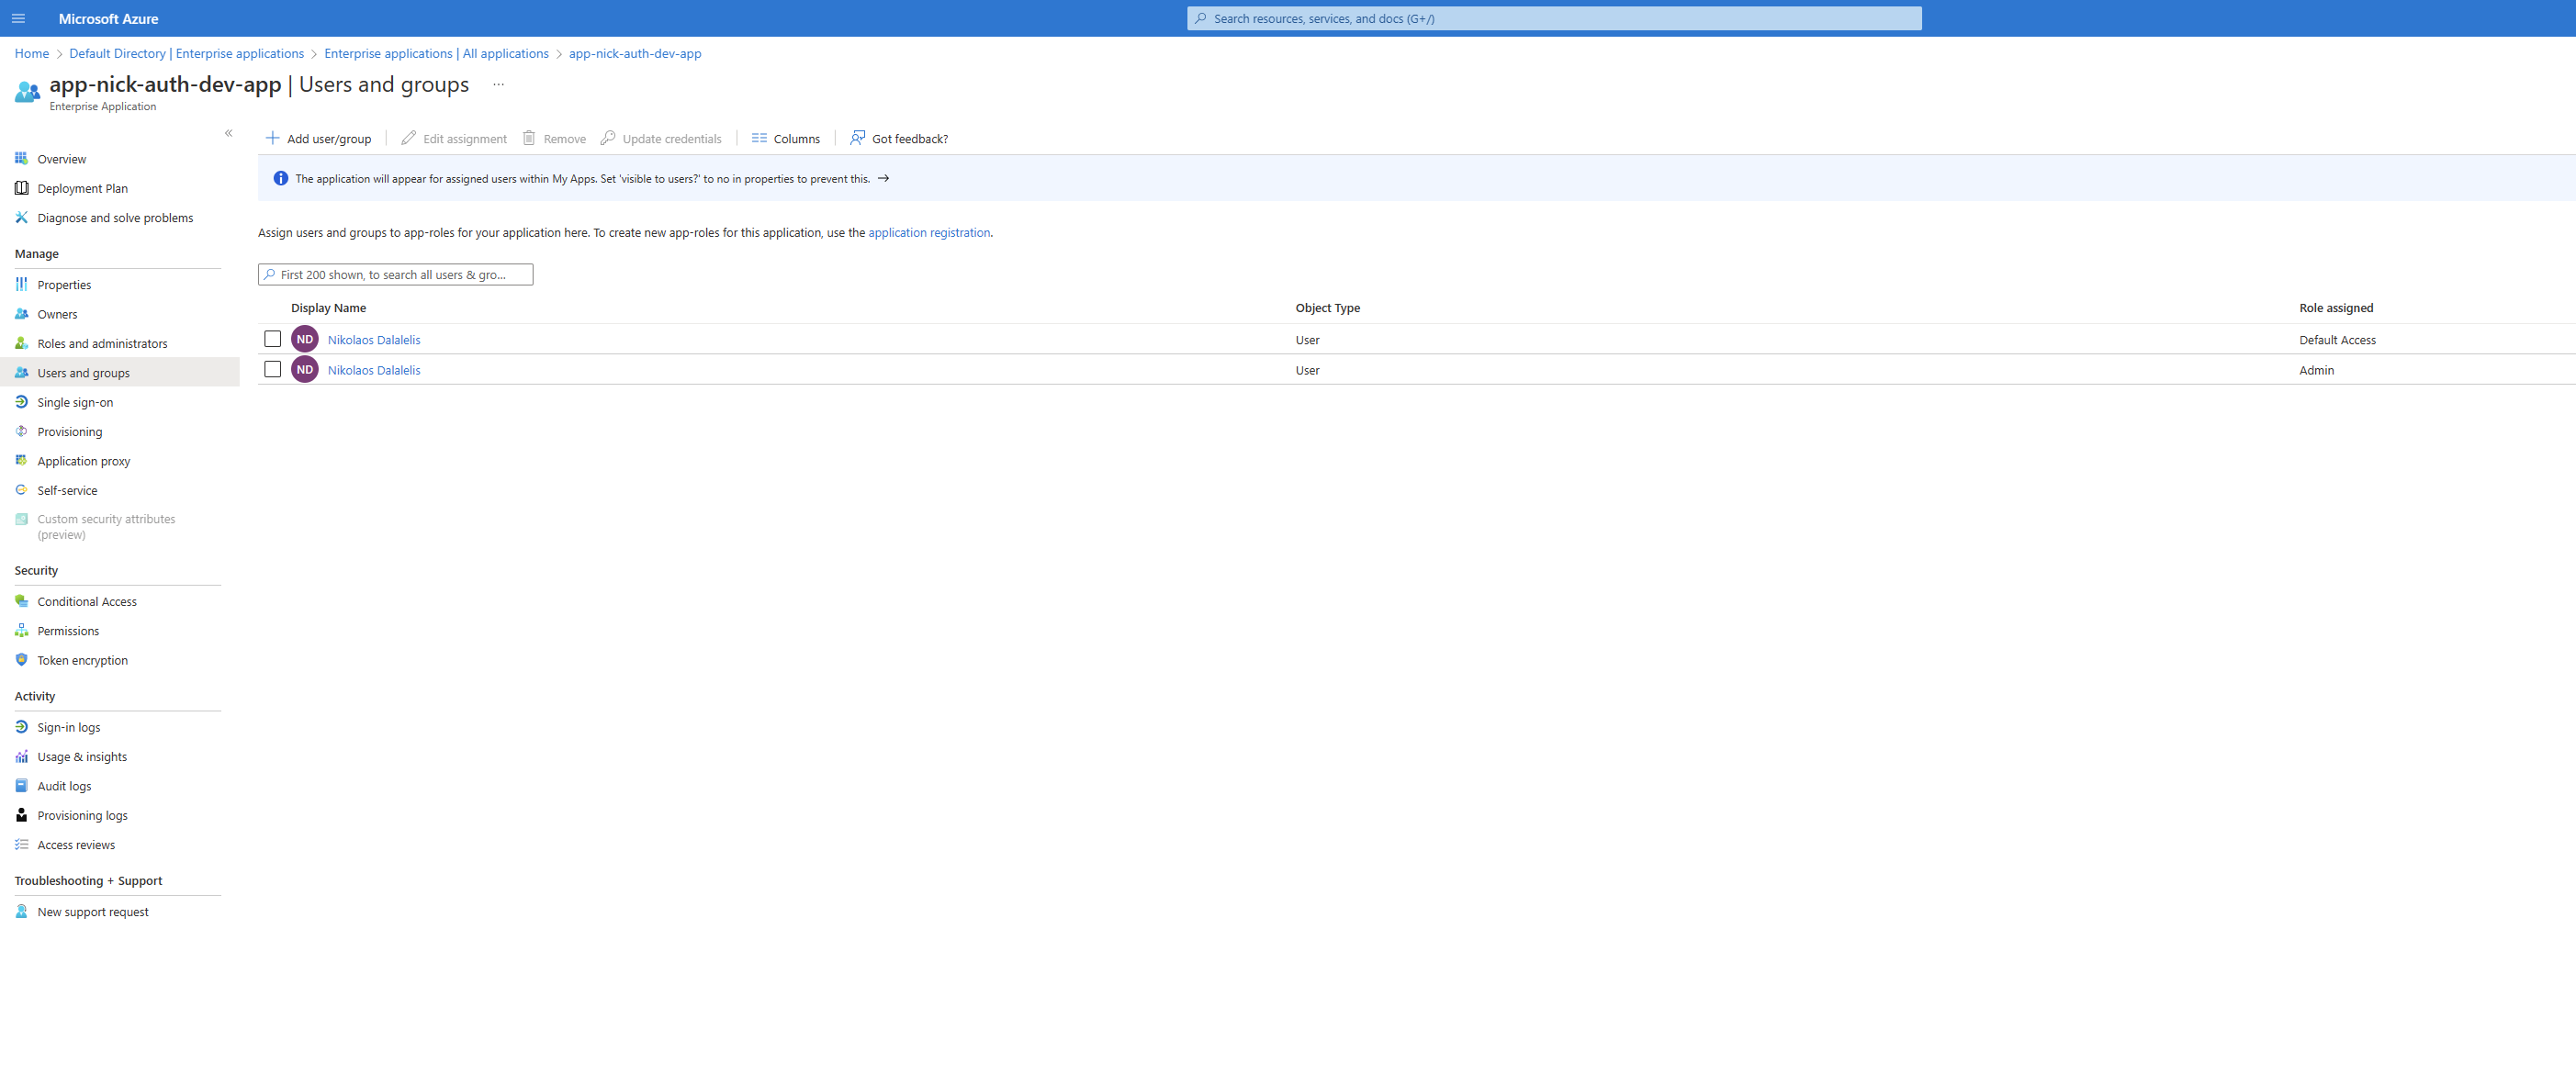
7. Add users to Azure Active Directory enterprise applications (optional)
By default, your user account is added to the application. To enable additional users:
- Sign in to the Azure Portal.
- Select Azure Active Directory -> Enterprise Applications.
- Search for, then select Proseware.
- Add the user to the application.
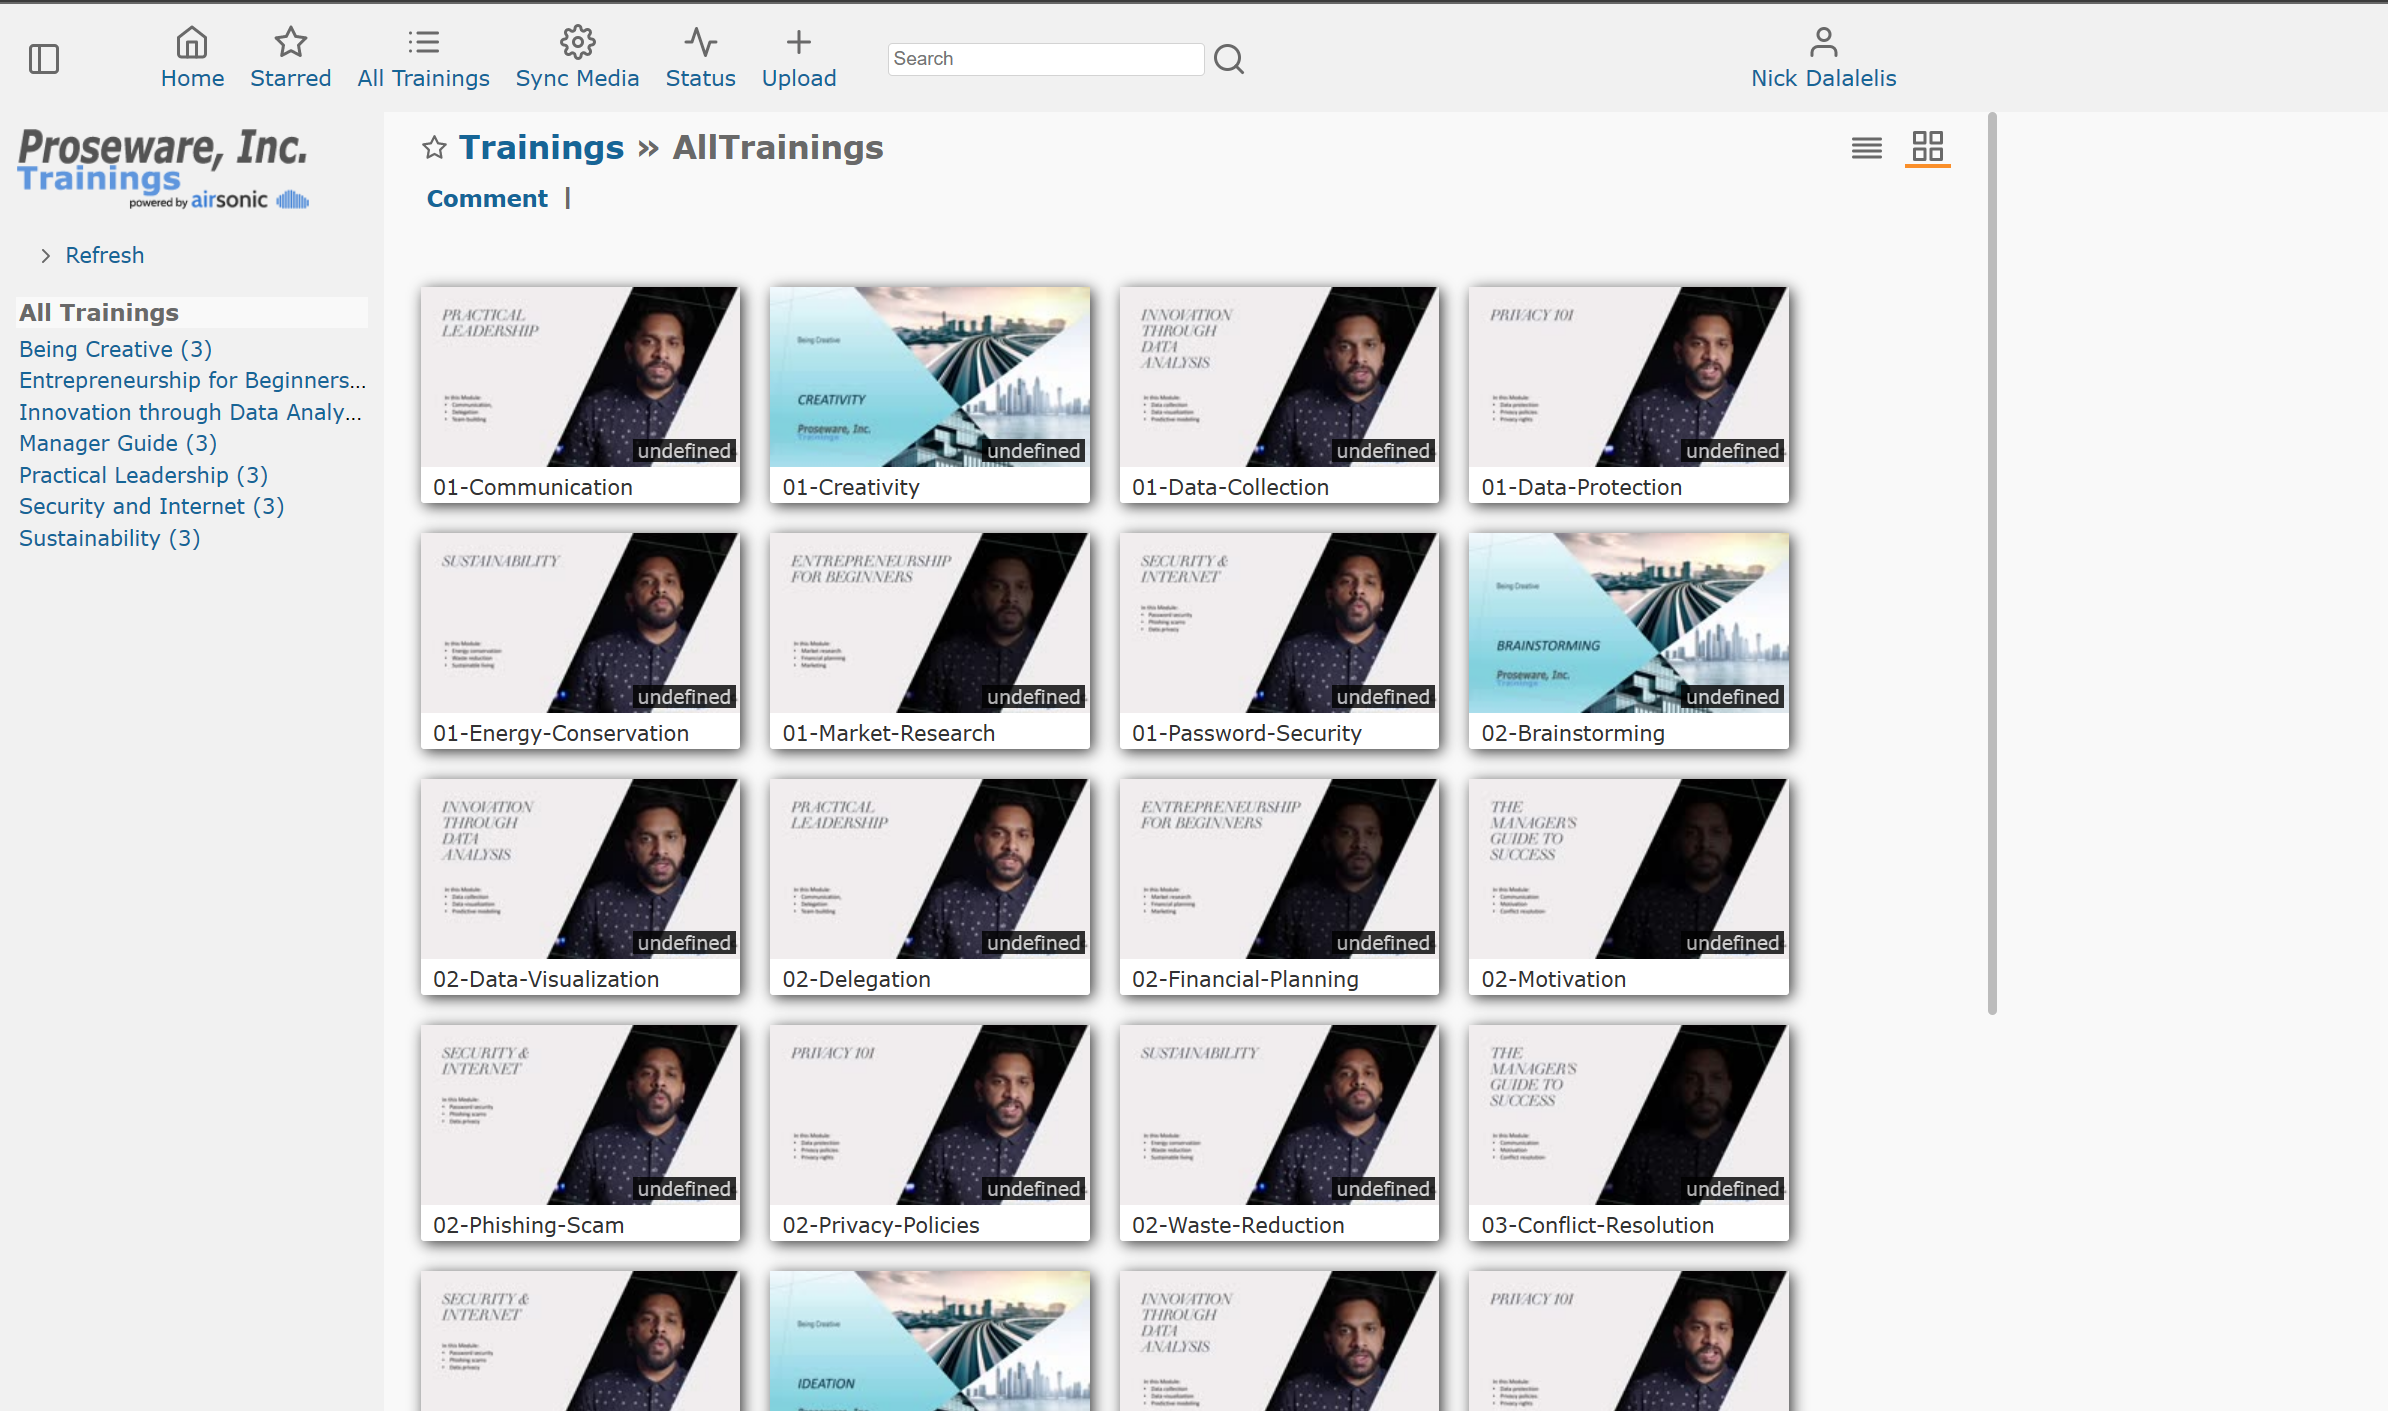
8. Open and use the application
Use the following to find the URL for the Proseware application that you have deployed:
azd env get-values --output json | jq -r .frontdoor_urlIt takes approximately 5 minutes for the Azure App Service to respond to requests using the code deployed during step 6.
9. Teardown
To tear down the deployment, run the following command:
azd downData collection
The software in the reference implementation may collect information about you and your use of the software and send it to Microsoft. Microsoft may use this information to provide services and improve our products and services. You can turn off the telemetry, and the following code shows you how to opt out. There are also some features in the software that enable you and Microsoft to collect data from users of your applications. If you use these features, you must comply with applicable law, including providing appropriate notices to users of your applications together with a copy of Microsoft Privacy Statement. You can learn more about data collection and use in the help documentation and our privacy statement. When you use the software, you consent to these practices.
Telemetry collection is on by default.
To opt out, set the environment variable ENABLE_TELEMETRY to false.
azd env set ENABLE_TELEMETRY falseTrademarks
This project may contain trademarks or logos for projects, products, or services. Authorized use of Microsoft trademarks or logos is subject to and must follow Microsoft's Trademark & Brand Guidelines.
Use of Microsoft trademarks or logos in modified versions of this project must not cause confusion or imply Microsoft sponsorship. Any use of third-party trademarks or logos are subject to those third-party's policies.


