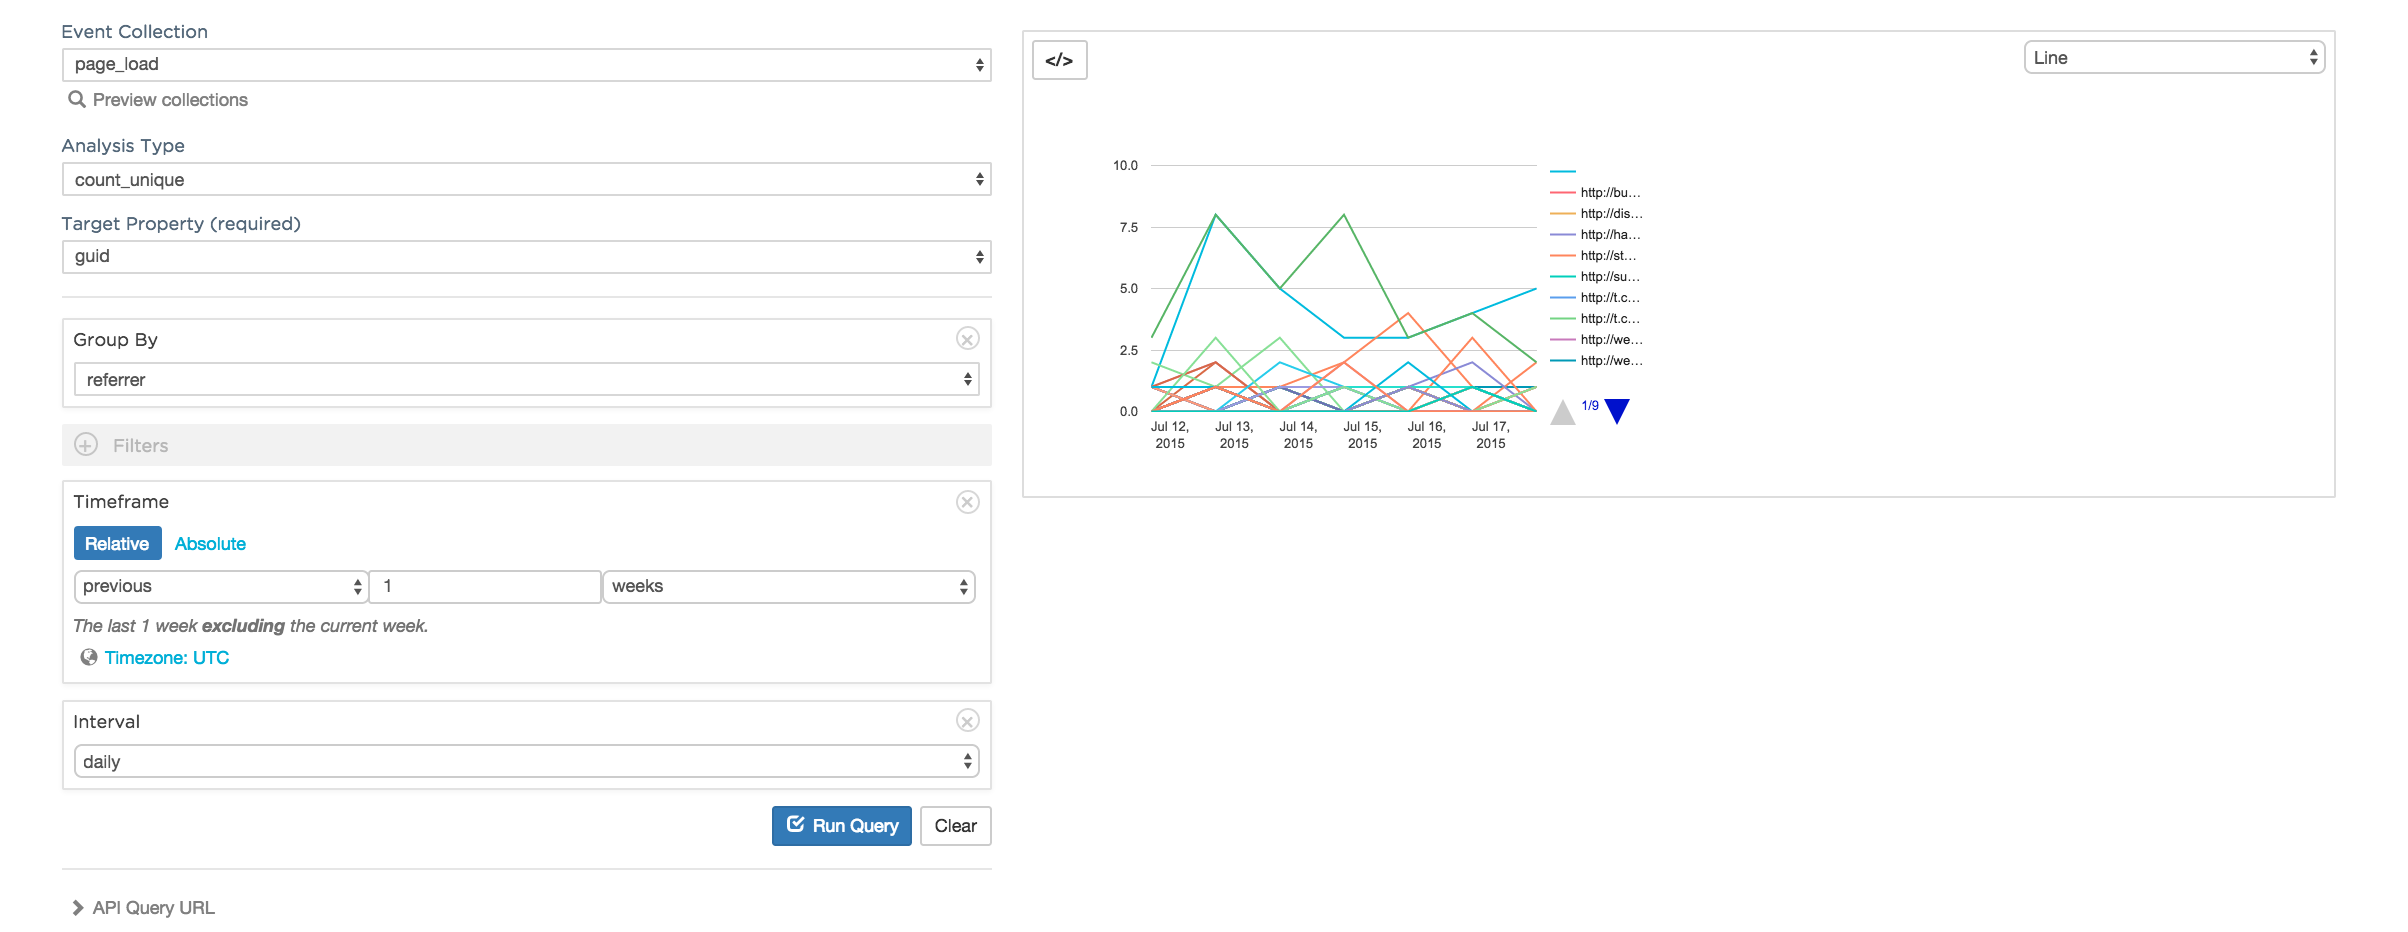
The data explorer is an open source point-and-click interface for querying and visualizing your event data.
cp demo/example_index.html demo/index.html- Add your Keen IO keys to demo/index.html
npm installnpm -g install gulp(if needed)gulp- You can now view the demo locally at
http://localhost:8081/explorer.
If you haven’t done so already, login to Keen IO to create a project for your app. You'll need a Keen IO account to create a project. The Project ID and API Keys are available on the Project Overview page. You will need these for the next steps.
You can see a complete code example of all these resources being included in our demo page here.
Include a copy of Bootstrap 3, which you can do from the CDN:
<link rel="stylesheet" href="https://maxcdn.bootstrapcdn.com/bootstrap/3.2.0/css/bootstrap.min.css">Include a copy of the Keen.DataTools styling from this project, found under: dist/keen-data-tools.css.
Have a div with an id that you'll use as the target to render out the app. A simple:
<div id="content"></div>will work just fine. All of the interface components will live under this div.
Include a copy of jQuery, which you can do from the Google CDN:
<script src="https://ajax.googleapis.com/ajax/libs/jquery/1.11.1/jquery.min.js"></script>Include a copy of Keen.js, the easiest way is to use our CDN version:
<script src="https://d26b395fwzu5fz.cloudfront.net/3.1.0-beta/keen.min.js" type="text/javascript"></script>Include a copy of Keen.DataTools from this project, found under: dist/keen-data-tools.js.
Initialize a new Keen.js client and then pass that into the initialization of a new Keen.DataTools.App.
<script type="text/javascript">
    $(document).ready(function(){
      client = new Keen({
        projectId: "your_project_id",
        readKey: "your_read_key",
        masterKey: "your_master_key"
        protocol: "https",
        host: "api.keen.io/3.0",
        requestType: "jsonp"
      });

      var app = new Keen.DataTools.App({
        client: client,
        targetId: 'content'
      });

      app.render(); // Render the app's UI into the targetId provided in the config.
    });
</script>
If you want the DataTools app to run on a path other than the root, you can pass in the root configuration option, eg: root: '/your/custom/root/path'.
You can read more about Keen.js here: The Keen.js client library.
Persistence is entirely optional. If you include it, a "favorites" feature will be shown and you can persist the state of the query you're working with to be looked up at a later time. If you do not want to use persistence, just do not include it in the Keen.DataTools.App initialization, like above.
To include persistence, create a new persistence object (this must be a compliant REST server, which we will document), and then pass that persistence object to the Keen.DataTools.App initialization. So, instead of what you see above, you would have:
<script type="text/javascript">
  $(document).ready(function(){
    client = new Keen({
      projectId: "your_project_id",
      readKey: "your_read_key",
      masterKey: "your_master_key",
      protocol: "https",
      host: "api.keen.io/3.0",
      requestType: "xhr"
    });

    // Initialization a new Firebase persistence object.
    var persistence = new Keen.DataTools.Persistence.REST({
      baseUrl: '/bookmarks'
    });

    var app = new Keen.DataTools.App({
      client: client,
      persistence: persistence, // Persistence now being passed in.
      targetId: 'content'
    });

    app.render();
  });
</script>
You can read more about how to build your own persistence plugin here: Keen.DataTools Persistence Docs.
If you want to customize this project or contribute, here is how to get started:
- clone the repo
- run
npm installto install project dependencies - update the
index.htmlwith your Project ID and API Keys
<script type="text/javascript">
    $(document).ready(function(){
      client = new Keen({
        projectId: "your_project_id",
        readKey: "your_read_key",
        masterKey: "your_master_key"
        protocol: "https",
        host: "api.keen.io/3.0",
        requestType: "jsonp"
      });

      var app = new Keen.DataTools.App({
        client: client,
        targetId: 'content'
      });

      app.render();
    });
</script>The project is built with Gulp.js.
- Run
gulpfrom the root directory of the project - The demo app will be running on
http://localhost:8081/explorer.
- Run
gulp test:unitto run the unit tests.
- Run
gulp test:functionalto run the functional tests.
This isn't normally requried, but if you need to, you can run the tests in the browser.
- Run
gulp - Run a server on another port, we use http-server on port
8082 - See the mocha unit test suite run on
http://localhost:8082/test/unit/
In order to move quickly and provide a good experience for its customers, Keen runs a private fork of Explorer for internal bug fixes, new features, and design changes. Some of those changes may rely on specific items in Keen's infrastructure, and need to go through a migration phase to work properly in the open source version.
Those migrations will happen frequently (it is likely that the two versions will usually be in sync), but there may be periods of lag after new larger features come out that this open source repo will behind what Keen shows on its website.
If you have any questions about using the open source Data Explorer feel free to contact us anytime at team@keen.io.
To contribute to this project:
- Fork the repo.
- Submit a Pull Request with test coverage.
- Follow our PR template, which includes the following sections:
# What's this PR do?

# Where should the reviewer start?

# How should this be manually tested?

# Screenshots (if appropriate)
Would an animated GIF be more informative than a screenshot? Then we recommend Recordit.
These are the major technologies used in the project.
- ReactJS for UI Components & input handling
- NPM for dependency management.
- Browserify to compile modules for use in the browser
- GulpJS for a task/build runner
