This is a demonstration of a flight board computer program for a drone developed with python. It controls the drone to autonomously take off, fly on a geometrically predetermined path and land in a simulated backyard environment.
It is possible to choose between 3 shapes, square triangle or circle, and control its side / radius.
It controls a quadcopter autonomously in the Udacity's Drone Simulator by sending commands and receiving incoming data from the drone and acting as the flight computer, using event-driven programming.
The python code here is similar to how the drone would be controlled from a ground station computer or an onboard flight computer. Since communication with the drone is done using MAVLink, this code is also suitable for controlling a PX4 quadcopter autopilot (or any drone that implemented MAVLink) with very few modifications.
This project is a programming assignment of the Udacity's Flying Car and Autonomous Flight Engineer Nanodegree.
If you haven't already, download the version of the simulator that's appropriate for your operating system from this repository.
If you haven't already, set up your Python environment and get all the relevant packages installed using Anaconda following instructions bellow:
-
Download miniconda and then install by opening the file/app that you download.
-
Clone the starter kit
git clone https://github.com/computationalcore/backyard-flyer- Enter into the starter kit directory
cd FCND-Term1-Starter-KitNote: If you have a windows machine, you must rename meta_windows_patch.yml to meta.yml as well.
- Create the miniconda environment (this can take several minutes due to the large number of installs required):
conda env create -f environment.yml- Activate the Conda Environment (this step is needed ANYTIME you want to work in this environment)
source activate fcndAfter activate the project start environment go the previous folder.
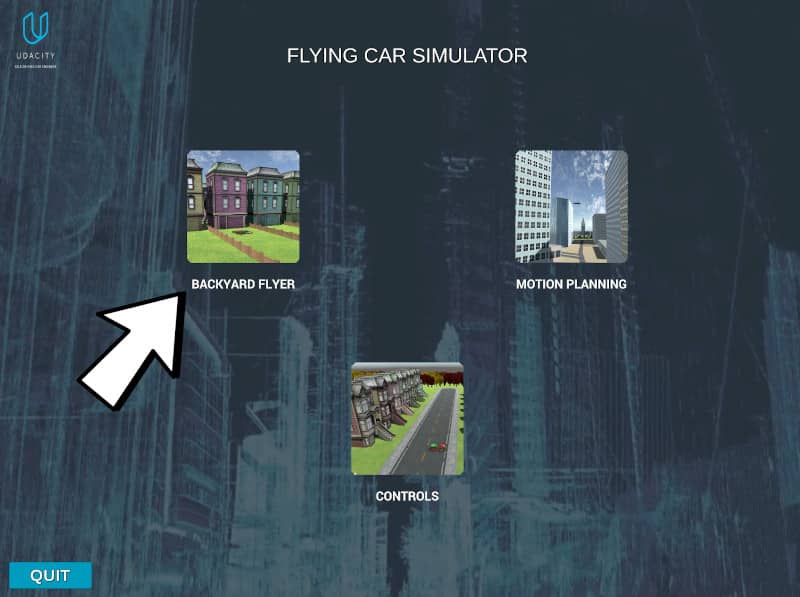
cd ../git clone https://github.com/computationalcore/backyard-flyercd backyard-flyerOpen the simulator and select "BACKYARD FLYER" (indicated in the arrow)
Run the program
python backyard_flyer.py The simulated drone should start engine, autonomously fly a 10 meter box at a 3 meter altitude and stop.
It is possible to change the geometric shape the drone will follow. Possible values are circle, triangle and square. The default value is square.
It is also possible to define the base size, in meters, of the geometric shape of the path that the drone will follow. For the square and triangle (which is actually an equilateral triangle), this is the size of the side, for the circle, this is the radius. The minimum allowed value is 2.0 and the maximum is 30.0. The default value is 10.
To see more usage options just run: python backyard_flyer.py -h
$ python backyard_flyer.py -h
usage: backyard_flyer.py [-h] [-p PORT] [--host HOST] [-g GEOMETRIC_SHAPE]
                         [-s GEOMETRIC_SIZE]

This program takes off a drone, flies it on a predetermined geometric path
autonomously and lands it, in a simulated backyard environment. The simulator
program must be open and running the Backyard Flyer simulation.

optional arguments:
  -h, --help            show this help message and exit
  -p PORT, --port PORT  Port number
  --host HOST           host address, i.e. '127.0.0.1'
  -g GEOMETRIC_SHAPE, --geometric-shape GEOMETRIC_SHAPE
        The geometric shape the drone will follow. Possible
        values are circle, triangle and square. The default
        value is square.
  -s GEOMETRIC_SIZE, --size GEOMETRIC_SIZE
        The base size, in meters, of the geometric shape the
        drone will follow. For square and triangle (which is
        actually an equilateral triangle) this is the side
        size, for the circle this is the radius. The minimum
        allowed value is 2.0 and maximum is 30.0. The default
        value is 10.
For example, to flight a circle of radius of 8 meters just run:
$ python backyard_flyer.py -g circle -s 8or
$ python backyard_flyer.py --geometric-shape circle --size 8Vin Busquet
This project is licensed under the MIT License - see the LICENSE file for details
For details, check out CHANGELOG.md.

