Add Jest to an Angular 6 project
Install globally
npm install -g @briebug/jestThen in an Angular CLI project run
ng g @briebug/jest:jest
This schematic will:
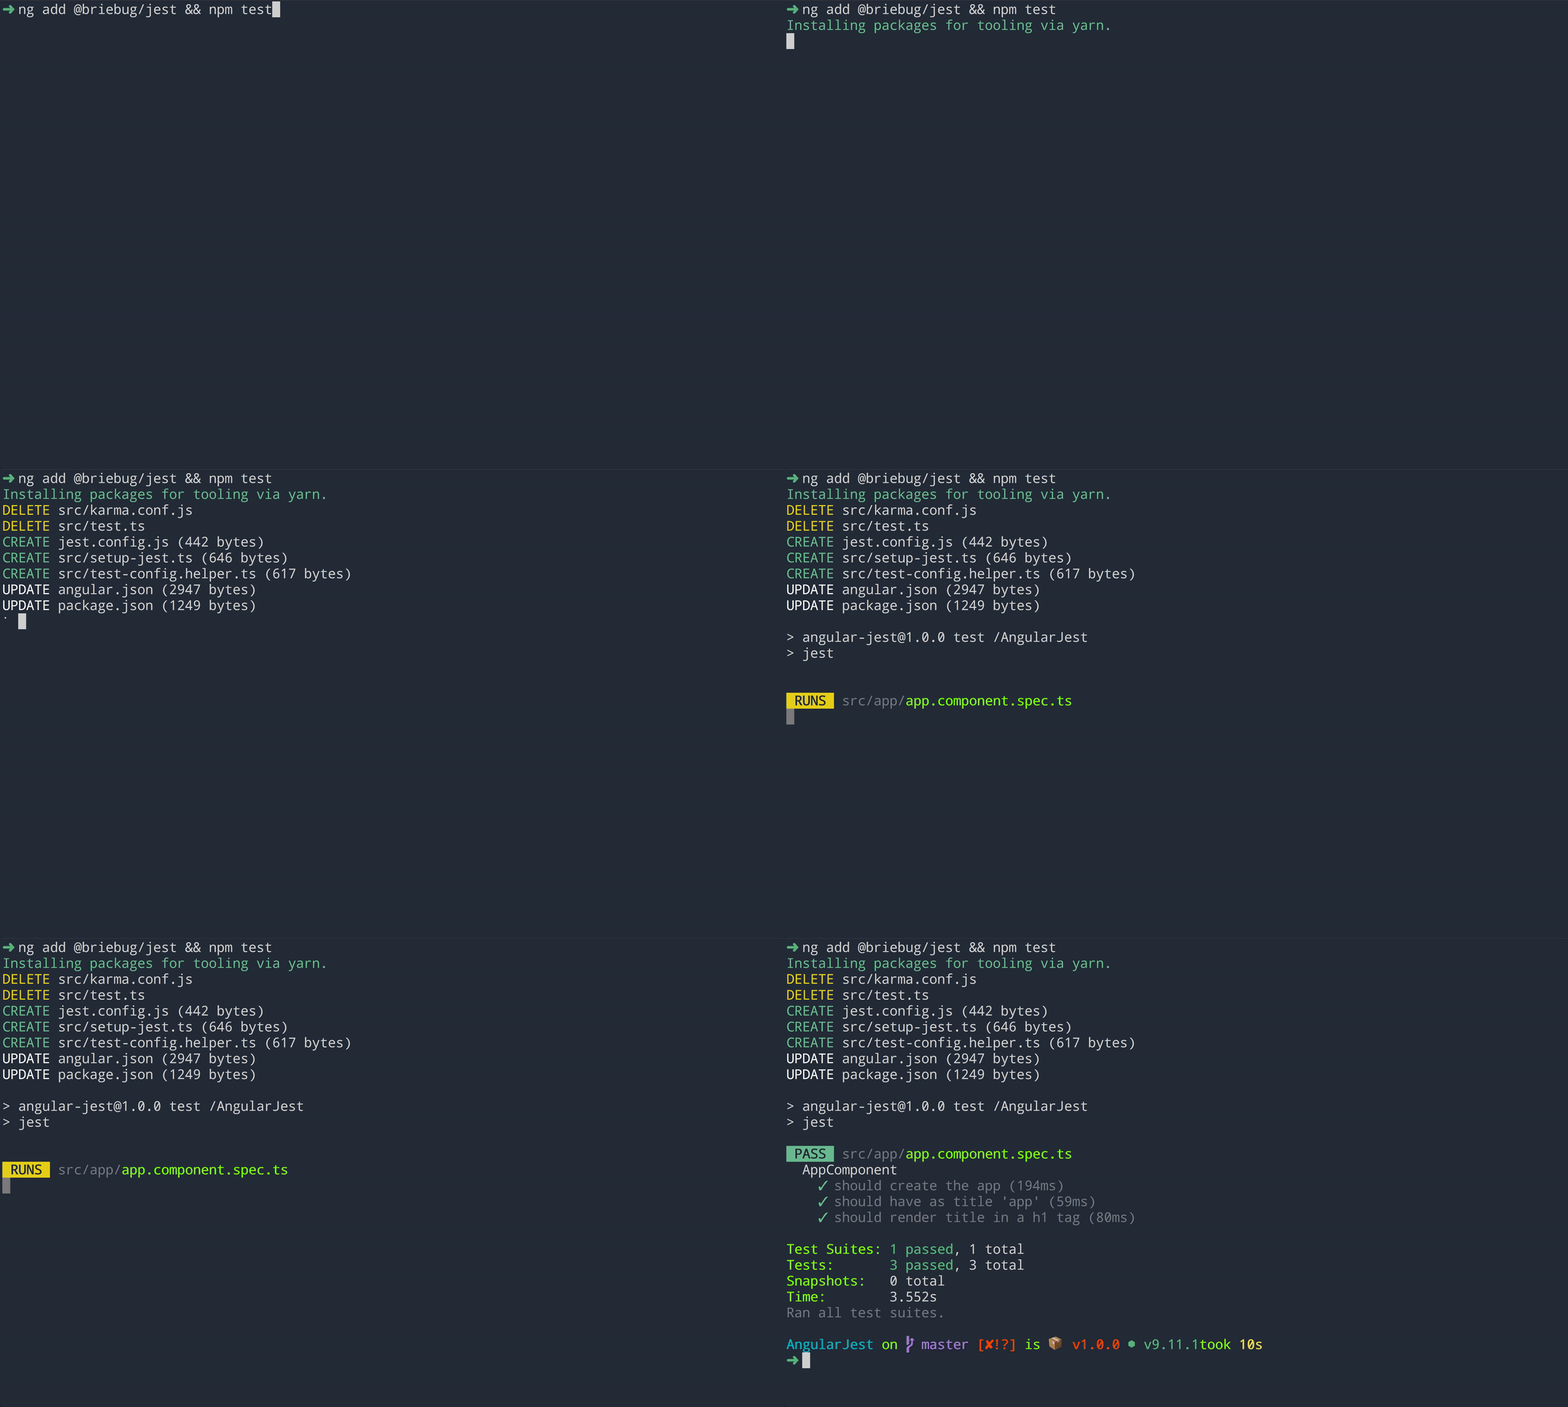
- install Jest, it's dependencies, and scripts
- add necessary files for Jest to work with Angular
- remove unnecessary Karma files and configuration
Optionally run as one command in an Angular CLI app directory. Note this will add the schematic as a dependency to your project.
ng add @briebug/jestnpm install && npm run linkWhen running locally, schematic changes will be applied to the test app in the ./sandbox directory. The sandbox is a bare CLI app and serves no other purpose than for testing schematics changes.
Compile the typescript in watch mode in one shell:
npm run buildRun the following in another shell every time a schematic change is made:
npm run clean:launchclean:launch will reset the sandbox to is current version controlled state, removing un-tracked files, and run the schematic against the sandbox. This will be your main development command.
⚠ Be careful not to check in changes to the sandbox directory unless necessary. ⚠
- run
npm run buildto compile the schematic in watch mode - open another shell, cd into the local repo you want to run the schematic against, and run
npm link ../PATH_TO_THIS_PROJECT- this will symlink the projects so that the Jest schematic command runs from you're local filesystem
- in the local repo you want to run the schematic against, run
ng g @briebug/jest:jest
For faster developing, find and comment out the following line to avoid npm installing dependencies
context.addTask(new NodePackageInstallTask());This will reset the sandbox folder to its HEAD commit and remove un-tracked files.
npm run cleanCompile the typescript files in watch mode
npm run buildCompile the typescript files once
npm run build:onceRun a series of standard tests to ensure the ./sandbox continues to function normally
npm run test:sandboxThis repository is a basic Schematic implementation that serves as a starting point to create and publish Schematics to NPM.
To test locally, install @angular-devkit/schematics globally and use the schematics command line tool. That tool acts the same as the generate command of the Angular CLI, but also has a debug mode.
Check the documentation with
schematics --helpnpm run test will run the unit tests, using Jasmine as a runner and test framework.
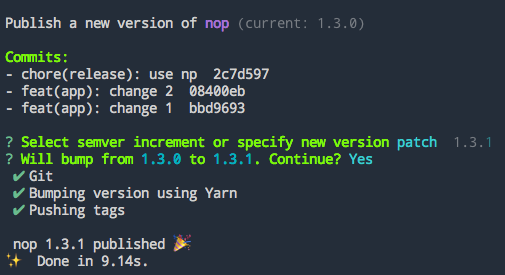
Publishing is handled by np. Ensure you have push access to this repo and are a @breibug NPM contributor. Several options are available for releases such as npm run release --no-publish.
Once all features are merged into master:
- on your machine, checkout
master - pull latest
npm run release- select the next appropriate version given the changes being added
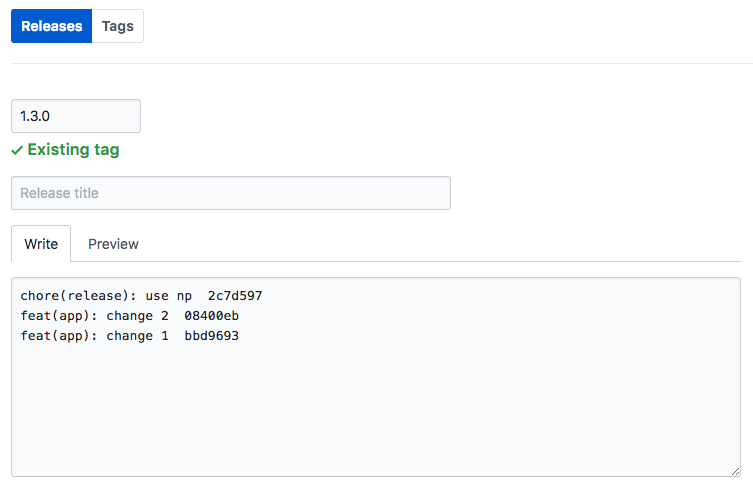
- copy the
Commits:displayed in your shell 
- edit the new release tag, and paste in the change notes and supply a title if appropriate

If you receive the following error and are on Angular CLI 1.X, trying moving to "@angular/cli": "1.7" or higher.
Error: Unregistered task "node-package" in schematic ...
