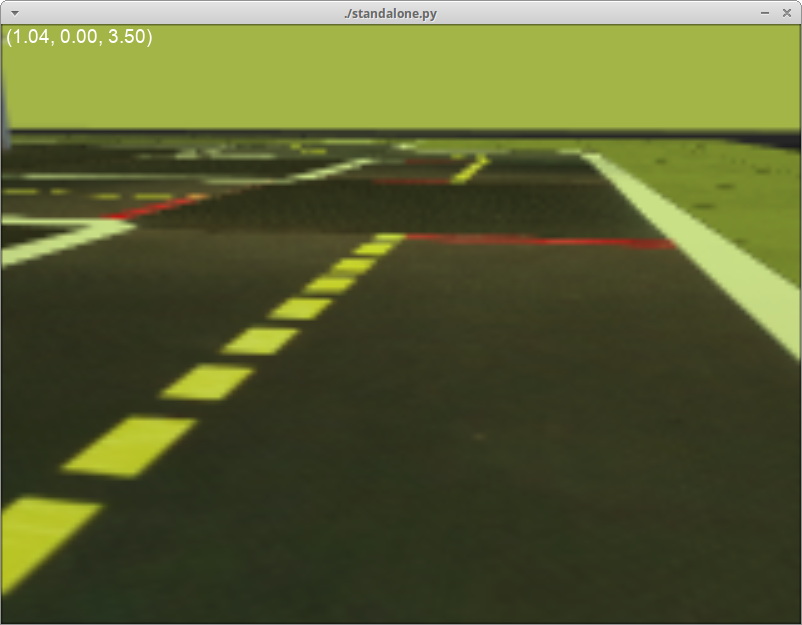
Duckietown self-driving car simulator environments for OpenAI Gym.
Please use this bibtex if you want to cite this repository in your publications:
@misc{gym_duckietown,
  author = {Maxime Chevalier-Boisvert, Florian Golemo, Yanjun Cao, Liam Paull},
  title = {Duckietown Environments for OpenAI Gym},
  year = {2018},
  publisher = {GitHub},
  journal = {GitHub repository},
  howpublished = {\url{https://github.com/duckietown/gym-duckietown}},
}
This simulator was created as part of work done at the MILA.
This repository contains two gym environments: SimpleSim-v0 and Duckiebot-v0.
The SimpleSim-v0 environment is a simple lane-following simulator
written in Python/OpenGL (Pyglet). It draws a loop of road with left and right turns,
along with objects in the background. It implements various forms of
domain-randomization
and basic differential-drive physics (without acceleration).
The Duckiebot-v0 environment is meant to connect to software running on
a real Duckiebot and remotely control the robot. It is a tool to test that policies
trained in simulation can transfer to the real robot. If you want to
control your robot remotely with the Duckiebot-v0 environment, you will need to
install the software found in the duck-remote-iface
repository on your Duckiebot.
Requirements:
- Python 3.5+
- OpenAI gym
- NumPy
- SciPy
- OpenCV
- Pyglet
- PyYAML
- PyTorch
You can install all the dependencies except PyTorch with pip3:
git clone https://github.com/duckietown/gym-duckietown.git
cd gym-duckietown
pip3 install -e .
Reinforcement learning code forked from this repository is included under /pytorch_rl. If you wish to use this code, you should install PyTorch as follows:
conda install pytorch torchvision -c pytorch
Alternatively, you can install all the dependencies, including PyTorch, using Conda as follows. For those trying to use this package on MILA machines, this is the way to go:
git clone https://github.com/duckietown/gym-duckietown.git
cd gym-duckietown
conda env create -f environment.yaml
Please note that if you use Conda to install this package instead of pip, you will need to activate your Conda environment and add the package to your Python path before you can use it:
source activate gym-duckietown
export PYTHONPATH="${PYTHONPATH}:`pwd`"
To run the standalone UI application, which allows you to control the simulation or real robot manually:
./standalone.py --env-name SimpleSim-v0
The standalone.py application will launch the Gym environment, display camera images and send actions (keyboard commands) back to the simulator or robot.
To train a reinforcement learning agent, you can use the code provided under /pytorch_rl. I recommend using the A2C or ACKTR algorithms. A sample command to launch training is:
python3 pytorch_rl/main.py --no-vis --env-name Duckie-SimpleSim-Discrete-v0 --algo a2c --lr 0.0002 --max-grad-norm 0.5 --num-steps 20
Then, to visualize the results of training, you can run the following command. Note that you can do this while the training process is still running. Also note that if you are running this through SSH, you will need to enable X forwarding to get a display:
python3 pytorch_rl/enjoy.py --env-name Duckie-SimpleSim-Discrete-v0 --num-stack 1 --load-dir trained_models/a2c
The simulator uses the OpenGL API to produce graphics. This requires an X11 display to be running, which can be problematic if you are trying to run training code through on SSH, or on a cluster. You can create a virtual display using Xvfb. The instructions shown below illustrate this. Note, however, that these instructions are specific to MILA, and may need to be adapted:
# Reserve a Debian 9 machine with 12GB ram, 2 cores and a GPU on the cluster
sinter --reservation=res_stretch --mem=12000 -c2 --gres=gpu

# Activate the gym-duckietown Conda environment
source activate gym-duckietown

cd gym-duckietown

# Add the gym_duckietown package to your Python path
export PYTHONPATH="${PYTHONPATH}:`pwd`"

# Load the GLX library
# This has to be done before starting Xvfb
export LD_LIBRARY_PATH=/Tmp/glx:$LD_LIBRARY_PATH

# Create a virtual display with OpenGL support
Xvfb :$SLURM_JOB_ID -screen 0 1024x768x24 -ac +extension GLX +render -noreset &> xvfb.log &
export DISPLAY=:$SLURM_JOB_ID

# You are now ready to train
If you run into problems of any kind, don't hesitate to open an issue on this repository. It's quite possible that you've run into some bug we aren't aware of. Please make sure to give some details about your system and configuration.
It's possible to improve the performance of the simulator by disabling Pyglet error-checking code. Export this environment variable before running the simulator:
export PYGLET_DEBUG_GL=True
Reinforcement learning algorithms are extremely sensitive to hyperparameters. Choosing the wrong set of parameters could prevent convergence completely, or lead to unstable performance over training. You will likely want to experiment. A learning rate that is too low can lead to no learning happening. A learning rate that is too high can lead unstable performance throughout training or a suboptimal result.
The reward values are currently rescaled into the [0,1] range, because the RL code in
pytorch_rl doesn't do reward clipping, and deals poorly with large reward values. Also
note that changing the reward function might mean you also have to retune your choice
of hyperparameters.

