The goals / steps of this project are the following:
-
Training / Calibration:
- Download the simulator and take data in "Training Mode"
- Test out the functions in the Jupyter Notebook provided
- Add functions to detect obstacles and samples of interest (golden rocks)
- Fill in the
process_image()function with the appropriate image processing steps (perspective transform, color threshold etc.) to get from raw images to a map. Theoutput_imageyou create in this step should demonstrate that your mapping pipeline works. - Use
moviepyto process the images in your saved dataset with theprocess_image()function. Include the video you produce as part of your submission.
-
Autonomous Navigation / Mapping
- Fill in the
perception_step()function within theperception.pyscript with the appropriate image processing functions to create a map and updateRover()data (similar to what you did withprocess_image()in the notebook). - Fill in the
decision_step()function within thedecision.pyscript with conditional statements that take into consideration the outputs of theperception_step()in deciding how to issue throttle, brake and steering commands. - Iterate on your perception and decision function until your rover does a reasonable job of navigating and mapping. (Mapping 40% of the map, at 60% Fidelity, and locate at least 1 rock sample).
- Fill in the
Rubric Points
1. Provide a Writeup / README that includes all the rubric points and how you addressed each one. You can submit your writeup as markdown or pdf.
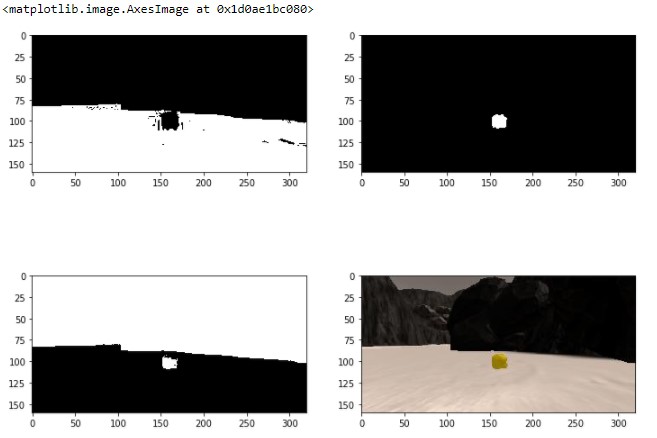
1. Run the functions provided in the notebook on test images (first with the test data provided, next on data you have recorded). Add/modify functions to allow for color selection of obstacles and rock samples.
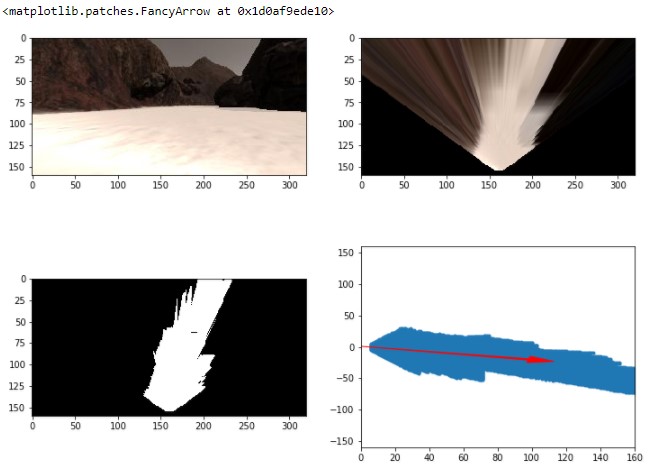
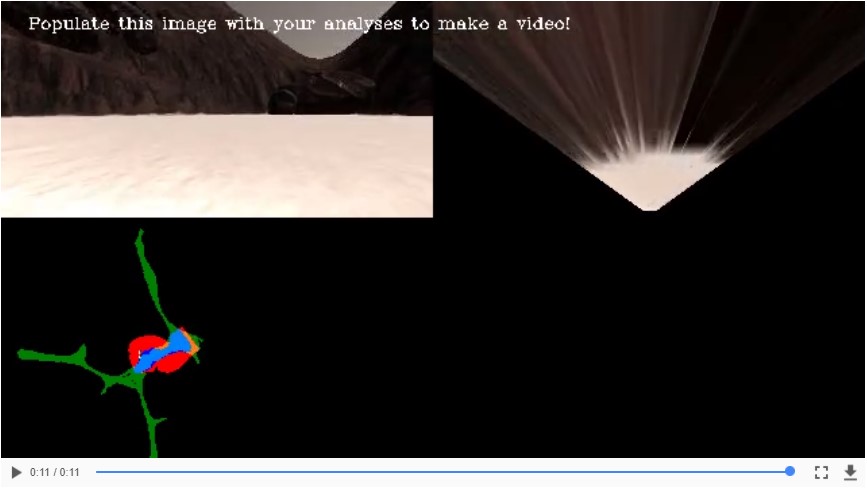
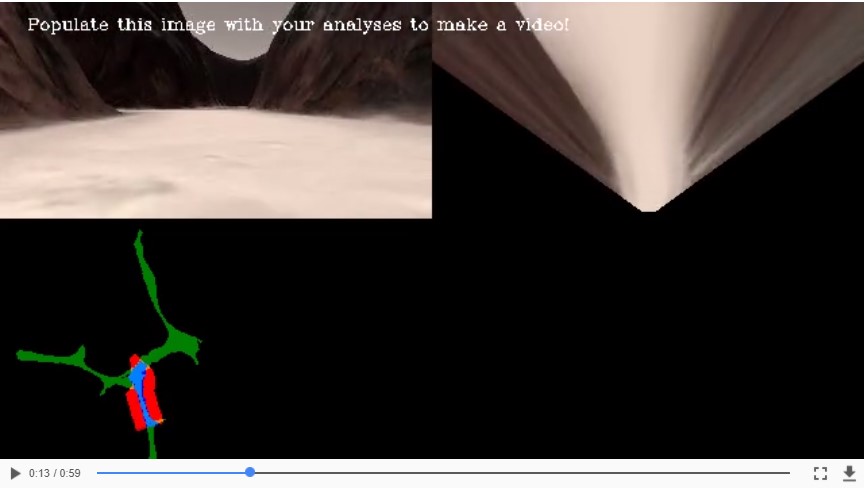
2. Populate the process_image() function with the appropriate analysis steps to map pixels identifying navigable terrain, obstacles and rock samples into a worldmap. Run process_image() on your test data using the moviepy functions provided to create video output of your result.
A. Did a few modifications to different functions. All details are shown in the jupyter notebook 'Rover_Project_Test_Notebook.ipynb'
1. Fill in the perception_step() (at the bottom of the perception.py script) and decision_step() (in decision.py) functions in the autonomous mapping scripts and an explanation is provided in the writeup of how and why these functions were modified as they were.
a. These color_thresh function modifications make it so that it outputs all 3 thresholds, one for navigable path, rock samples, and rock samples; respectively. Thought, red and green thresholds higher than 100 and blue threshold lower than 50 do the trick to recognize the yellow pixels from the rock samples.
def color_thresh(img, rgb_thresh=(160, 160, 160, 100 , 100,50)):

	# Create an array of zeros same xy size as img, but single channel
	color_select_path = np.zeros_like(img[:,:,0])
	color_select_rock = np.zeros_like(img[:,:,0])
	color_select_obstacle = np.zeros_like(img[:,:,0])
	# Threshold for navigable path
	above_thresh = (img[:,:,0] > rgb_thresh[0])
				& (img[:,:,1] > rgb_thresh[1])
				& (img[:,:,2] > rgb_thresh[2])
		# Threshold for rocks
	between_thresh = (img[:,:,0] > rgb_thresh[3] )
				& (img[:,:,1] > rgb_thresh[4] )
				& (img[:,:,2] < rgb_thresh[5] )
		# Threshold for obstacles
	below_thresh = (img[:,:,0] < rgb_thresh[0])
				& (img[:,:,1] < rgb_thresh[1])
				& (img[:,:,2] < rgb_thresh[2])
	# Index the array of zeros with the boolean array and set to 1
	color_select_path[above_thresh] = 1
	color_select_rock[between_thresh] = 1
	color_select_obstacle[below_thresh] = 1
	# Return the binary images for each objects
	return color_select_path, color_select_rock, color_select_obstacle
b. Changes to the perspect_transform function generate a second output to consider the outside field of view, which would otherwise be considered part of the obstacles without this method.
def perspect_transform(img, src, dst):

	M = cv2.getPerspectiveTransform(src, dst)
	warped = cv2.warpPerspective(img, M, (img.shape[1], img.shape[0]))# keep same size as input image
	outside_field = cv2.warpPerspective(np.ones_like(img[:,:,0]), M, (img.shape[1], img.shape[0]))
	return warped, outside_field
c. Changes to the perception_step() function have been made to apply all the functions previously stated to provide a complete computer vision image that can be used to tell the rover where it can travel and where it can't, as well as adding the ability to detect rock samples.
####### - I also applied the to_polar_coords() function to the rock 'x' and 'y' pixels to provide the rover distance and direction to where the rock samples are, for steering guidance.
def perception_step(Rover):

	# Perform perception steps to update Rover()
	# TODO:
	# NOTE: camera image is coming to you in Rover.img
	# 1) Define source and destination points for perspective transform
		xpos, ypos = Rover.pos
		yaw = Rover.yaw
		dst_size=8
		bottom_offset=6
		world_size = Rover.worldmap.shape[0]
		scale = 2* dst_size
		source = np.float32([[14, 140], [301 ,140],[200, 96], [118, 96]])
		destination = np.float32([[Rover.img.shape[1]/2 - dst_size, Rover.img.shape[0] - bottom_offset],
				[Rover.img.shape[1]/2 + dst_size, Rover.img.shape[0] - bottom_offset],
				[Rover.img.shape[1]/2 + dst_size, Rover.img.shape[0] - 2*dst_size - bottom_offset],
				[Rover.img.shape[1]/2 - dst_size, Rover.img.shape[0] - 2*dst_size - bottom_offset],
				])
	# 2) Apply perspective transform
		warped, outside_field = perspect_transform(Rover.img, source, destination)
	# 3) Apply color threshold to identify navigable terrain/obstacles/rock samples
		threshed_path, threshed_rock, threshed_obs = color_thresh(warped)
		obstacles_world = np.absolute(np.float32(threshed_obs))*outside_field
	# 4) Update Rover.vision_image (this will be displayed on left side of screen)
		Rover.vision_image[:,:,0] = obstacles_world * 255 #obstacles color-thresholded binary image
		Rover.vision_image[:,:,1] = threshed_rock * 255 #rocks color-thresholded binary image
		Rover.vision_image[:,:,2] = threshed_path * 255 #terrain color-thresholded binary images
	# 5) Convert map image pixel values to rover-centric coords
		xpix, ypix = rover_coords(threshed_path)
		obs_xpix, obs_ypix = rover_coords(obstacles_world)
		rock_xpix, rock_ypix = rover_coords(threshed_rock)
	# 6) Convert rover-centric pixel values to world coordinates
		x_world, y_world = pix_to_world(xpix,ypix,xpos,ypos,yaw,world_size,scale)
		obs_xworld, obs_yworld = pix_to_world(obs_xpix,obs_ypix,xpos,ypos,yaw,world_size,scale)
		rock_xworld, rock_yworld = pix_to_world(rock_xpix,rock_ypix,xpos,ypos,yaw,world_size,scale)
	# 7) Update Rover worldmap (to be displayed on right side of screen)
		Rover.worldmap[obs_yworld, obs_xworld, 0] += 50
		Rover.worldmap[rock_yworld, rock_xworld, 1] += 50
		Rover.worldmap[y_world, x_world, 2] += 50
		# 8) Convert rover-centric pixel positions to polar coordinates
		rover_dist, rover_angles = to_polar_coords(xpix, ypix)
		rock_dist, rock_angle = to_polar_coords(rock_xpix, rock_ypix)
	# Update Rover pixel distances and angles
		Rover.nav_dists = rover_dist
		Rover.nav_angles = rover_angles
		Rover.rock_dists = rock_dist
		Rover.rock_angles = rock_angle
a. Made these changes to the decision_step() function to provide the extra capability to locate and steer towards rock samples when found, stop when near a sample, and pickup sample when it has stopped in front of the rock sample.
import numpy as np
# This is where you can build a decision tree for determining throttle, brake and steer

# commands based on the output of the perception_step() function

def decision_step(Rover):

	# Implement conditionals to decide what to do given perception data
	# Here you're all set up with some basic functionality but you'll need to
	# improve on this decision tree to do a good job of navigating autonomously!
	# Example:
	# Check if we have vision data to make decisions with
	if Rover.nav_angles is not None:
		# Check for Rover.mode status
		if len(Rover.rock_angles) != 0:
			Rover.sample_pos_found = Rover.rock_angles
			Rover.steer = np.clip(np.mean(Rover.rock_angles * 180/np.pi), -15, 15)
			if len(Rover.rock_angles) >= 20:
				Rover.sample_pos_found = Rover.rock_dists
				if Rover.vel < 1:
				# Set throttle value to throttle setting
					Rover.throttle = 0.1
					Rover.brake = 0
				elif Rover.vel >= 1:
					Rover.brake = 5
					Rover.throttle = 0
				else: # Else coast
					Rover.throttle = 0
				Rover.brake = 0
			elif len(Rover.rock_angles) <= 20:
				Rover.sample_pos_found = len(Rover.rock_angles)
				# Set mode to "stop" and hit the brakes!
				#Rover.throttle = 0
				if Rover.vel < 0.7:
				# Set throttle value to throttle setting
					Rover.throttle = 0.1
					Rover.brake = 0
				elif Rover.vel >= 0.7:
					Rover.throttle = 0
					Rover.brake = 5
				else: # Else coast
					Rover.throttle = 0
				# Set brake to stored brake value
				if Rover.near_sample:
					Rover.throttle = 0
					Rover.brake = Rover.brake_set
					Rover.steer = 0
					if Rover.near_sample and Rover.vel == 0 and not Rover.picking_up:
						Rover.send_pickup = True
		elif Rover.mode == 'forward' and len(Rover.rock_angles) == 0 and Rover.near_sample == 0:
			Rover.sample_pos_found = len(Rover.rock_angles)
			# Check the extent of navigable terrain
			if len(Rover.nav_angles) >= Rover.stop_forward:
				# If mode is forward, navigable terrain looks good
				# and velocity is below max, then throttle
				if Rover.vel < Rover.max_vel:
					# Set throttle value to throttle setting
					Rover.throttle = Rover.throttle_set
				else: # Else coast
					Rover.throttle = 0
				Rover.brake = 0
				# Set steering to average angle clipped to the range +/- 15
				Rover.steer = np.clip(np.mean(Rover.nav_angles * 180/np.pi), -15, 15)
				# If there's a lack of navigable terrain pixels then go to 'stop' mode
			elif len(Rover.nav_angles) < Rover.stop_forward:
				# Set mode to "stop" and hit the brakes!
				Rover.throttle = 0
				# Set brake to stored brake value
				Rover.brake = Rover.brake_set
				Rover.steer = 0
				Rover.mode = 'stop'
			# If we're already in "stop" mode then make different decisions
		elif Rover.mode == 'stop' and len(Rover.rock_angles) == 0:
			# If we're in stop mode but still moving keep braking
			if Rover.vel > 0.2:
				Rover.throttle = 0
				Rover.brake = Rover.brake_set
				Rover.steer = 0
			# If we're not moving (vel < 0.2) then do something else
			elif Rover.vel <= 0.2:
				# Now we're stopped and we have vision data to see if there's a path forward
				if len(Rover.nav_angles) < Rover.go_forward:
					Rover.throttle = 0
					# Release the brake to allow turning
					Rover.brake = 0
					# Turn range is +/- 15 degrees, when stopped the next line will induce 4-wheel turning
					Rover.steer = -25 # Could be more clever here about which way to turn
				# If we're stopped but see sufficient navigable terrain in front then go!
				elif len(Rover.nav_angles) >= Rover.go_forward:
					# Set throttle back to stored value
					Rover.throttle = Rover.throttle_set
					# Release the brake
					Rover.brake = 0
					# Set steer to mean angle
					Rover.steer = np.clip(np.mean(Rover.nav_angles * 180/np.pi), -15, 15)
					Rover.mode = 'forward'
	else:
		Rover.throttle = Rover.throttle_set
		Rover.steer = 0
		Rover.brake = 0
	return Rover
a. Made these changes to the init() function to provide the extra variables to the rover for storing rock sample distance and angles, along with a string variable that's used to prompt in different situations for testing and debugging purposes.
def __init__(self):

		self.start_time = None # To record the start time of navigation
		self.total_time = None # To record total duration of naviagation
		self.img = None # Current camera image
		self.pos = None # Current position (x, y)
		self.yaw = None # Current yaw angle
		self.pitch = None # Current pitch angle
		self.roll = None # Current roll angle
		self.vel = None # Current velocity
		self.steer = 0 # Current steering angle
		self.throttle = 0 # Current throttle value
		self.brake = 0 # Current brake value
		self.nav_angles = None # Angles of navigable terrain pixels
		self.nav_dists = None # Distances of navigable terrain pixels
		self.ground_truth = ground_truth_3d # Ground truth worldmap
		self.mode = 'forward' # Current mode (can be forward or stop)
		self.throttle_set = 0.6 # Throttle setting when accelerating
		self.brake_set = 10 # Brake setting when braking
		# The stop_forward and go_forward fields below represent total count
		# of navigable terrain pixels.  This is a very crude form of knowing
		# when you can keep going and when you should stop.  Feel free to
		# get creative in adding new fields or modifying these!
		self.stop_forward = 100 # Threshold to initiate stopping
		self.go_forward = 1000 # Threshold to go forward again
		self.max_vel = 2 # Maximum velocity (meters/second)
		# Image output from perception step
		# Update this image to display your intermediate analysis steps
		# on screen in autonomous mode
		self.vision_image = np.zeros((160, 320, 3), dtype=np.float)
		# Worldmap
		# Update this image with the positions of navigable terrain
		# obstacles and rock samples
		self.worldmap = np.zeros((200, 200, 3), dtype=np.float)
		self.samples_pos = None # To store the actual sample positions
		self.samples_to_find = 0 # To store the initial count of samples
		self.samples_located = 0 # To store number of samples located on map
		self.samples_collected = 0 # To count the number of samples collected
		self.sample_pos_found = None # to print string of sample pos situation
		self.rock_angles = 0 # rock angles by perception_step
		self.rock_dists =  0 # rock distances by perception_step
		self.near_sample = 0 # Will be set to telemetry value data["near_sample"]
		self.picking_up = 0 # Will be set to telemetry value data["picking_up"]
		self.send_pickup = False # Set to True to trigger rock pickup
2. Launching in autonomous mode your rover can navigate and map autonomously. Explain your results and how you might improve them in your writeup.
In autonomous mode, I managed to map at least 40% with at least 60% fidelity. Also, some capability to detect, navigate towards rock samples, and pick them up was added. There are instances where it would crash against the rocks in the middle of the map, sometimes getting stuck. Also, sometimes it stays in a loop going to the same places over and over, or just stays around in circles looking for a greater navigable path.
Would further optimization be pursued, it would be in the better obstacle detection area (specially rocks in the middle of the map, not big enough to be perceived as obstacle), along with better decision making after it notices it stayed in a loop, and running in circles.
Figure 5: Resolution Setup for Simulation
