Pneumonia Detection Using Various Neural Networks Architecture and using Transfer Learning on VGG16 as Pretrained Model
Explore the docs »
View Demo
·
Report Bug
·
Request Feature
- Table of Contents
- About The Project
- Built With
- Getting Started
- Train Your Own Model
- Product Screenshots
- Roadmap
- Contributing
- License
- Contact
Pneumonia Detection Using Various Neural Networks Architecture and using Transfer Learning on VGG16 as Pretrained Model
Pneumonia is an infection that inflames the air sacs in one or both lungs. The air sacs may fill with fluid or pus (purulent material), causing cough with phlegm or pus, fever, chills, and difficulty breathing. A variety of organisms, including bacteria, viruses and fungi, can cause pneumonia.
The project is about diagnosing pneumonia from XRay images of lungs of a person using self laid convolutional neural network and tranfer learning via inceptionV3 and VGG16.
Architecture :
- ReLU Activation
- adam optimzer
New architecture with improving the previous architecture
- ReLU Activation
- SGD optimzer
- Dropout + Batch Normalization
3 Hidden Layers
- ReLU Activation
- RMSprop optimzer
- Dropout
- Model Architecture: 784-512-364-128-10
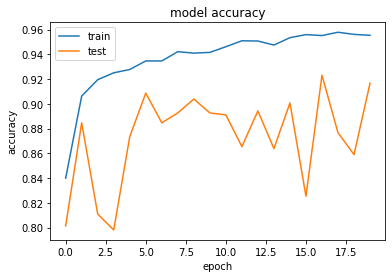
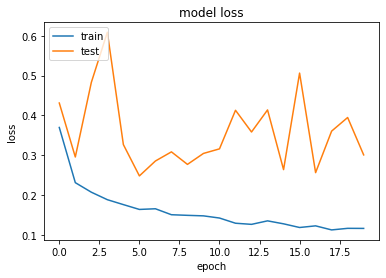
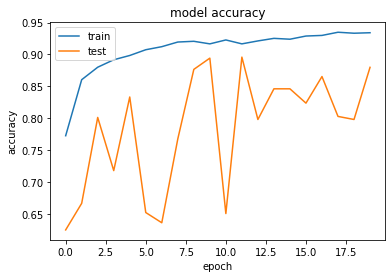
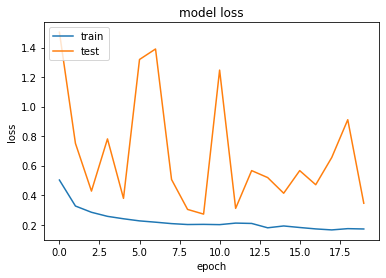
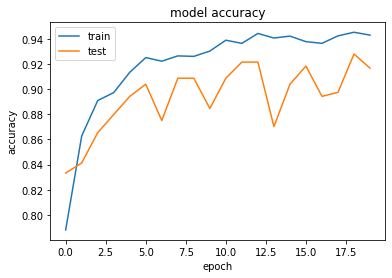
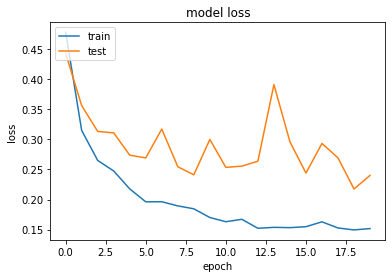
Here are the results of our three models :
| Model | Architecture | Training Accuracy | Test Accuracy |
|---|---|---|---|
| Model 1 | 2:1 Arcitecture without using Batch Normalization and Dropout | 95.48% | 91.67% |
| Model 2 | 4:2 Achitecture using Batch Normalization and Dropout | 93.58% | 87.98% |
| Model 3 | 3:1 Convolutional layer | 94.74% | 91.67% |
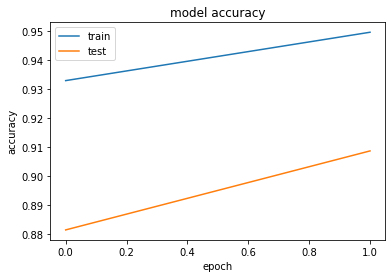
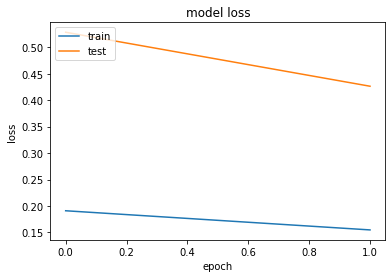
Here are the results of Transfer Learning :
| Model | Architecture | Training Accuracy | Test Accuracy |
|---|---|---|---|
| VGG 16 | Epoch = 2 Batch size = 10 | 95.24% | 90.87% |
To get a local copy up and running follow these simple example steps.
You will need:
- Python
- Tensorflow
- scikit-learn
- Flask
- Make sure you have python3 setup on your system
- Clone the repo
git clone https://github.com/ctrl-gaurav/Pneumonia-Detection.git- Install requirements
pip install -r requirements.txt- Download Pre-Trained Weights
- Run app.py
python app.pyIf you want to train your own model
- Make sure you have python3 setup on your system
- Clone the repo
git clone https://github.com/ctrl-gaurav/Pneumonia-Detection.git- Install requirements
pip install -r requirements.txt- Read Documentation and see which model architecture you want to use or fit best for your model.
- Set Parameters according to your dataset then :
- Run model_2_1_architecture.py
python model_2_1_architecture.py- Run model_3_1_architecture.py
python model_3_1_architecture.py- Run model_4_2_architecture.py
python model_4_2_architecture.py- Your Trained Model is automatically saved in models folder
- Change Your model name in app.py and then test your model
- Run app.py
python app.pySee the open issues for a list of proposed features (and known issues).
To add your contributions to this project follow these steps :
- Fork the Project
- Create your improvements Branch (
git checkout -b improvements/myimprovements) - Commit your Changes (
git commit -m 'Done some Improvements') - Push to the Branch (
git push origin improvements/myimprovements) - Open a Pull Request
Distributed under the MIT License. See LICENSE for more information.
- Gaurav
- Project Link: https://github.com/ctrl-gaurav/Pneumonia-Detection

