####A simple star rating view written in pure swift, lightweight but powerful.
######🇨🇳中文介绍
##Screenshots
- iOS 8.0+
- Xcode 8
- Swift 3.0
##CocoaPods
CocoaPods is the recommended way to add SwiftyStarRatingView to your project.
Add a pod entry for SwiftyStarRatingView to your Podfile.
pod 'SwiftyStarRatingView'
Second, install SwiftyStarRatingView into your project:
pod install
- Download the latest code version .
- Open your project in Xcode,drag the
SwiftyStarRatingViewfolder into your project. Make sure to select Copy items when asked if you extracted the code archive outside of your project.
####Create a simple rating view:
	let starRatingView = SwiftyStarRatingView()

	starRatingView.frame = CGRect(x: x, y: y, width: width, height: height)

	starRatingView.maximumValue = 5 		//default is 5
	starRatingView.minimumValue = 0 		//default is 0
	starRatingView.value = 3        		//default is 0

	starRatingView.tintColor = UIColor.yellow

	starRatingView.addTarget(self, action: #selector(function), for: .valueChanged)

	self.view.addSubview(starRatingView)
####Setting this property to control whether to display a half stars:
	starRatingView.allowsHalfStars = true 	//default is true
    starRatingView.value = 3.5				//default is 0
####Whether accurate display:
starRatingView.accurateHalfStars = true //default is true
####Always callback or just stop touch:
starRatingView.continuous = true //default is true
####Use custom image:
	starRatingView.halfStarImage = UIImage(named: "half.png")
	starRatingView.emptyStarImage = UIImage(named: "empty.png")
    starRatingView.filledStarImage = UIImage(named: "filled.png")
####StoryBoard or XIB:
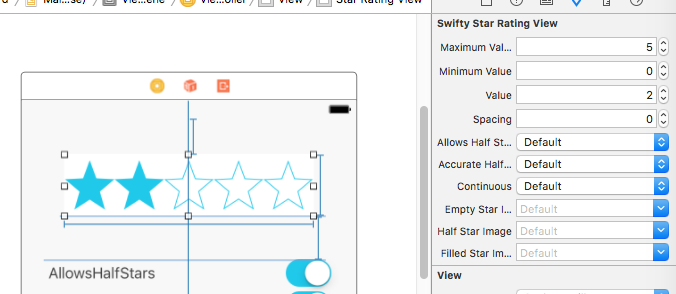
SwiftyStarRatingView also works great with Auto Layout, you can use it in StoryBoard or XIB.
####If you wish to contact me, email at: chen.developer@foxmail.com
#####Sina : @后知后觉乀
SwiftyStarRatingView is released under the GNU GENERAL PUBLIC LICENSE. See LICENSE for details.


