Live application can be found here
This is a full-stack e-commerce project built using Django, Python, HTML, CSS and JavaScript. I have created a website for 'Heiwa Gallery' that has been designed to display exhibition information and allows customers to purchase prints of photography & artwork from the online shop.
Using the core UX principles I first started with Strategy, thinking about the target audience for this gallery & the features they would benefit from.
The target audience for 'heiwa' are:
- 25 to 55 year olds
- Photographers & creatives
- People that enjoy visiting exhibitions, partaking in cultural activities in their spare time
These users will be looking for:
- An informative website, with information that is easy-to-find & concise
- Current & up-to-date exhibitions information, with essential information such as dates & price
- Ability to view & purchase prints that are for sale
- User account functionality to view past orders and store billing information
- A way to sign up for the gallery's newsletter
This website will offer all of these things whilst also allowing for intuitive navigation and comfortability of use.
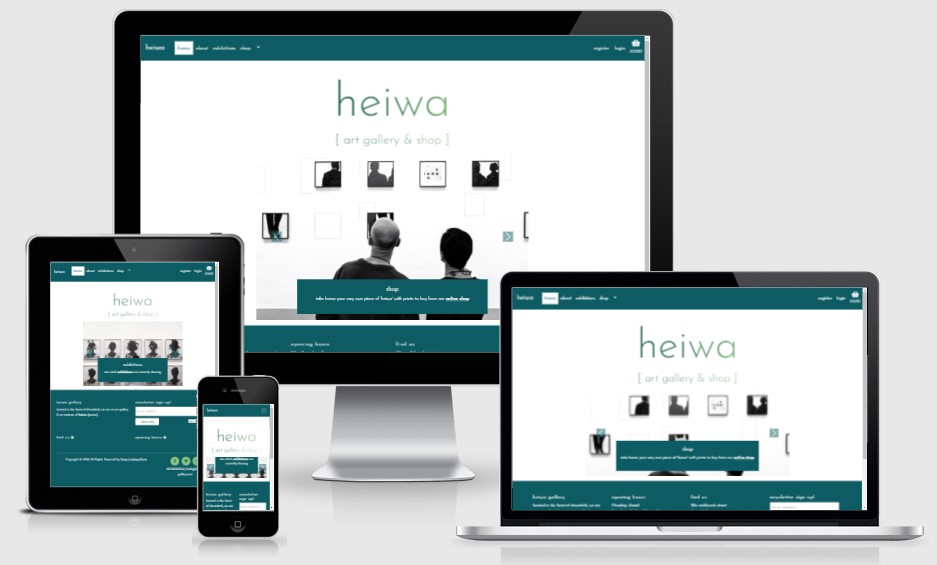
Due to the age group of the users, it is assumed that there will be an even split between users viewing the website on their mobiles phone and laptops. Therefore creating something responsive is integral to the design, I have used Bootstrap grids and elements & custom CSS to allow for this.
Please find all my defined user stories & their acceptance criteria here
- As a user I can intuitively navigate through the site so that I can view desired content.
- As a user I can find a navigation bar and footer so that I can see what content there is on the website.
- As a user I can get key information about the gallery from the landing page so that I can spend less time having to search for information.
- As a user I am notified about any changes I have made so that I have a clear understanding of what has been completed/updated/failed.
- As a user I can access the website on both mobile and desktop so that I can view the information regardless of my location.
- As a user I can view all products that are in stock and available to buy.
- As a user I can easily find all of the relevant information about the products so that I can make informed decisions before purchasing.
- As a user I can filter the prints by categories to have more control over what I'm viewing.
- As a user I can easily identify prints that are not in stock so that I can avoid later frustration if they are not available.
- As a user I am able to process orders by making a card payment.
- As a user I can view a breakdown of their current basket so that I can make changes if required.
- As a user I can only add prints to my basket that are in stock so that I can avoid later frustration if my order cannot be fulfilled.
- As a user I receive order confirmations to be sure my order has been processed.
- As an admin user I can log in so that I can access the site's backend.
- As an admin user I am able to log in to see the product management page so that I can make changes in the front end.
- As an admin user I can add/edit/remove items from the product model so that I can make sure the website is up to date and accurately reflects what is being sold.
- As an admin user I can update the stock levels for the products so that customers are only able to purchase items in stock.
- As a user I can register & login so that I can view my orders.
- As a user I can access my profile page so that I can view my previous orders & wishlist.
- As a user I can easily see if I'm logged in or not so that I can choose to log in or log out.
- As a user I am prompted to register for an account so that I can create an account and receive the benefits of having a profile.
- As a user I can log in so that I can auto-populate forms with my information on the site.
- As a user I can save my default billing/shipping details so that I can save time making my next purchase.
- As an admin user I can add/edit/delete exhibitions to be displayed on the website.
- As a user I can find the date, description and entry fee for each exhibition so that I can make informed decisions about attending.
- As a user I can sign up for a newsletter to receive up to date information regarding exhibitions and items for sale.
- As an admin user I conducted research and implemented SEO keywords to increase traction to my website.
- As an admin user I have created a FB shop page to increase traction to my website.
In order to achieve the desired user & business goals, the following features will be included in this release:
- Responsive navbar that will navigate to the various pages throughout the site
- Landing page with image carousel with information to be found on the website
- Shop page, that displays all prints available for purchase with the option to filter on the print category.
- Exhibitions page, that displays exhibition information for the gallery.
- My Account page, for logged in users to update their details which in turn updates the user model. User is also able to view their previous orders and wishlist.
- Register/login feature using Django AllAuth so that users can create an account.
- Custom 404 and 500 error pages.
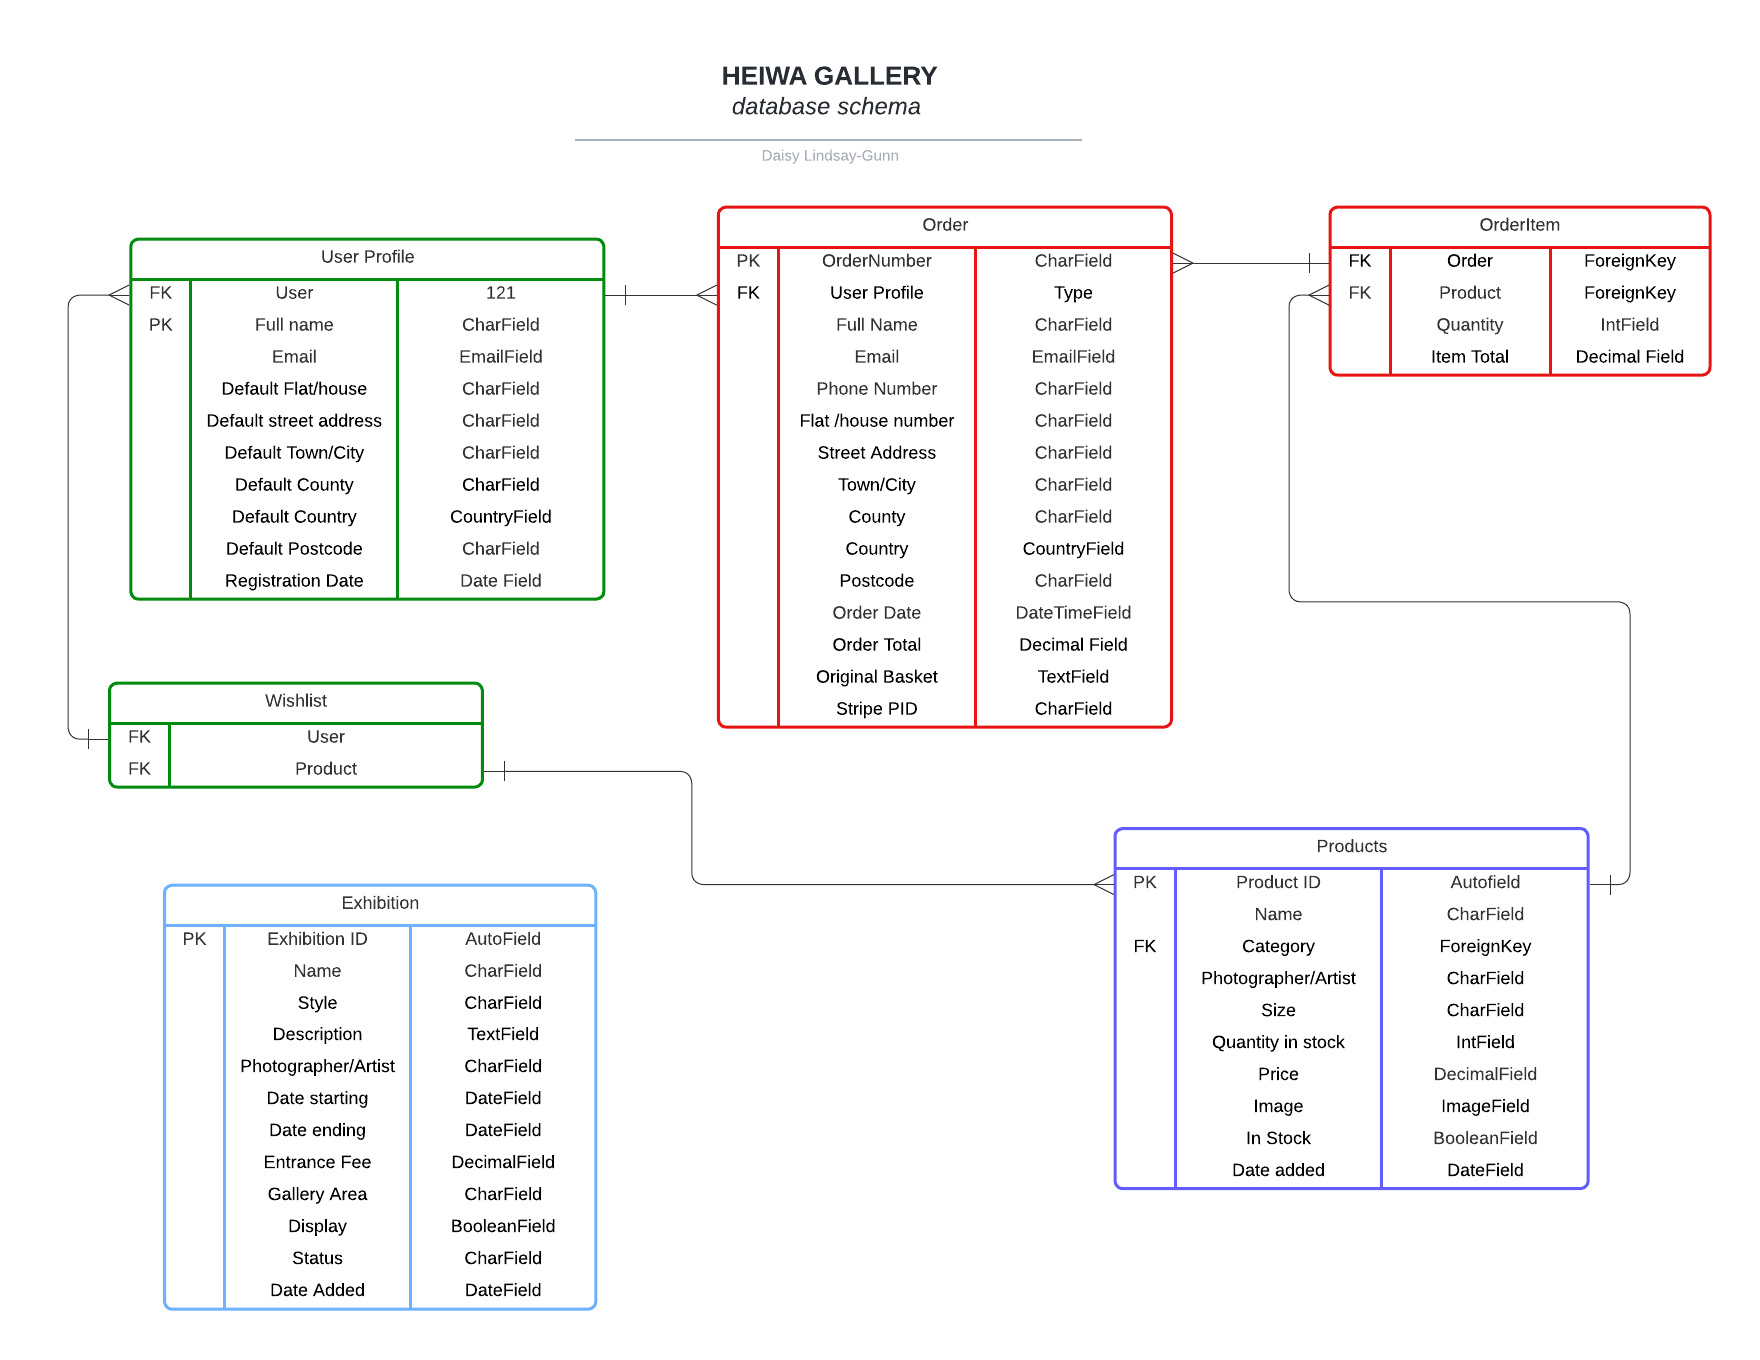
I opted to connect to the Heroku Postgres database from the beginning which is provided by Heroku as an add-on. For almost all of the apps (aside from home) I have created models, the Entity-Relationship Diagram below shows how the database models relate to each other:
This app enables authenticated users to save their information so that when they are logged in the order form is pre-filled, creating an improved user experience. The UserProfile model has a one-to-one field that is linked to the Django AllAuth user account, upon logging in the model method create_or_update_user_profile creates the profile if it isn't already present in the model.
The second model in this app is UserWishlist, this model has two foreign keys, one relating to the UserProfile and the other is Product. This model stores the products that the user wants to be saved to their wishlist. This information is then displayed in the wishlist view.
This app controls the products that are displayed in the online shop. I have created two models to store the necessary data: Products & Category.
Products enables individual products to be added to the database in order for them to be purchased via the online shop. Only admin users are able to access this functionality and it can be done from the front end using the add_product view. This model has one FK which relates to the second model in this app, the category.
Category stores the various category types of the artwork/prints on sale, this allows the user to filter the shop page by the category if they are looking for something specific.
The checkout app is used solely for the user to make purchases via the online shop; this app contains two models, Order & OrderItem.
OrderItem contains all of the information regarding the products that have been purchased as part of a specific order. It has a foreign key to Product & Order, it also contains the quantity purchased of that product and then the item total. This information is used to calculate the total cost for the order. For the product FK I chose to use on_delete=models.CASCADE, using the 'original basket' field the admin can still see what the original purchase was.
Order contains all of the relevant address information for billing/shipping, a foreign key to the UserProfile, email & phone number. It also contains information regarding the payment itself, the stripe PID, original basket contents (so that if the order is changed, the admin user can see what was purchased initially) and a boolean field called order_success that updates when the order is successful. Each order has an order number which is automatically generated when a new order is added to the database using UUID.
There are some other model methods used at various points, order.full_address collates all of the users' address details in one f string, used when sending the confirmation email to the user.
update_total calculates the overall total depending on the order items linked to the order, ensuring the value is always correct.
The exhibitions app contains one model - Exhibitions - that enables the admin user to add exhibitions to the database in order to be displayed on the website. This is a self-contained model with no connections. The information added is name, description, artist/photographer, the start and end date & a boolean field called 'display' which allows the admin to decide what is displayed on the website. There are a few model methods in place that calculate the 'status' depending on the dates input, which is called every time the exhibitions page is loaded to ensure that the status is correct.
There is also a date validation method that is called when the admin user adds/edit a product to ensure that the end date is not before the start date.
Please note the actual website differs slightly from the original wireframes.
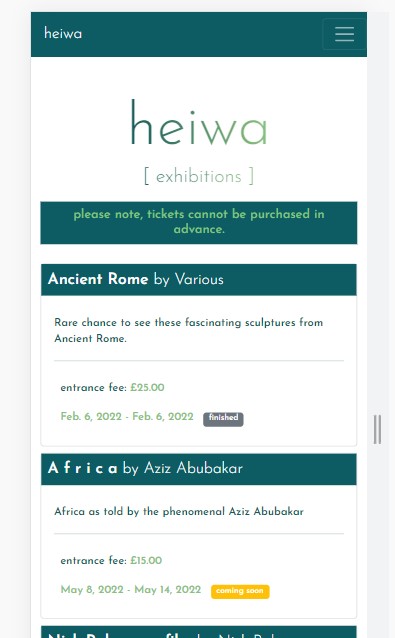
The theme of simplicity follows through to the design, I've used bootstrap columns and rows to divide the pages and tried to keep the same layout throughout so that the user has a sense of ease when on the various pages. Some content has been hidden on mobiles to ensure that there is never any information overload or that the screen is taken up by content not completely required.
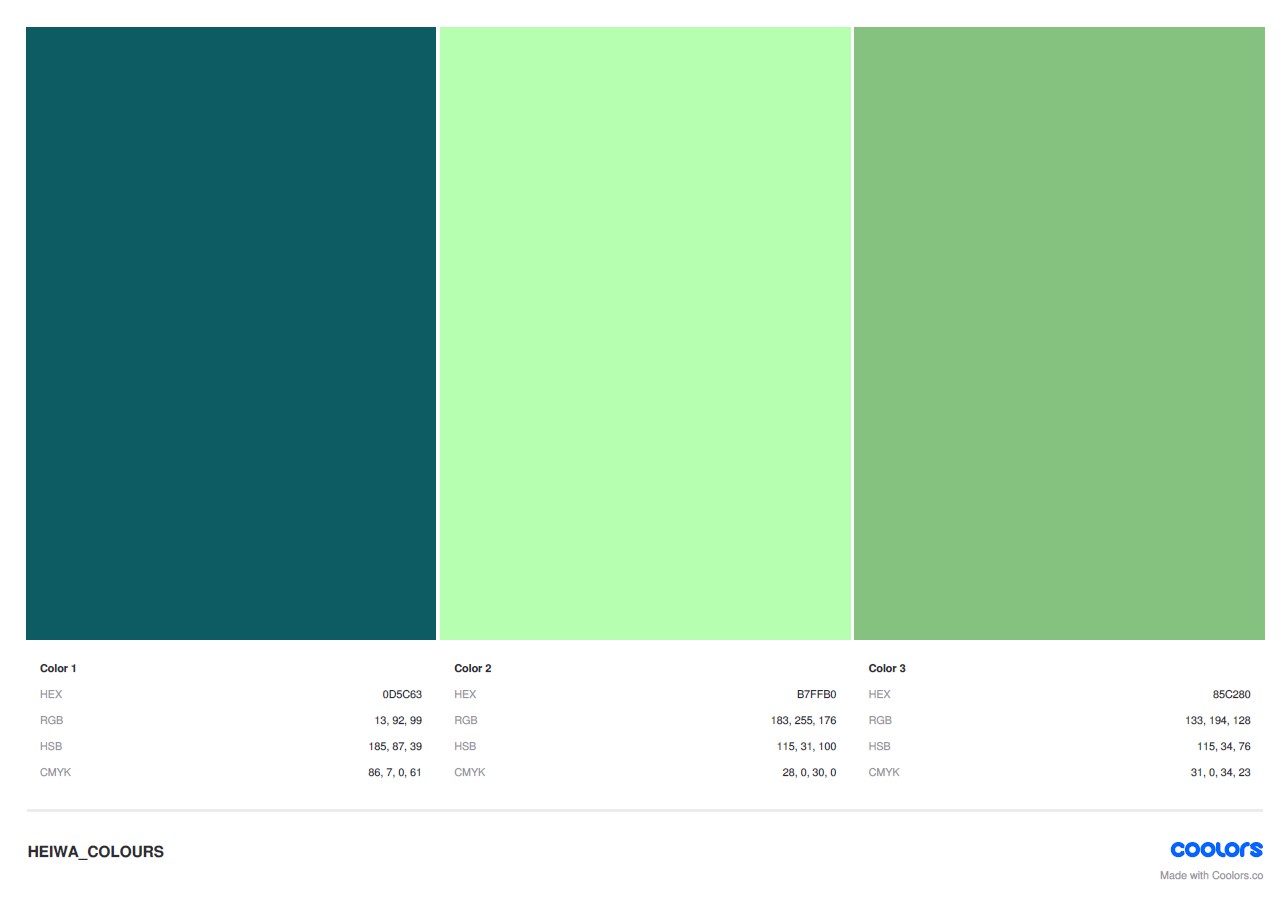
I have chosen the name 'heiwa' for the name of the gallery, which is the Japanese word for 'peace', this choice of name heavily influences the design choices that I have made. I started by researching which colours in Japanese culture represent peace, which is why I have chosen blues and greens to use as my accent colours and the colour for the main logo/header. The main bulk of the website will incorporate these two colours and feature flecks of black and white. As this is an art gallery the design and feel of the website echos the minimalism of the art displayed in the galleries and continues the theme of peace.
For the font, I have chosen 'josefin sans' as I felt it continued with the peaceful theme and I wanted to carry this feeling throughout the entire project; this is also why I have opted to use lowercases throughout.
Heiwa's website is a business to customer e-commerce platform, built and designed to sell products to the user & inform customers about exhibitions at the gallery. Before beginning this project I wrote a marketing plan which can be found here:
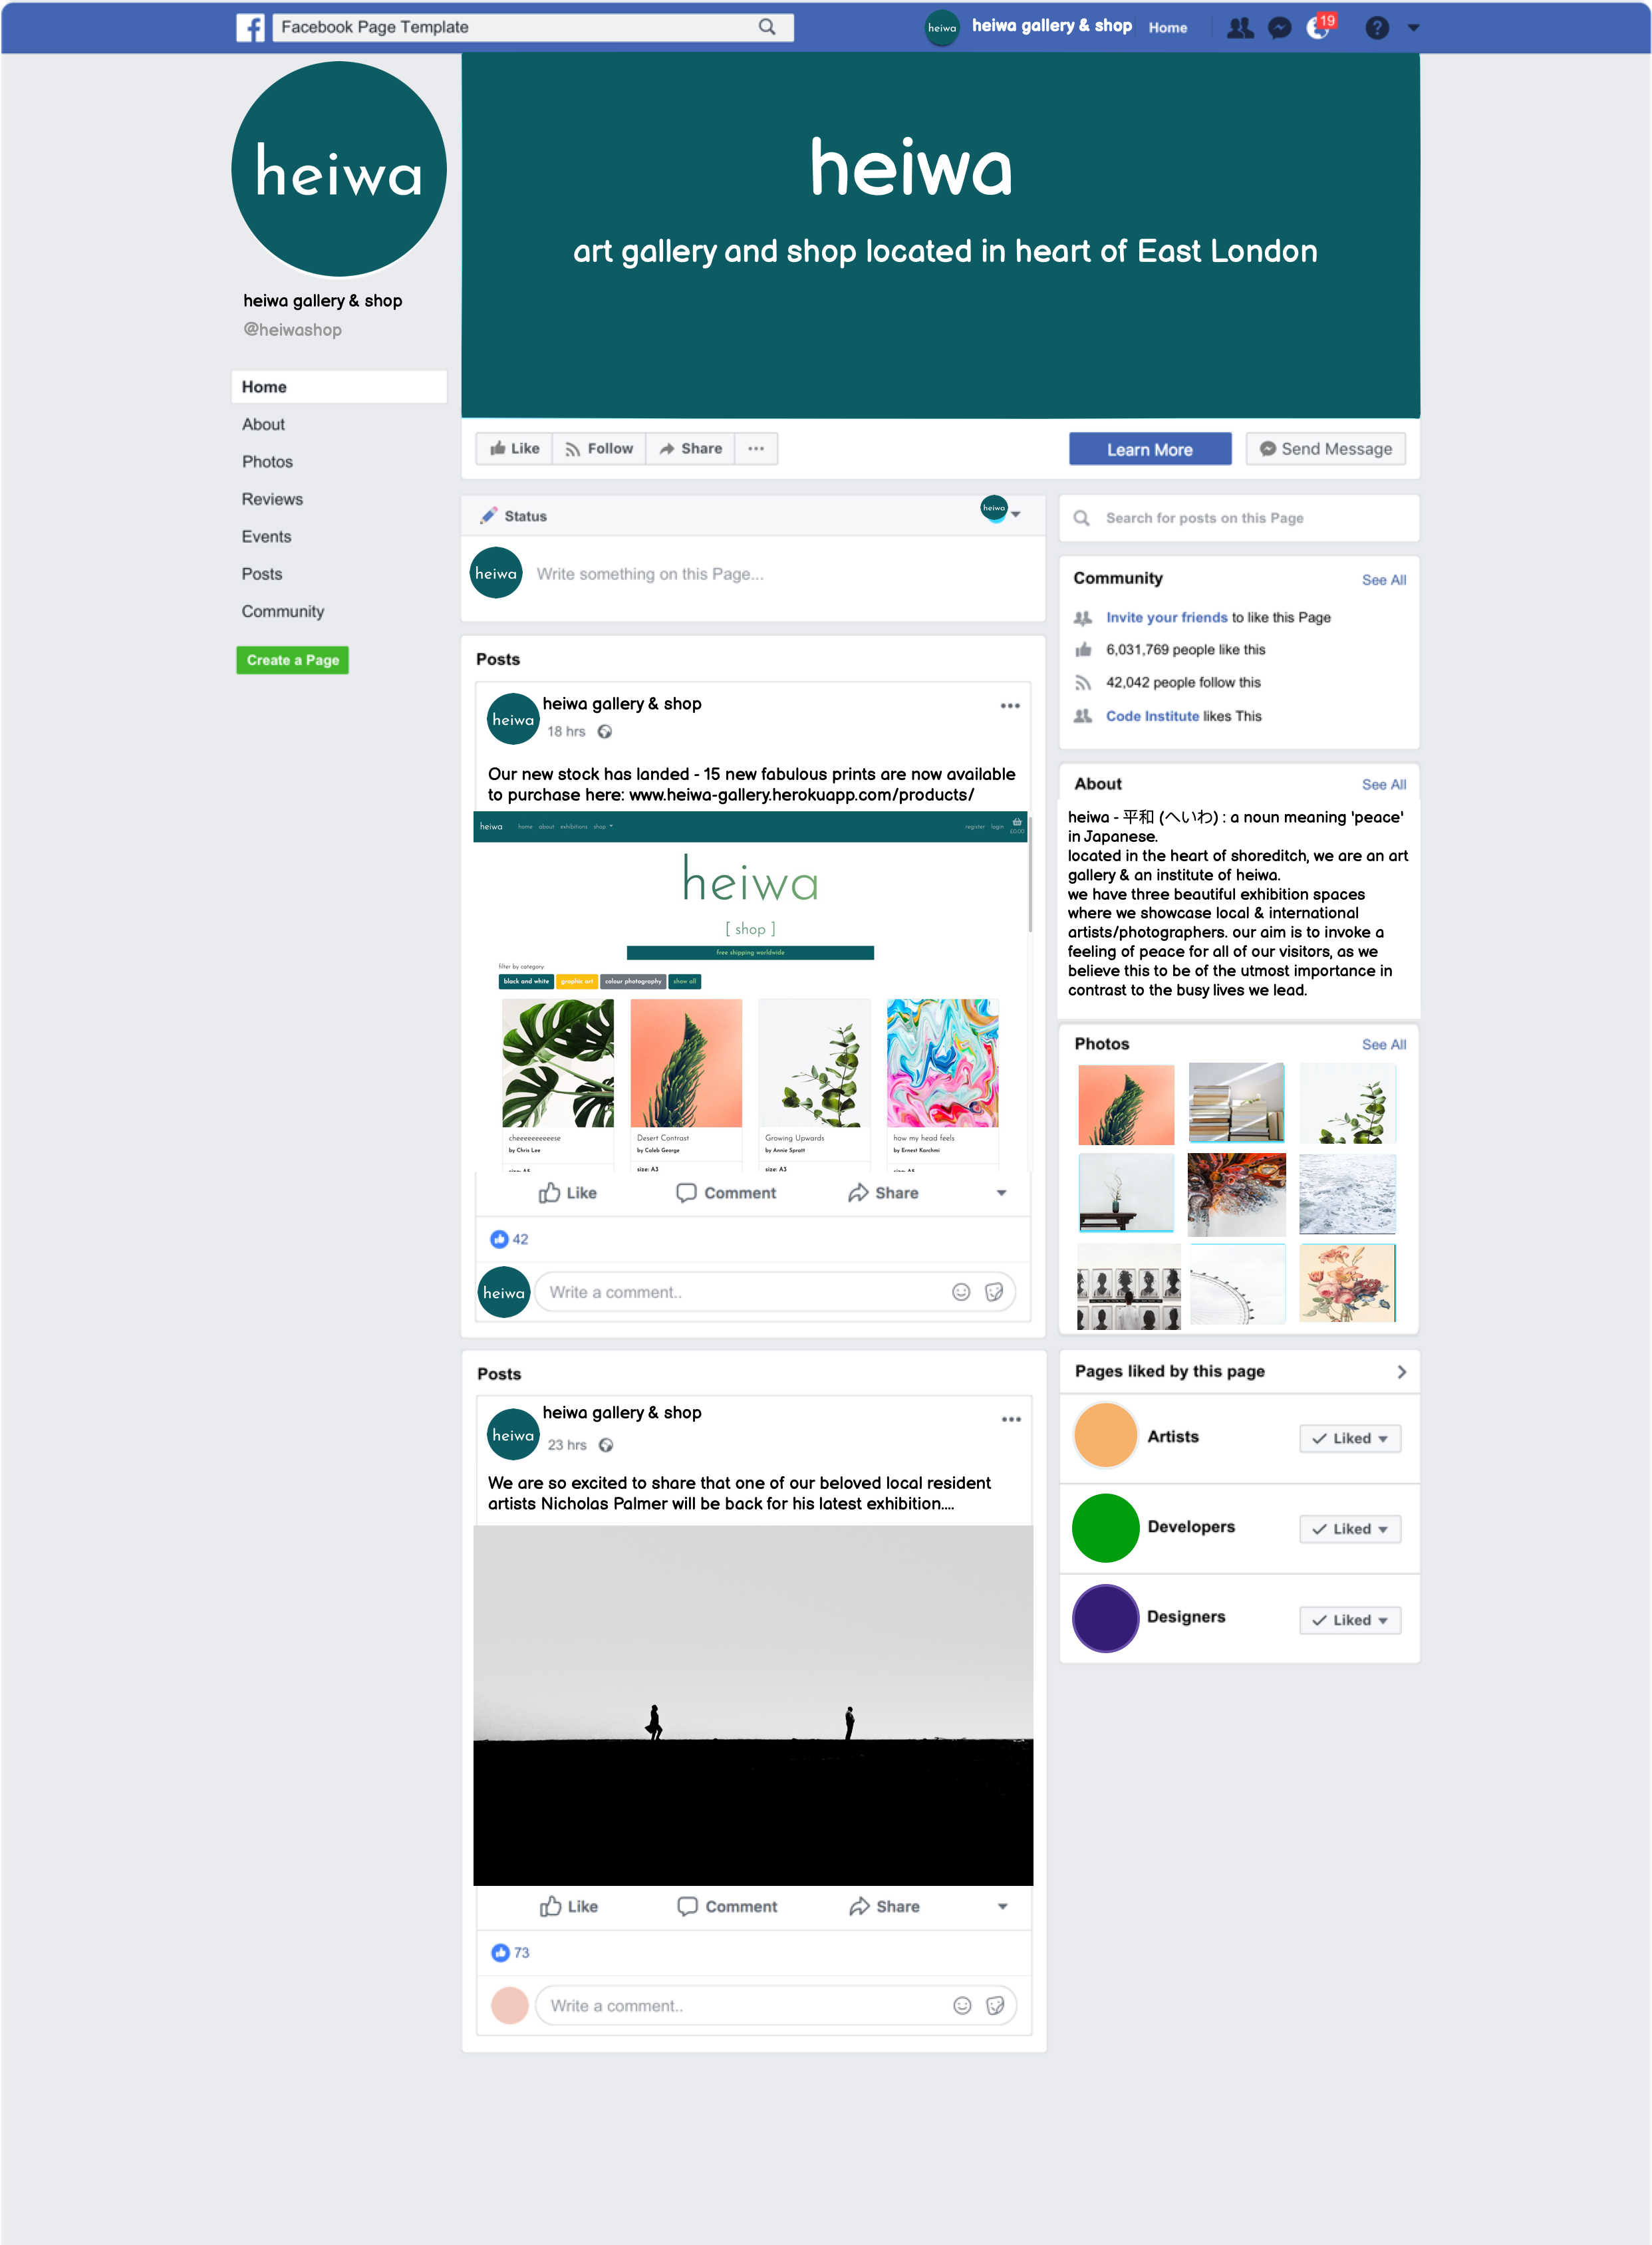
To further enhance sales there is also a heiwa gallery Facebook page, that will display information about new exhibitions or prints that are for sale:
Users are also able to subscribe to receive the gallery's newsletter, using the MailChimp form found in the footer.
If the user is logged in and has previously subscribed then the form is hidden to provide clarity to the user. I have achieved this using a call to the MailChimp API to retrieve a list of all of the emails currently registered if the email address of the logged-in user is present in this list then the following message is shown:
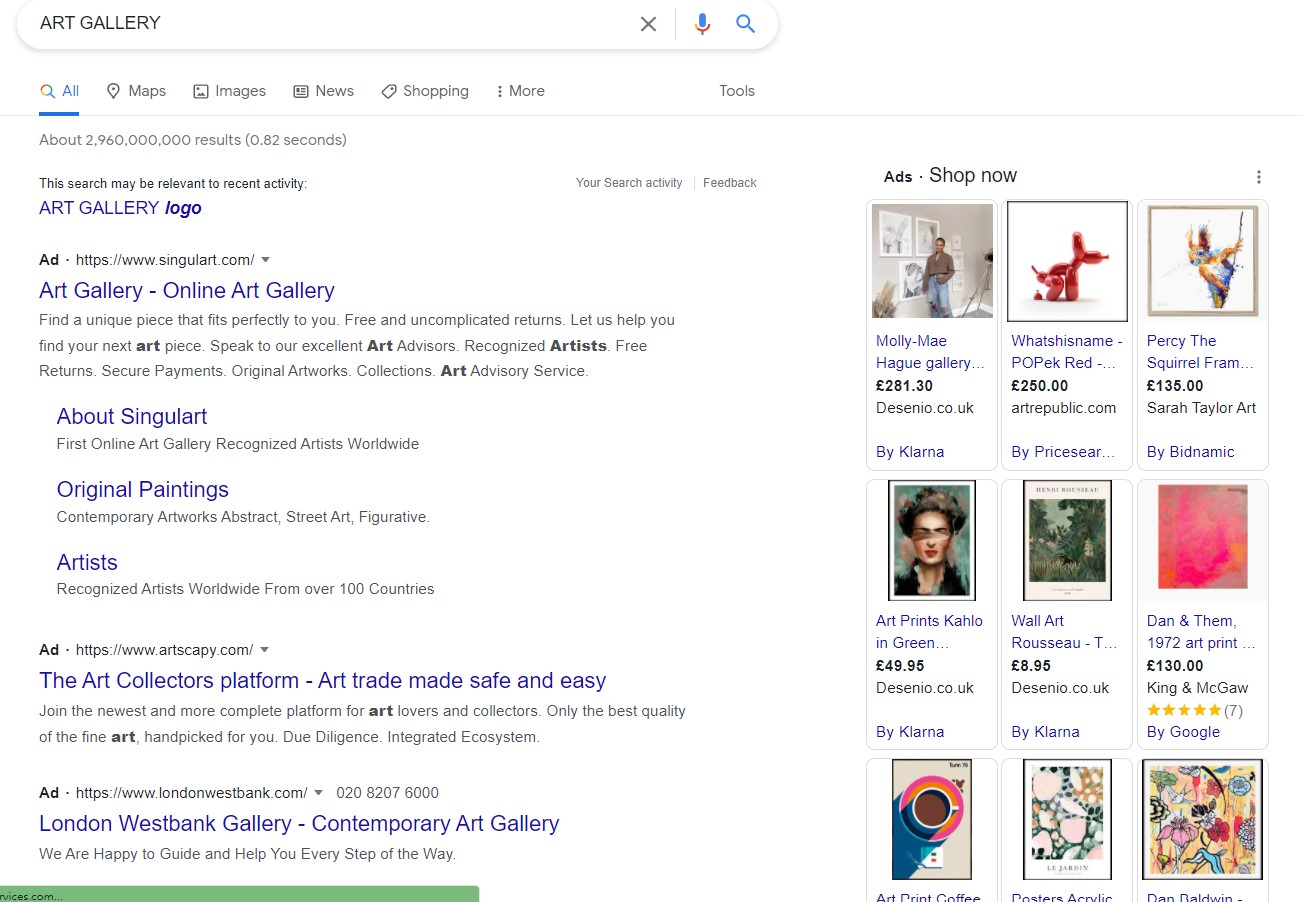
I conducted SEO research to decide on the keywords and phrases that would be used across the website, I wrote a list of as many words and phrases I could think of and then using Google, I searched by these keywords to see the sort of websites that were returned.
I used this research to condense my list:
In addition to my research, once the bulk of the website had been built I used an online tool called Semrush which provided a report on ways that I could improve my SEO. This report showed that each page needed its own title so I implemented this. I chose the keep the meta tags and descriptions the same across each page as the content wouldn't have varied too much and there would have been a lot of replication.
I have implemented a fixed navbar that remains at the top of the screen at all times, allowing the user to easily navigate through the website. Furthermore, it is responsive and so it collapses into a burger menu on smaller screens.
On a laptop it is split into two sections, on the left, are the pages relating to the gallery and on the right are links to the user profile, basket and for admin users, the admin section. The options displayed vary depending on the user and if they are logged in.
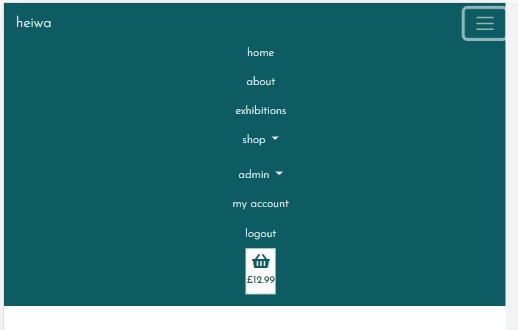
On mobile, the menu is one list displayed in the centre:
Active nav links have a white background with a green dashed border to indicate to the user which page they are on, further enhancing the usability and ease of the website.
There is also a basket icon with a subtotal displayed below it, to allow the user to keep track of the cost of the products in their basket.
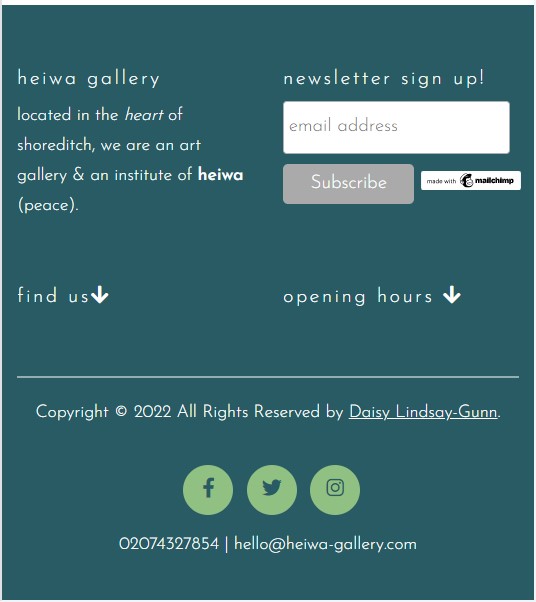
The footer has the same colour theme as the navbar & features key information about the gallery. I wanted this information displayed as part of the footer so the user can find it, should they need it, at any point in their customer journey.
I have used JavaScript and JQuery to hide elements of the footer when displayed on mobile as I felt it was too long and took up too much space. I have also taken advantage of bootstrap column re-ordering, allowing the footer to be as small as possible.
Also featured is a newsletter sign up form that uses Mailchimp and social media icons to take the user to Facebook/Twitter/Instagram.
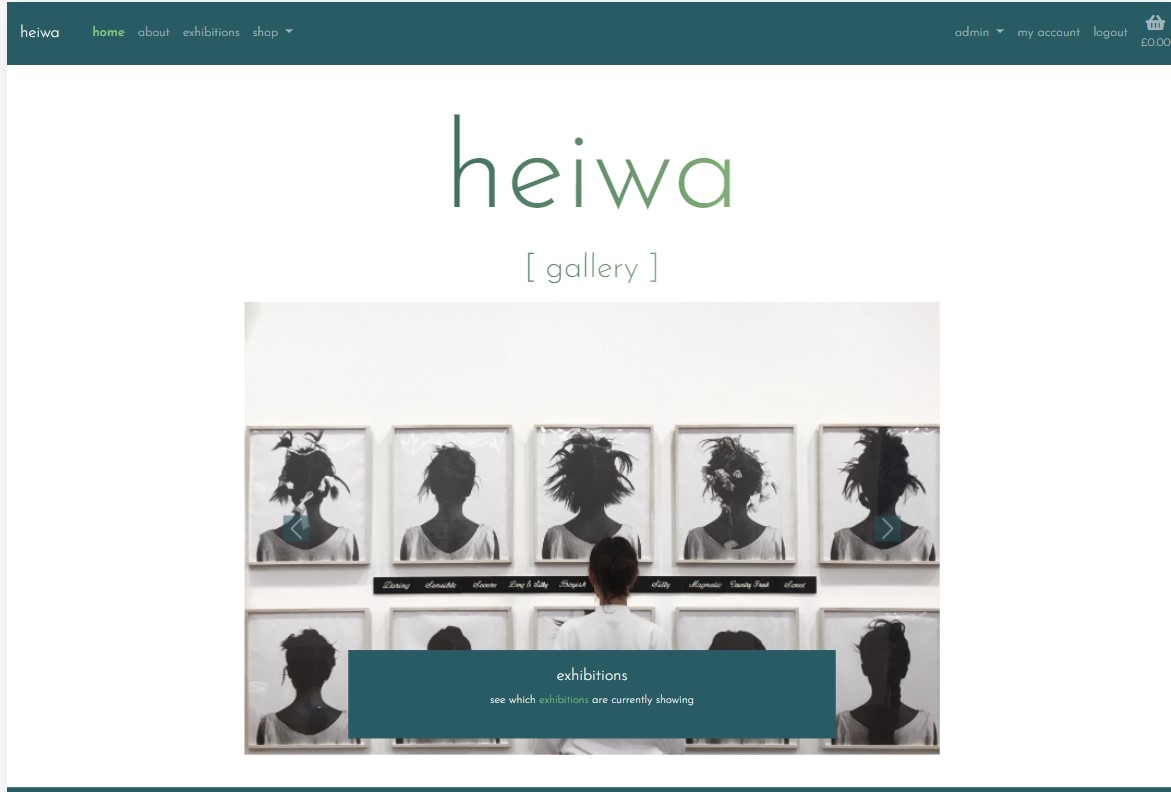
The home page, in keeping with the peaceful theme, is very simple. There is an h1 title followed by an h2 subtitle with the page name. Below is an animated bootstrap carousel, that provides information and links to the main sections of the website - 'About', 'Exhibitions' & 'Shop'.
The images used in the carousel are black and white so as not to cause any distraction or major clash with the blues & greens.
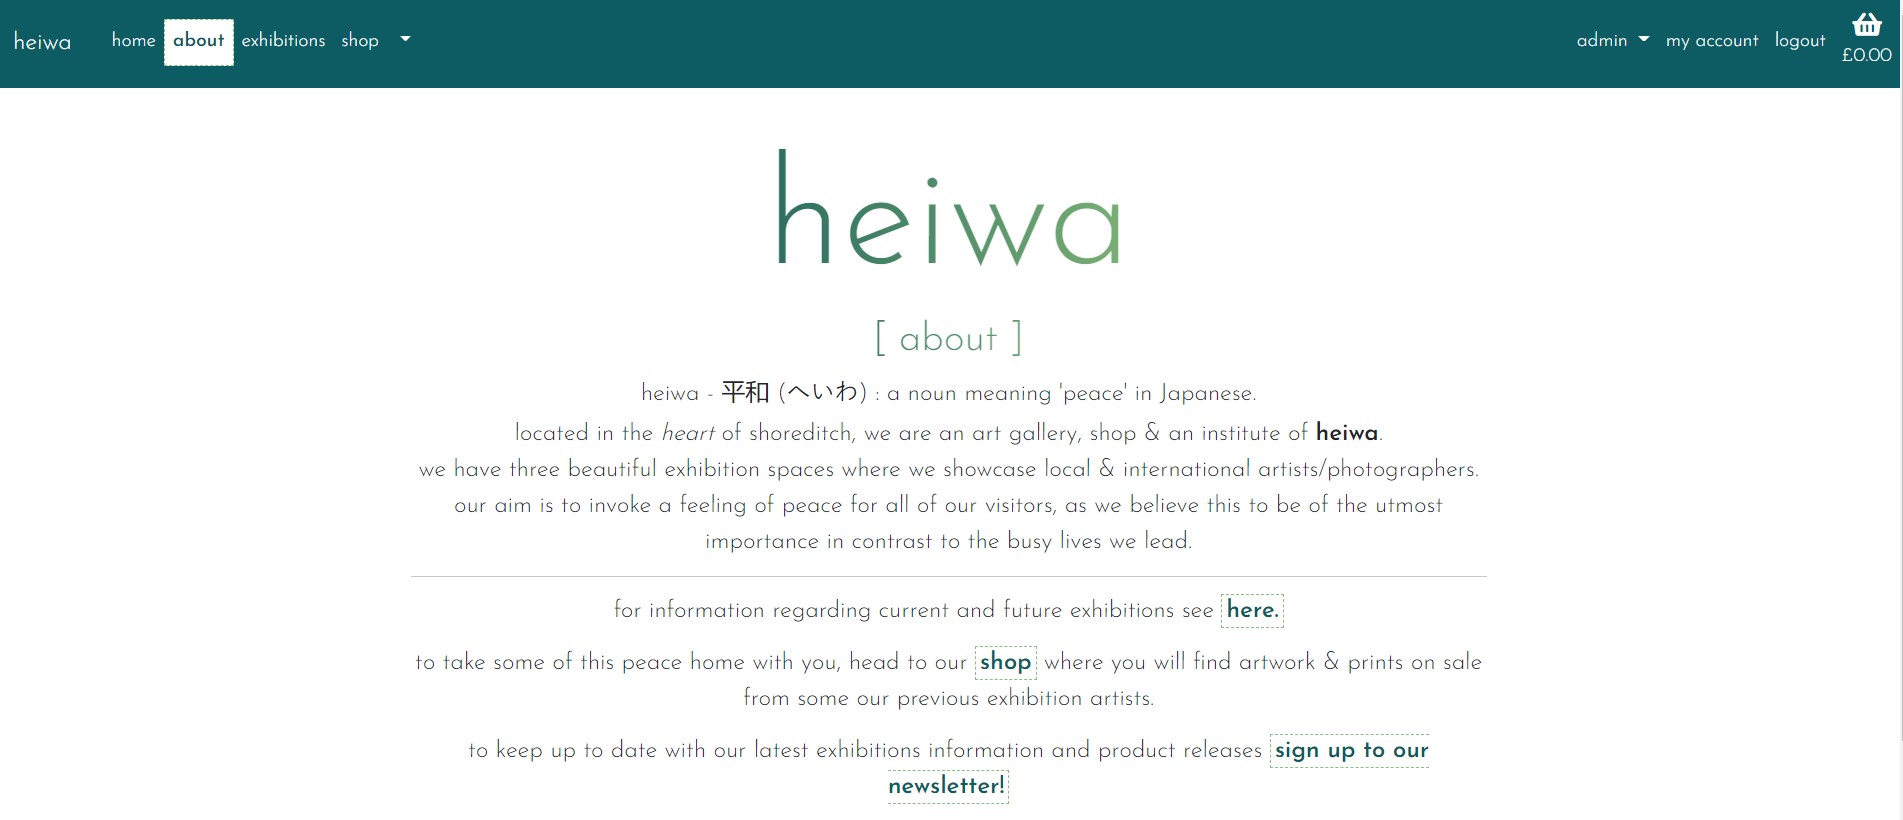
The about page provides an insight into the gallery, their ethos and an explanation of 'heiwa'; there is also a link to the exhibitions page and shop to encourage the user to continue exploring the website and to increase the chance of sales.
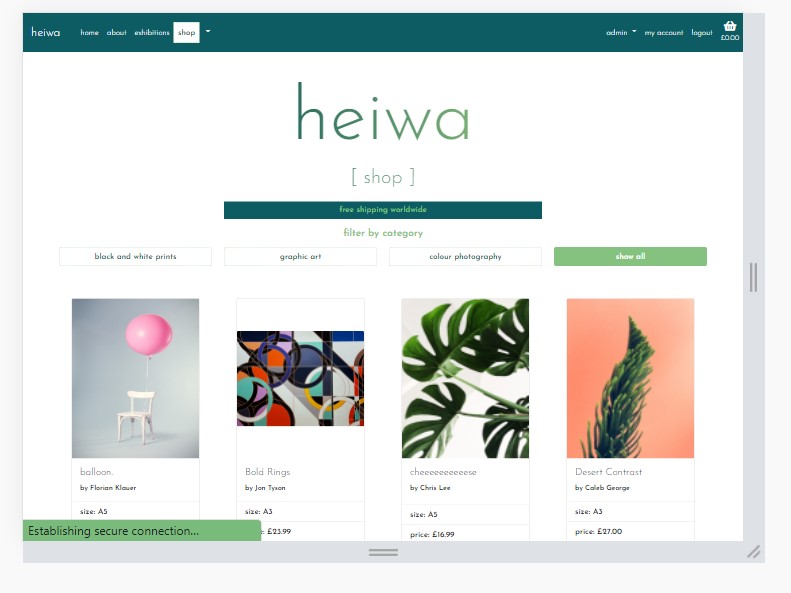
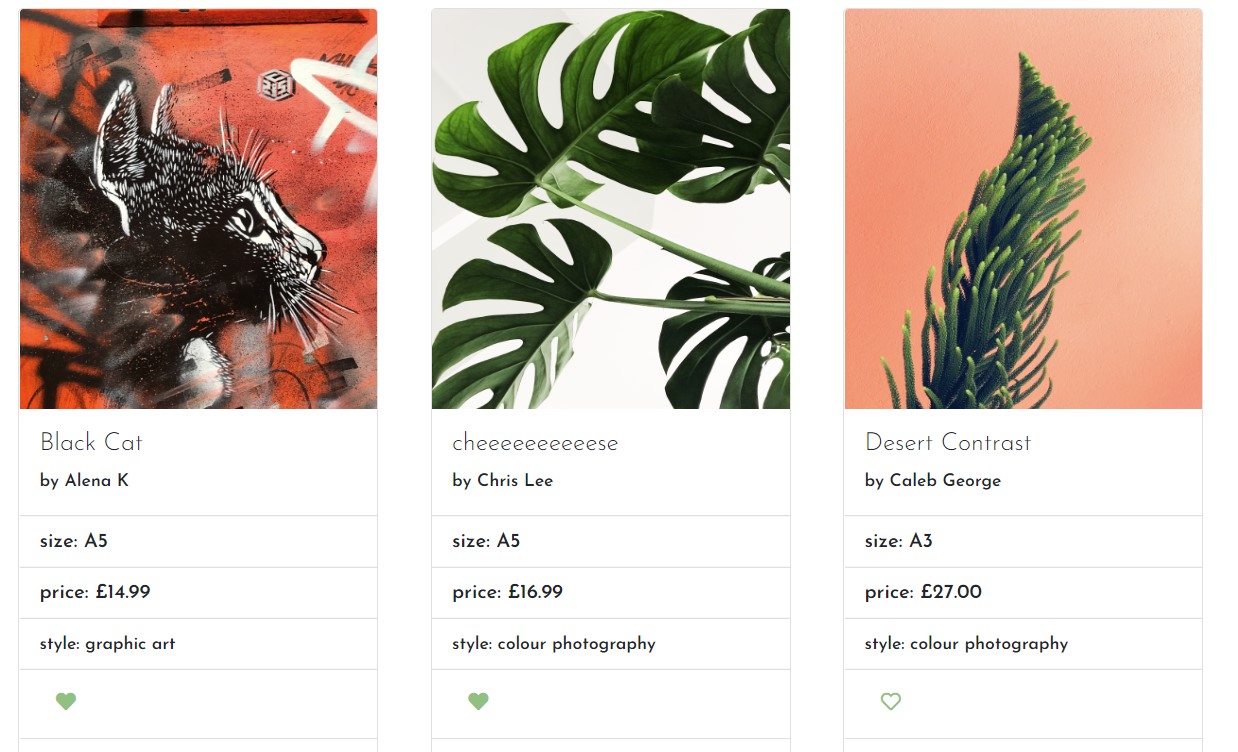
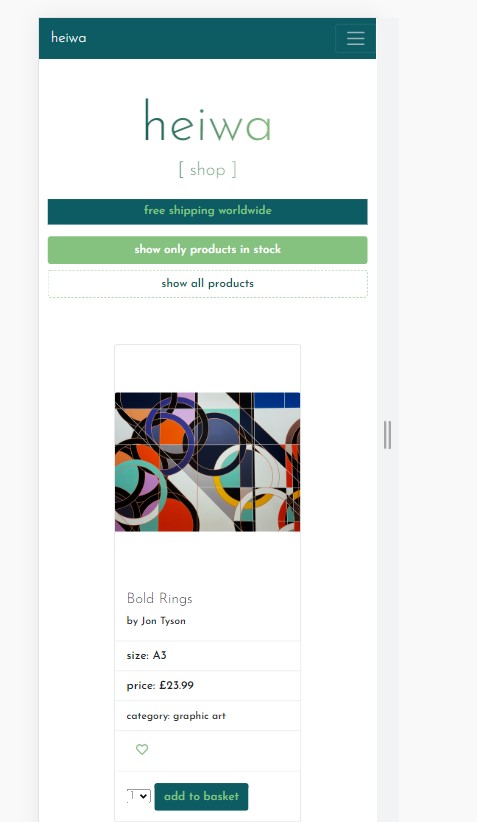
This page displays all of the products sold by the gallery, displayed in a grid of bootstrap cards, each product has an image, product title, photographer or artist name, size & price. Below this, there is a select box, with choices of the numbers 1-5 and a button to add the product to the basket.
Additionally, if a user is logged in then an empty love heart icon is displayed, once clicked this will add the product to the user's wishlist and the icon becomes solid. If clicked again the product is removed from the wishlist and the heart becomes empty again.
The products can be filtered by their respective category, this can be done in the navbar and also from the all products page (on a laptop). I chose to hide some the filter options on a smaller screen as I felt it took up too much of the page; I left the 'show only products in stock' and 'all products' on a mobile screen as I felt filtering out the not in stock products made a big difference to the user experience.
This filter sends a query to the database and only returns the products that have a category matching the id passed in the URL.
The cards and columns are all responsive so that on mobile there is the same functionality and the images aren't warped.
The basket page provides an overview of all of the items added by the user, the information is displayed in a table that has product name, image, quantity, price and subtotal. The user can amend the quantity of each product and also remove it whilst on this page and below there are buttons to proceed to the checkout or to keep shopping.
If there is nothing in the basket then there is no table is displayed, and instead a message that says 'your basket is currently empty.'
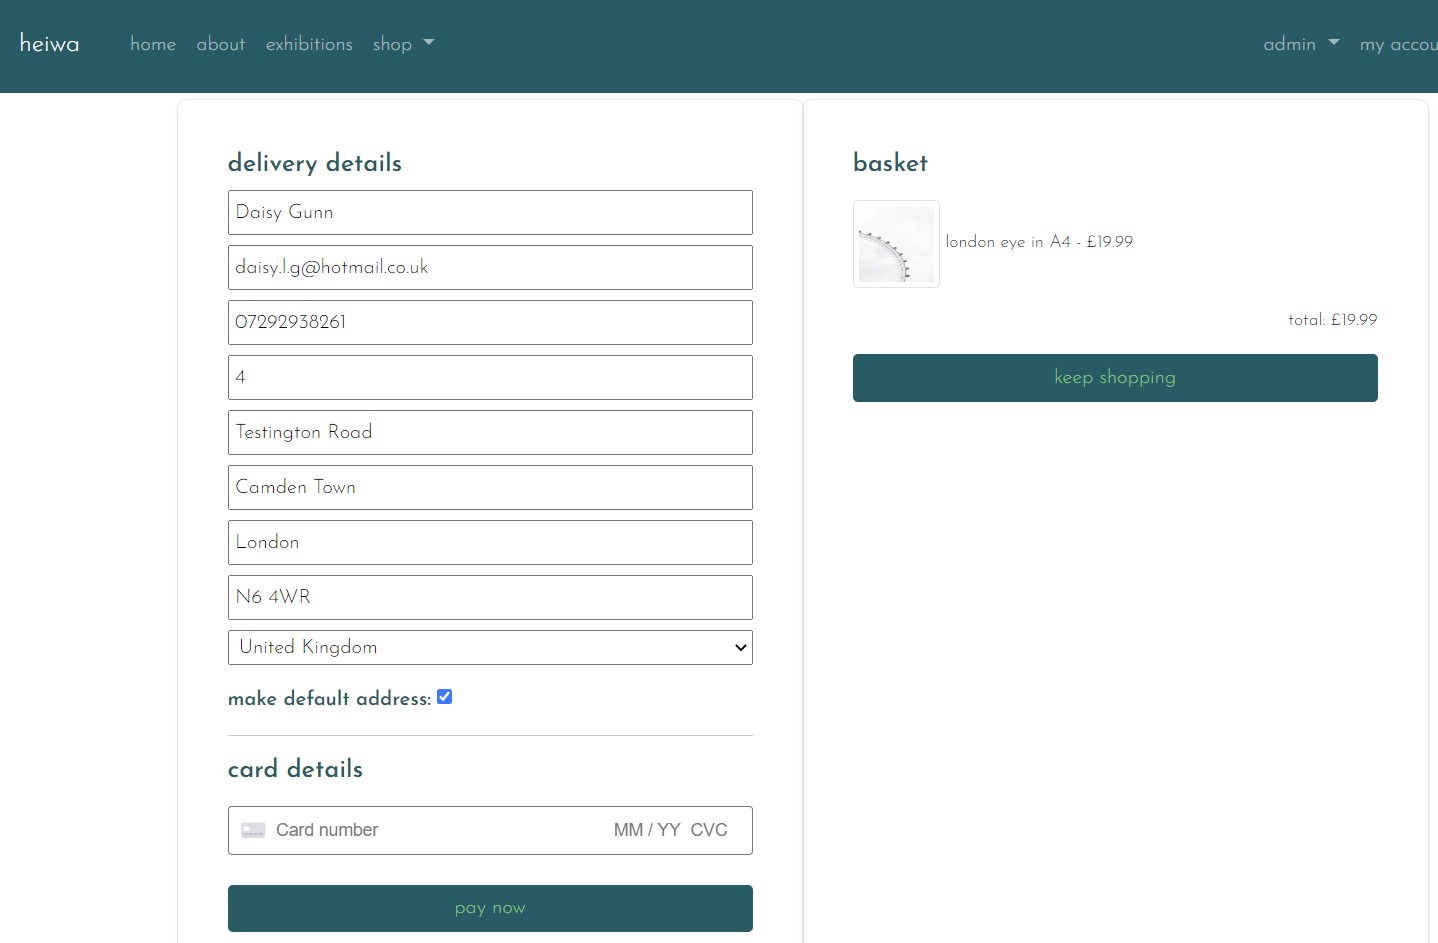
This page is where the user can complete their purchase, split into two columns, billing & card details on one side and their basket overview on the other. The forms are simple, with placeholders explaining what each input is for.
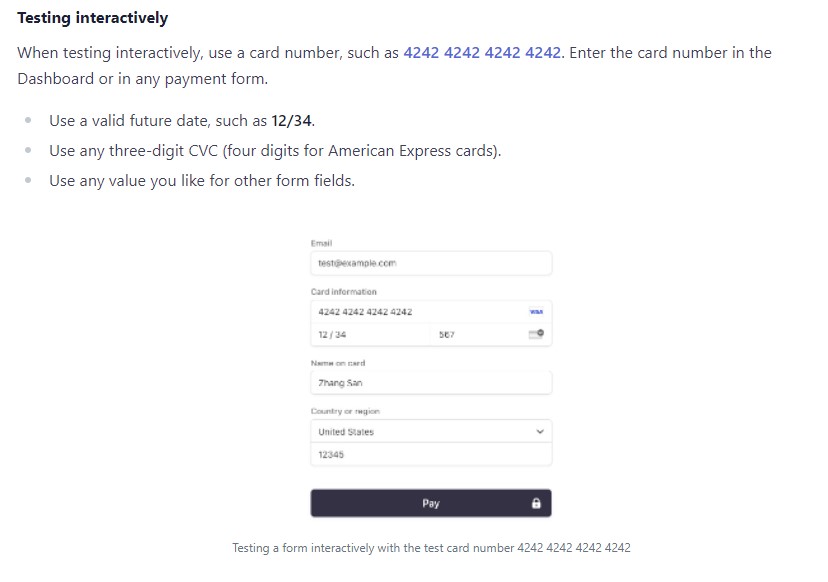
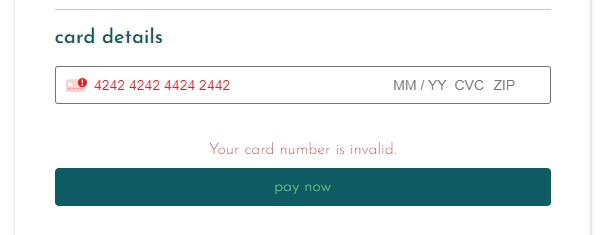
The card payment feature has been built using Stripe, to make test payments I have used the card details found in Stripe docs:
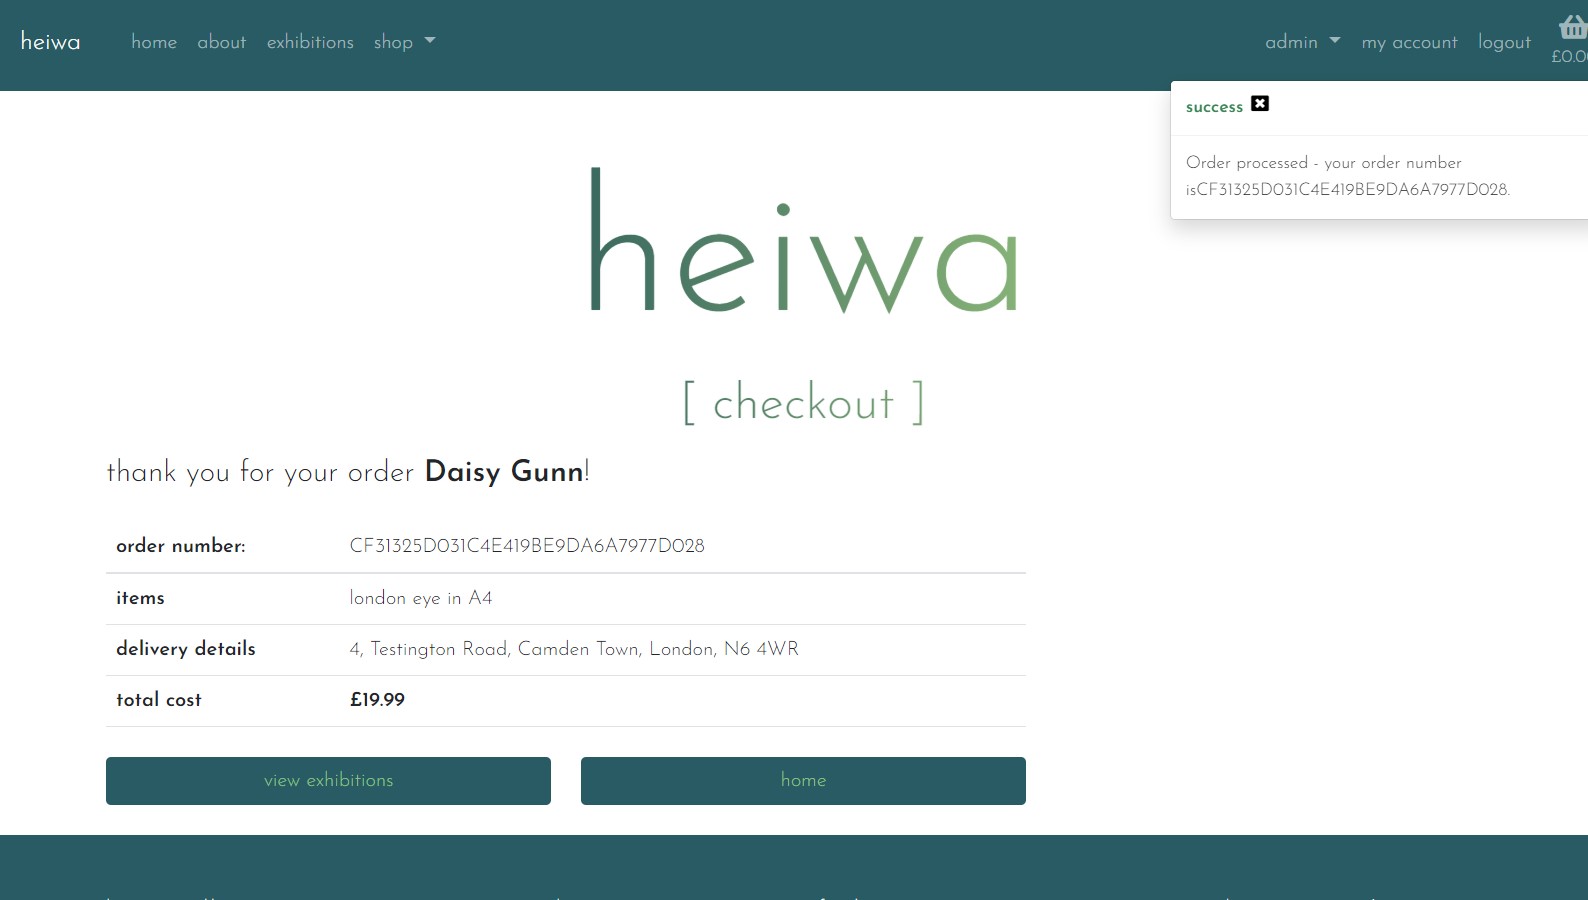
so upon submission of the payment form information is passed to stripe and then back, if successful the user is taken to the 'checkout success' page, which displays the order number and delivery details.
If the payment is not successful, the form does not submit, an inline error message is displayed and the user is able to rectify the issues.
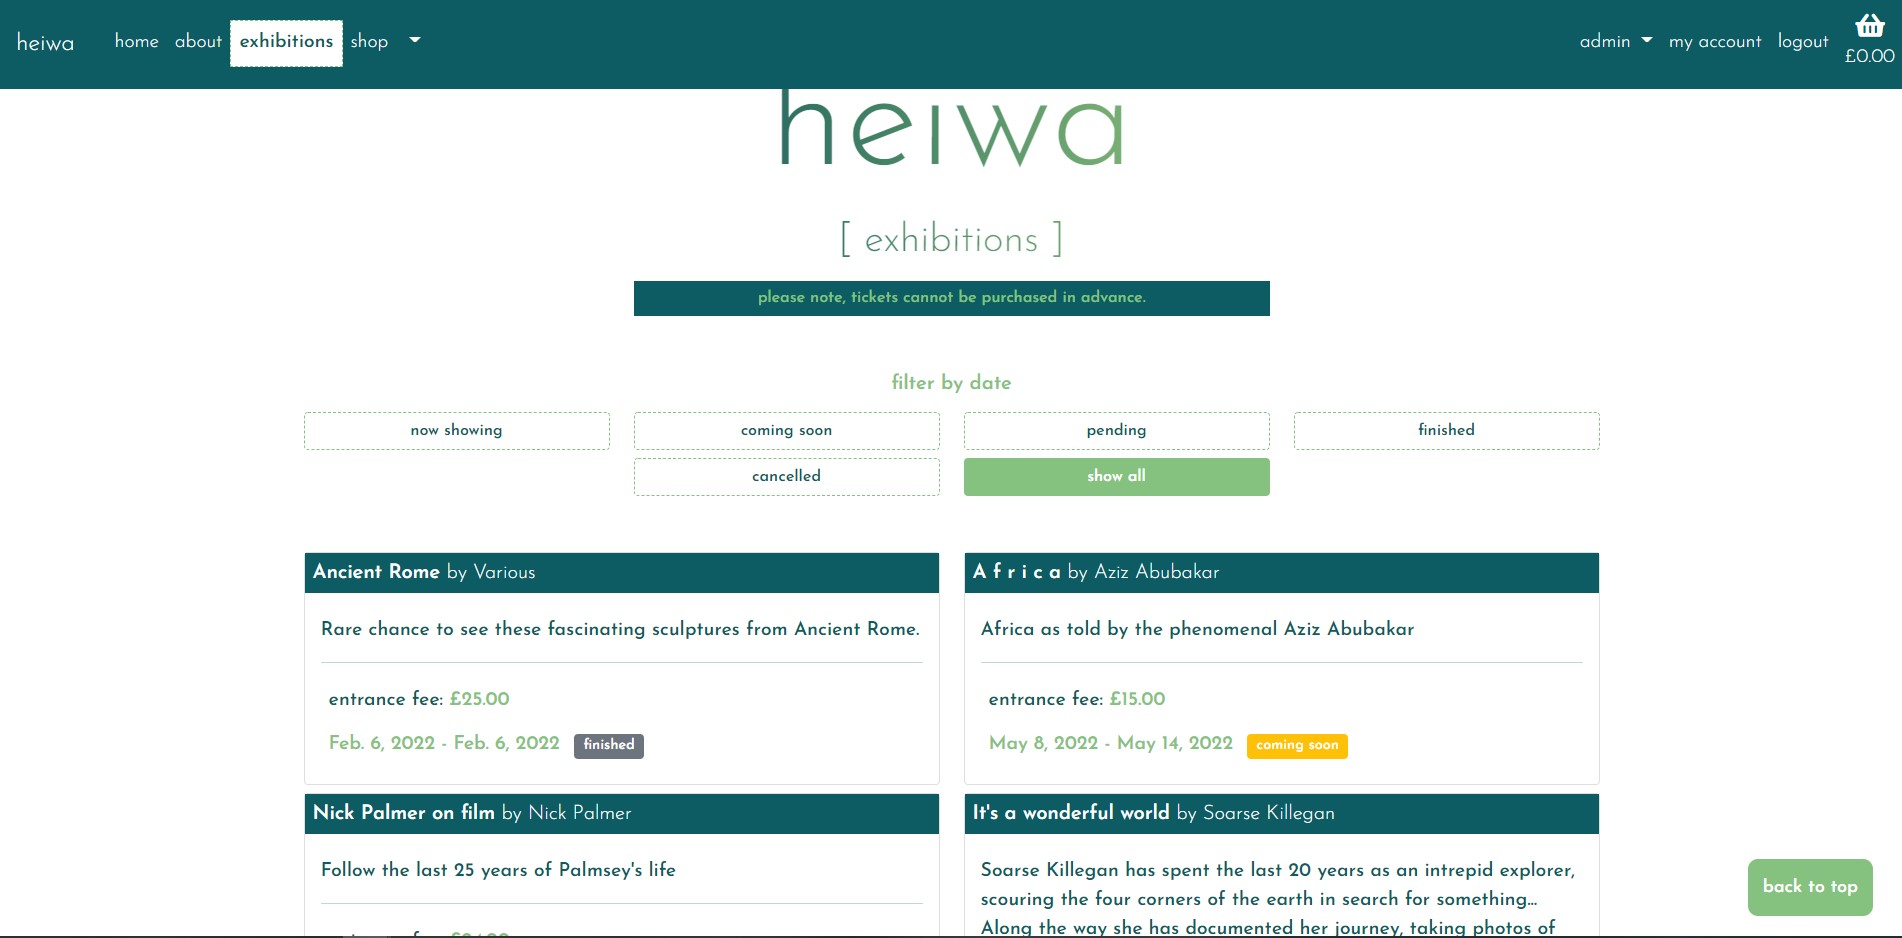
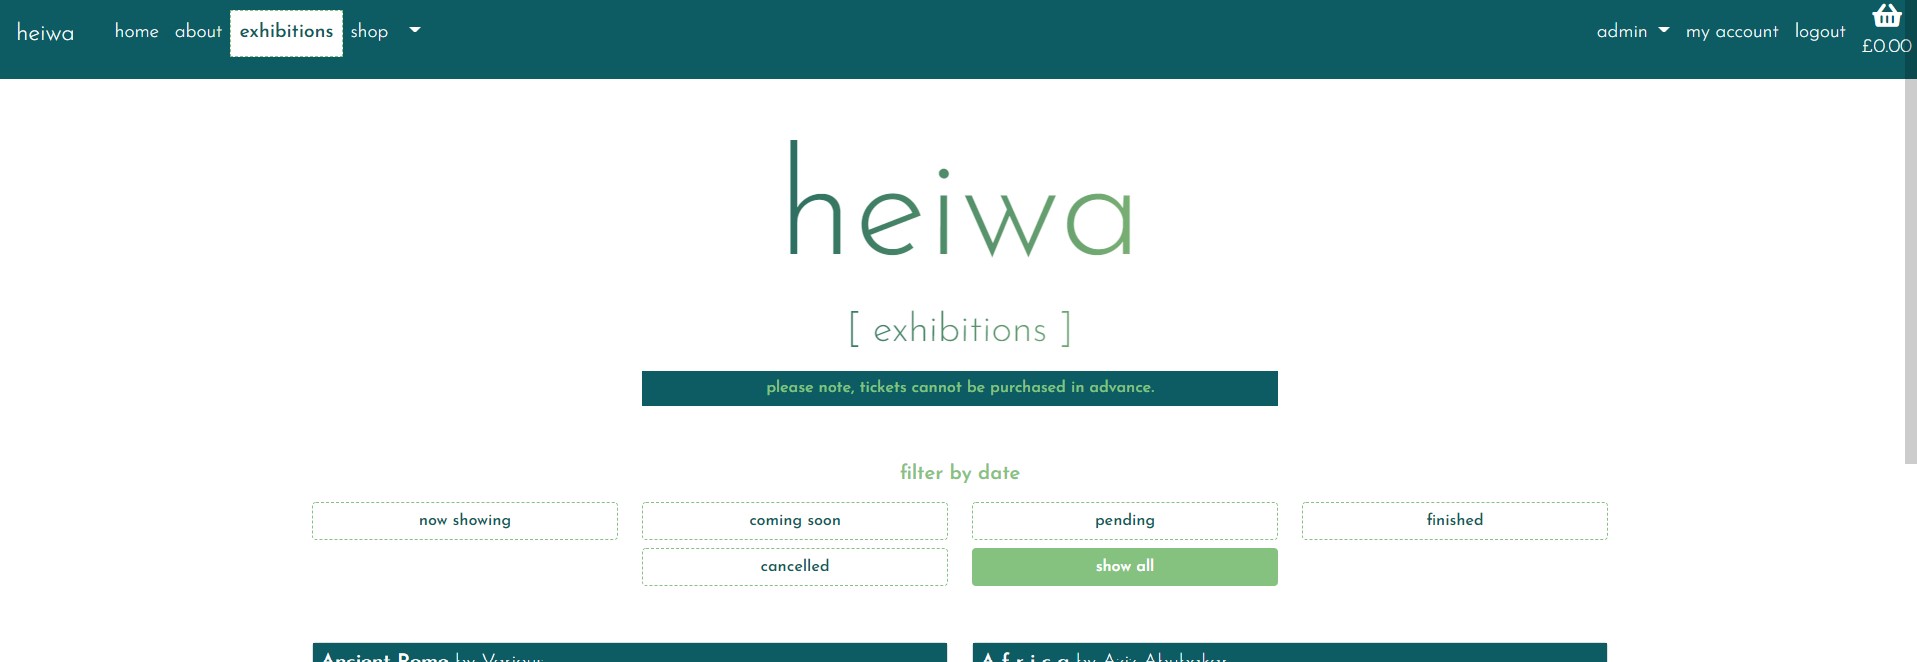
The exhibitions page displays all exhibition information, they are displayed in a bootstrap card with a title, description, entrance fee and the dates the exhibition is showing. There is also a status badge, so it's clear without looking at the dates if it is currently showing or coming soon.
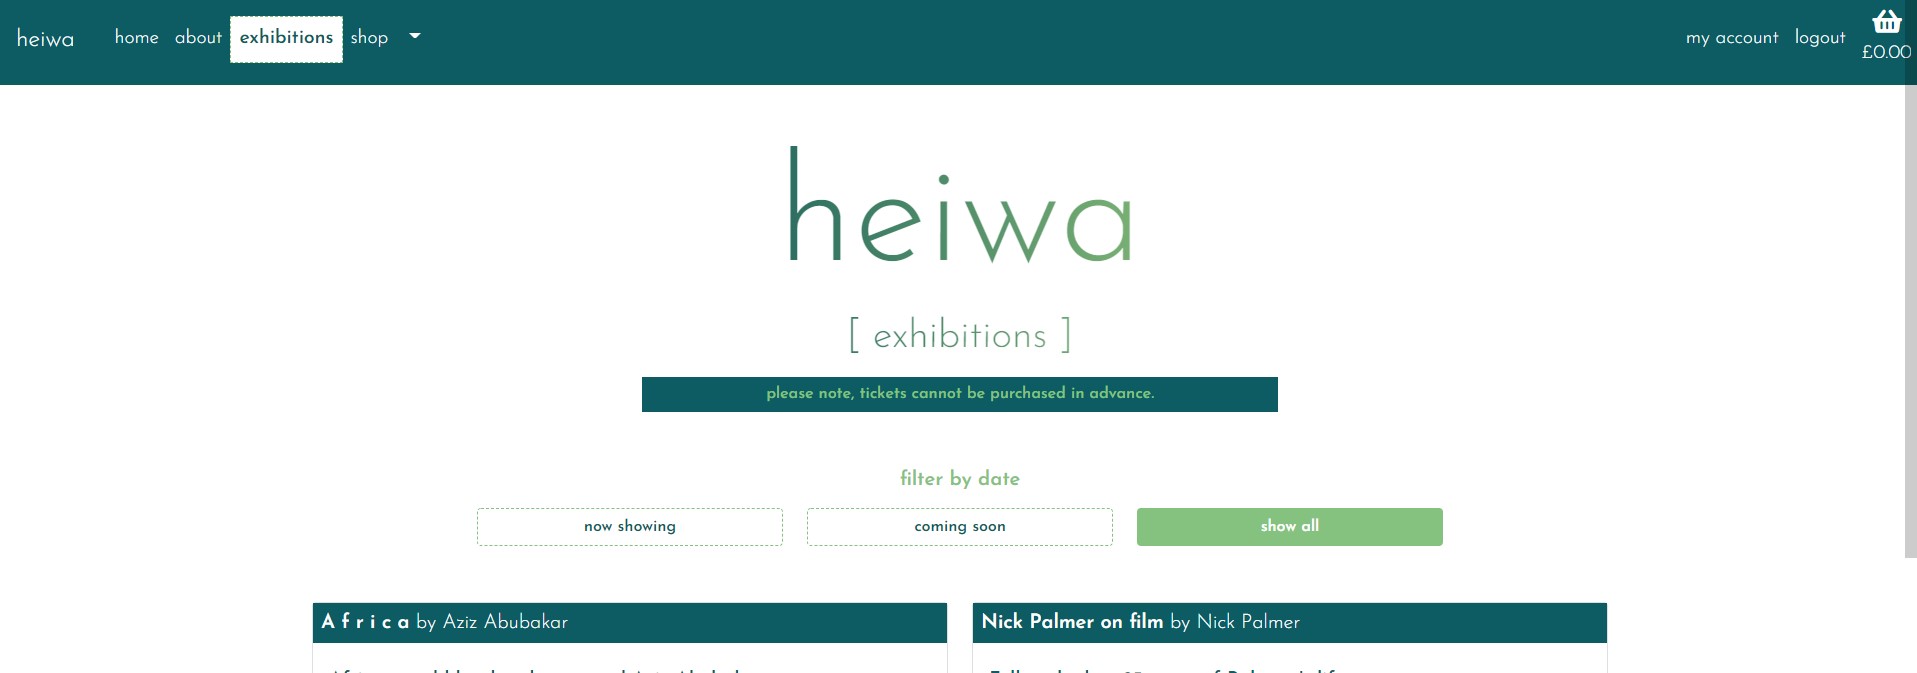
Similarly to the categories page, you can filter by the status on a laptop so the user can only see the exhibitions they want to.
The filter buttons also change depending on the user as it didn't make sense for a normal to be able to see exhibitions that have finished, were pending or had been cancelled.
A normal user sees only the 'now showing', 'coming soon' and 'show all' options:
And an admin user sees the following options:
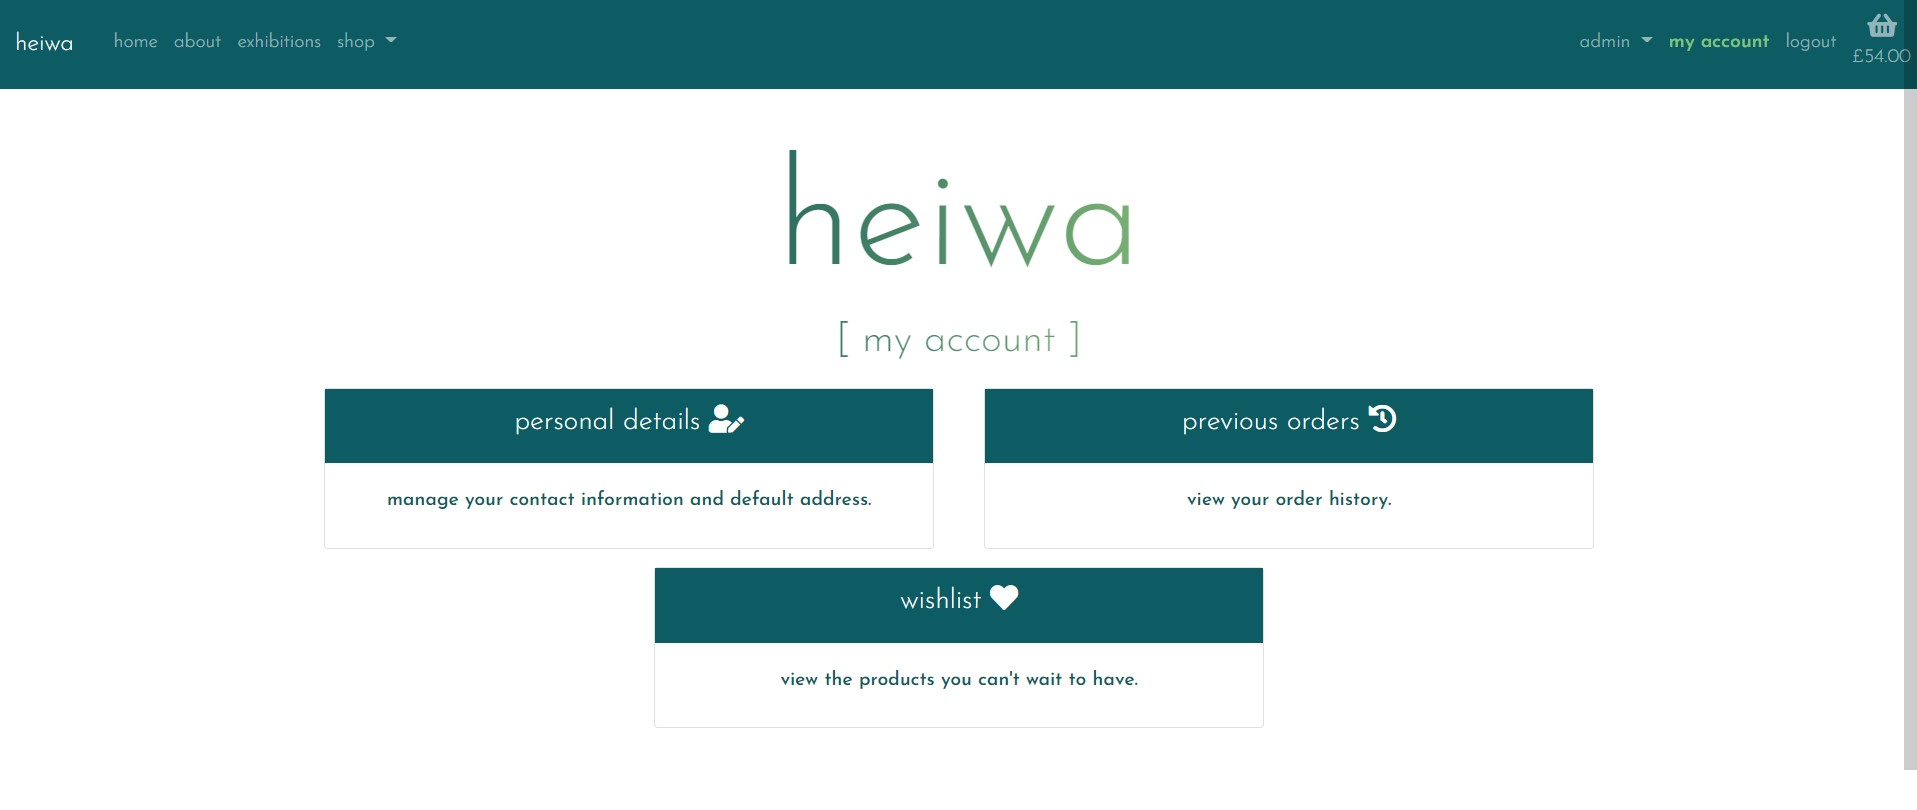
A logged-in user can access the my account link, this page displayed links to personal details, previous orders and wishlist.
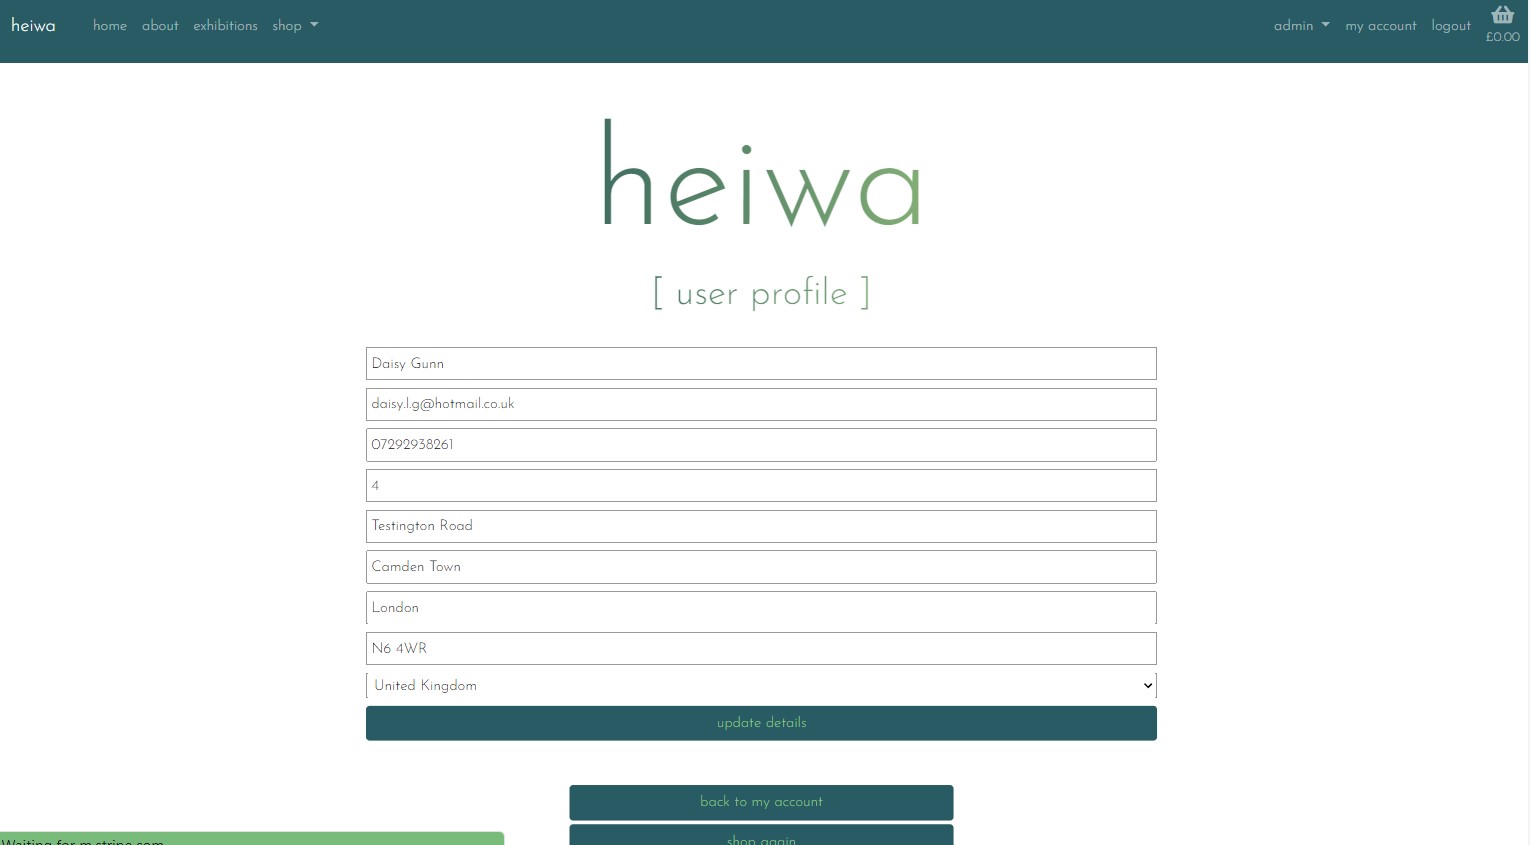
The personal details page is where the user can update their default shipping/billing address and contact information; on this page is also a link to change their Django AllAuth login details.
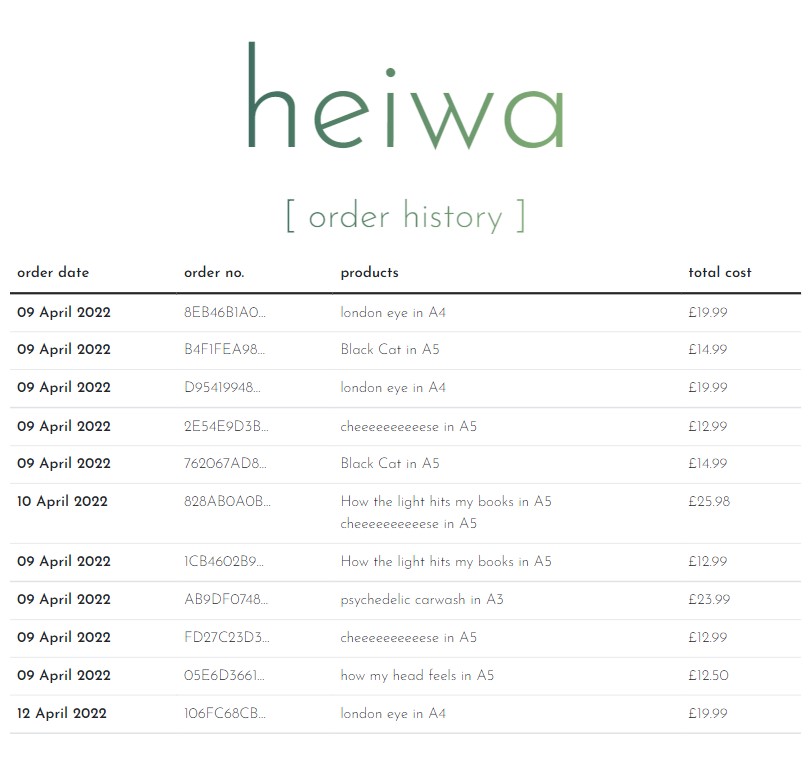
The previous order displays a list of all the orders previously made by the user
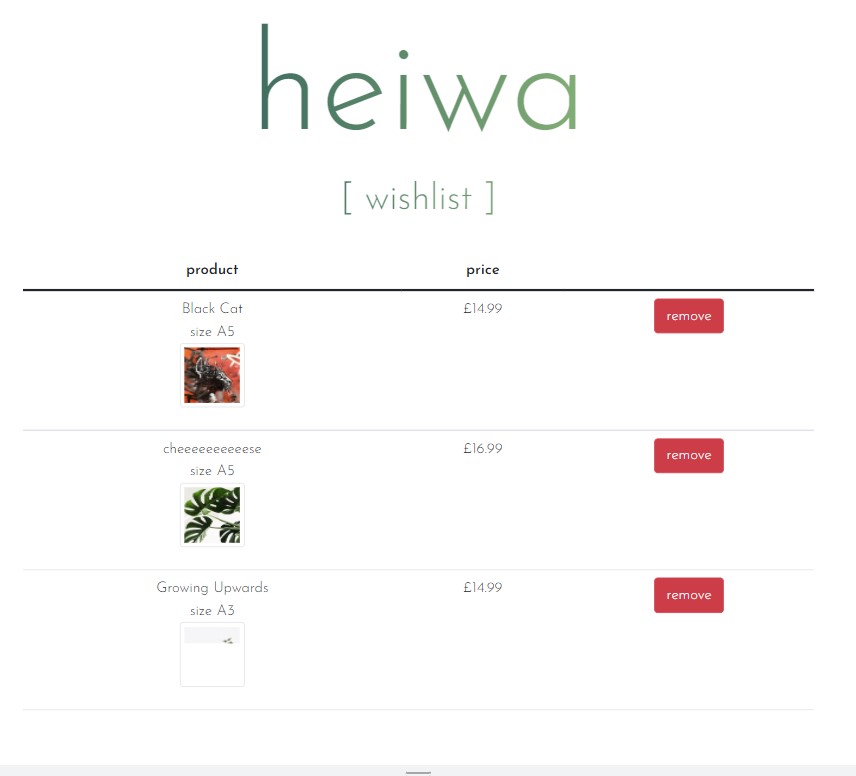
- Wishlist displays the list of items the user has saved to their wishlist, with the ability to remove the product.
The admin section of this website allows a logged-in superuser to update the exhibitions and product models from the front end, I have broken it down into exhibitions and product management.
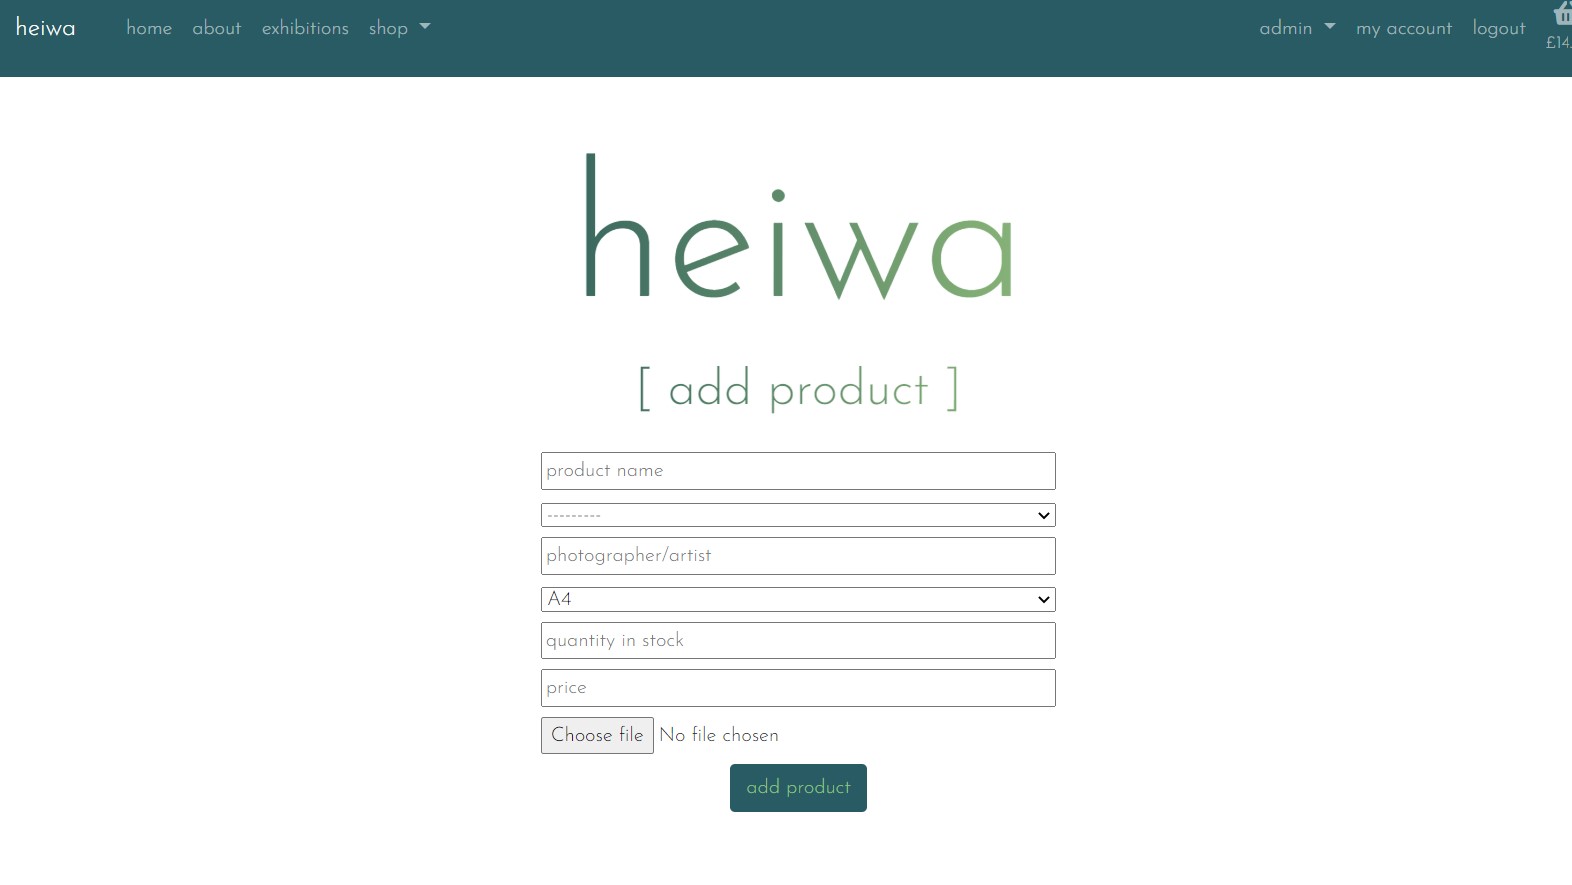
Products can be added using the add product dropdown, the superuser is taken to a form whereupon submission the product is added to the model:
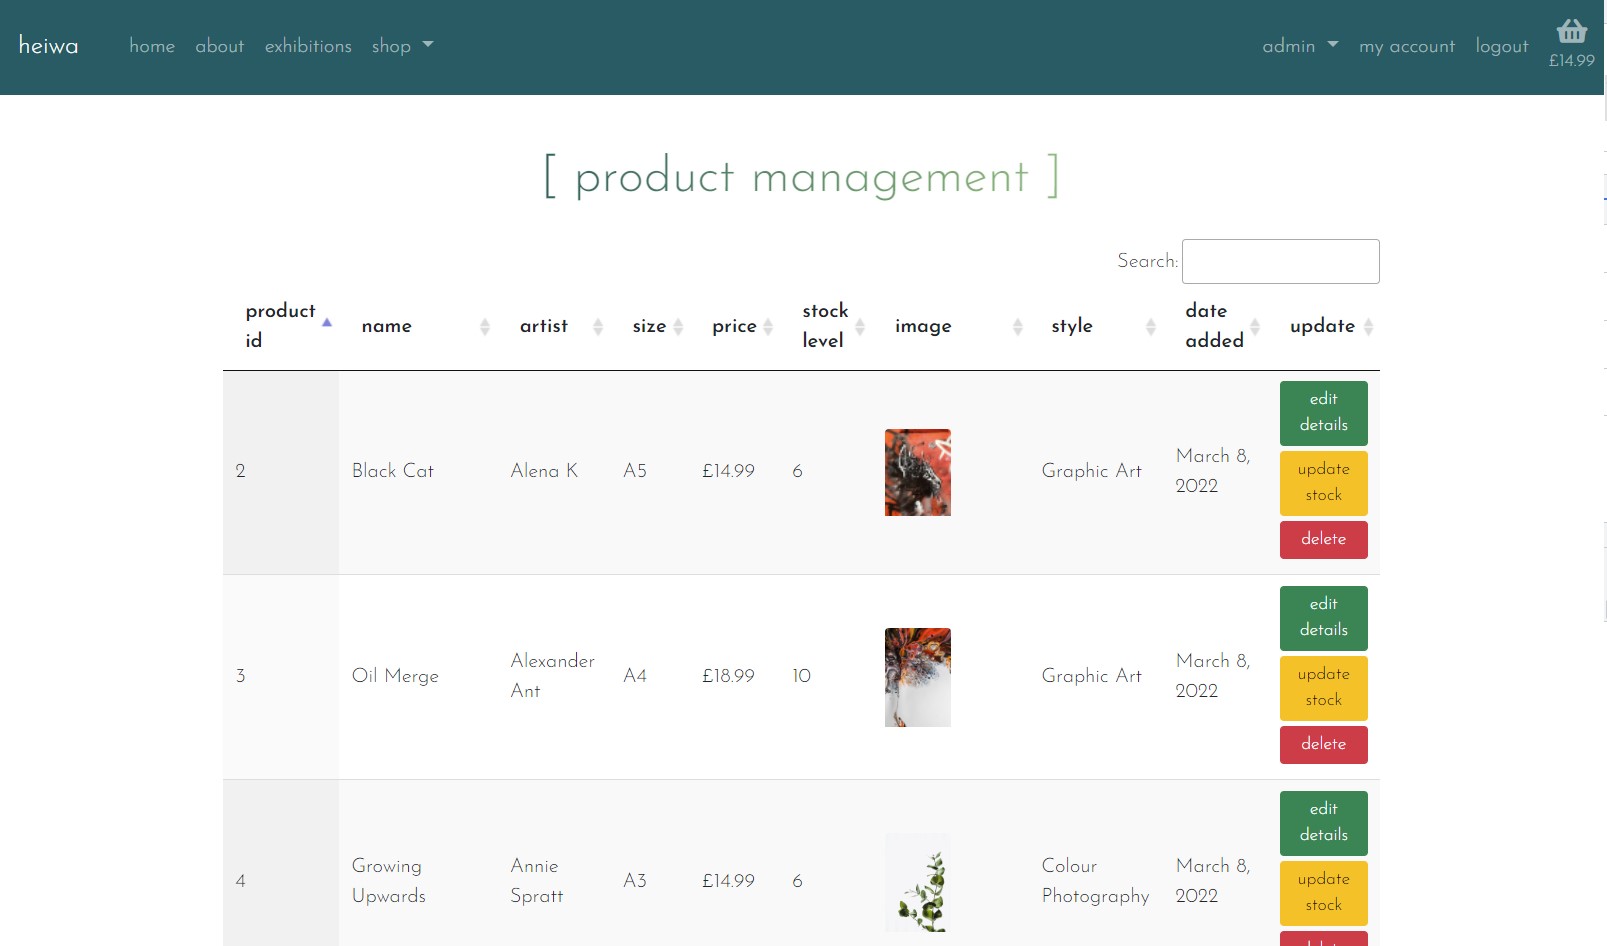
Using the update products dropdown the admin user is taken to the update products page, which consists of a data table that displays all of the product information, including the stock level. In the final column there are action buttons, to edit product info, update stock level or delete entirely. I created a separate page for this as I felt it was important for product information to be viewed differently from the shopping page; the data table allows the admin user to order the products by any of the column headers giving more control over how the information is viewed.
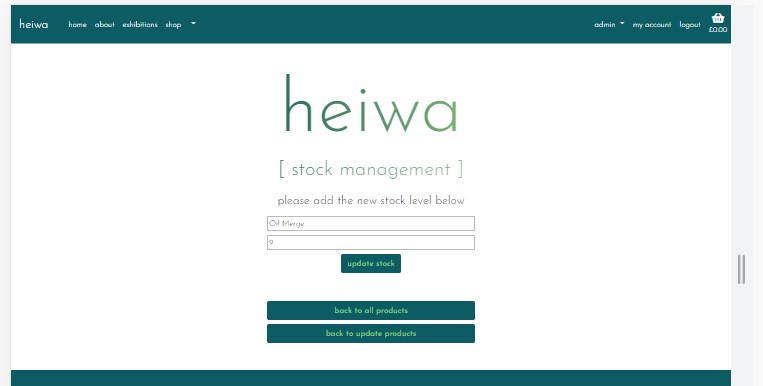
I chose to keep the stock & product info updating separate as I didn't want the stock to be able to be edited unintentionally as this could cause problems for the business if the stock level wasn't correct.
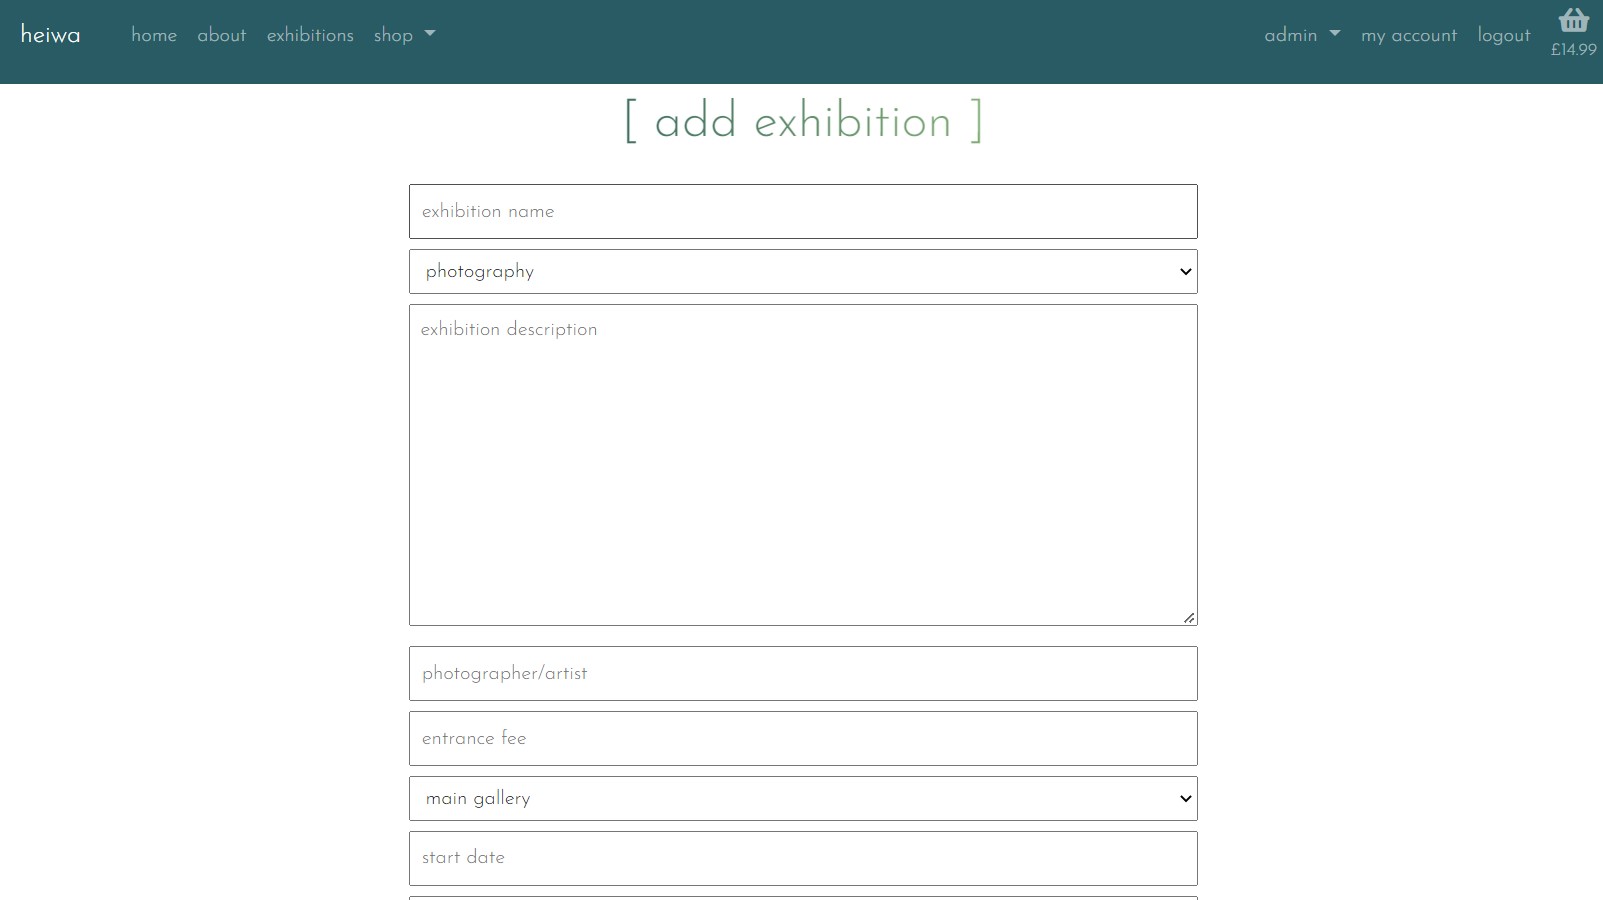
Products can be added using the add exhibition dropdown, the superuser is taken to a form whereupon submission the exhibition is added to the model.
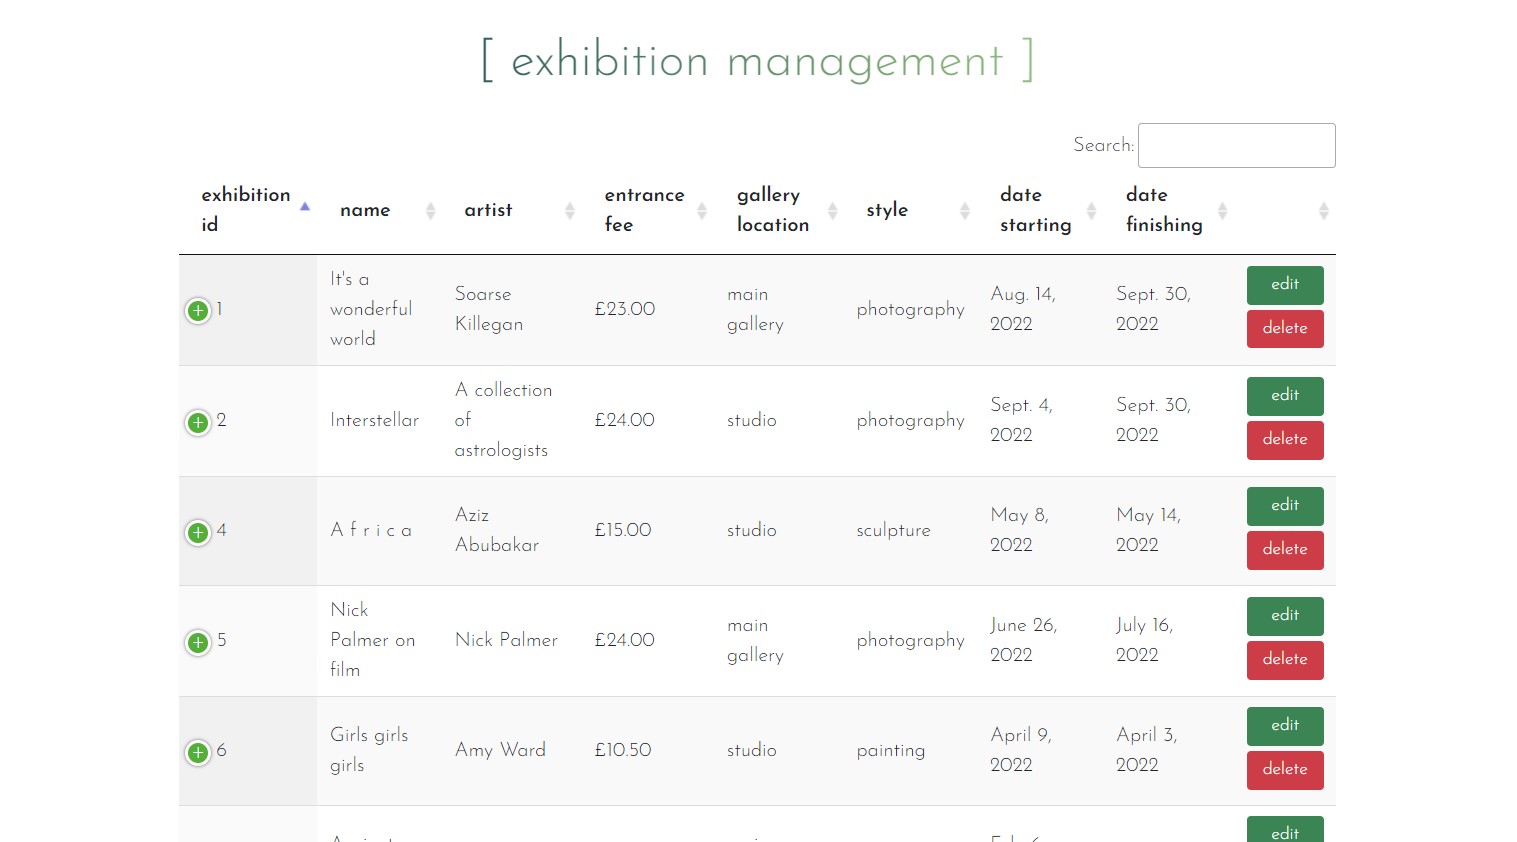
Using the exhibition management dropdown the admin user is taken to the exhibition management page, which consists of a data table that displays all of the exhibitions information. In the final column there are action buttons, to edit exhibition info or delete it entirely. I created a separate page for this as I felt it was important for exhibitions information to be viewed differently from the exhibition page; the data table allows the admin user to order the exhibitions by any of the column headers giving more control over how the information is viewed.
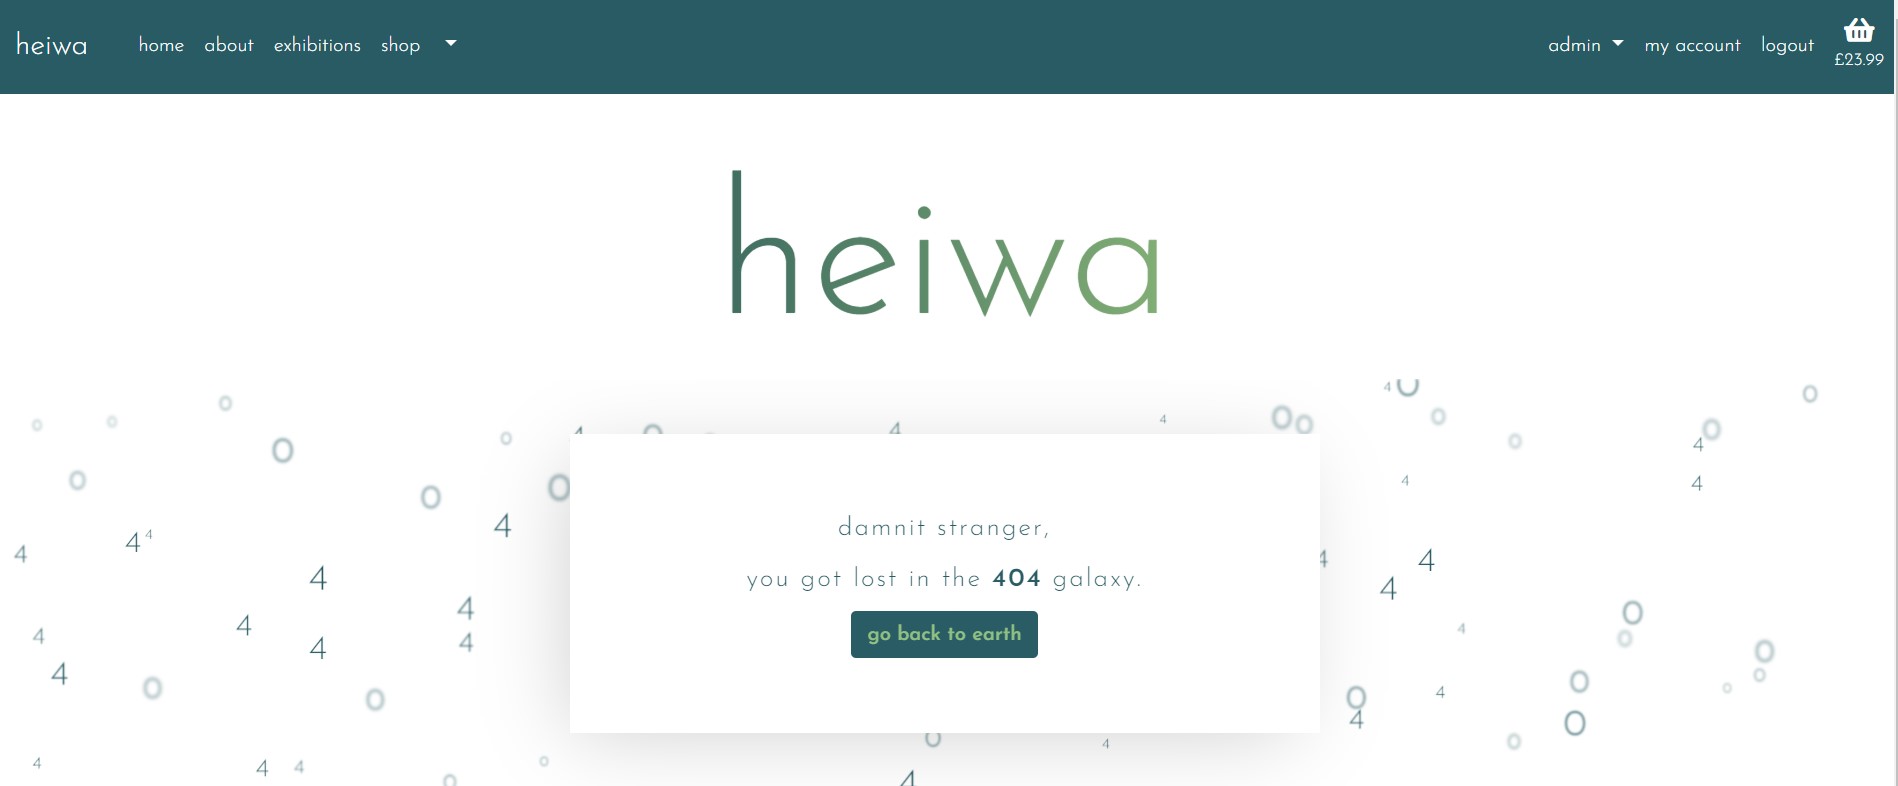
I have designed custom 404 and 500 error pages using this template; this allows the user to easily navigate back to the home page should they experience any errors.
I have used several technologies that have enabled this design to work:
- Django
- Django is the framework that has been used to build the over project and its apps.
- Python
- Python is the core programming language used to write all of the code in this application to make it fully functional.
- Bootstrap
- Used for creating responsive design.
- Google Fonts
- Used to obtain the fonts linked in the header, fonts used were Raleway and Lobster
- Font Awesome
- Used to obtain the icons used on the high scores and rules pages.
- Google Developer Tools
- Used as a primary method of fixing spacing issues, finding bugs, and testing responsiveness across the project.
- GitHub
- Used to store code for the project after being pushed.
- Git
- Used for version control by utilising the Gitpod terminal to commit to Git and Push to GitHub.
- Gitpod
- Used as the development environment.
- Heroku
- Used to deploy my application.
- Lucid
- Used to create the ERD for the project.
- ImageResizer
- Used to resize images to reduce loading time.
- Pep8
- Used to test my code for any issues or errors.
- Grammarly
- Used to fix the grammar errors across the project.
- Unicorn Revealer
- Used to detect overflow of elements, which allowed me to quickly debug any issues.
- Coloors
- Used to create a colour palette for the design.
- Favicon.io
- Used to create favicon for my website
- Color Contrast Accessibility Validator
- Allowed me to test the colour contrast of my webpage.
- W3C Markup Validation Service
- Used to validate all HTML code written and used in this webpage.
- W3C CSS Validation Service
- Used to validate all CSS code written and used in this webpage.
- JSHint
- Used to validate JS code
- Freeformatter CSS Beautify
- Used to accurately format my CSS code.
- Freeformatter HTML Formatter
- Used to accurately format my HTML code.
- AmIResponsive
- Used to generate responsive image used in README file.
- Wave
- Used to test the accessibility of the website.
- SQLite
- I have SQLite to run my database tests locally.
- PostgreSQL
- I have used Heroku's PostgreSQL relational database in deployment to store the data for my models.
- AWS
- I used Amazon AWS S3 to store all of my media files.
- Kaffeine
- Used to ping the app every 30 minutes so it speeds up when loading each time.
I have used a combination of manual and automated testing to ensure the website's functionality meets the desired intent.
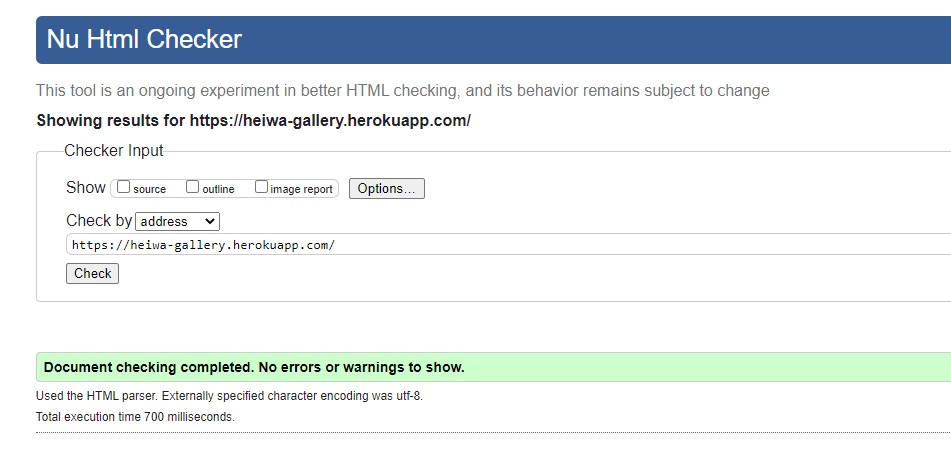
All of my code has been validated using an online validator specific to the language, all code now passes with zero errors.
- W3C Markup Validation Service
- Used to validate all HTML code written and used in this webpage.
- W3C CSS Validation Service
- Used to validate all CSS code written and used in this webpage.
-
- Used to validate JS code
-
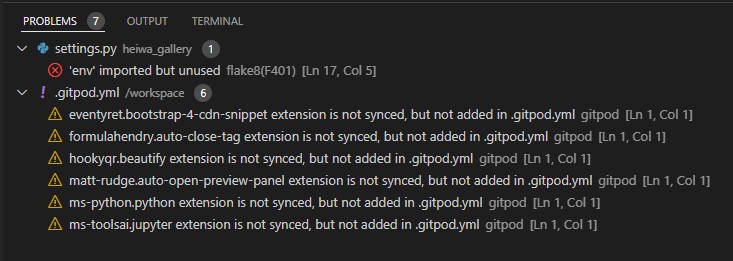
- Used to test my Python code for any issues or errors; please note when using inline Flake8 linter some errors flagged up that didn't flag in pep8 and have therefore been left as they are.
In addition to this I have also used online validators to test the accessibility of my website:
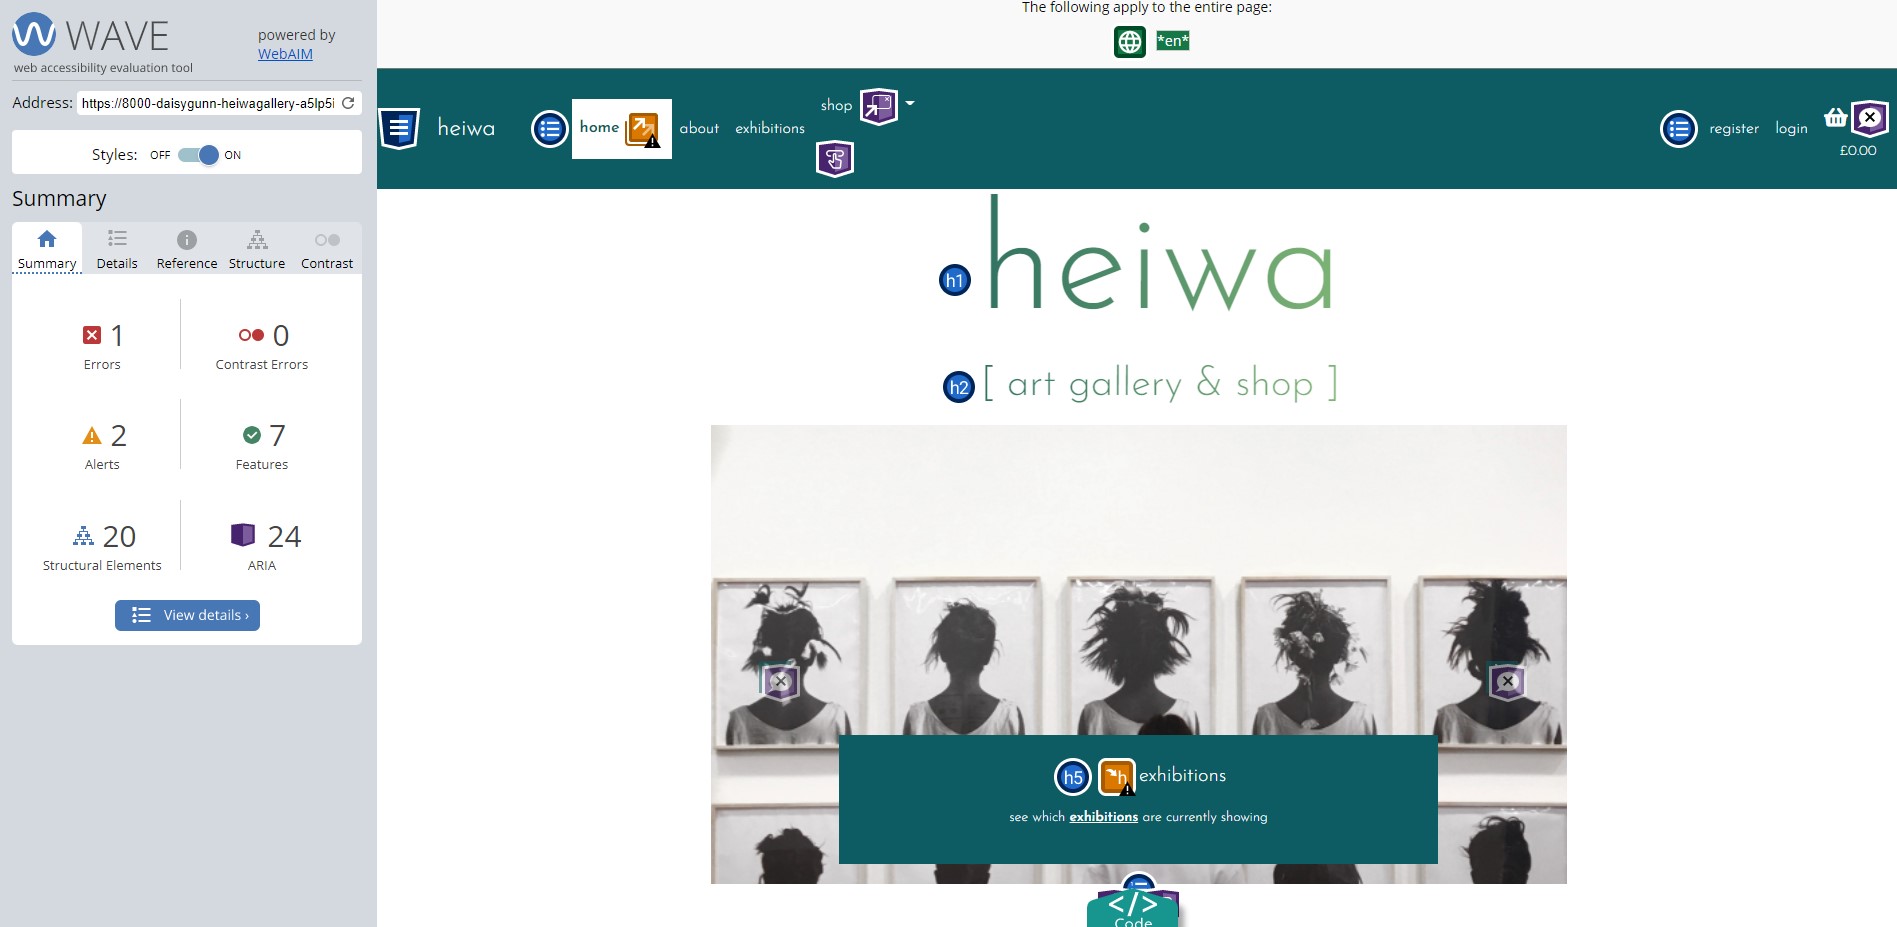
- Wave
- Used to test the accessibility of the website.
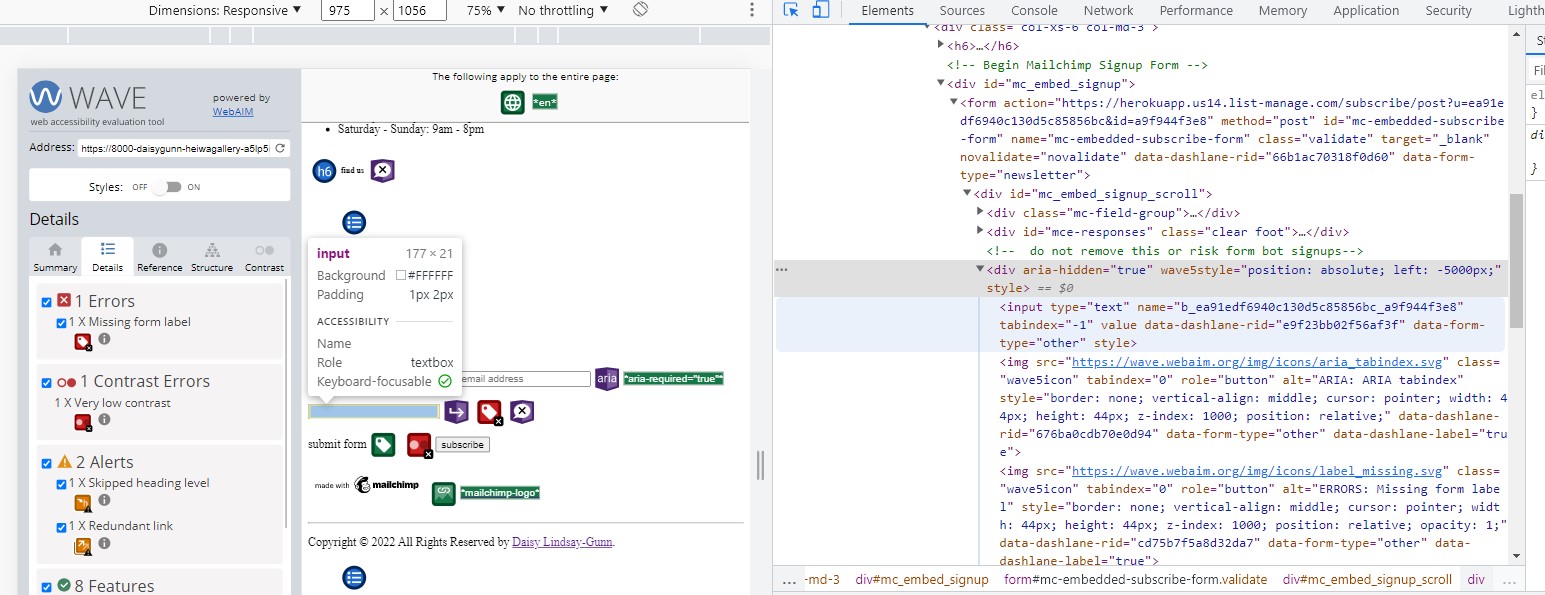
There is one error in the wave report that relates to a missing form input, this is due to an empty input required by Mailchimp to prevent bots from being able to submit the form and so I have not resolved this error.
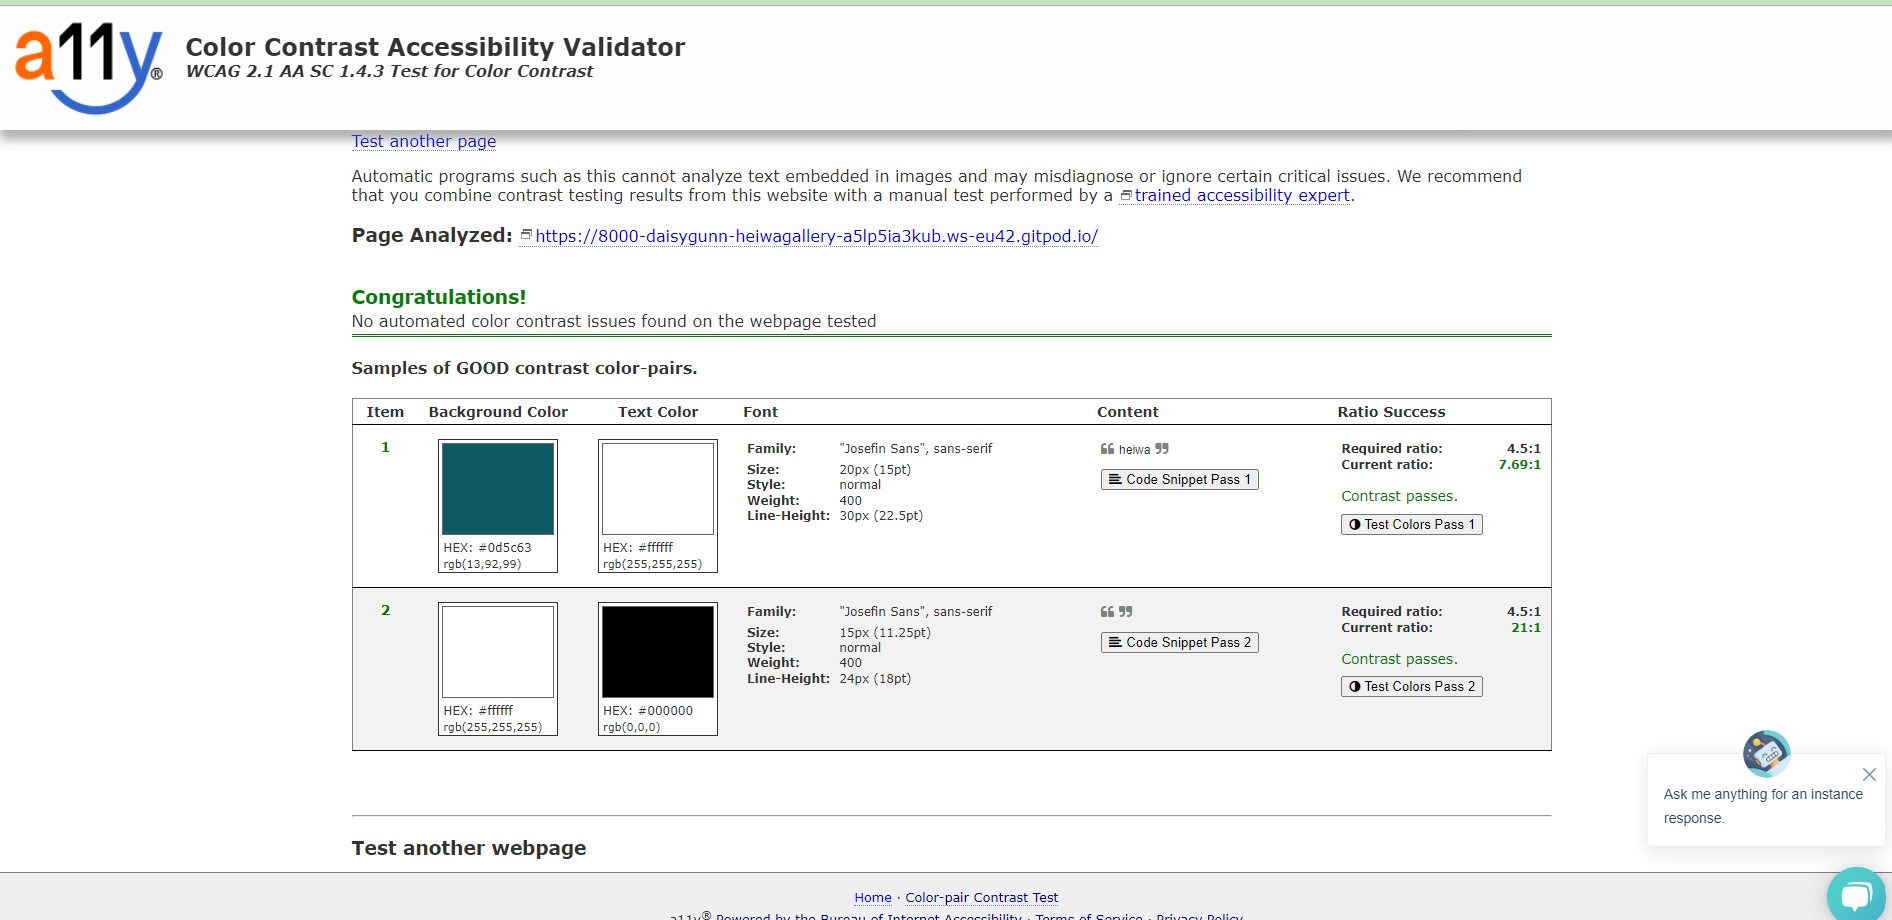
- Color Contrast Accessibility Validator
- Allowed me to test the colour contrast of my webpage.
I have tested this project manually myself and have also had it peer-reviewed & tested by friends and family on multiple devices and screen sizes.
For all user story testing please view the manual testing document below:
I have used the Coverage library throughout testing to keep track of how much of my Python code was covered by the tests I had written. From running the coverage report my website has 72% of my code tested. The remaining code is covered by manual testing.
To generate your own coverage report from the command line:
- Install the package using
pip3 install coverage - Run
coverage run manage.py test - Then
coverage htmlto generate the report - You can view the report in a browser by using the command
python3 -m http.serverand opening theindex.htmlfile from inside thehtmlcovfolder.
Whilst in development there were several bugs that I had to resolve.
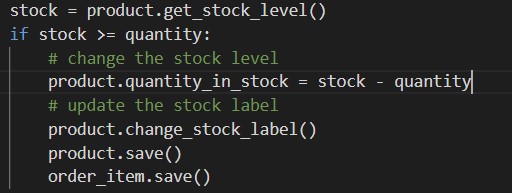
- The stock level of a product is reduced by the quantity purchased by the customer each time the order is successful; this in turn should have changed the stock label so that if the stock level dropped below 1 then it was 'not in stock' and wouldn't be available to buy. However, I realised that this was not the case and some products had 0 in stock but were still available to add to the basket. I add the following section of code to resolve this:
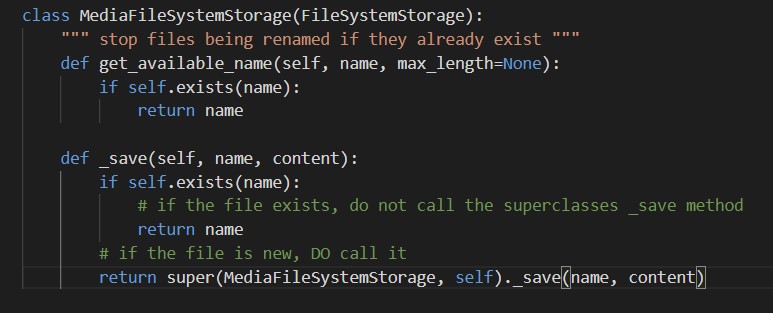
- When I first created the product model and began adding products to the database, all of the images were being added with a hashed name which is not what I wanted. After conducting some research I discovered that I could create a MediaFileStorage class that defined how they were saved:
- However, in the final stages of testing I attempted to add a product with a random image and got a 500 error - the custom storage class was preventing the upload and so I had to remove it. In order to do this successfully, I had to wipe all my previous migrations, save the database data into fixtures and then reload everything.
The master branch of this repository has been used for the deployed version of this application.
To deploy my Django application, I had to use the Code Institute Python Essentials Template.
- Click the
Use This Templatebutton. - Add a repository name and brief description.
- Click the
Create Repository from Templateto create your repository. - To create a Gitpod workspace you then need to click
Gitpod, this can take a few minutes. - When you want to work on the project it is best to open the workspace from Gitpod (rather than Github) as this will open your previous workspace rather than create a new one. You should pin the workspace so that it isn't deleted.
- Committing your work should be done often and should have clear/explanatory messages, use the following commands to make your commits:
git add .: adds all modified files to a staging areagit commit -m "A message explaining your commit": commits all changes to a local repository.git push: pushes all your committed changes to your Github repository.
Forking the GitHub Repository
If you want to make changes to your repository without affecting it, you can make a copy of it by 'Forking' it. This ensures your original repository remains unchanged.
- Find the relevant GitHub repository
- In the top right corner of the page, click the Fork button (under your account)
- Your repository has now been 'Forked' and you have a copy to work on
Cloning the GitHub Repository
Cloning your repository will allow you to download a local version of the repository to be worked on. Cloning can also be a great way to backup your work.
- Find the relevant GitHub repository
- Press the arrow on the Code button
- Copy the link that is shown in the drop-down
- Now open Gitpod & select the directory location where you would like the clone created
- In the terminal type 'git clone' & then paste the link you copied in GitHub
- Press enter and your local clone will be created.
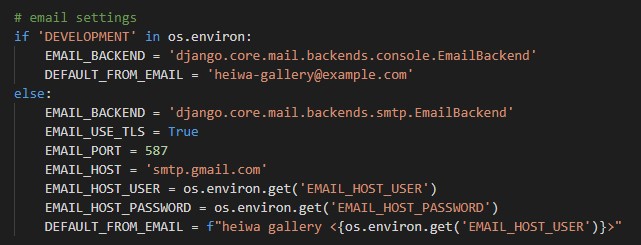
I have used Gmail SMTP to send confirmation emails and all AllAuth related emails when the deployed version is used. I used the following documentation to set it up and add these settings to my settings.py file:
In order to take payments for the online store, I implemented Stripe; you first must create an account with them and then using the documentation add the relevant HTML, python & JS code suitable for your needs.
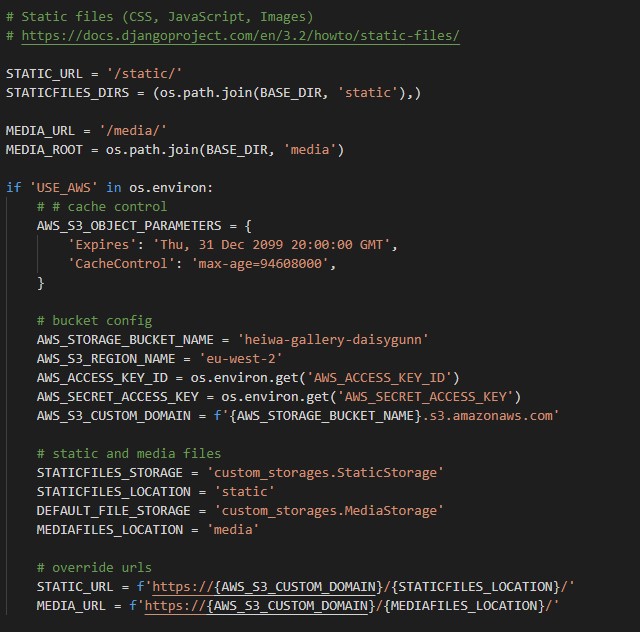
All static and media files are stored in the cloud using Amazon AWS S3; i have created a bucket, user group and user that can access this site and the relevant files. In order for the files to be correctly served the following settings have to be added to your main settings.py file:
I followed the below steps using the Code Institute tutorial and Django Blog cheatsheat
- The following command in the Gitpod CLI will create the relevant files needed for Heroku to install your project dependencies
pip3 freeze --local > requirements.txt. Please note this file should be added to a .gitignore file to prevent the file from being committed. AProcfileis also required that specifies the commands that are executed by the app on startup.
- Go to Heroku.com and log in; if you do not already have an account then you will need to create one.
- Click the
Newdropdown and selectCreate New App. - Enter a name for your new project, all Heroku apps need to have a unique name, you will be prompted if you need to change it.
- Select the region you are working in.
Heroku Settings You will need to set your Environment Variables - this is a key step to ensuring your application is deployed properly.
- In the Settings tab, click on
Reveal Config Varsand set the following variables:
- In the resources tab you must install 'Heroku Postgres'
Heroku Deployment using website In the Deploy tab:
- Connect your Heroku account to your Github Repository following these steps:
- Click on the
Deploytab and chooseGithub-Connect to Github. - Enter the GitHub repository name and click on
Search. - Choose the correct repository for your application and click on
Connect.
- Click on the
- You can then choose to deploy the project manually or automatically, automatic deployment will generate a new application every time you push a change to Github, whereas manual deployment requires you to push the
Deploy Branchbutton whenever you want a change made. - Once you have chosen your deployment method and have clicked
Deploy Branchyour application will be built and you should see the belowViewbutton, click this to open your application:
Heroku CLI deployment
Whilst building this project there was a security breach on Heroku which caused issues with deployment via their website. Due to this, I had to add a runtime.txt file specifying which version of Python to build the app with and used the following commands to push the code to Heroku:
- Login to Heroku via the CLI using
heroku login -i - Enter your email and password
- Connect to the Heroku git remote using the
heroku git:remote -a YOURAPPNAME - Push to the Heroku git remote using
git push heroku main
Throughout the process of building this website, I have used various sources online to help me fix bugs & tackle problems, in addition to various modules to build the functionality of this website:
I would like to thank my course mentor Guido Cecilio for his support and guidance throughout the course of the project and my peers Harry Dhillon and Jack Crosbie for their support & feedback.
