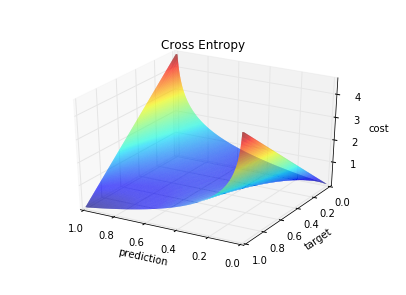
This project aims to be a clean and modular implementation of feed forward neural networks. It's written in Python 3 and published under the MIT license. I started this project in order to understand the concepts of deep learning. You can use this repository as guidance if you want to implement neural networks what I highly recommend if you are interested in understanding them.
This will train a network with 1.3M weights to classify handwritten digits and visualize the progress. After a couple of minutes, the error should drop below 3%. To install globally, just skip the first command. Solutions to all reported problems can be found in the troubleshooting section.
virtualenv . -p python3 --system-site-packages && source bin/activate
pip3 install layered
curl -o mnist.yaml -L http://git.io/vr7y1
layered mnist.yaml -vLearning problems are defined in YAML files and it's easy to create your own. An overview of available cost and activation functions is available a few sections below.
dataset: Mnist
cost: CrossEntropy
layers:
- activation: Identity
  size: 784
- activation: Relu
  size: 700
- activation: Relu
  size: 700
- activation: Relu
  size: 400
- activation: Softmax
  size: 10
epochs: 5
batch_size: 32
learning_rate: 0.01
momentum: 0.9
weight_scale: 0.01
weight_decay: 0
evaluate_every: 5000layered [-h] [-v] [-l weights.npy] [-s weights.npy] problem.yaml
| Short | Long | Description |
|---|---|---|
-h |
--help |
Print usage instructions |
-v |
--visual |
Show a diagram of trainig costs and testing error |
-l |
--load |
Path to load learned weights from at startup |
-s |
--save |
Path to dump the learned weights at each evaluation |
Optionally, create a virtual environment. Then install the dependencies. The last command is to see if everything works.
git clone https://github.com/danijar/layered.git && cd layered
virtualenv . -p python3 --system-site-packages && source bin/activate
pip3 install -e .
python3 -m layered problem/modulo.yaml -v
Now you can start playing around with the code. For pull requests, please squash the changes to a single commit and ensure that the linters and tests are passing.
python setup.py testIf you have questions, feel free to contact me.
In this guide you will learn how to create and train models manually rather than using the problem definitions to gain more insight into training neural networks. Let's start!
A network is defined by its layers. The parameters for a layer are the amount of neurons and the activation function. The first layer has the identity function since we don't want to already modify the input data before feeding it in.
from layered.network import Network
from layered.activation import Identity, Relu, Softmax

num_inputs = 784
num_outputs = 10

network = Network([
    Layer(num_inputs, Identity),
    Layer(700, Relu),
    Layer(500, Relu),
    Layer(300, Relu),
    Layer(num_outputs, Softmax),
])The weight matrices of the network are handed to algorithms like backpropagation, gradient descent and weight decay. If the initial weights of a neural network would be zero, no activation would be passed to the deeper layers. So we start with random values sampled from a normal distribution.
from layered.network import Matrices

weights = Matrices(network.shapes)
weights.flat = np.random.normal(0, weight_scale, len(weights.flat))Now let's learn good weights with standard backpropagation and gradient
descent. The classes for this can be imported from the gradient and
optimization modules. We also need a cost function.
from layered.cost import SquaredError
from layered.gradient import Backprop
from layered.optimization import GradientDecent

backprop = Backprop(network, cost=SquaredError())
descent = GradientDecent()Datasets are automatically downloaded and cached. We just iterate over the training examples and train the weights on them.
from layered.dataset import Mnist

dataset = Mnist()
for example in dataset.training:
    gradient = backprop(weights, example)
weights = descent(weights, gradient, learning_rate=0.1)Finally, we want to see what our network has learned. We do this by letting the
network predict classes for the testing examples. The strongest class is the
model's best bet, thus the np.argmax.
import numpy as np

error = 0
for example in dataset.testing:
    prediction = network.feed(weights, example.data)
    if np.argmax(prediction) != np.argmax(example.target):
        error += 1 / len(dataset.testing)
print('Testing error', round(100 * error, 2), '%')You can safely ignore this messages during installation.
If you get this error on Mac, don't create a virtualenv and install layered
globally with sudo pip3 install layered.
Install or reinstall python3-matplotlib or equivalent using your package
manager. Check if matplotlib works outside of the virtualenv.
import matplotlib.pyplot as plt
plt.plt([1, 2, 3, 4])
plt.show()
Ensure you create your virtualenv with --system-site-packages.
Please open an issue.

