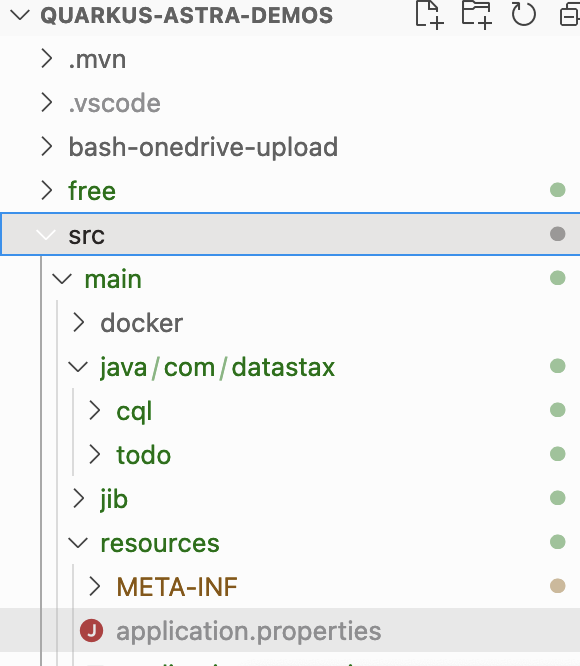
Today we showcase an application using Apache Cassandra™ as a backend implemented with Quarkus, and experience some developer joy with features that often have been an envy for Java programmers - hot reloading, debugging, containerizing and finally generating native code.
There are many other features of the Quarkus platform that we will not be looking into that are widely considered as unique strengths of the platform including testing.
We will deploy the app on containers in Kubernetes using Lens.
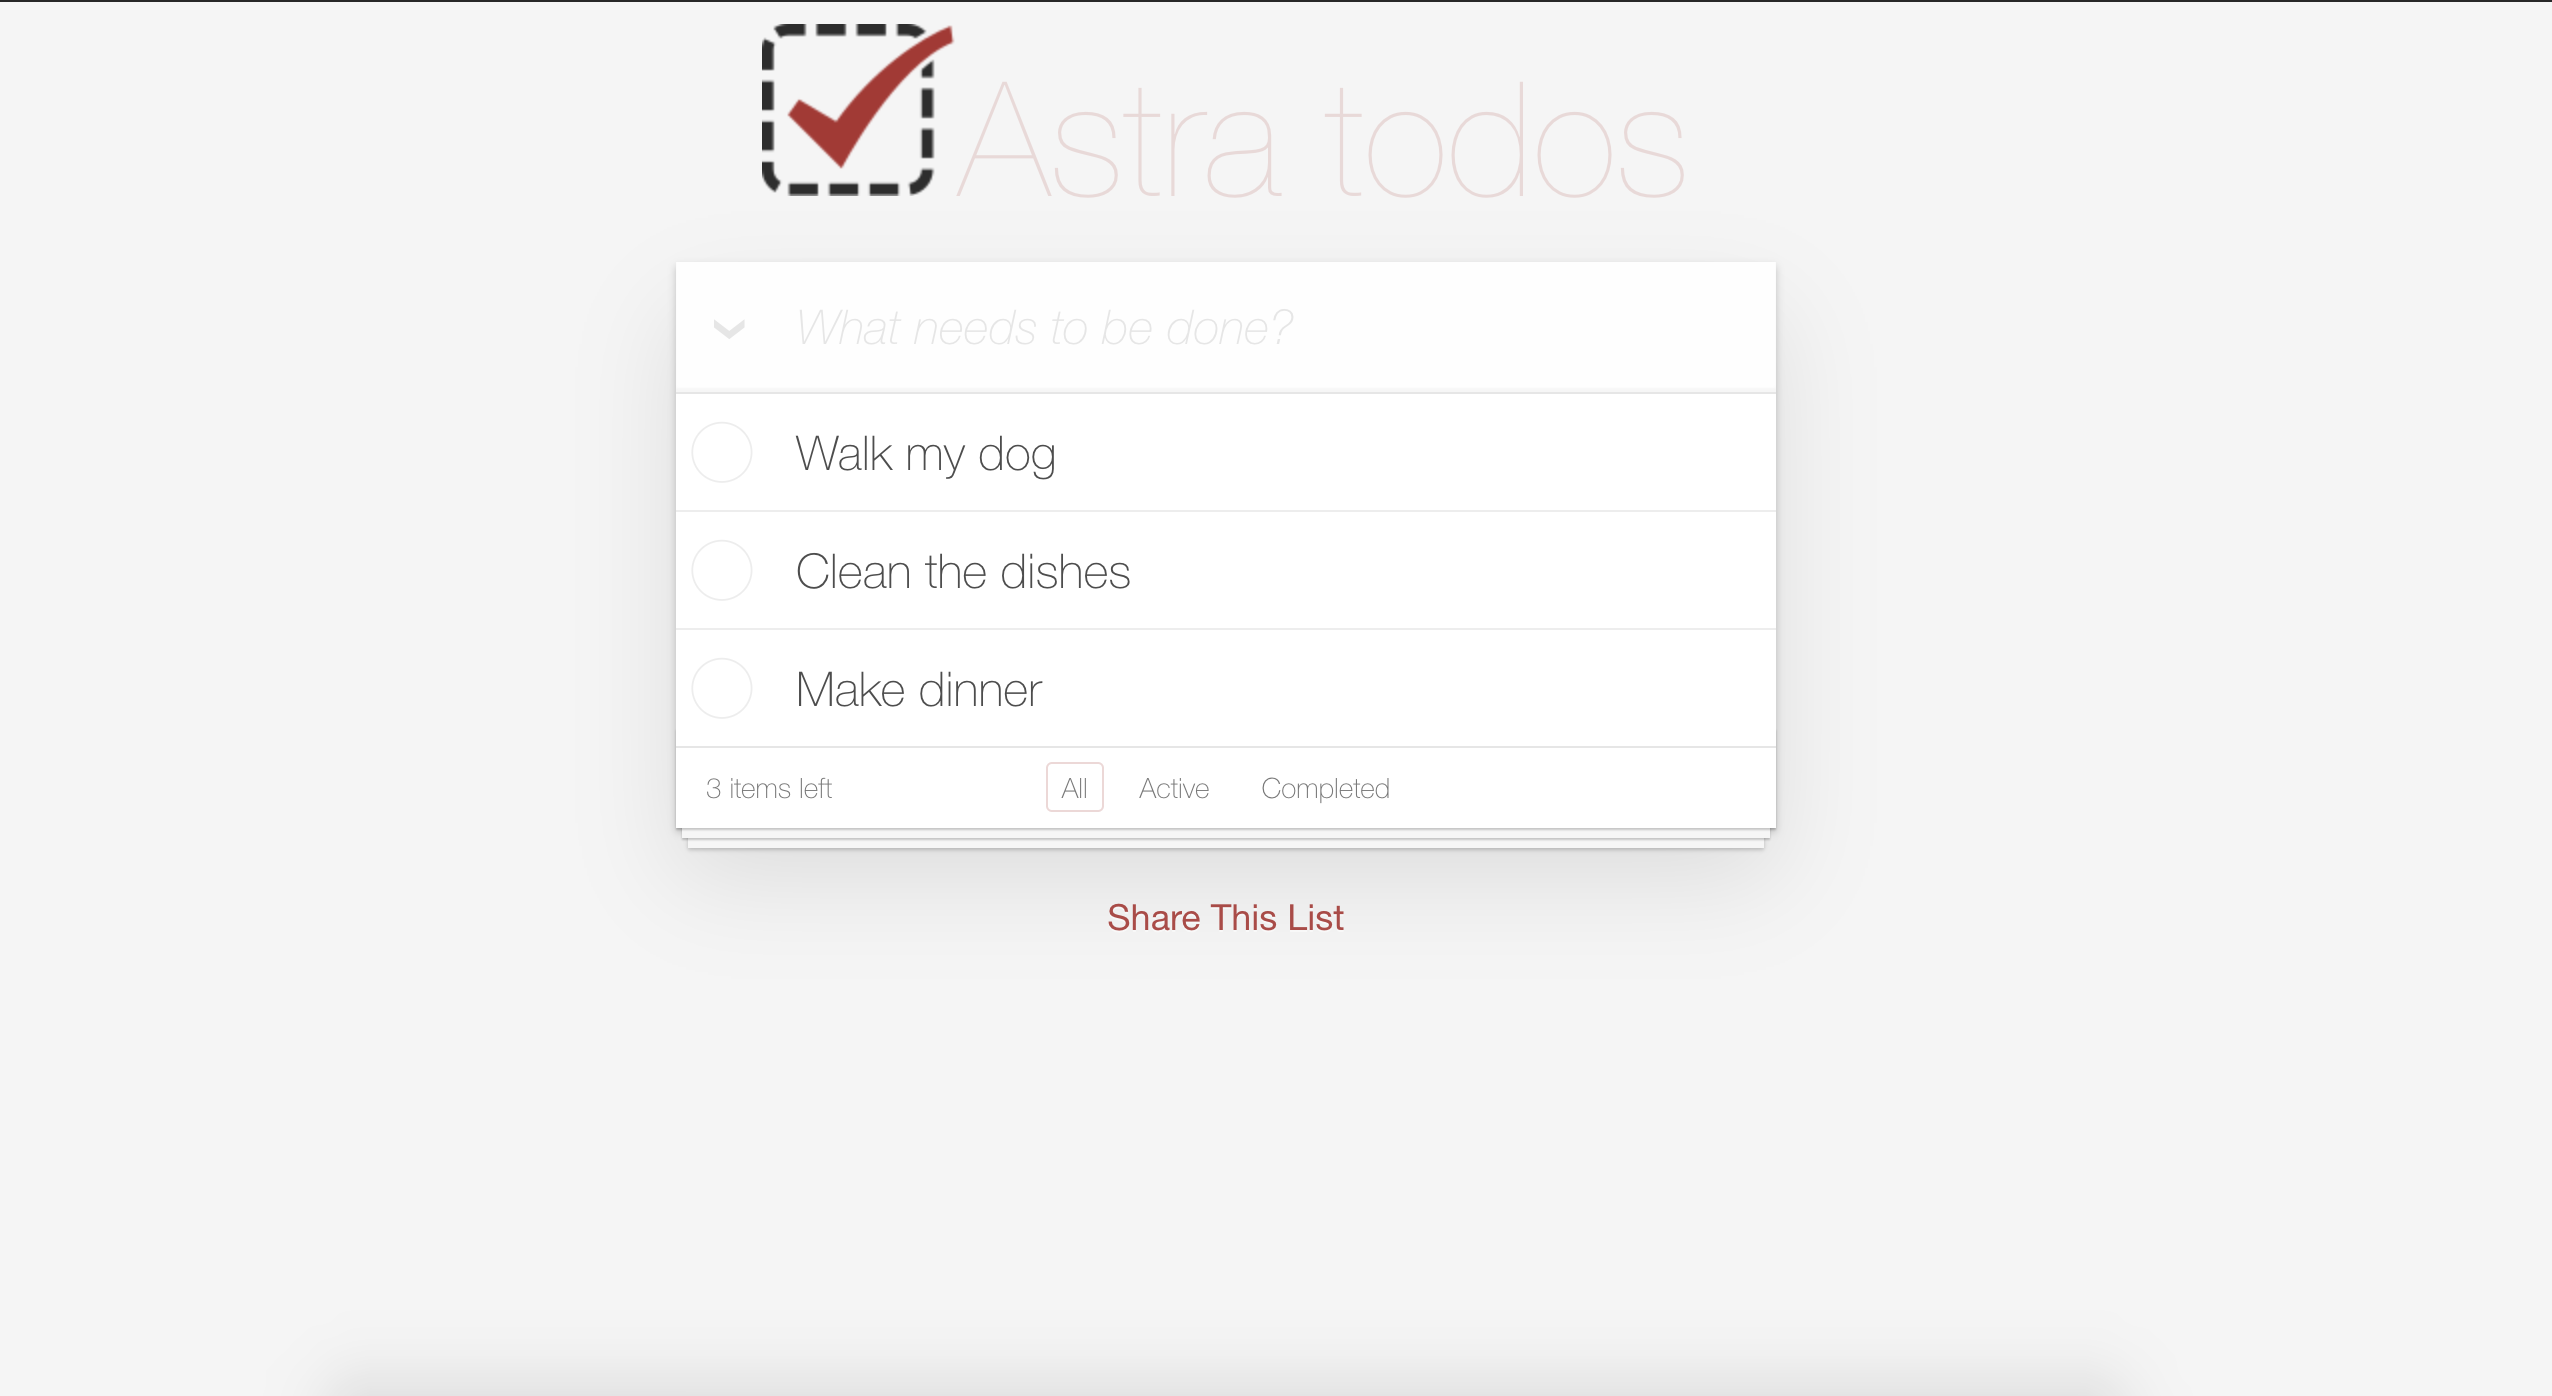
The application we will be using is based on Jake's port of the TodoMVC code originally written by Pete Hunt. The example is modified from https://github.com/huksley/todo-react-ssr-serverless.
A screenshot of this simple app is below.
ℹ️ Objective(s) of workshop
Whether you're a seasoned developer or relatively new to programming, you will be spending a lot of time in an Integrated Development Environment and the "inner loop" of development with a lightweight CI/CD cycle.
Once you have a stable environment after repeated iterations in the editor, testing environments, profiler, debugger, etc. you push it to the outer loop which has a more robust CI/CD cycle usually backed by gitops, Jenkins and other CI/CD tools.
The objective of today's workshop is to understand how the Quarkus platform simplifies the "inner loop" of development which results in huge developer productivity gains. You will see in today's workshop you can go from plain old Java to containers with relative ease and yet not make a significant change in devlopment.
Although, the Quarkus platform leverages a reactive architecture, the developer tools are drawn from a list that they are familar with and complements them while making those same tools leaner and more performant. This means that Quarkus does not force developers to use reactive programming styles. Additionally, it helps to build better and more performant applications (which is always necessary) and also enhances the day-to-day life of a developer having to bridge the gap between their existing platforms and taking a plunge into microservices, service mesh and so on. Developers can use their current tools and methodologies and let Quarkus take care of being "reactive", or build new fully-reactive applications that take advantage of Quarkus' reactive core.
ℹ️ Frequently asked questions
- Can I run the workshop on my computer?
There is nothing preventing you from running the workshop on your own machine. If you do so, you will need java jdk11+, Graal VM, Maven, an IDE like VSCode, IntelliJ, Eclipse, Spring STS. You will have to adapt commands and paths based on your environment and install the dependencies by yourself. We won't provide support to keep on track with schedule.
We strive to make our hands-on workshops prerequisites free -- who has the time to install prerequistes? :-)
However, docker login credentials, some familiarity with an IDE like Visual Studio Code or Gitpod (although not strictly necessary) might help.
It doesn't matter if you join our workshop live or you prefer to do at your own pace, we have you covered. In this repository, you'll find everything you need for this workshop:
If you're primarily interested in containerization (as in Slay the complexity of Kubernetes Inner Loop Development), you can skip most of the early steps and jump straight to Containerizing. Summarizing
| Focus | Step(s) | Verify connection | Step(s) skipped |
|---|---|---|---|
| Containers/Inner loop | Do steps 1-6 and 10 onwards | After steps 1-6, verify connection | Skip steps 7,8,9 |
- Database Initialization
- Launch Gitpod
- Know your Gitpod
- Setup your Application
- Run Unit test(s)
- Quarkus Dev Mode
- Debugging
- Packaging
- Containerizing
- Native Image
- Homework
Note: Datastax Astra is a cloud-native, fully managed database-as-a-service (DBaaS) based on Apache Cassandra. It provides a scalable, performant and highly available database solution without the operational overhead of managing Cassandra clusters. Astra supports both SQL and NoSQL APIs, and includes features like backup and restore, monitoring and alerting, and access control. It enables developers to focus on application development while the database infrastructure is managed by Datastax.
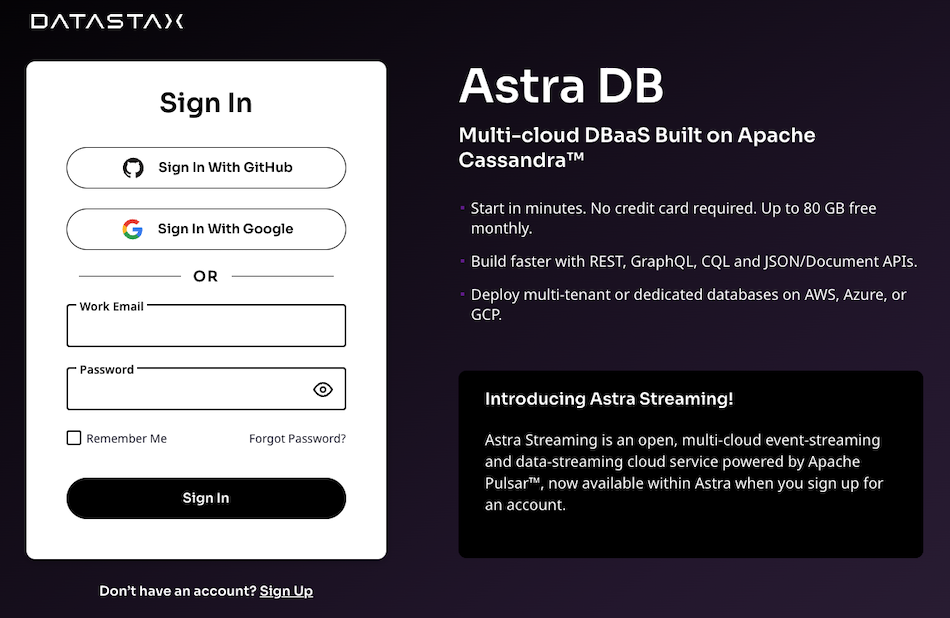
✅ 1.1.a- Access https://astra.datastax.com and register withGoogleorGithubaccount
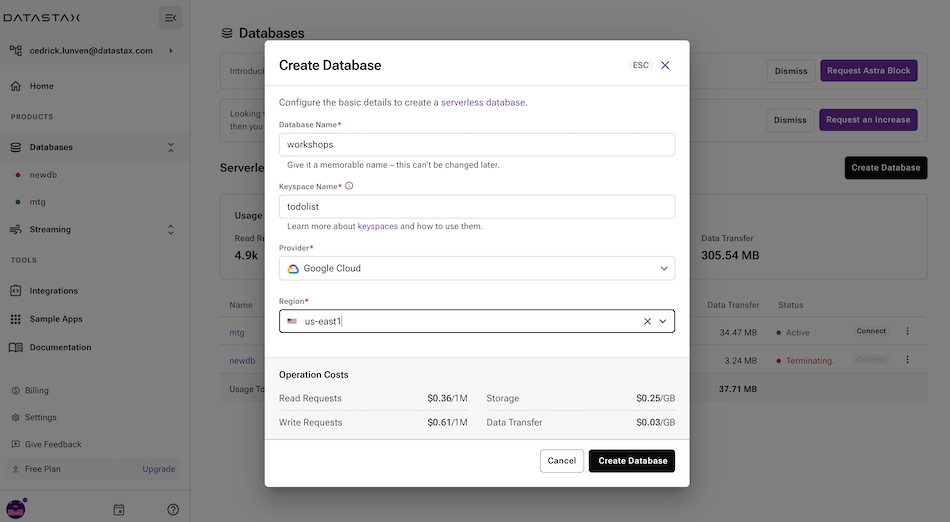
| Parameter | Value |
|---|---|
| Database name | workshops |
| Keyspace name | todolist |
| Cloud | GCP |
| Region | us-east1 |
-
✅ 1.2.aLocateSettings(#1) in the menu on the left, thenToken Management(#2) -
✅ 1.2.bSelect the roleOrganization Administratorbefore clicking[Generate Token]
✅ 1.2.c- Copy your token in the clipboard. With this token we will now create what is needed for the training.
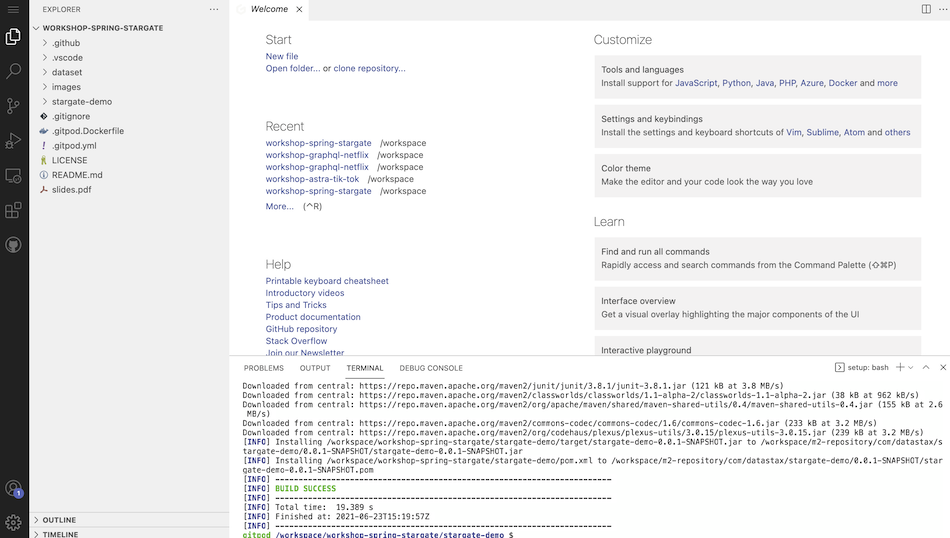
Gitpod is an IDE 100% online based on VS Code. To initialize your environment simply click on the button below (CTRL + Click to open in new tab) You will be asked for you github account, as needed.
👁️ Expected output
The screenshot may be slightly different based on your default skin and a few edits in the read me.
That's it. Gitpod provides all tools we will need today including maven and exposing port 8080, ports 5005 which is used for debugging, etc.
You may safely ignore the error output at the end of the terminal window.
👁️ Expected output
Although GitPod terminal might seem to be available, the setup might still be ongoing. Wait for a few minutes before entering commands in the GitPod terminal window.
Take a moment to read this entire section since it'll help you with the rest of the workshop as you'll be spending most of your time in Gitpod. If you're familiar with Gitpod, you can easily skip this entire section.
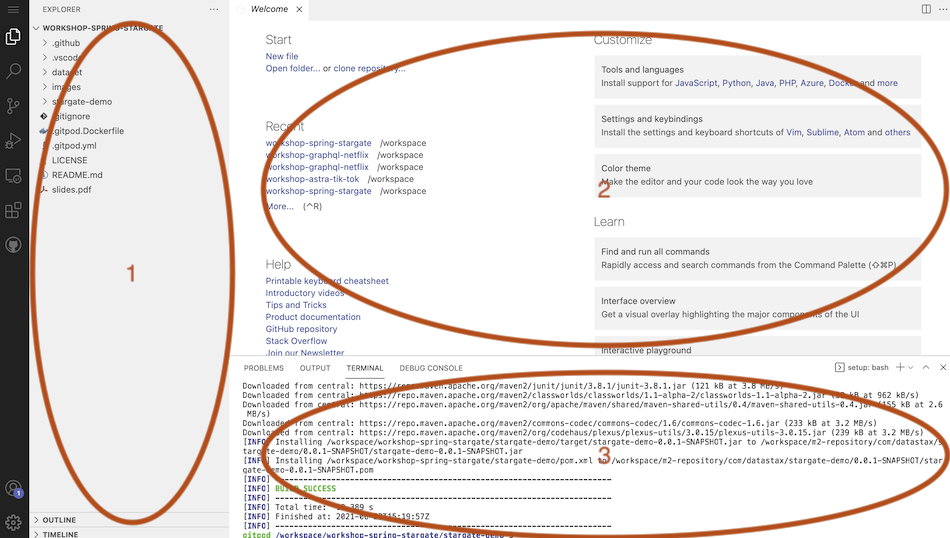
The extreme left side has the explorer view(1). The top left, middle to right is where you'll be editing files(2), etc. and the bottom left, middle to right is what we will refer to as the Gitpod terminal window(3) as shown below.
👁️ Expected output
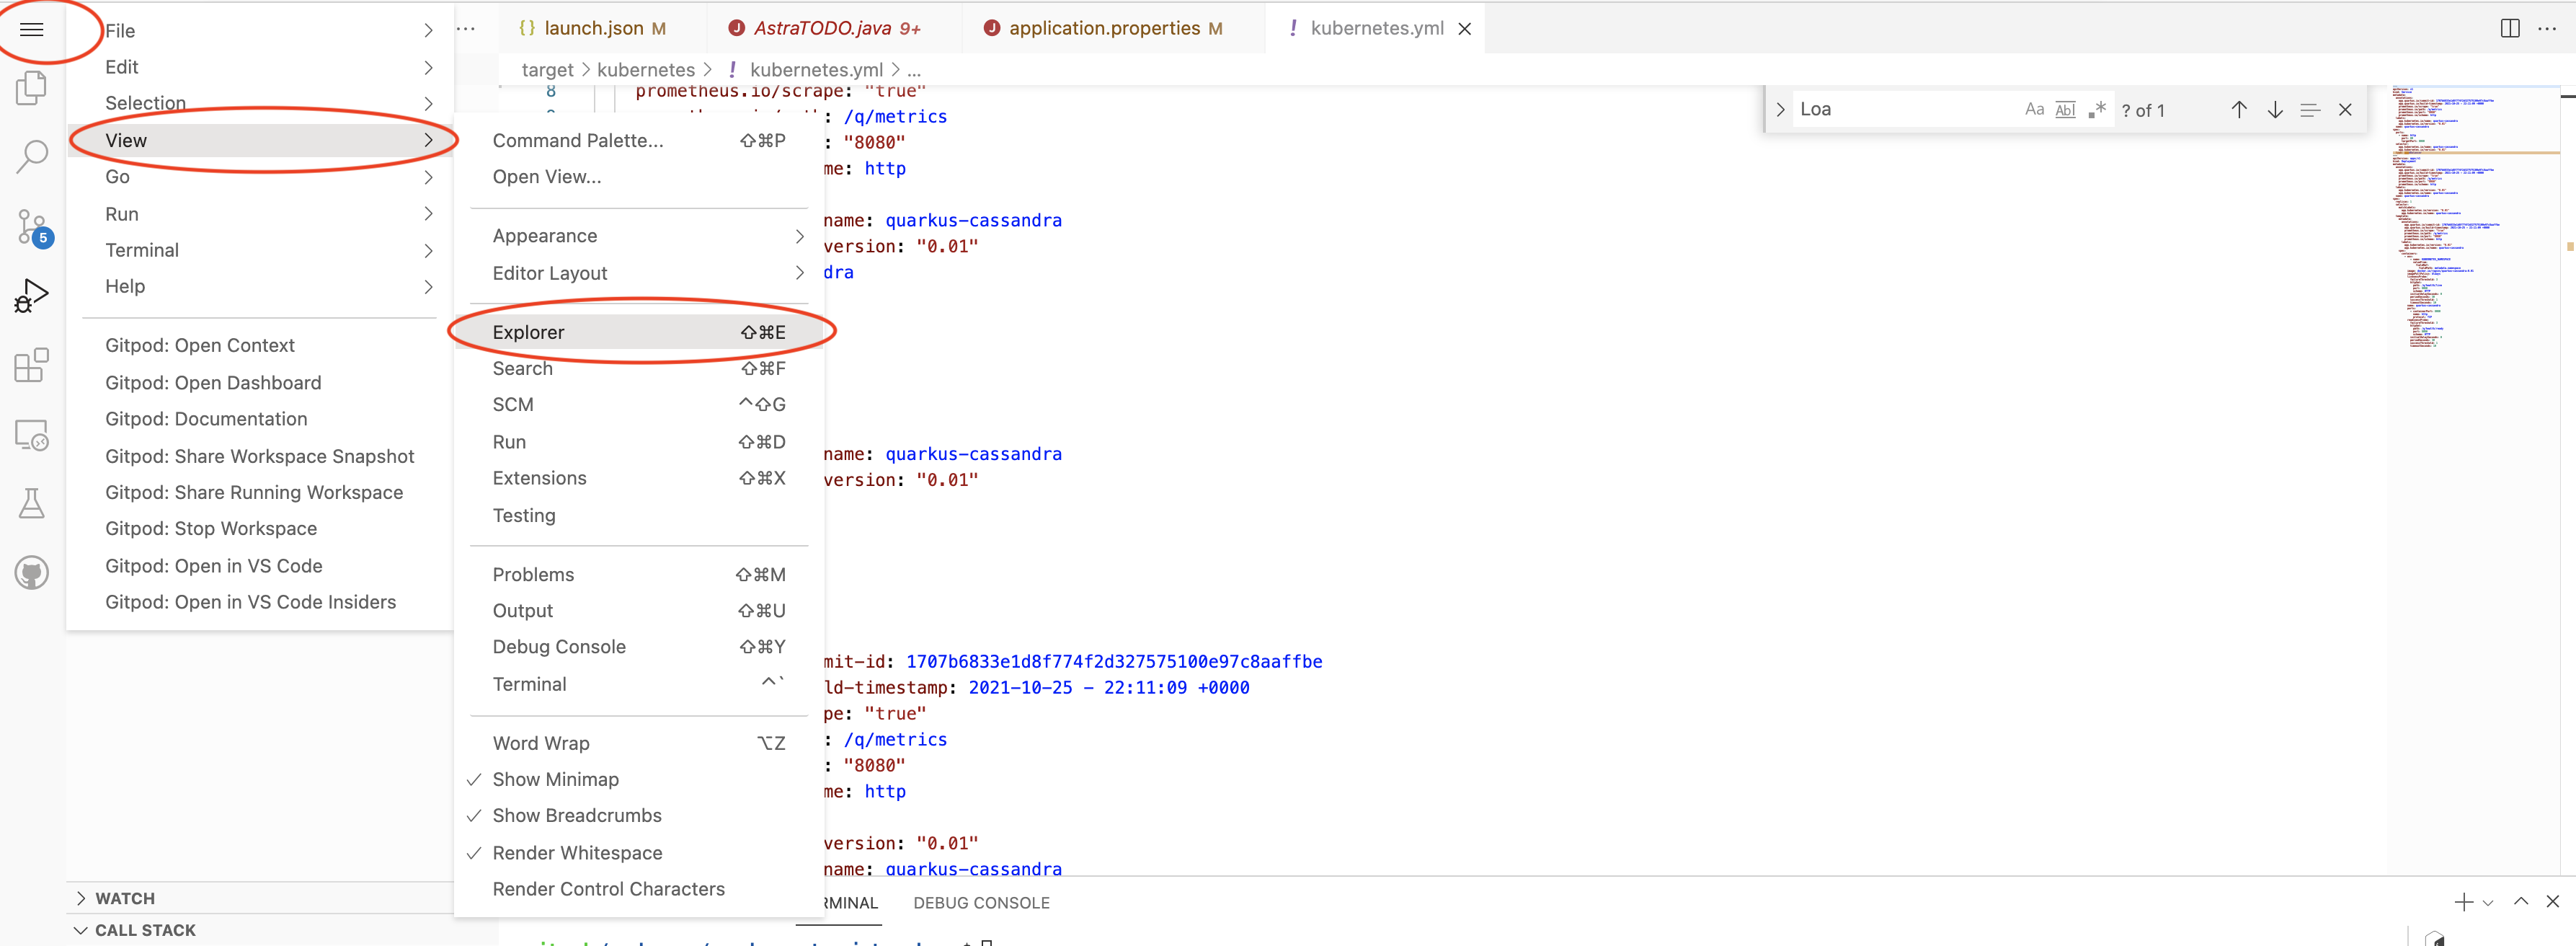
You can always get back to the file explorer view whenever by clicking on the hamburger menu on the top left followed by View and Explorer as shown below.
✅ Step 4a: Know your public URL
The workshop application has opened with an ephemeral URL. To know the URL where your application endpoint will be exposed you can run the following command in the terminal after the build has completed. Please note this URL and open this up in a new browser window as shown below.
gp url 8080👁️ Expected output
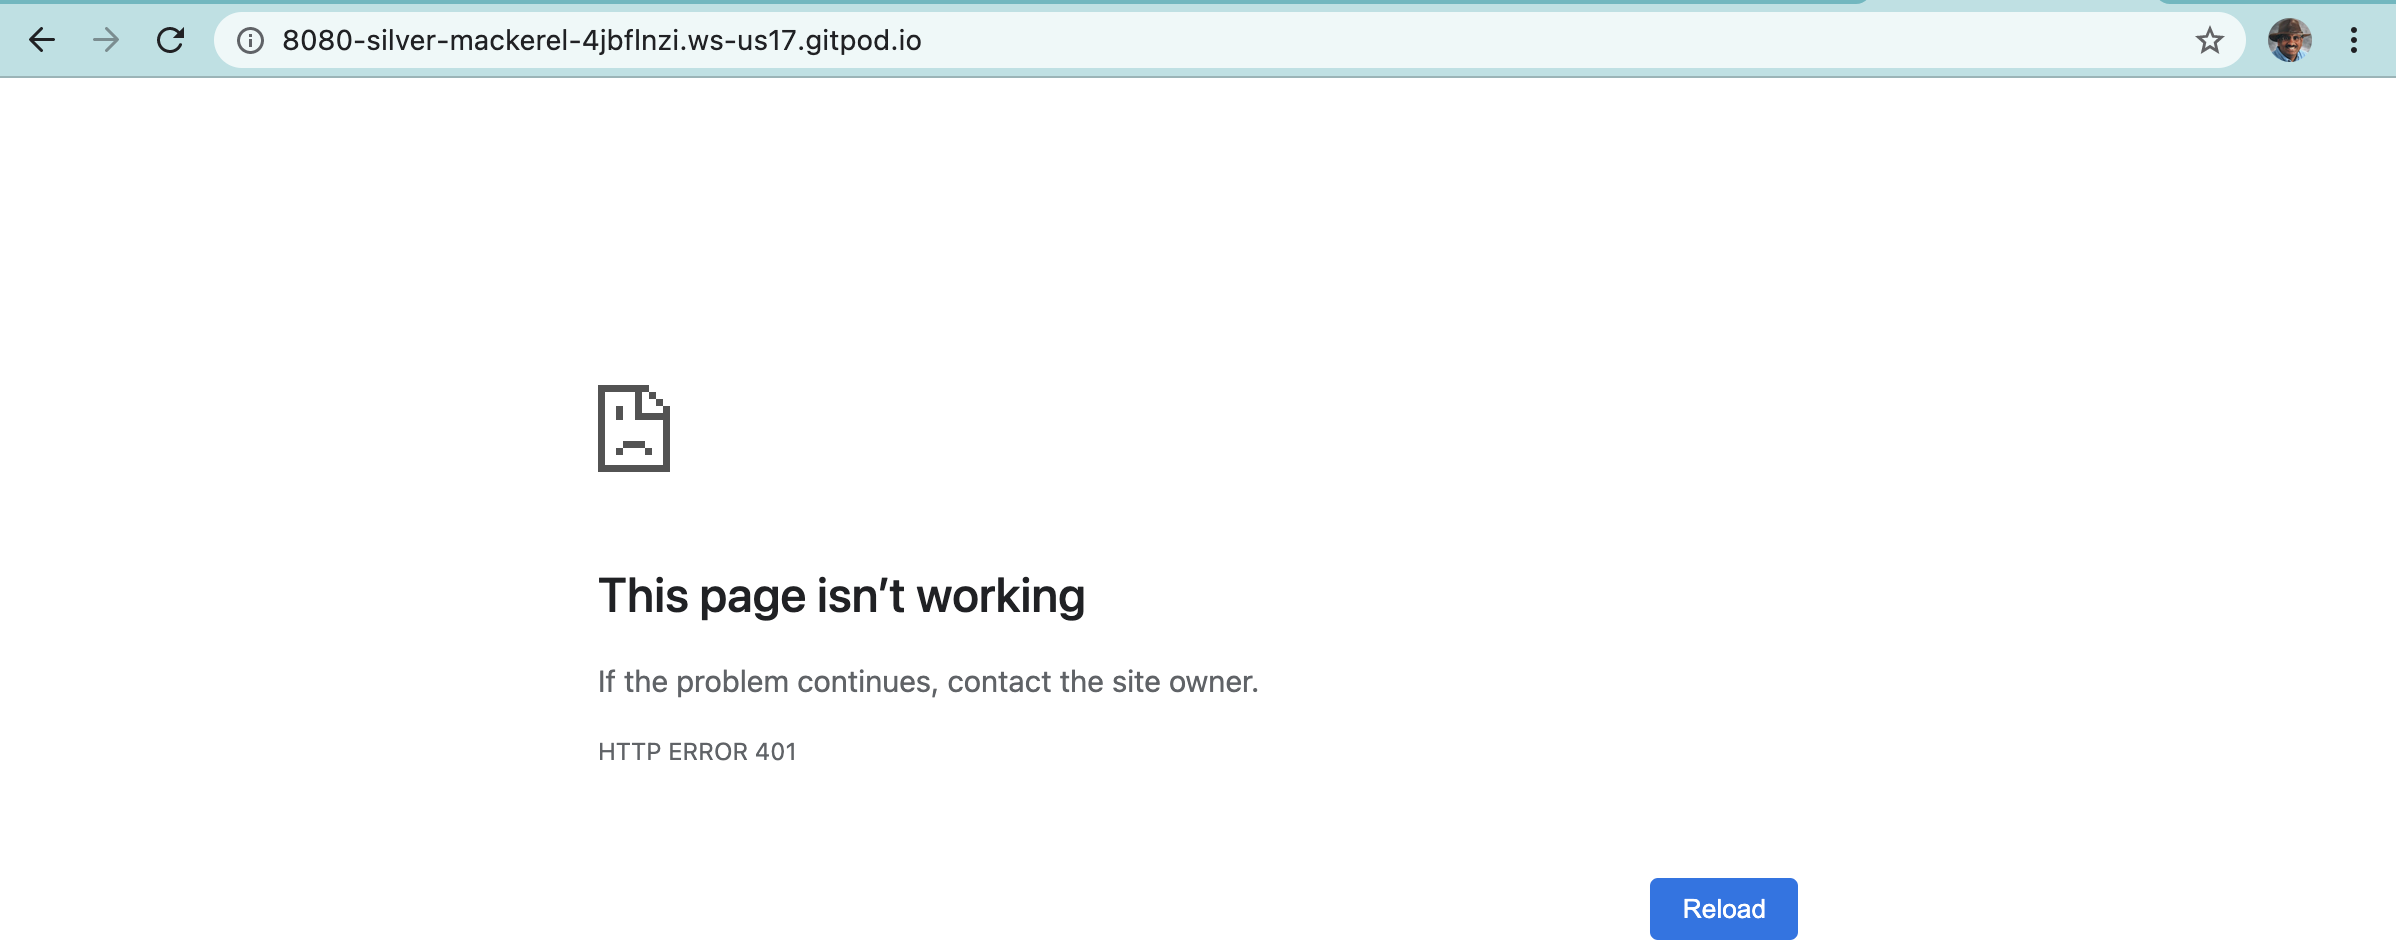
Although the application is not running yet, launch a new browser window (don't close it for the rest of the workshop since you'll continually keep using this. If you accidentally close it, just come back to this step. The browser will generate an error (due to application not running yet) which is fine for now as shown below.
👁️ Expected output
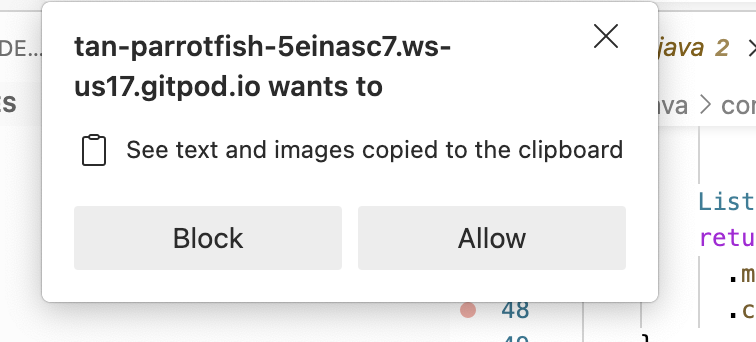
You may encounter the following at different steps and although this may not be applicable right away, the steps are included in advance and summarized here so that you can keep an eye out for it. Different paths and different environments might be slightly different although Gipod levels the playing field a bit.
You can allow cutting and pasting into the window by clicking on Allow as shown below.
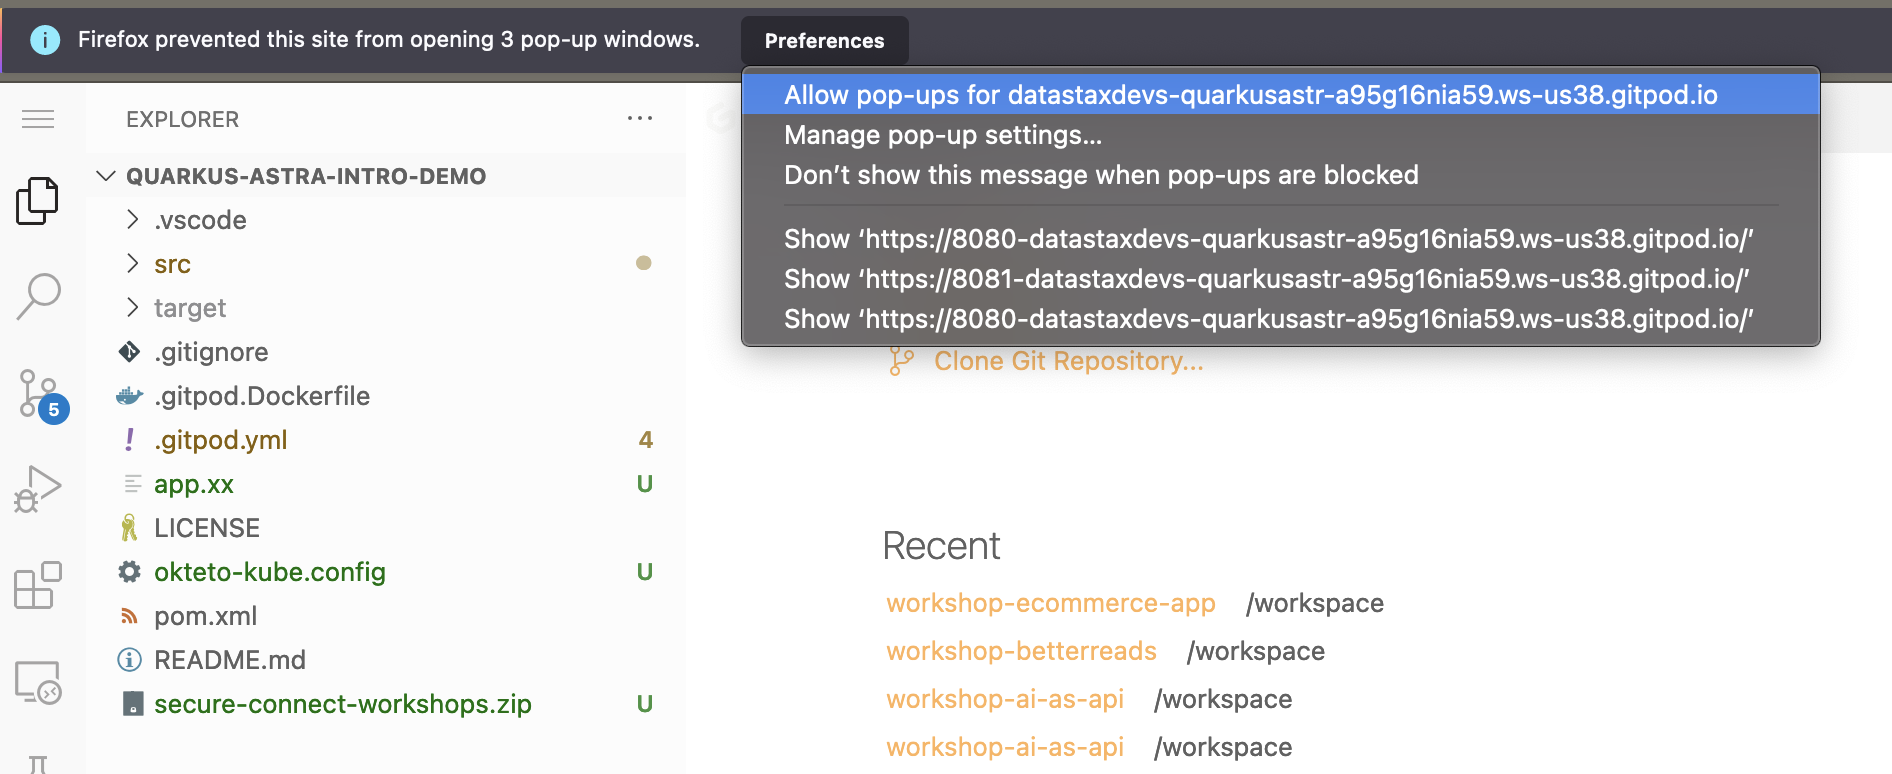
Or allow ports to be opened by just exiting windows that are informational messages about ports like below.
To run the application you need to provide the credentials and identifier to the application.
Issue the following command from the Gitpod terminal window.
gp open src/main/resources/application.properties
✅ Step 5a: Enter 2 values from the token
Enter the values of Client Id and Client Secret from values noted earlier for astra-username and astra-password respectively. The two lines with a TBD in comments is shown below.
✅ Step 5b: Download the secure connect bundle
curl -Ls "https://dtsx.io/get-astra-cli" | bash
source /home/gitpod/.astra/cli/astra-init.sh
astra
astra setup --token <>
astra db download-scb workshops -f /workspace/quarkus-astra-intro-demo/secure-connect-workshops.zip
ls -l secure-connect-workshops.zip
The file size should be roughly 12K otherwise something may have gone wrong in the process.
👁️ Expected output
-rw-r--r-- 1 gitpod gitpod 12231 Oct 26 00:15 secure-connect-workshops.zip
TADA your application is now configured we can finally play with some code.
The application is now set and you should be able to interact with your DB, although connecting to a "real" DB is not necessary in order to execute tests. The application's tests use the Quarkus Cassandra Test Framework. Quarkus will automatically bootstrap a Cassandra Docker container and connect it to the application when the tests execute.
Under the covers, all interaction with Cassandra is implemented in Java through the com.datastax.oss.driver.api.core.CqlSession, part of the DataStax Java Driver. Higher level frameworks like Quarkus, Spring, Spring Data, rely on this object. The Quarkus Cassandra Test Framework makes sure its available to the tests.
Let's run this unit test in the Gitpod terminal window.
./mvnw test -Dtest=com.datastaxdev.todo.rest.TodoResourceTests👁️ Expected output
Picked up JAVA_TOOL_OPTIONS:  -Xmx3435m
[INFO] Scanning for projects...
[INFO]
[INFO] ---------< quarkus-astra-intro-demo:quarkus-astra-intro-demo >----------
[INFO] Building quarkus-astra-intro-demo 0.01
[INFO] --------------------------------[ jar ]---------------------------------
[INFO]
[INFO] --- maven-resources-plugin:2.6:resources (default-resources) @ quarkus-astra-intro-demo ---
[INFO] Using 'UTF-8' encoding to copy filtered resources.
[INFO] Copying 24 resources
[INFO]
[INFO] --- quarkus-maven-plugin:2.9.1.Final:generate-code (default) @ quarkus-astra-intro-demo ---
[INFO]
[INFO] --- maven-compiler-plugin:3.8.1:compile (default-compile) @ quarkus-astra-intro-demo ---
[INFO] Nothing to compile - all classes are up to date
[INFO]
[INFO] --- quarkus-maven-plugin:2.9.1.Final:generate-code-tests (default) @ quarkus-astra-intro-demo ---
[INFO]
[INFO] --- maven-resources-plugin:2.6:testResources (default-testResources) @ quarkus-astra-intro-demo ---
[INFO] Using 'UTF-8' encoding to copy filtered resources.
[INFO] Copying 1 resource
[INFO]
[INFO] --- maven-compiler-plugin:3.8.1:testCompile (default-testCompile) @ quarkus-astra-intro-demo ---
[INFO] Nothing to compile - all classes are up to date
[INFO]
[INFO] --- maven-surefire-plugin:3.0.0-M5:test (default-test) @ quarkus-astra-intro-demo ---
[INFO]
[INFO] -------------------------------------------------------
[INFO]  T E S T S
[INFO] -------------------------------------------------------
[ERROR] Picked up JAVA_TOOL_OPTIONS:  -Xmx3435m
[INFO] Running com.datastaxdev.todo.rest.TodoResourceTests
INFO  [org.jbo.threads] (main) JBoss Threads version 3.4.2.Final
INFO  [org.tes.uti.ImageNameSubstitutor] (main) Image name substitution will be performed by: DefaultImageNameSubstitutor (composite of 'ConfigurationFileImageNameSubstitutor' and 'PrefixingImageNameSubstitutor')
INFO  [org.tes.doc.DockerClientProviderStrategy] (pool-4-thread-1) Loaded org.testcontainers.dockerclient.UnixSocketClientProviderStrategy from ~/.testcontainers.properties, will try it first
INFO  [org.tes.doc.DockerClientProviderStrategy] (pool-4-thread-1) Found Docker environment with local Unix socket (unix:///var/run/docker.sock)
INFO  [org.tes.DockerClientFactory] (pool-4-thread-1) Docker host IP address is localhost
INFO  [org.tes.DockerClientFactory] (pool-4-thread-1) Connected to docker:
  Server Version: 20.10.14
  API Version: 1.41
  Operating System: Ubuntu 20.04.4 LTS
  Total Memory: 64312 MB
INFO  [org.tes.uti.RegistryAuthLocator] (pool-4-thread-1) Failure when attempting to lookup auth config. Please ignore if you don't have images in an authenticated registry. Details: (dockerImageName: testcontainers/ryuk:0.3.3, configFile: /home/gitpod/.docker/config.json. Falling back to docker-java default behaviour. Exception message: /home/gitpod/.docker/config.json (No such file or directory)
INFO  [org.tes.uti.RyukResourceReaper] (pool-4-thread-1) Ryuk started - will monitor and terminate Testcontainers containers on JVM exit
INFO  [org.tes.DockerClientFactory] (pool-4-thread-1) Checking the system...
INFO  [org.tes.DockerClientFactory] (pool-4-thread-1) ✔︎ Docker server version should be at least 1.6.0
INFO  [org.tes.DockerClientFactory] (pool-4-thread-1) ✔︎ Docker environment should have more than 2GB free disk space
INFO  [com.dat.oss.qua.tes.CassandraTestResource] (pool-4-thread-1) Container cassandra:latest starting...
INFO  [🐳 [cassandra:latest]] (pool-4-thread-1) Creating container for image: cassandra:latest
INFO  [🐳 [cassandra:latest]] (pool-4-thread-1) Container cassandra:latest is starting: 001d53b387a0a5861466621f6828e753036bec4d9958562ba24a934442c430e5
INFO  [com.dat.dri.core] (ducttape-0) DataStax Java driver 3.7.1 for Apache Cassandra
INFO  [com.dat.dri.cor.GuavaCompatibility] (ducttape-0) Detected Guava >= 19 in the classpath, using modern compatibility layer
INFO  [com.dat.dri.cor.ClockFactory] (ducttape-0) Using native clock to generate timestamps.
INFO  [com.dat.dri.cor.NettyUtil] (ducttape-0) Did not find Netty's native epoll transport in the classpath, defaulting to NIO.
INFO  [com.dat.dri.cor.ClockFactory] (ducttape-0) Using native clock to generate timestamps.
INFO  [com.dat.dri.cor.ClockFactory] (ducttape-0) Using native clock to generate timestamps.
WARN  [com.dat.dri.cor.Cluster] (ducttape-0) You listed localhost/127.0.0.1:49156 in your contact points, but it wasn't found in the control host's system.peers at startup
INFO  [com.dat.dri.cor.pol.DCAwareRoundRobinPolicy] (ducttape-0) Using data-center name 'datacenter1' for DCAwareRoundRobinPolicy (if this is incorrect, please provide the correct datacenter name with DCAwareRoundRobinPolicy constructor)
INFO  [com.dat.dri.cor.Cluster] (ducttape-0) New Cassandra host localhost/0:0:0:0:0:0:0:1:49156 added
INFO  [🐳 [cassandra:latest]] (pool-4-thread-1) Container cassandra:latest started in PT9.049449S
INFO  [org.tes.ext.ScriptUtils] (pool-4-thread-1) Executing database script from init_script.cql
INFO  [com.dat.dri.cor.ClockFactory] (pool-4-thread-1) Using native clock to generate timestamps.
WARN  [com.dat.dri.cor.Cluster] (pool-4-thread-1) You listed localhost/127.0.0.1:49156 in your contact points, but it wasn't found in the control host's system.peers at startup
INFO  [com.dat.dri.cor.pol.DCAwareRoundRobinPolicy] (pool-4-thread-1) Using data-center name 'datacenter1' for DCAwareRoundRobinPolicy (if this is incorrect, please provide the correct datacenter name with DCAwareRoundRobinPolicy constructor)
INFO  [com.dat.dri.cor.Cluster] (pool-4-thread-1) New Cassandra host localhost/0:0:0:0:0:0:0:1:49156 added
INFO  [org.tes.ext.ScriptUtils] (pool-4-thread-1) Executed database script from init_script.cql in 2132 ms.
INFO  [com.dat.dri.cor.ClockFactory] (pool-4-thread-1) Using native clock to generate timestamps.
WARN  [com.dat.dri.cor.Cluster] (pool-4-thread-1) You listed localhost/0:0:0:0:0:0:0:1:49156 in your contact points, but it wasn't found in the control host's system.peers at startup
INFO  [com.dat.dri.cor.pol.DCAwareRoundRobinPolicy] (pool-4-thread-1) Using data-center name 'datacenter1' for DCAwareRoundRobinPolicy (if this is incorrect, please provide the correct datacenter name with DCAwareRoundRobinPolicy constructor)
INFO  [com.dat.dri.cor.Cluster] (pool-4-thread-1) New Cassandra host localhost/127.0.0.1:49156 added
INFO  [com.dat.oss.qua.tes.CassandraTestResource] (pool-4-thread-1) Container cassandra:latest listening on 127.0.0.1:49156 (inferred local DC: datacenter1)
WARN  [io.qua.config] (main) Unrecognized configuration key "quarkus.kubernetes.service-type" was provided; it will be ignored; verify that the dependency extension for this configuration is set or that you did not make a typo
WARN  [io.qua.config] (main) Unrecognized configuration key "quarkus.kubernetes.env.secrets" was provided; it will be ignored; verify that the dependency extension for this configuration is set or that you did not make a typo
INFO  [com.dat.oss.qua.run.int.qua.CassandraClientRecorder] (main) Enabling Cassandra metrics using Micrometer.
INFO  [com.dat.oss.qua.run.int.qua.CassandraClientStarter] (main) Eagerly initializing Quarkus Cassandra client.
INFO  [com.dat.oss.dri.int.cor.DefaultMavenCoordinates] (main) DataStax Java driver for Apache Cassandra(R) (com.datastax.oss:java-driver-core) version 4.14.0
INFO  [com.dat.oss.dri.int.cor.tim.Clock] (vert.x-eventloop-thread-0) Using native clock for microsecond precision
INFO  [com.dat.tod.res.TodoResource] (main) **** Table created true****
INFO  [io.quarkus] (main) quarkus-astra-intro-demo 0.01 on JVM (powered by Quarkus 2.9.1.Final) started in 16.146s. Listening on: http://localhost:41159
INFO  [io.quarkus] (main) Profile test activated.
INFO  [io.quarkus] (main) Installed features: [cassandra-client, cdi, micrometer, resteasy-reactive, resteasy-reactive-jackson, smallrye-context-propagation, smallrye-health, smallrye-openapi, swagger-ui, vertx]
[INFO] Tests run: 8, Failures: 0, Errors: 0, Skipped: 0, Time elapsed: 19.304 s - in com.datastaxdev.todo.rest.TodoResourceTests
INFO  [com.dat.oss.qua.run.int.qua.CassandraClientRecorder] (main) Closing Quarkus Cassandra session.
INFO  [io.quarkus] (main) quarkus-astra-intro-demo stopped in 0.039s
[INFO]
[INFO] Results:
[INFO]
[INFO] Tests run: 8, Failures: 0, Errors: 0, Skipped: 0
[INFO]
[INFO] ------------------------------------------------------------------------
[INFO] BUILD SUCCESS
[INFO] ------------------------------------------------------------------------
[INFO] Total time:  25.096 s
[INFO] Finished at: 2022-05-16T18:22:07Z
[INFO] ------------------------------------------------------------------------
You can see from the output that the cassandra:latest Docker container was started before the tests were executed.
Verfiy that the table got created with the following command
./mvnw test -Dcom.datastaxdev.todo.rest.TodoResourceTests | grep -i table👁️ Expected output
INFO [com.dat.tod.res.TodoResource] (main) **** Table created true****
You will likely see that output repeated more than once.
Although a significant strength of the Quarkus platform is it's continuous testing capabilities, we will skip tests going foraward and focus on the other capabilities of the platform (perhaps, another workshop sometime focussed mainly on testing capabilities, assuming there is enough demand).
Before we get started let's check that the Graal VM is available.
echo $GRAALVM_HOME
👁️ Expected output
/home/gitpod/.sdkman/candidates/java/current
✅ Step 7a: Begin dev
In the Gitpod terminal window, We will begin the inner loop journey in dev mode using the following command.
./mvnw quarkus:dev -DskipTests👁️ Expected output
__  ____  __  _____   ___  __ ____  ______
 --/ __ \/ / / / _ | / _ \/ //_/ / / / __/
 -/ /_/ / /_/ / __ |/ , _/ ,< / /_/ /\ \
--\___\_\____/_/ |_/_/|_/_/|_|\____/___/
WARN  [io.qua.config] (Quarkus Main Thread) Unrecognized configuration key "quarkus.kubernetes.service-type" was provided; it will be ignored; verify that the dependency extension for this configuration is set or that you did not make a typo

WARN  [io.qua.config] (Quarkus Main Thread) Unrecognized configuration key "quarkus.kubernetes.env.secrets" was provided; it will be ignored; verify that the dependency extension for this configuration is set or that you did not make a typo
INFO  [com.dat.oss.qua.run.int.qua.CassandraClientRecorder] (Quarkus Main Thread) Enabling Cassandra metrics using Micrometer.
INFO  [com.dat.oss.qua.run.int.qua.CassandraClientStarter] (Quarkus Main Thread) Eagerly initializing Quarkus Cassandra client.
INFO  [com.dat.oss.dri.int.cor.DefaultMavenCoordinates] (Quarkus Main Thread) DataStax Java driver for Apache Cassandra(R) (com.datastax.oss:java-driver-core) version 4.14.0
INFO  [com.dat.oss.dri.int.cor.tim.Clock] (vert.x-eventloop-thread-0) Using native clock for microsecond precision
INFO  [com.dat.oss.dri.int.cor.ses.DefaultSession] (vert.x-eventloop-thread-9) [s0] Negotiated protocol version V4 for the initial contact point, but cluster seems to support V5, keeping the negotiated version
INFO  [com.dat.tod.res.TodoResource] (Quarkus Main Thread) **** Table created true****
INFO  [io.quarkus] (Quarkus Main Thread) quarkus-astra-intro-demo 0.01 on JVM (powered by Quarkus 2.9.1.Final) started in 7.383s. Listening on: http://localhost:8080
INFO  [io.quarkus] (Quarkus Main Thread) Profile dev activated. Live Coding activated.
INFO  [io.quarkus] (Quarkus Main Thread) Installed features: [cassandra-client, cdi, micrometer, resteasy-reactive, resteasy-reactive-jackson, smallrye-context-propagation, smallrye-health, smallrye-openapi, swagger-ui, vertx]

--
Tests paused
Press [r] to resume testing, [o] Toggle test output, [:] for the terminal, [h] for more options>
✅ Step 7b: Explore Quarkus dev mode
Typing h in the terminal window should bring up the following
👁️ Expected output
The following commands are currently available:

== Continuous Testing

[r] - Resume testing
[o] - Toggle test output (disabled)

== Exceptions

[x] - Opens last exception in IDE (None)

== HTTP

[w] - Open the application in a browser
[d] - Open the Dev UI in a browser

== System

[s] - Force restart
[i] - Toggle instrumentation based reload (disabled)
[l] - Toggle live reload (enabled)
[j] - Toggle log levels (INFO)
[h] - Shows this help
[:] - Enters terminal mode
[q] - Quits the application

--
Tests paused
Press [r] to resume testing, [o] Toggle test output, [:] for the terminal, [h] for more options>
You can try the different options available.
Note that you may have to allow popups from gitpod.io as shown below.
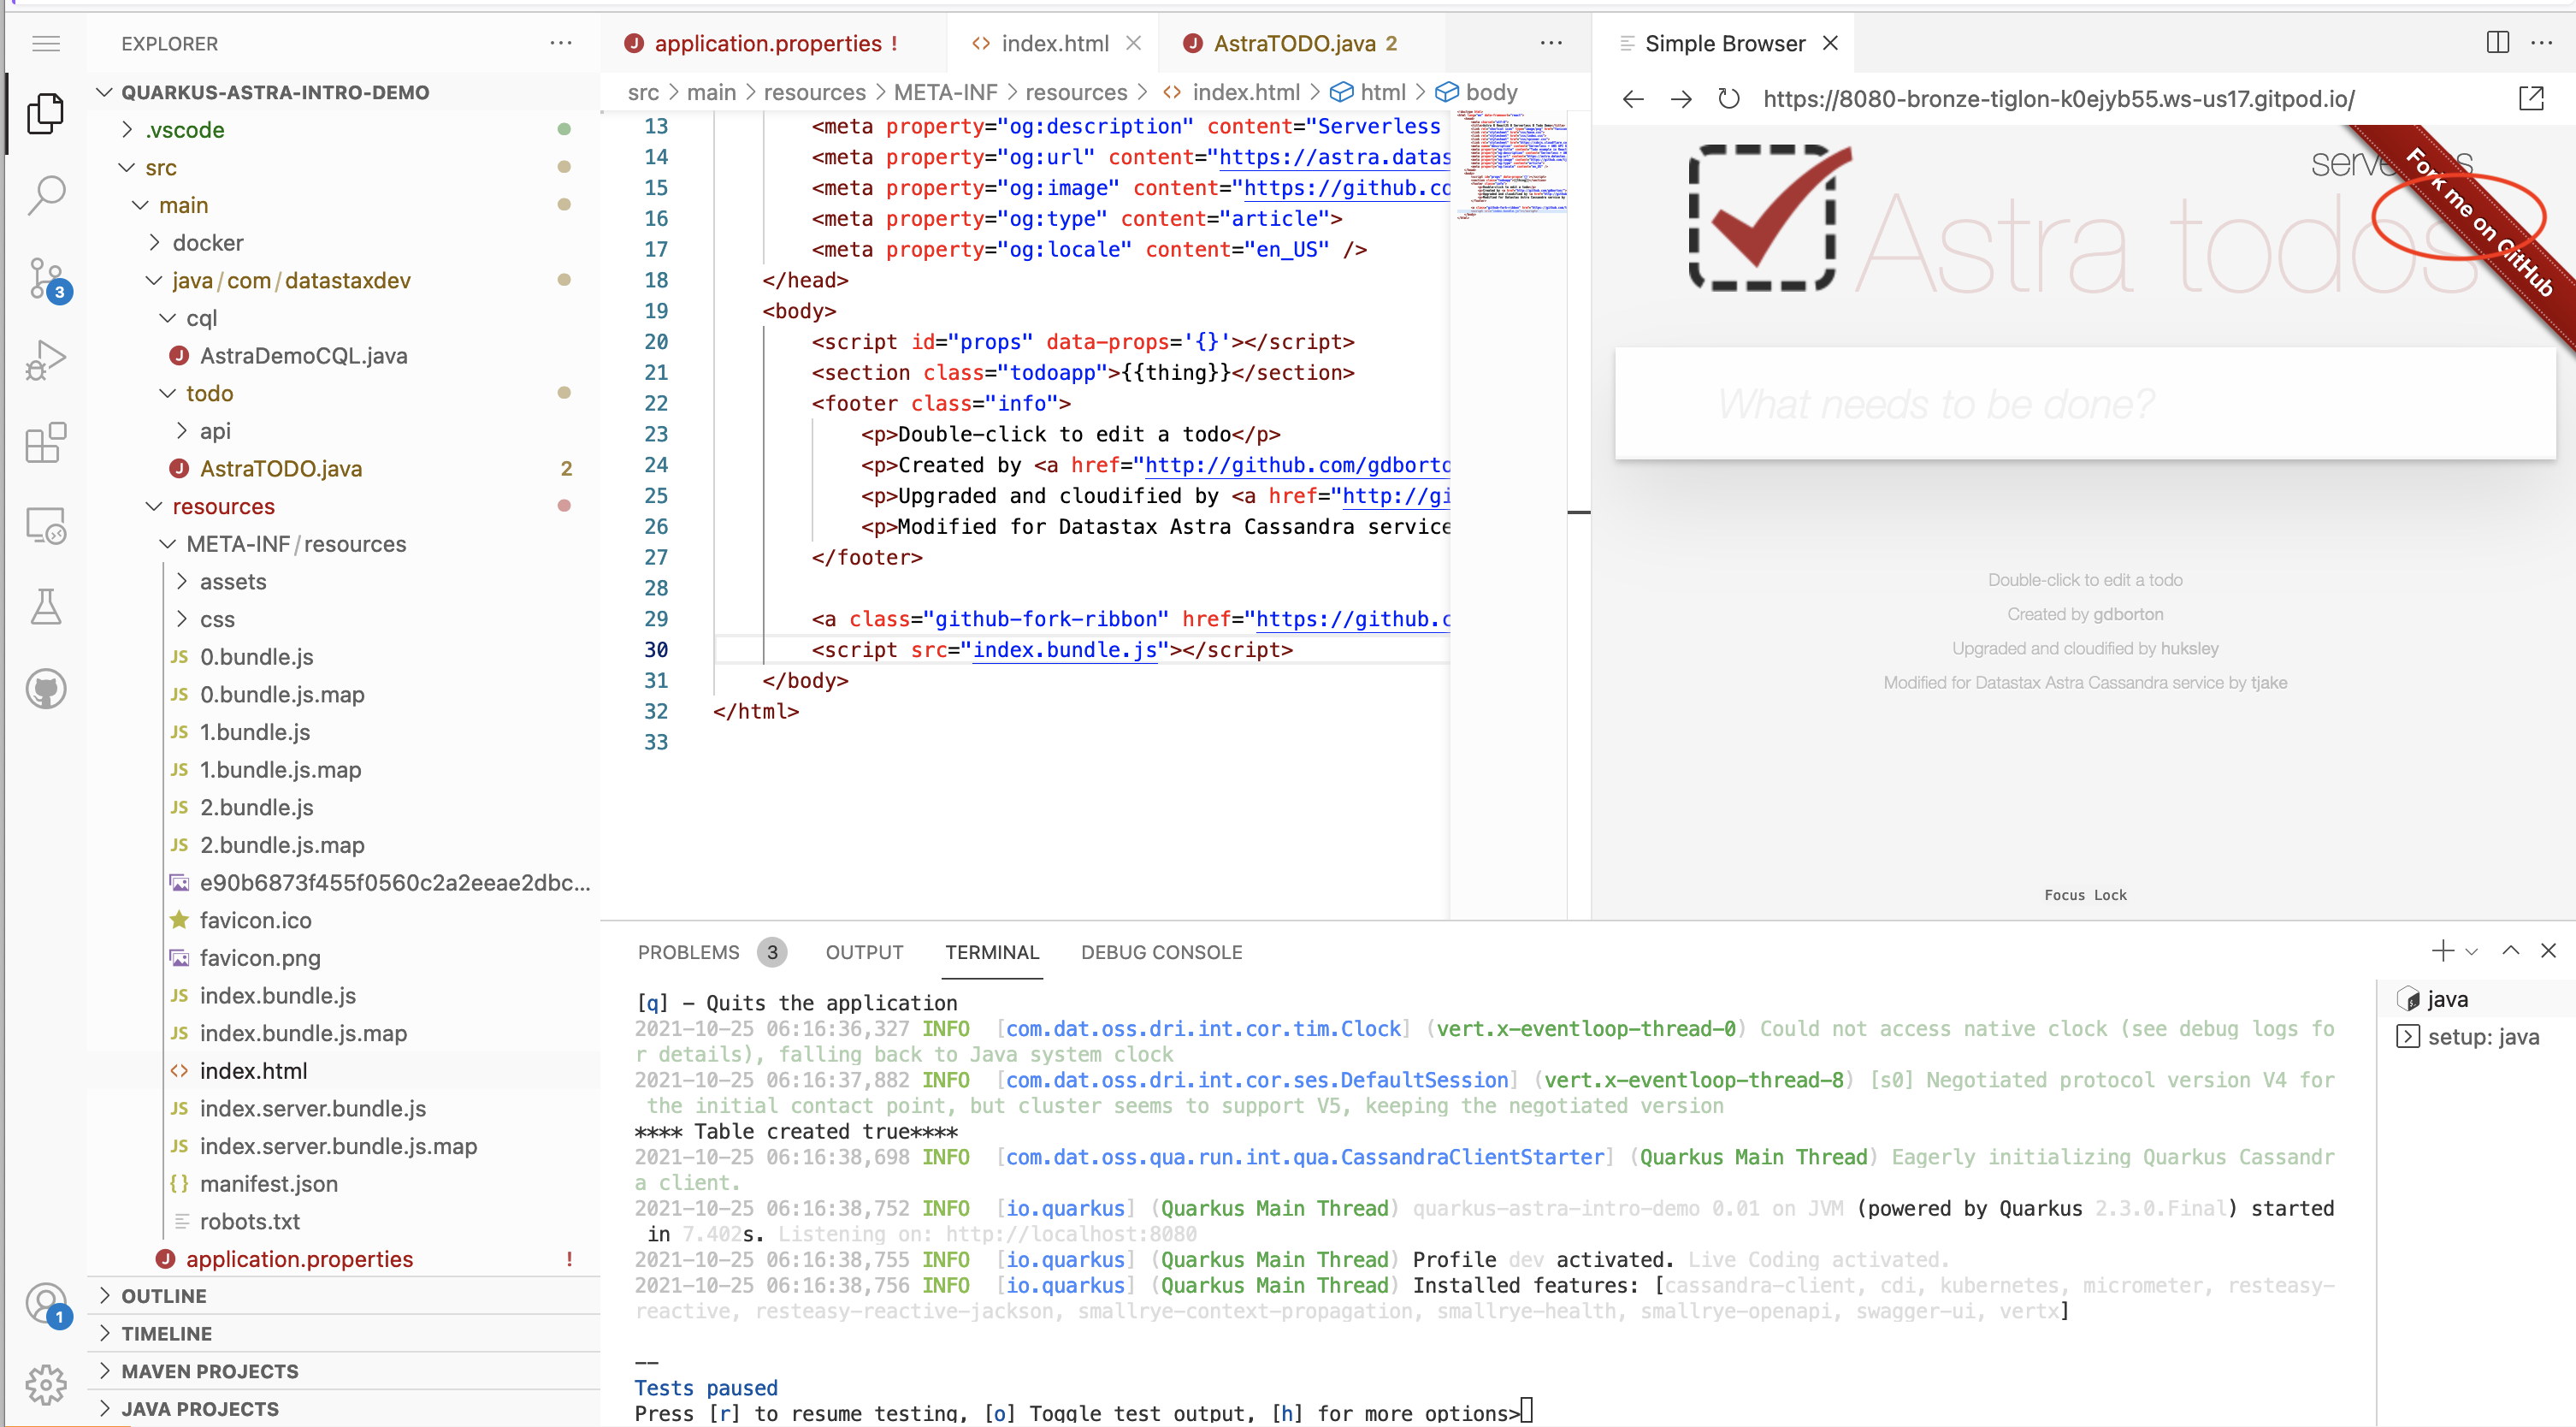
Try connecting to the application in a browser by pressing the w key as indicated above. This should bring up the application as below.
NOTE: This may not actually work in Gitpod because of the way Gitpod handles links. If the page doesn't open for you simply go to the browser tab you opened back in step 4a.
👁️ Expected output
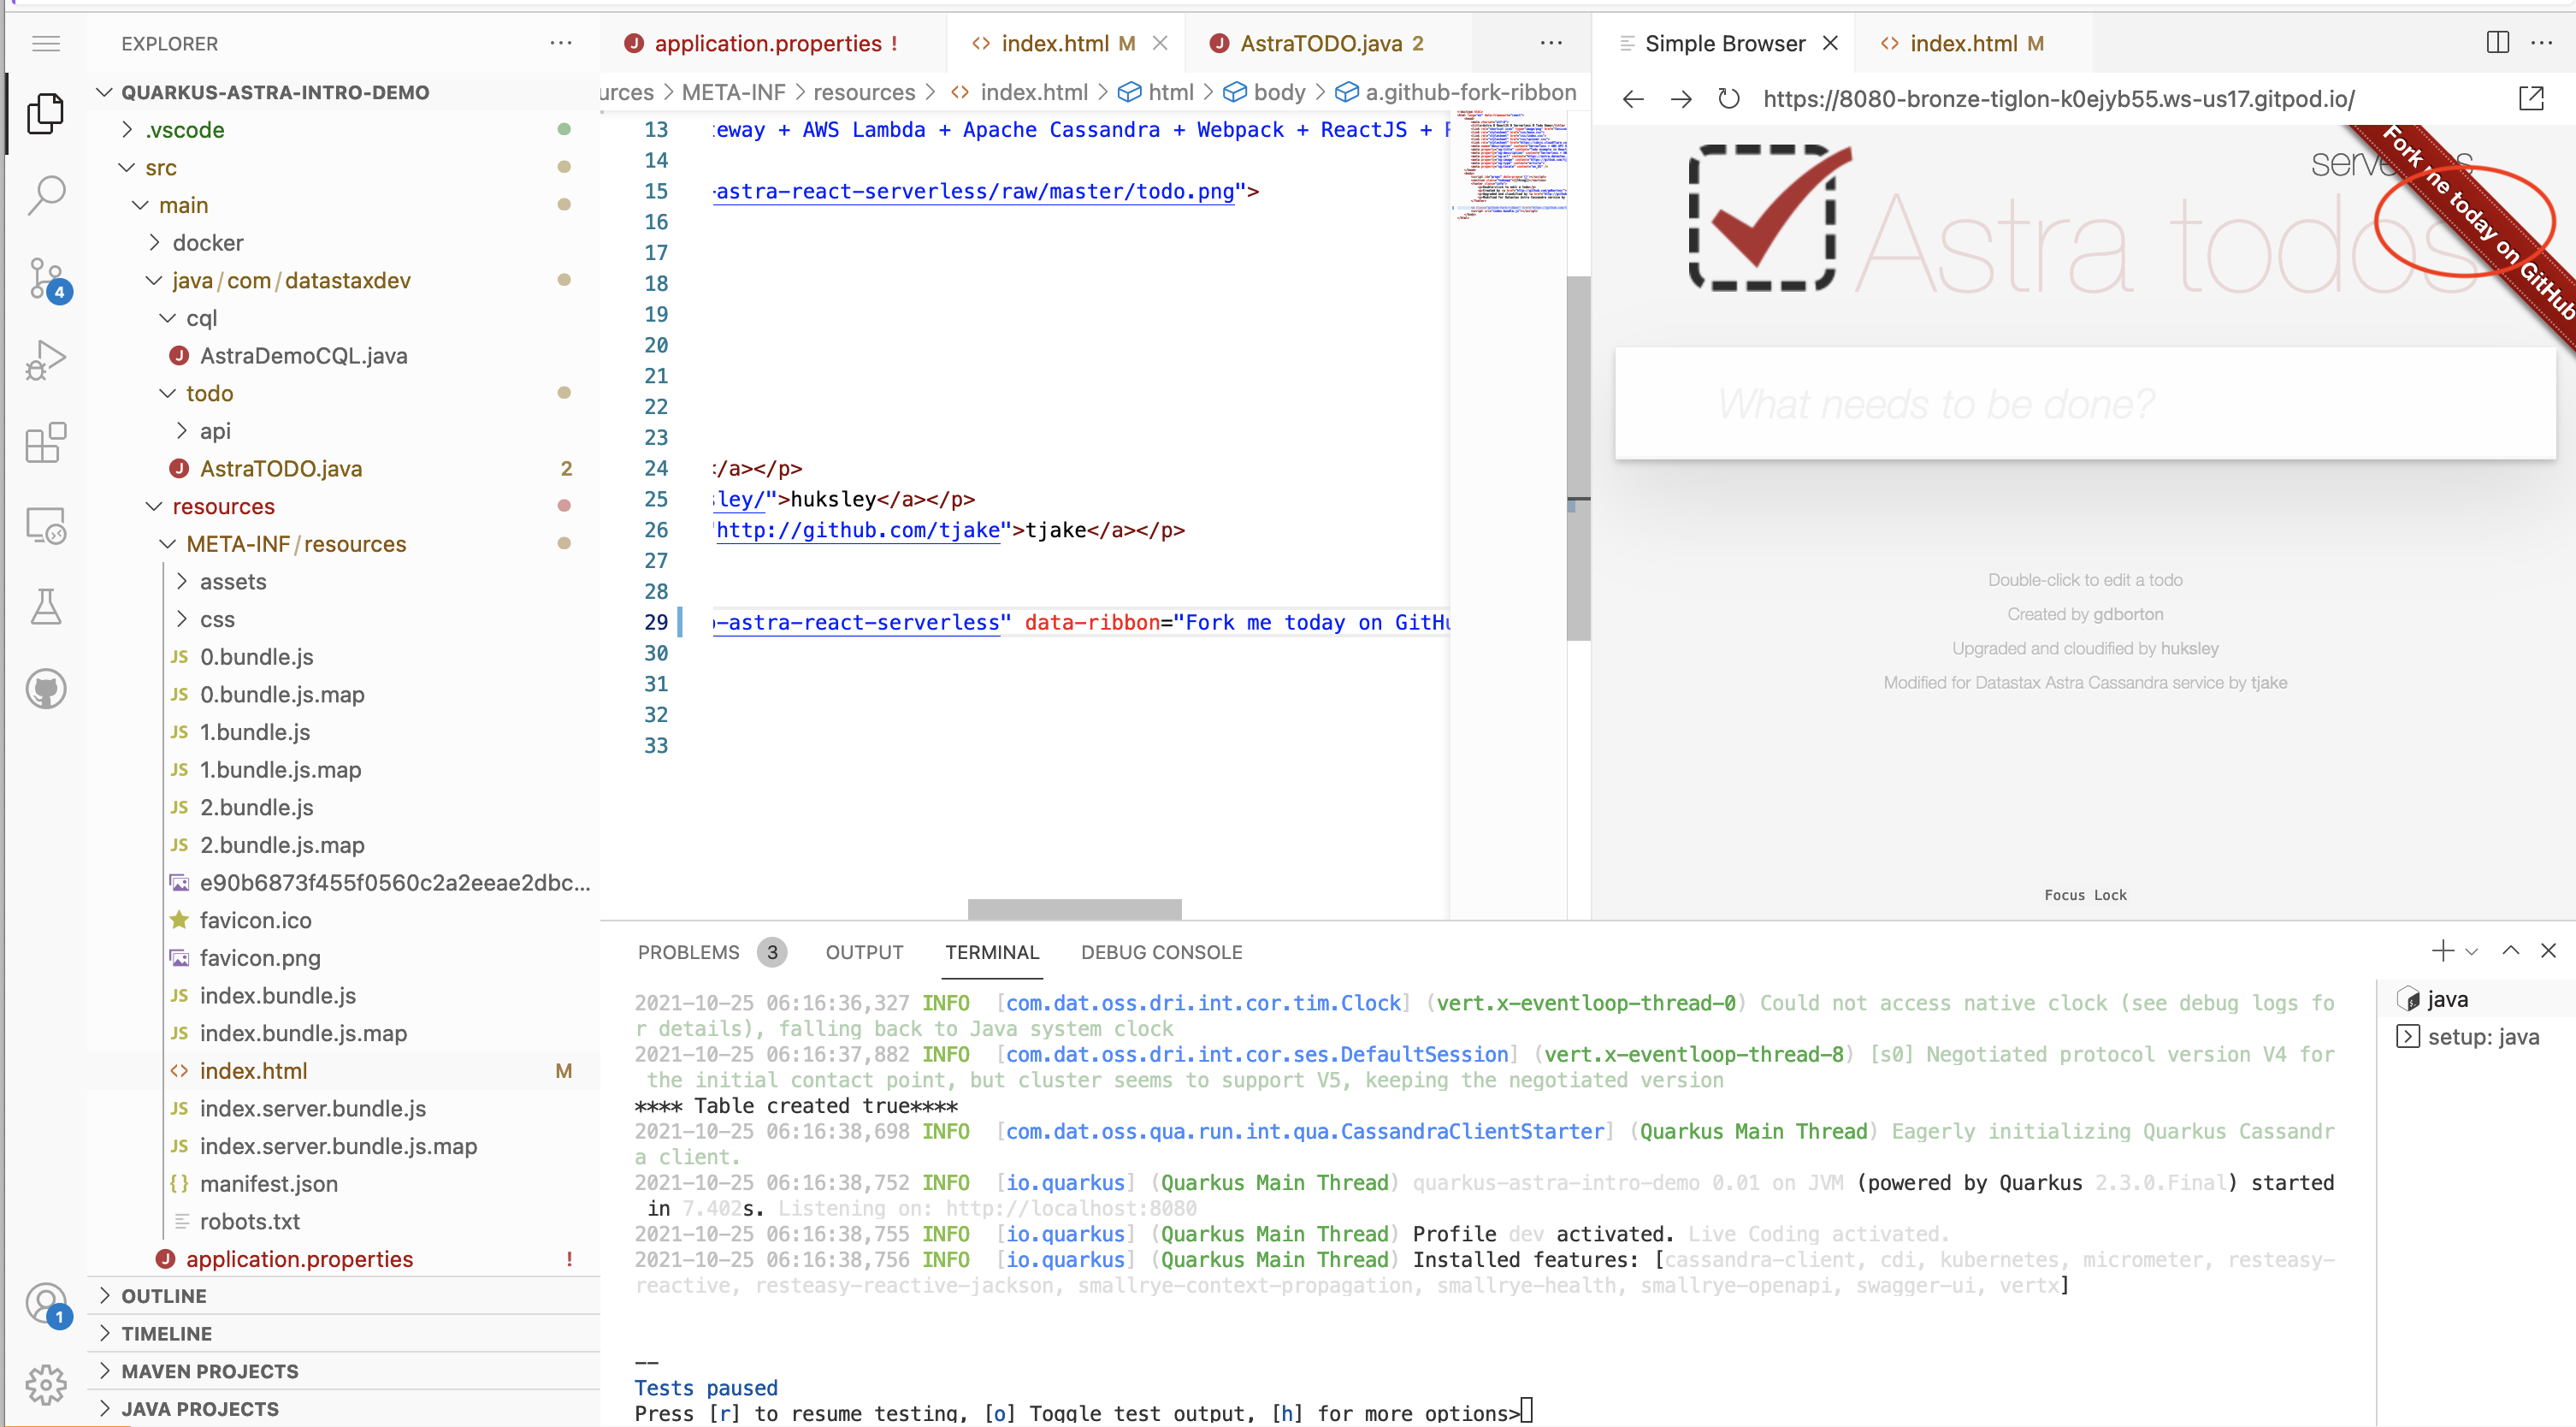
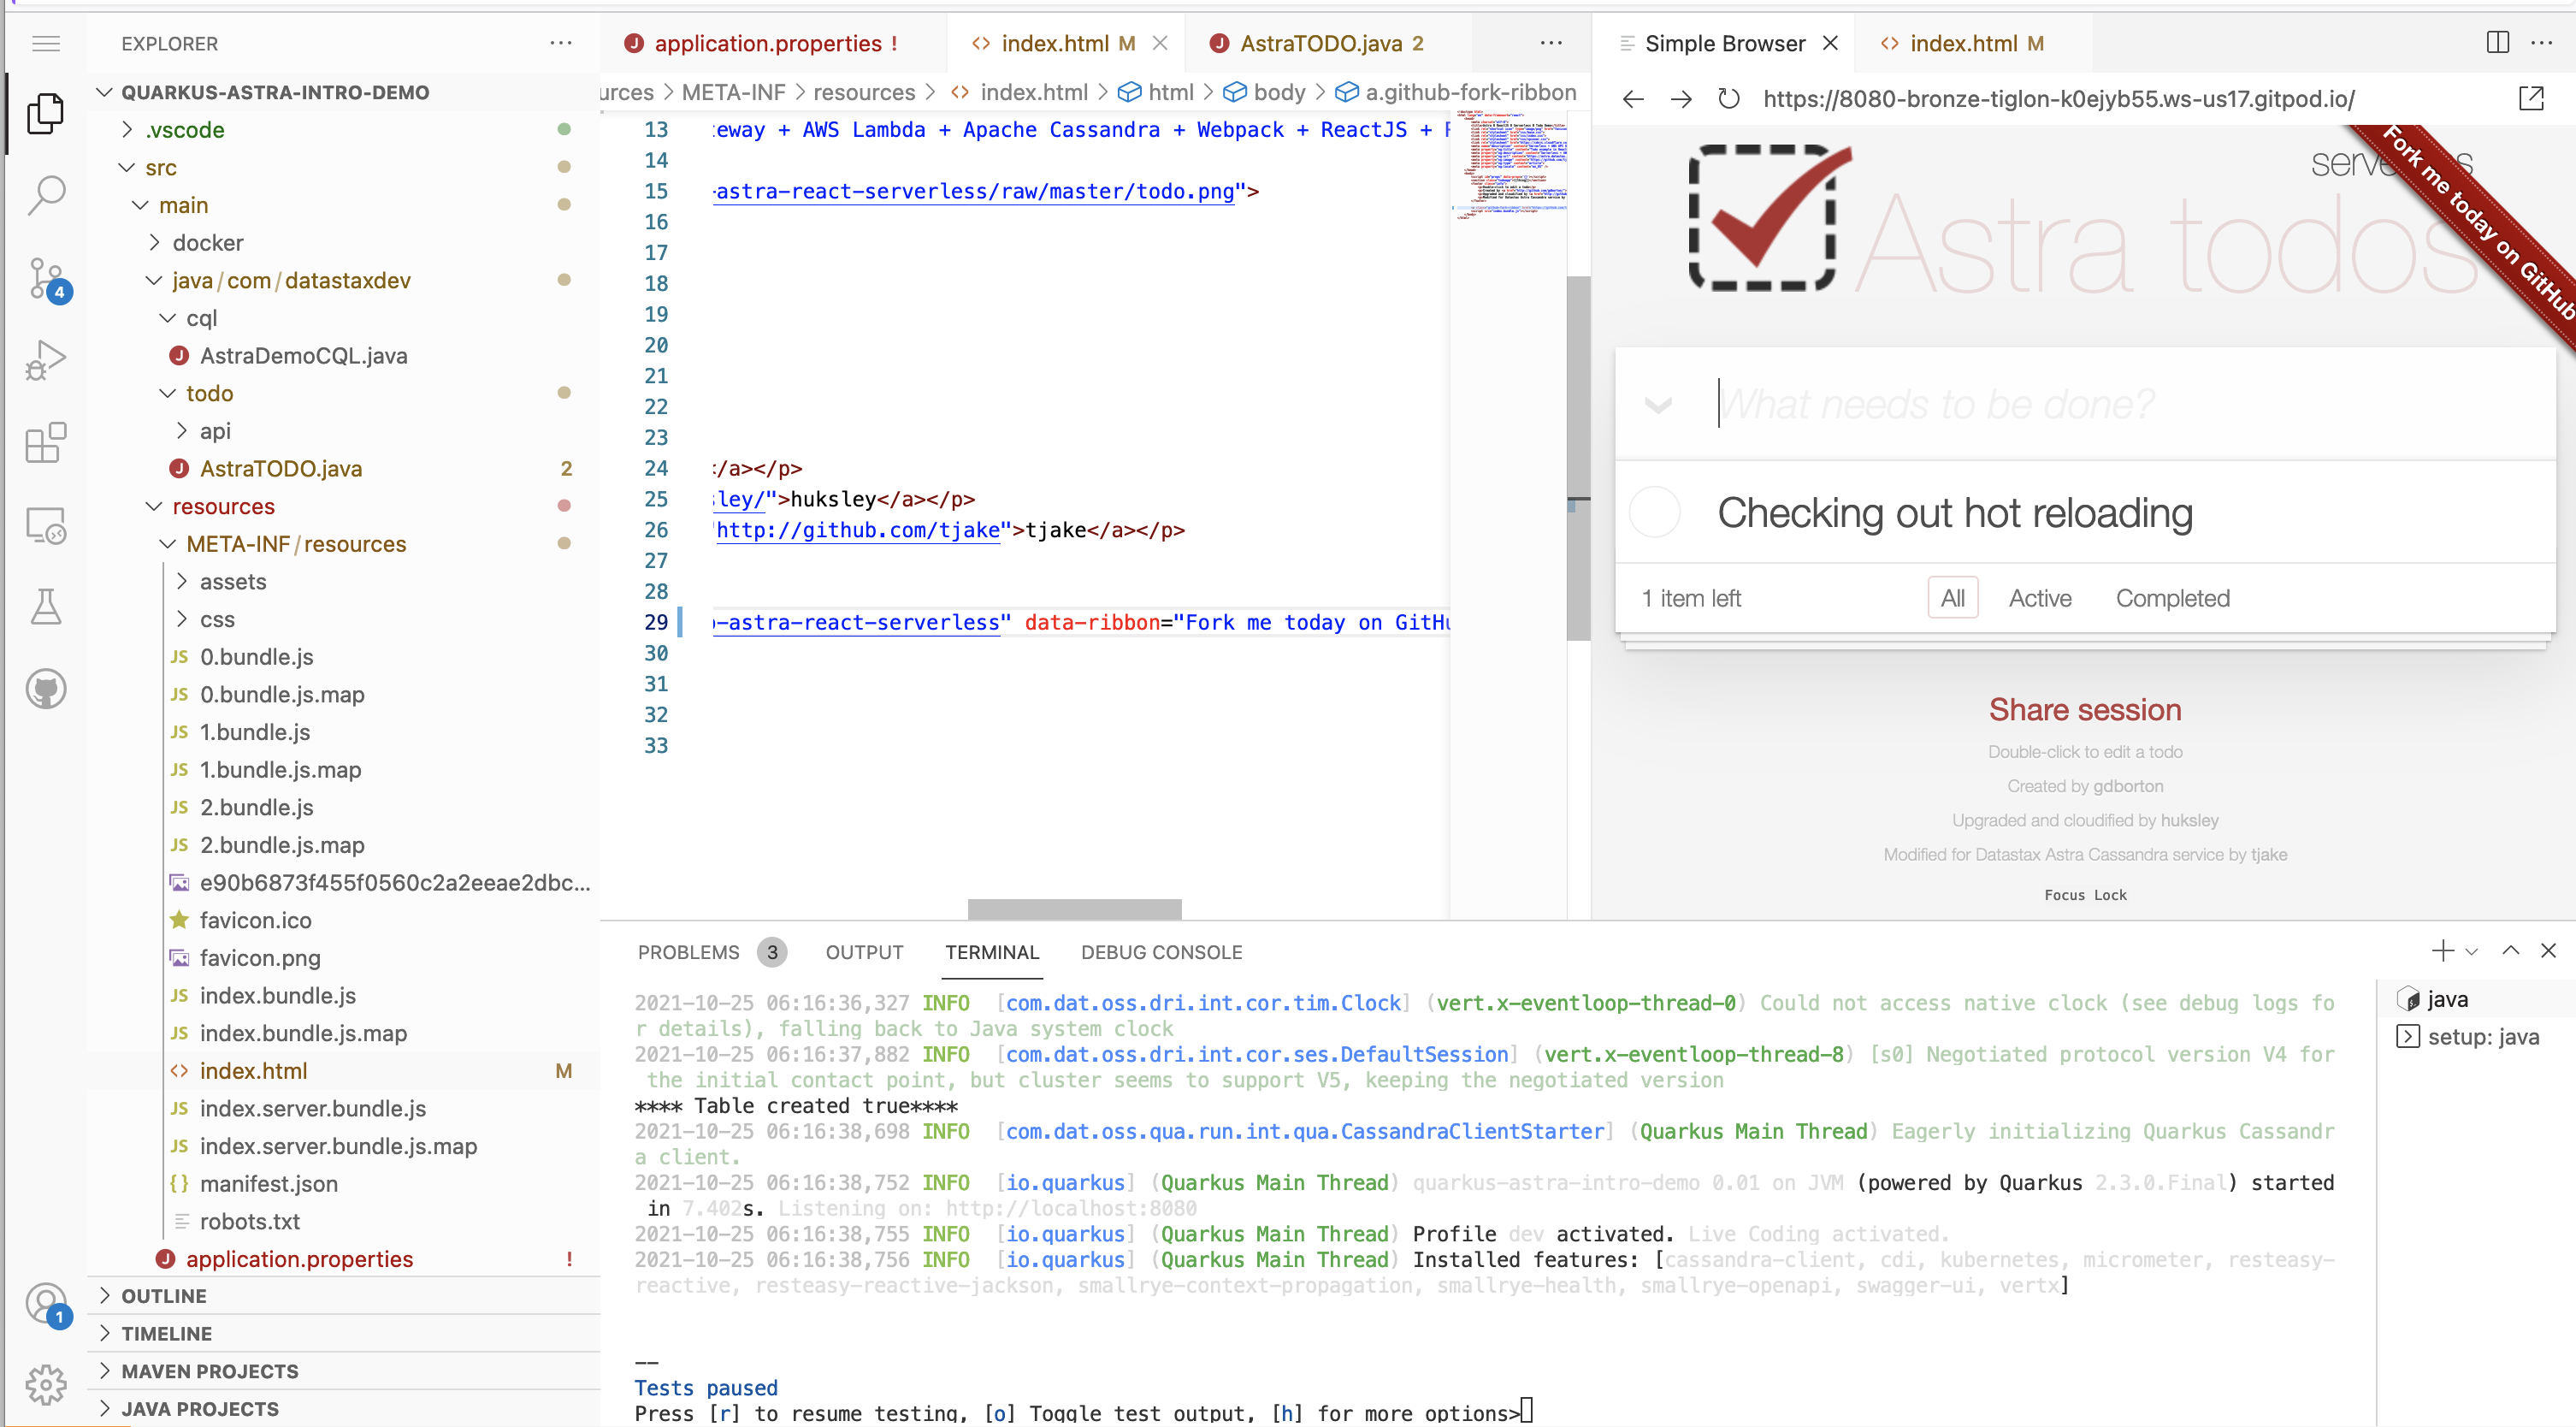
✅ Step 7c: Hot reload Now, let's go ahead and make an illustrative change.
Navigate to the file src/main/java/resources/META-INF/resources/index.html and change the data-ribbon entry from "Fork me on Github" to "Fork me today on Github."
Next, refresh the browser page. You should immediately see the update. This hot reloading feature of Quarkus works for more than just static content too!
👁️ Expected output
You could add a few entries to the "todo list" as shown below.
👁️ Expected output
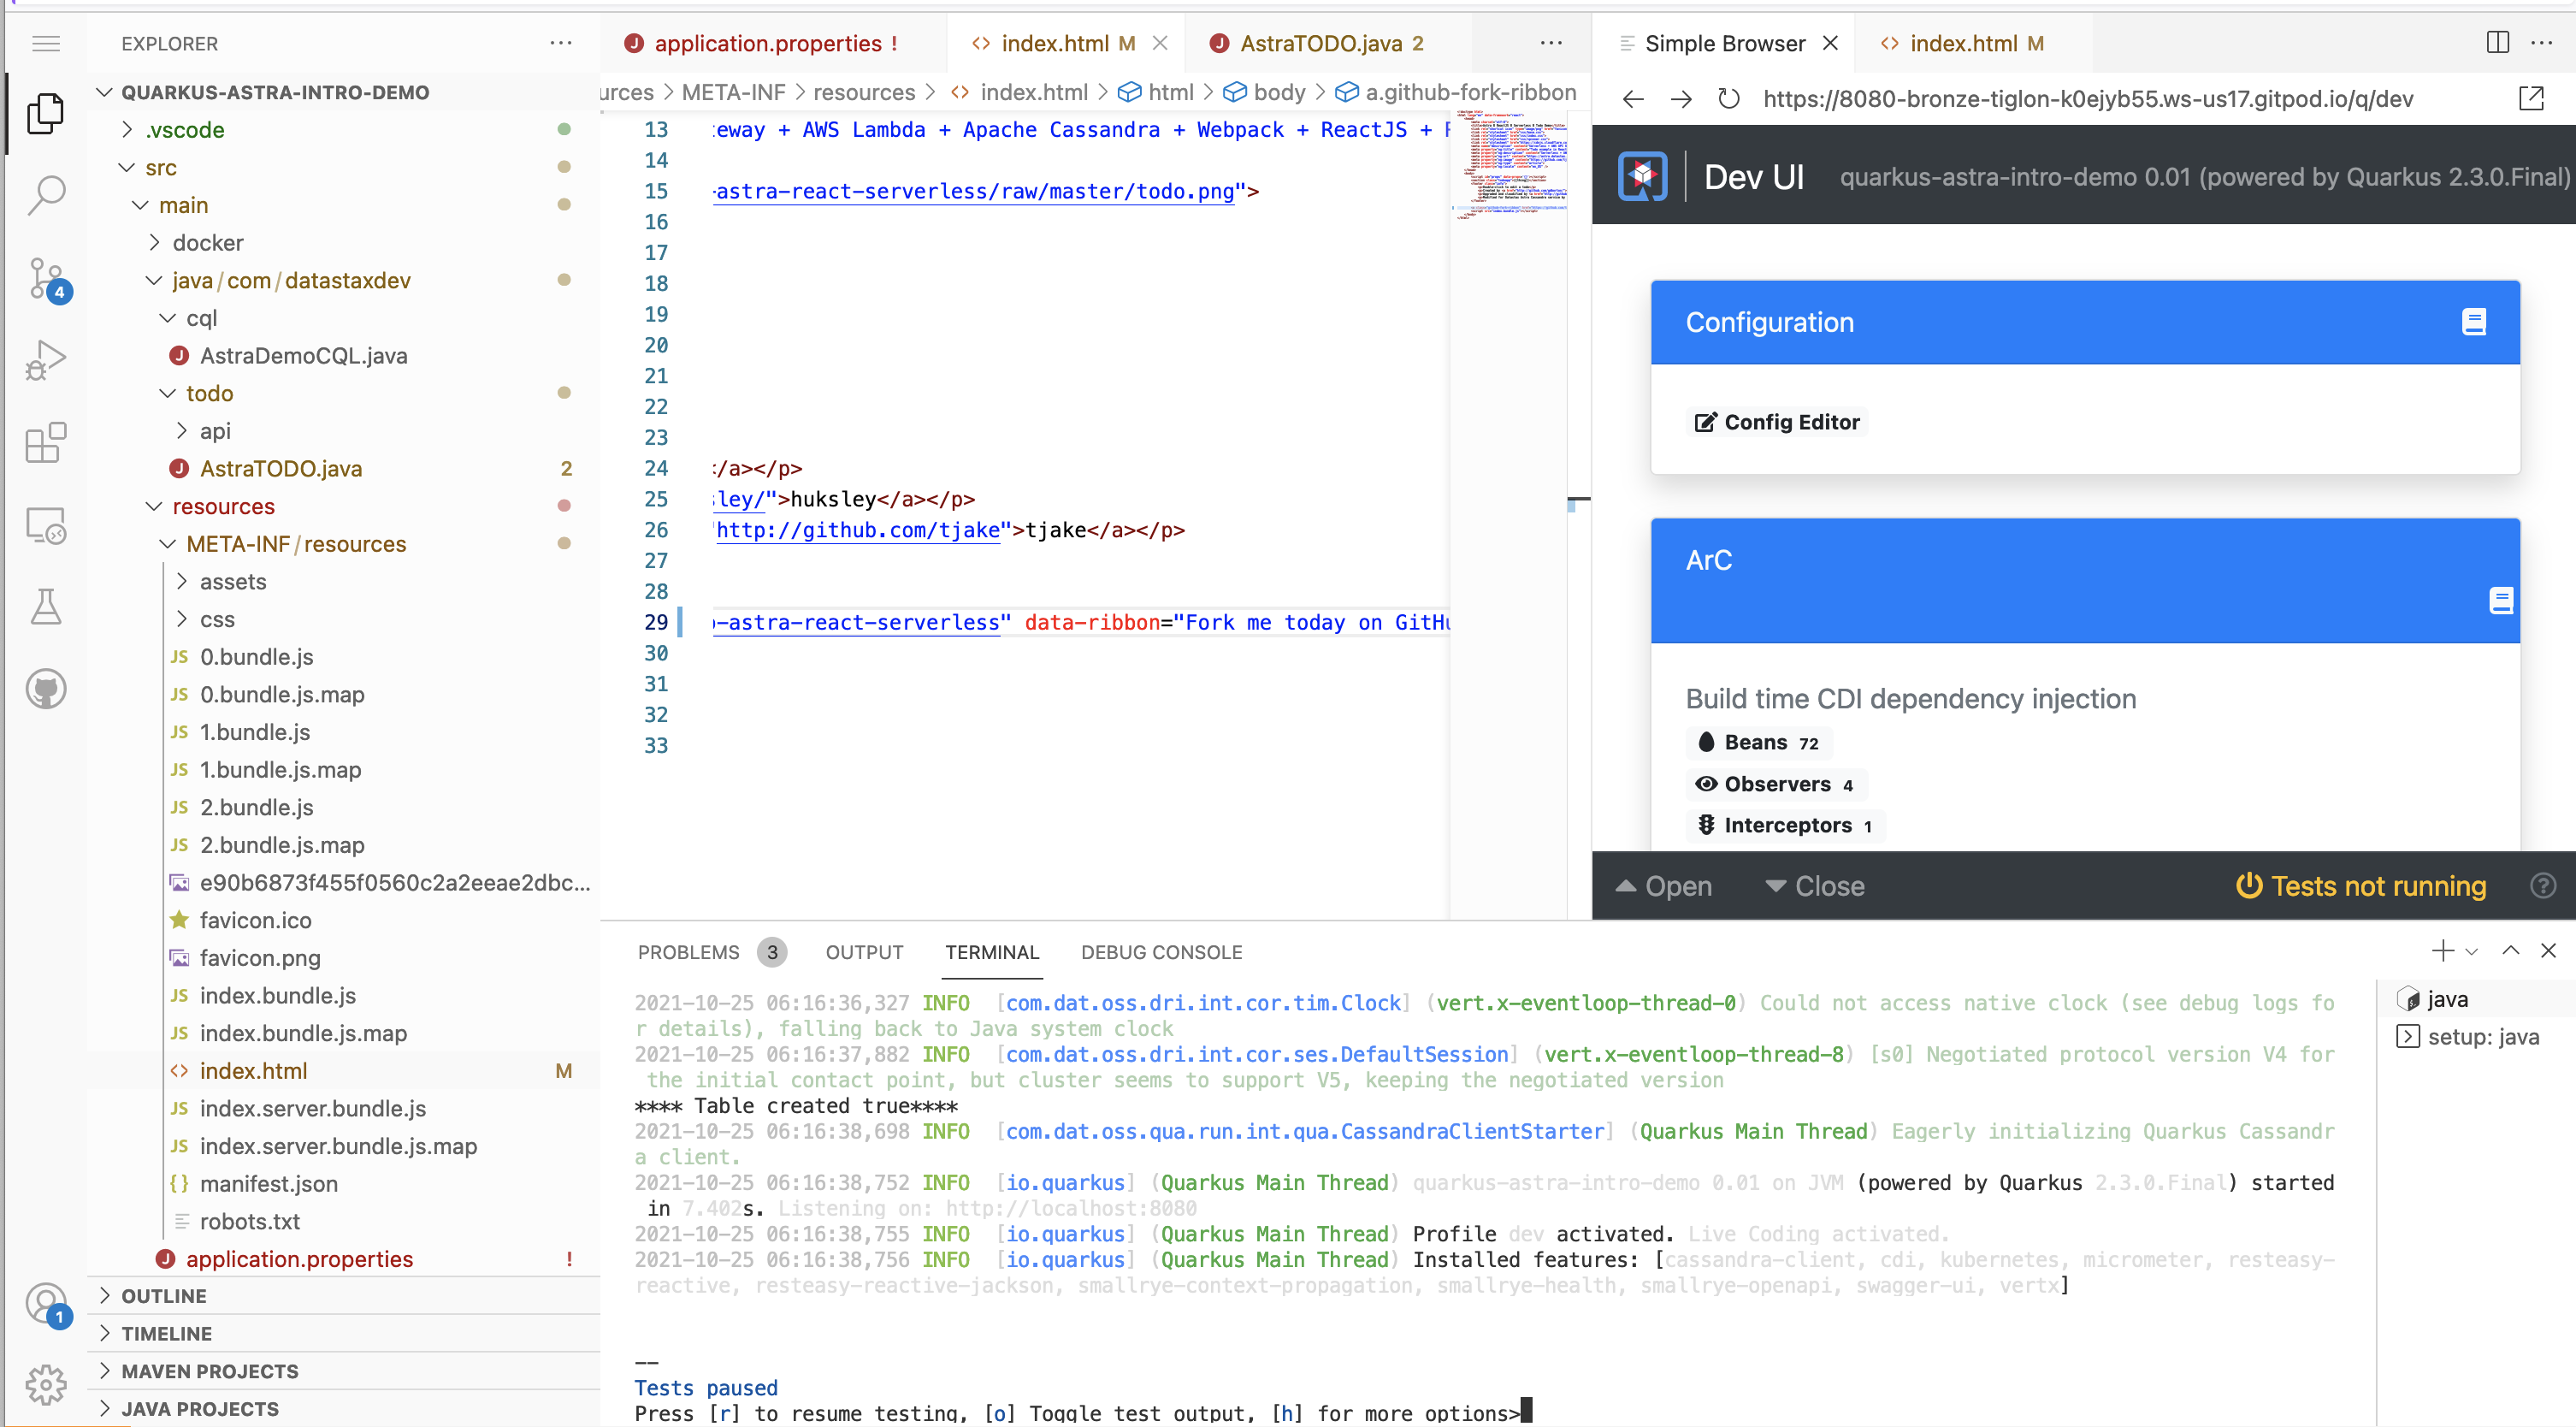
✅ Step 7d: Quarkus dev metrics
You can get Quarkus development metrics and so on hitting the d key as indicated in the help and this should bring up a window that looks like below.
NOTE: Again, because of the way Gitpod works, this may not bring up the window. If it doesn't, go back to the browser window containing the running application and append
/q/devto the URL.
👁️ Expected output
The
/q/devend point can be accessed using the URL below when the application is running indevmode. You can use anotherbashtab in the gitpod terminal window to enter the commands while the application is running and switch between tabs as required.
echo $(gp url 8080)/q/dev
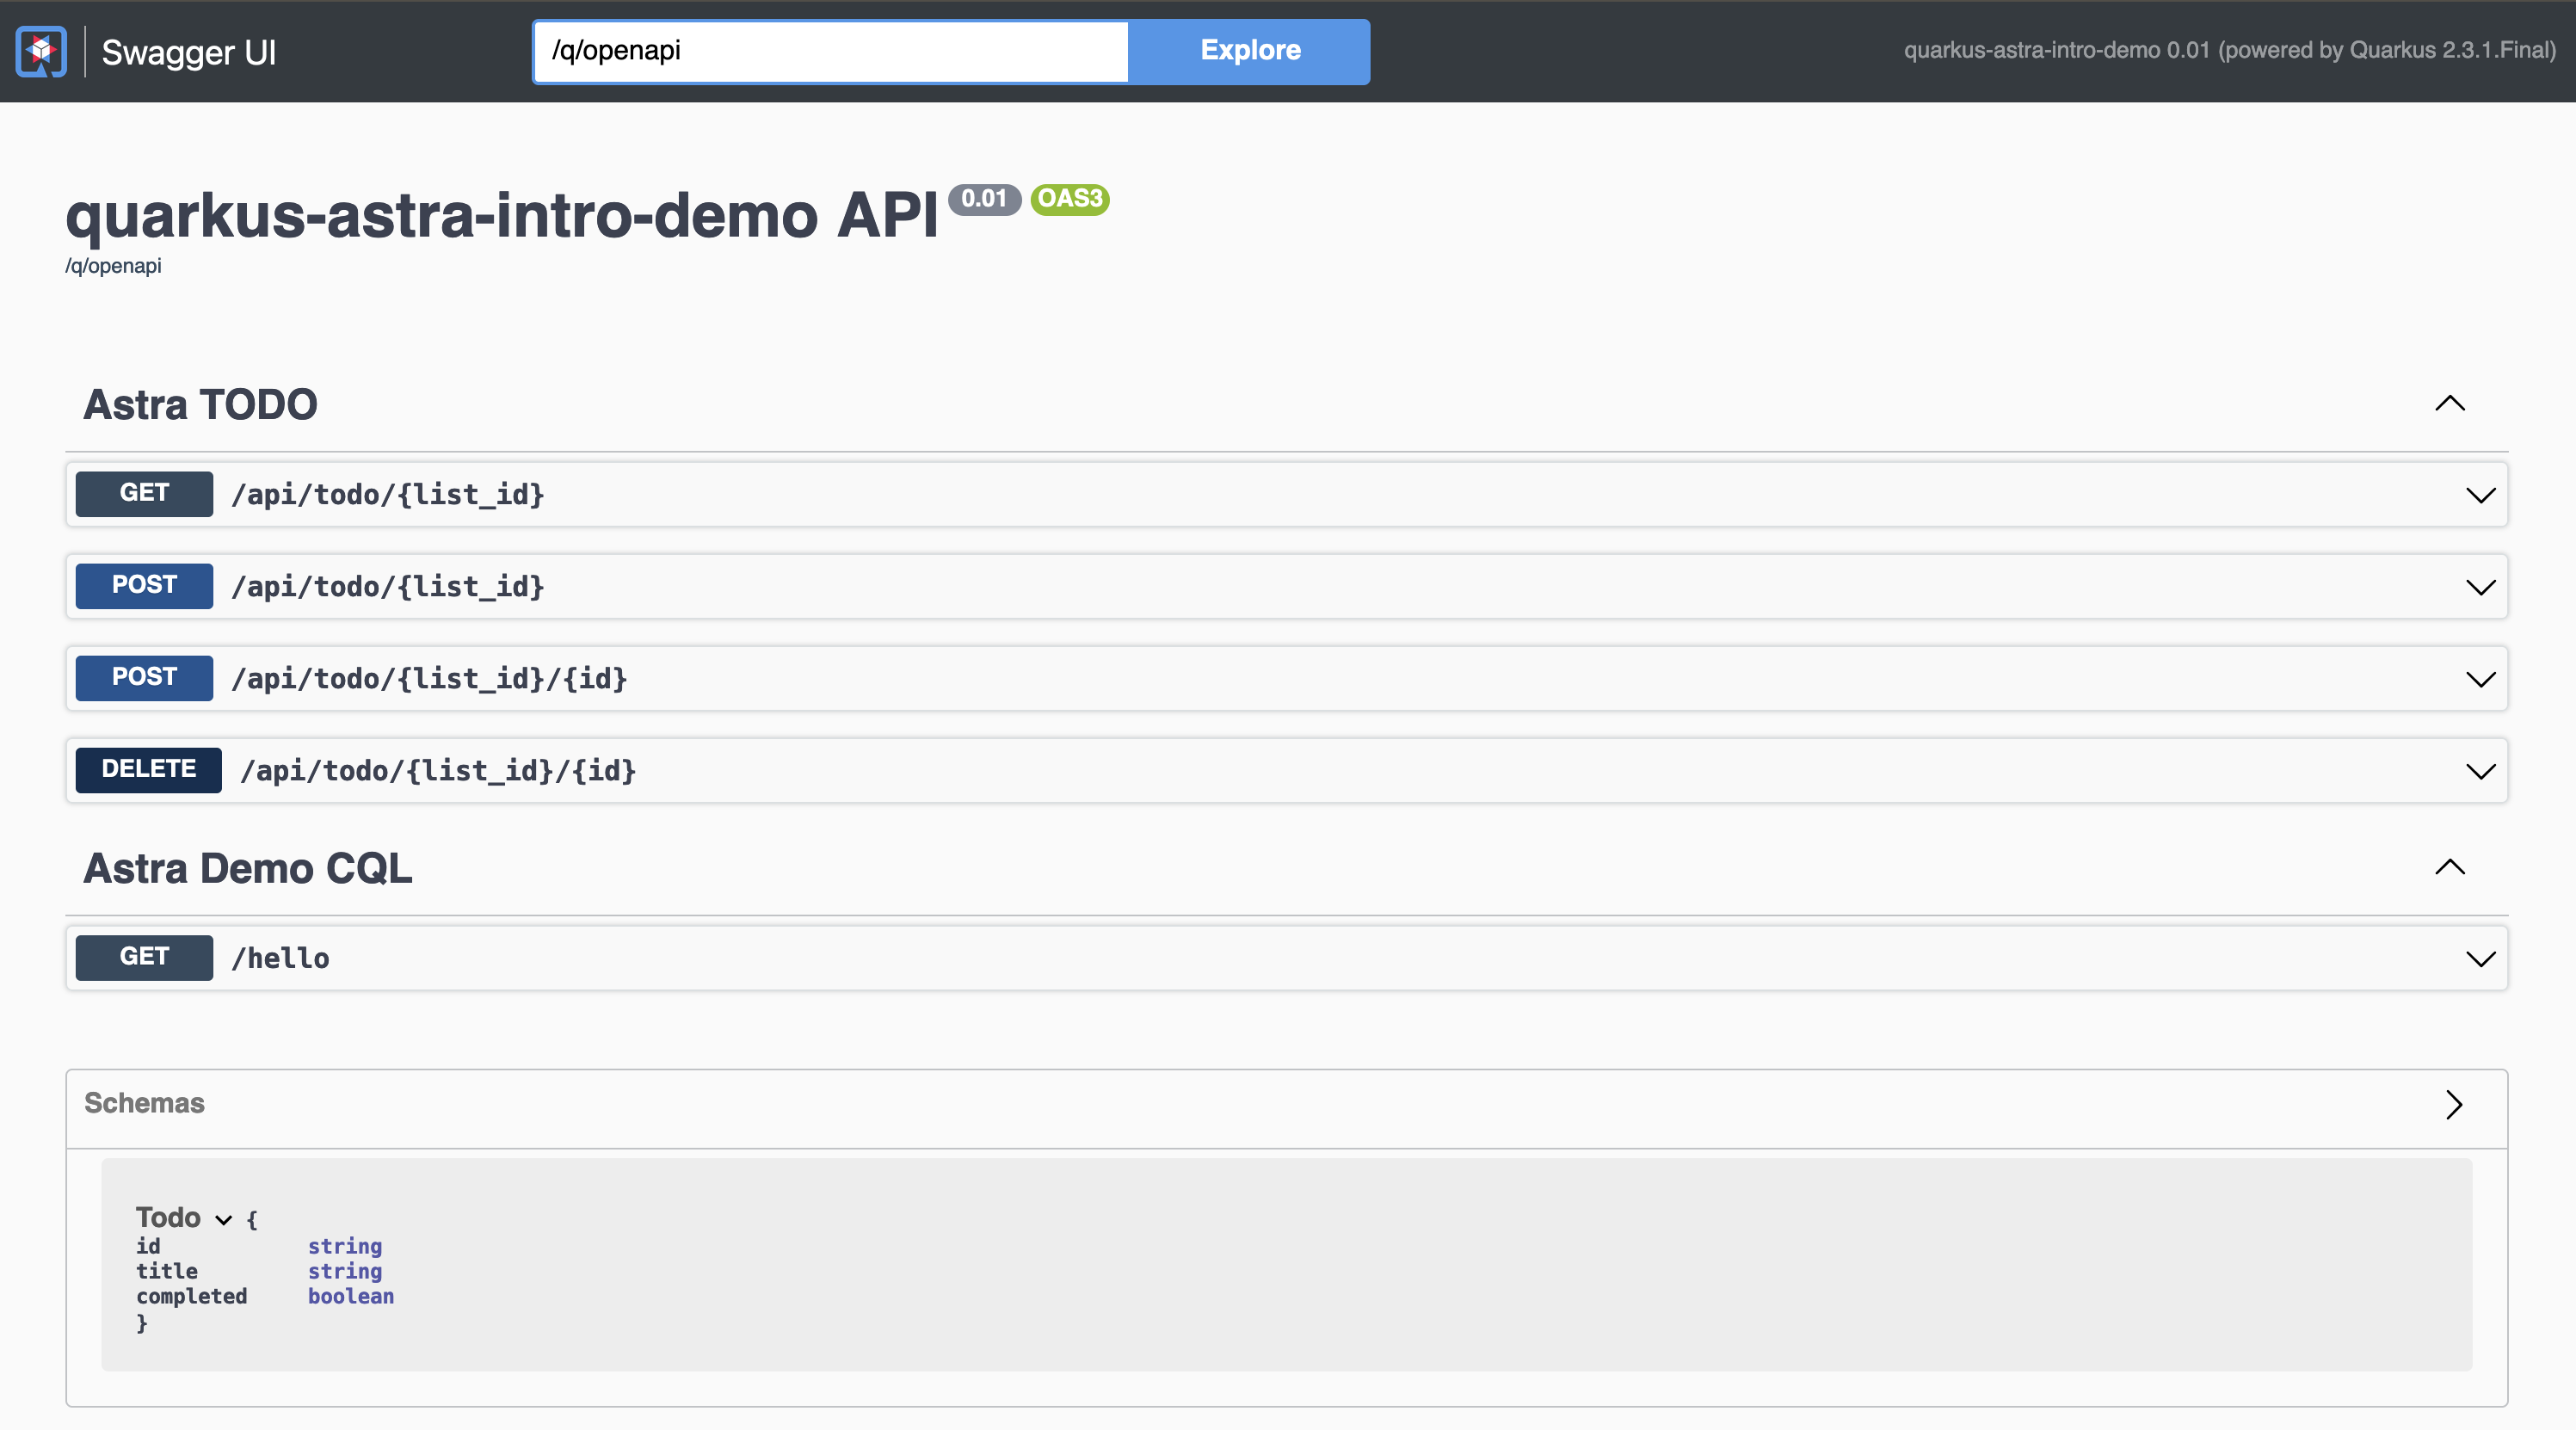
and the openapi spec is at
echo $(gp url 8080)/q/openapi
as shown below.
You could continue developing your entire application without ever leaving dev mode! It will even handle refactorings and project dependency changes!
Let's out of development mode by hitting q or hitting <Ctrl>+C.
✅ Step 7e: Quarkus smart dispatch
Let's quickly examine the Quarkus smart dispatching mechanism. Let's open the com.datastaxdev.todo.rest.TodoResource.java class by executing the following in a terminal:
gp open src/main/java/com/datastaxdev/todo/rest/TodoResource.java
Notice some methods return Mutiny reactive types (i.e. Uni and Multi) while others return non-reactive types (i.e. String, Response, and void). Quarkus doesn't care whether you write reactive or blocking code. Quarkus will make sure reactive code runs on the I/O thread while blocking code will be moved off onto worker thread(s). As you can see, you can even mix and match within the same class!
This application was designed to illustrate both approaches. Which methods are implemented in which manner were randomly chosen.
You can always get back to the file explorer view whenever by clicking on the hamburger menu on the top left followed by View and Explorer as shown below.
Let's go ahead and hit q or Ctrl+C to exit out of the running application if you have not already.
Before we set a breakpoint and start debugging, let's explain the application's structure a bit. The TodoResource class (which you saw in the previous section) calls a com.datastaxdev.todo.service.AstraService. AstraService is an interface with 2 implementations:
com.datastaxdev.todo.service.CqlSessionAstraService.java- Uses the
com.datastax.oss.quarkus.runtime.api.session.QuarkusCqlSessiondirectly using CQL queries to implement the operations.
- Uses the
com.datastaxdev.todo.service.MapperAstraService.java- Uses the DataStax Object Mapper and Cassandra Entity Modeling to model entities as Java objects, greatly simplifying the application's data access layer by sparing you the hassle of writing CQL queries by hand. This is conceptually similar to how Hibernate works in the JPA world.
- Uses Mapstruct to easily convert between the
com.datastaxdev.todo.dao.TodoItemdao entities and thecom.datastaxdev.todo.api.TodoPOJO used at the REST layer. See thecom.datastaxdev.todo.mapping.TodoMapperclass for details.
The application has a build-time property (not overridable at runtime) called astra-service.type. Resolving dependency injection at build time is one of the key benefits of Quarkus, allowing Quarkus applications to be super small and memory-performant.
By default, if this property is undefined OR has the value cql-session, com.datastaxdev.todo.service.CqlSessionAstraService will be injected as the implementation for com.datastaxdev.todo.service.AstraService.
If, at build time, astra-service.type=dao, then com.datastaxdev.todo.service.MapperAstraService will be used instead.
The com.datastaxdev.todo.config.AstraConfig class contains everything needed for reading the astra-service.type flag at build time and injecting the appropriate com.datastaxdev.todo.service.AstraService implementation.
There is a full suite of unit tests that cover both implementations! See src/test/java/com/datastaxdev/todo/service/CqlSessionAstraServiceTests.java and src/test/java/com/datastaxdev/todo/service/MapperAstraServiceTests.java for details.
If you'd like to play around with the mapper implementation, open
src/main/resources/application.propertiesand un-comment the line#astra-service.type=dao.
Since the application, by default, uses the com.datastaxdev.todo.service.CqlSessionAstraService implementation, we'll use that implementation for setting the breakpoint.
✅ Step 8a: Set breakpoint
Now issue the following command to open up the file where we will subsequently set a breakpoint to be hit whenever we create a new todo item.
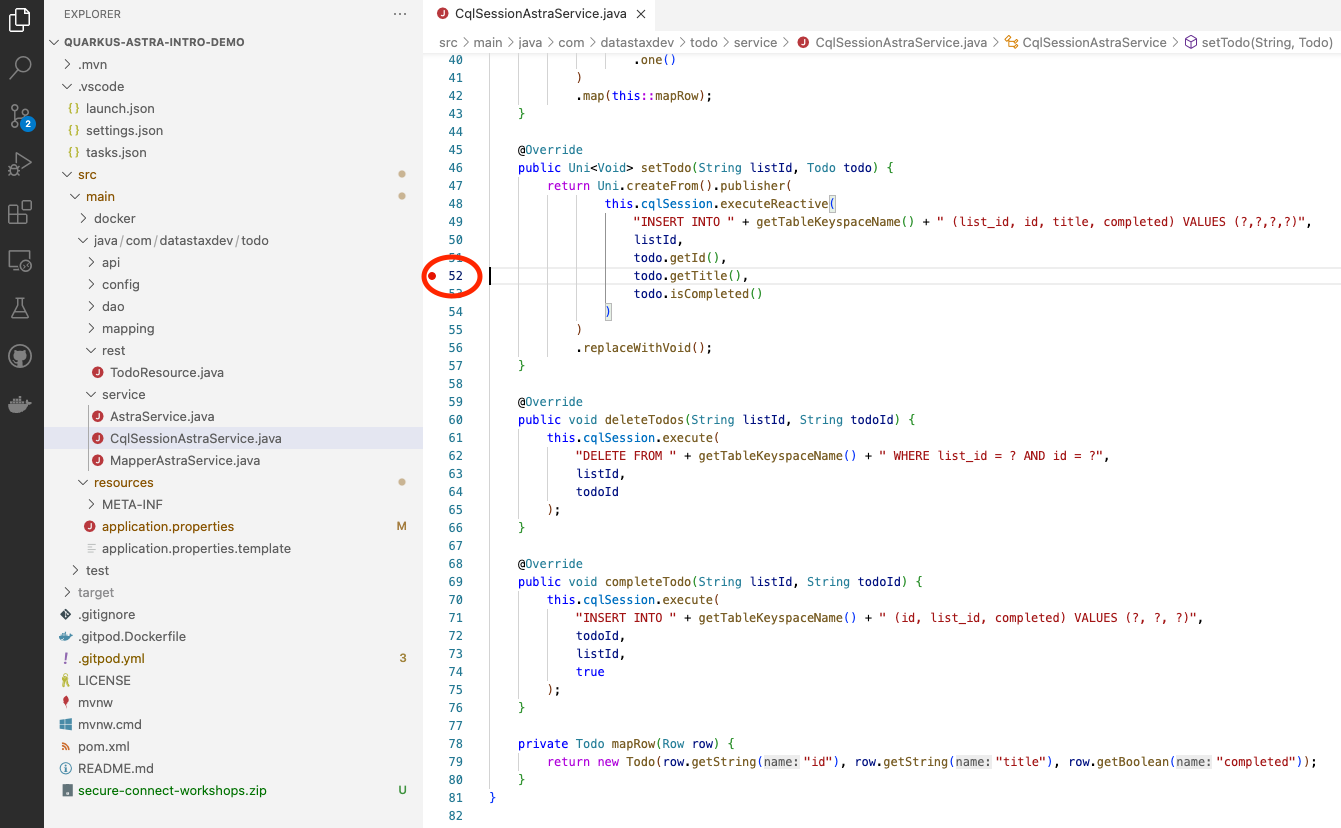
gp open src/main/java/com/datastaxdev/todo/service/CqlSessionAstraService.java
Now navigate to line 52 and set a breakpoint by clicking to the left of the line number 52 and you'll see a stop sign as shown below.
Re-run the application with the following command and we will debug it live.
./mvnw quarkus:dev✅ Step 8b: Start debugging
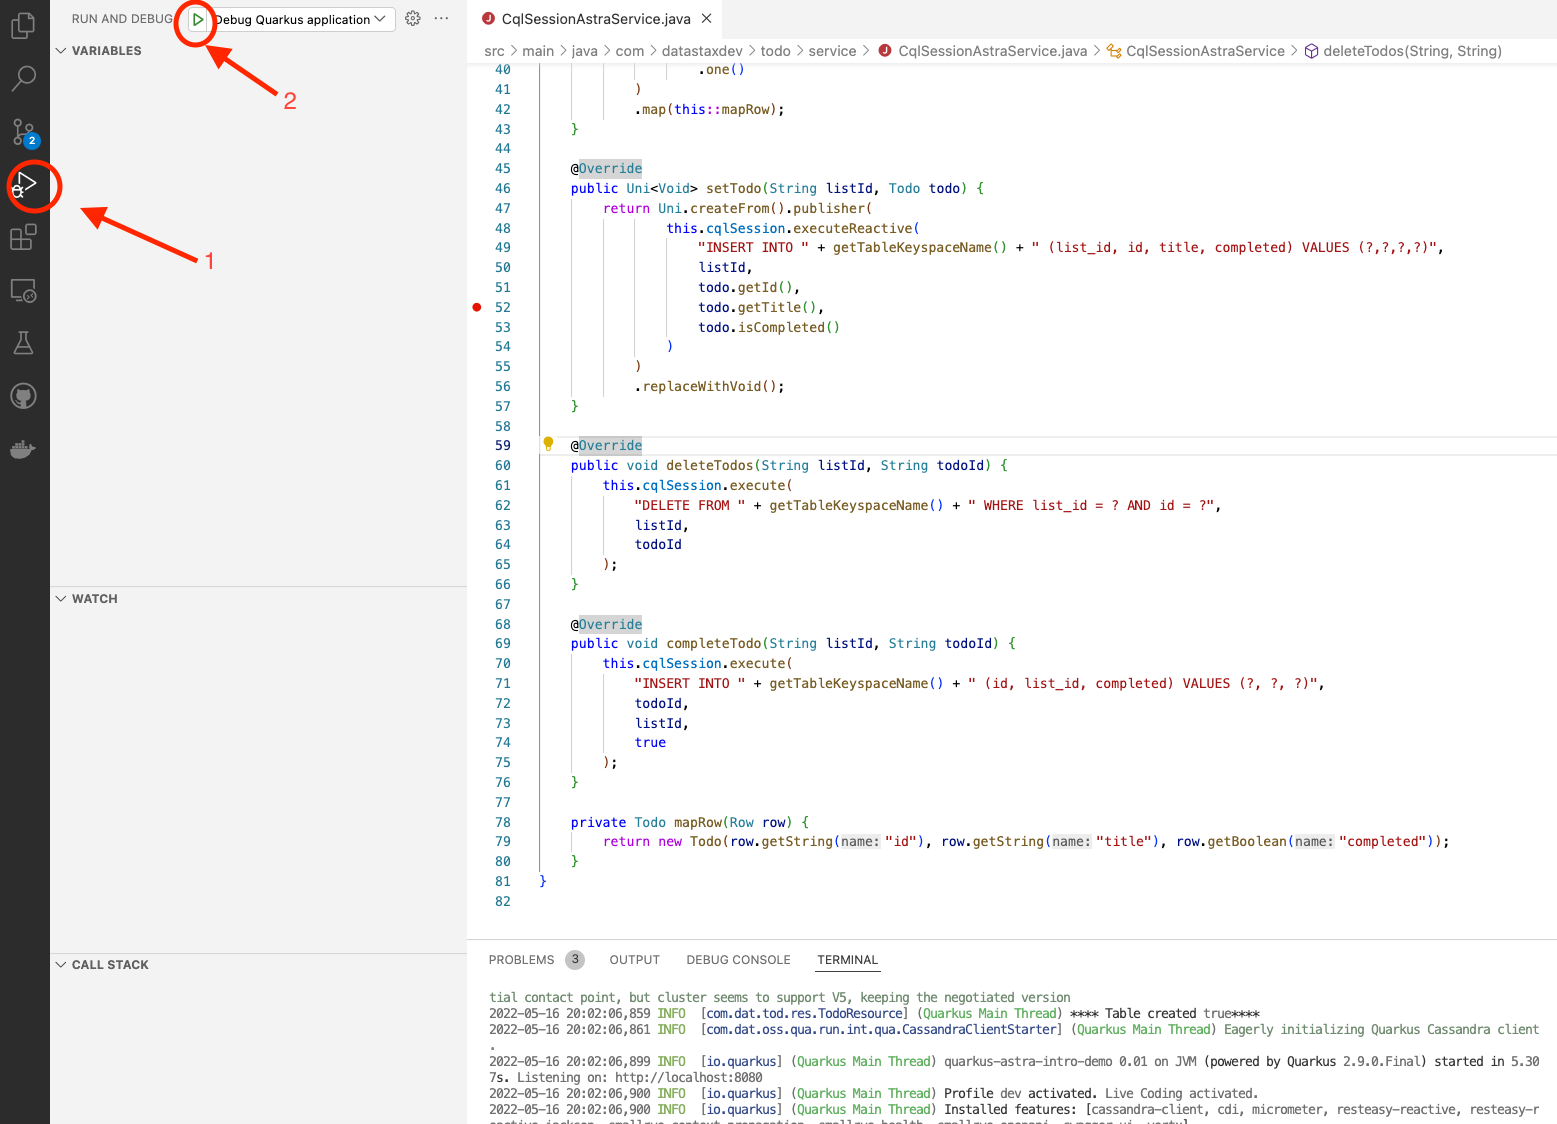
First, click on the debug button on the left towards top.
Then, click on the arrow on the top left to start debugging as shown below.
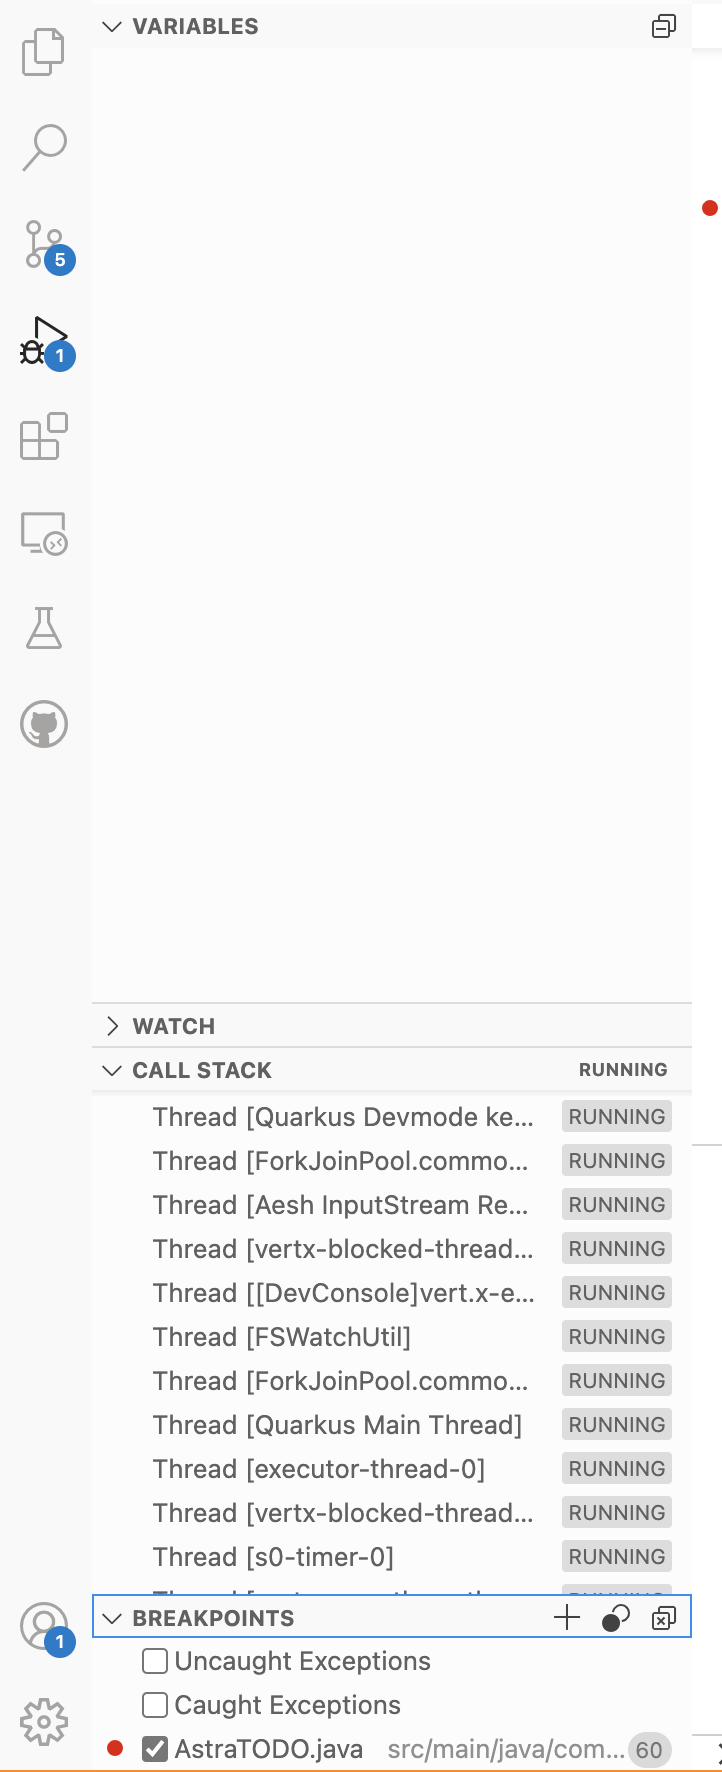
Notice debug related information populate in the left side of the window as shown below.
If for some reason the debugger doesn't attach, there may be some weirdness going on with the Gitpod IDE. Refreshing the browser tab containing the workspace or restarting the workspace will usually fix it.
We will demonstrate debugging by fixing a todo item that was entered although there are more powerful features that you can try.
Go to the new browser window you created and the application should be up and running. Hit enter after filling up a todo item as shown below. The application freezes and you see a red square that signals the breakpoint has been hit.
Now that you hit the breakpoint, Cool! Let's go back to the Gitpod window and verify if the breakpoint was really hit. You should see something like below.
👁️ Expected output
✅ Step 8c: Use debugger features
Now, fix the entry spelling in debug mode by clicking on the left(>) arrow of todo, double clicking on the title entry and entering debugging. Finally, hit arrow button in the top small middle pane in the center which will allow the application to continue as shown below.
Go back to your browser and check the todo item that was added to the list. You should see that the updated entry that you fixed with a debug session is what's persisted.
Hit q or Ctrl+C in the GitPod terminal window to exit the application.
✅ Step 9a: Package You can package up the application with the command below.
./mvnw clean package -DskipTests👁️ Expected output
Picked up JAVA_TOOL_OPTIONS:  -Xmx3435m
[INFO] Scanning for projects...
[INFO]
[INFO] ---------< quarkus-astra-intro-demo:quarkus-astra-intro-demo >----------
[INFO] Building quarkus-astra-intro-demo 0.01
[INFO] --------------------------------[ jar ]---------------------------------
[INFO]
[INFO] --- maven-clean-plugin:2.5:clean (default-clean) @ quarkus-astra-intro-demo ---
[INFO] Deleting /workspace/quarkus-astra-intro-demo/target
[INFO]
[INFO] --- maven-resources-plugin:2.6:resources (default-resources) @ quarkus-astra-intro-demo ---
[INFO] Using 'UTF-8' encoding to copy filtered resources.
[INFO] Copying 24 resources
[INFO]
[INFO] --- quarkus-maven-plugin:2.9.1.Final:generate-code (default) @ quarkus-astra-intro-demo ---
[INFO]
[INFO] --- maven-compiler-plugin:3.8.1:compile (default-compile) @ quarkus-astra-intro-demo ---
[INFO] Changes detected - recompiling the module!
[INFO] Compiling 10 source files to /workspace/quarkus-astra-intro-demo/target/classes
[INFO]
[INFO] --- quarkus-maven-plugin:2.9.1.Final:generate-code-tests (default) @ quarkus-astra-intro-demo ---
[INFO]
[INFO] --- maven-resources-plugin:2.6:testResources (default-testResources) @ quarkus-astra-intro-demo ---
[INFO] Using 'UTF-8' encoding to copy filtered resources.
[INFO] Copying 1 resource
[INFO]
[INFO] --- maven-compiler-plugin:3.8.1:testCompile (default-testCompile) @ quarkus-astra-intro-demo ---
[INFO] Changes detected - recompiling the module!
[INFO] Compiling 6 source files to /workspace/quarkus-astra-intro-demo/target/test-classes
[INFO]
[INFO] --- maven-surefire-plugin:3.0.0-M5:test (default-test) @ quarkus-astra-intro-demo ---
[INFO] Tests are skipped.
[INFO]
[INFO] --- maven-jar-plugin:2.4:jar (default-jar) @ quarkus-astra-intro-demo ---
[INFO] Building jar: /workspace/quarkus-astra-intro-demo/target/quarkus-astra-intro-demo-0.01.jar
[INFO]
[INFO] --- quarkus-maven-plugin:2.9.1.Final:build (default) @ quarkus-astra-intro-demo ---
[WARNING] [io.quarkus.config] Unrecognized configuration key "quarkus.kubernetes.env.secrets" was provided; it will be ignored; verify that the dependency extension for this configuration is set or that you did not make a typo
[WARNING] [io.quarkus.config] Unrecognized configuration key "quarkus.kubernetes.service-type" was provided; it will be ignored; verify that the dependency extension for this configuration is set or that you did not make a typo
[INFO] [io.quarkus.deployment.QuarkusAugmentor] Quarkus augmentation completed in 2076ms
[INFO] ------------------------------------------------------------------------
[INFO] BUILD SUCCESS
[INFO] ------------------------------------------------------------------------
[INFO] Total time:  9.681 s
[INFO] Finished at: 2022-05-16T20:21:41Z
[INFO] ------------------------------------------------------------------------
✅ Step 9b: Run
You can run the recently packaged application as below.
java -jar ./target/quarkus-app/quarkus-run.jar👁️ Expected output
Picked up JAVA_TOOL_OPTIONS:  -Xmx3435m
__  ____  __  _____   ___  __ ____  ______
 --/ __ \/ / / / _ | / _ \/ //_/ / / / __/
 -/ /_/ / /_/ / __ |/ , _/ ,< / /_/ /\ \
--\___\_\____/_/ |_/_/|_/_/|_|\____/___/
WARN  [io.qua.config] (main) Unrecognized configuration key "quarkus.kubernetes.service-type" was provided; it will be ignored; verify that the dependency extension for this configuration is set or that you did not make a typo
WARN  [io.qua.config] (main) Unrecognized configuration key "quarkus.kubernetes.env.secrets" was provided; it will be ignored; verify that the dependency extension for this configuration is set or that you did not make a typo
INFO  [com.dat.oss.qua.run.int.qua.CassandraClientRecorder] (main) Enabling Cassandra metrics using Micrometer.
INFO  [io.qua.sma.ope.run.OpenApiRecorder] (main) Default CORS properties will be used, please use 'quarkus.http.cors' properties instead
INFO  [com.dat.oss.qua.run.int.qua.CassandraClientStarter] (main) Eagerly initializing Quarkus Cassandra client.
INFO  [com.dat.oss.dri.int.cor.DefaultMavenCoordinates] (main) DataStax Java driver for Apache Cassandra(R) (com.datastax.oss:java-driver-core) version 4.14.0
INFO  [com.dat.oss.dri.int.cor.tim.Clock] (vert.x-eventloop-thread-0) Using native clock for microsecond precision
INFO  [com.dat.oss.dri.int.cor.ses.DefaultSession] (vert.x-eventloop-thread-9) [s0] Negotiated protocol version V4 for the initial contact point, but cluster seems to support V5, keeping the negotiated version
INFO  [com.dat.tod.res.TodoResource] (main) **** Table created true****
INFO  [io.quarkus] (main) quarkus-astra-intro-demo 0.01 on JVM (powered by Quarkus 2.9.1.Final) started in 3.882s. Listening on: http://0.0.0.0:8080
INFO  [io.quarkus] (main) Profile prod activated.
INFO  [io.quarkus] (main) Installed features: [cassandra-client, cdi, micrometer, resteasy-reactive, resteasy-reactive-jackson, smallrye-context-propagation, smallrye-health, smallrye-openapi, swagger-ui, vertx]
You can play with the application from the new browser window you created in step 4.
Hit Ctrl+C in the GitPod terminal window to exit the application.
✅ Step 10a: Adjust for containerization
We are using the Quarkus Jib container extension for easy containerization. Copy the secure connect bundle to the directory that Jib will create on the container as below. We take advantage of the property of Jib plugin which automaticaly includes the relevant artifacts from the src/main/jib sub-directory as part of the process -- we include the secure connect bundle to be able to connect to the Astra database.
mkdir -p src/main/jib/workspace/quarkus-astra-intro-demo/
cp secure-connect-workshops.zip src/main/jib/workspace/quarkus-astra-intro-demo/
✅ Step 10b: Containerize
Let's containerize the application with the following command.
./mvnw clean package -Dquarkus.container-image.build=true -DskipTestsOnce complete, check that the image exists on your local repository with the following command:
docker imagesExpected Output
REPOSITORY                 TAG       IMAGE ID       CREATED          SIZE
gitpod/quarkus-cassandra   0.01      77431983359a   26 seconds ago   216MB
✅ Step 10c: Run the containerized image
You can execute the recently generated containerized image with the following command.
docker run -i --rm -p 8080:8080 gitpod/quarkus-cassandra:0.01Hit <Ctrl+C> in the GitPod terminal window to exit the application.
✅ Step 10d: docker login
Login to Dockerhub to be able to push containerized images and to be able for you and the rest of the world to pull them.
If you do not have a docker login credential you can skip this step and go right to Native Image
docker loginExpected Output
Login with your Docker ID to push and pull images from Docker Hub. If you don't have a Docker ID, head over to https://hub.docker.com to create one.
Username: ragsns
Password:
WARNING! Your password will be stored unencrypted in /home/gitpod/.docker/config.json.
Configure a credential helper to remove this warning. See
https://docs.docker.com/engine/reference/commandline/login/#credentials-store

Login Succeeded
Get the Docker ID as below.
docker system info | grep -E 'Username' || echo "you have not done a docker login(yet)"
DOCKER_LOGINID=$(docker system info | grep -E 'Username' | awk '{print $2}')
echo "Docker login ID that will be used: " "$DOCKER_LOGINID"
You should see an output of your Docker Login ID. If you do not see this repeat this step from the beginning.
Docker login ID that will be used: ragsns
✅ Step 10e: Push to Dockerhub
Let's not only build the containerized image but also push it to DockerHub (be sure to substitute the group with docker ID) with the following command.
./mvnw clean package -Dquarkus.container-image.build=true -Dquarkus.container-image.push=true -Dquarkus.container-image.group=$DOCKER_LOGINID -DskipTestsNOTE: If the repo in your Docker Hub account didn't previously exist it will be created for you as a private repo. You will need to go into your Docker Hub account and make the repo public.
In today's world of microservices and service meshes, it's all about deploying to Kubernetes. Quarkus gives us an easy way to do that!
Step A: Quarkus includes the Kubernetes extension, allowing developers to deploy directly to Kubernetes and use Kubernetes ConfigMaps and Secrets as configuration sources. To use this update pom.xml with the following command in the Gitpod ternimal window as below.
./mvnw quarkus:add-extension -Dextensions="kubernetes"and verify with the following command
git diff pom.xmlwhich should that the io.quarkus:quarkus-kubernetes dependency has been added.
diff --git a/pom.xml b/pom.xml
index 371e35e..4b842d8 100644
--- a/pom.xml
+++ b/pom.xml
+    <dependency>
+      <groupId>io.quarkus</groupId>
+      <artifactId>quarkus-kubernetes</artifactId>
+    </dependency>
Step B:
Ensure that DOCKER_LOGINID was set in the earlier step as below and the command should output the Docker login ID.
echo $DOCKER_LOGINID
Next, let's generate the containerized image with the secrets as below.
./mvnw clean package -Dquarkus.container-image.build=true -Dquarkus.container-image.push=false -Dquarkus.container-image.group=$DOCKER_LOGINID -DskipTests
Next, let's generate and push the containerized image with the secrets removed as below.
sed -i '/# TBD Below/,+4 d' ./target/classes/application.properties
./mvnw package -Dquarkus.container-image.build=true -Dquarkus.container-image.push=true -Dquarkus.container-image.group=$DOCKER_LOGINID -DskipTests
✅ Step 10f: Stand up application in Kubernetes
Hereafter, there are two paths -- steps prefixed with Lens OR steps prefixed with Okteto as summarized below.
| Steps prefixed with | Details | First step |
|---|---|---|
| Lens | Install on Lens IDE | Lens.A |
| Okteto | Sample Kubernetes provider | Okteto.A |
If you're familiar with using kubectl command you can pick either. If you're not you're recommended to use Steps prefixed with Lens.
Step Lens.A: Download Lens
Lens is a popular Integrated Development Environment (IDE) for Kubernetes and enables developers and engineers to develop and deploy apps on multiple clusters and adminster them easier than using command line tools like kubectl.
Download Lens on your local system.
Step Lens.B: Download, install and run Lens Desktop
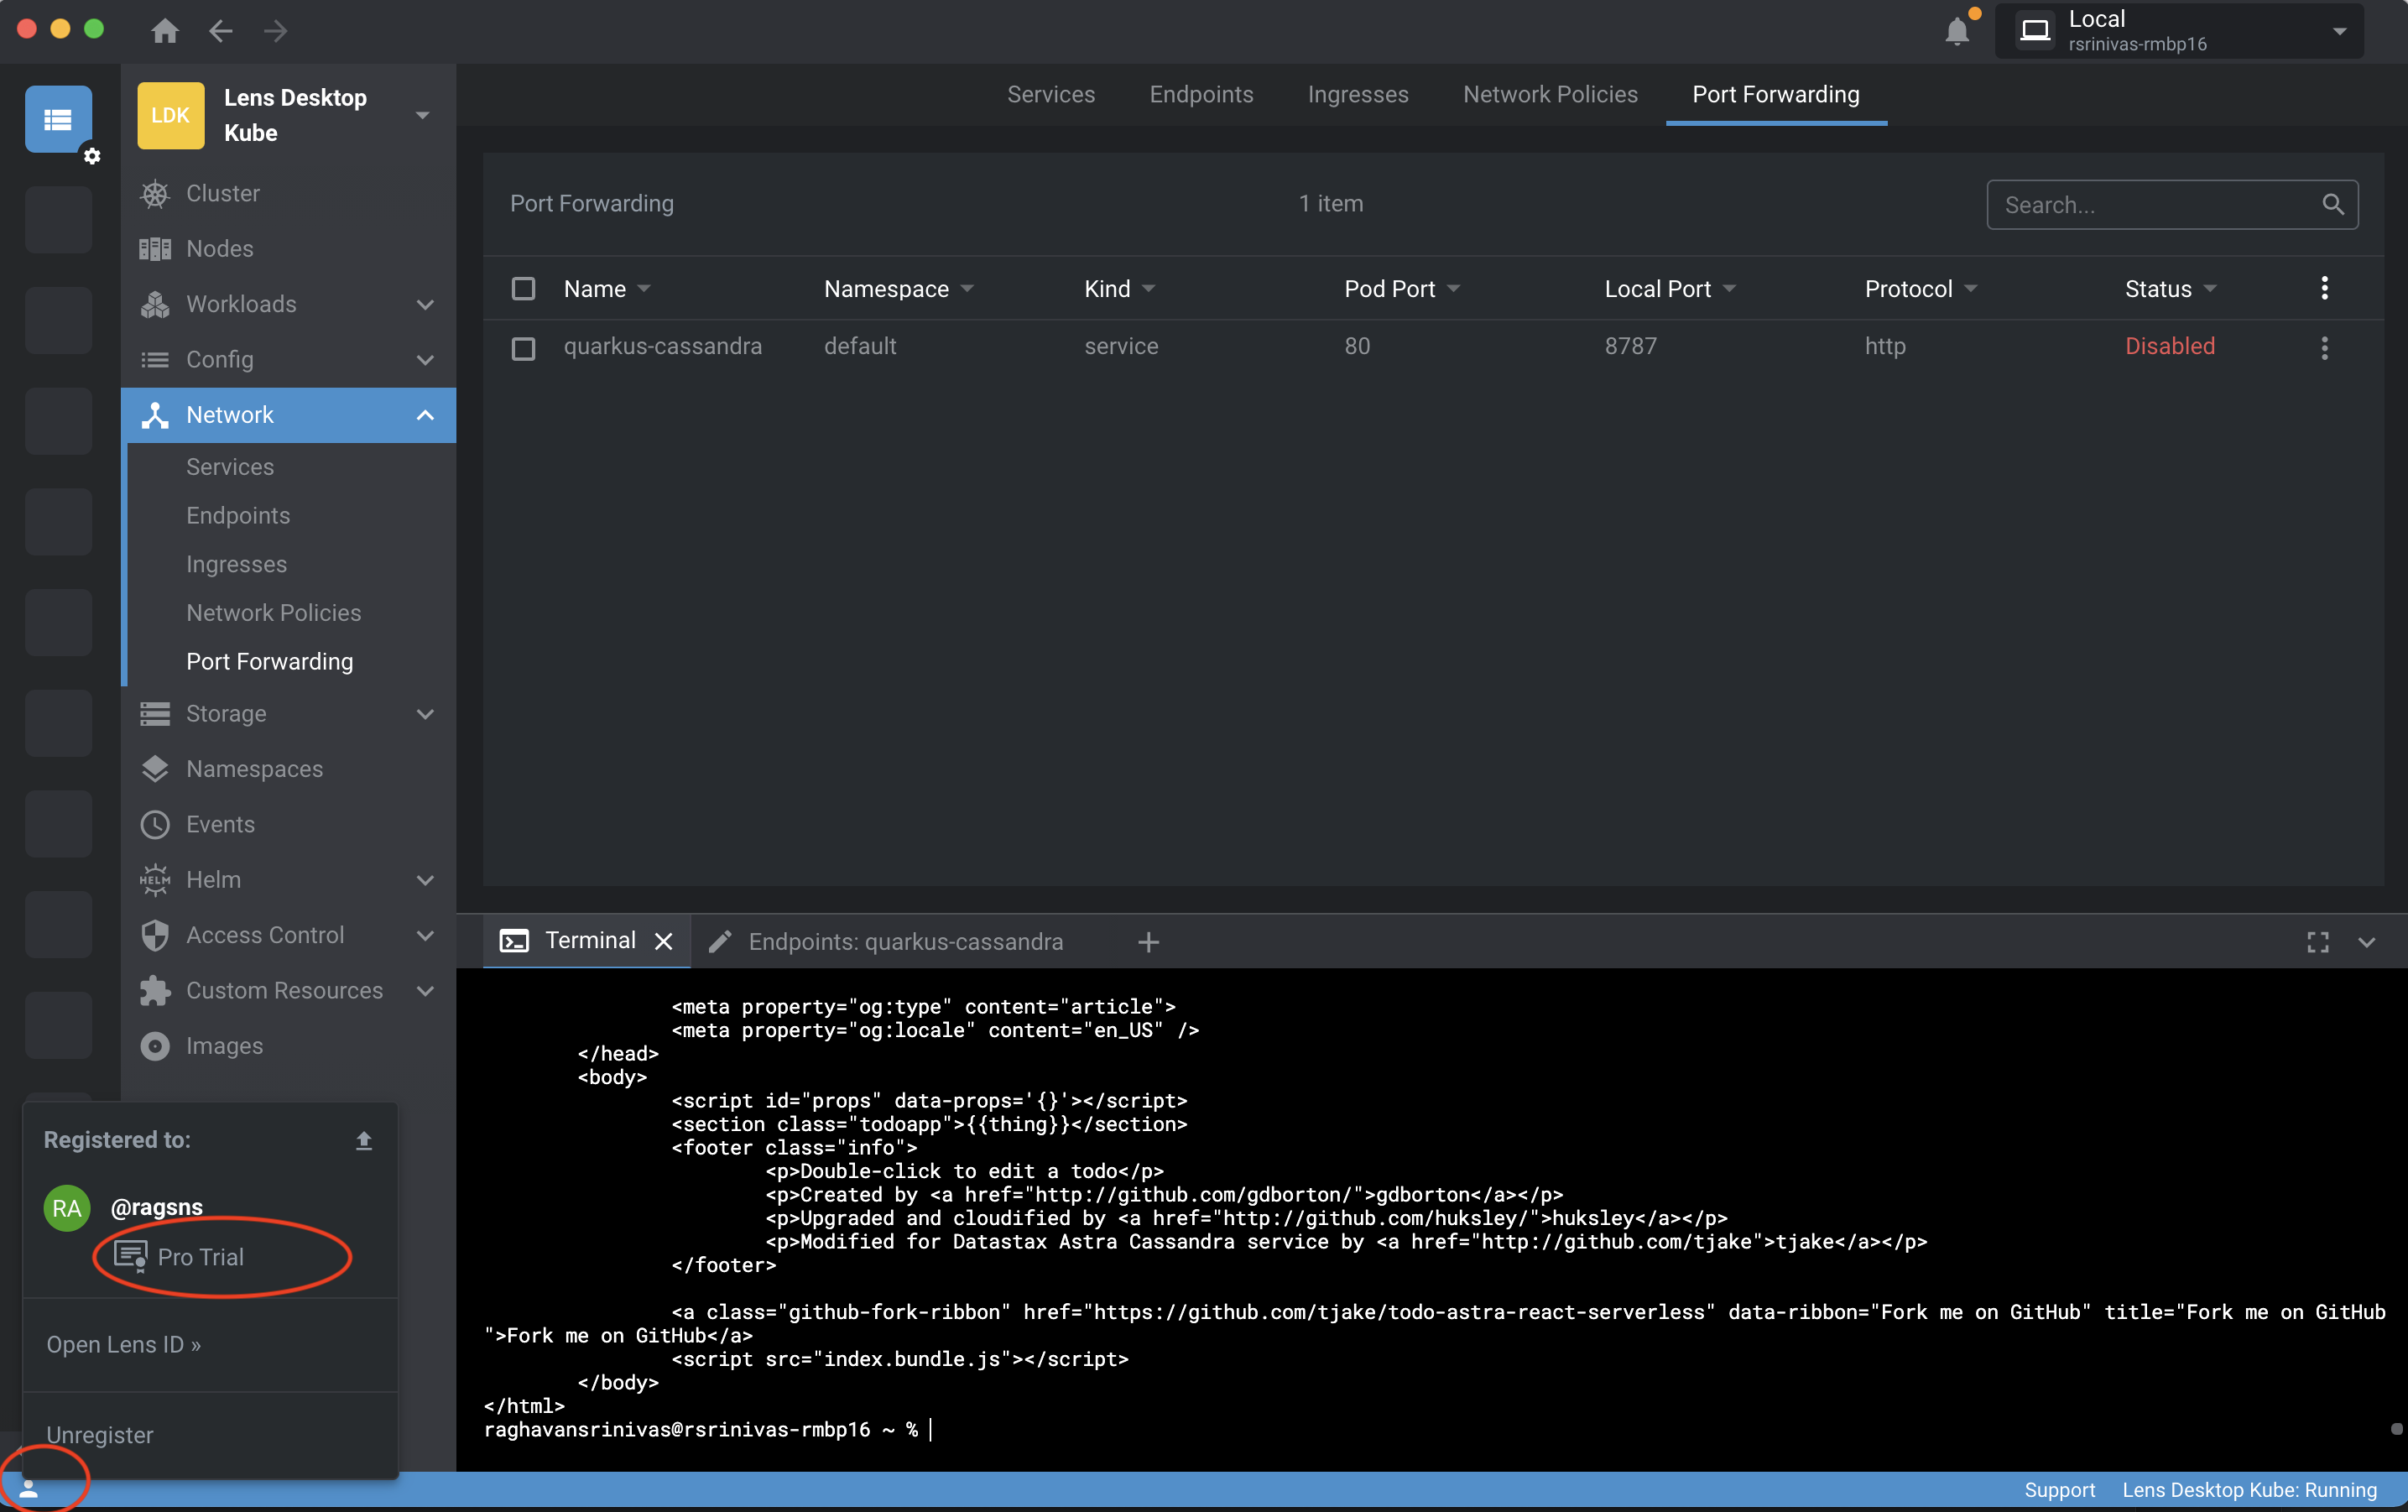
Sign up for a free trial and download Lens desktop and install it as shown below. Make sure you select the tiny icon on the bottom left and click on the free trial as shown below.
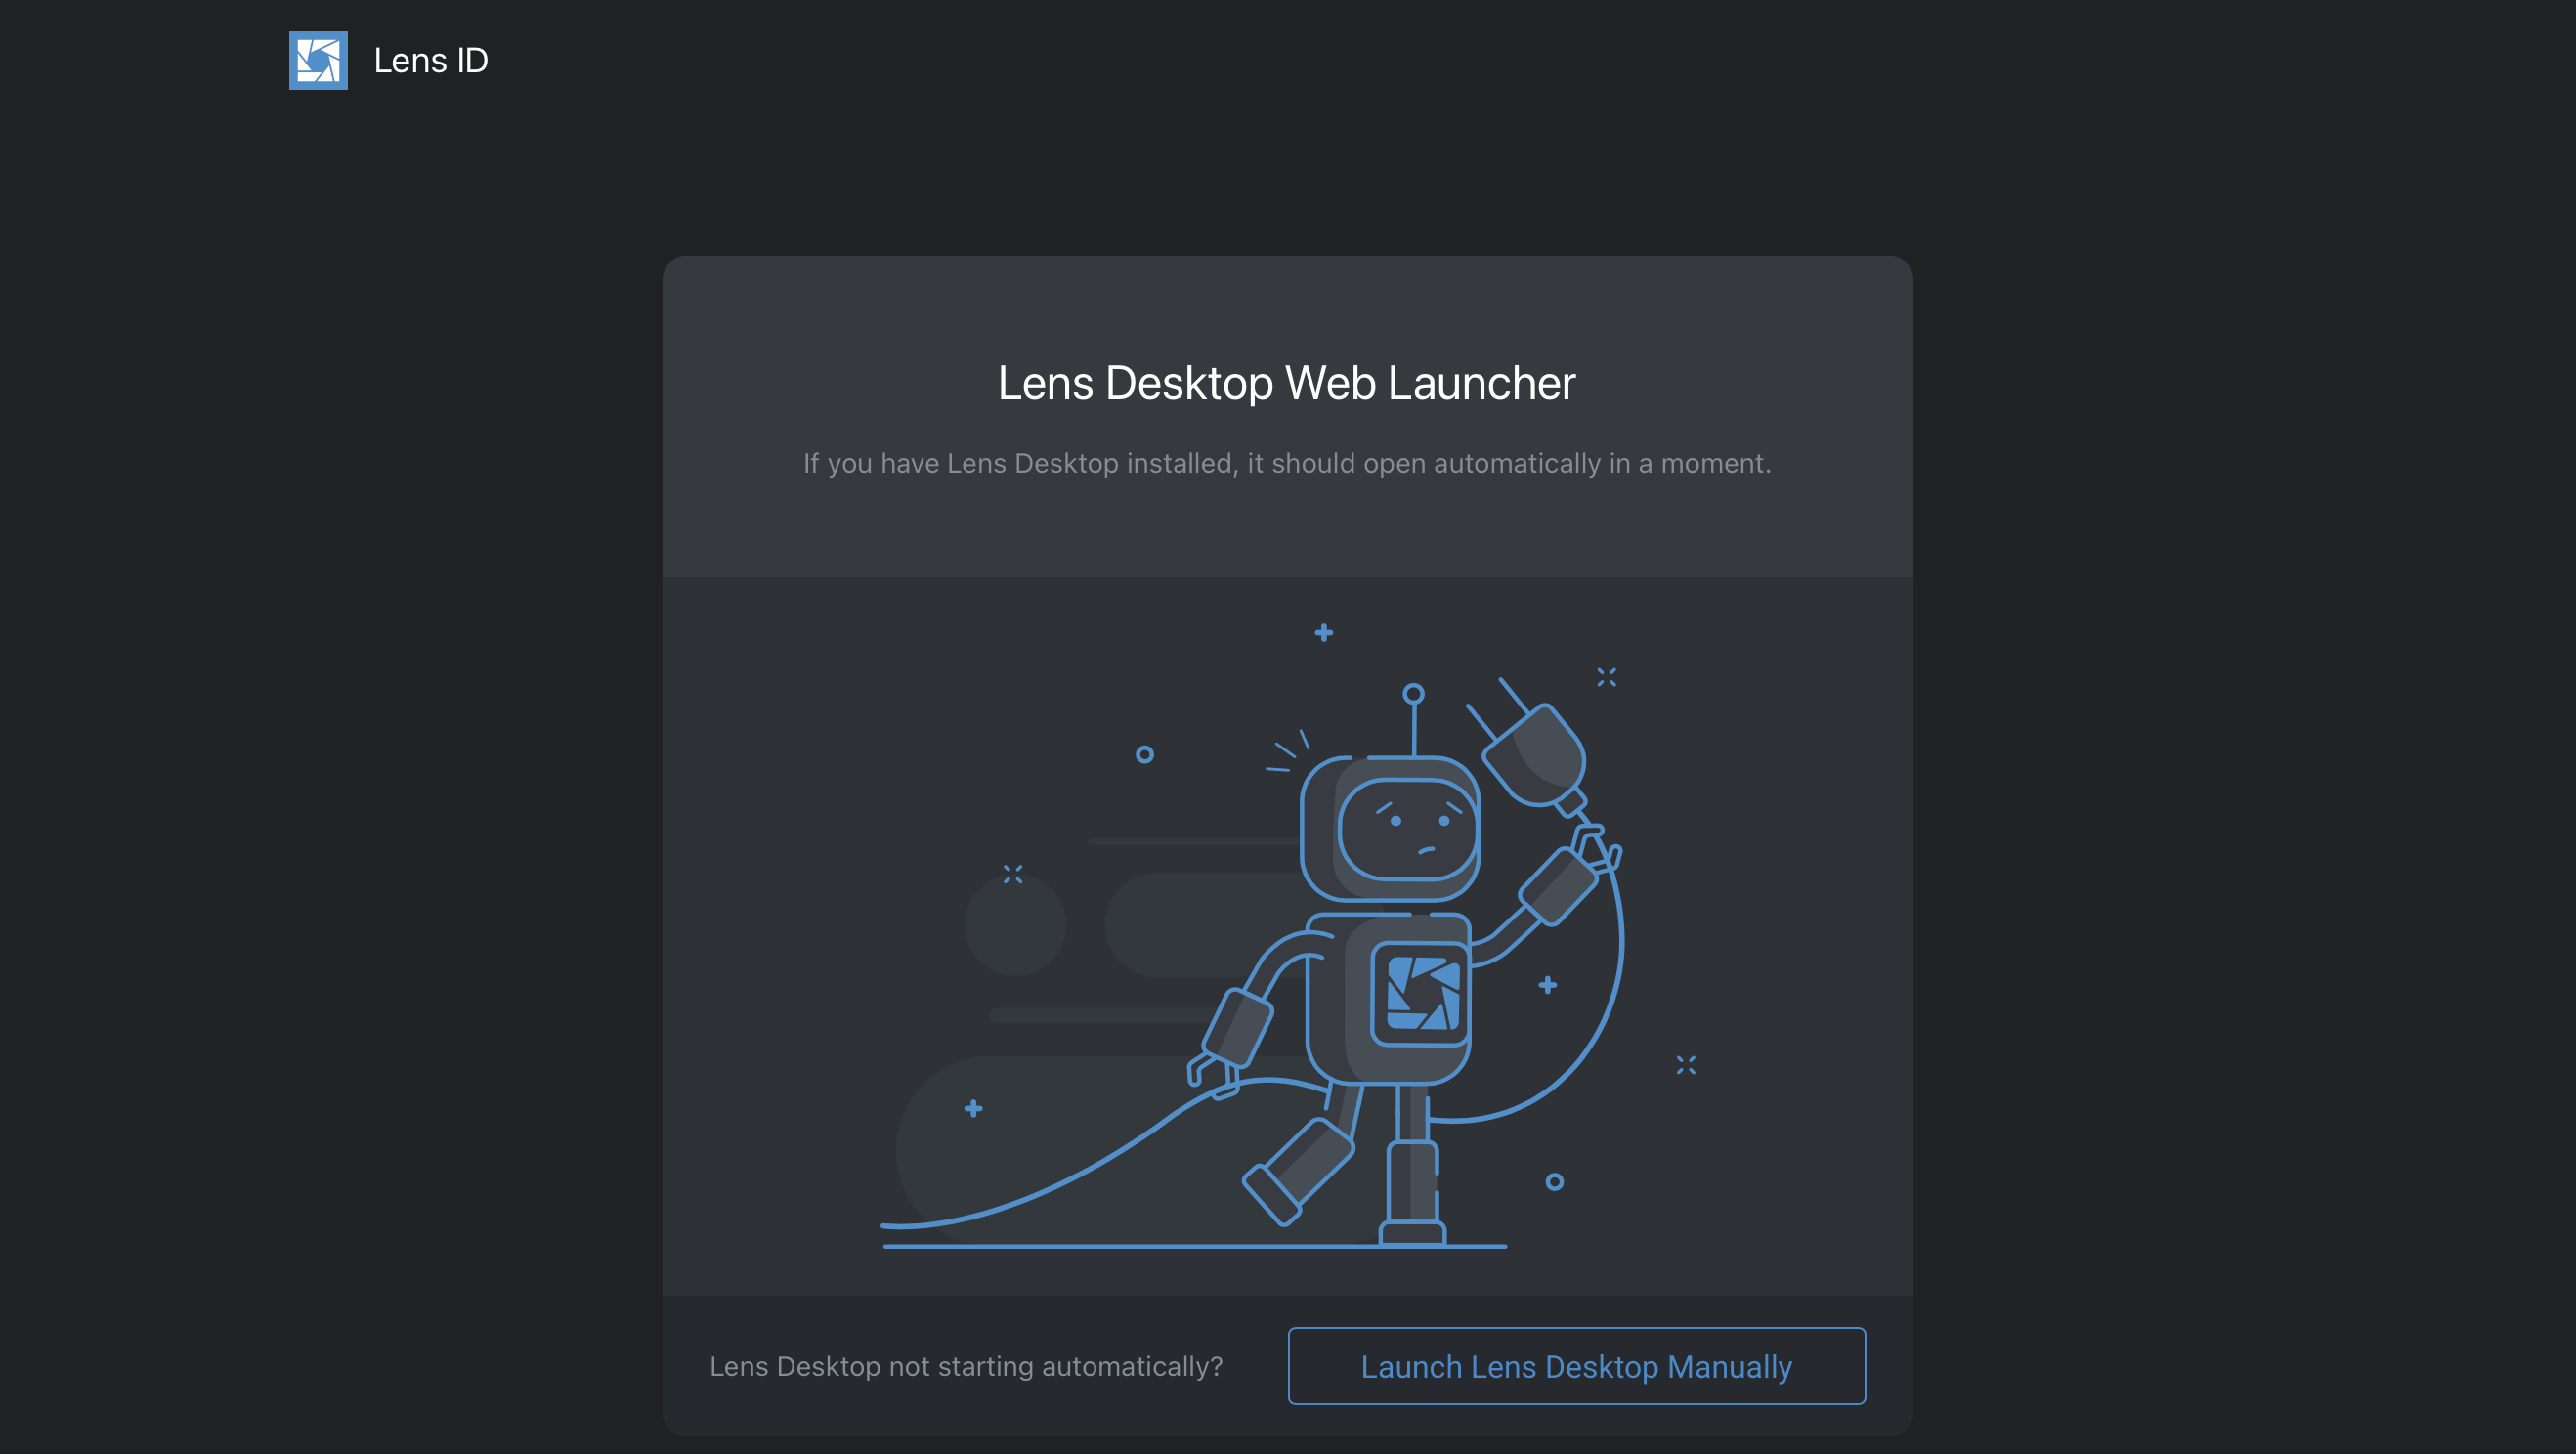
If needed, launch the desktop manually as shown below.
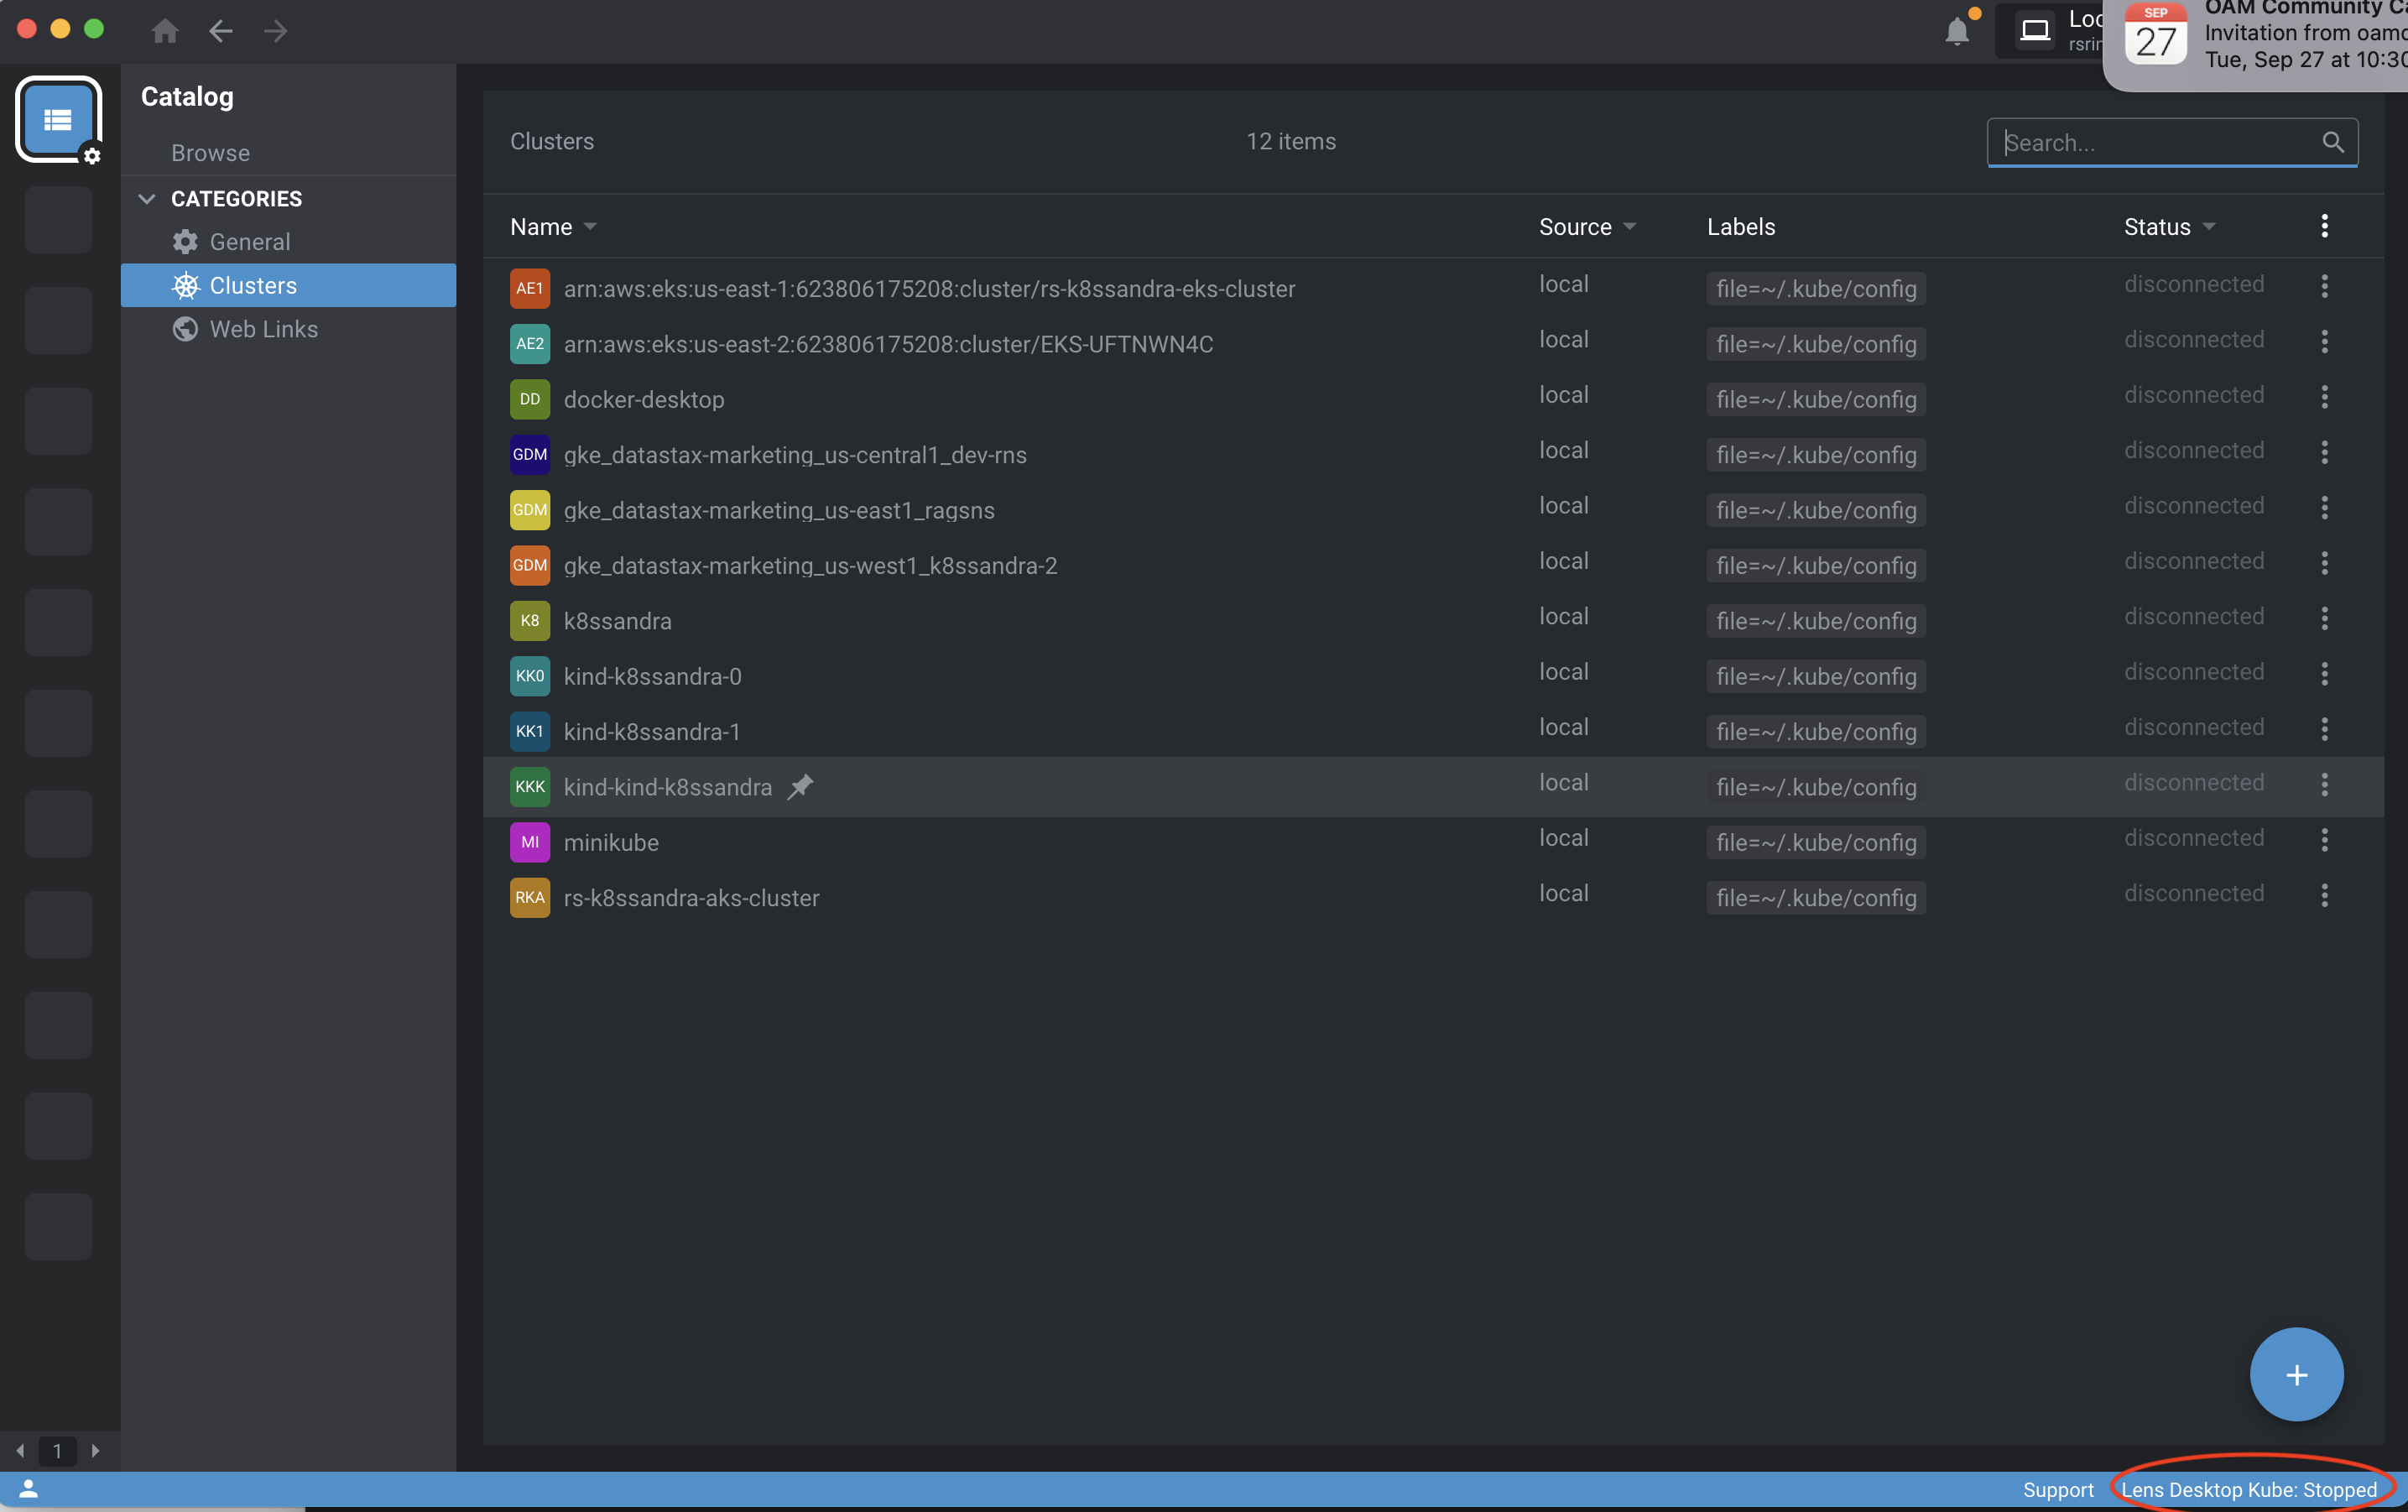
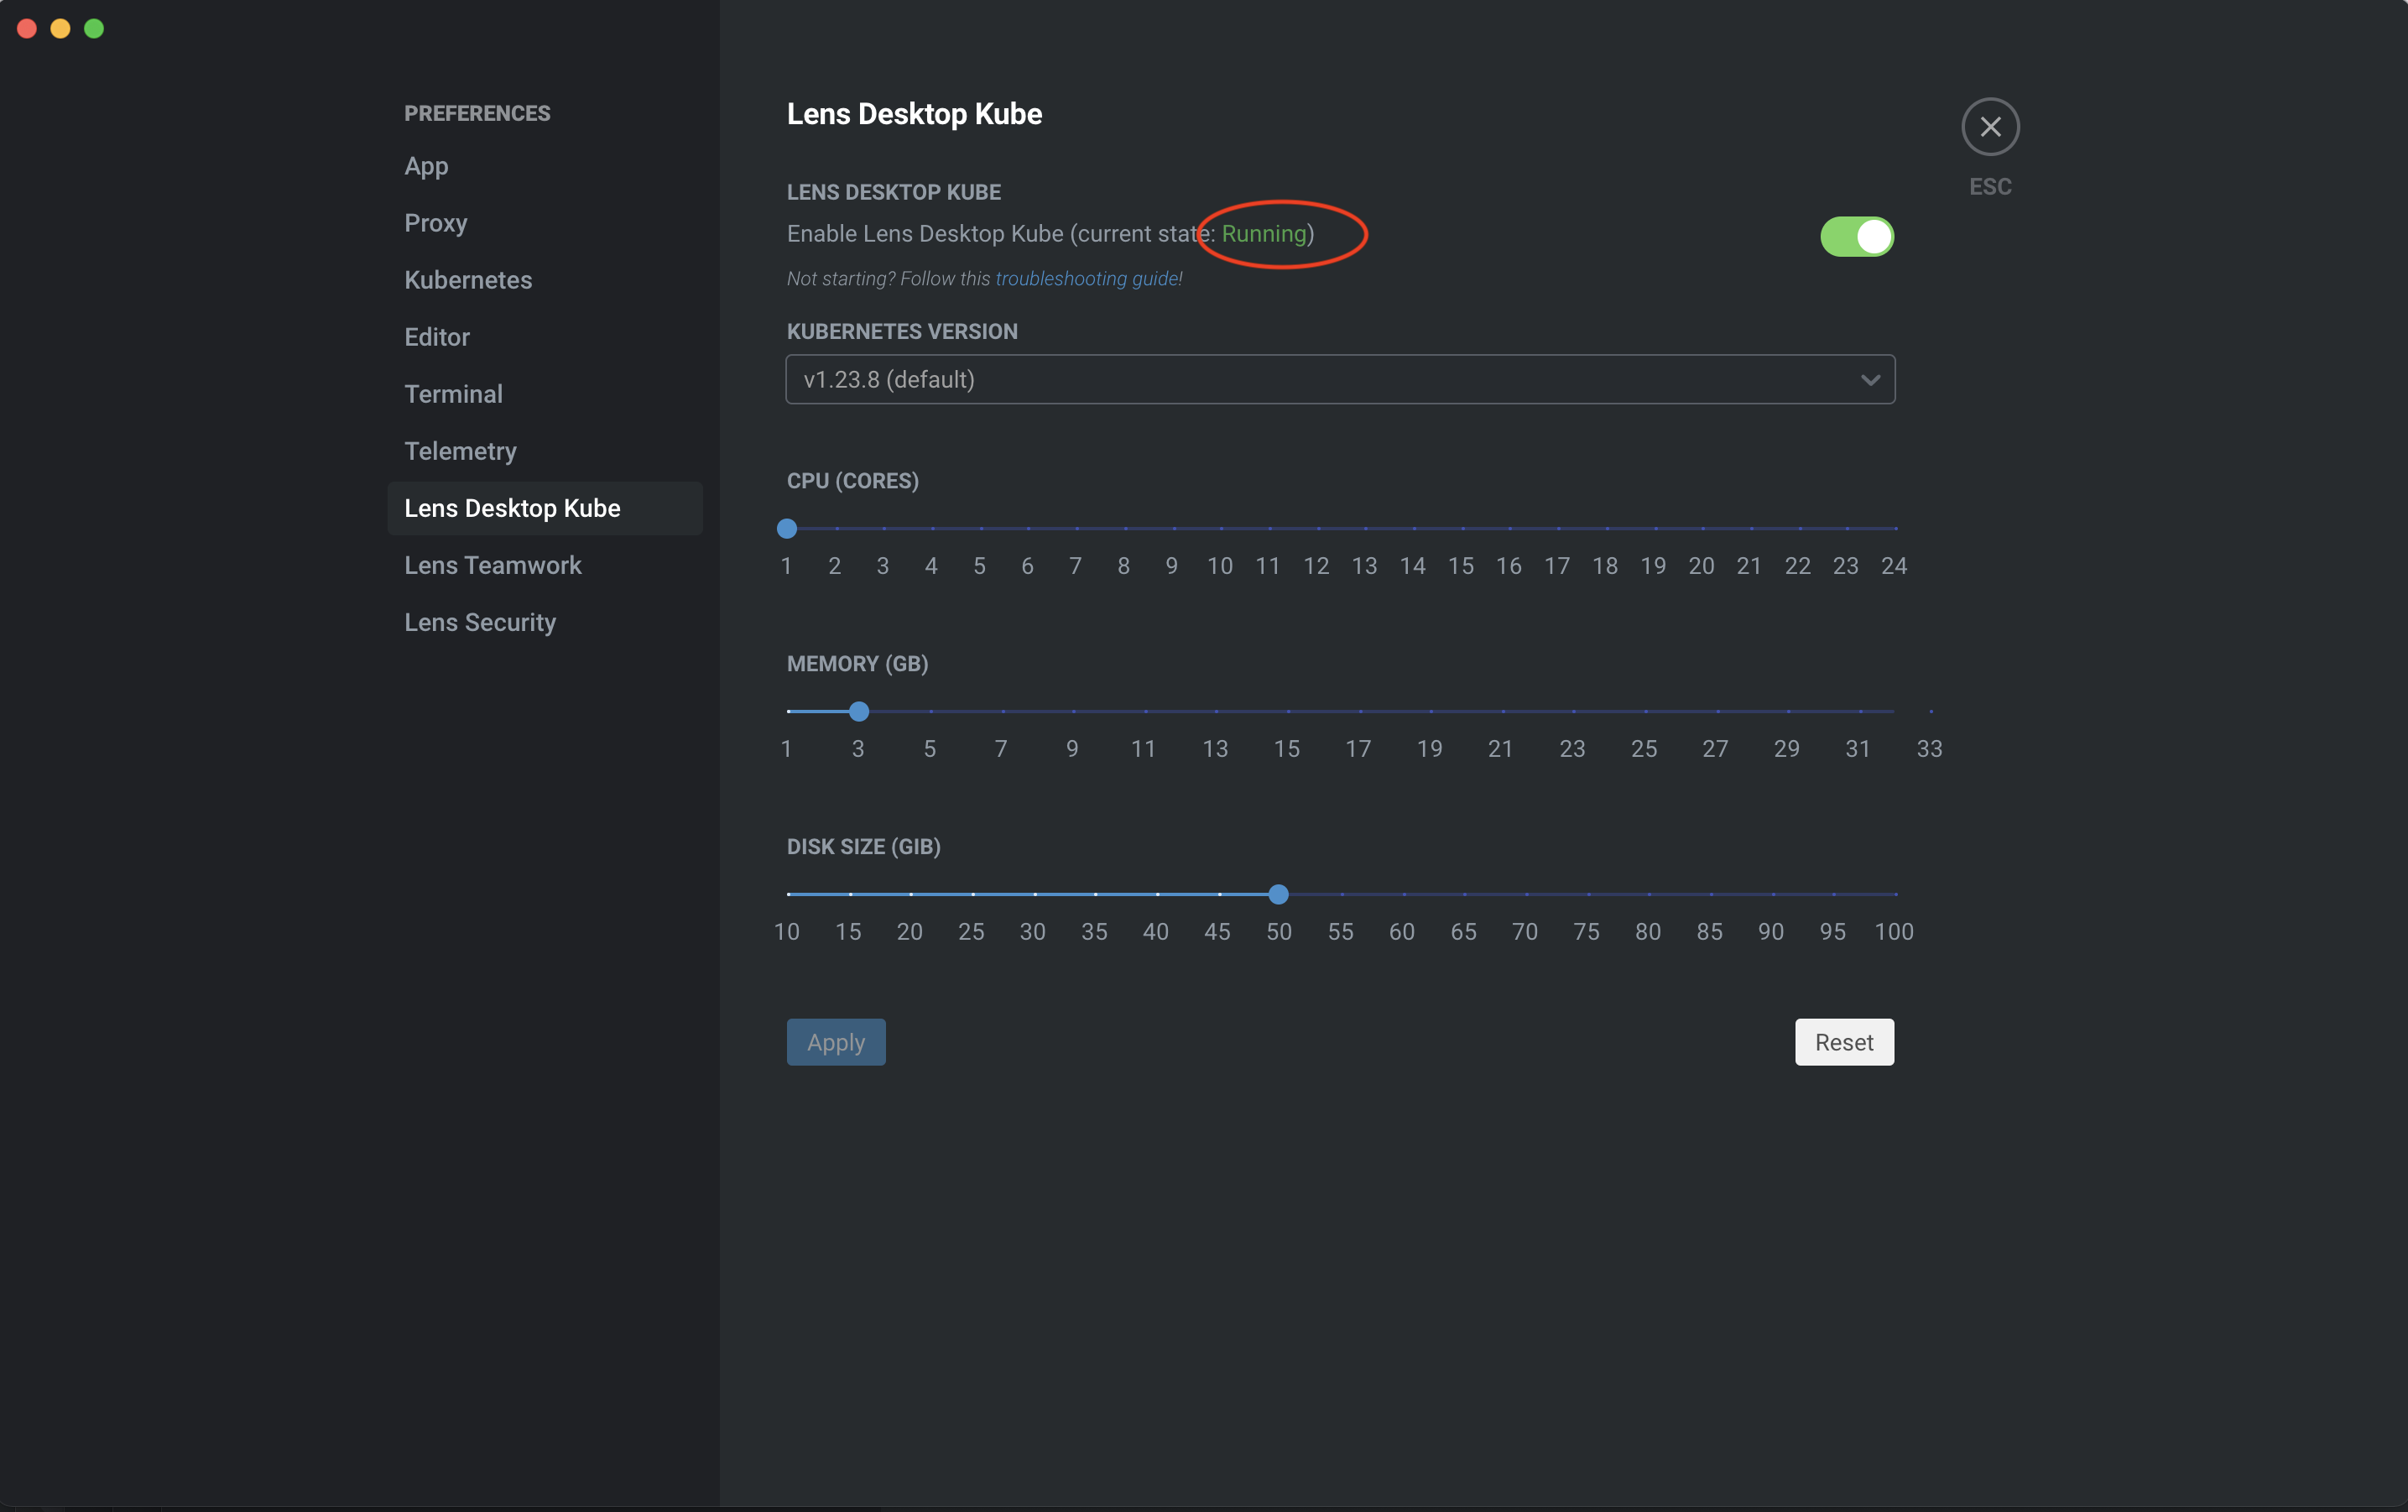
After the launch the Lens Desktop might be in a stopped state as shown in the bottom left below.
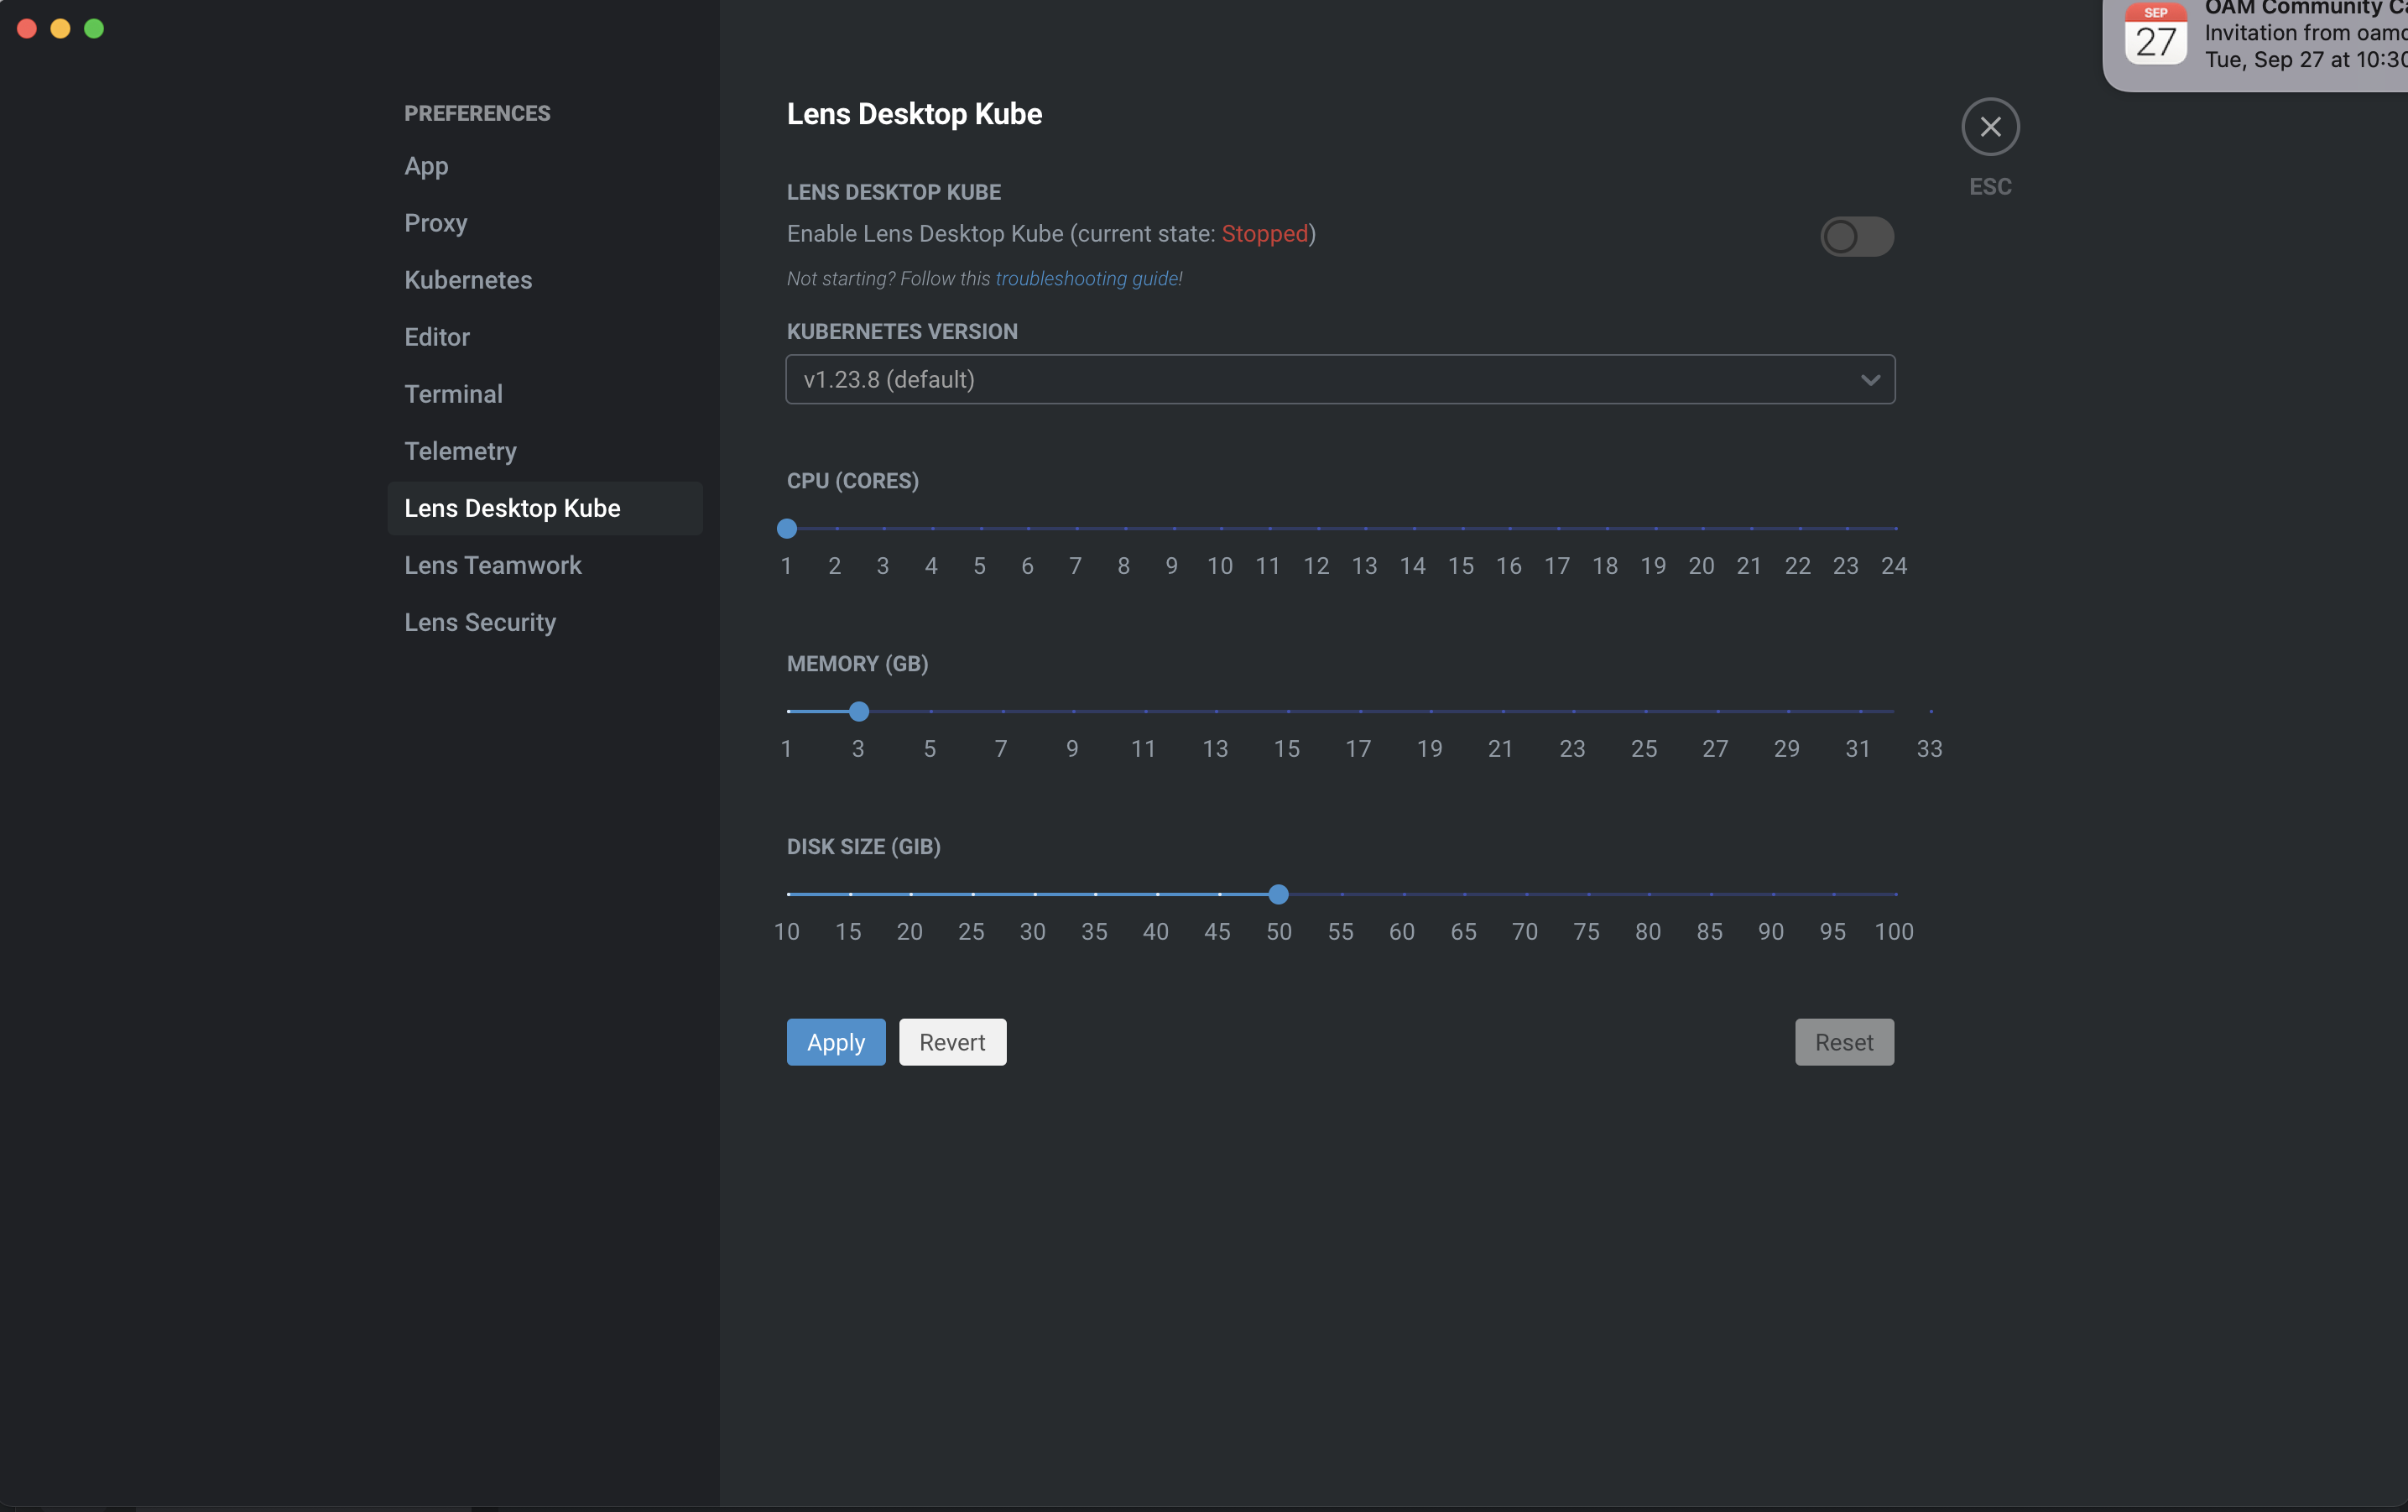
Click on the Lens Desktop Kube: Stopped and pick appropriate values as shown below.
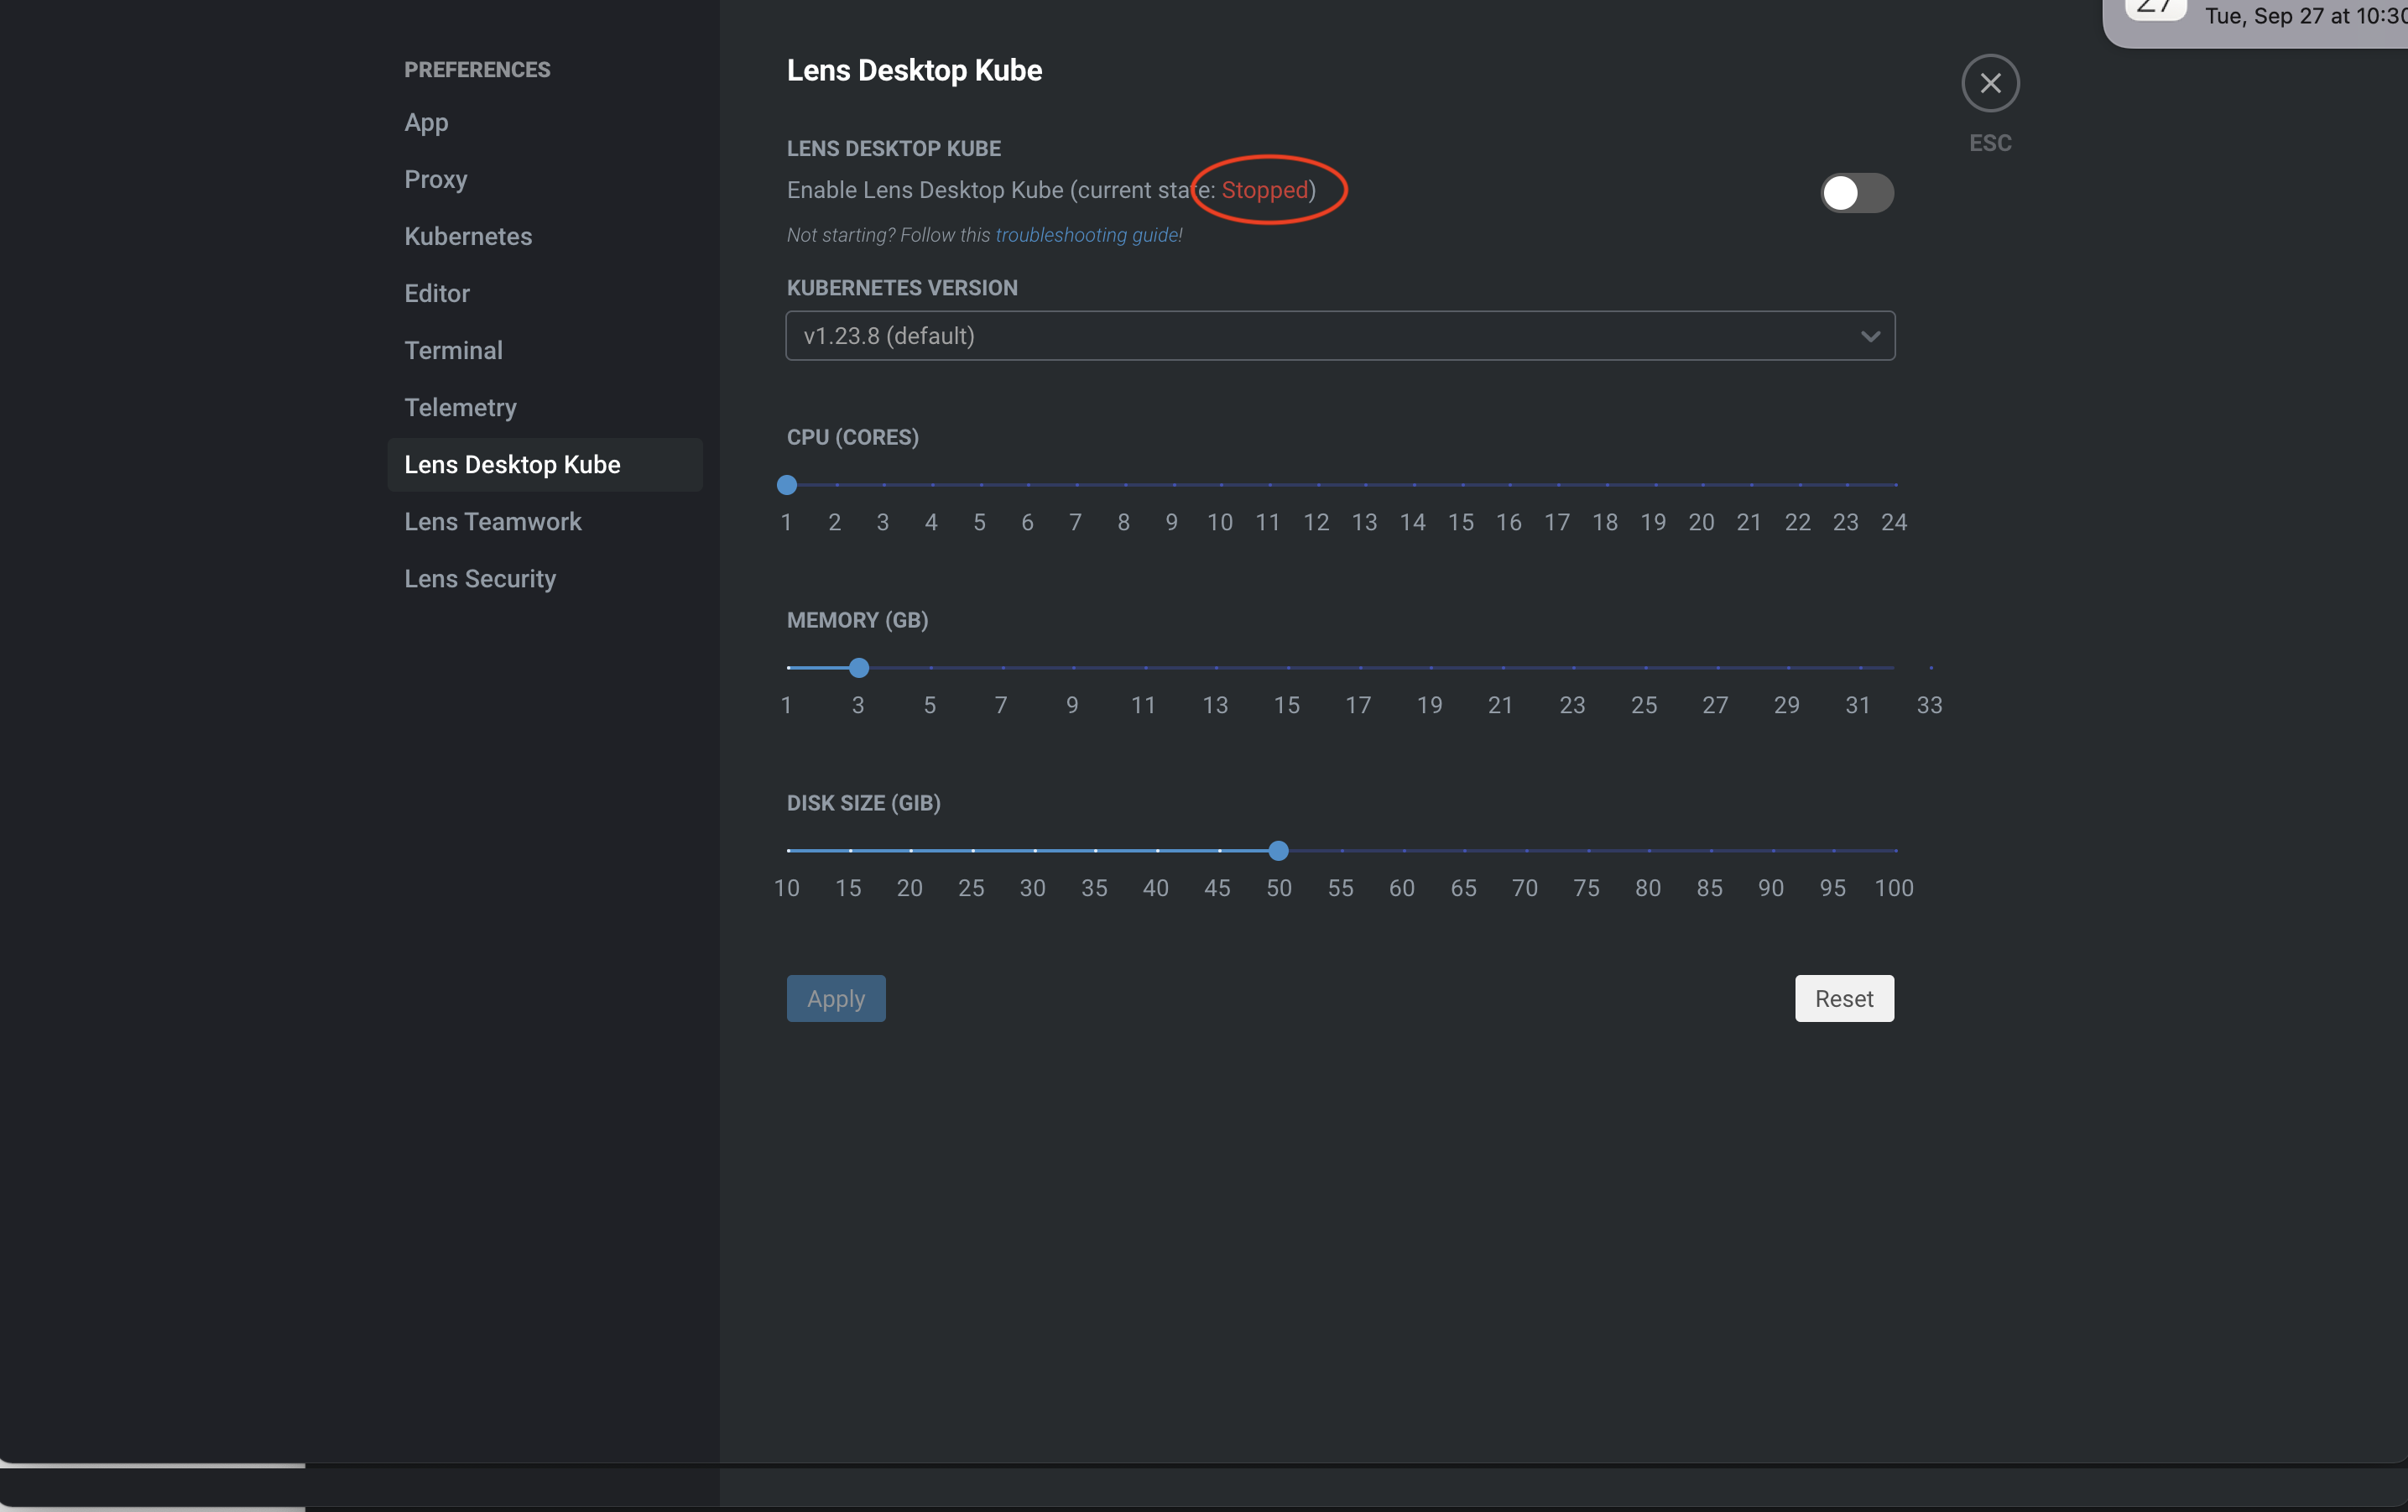
Note that the current state is shown as stopped as shown below.
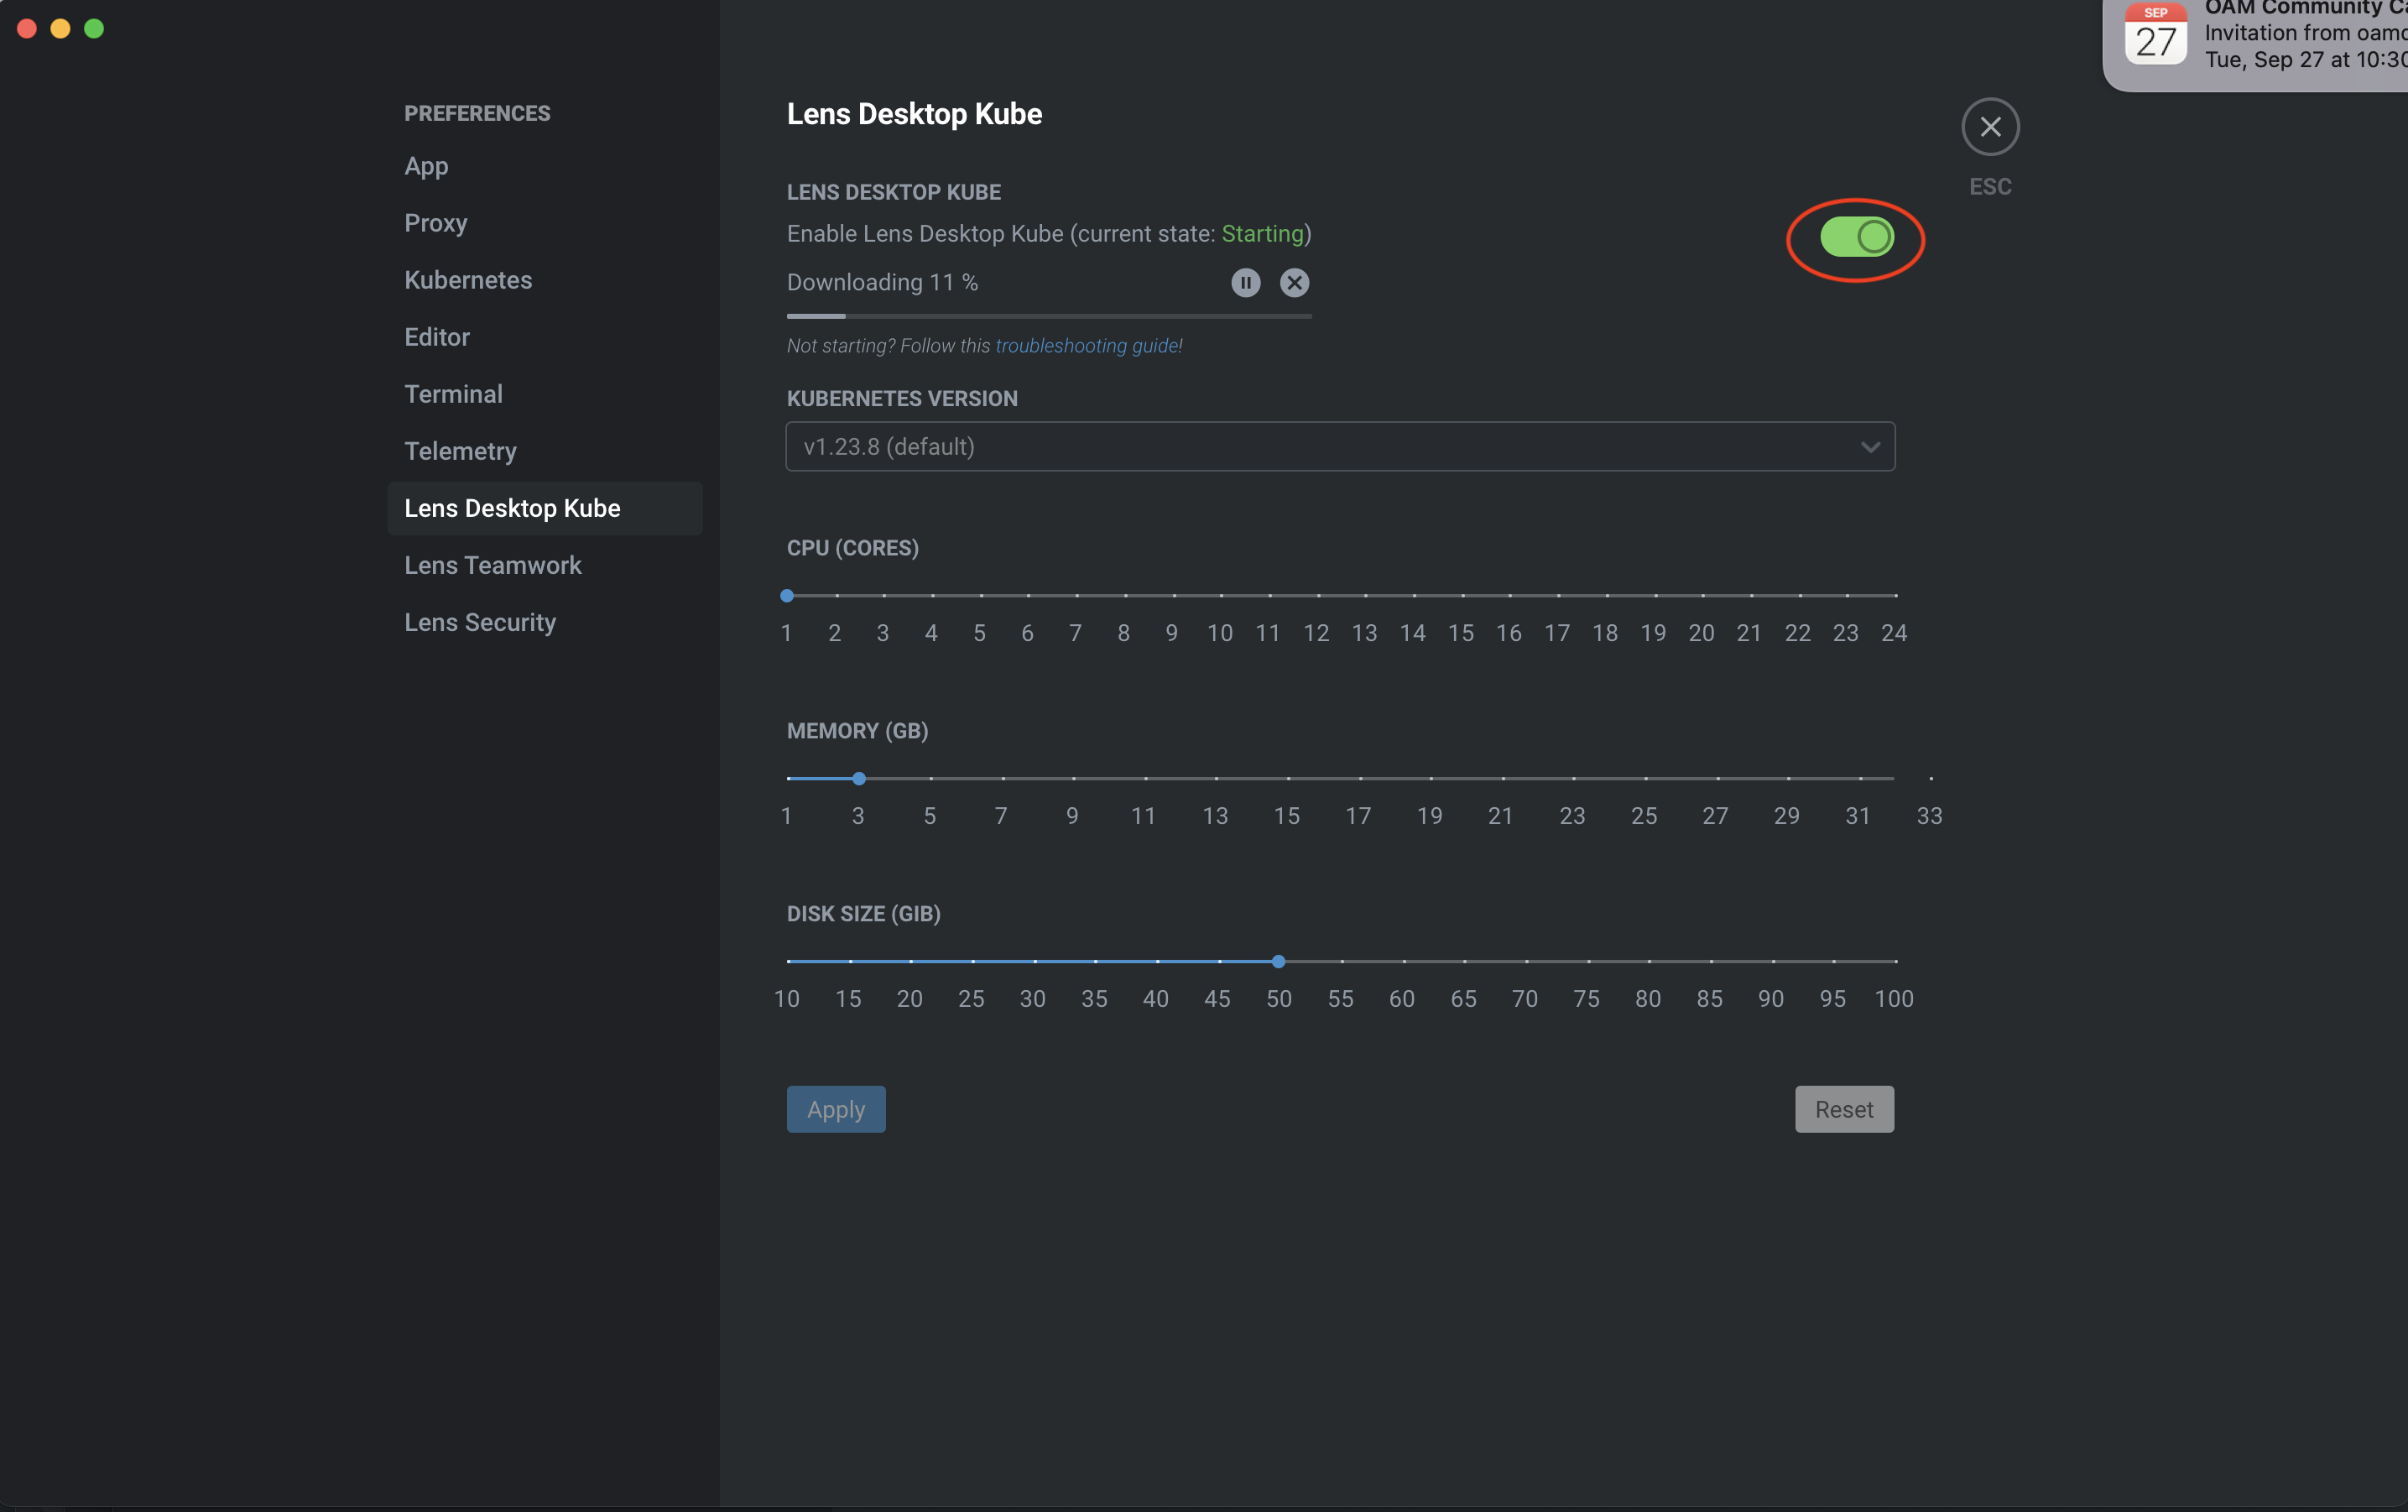
Toggle the button as shown below to move it from stopped to running.
Make sure that Lens is running as shown below. It might take well over five minutes for the state to move to running.
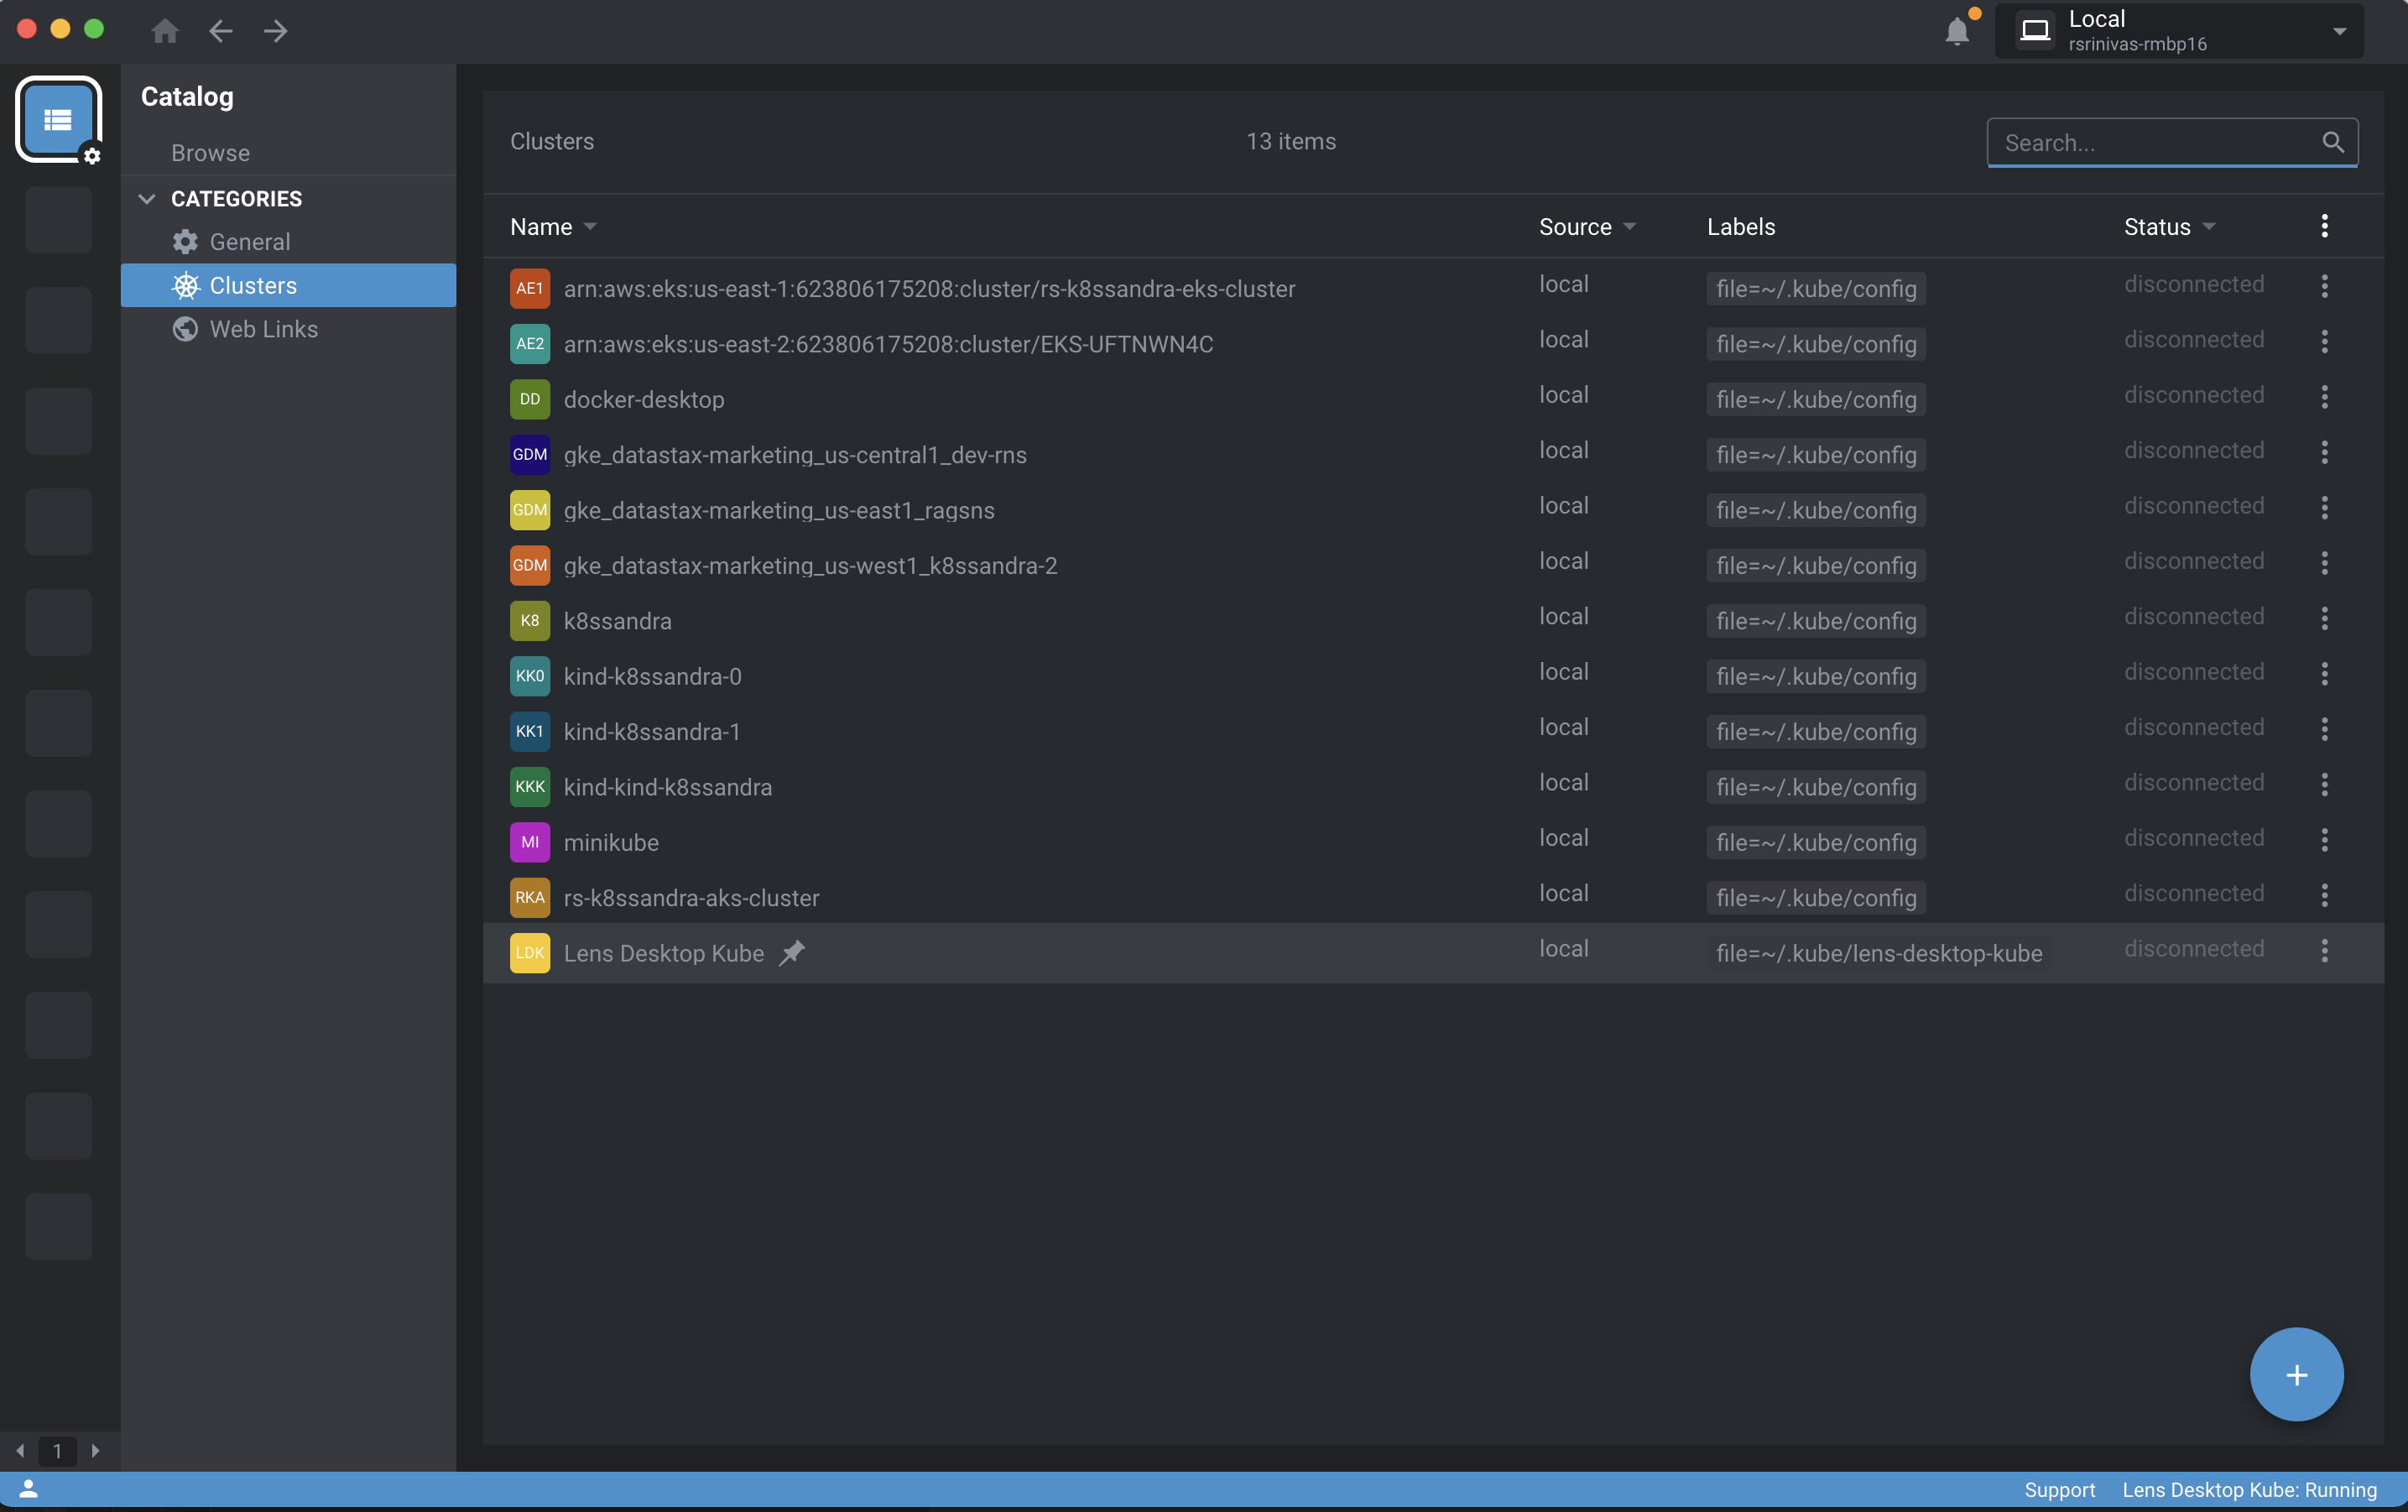
You should have Lens desktop in your clusters list as shown below.
Now that Lens Desktop is installed, up and running we're ready to deploy the ToDo app.
Step Lens.C: Set up secrets
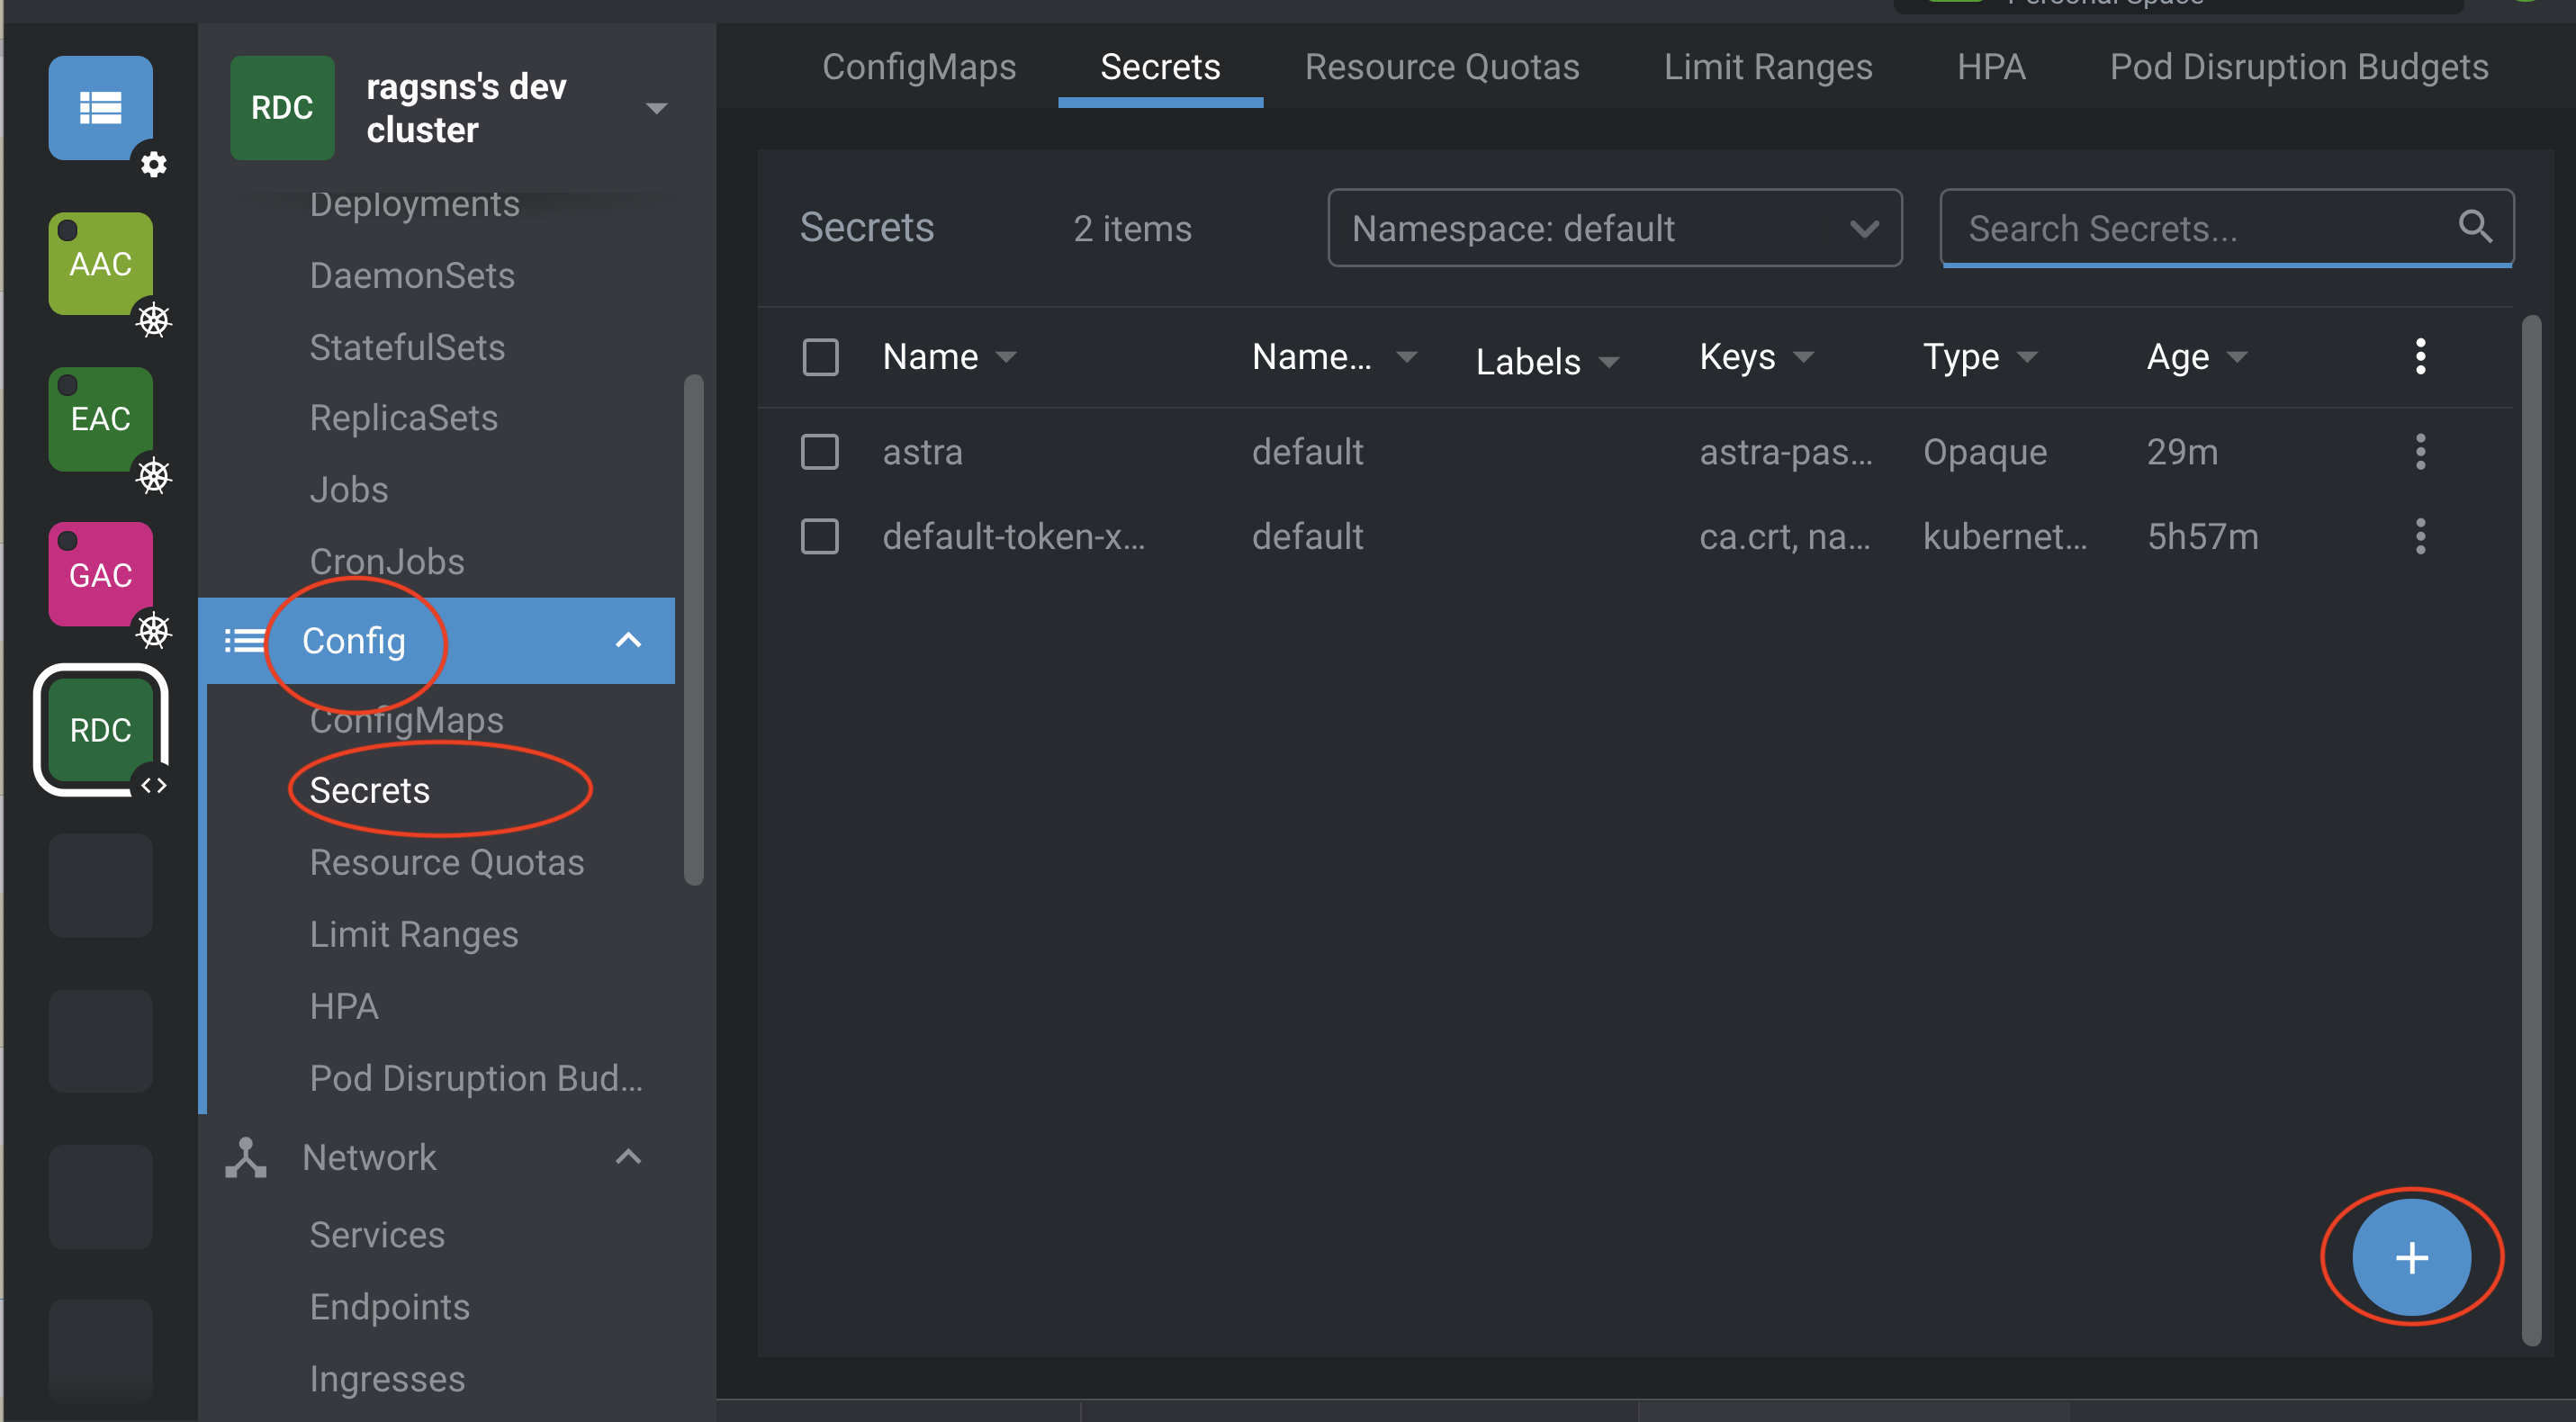
Start by clicking on Config, Secrets and + as shown below.
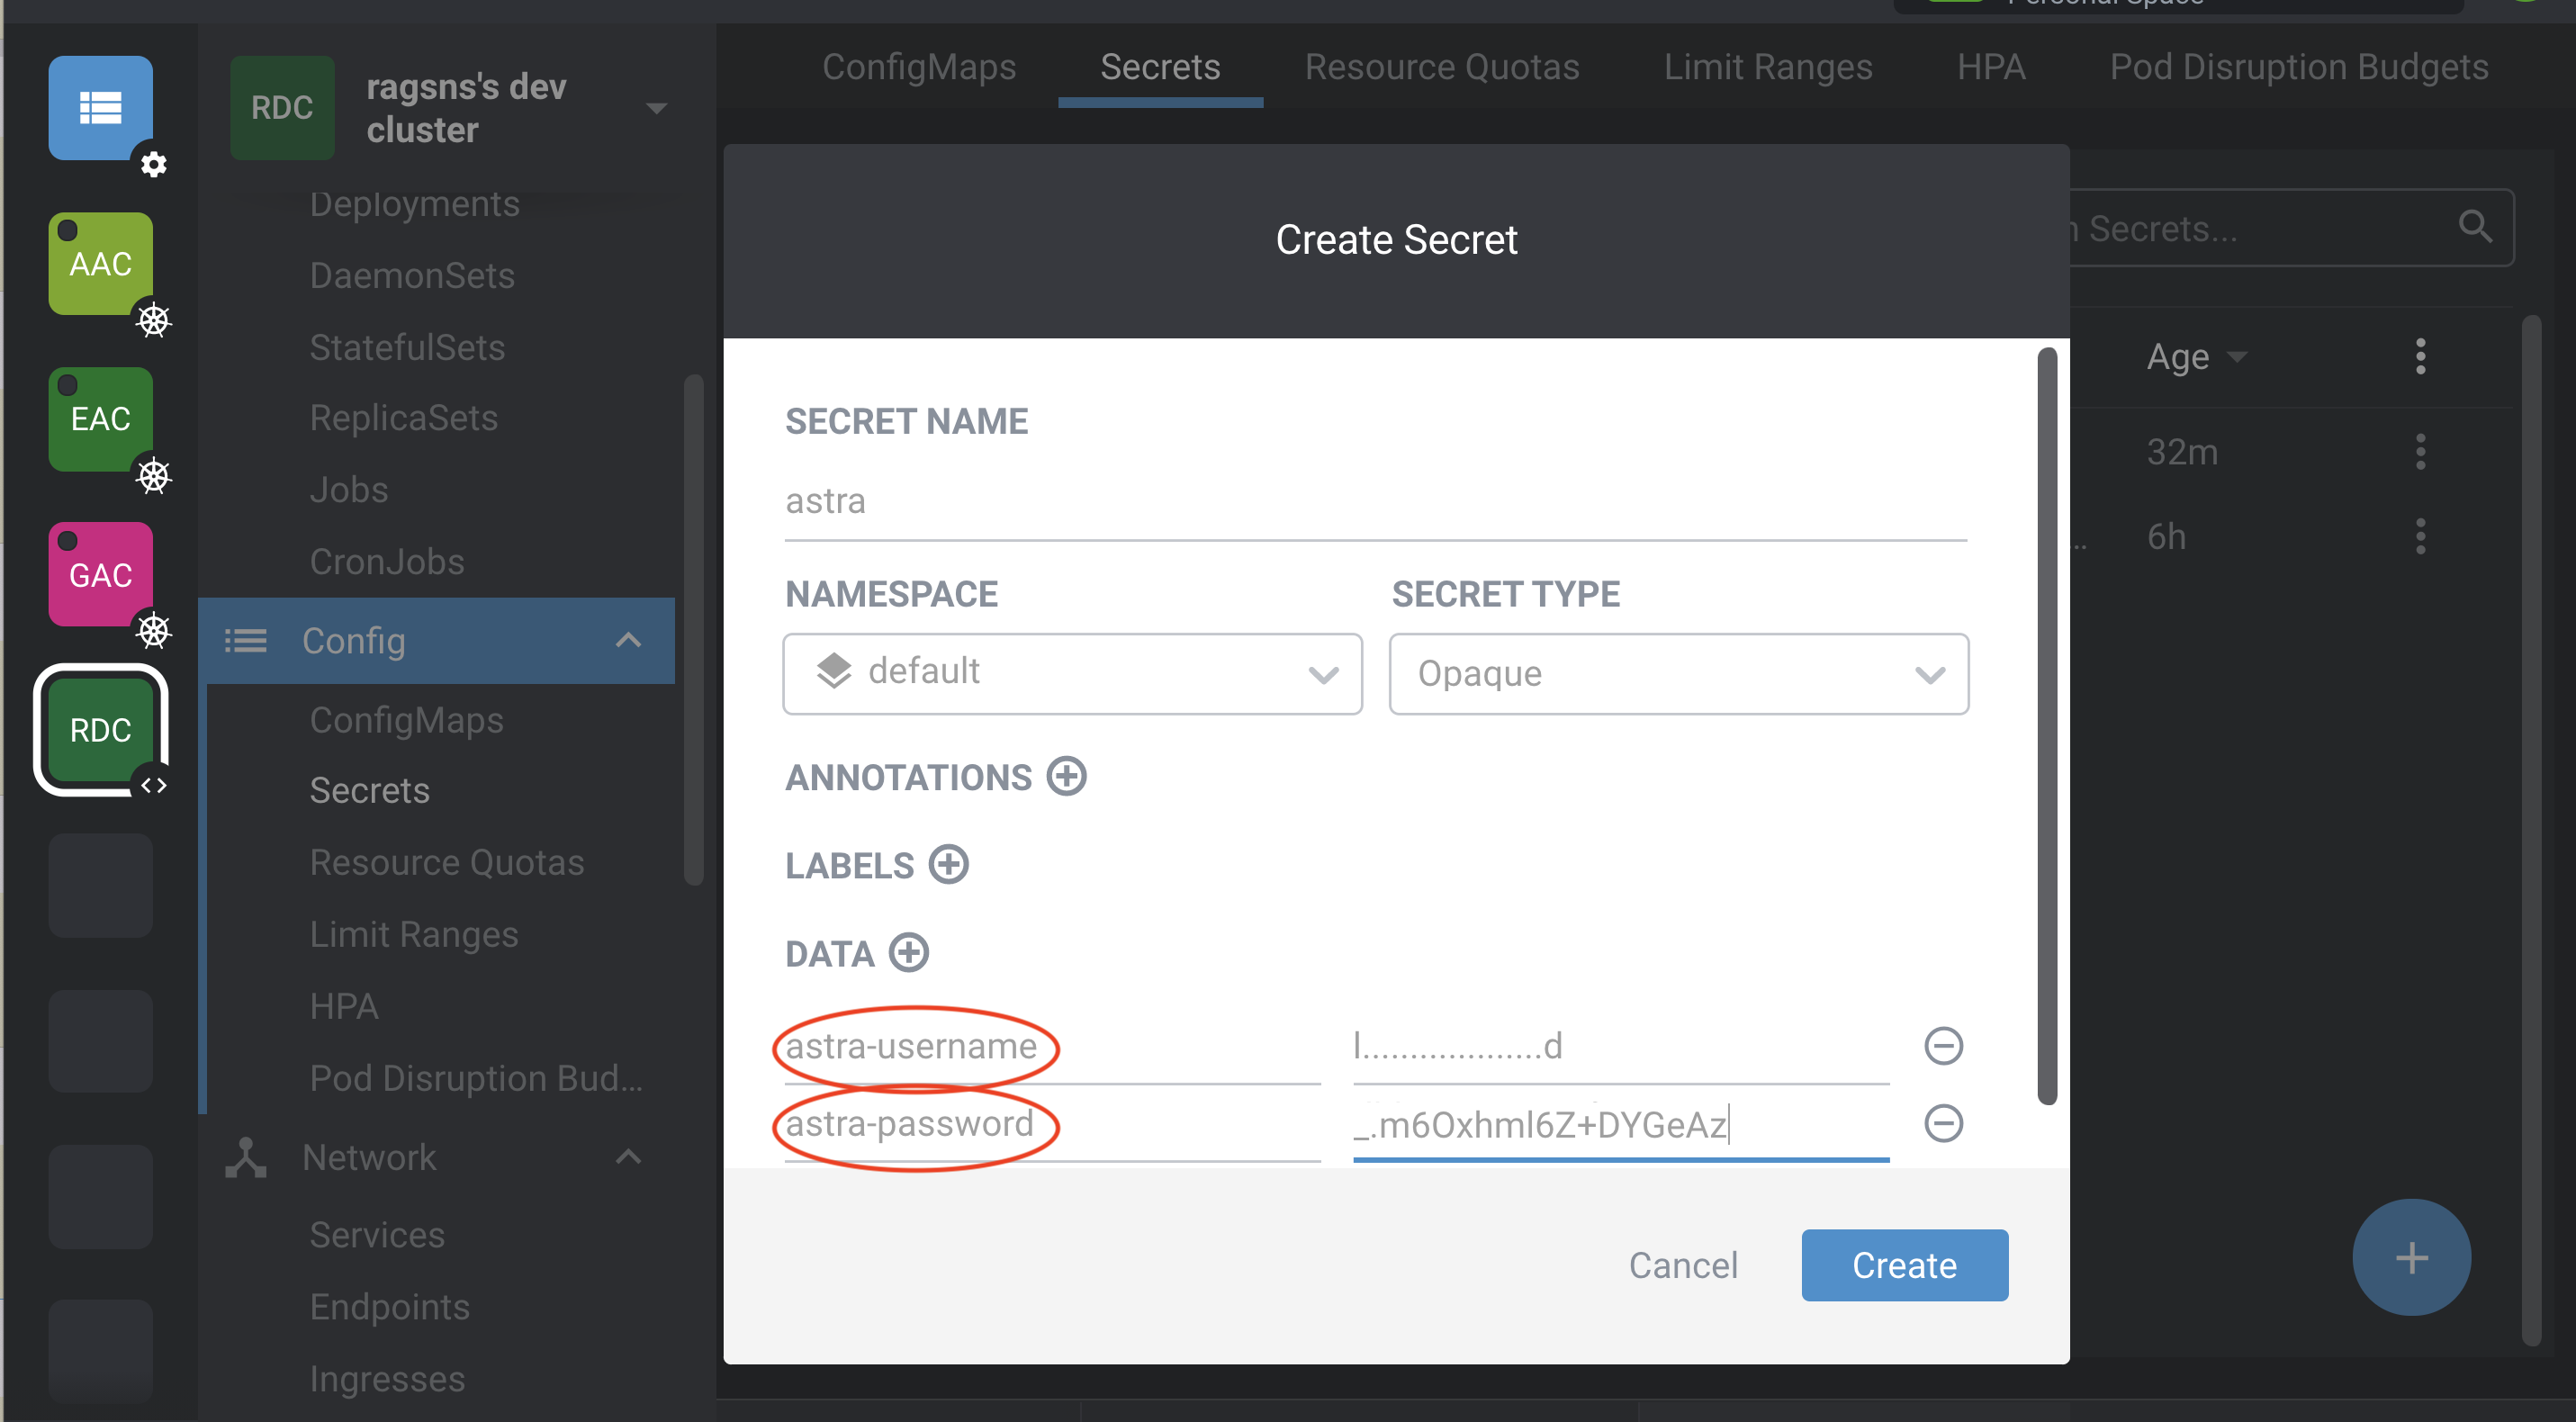
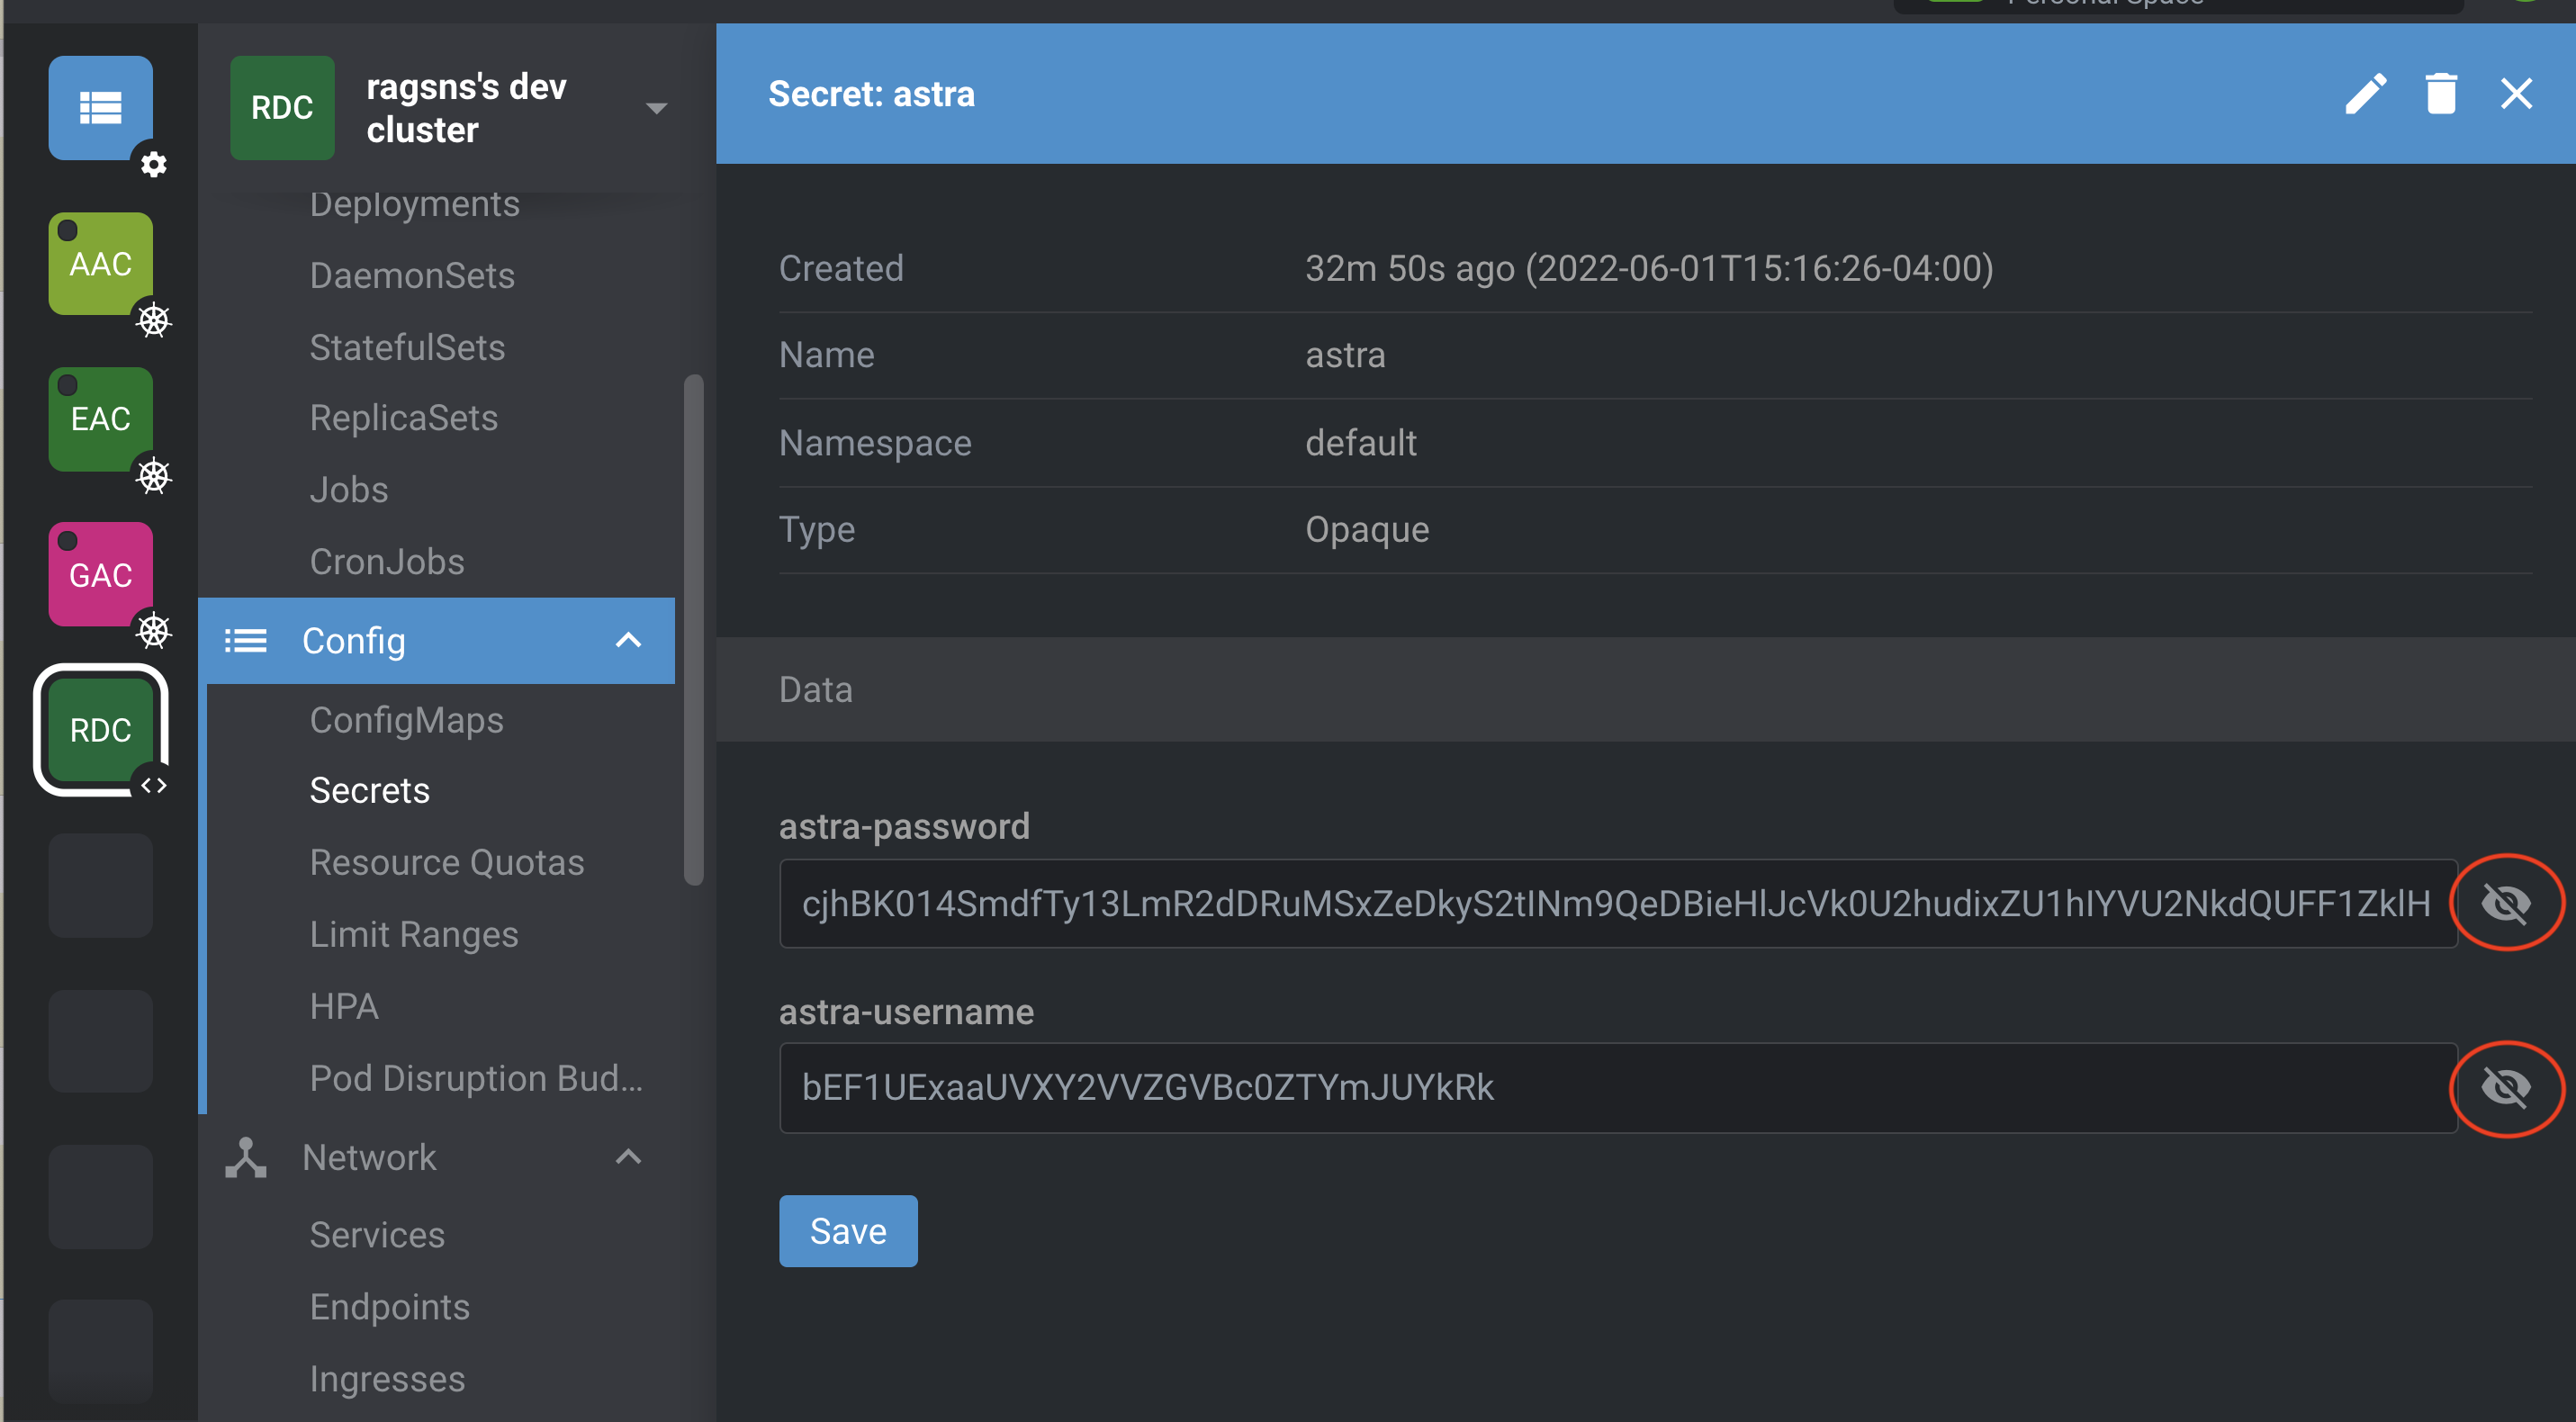
Now add the secret astra and the secrets astra-username and astra-password as shown below.
You can verify you entered the values correctly by hitting the button as shown below which will show the values in clear.
Step Lens.D: Start the workload
We use the generated kubernetes.yml file to install the workload in Lens.
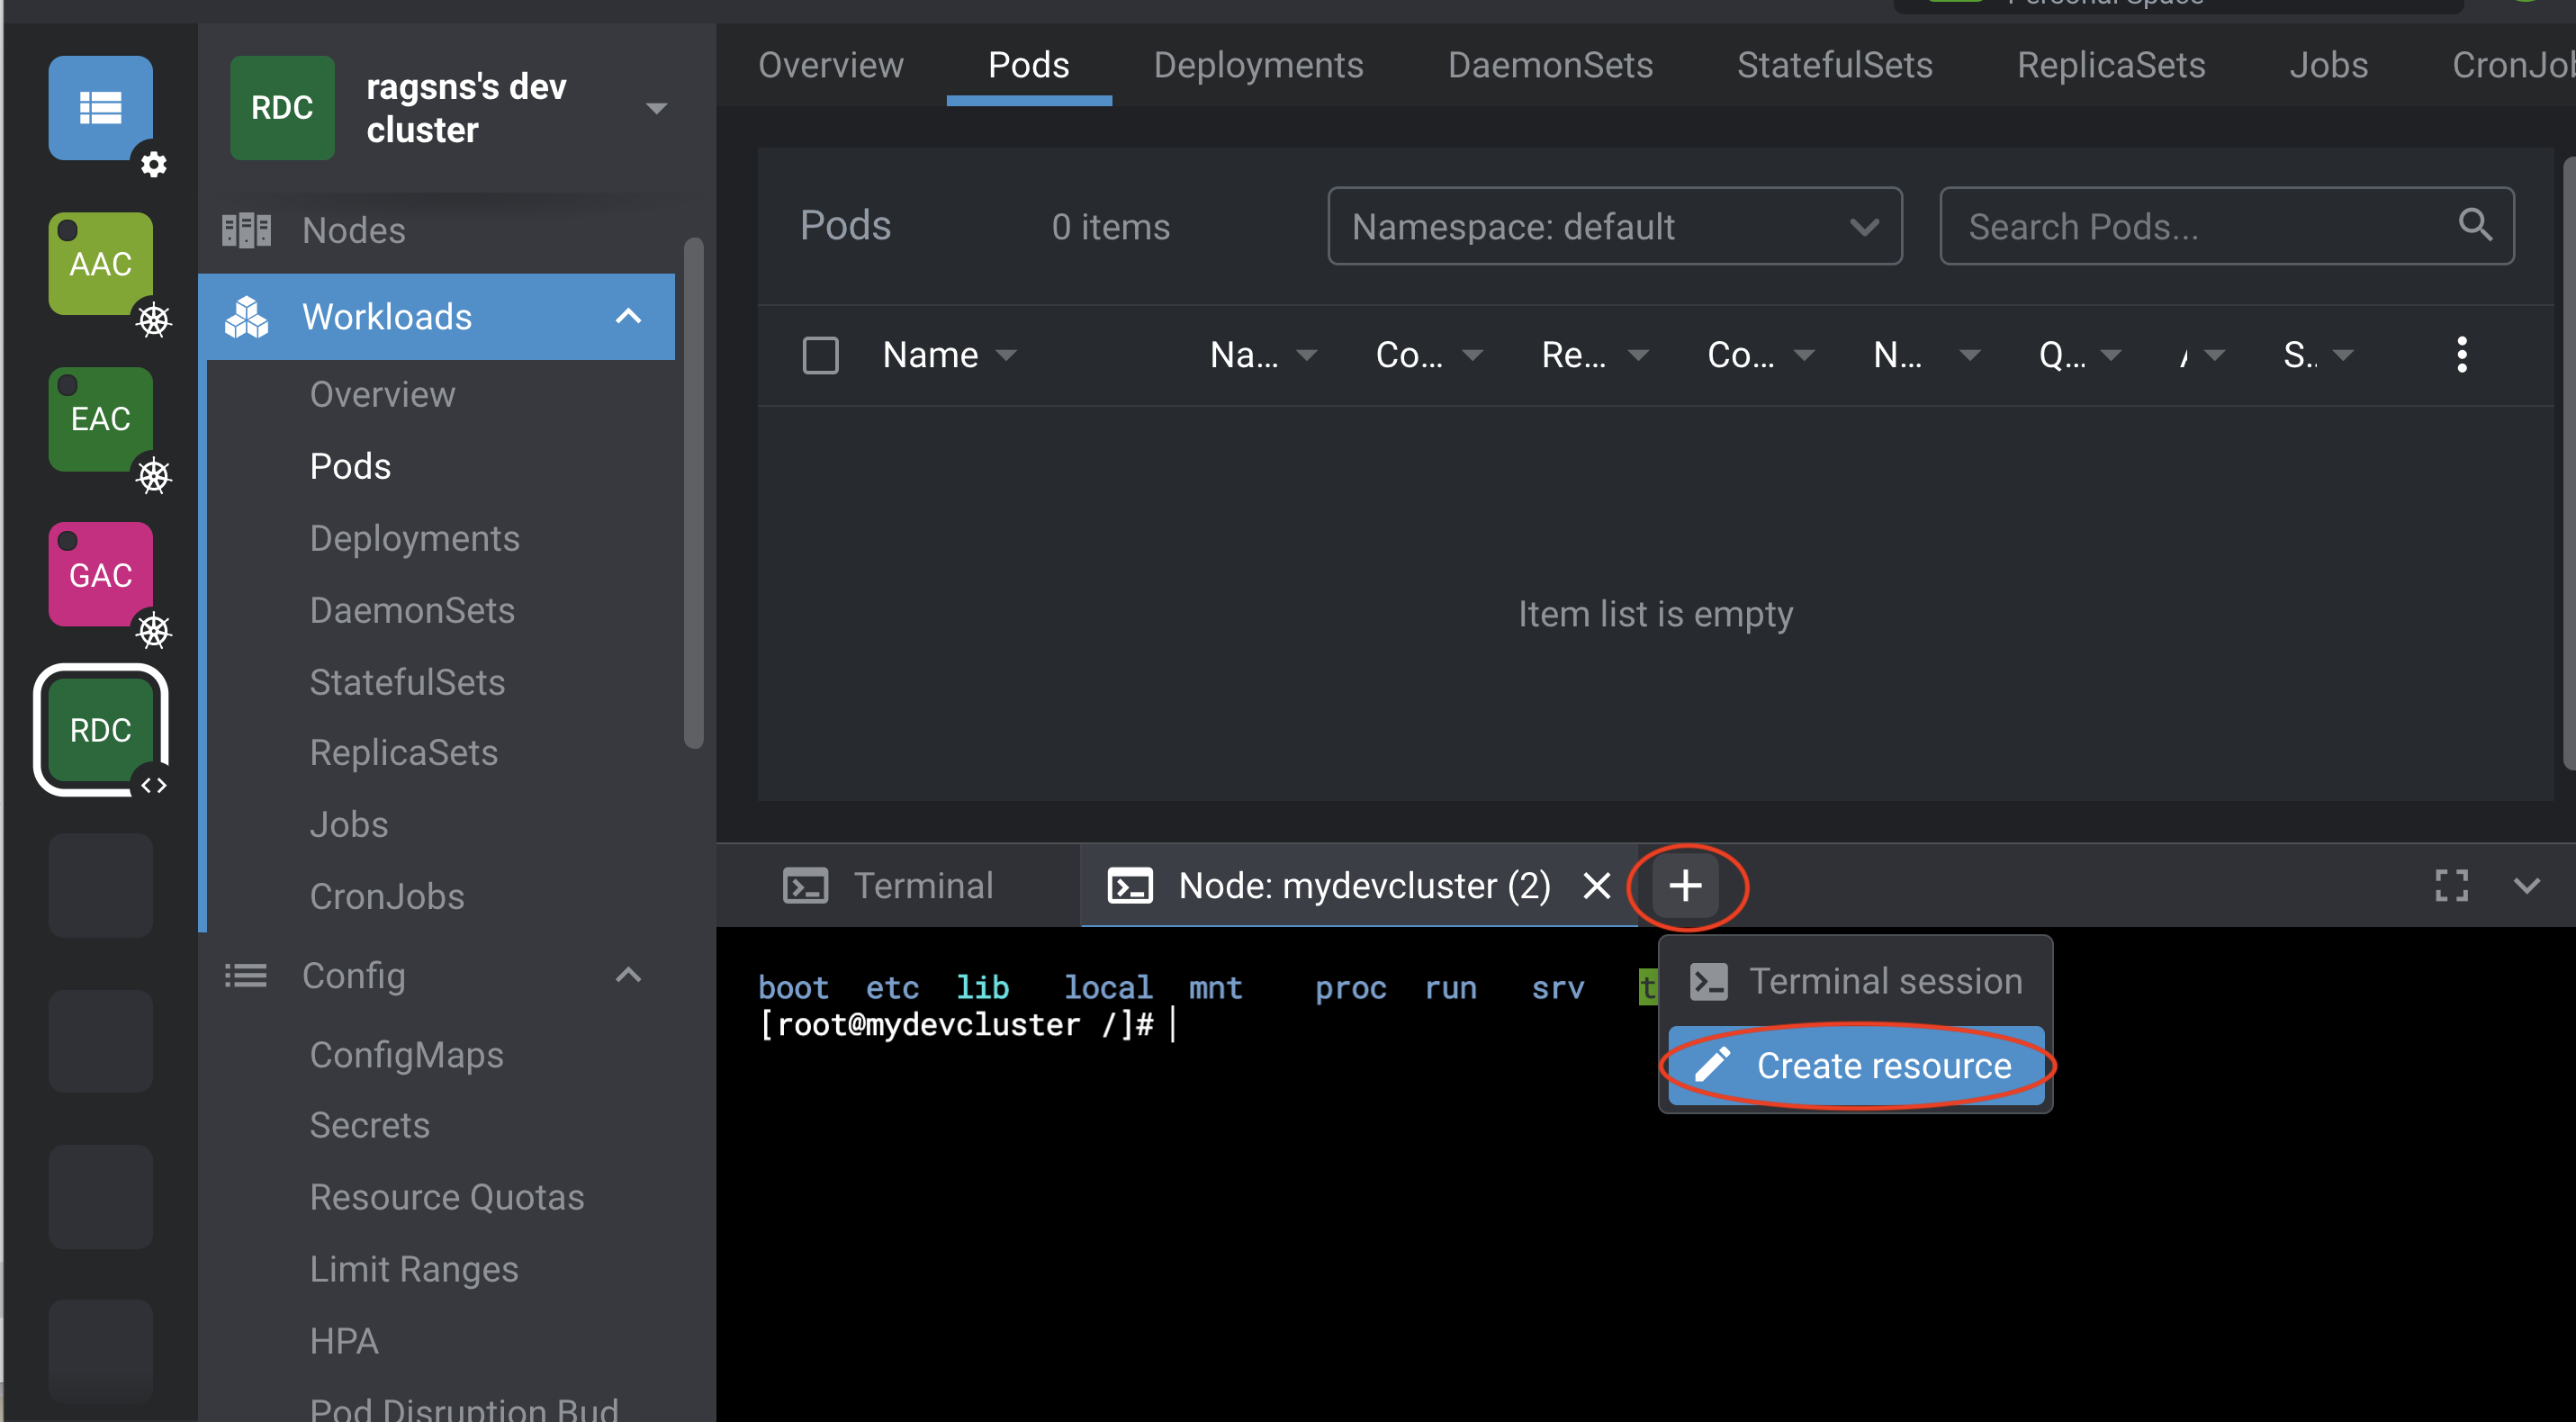
Click on + and Create resource as shown below.
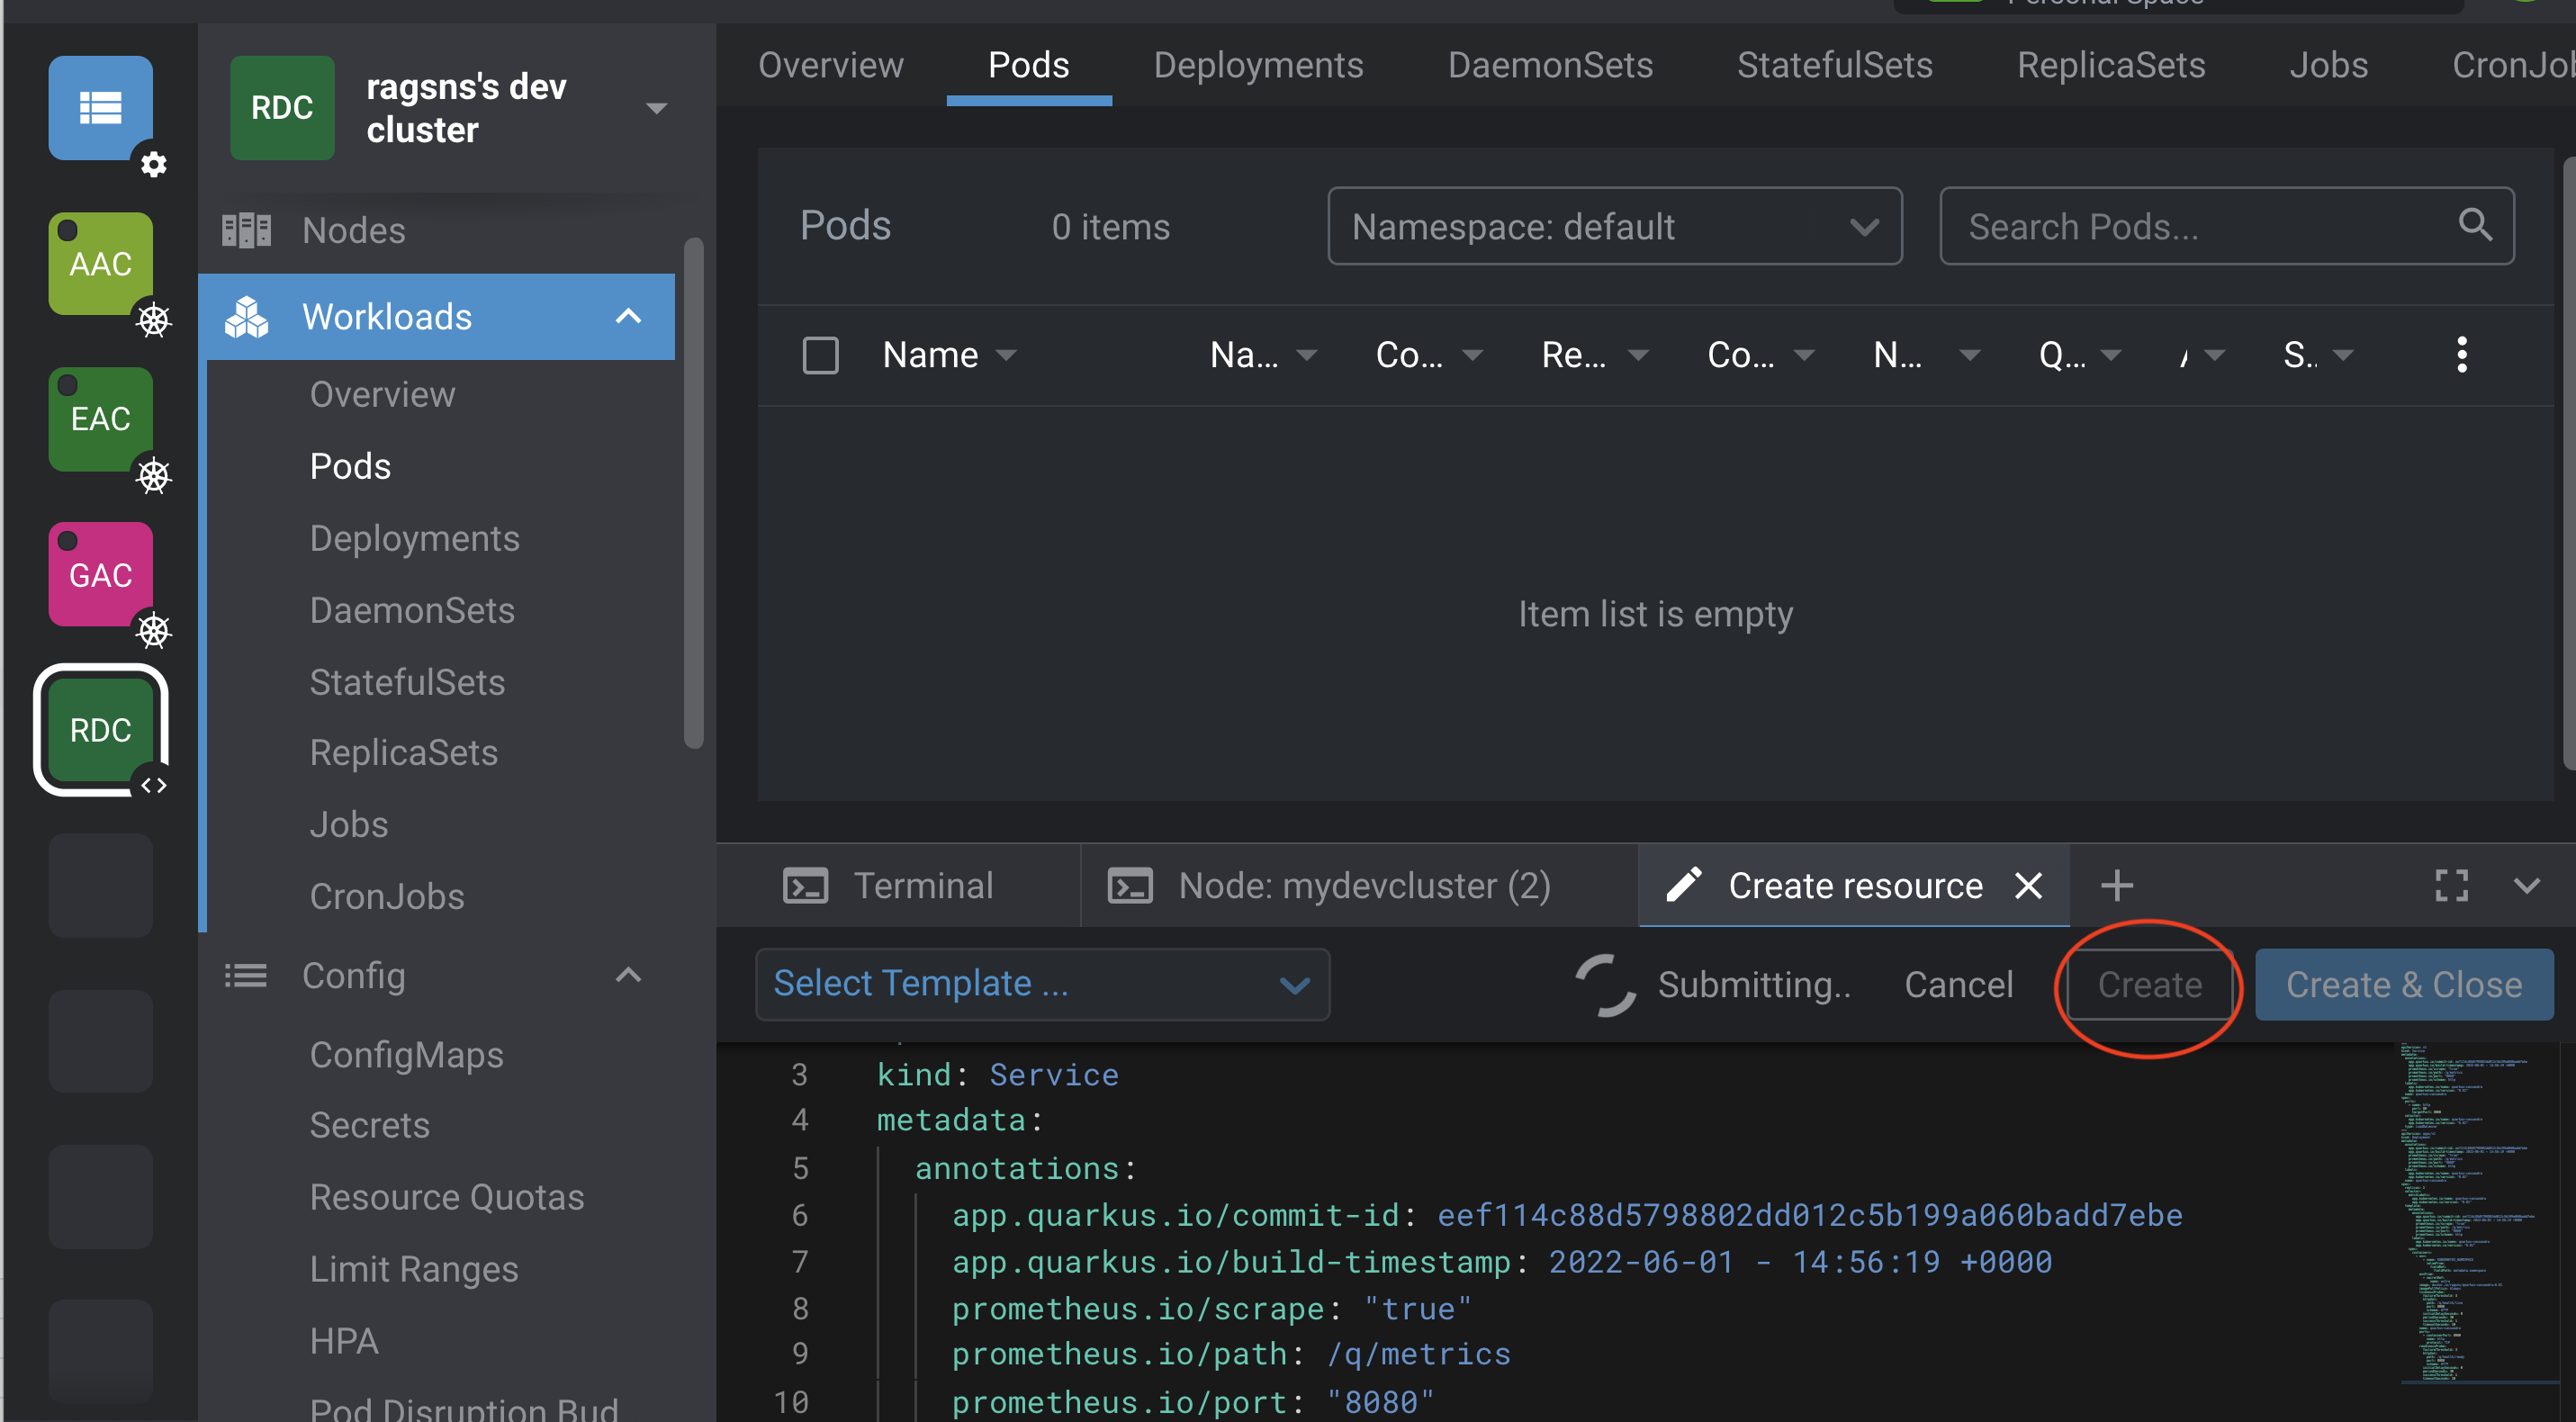
We are going to cut-n-paste the contents from the Gitpod window into Lens.
Issue the following command in the Gitpod terminal window to look at the Kubernetes manifests that were automatically generated and applied to the cluster.
gp open target/kubernetes/kubernetes.yml
and cut-n-paste the contents into Lens as shown below and hit Create as shown below.
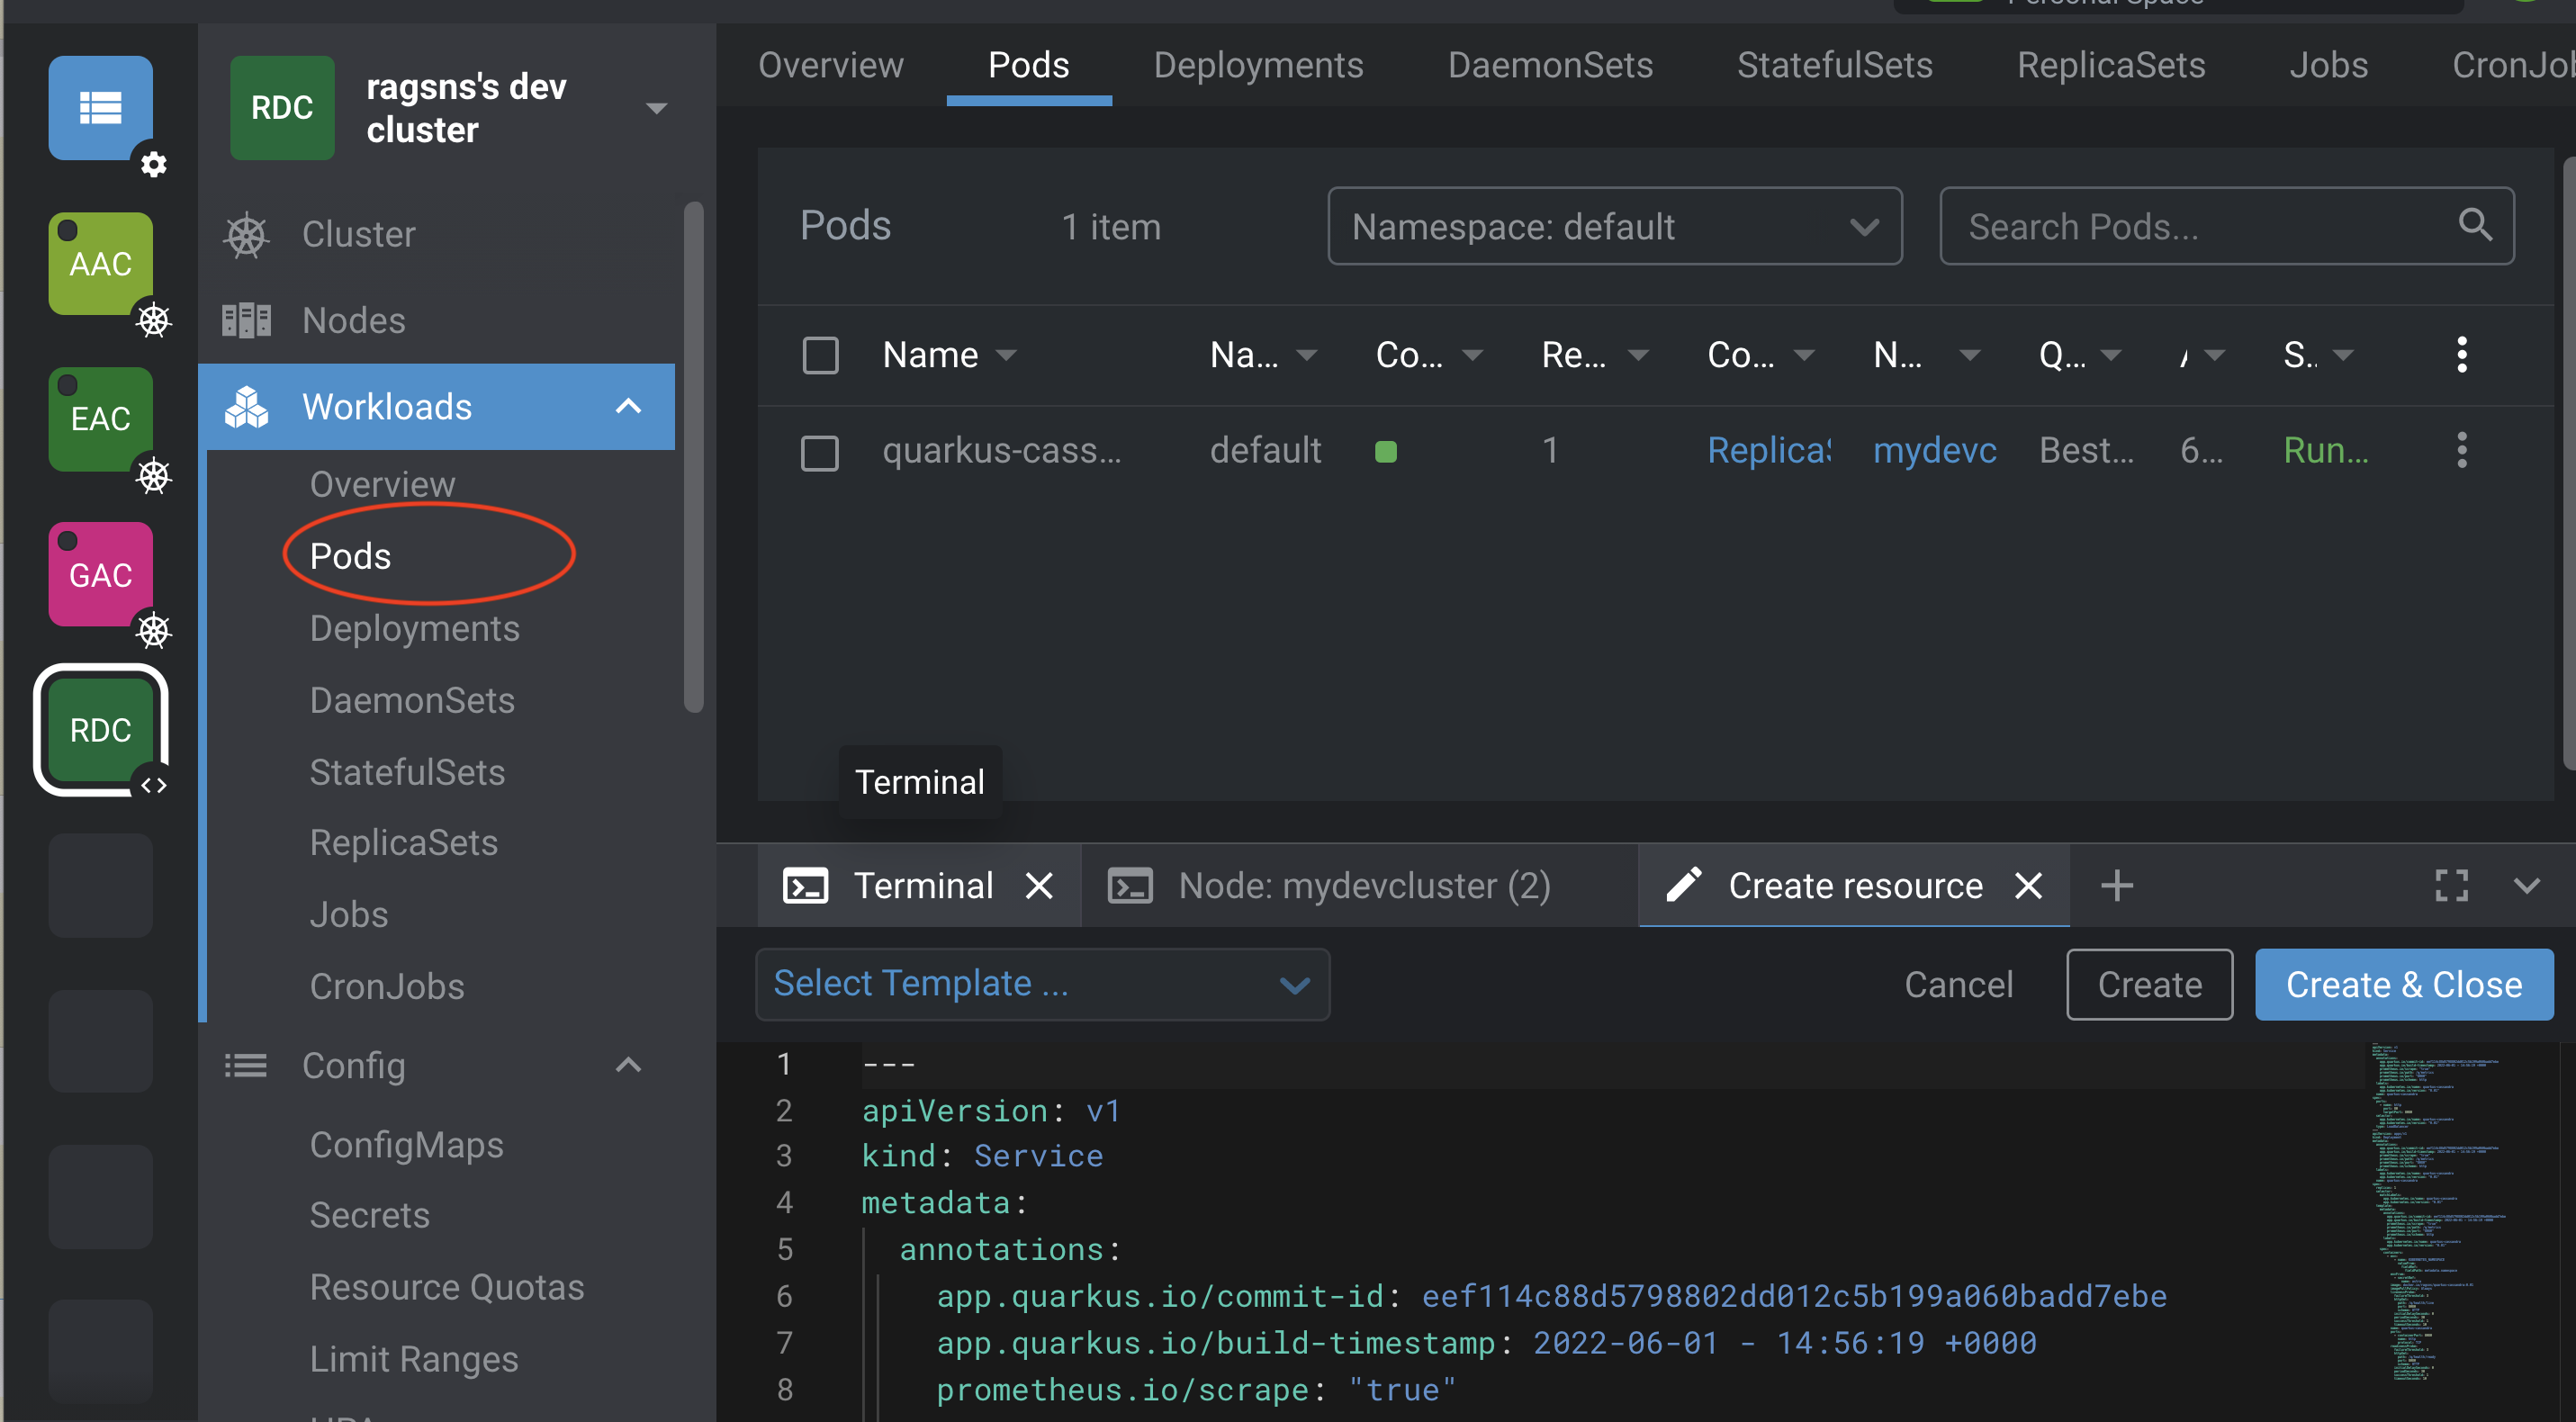
If you dig into Pods you should be see it running as shown below.
You can look through other Kubernetes artifacts which you can easily navigate via Lens.
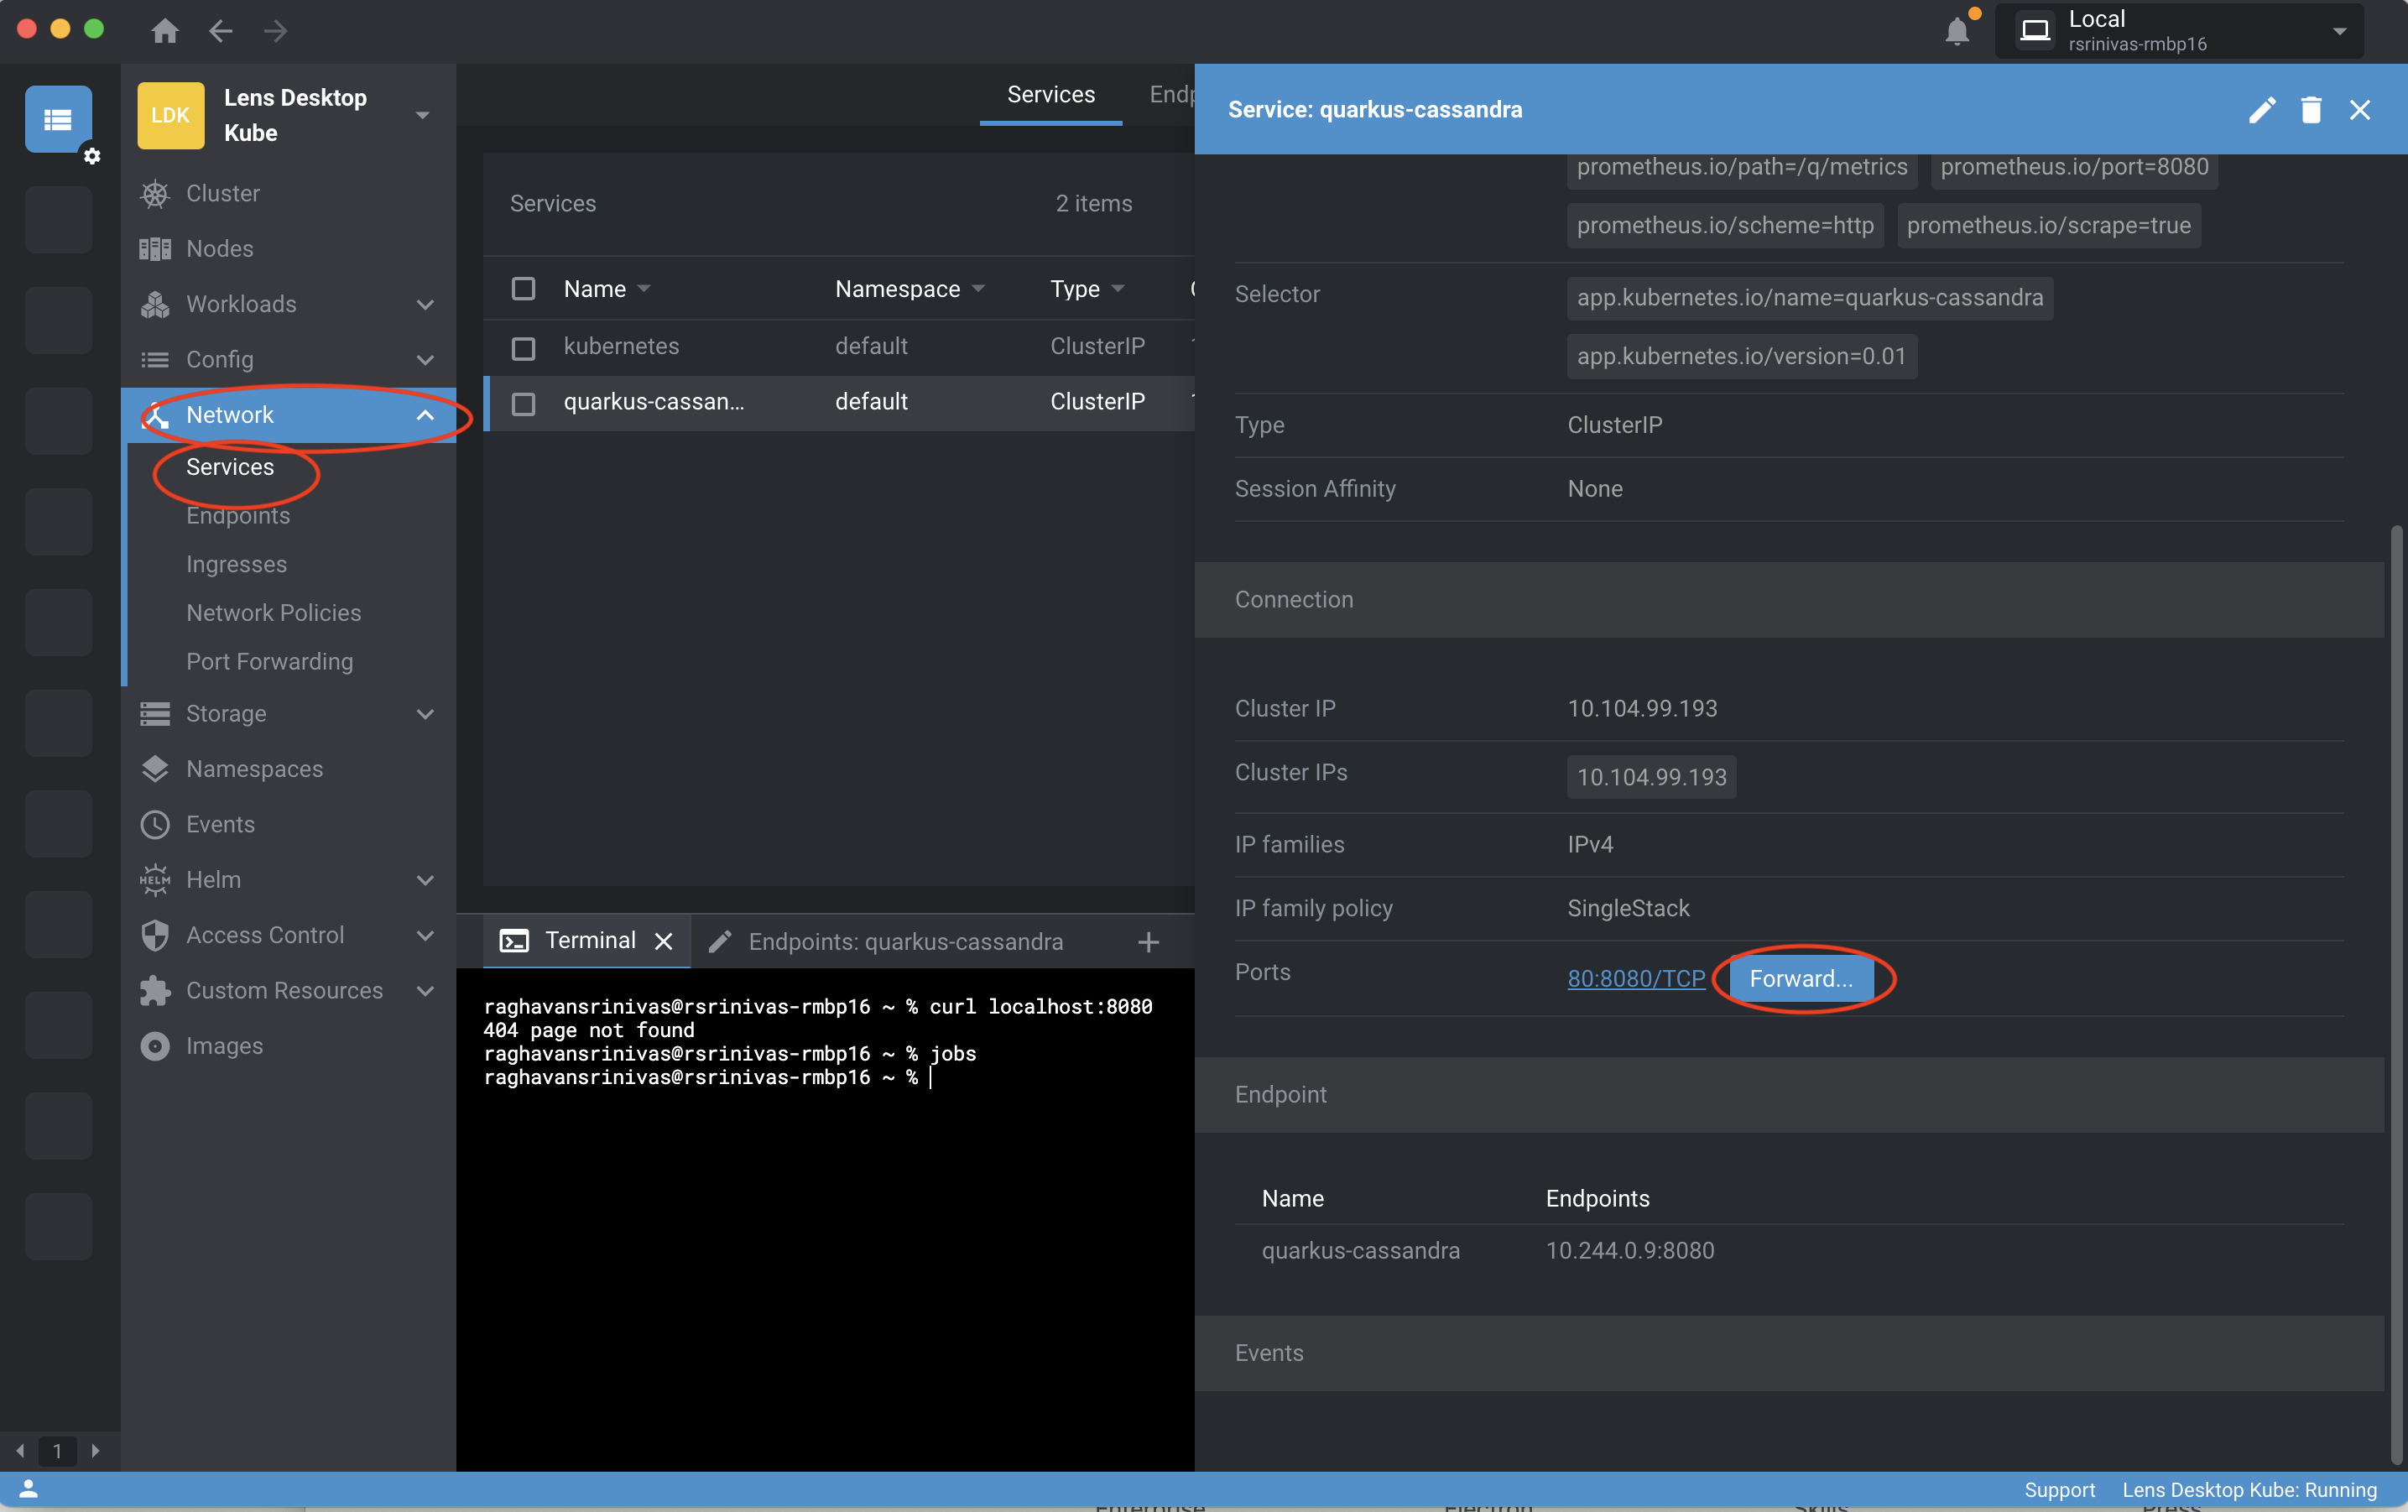
Step Lens.F: Setup port forwarding
Click on Network, Services and Forward... as shown below.
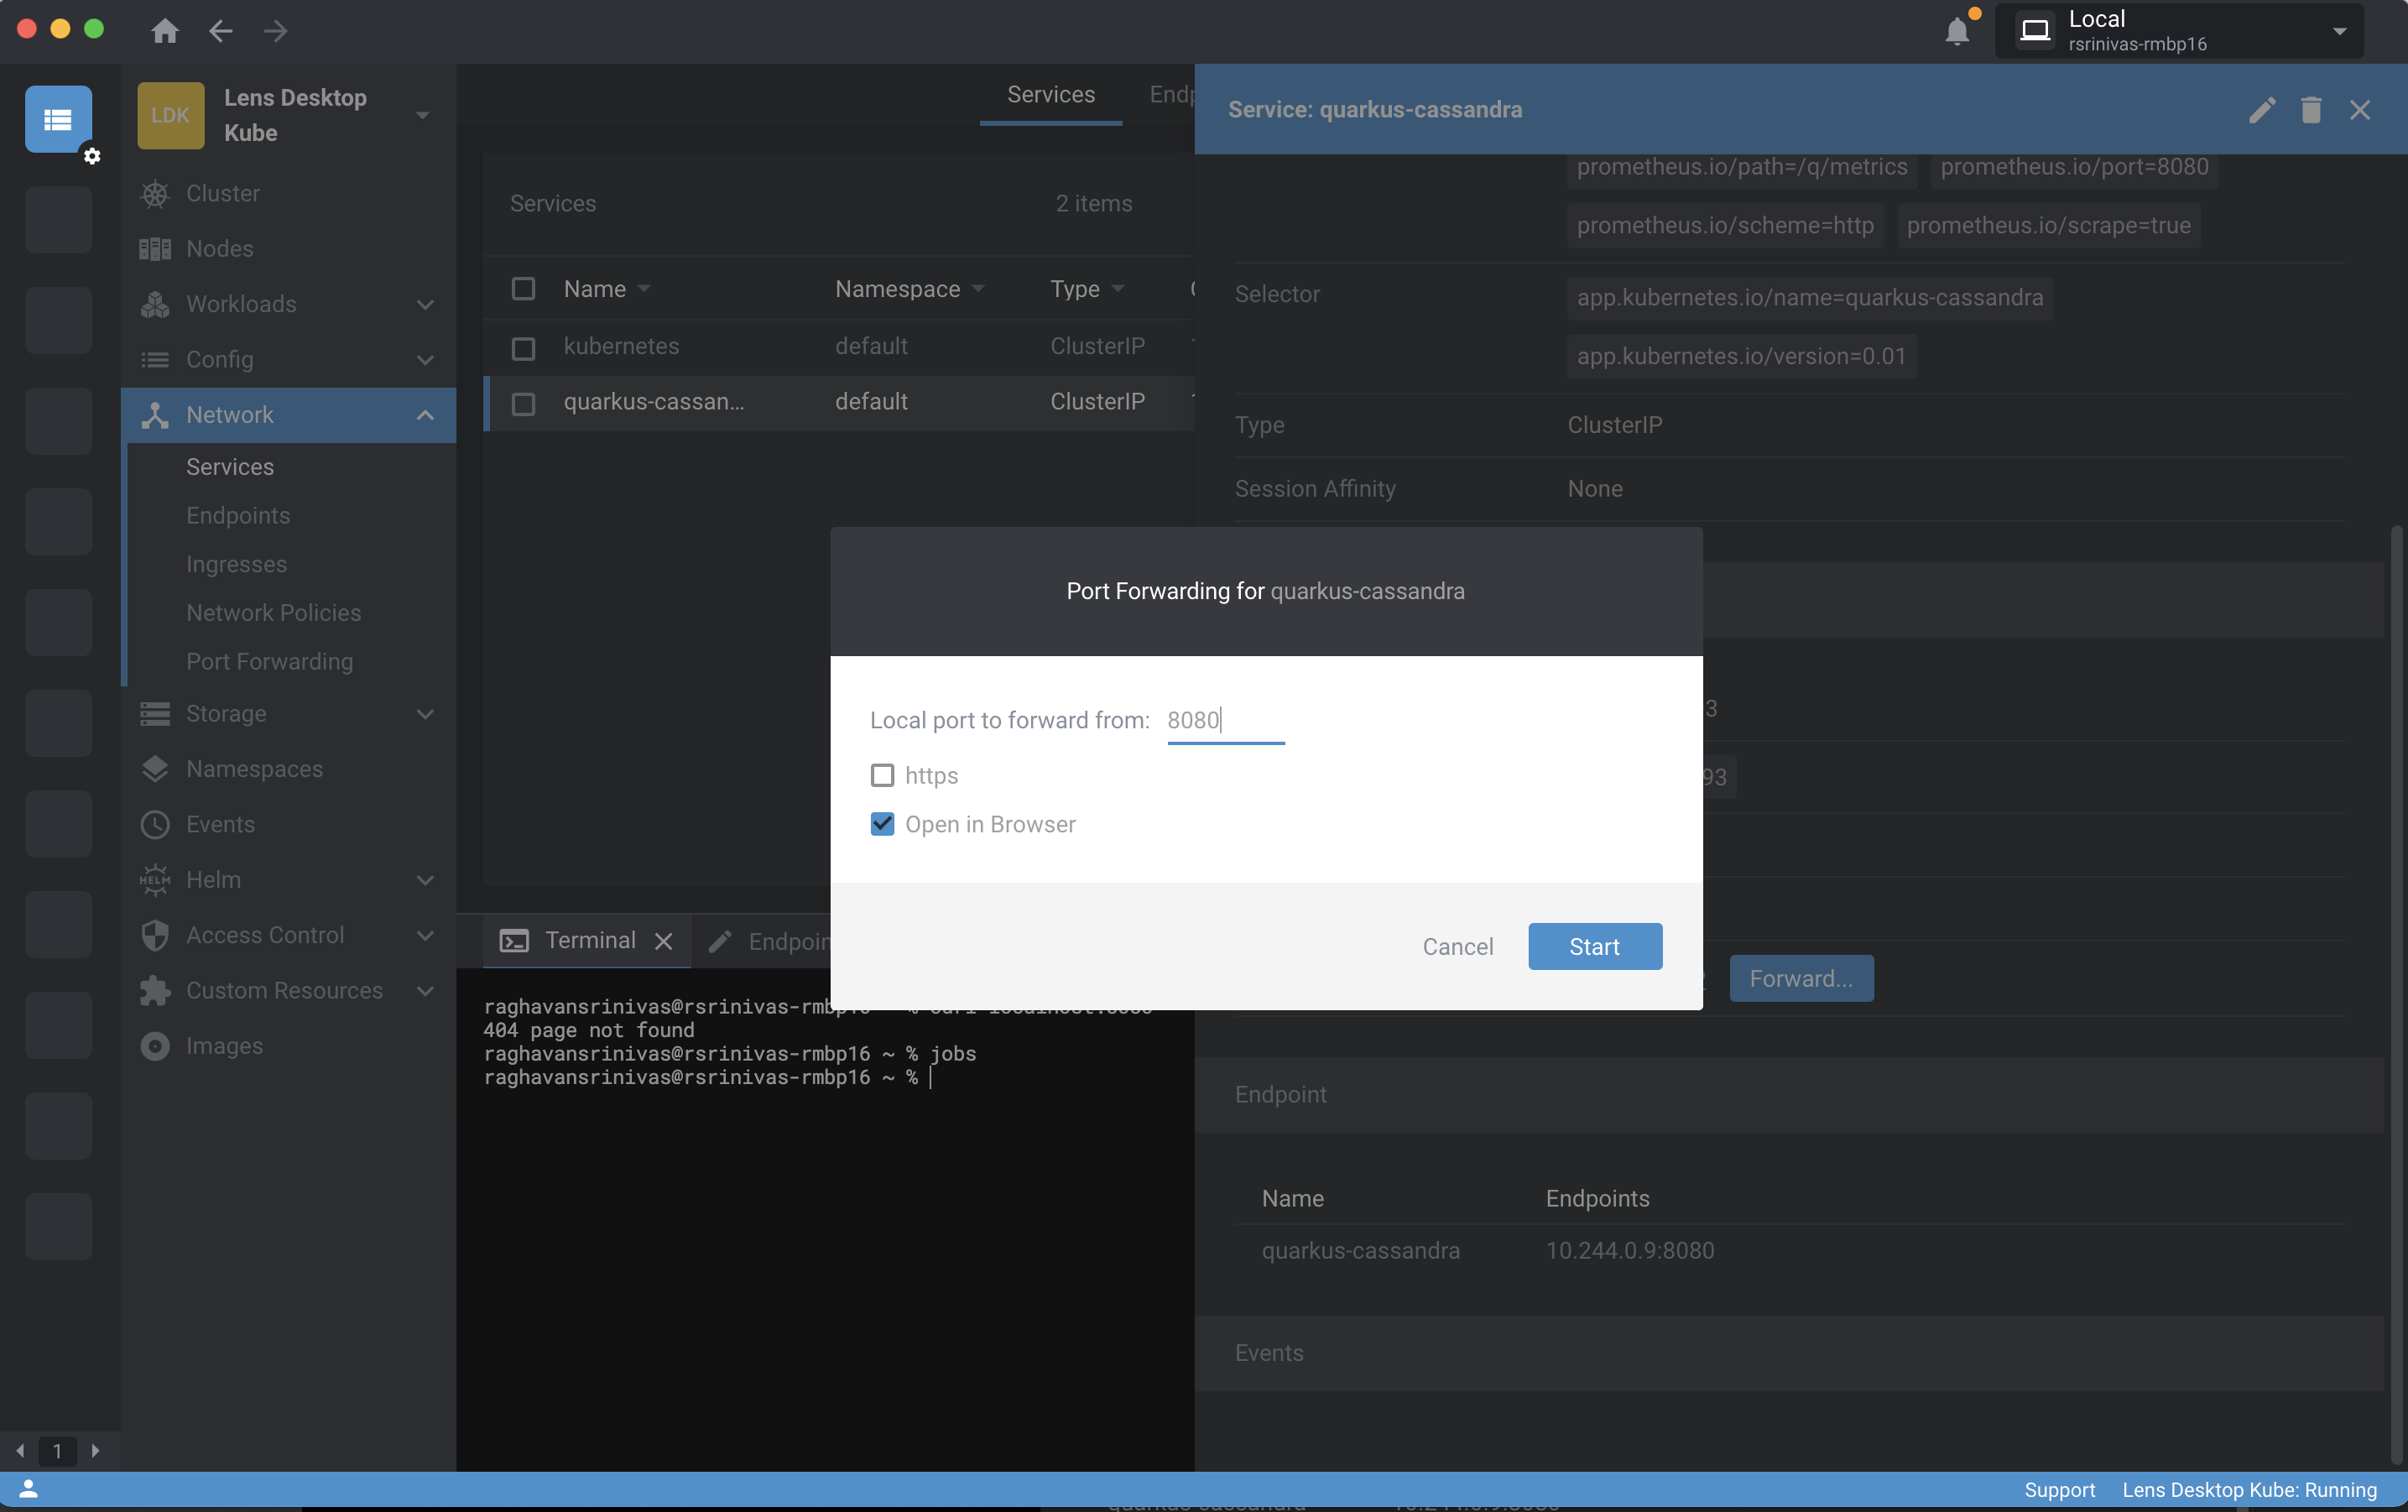
Next forward to 8080 as shown below.
This will setup the port forwarding to the appropriate pod. Ignore errors if any. You can now access the app via 8080 on localhost.
Step Lens.G: Cleanup
You can delete the service, deployment and secret using Lens.
You're now done with Lens deployment and can skip other deployment(s).
OR
Step Okteto.A: Create a cluster
We've included some steps here using okteto (you can modify the steps below depending on your choice of provider).
Create a Kubernetes cluster. You can get one for free at https://okteto.com with your Github credentials.
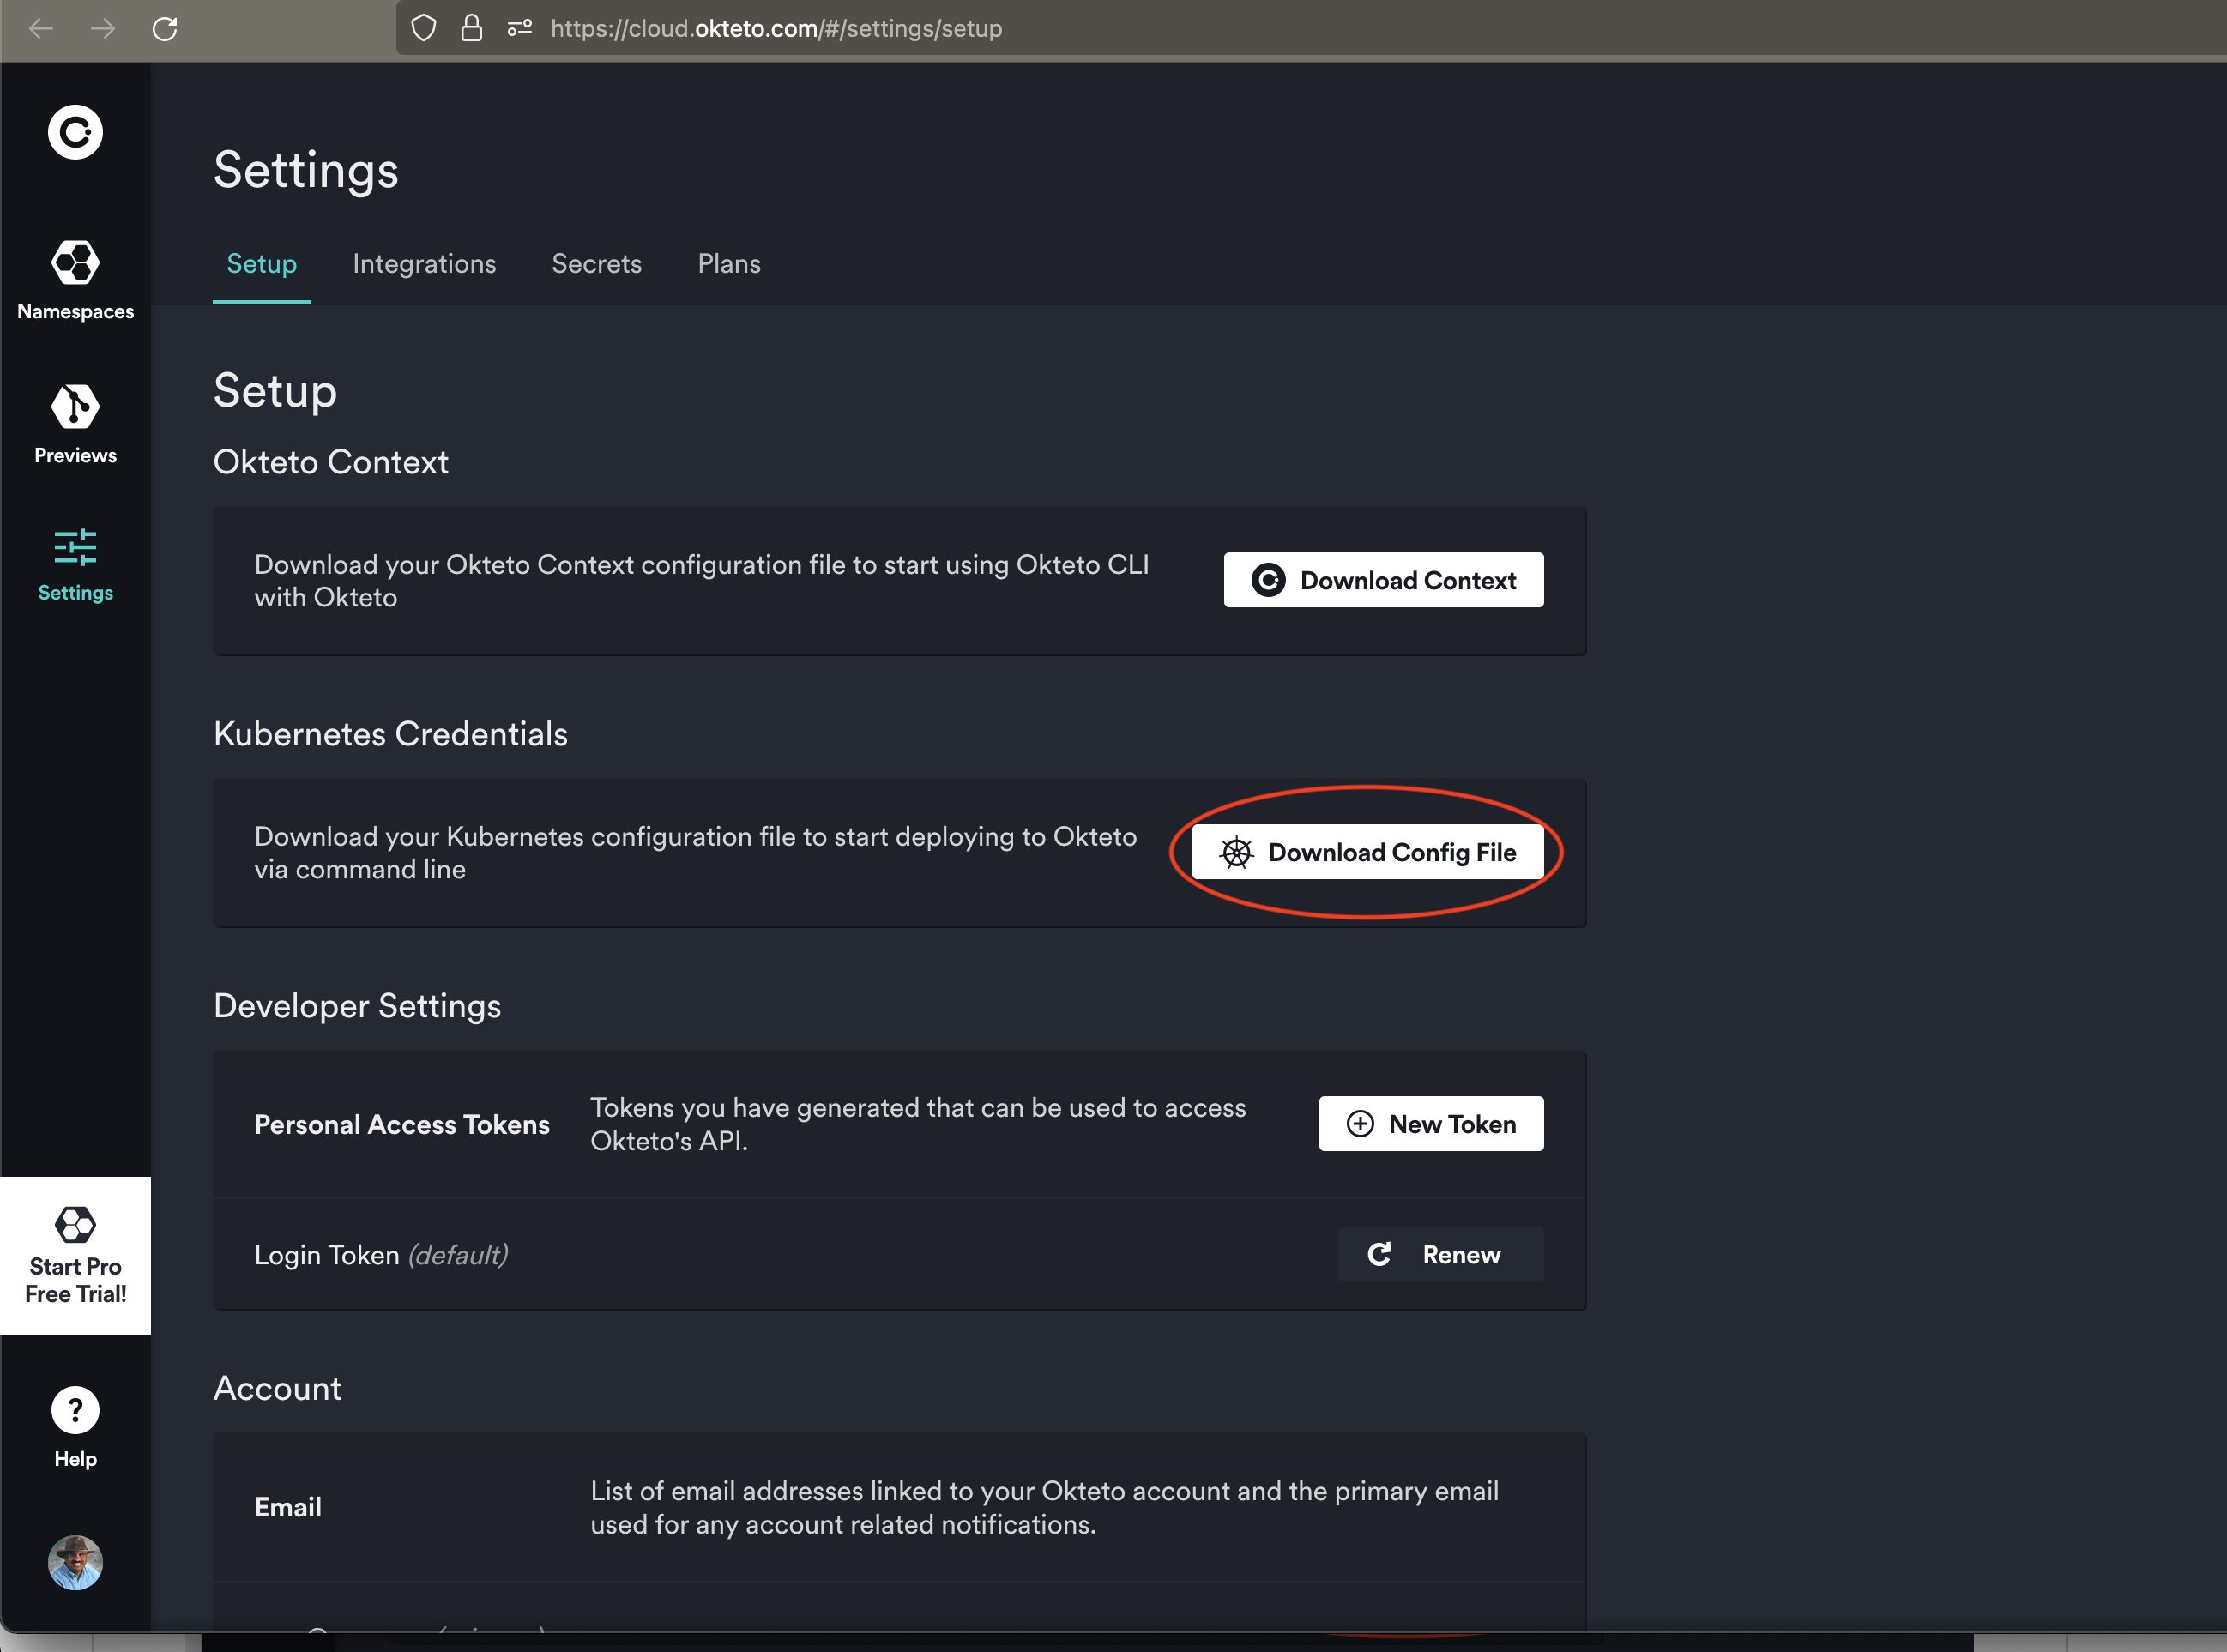
Step Okteto.B: Download config file
Download the config file from https://cloud.okteto.com/#/settings/setup locally as shown below.
Step Okteto.C: Drag and drop config into Gitpod
Now "drag and drop" it over to the gitpod window (similar to how we transferred the secure connect bundle) as shown below.
Step Okteto.D: Setup config in Gitpod window
Use the transferred okteto config file with the following command in the Gitpod terminal window and verify
export KUBECONFIG=okteto-kube.config
kubectl config get-contexts
kubectl get all
If you get a message like error: You must be logged in to the server (Unauthorized) reauthorize and download the okteto-kube.config file again.
Since okteto only provides access to your namespace, you should see something like below and you won't be able to run other commands like you would normally with a cluster that you created.
No resources found in ragsns namespace.
Step Okteto.E: Setup secrets
The application.properties file is setup to use the Kubernetes secrets already (quarkus.kubernetes.env.secrets=astra). Setup the Kubernetes secrets as below from theClient Id and Client Secret respectively as we did earlier.
kubectl create secret generic astra --from-literal=astra-username=<Client Id> --from-literal=astra-password=<Client Secret>
Verify the screts are setup properly with the following commands.
kubectl get secret astra -o jsonpath="{.data.astra-username}" | base64 --decode
kubectl get secret astra -o jsonpath="{.data.astra-password}" | base64 --decode
The kubernetes.yml deployment file that will be generated in the next step will be setup to use the secrets.
Step Okteto.F: Push image
You may want to remove the actual values of astra-username and astra-password from theapplication.properties file as below before pushing the container image to a public registry.
sed -i '/# TBD Below/,+4 d' ./target/classes/application.properties
./mvnw package -Dquarkus.container-image.build=true -Dquarkus.container-image.push=true -Dquarkus.container-image.group=$DOCKER_LOGINID -Dquarkus.kubernetes.deploy=true -DskipTests
The result of this command will be that your application's container image is built, pushed to the registry, and then deployed on Kubernetes. The Quarkus Kubernetes extension generates all the necessary Kubernetes desriptors for you.
Issue the following command in the Gitpod terminal window to look at the Kubernetes manifests that were automatically generated and applied to the cluster.
gp open target/kubernetes/kubernetes.yml
You should see the following output which indicates the deployment and the service have been created. You can ignore errors related to webhook.
[INFO] [io.quarkus.container.image.jib.deployment.JibProcessor] Pushed container image xxx/quarkus-cassandra:0.01 (sha256:xxxxxx)

[INFO] [io.quarkus.kubernetes.deployment.KubernetesDeployer] Deploying to kubernetes server: https://a.b.c.d:443/ in namespace: xxxx.
[INFO] [io.quarkus.kubernetes.deployment.KubernetesDeployer] Applied: Service quarkus-cassandra.
[INFO] [io.quarkus.kubernetes.deployment.KubernetesDeployer] Applied: Deployment quarkus-cassandra.
[INFO] [io.quarkus.deployment.QuarkusAugmentor] Quarkus augmentation completed in 12904ms
Running the command
kubectl get allshould yield a different output as below.
NAME                                    READY   STATUS    RESTARTS   AGE
pod/quarkus-cassandra-5f4d69b8d-lx46l   1/1     Running   0          95s

NAME                        TYPE        CLUSTER-IP       EXTERNAL-IP   PORT(S)   AGE
service/quarkus-cassandra   ClusterIP   10.154.219.218   <none>        80/TCP    96s

NAME                                READY   UP-TO-DATE   AVAILABLE   AGE
deployment.apps/quarkus-cassandra   1/1     1            1           96s

NAME                                          DESIRED   CURRENT   READY   AGE
replicaset.apps/quarkus-cassandra-5f4d69b8d   1         1         1       96s
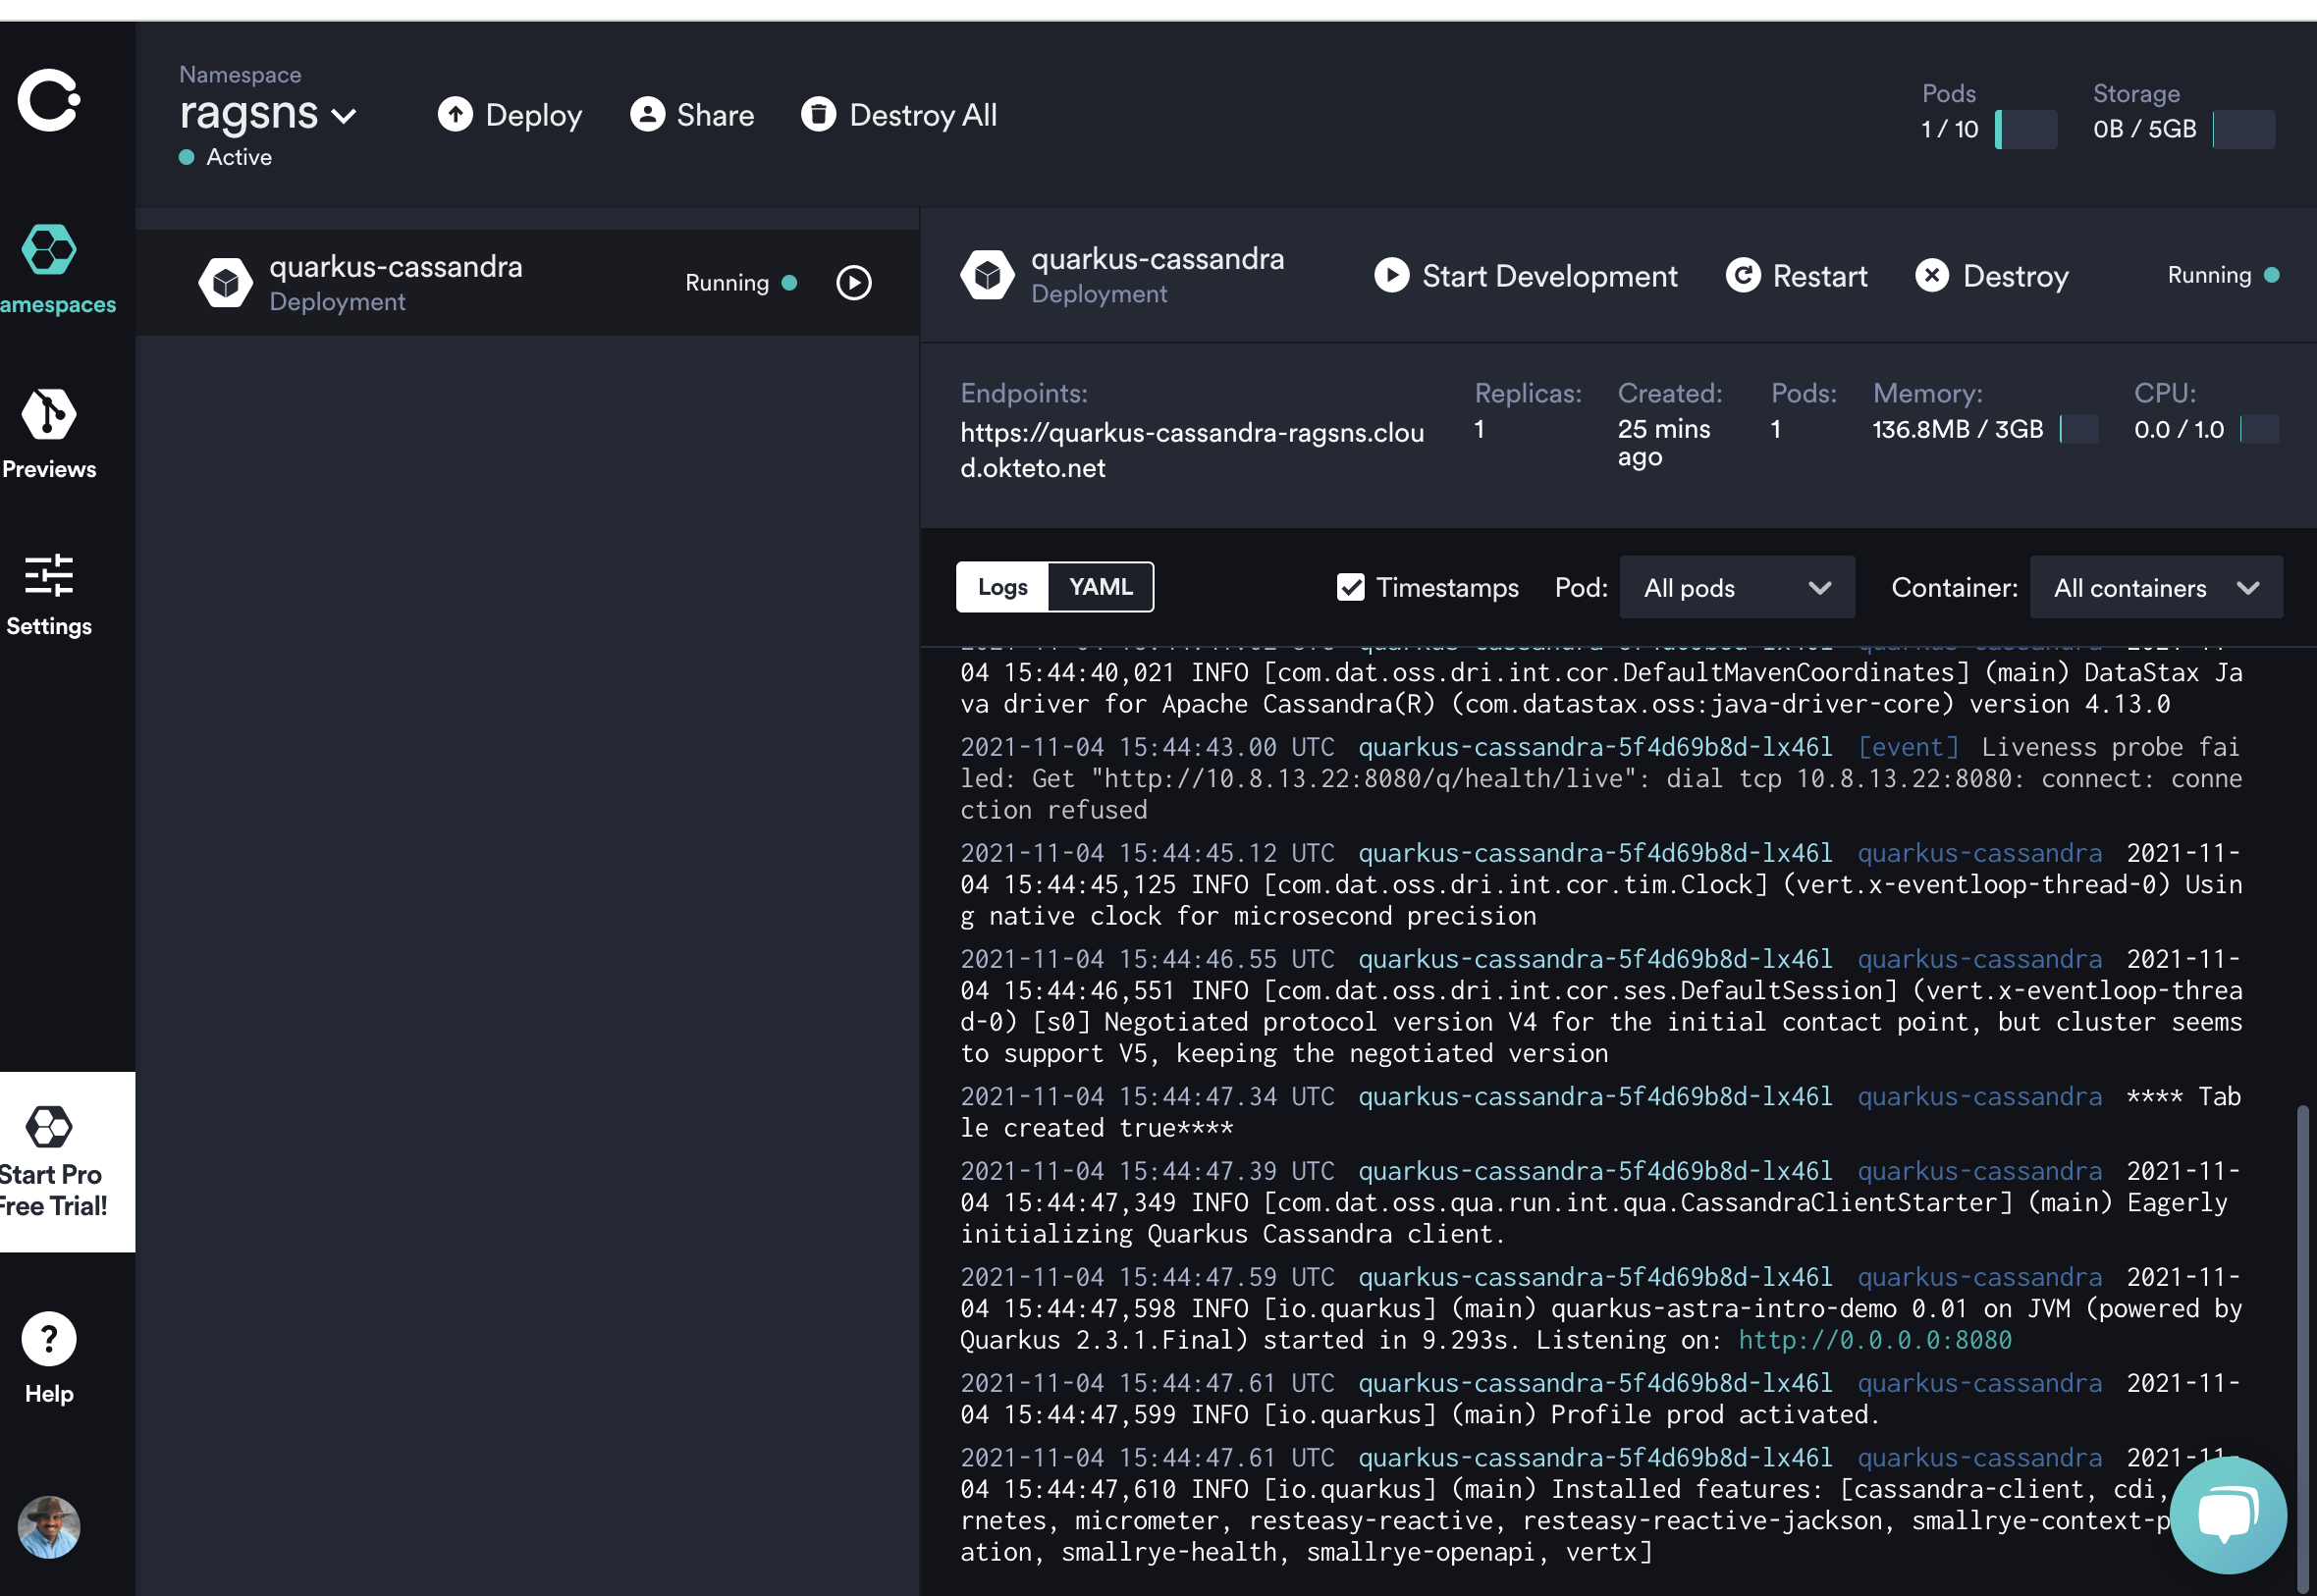
You should be able to access the application from the endpoint provided by the okteto console and also be able to access the application logs as shown below.
Alternately, you can access the application provided by the gitpod URL like we have always been doing throughout the workshop by issuing the following command.
kubectl port-forward svc/quarkus-cassandra 8080:80 &
Step Okteto.G: Cleanup
You can stop the port forwarding by deleting the background job as below.
kill -9 %1
You can go ahead and get rid of the application as well with the following command from the Gitpod terminal window.
kubectl delete all --all
and you should see the following output.
pod "quarkus-cassandra-886d9f8b9-h7tw5" deleted
service "quarkus-cassandra" deleted
deployment.apps "quarkus-cassandra" deleted
Additionally, you should delete the Secret you created.
kubectl delete secret astra
If the public docker image contains the credentials to be able to access the database, it's a good idea to delete the docker image from docker hub right away, anyway.
Finally, Quarkus can build a native executable image with the help of the GraalVM that was pre-installed with a simple command as below. Get yourself some coffee or water as this will take almost 10 minutes but exceuting this image will be super fast with minimal startup time since it does not depend on the JVM.
✅ Step 11a: Generating Native Image
./mvnw clean package -Pnative -DskipTestsExpected output:
Picked up JAVA_TOOL_OPTIONS:  -Xmx3435m
[INFO] Scanning for projects...
[INFO]
[INFO] ---------< quarkus-astra-intro-demo:quarkus-astra-intro-demo >----------
[INFO] Building quarkus-astra-intro-demo 0.01
[INFO] --------------------------------[ jar ]---------------------------------
[INFO]
[INFO] --- maven-clean-plugin:2.5:clean (default-clean) @ quarkus-astra-intro-demo ---
[INFO] Deleting /workspace/quarkus-astra-intro-demo/target
[INFO]
[INFO] --- maven-resources-plugin:2.6:resources (default-resources) @ quarkus-astra-intro-demo ---
[INFO] Using 'UTF-8' encoding to copy filtered resources.
[INFO] Copying 24 resources
[INFO]
[INFO] --- quarkus-maven-plugin:2.9.1.Final:generate-code (default) @ quarkus-astra-intro-demo ---
[INFO]
[INFO] --- maven-compiler-plugin:3.8.1:compile (default-compile) @ quarkus-astra-intro-demo ---
[INFO] Changes detected - recompiling the module!
[INFO] Compiling 10 source files to /workspace/quarkus-astra-intro-demo/target/classes
[INFO]
[INFO] --- quarkus-maven-plugin:2.9.1.Final:generate-code-tests (default) @ quarkus-astra-intro-demo ---
[INFO]
[INFO] --- maven-resources-plugin:2.6:testResources (default-testResources) @ quarkus-astra-intro-demo ---
[INFO] Using 'UTF-8' encoding to copy filtered resources.
[INFO] Copying 1 resource
[INFO]
[INFO] --- maven-compiler-plugin:3.8.1:testCompile (default-testCompile) @ quarkus-astra-intro-demo ---
[INFO] Changes detected - recompiling the module!
[INFO] Compiling 6 source files to /workspace/quarkus-astra-intro-demo/target/test-classes
[INFO]
[INFO] --- maven-surefire-plugin:3.0.0-M5:test (default-test) @ quarkus-astra-intro-demo ---
[INFO] Tests are skipped.
[INFO]
[INFO] --- maven-jar-plugin:2.4:jar (default-jar) @ quarkus-astra-intro-demo ---
[INFO] Building jar: /workspace/quarkus-astra-intro-demo/target/quarkus-astra-intro-demo-0.01.jar
[INFO]
[INFO] --- quarkus-maven-plugin:2.9.1.Final:build (default) @ quarkus-astra-intro-demo ---
[INFO] [io.quarkus.deployment.pkg.steps.JarResultBuildStep] Building native image source jar: /workspace/quarkus-astra-intro-demo/target/quarkus-astra-intro-demo-0.01-native-image-source-jar/quarkus-astra-intro-demo-0.01-runner.jar
[INFO] Checking for existing resources in: /workspace/quarkus-astra-intro-demo/src/main/kubernetes.
[INFO] [io.quarkus.deployment.pkg.steps.NativeImageBuildStep] Building native image from /workspace/quarkus-astra-intro-demo/target/quarkus-astra-intro-demo-0.01-native-image-source-jar/quarkus-astra-intro-demo-0.01-runner.jar
[INFO] [io.quarkus.deployment.pkg.steps.NativeImageBuildStep] Running Quarkus native-image plugin on GraalVM 22.0.0.2 Java 11 CE (Java Version 11.0.14+9-jvmci-22.0-b05)
[INFO] [io.quarkus.deployment.pkg.steps.NativeImageBuildRunner] /home/gitpod/.sdkman/candidates/java/current/bin/native-image -J-Dsun.nio.ch.maxUpdateArraySize=100 -J-Djava.util.logging.manager=org.jboss.logmanager.LogManager -J-Dvertx.logger-delegate-factory-class-name=io.quarkus.vertx.core.runtime.VertxLogDelegateFactory -J-Dvertx.disableDnsResolver=true -J-Dio.netty.leakDetection.level=DISABLED -J-Dio.netty.allocator.maxOrder=3 -J-Duser.language=en -J-Duser.country=US -J-Dfile.encoding=UTF-8 -H:-ParseOnce -J--add-exports=java.security.jgss/sun.security.krb5=ALL-UNNAMED -J--add-opens=java.base/java.text=ALL-UNNAMED -H:InitialCollectionPolicy=com.oracle.svm.core.genscavenge.CollectionPolicy\$BySpaceAndTime -H:+JNI -H:+AllowFoldMethods -J-Djava.awt.headless=true -H:FallbackThreshold=0 -H:+ReportExceptionStackTraces -H:-AddAllCharsets -H:EnableURLProtocols=http,https -H:NativeLinkerOption=-no-pie -H:-UseServiceLoaderFeature -H:+StackTrace quarkus-astra-intro-demo-0.01-runner -jar quarkus-astra-intro-demo-0.01-runner.jar
Picked up JAVA_TOOL_OPTIONS:  -Xmx3435m
========================================================================================================================
GraalVM Native Image: Generating 'quarkus-astra-intro-demo-0.01-runner'...
========================================================================================================================
[1/7] Initializing...                                                                                    (4.9s @ 0.42GB)
 Version info: 'GraalVM 22.0.0.2 Java 11 CE'
 3 user-provided feature(s)
  - io.quarkus.runner.AutoFeature
  - io.quarkus.runtime.graal.DisableLoggingAutoFeature
  - io.quarkus.runtime.graal.ResourcesFeature
[2/7] Performing analysis...  [20:33:32,360 INFO  [com.dat.oss.qua.run.int.qua.CassandraClientRecorder] Enabling Cassandra metrics using Micrometer.
20:33:36,471 INFO  [com.dat.oss.dri.int.cor.DefaultMavenCoordinates] DataStax Java driver for Apache Cassandra(R) (com.datastax.oss:java-driver-core) version 4.14.0
**********]                                                              (31.7s @ 2.17GB)
  14,155 (95.32%) of 14,850 classes reachable
  20,586 (66.60%) of 30,912 fields reachable
  69,696 (82.00%) of 84,993 methods reachable
     482 classes,    39 fields, and   850 methods registered for reflection
      68 classes,    88 fields, and    54 methods registered for JNI access
[3/7] Building universe...                                                                               (2.0s @ 2.69GB)
[4/7] Parsing methods...      [***]                                                                      (5.3s @ 1.81GB)
[5/7] Inlining methods...     [*****]                                                                    (4.7s @ 3.18GB)
[6/7] Compiling methods...    [*****]                                                                   (22.6s @ 3.42GB)
[7/7] Creating image...                                                                                  (4.3s @ 2.54GB)
  25.64MB (36.89%) for code area:   46,599 compilation units
  37.07MB (53.33%) for image heap:   9,899 classes and 350,222 objects
   6.80MB ( 9.78%) for other data
  69.50MB in total
------------------------------------------------------------------------------------------------------------------------
Top 10 packages in code area:                               Top 10 object types in image heap:
   1.67MB sun.security.ssl                                    19.83MB byte[] for general heap data
   1.03MB java.util                                            3.40MB java.lang.Class
 686.94KB com.sun.crypto.provider                              2.65MB java.lang.String
 531.52KB io.quarkus.runtime.generated                         2.21MB byte[] for java.lang.String
 490.01KB sun.security.x509                                  627.75KB java.util.HashMap$Node
 458.87KB java.util.concurrent                               581.63KB java.util.LinkedHashMap
 446.33KB io.netty.buffer                                    534.65KB com.oracle.svm.core.util.LazyFinalReference
 426.93KB com.oracle.svm.core.reflect                        526.91KB java.lang.String[]
 425.74KB com.typesafe.config.impl                           439.28KB byte[] for method metadata
 379.99KB java.lang                                          427.69KB c.o.s.c.h.DynamicHub$$Lambda$~31d9af6a7fe68cfc2a1f
      ... 661 additional packages                                 ... 3407 additional object types
                                           (use GraalVM Dashboard to see all)
------------------------------------------------------------------------------------------------------------------------
                        6.2s (7.7% of total time) in 40 GCs | Peak RSS: 5.21GB | CPU load: 4.98
------------------------------------------------------------------------------------------------------------------------
Produced artifacts:
 /workspace/quarkus-astra-intro-demo/target/quarkus-astra-intro-demo-0.01-native-image-source-jar/quarkus-astra-intro-demo-0.01-runner (executable)
 /workspace/quarkus-astra-intro-demo/target/quarkus-astra-intro-demo-0.01-native-image-source-jar/quarkus-astra-intro-demo-0.01-runner.build_artifacts.txt
========================================================================================================================
Finished generating 'quarkus-astra-intro-demo-0.01-runner' in 1m 20s.
[INFO] [io.quarkus.deployment.pkg.steps.NativeImageBuildRunner] objcopy --strip-debug quarkus-astra-intro-demo-0.01-runner
[INFO] [io.quarkus.deployment.QuarkusAugmentor] Quarkus augmentation completed in 83782ms
[INFO] ------------------------------------------------------------------------
[INFO] BUILD SUCCESS
[INFO] ------------------------------------------------------------------------
[INFO] Total time:  01:29 min
[INFO] Finished at: 2022-05-16T20:34:47Z
[INFO] ------------------------------------------------------------------------
✅ Step 11b: Running Native Image
Run the native image with the following command:
./target/quarkus-astra-intro-demo-0.01-runner__ ____ __ _____ ___ __ ____ ______
--/ __ \/ / / / _ | / _ \/ //_/ / / / __/
-/ /_/ / /_/ / __ |/ , _/ ,< / /_/ /\ \
--\___\_\____/_/ |_/_/|_/_/|_|\____/___/
INFO [io.qua.sma.ope.run.OpenApiRecorder] (main) Default CORS properties will be used, please use 'quarkus.http.cors' properties instead
INFO [com.dat.oss.qua.run.int.qua.CassandraClientStarter] (main) Eagerly initializing Quarkus Cassandra client.
INFO [com.dat.oss.dri.int.cor.os.Native] (vert.x-eventloop-thread-0) Using Graal-specific native functions
INFO [com.dat.oss.dri.int.cor.tim.Clock] (vert.x-eventloop-thread-0) Using native clock for microsecond precision
INFO [com.dat.oss.dri.int.cor.ses.DefaultSession] (vert.x-eventloop-thread-9) [s0] Negotiated protocol version V4 for the initial contact point, but cluster seems to support V5, keeping the negotiated version
INFO [com.dat.tod.res.TodoResource] (main) **** Table created true****
INFO [io.quarkus] (main) quarkus-astra-intro-demo 0.01 native (powered by Quarkus 2.9.1.Final) started in 2.273s. Listening on: http://0.0.0.0:8080
INFO [io.quarkus] (main) Profile prod activated.
INFO [io.quarkus] (main) Installed features: [cassandra-client, cdi, kubernetes, micrometer, resteasy-reactive, resteasy-reactive-jackson, smallrye-context-propagation, smallrye-health, smallrye-openapi, swagger-ui, vertx]
Notice the fast startup time since the image is running as a native image.
Hit Ctrl+C in the GitPod terminal window to exit the application.
Don't forget to complete your upgrade and get your verified skill badge! Finish and submit your homework! You have 2 options (option A or Option B). Pick whichever works for you.
Option A. Complete the practice steps from this repository as described above (including optional steps 10d and 10e) and deploy to a Kubernetes cluster. Make screenshots of the deployment to a Kubernetes cluster.
Option B: Learn more about Quarkus and do some development with https://github.com/datastax/cassandra-quarkus. Send a screenshot of the working "Fruits application" with the following entry "Jackfruit" and the correpsonding description as "King/Queen of fruits".
Submit your homework here
That's it, you are done! Expect an email next week!
Congratulations, your made it to the END of the show.
🧑🏻🤝🧑🏽 Let's get in touch
 |
|---|
| Rags Srinivas @ragsns |


