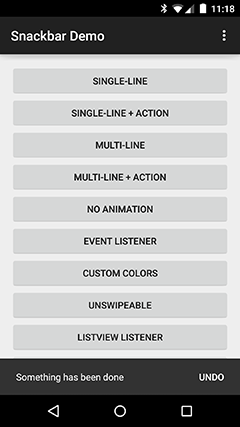
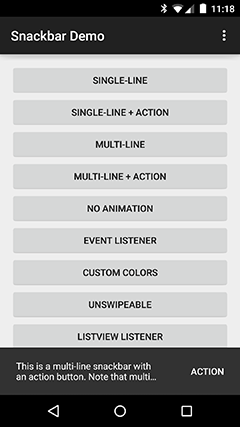
Library that implements Snackbars from Google's Material Design documentation. Works on API levels >= 8

You can import the library from source as a module or grab via Gradle:
compile 'com.nispok:snackbar:2.7.3'Using the Snackbar class is easy, this is how you would display it on an Activity:
Snackbar.with(getApplicationContext()) // context
    .text("Single-line snackbar") // text to display
    .show(this); // activity where it is displayed
However, I recommend you use the SnackbarManager to handle the Snackbars queue:
// Dismisses the Snackbar being shown, if any, and displays the new one
SnackbarManager.show(
    Snackbar.with(myActivity)
    .text("Single-line snackbar"));
If you are using getApplicationContext() as the Context to create the Snackbar then you must
specify the target Activity when calling the SnackbarManager:
// Dismisses the Snackbar being shown, if any, and displays the new one
SnackbarManager.show(
    Snackbar.with(getApplicationContext())
    .text("Single-line snackbar"), myActivity);
If you want an action button to be displayed, just assign a label and an ActionClickListener:
SnackbarManager.show(
    Snackbar.with(getApplicationContext()) // context
        .text("Item deleted") // text to display
        .actionLabel("Undo") // action button label
        .actionListener(new ActionClickListener() {
            @Override
            public void onActionClicked(Snackbar snackbar) {
                Log.d(TAG, "Undoing something");
            }
        }) // action button's ActionClickListener
     , this); // activity where it is displayed
If you need to know when the Snackbar is shown or dismissed, assign a EventListener to it.
This is useful if you need to move other objects while the Snackbar is displayed. For instance,
you can move a Floating Action Button up while the Snackbar is on screen:
SnackbarManager.show(
    Snackbar.with(getApplicationContext()) // context
        .text("This will do something when dismissed") // text to display
        .eventListener(new EventListener() {
            @Override
            public void onShow(Snackbar snackbar) {
                myFloatingActionButton.moveUp(snackbar.getHeight());
            }
            @Override
            public void onShown(Snackbar snackbar) {
                Log.i(TAG, String.format("Snackbar shown. Width: %d Height: %d Offset: %d",
                        snackbar.getWidth(), snackbar.getHeight(),
                        snackbar.getOffset()));
            }
            @Override
            public void onDismiss(Snackbar snackbar) {
                myFloatingActionButton.moveDown(snackbar.getHeight());
            }
            @Override
            public void onDismissed(Snackbar snackbar) {
                Log.i(TAG, String.format("Snackbar dismissed. Width: %d Height: %d Offset: %d",
                                    snackbar.getWidth(), snackbar.getHeight(),
                                    snackbar.getOffset()));
            }
        }) // Snackbar's EventListener
    , this); // activity where it is displayed
There are two Snackbar types: single-line (default) and multi-line (2 lines max. Note this only applies for phones; tablets are always single-line). You can also set
the duration of the Snackbar similar to a
Toast.
The lengths of a Snackbar duration are:
LENGTH_SHORT: 2sLENGTH_LONG: 3.5sLENGTH_INDEFINTE: Indefinite; ideal for persistent errors
You could also set a custom duration.
Animation disabling is also possible.
SnackbarManager.show(
    Snackbar.with(getApplicationContext()) // context
        .type(Snackbar.SnackbarType.MULTI_LINE) // Set is as a multi-line snackbar
        .text("This is a multi-line snackbar. Keep in mind that snackbars are " +
            "meant for VERY short messages") // text to be displayed
        .duration(Snackbar.SnackbarDuration.LENGTH_SHORT) // make it shorter
        .animation(false) // don't animate it
    , this); // where it is displayed
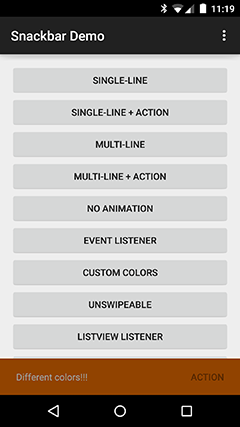
You can also change the Snackbar's colors.
SnackbarManager.show(
    Snackbar.with(getApplicationContext()) // context
        .text("Different colors this time") // text to be displayed
        .textColor(Color.GREEN) // change the text color
        .color(Color.BLUE) // change the background color
        .actionLabel("Action") // action button label
        .actionColor(Color.RED) // action button label color
        .actionListener(new ActionClickListener() {
            @Override
            public void onActionClicked(Snackbar snackbar) {
                Log.d(TAG, "Doing something");
            }
         }) // action button's ActionClickListener
    , this); // activity where it is displayed
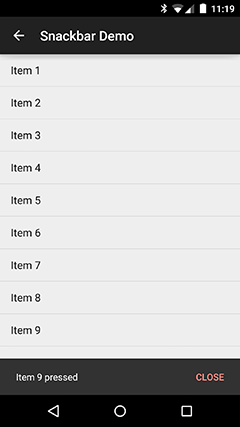
Finally, you can attach the Snackbar to a AbsListView (ListView, GridView) or a RecyclerView.
SnackbarManager.show(
    Snackbar.with(getApplicationContext()) // context
        .type(Snackbar.SnackbarType.MULTI_LINE) // Set is as a multi-line snackbar
        .text(R.string.message) // text to be displayed
        .duration(Snackbar.SnackbarDuration.LENGTH_LONG)
        .animation(false) // don't animate it
        .attachToAbsListView(listView) // Attach to ListView - attachToRecyclerView() is for RecyclerViews
        , this); // where it is displayed
It uses Roman Nurik's SwipeToDismiss sample code to implement the swipe-to-dismiss functionality. This is enabled by default. You can disable this if you don't want this functionality:
NOTE: This has no effect on apps running on APIs < 11; swiping will always be disabled in those cases
SnackbarManager.show(
    Snackbar.with(SnackbarSampleActivity.this) // context
        .text("Can't swipe this") // text to be displayed
        .swipeToDismiss(false) // disable swipe-to-dismiss functionality
, this); // activity where it is displayedThere's a sample app included in the project. SnackbarSampleActivity is where you want to start.
If you would like to add features or report any bugs, open a PR or refer to the issues section.
Go to the releases section for a brief description of each release.


