Source code of Custom Linked roles workshop made in live on our Discord server
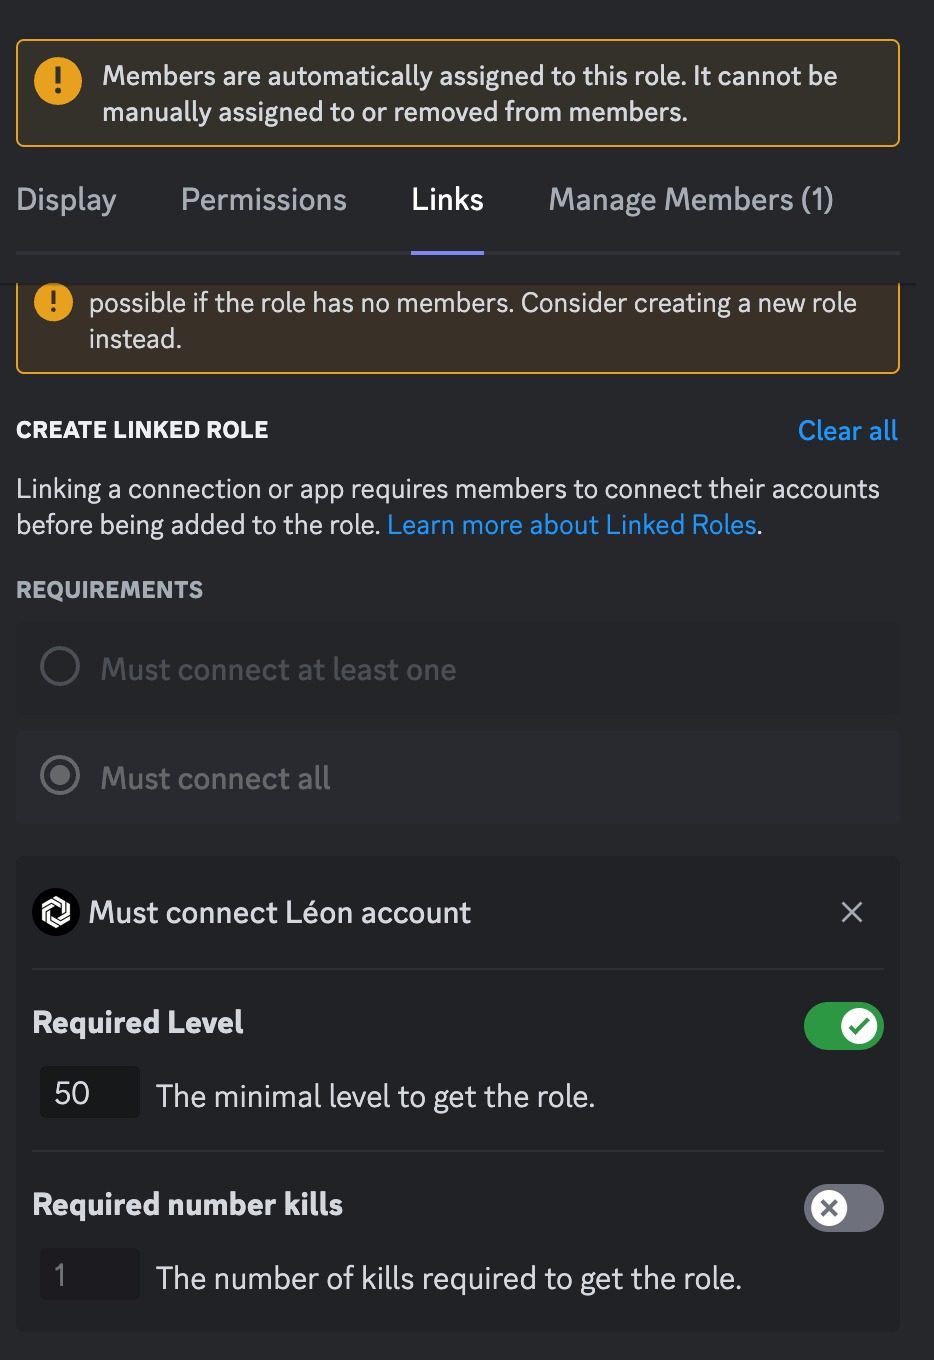
The aim is to be able to automate a role with the linked roles feature. Let's take Rainbow Six Siege as an example, where the user must have a certain level and a certain number of kills in order to have the role.
- Node.js (I personally use version v18.16.1)
- NPM
First, you need to configure your Bot so that it can function properly, and retrieve certain information from the Discord Developer Portal.
The information we retrieve must be put in an .env file.
-
Choose the bot where you want to integrate this feature.
-
Information to be retrieved
2.1. Your Bot token
Go to the Bot tab or enter your bot's ID in the following link: https://discord.com/developers/applications/ID/bot to go directly to the Bot page.
Press Reset Token to retrieve your token.
(Warning: this will reset your token and all applications connected to it will be disconnected!)
Then add to the .env file:
TOKEN=DiscordClientToken2.2. Client information
You need to go to the oAuth2 tab and then General or put your bot's ID in the following link: https://discord.com/developers/applications/ID/oauth2/general to go directly to the General page of the oAuth2 tab.
Then copy your customer's ID and press Reset Secret to retrieve the customer's secret.
(Please note that pressing Client Secret will disconnect all applications using the current Client Secret!)
Then add to the .env file:
SECRET=DiscordClientSecret
ID=DiscordClientID
2.3. The link for users to connect to Discord
Go to the oAuth2 tab, then URL Generator, or enter your bot's ID in the following link: https://discord.com/developers/applications/ID/oauth2/url-generator to go directly to the URL Generator page in the oAuth2 tab.
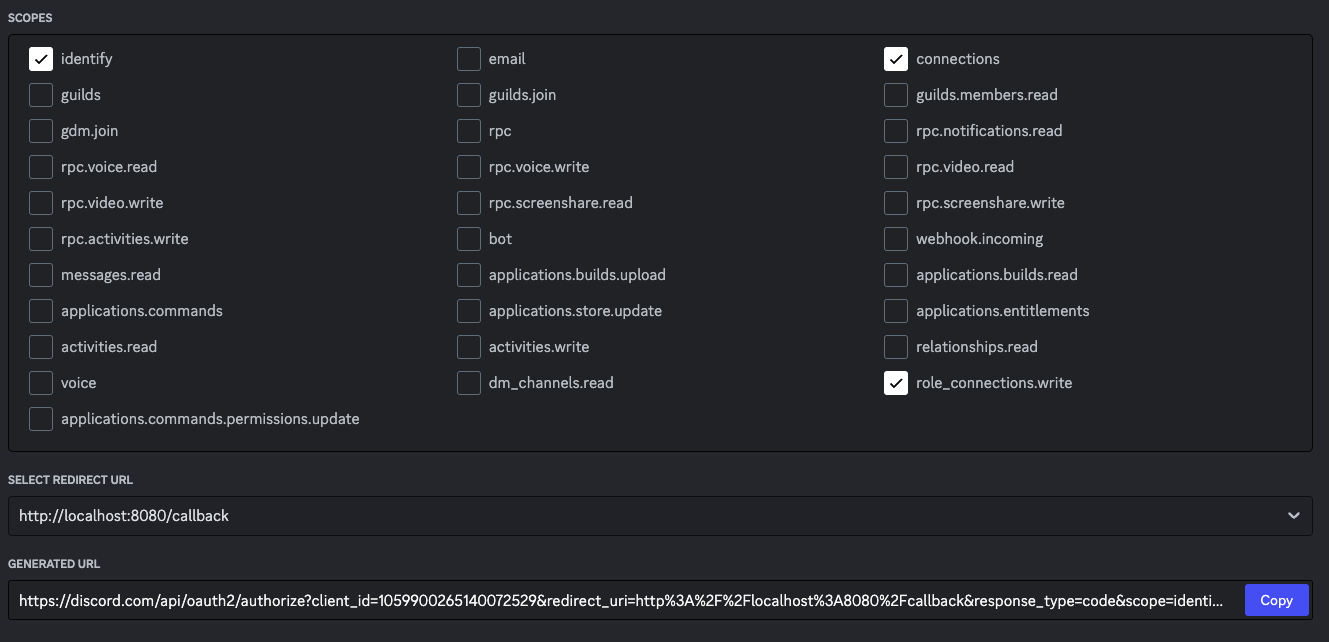
You need to check the following information:
identify - Allows you to retrieve user information (name, avatar, banner...)
connections - Allows you to retrieve the user's third-party connections (PayPal, Steam...)
role_connections.write - Make this feature work!
Then select your redirection URL (see 3.1). Your link should appear as in the image below:
Then add to the .env file:
DISCORD_REDIRECT_URI=DiscordGeneratedURL
- Information to be provided
3.1. The redirect URL
You can write this information in the oAuth2 tab and then General or you can put your ID in the following link: https://discord.com/developers/applications/ID/oauth2/general to go directly to the General page of the oAuth2 tab.
If you wish to use this source code using my redirects, you must write in Redirects: http://localhost:8080/callback.
Otherwise you need to put the route you want with the port you've chosen in the src/index.js file.
src/index.js
line 18 app.get('/return', async (req, res) => {Here, instead of a /callback route, I use a /return route.
line 101     app.listen(3030, () => {
line 102         console.log("Listening on port 3030")
line 103     });
So here, I'm using port 3030. So the link I need to put in is: http://localhost:3030/return.
Then add it to the .env file:
REDIRECT_URI=DiscordRedirectURL- Check that you have set up your
.envcorrectly. It should contain all this information
TOKEN=DiscordClientToken
SECRET=DiscordClientSecret
ID=DiscordClientID
REDIRECT_URI=DiscordRedirectURL
DISCORD_REDIRECT_URI=DiscordGeneratedURL- Installing dependencies
If you use NPM:
npm i
If you use Yarn:
yarn
It will install r6s-stats-api, if you don't want to make your Linked role with Rainbow Six Siege, you can remove in package.json the dependency r6s-stats-api.
- Launch in development mode
If you use NPM:
npm run dev
If you use Yarn:
yarn run dev
- Launch in production mode
If you use NPM:
npm run prod
If you use Yarn:
yarn run prod
In all cases, you must run the src/register.js file at least once to be able to send your parameter to DISCORD.
- booleans-oss - CTO at Development Community
- VIX - Léon's Developer Team at Development Community

