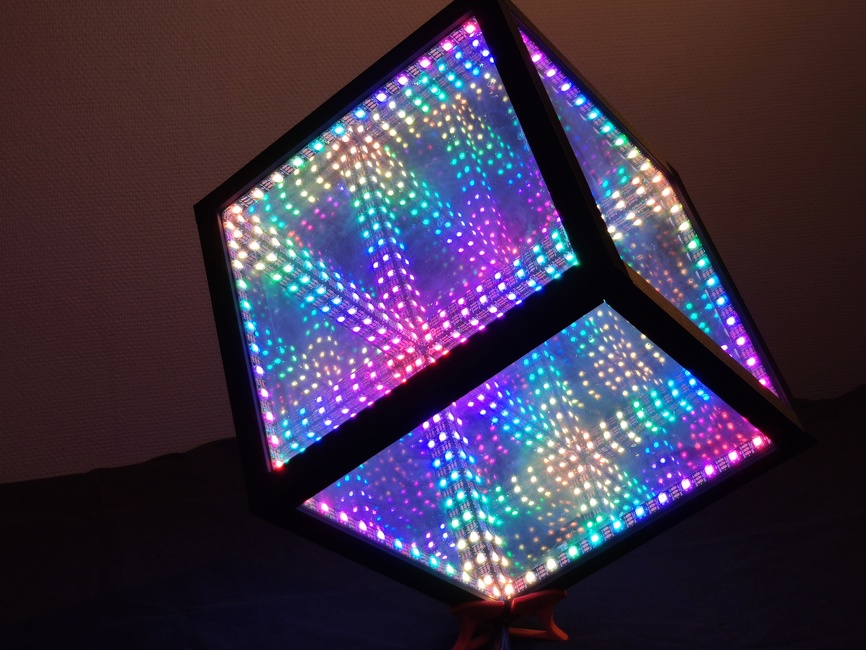
Homemade clone of the HyperCube by the Hyperspace Lighting Company.
- 6x beam
- 2x beam-w-hole
- 2x beam-bottom (one symmetry !)
- 2x beam-bottom-w-hole (one symmetry !)
- 4x corner
- 4x corner-bottom
- 5x corner-cache
- 1x corner-cache-w-hole
- 4x panel-holder
- 1x electronics-case
- 1x electronics-case-top
- 1x support
In doubt you can replace all beam variants by :
- 8x beam-w-hole
- 4x beam-bottom-w-hole (two symmetries !)
The no-hole variants use less material and are faster to print.
- 6x 210mm/2mm square one-way mirrors (or standard glass/PMAA with one-way film)
- 24x M2 15mm wood screws
- 6x 80cm WS2812 LED strips (60 LEDS/m)
- 1x Arduino Nano
- 1x Bluetooth module
- 1x capacitive touch button (20x15mm)
- 1x 10A 5V power supply
- 3-wire cable
- Start building the cube from the top panel, taking care where you use beams with or without holes to pass the wires. You will use all beams and corner pieces and five panels, dont put the last bottom panel yet
- Cut the LED strips to lenght en solder the wires, I recommend using dedicated power lines for each strip but you can use a single wire for the data line
- Glue the strips to each side and pass the wires in the beams, all wires must output on the same corner. I recommend adding CA glue as the standard 3M tape is not adhesive enough
- Check that every strip is working correctly
- Put the bottom panel and secure it in place by glueing the four panel holders
- Glue all height corner caches
The following diagram shows one way to arrange strips (flattened cube seen from top).

Edit the constants.h file according to your wiring :
PIN_LEDoutput pin use to control LEDSPIN_BUTTONinput pin for the control buttonBLE_RXDRX pin for the BLE moduleBLE_TXDTX pin for the BLE module
Edit MAX_MILLI_AMPS according to the rating of your power supply (keep a safety margin, especially with cheap Chinese stuff).
The cube is controlled via Bluetooth and can received basic serial commands:
BRIGHT X(X=0-255) to change the brightnessBRIGHT+to increase the brightness by 16BRIGHT-to decrease the brightness by 16MODE Xto change the current mode, modes are:RAINBOWRAINDROPPULSECYLONCHASERRANDOM
MODE+to use the next modeMODE-to use the previous modeHUE Xto change the current hue, huse are:RAINBOWREDYELLOWGREENBLUEPINKWHITE
HUE+to use the next hueHUE-to use the previous hue
The SolidWorks files and Arduino code are distributed under the Creative Commons 3.0 BY-SA license.
