- Clone or Download the project/app from Github or any other sources
- If using Visual Studio Code / Insiders, open Command panel/terminal from menu: View -> Terminal (shortcut key is
CTRL + BackTickORCOMMAND + J) - Go inside the project/app directory, command:
cd _examples-angular6-2-routing OR cd appName - Run command:
npm installto install project/app dependencies(node_modules) - To Build and run Angular App, command:
ng serve / npm startORng serve -oORng serve --open - To change port from 4200 to other port - type command:
ng serve --port 5000 - To check the application in browser type path/url:
localhost:4200 / 5000
- The
Angular Router enables navigation from one view (component)to the another/next as users perform tasks, views (component) - Routing simply means navigating between different view (component)
- RouterModule
- RouterModule helps to
create routes, which allows us to move from one part of the application to another part or from one view to another - A separate NgModule/Angular Module that provides the necessary service providers and directives for navigating through application views
- RouterModule helps to
- Router
- The Angular Router is an
optional service that presents a particular component viewfor a given URL, it is not part of the Angular core - The Angular Router enables navigation from one view to the another as users perform application tasks/actions
- The Angular Router is an
- router-outlet
- The directive
(<router-outlet>)that marks where the router displays a view (a container to hold different views/components loaded as users perform application tasks/actions)
- The directive
- routerLink
- The attribute/directive for binding a clickable HTML element to a route which denotes link/view name to load/show in
(<router-outlet>)
- The attribute/directive for binding a clickable HTML element to a route which denotes link/view name to load/show in
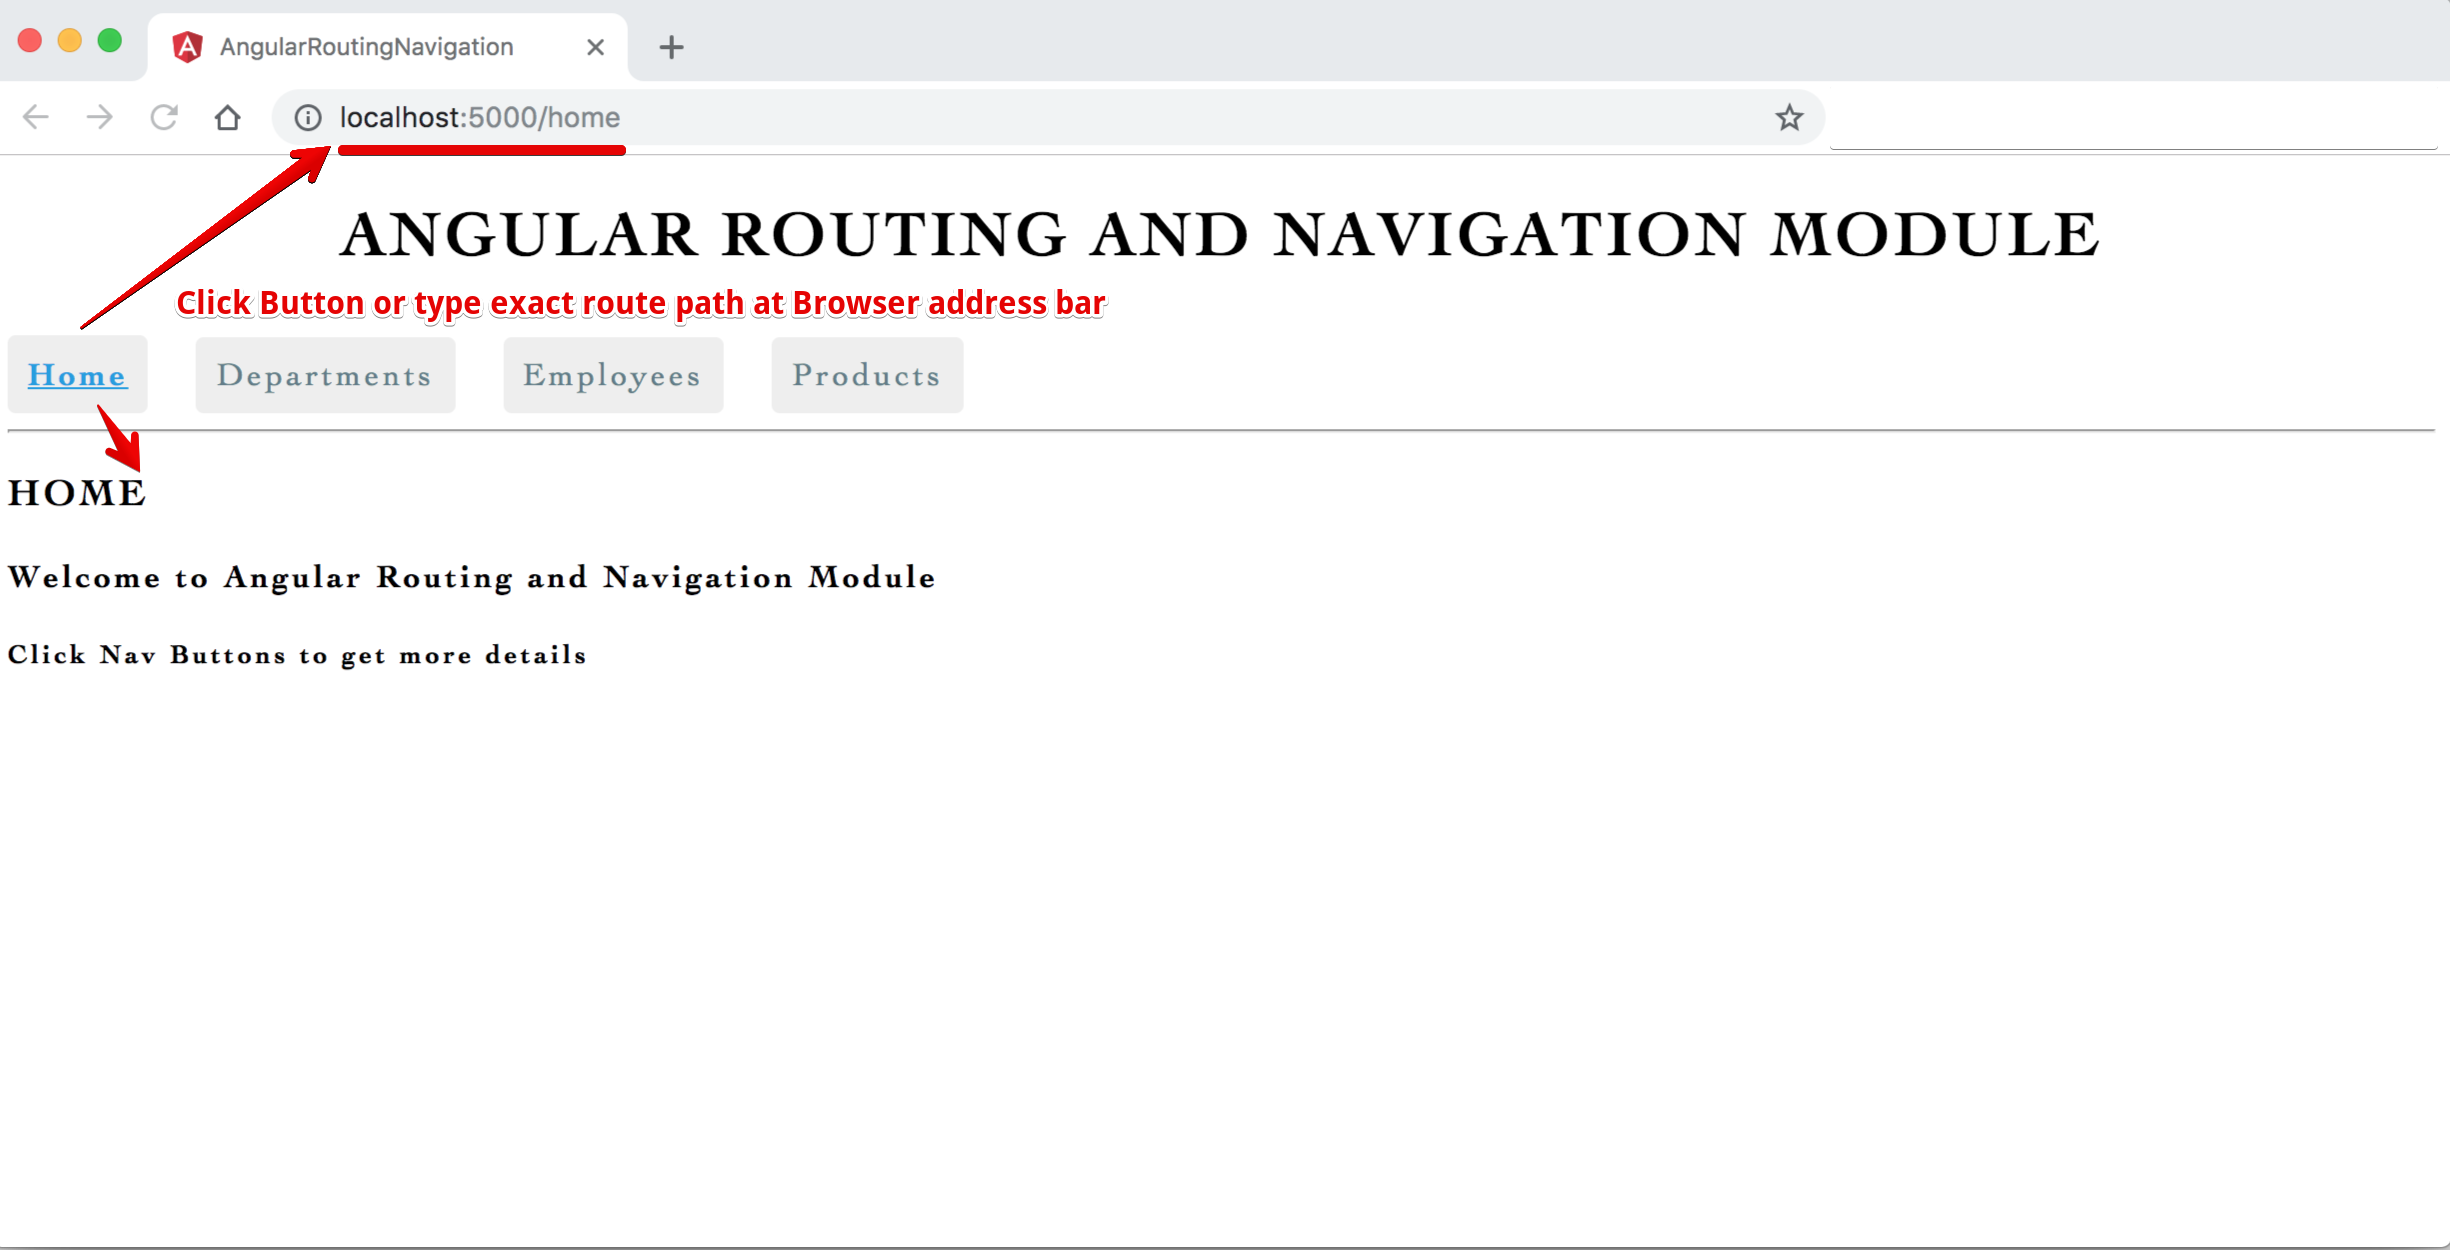
Image - Output - Angular Single Page Application (SPA) with Routing Navigation - Home View
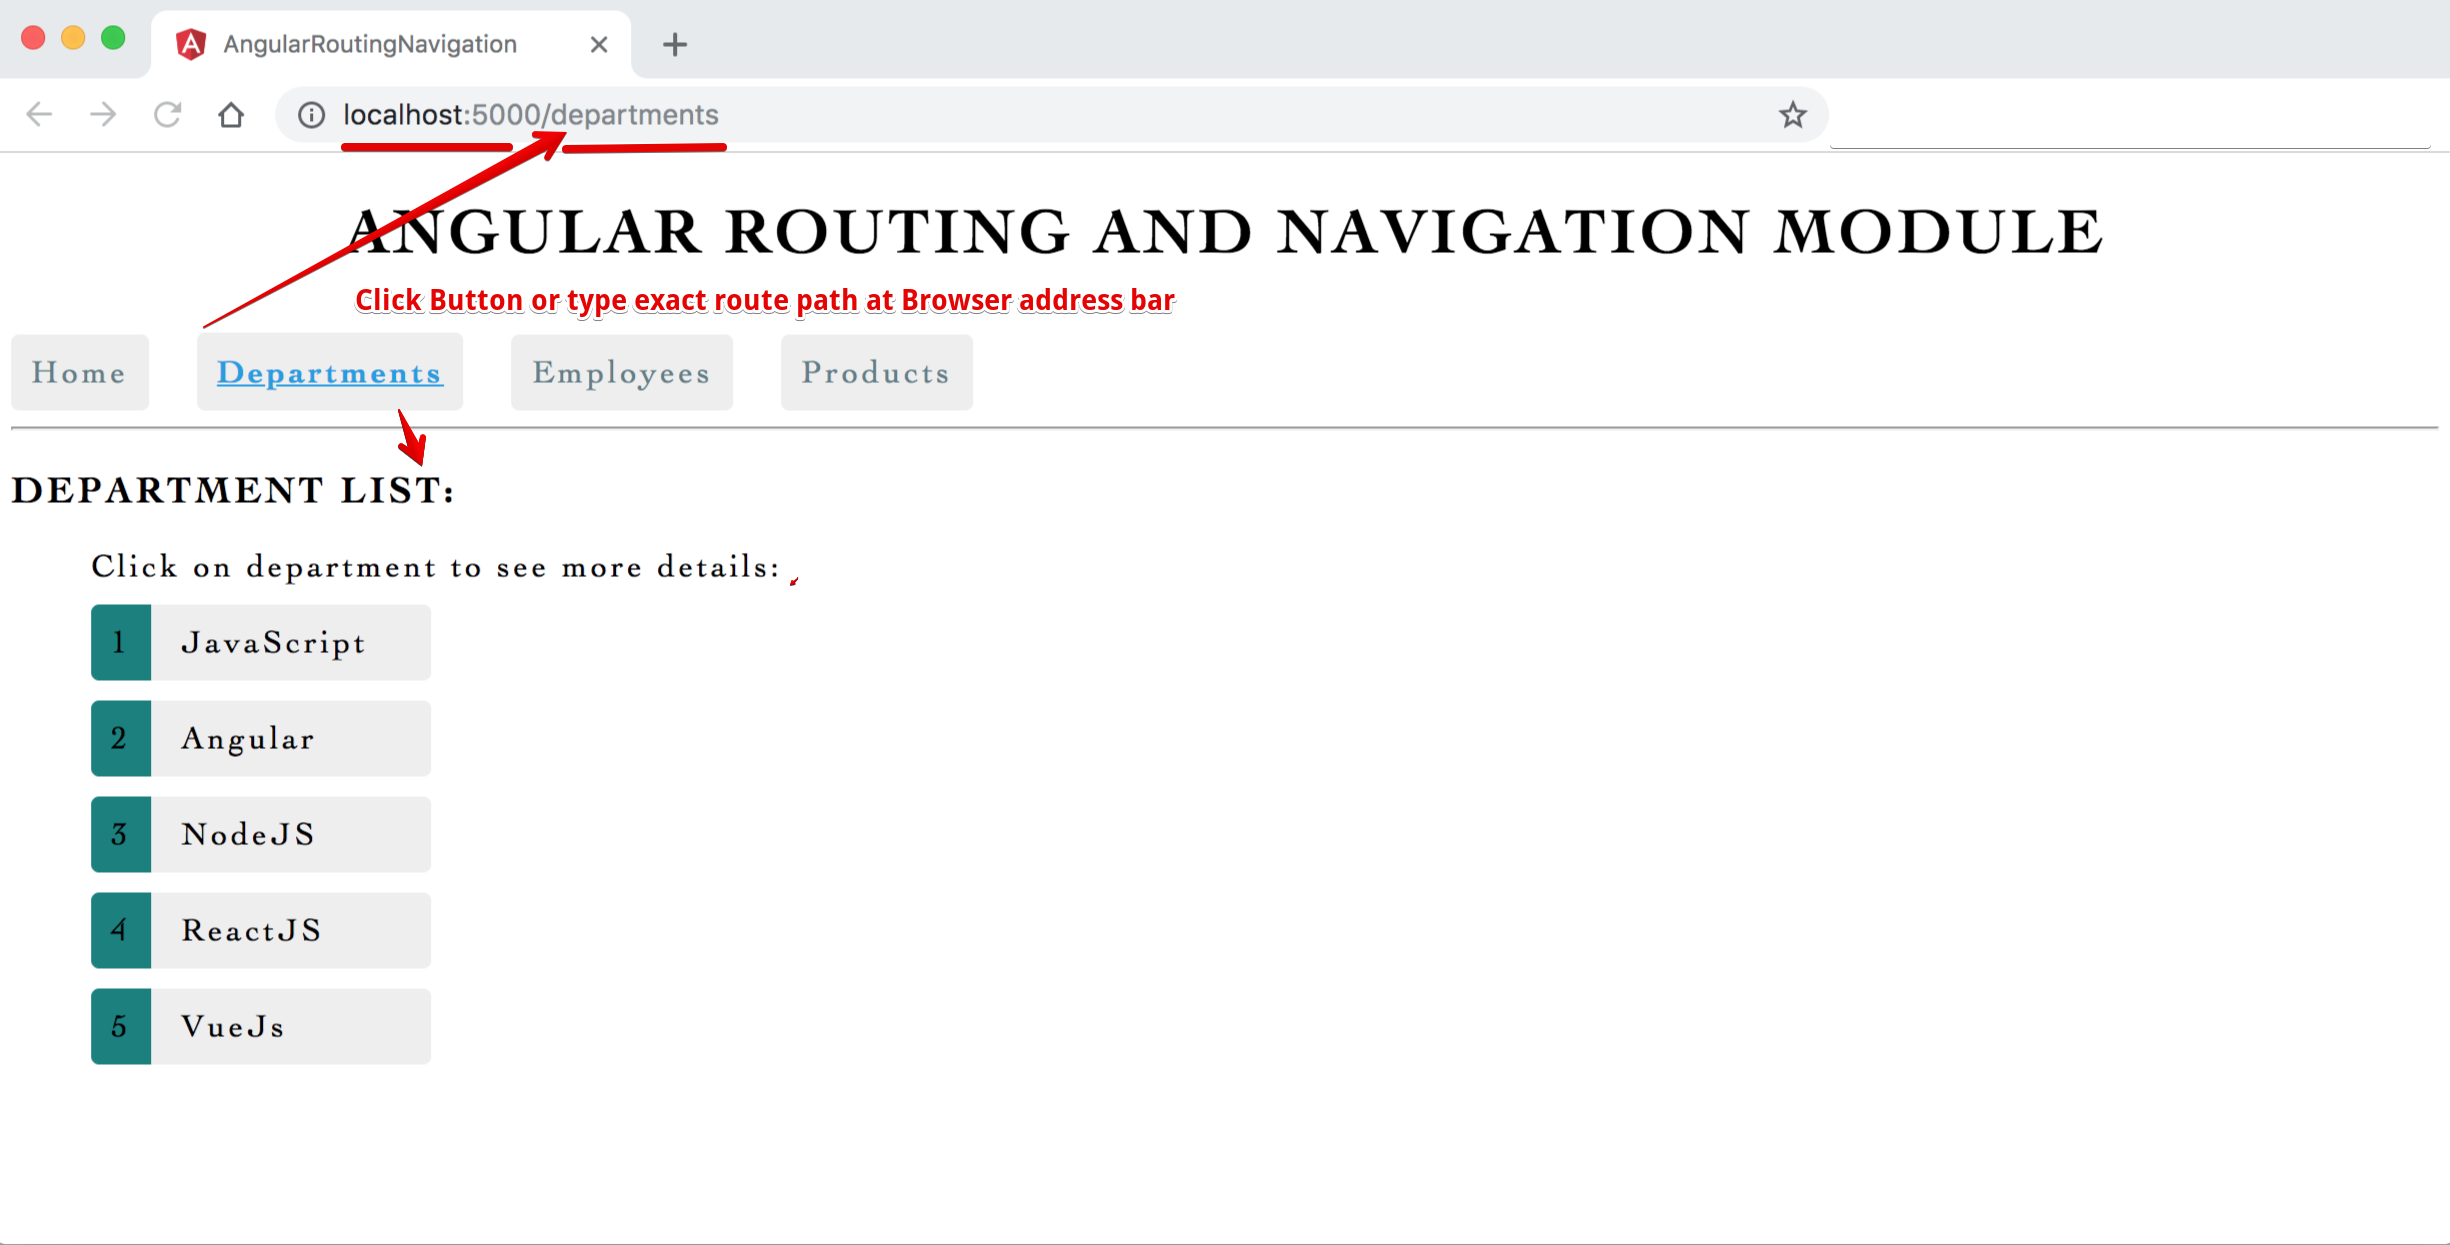
Image - Output - Angular Single Page Application (SPA) with Routing Navigation - Departments View
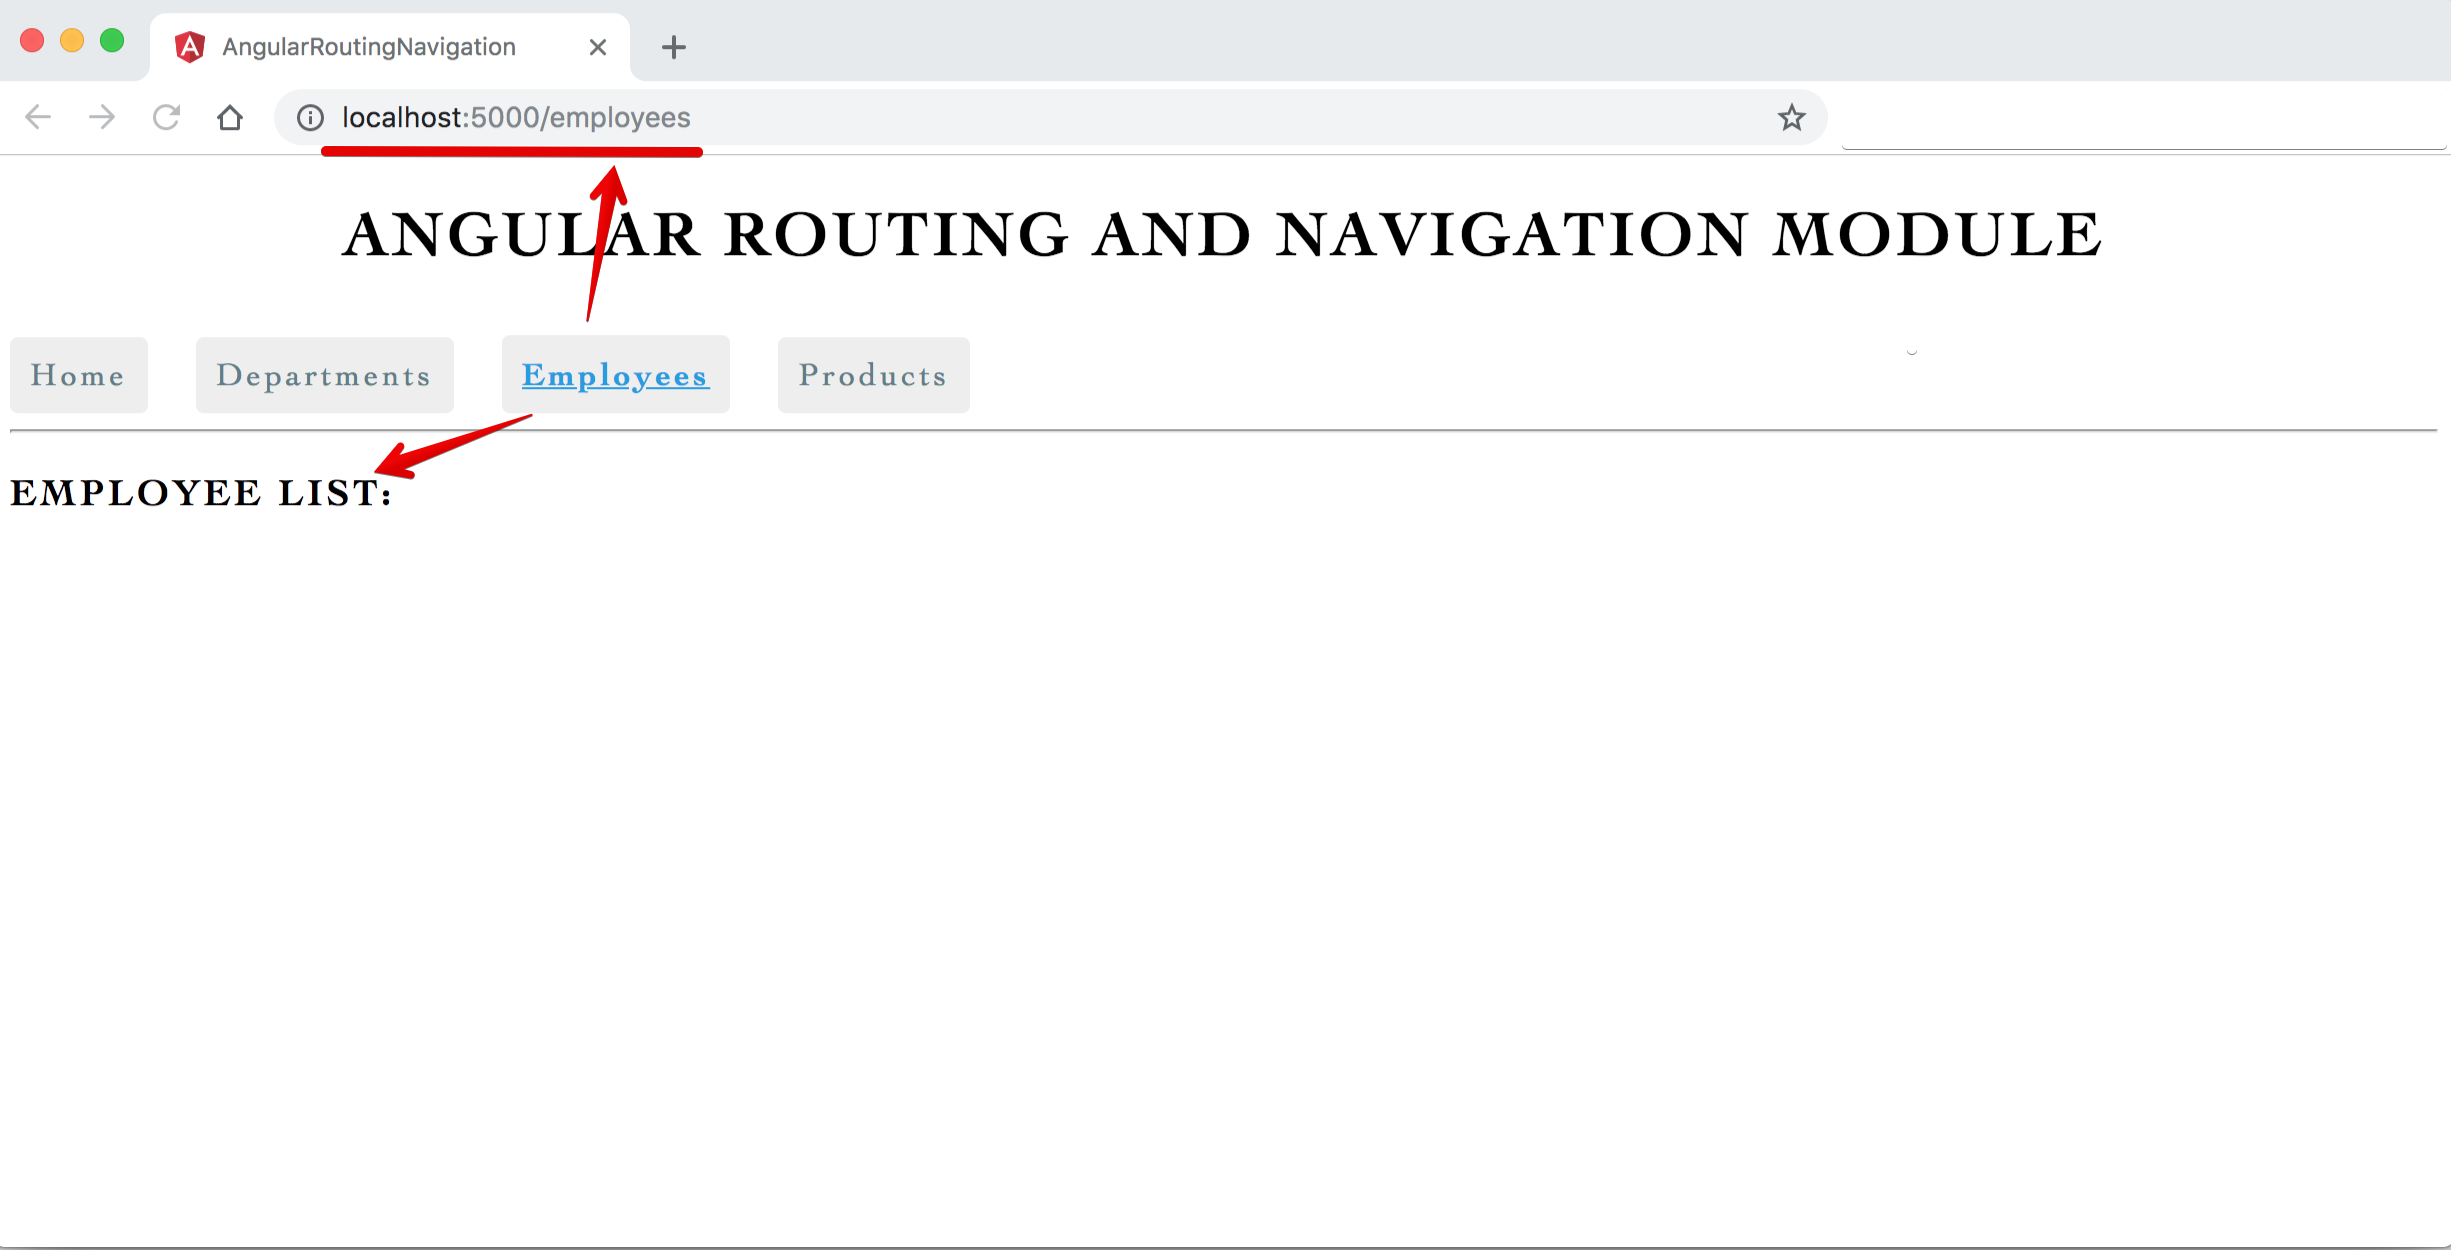
Image - Output - Angular Single Page Application (SPA) with Routing Navigation - Employees View
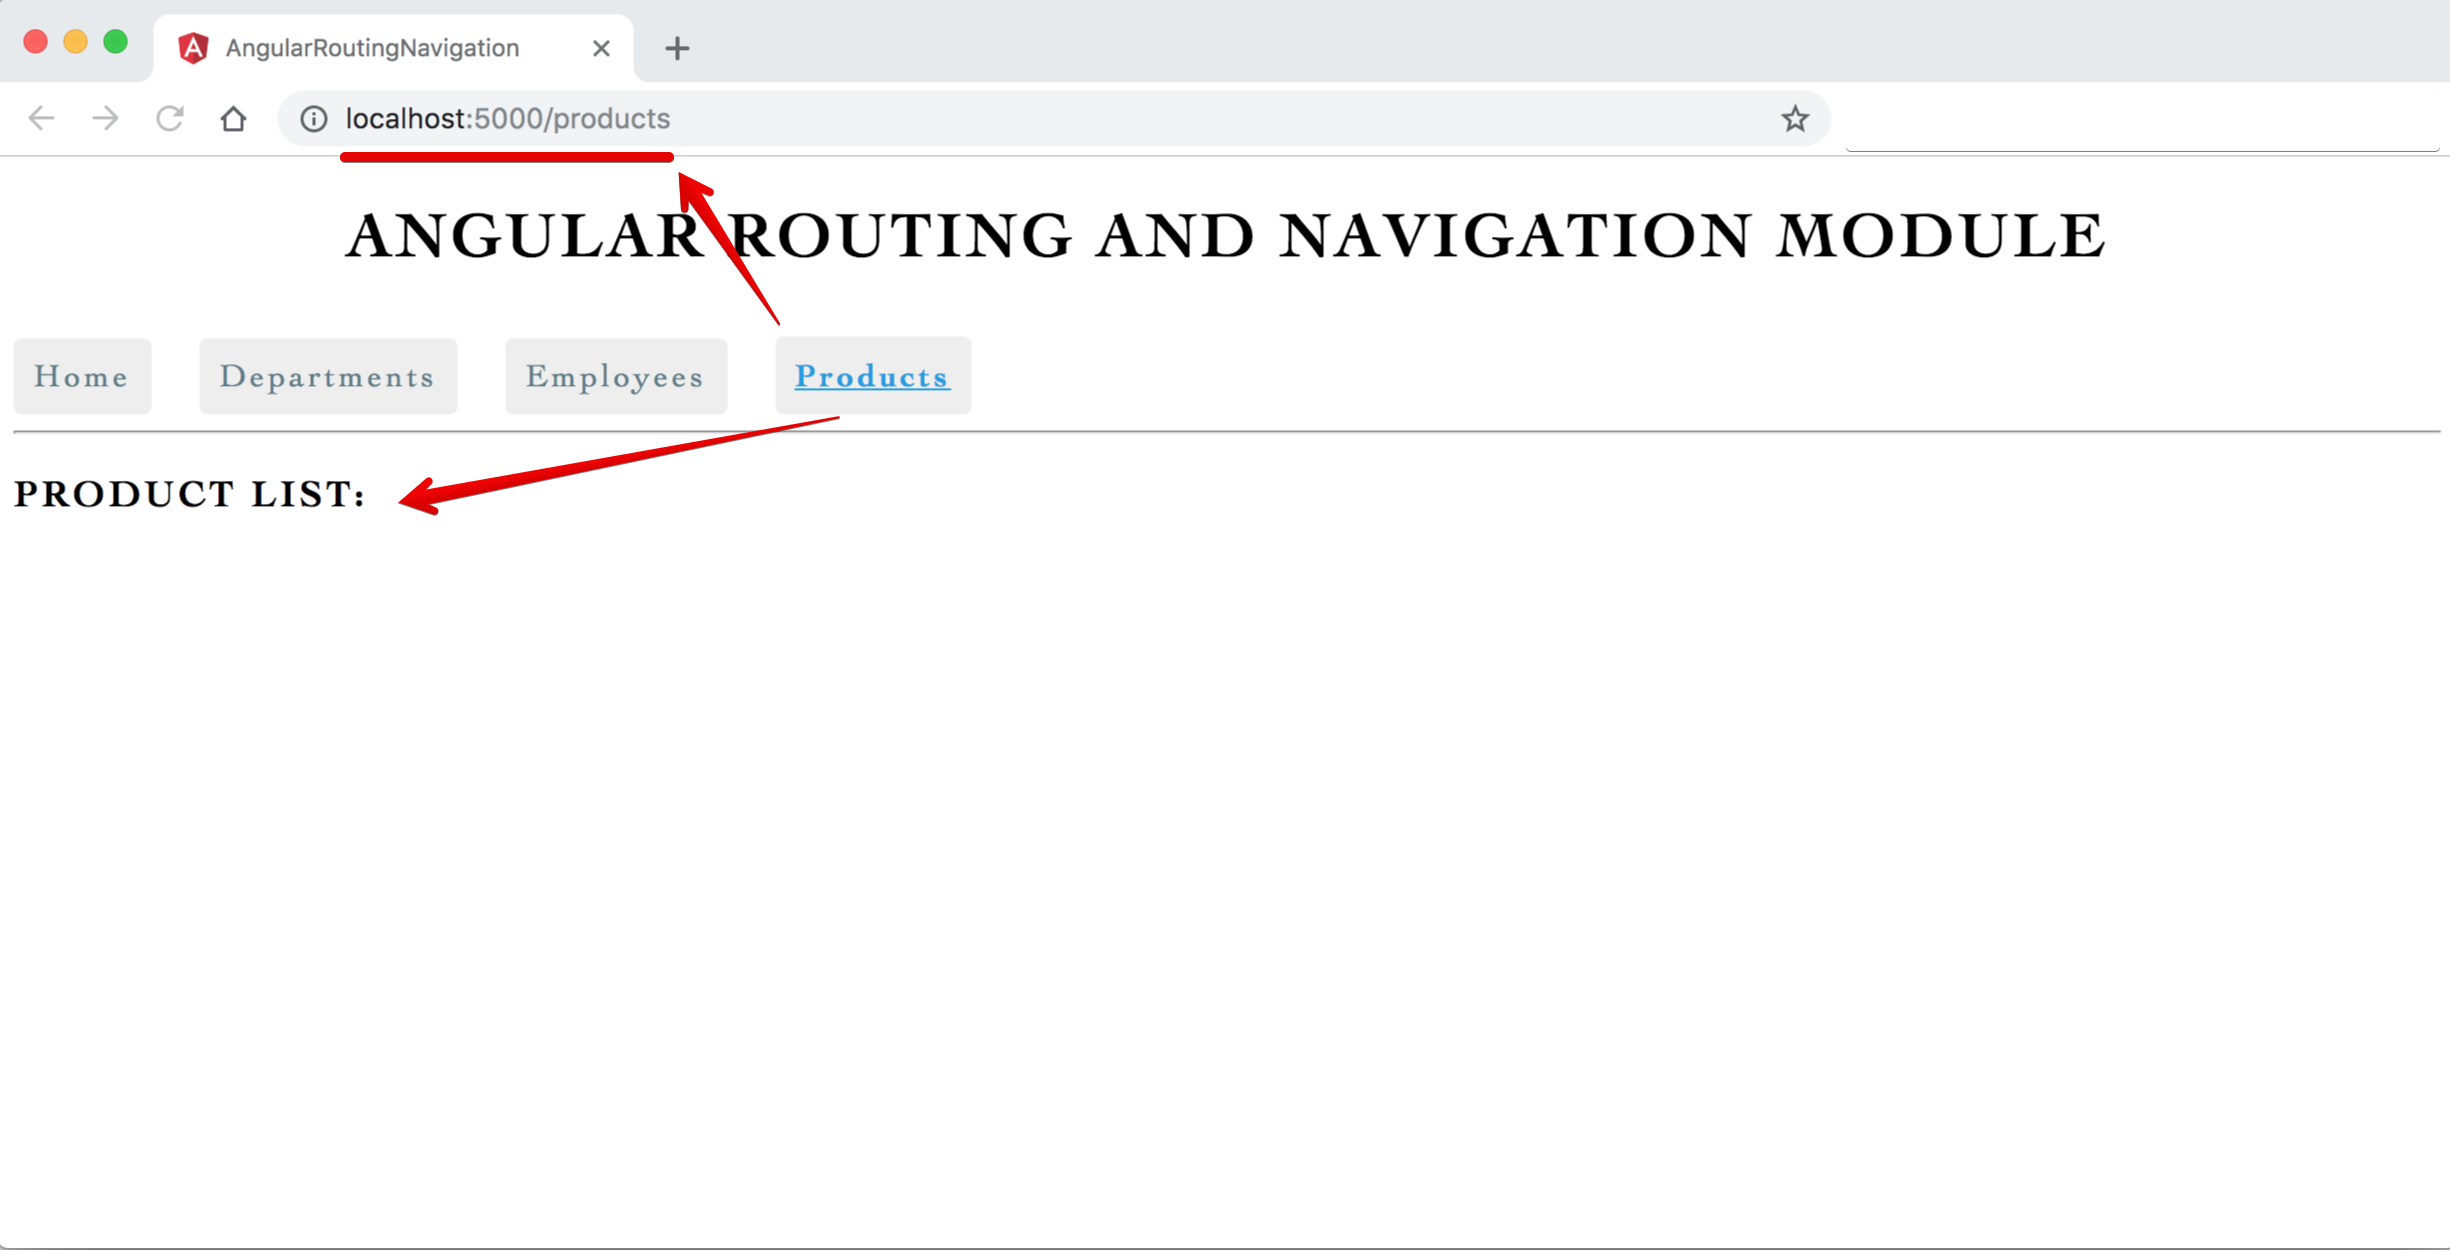
Image - Output - Angular Single Page Application (SPA) with Routing Navigation - Products View
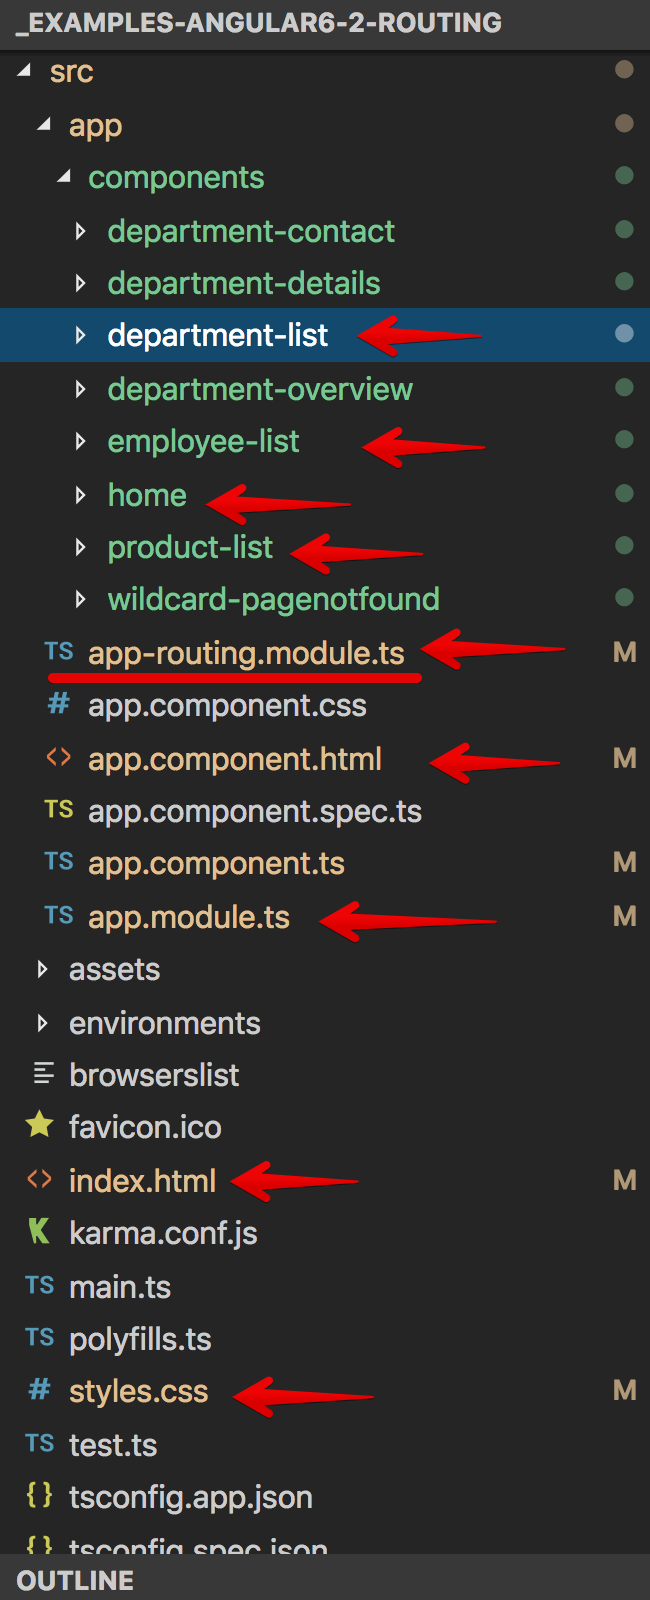
Image - Output - Angular Single Page Application (SPA) with Routing Navigation - Folder structure
- Generate a new Angular project/app with routing option
- Generate departmentList and employeeList, and other required components if any
- Configure the Routes
- Add buttons and use a directive to navigate
-
Command to create an Angular app with routing:
ng new routing-demo-app --routing -
Creating a routing module manually in any existing application:
- In index.html file under
<head> tagadd<base href="/">(It helps application to build/generate/constructs URL/view to load properly) - In the app, folder create
app-routing.module.tsfile (contains RoutingModule/Routes for application - enter a required path and components details) - import app-routing.module.ts file in
app.module.tsfile also add in the imports array
- In index.html file under
- Angular CLI command to generate component:
ng g c employee-list -it -is(Inline Template / Inline style) - Angular CLI command to generate component:
ng g c department-list -it -isand other required components if any
- In
app.component.htmladd tag/directive:<router-outlet> </router-outlet> - In the app-routing.module.ts file, enter required paths and component details to navigate
- In
app.component.htmladd links/buttons:<a routerLink="/home" routerLinkActive="active">Home</a> - We can also use
<a routerLink="/home" routerLinkActive="active" routerLinkActiveOptions="{exact:true}">Home</a>to make current exact link active
Syntax & Example: index.html
<!doctype html>
<html lang="en">

<head>
  <meta charset="utf-8">
  <title>AngularRoutingNavigation</title>
  <base href="/">

  <meta name="viewport" content="width=device-width, initial-scale=1">
  <link rel="icon" type="image/x-icon" href="favicon.ico">
</head>

<body>
  <app-root></app-root>
</body>

</html>
Syntax & Example: app-routing.module.ts
import { NgModule } from '@angular/core';
import { Routes, RouterModule } from '@angular/router';

import { DepartmentListComponent } from './components/department-list/department-list.component';
import { EmployeeListComponent } from './components/employee-list/employee-list.component';
import { HomeComponent } from './components/home/home.component';
import { ProductListComponent } from './components/product-list/product-list.component';

const routes: Routes = [
  // default path
  // { path: '', component:DepartmentListComponent},
  { path: 'home', component: HomeComponent },
  { path: 'departments', component: DepartmentListComponent },
  { path: 'employees', component: EmployeeListComponent },
  { path: 'products', component: ProductListComponent },
];

@NgModule({
  imports: [RouterModule.forRoot(routes)],
  exports: [RouterModule]
})
export class AppRoutingModule { }

// to store all routing component and avoid importing/writing duplicate list of components in app.routing.module / app.module.
// create an array of all routing components export it, then import it in app.module.ts
export const RoutingComponents = [
  DepartmentListComponent,
  EmployeeListComponent,
  HomeComponent,
  ProductListComponent,
]
Syntax & Example: app.module.ts
import { BrowserModule } from '@angular/platform-browser';
import { NgModule } from '@angular/core';

import { AppRoutingModule, RoutingComponents } from './app-routing.module';
import { AppComponent } from './app.component';

// RoutingComponents array - list all the components used in application

// import { DepartmentContactComponent } from './components/department-contact/department-contact.component';
// import { DepartmentDetailsComponent } from './components/department-details/department-details.component';
// import { DepartmentListComponent } from './components/department-list/department-list.component';
// import { DepartmentOverviewComponent } from './components/department-overview/department-overview.component';
// import { EmployeeListComponent } from './components/employee-list/employee-list.component';
// import { HomeComponent } from './components/home/home.component';
// import { ProductListComponent } from './components/product-list/product-list.component';
// import { WildcardPagenotfoundComponent } from './components/wildcard-pagenotfound/wildcard-pagenotfound.component';

@NgModule({
  declarations: [
    AppComponent,
    RoutingComponents,
    // DepartmentDetailsComponent,
    // DepartmentContactComponent,
    // DepartmentOverviewComponent,
    // DepartmentListComponent,
    // EmployeeListComponent,
    // HomeComponent,
    // ProductListComponent,
    // WildcardPagenotfoundComponent

  ],
  imports: [
    BrowserModule,
    AppRoutingModule
  ],
  providers: [],
  bootstrap: [AppComponent]
})
export class AppModule { }
Syntax & Example: app.component.html
<!--The content below is only a placeholder and can be replaced.-->
<h1 style="text-align:center;">{{ appTitle }}</h1>
<!-- add buttons/links to navigate pages or routings -->
<nav>
<a routerLink="/home" routerLinkActive="active" routerLinkActiveOptions="{exact:true}">Home</a>
<a routerLink="/departments" routerLinkActive="active" routerLinkActiveOptions="{exact:true}">Departments</a>
<a routerLink="/employees" routerLinkActive="active" routerLinkActiveOptions="{exact:true}">Employees</a>
<a routerLink="/products" routerLinkActive="active" routerLinkActiveOptions="{exact:true}">Products</a>
</nav>
<hr />
<!-- ng new routing-demo-app --routing - defulat include router-outlet in app.component.html. routed views goes here -->
<router-outlet></router-outlet>Syntax & Example: app.component.ts
import { Component } from '@angular/core';

@Component({
  selector: 'app-root',
  templateUrl: './app.component.html',
  styleUrls: ['./app.component.css']
})
export class AppComponent {
  public appTitle = 'Angular Routing and Navigation Module';
}
Syntax & Example: styles.css
/* You can add global styles to this file, and also import other style files */

/* common global generic styles */
.custom-divider {
  margin: 30px 0px;
  border-bottom:2px dashed gray;
}

h1,h2,h3 {
  text-transform: uppercase;
  /* text-transform: capitalize; */
}

h2 {
  text-decoration: underline;
}

body {
  font-family: Cambria, Cochin, Georgia, Times, 'Times New Roman', serif;
  letter-spacing: 2px;
}

li {
  margin: 10px 0px;
}

input {
  padding: 5px;
}

button {
  border-radius: 5px;
  padding: 10px 15px;
  background-color: teal;
  border: none;
  outline: none;
  cursor: pointer;
  color: lightcyan;
}

.button-sub {
  background-color: rgba(0, 128, 128, 0.6);
  color: white;
}

/* route and navigation - links */
nav a {
  padding:10px;
  text-decoration: none;
  margin-top: 10px;
  display: inline-block;
  background-color: #eeeeee;
  border-radius: 4px;
}

nav a:visited, a:link, a {
  color:#607D8B;
}

nav a:hover {
  color:#039be5;
  background-color: #CFD8DC;
}

nav a.active {
  color:#039be5;
  font-weight: bold;
  text-decoration: underline;
}

/* route and navigation - list badge */
.items {

}

.items li, .link-sub {
  width: 200px;
  cursor: pointer;
  width: 150px;
  padding: 10px;
  text-decoration: none;
  margin-top: 10px;
  background-color: #eeeeee;
  border-radius: 4px;
}

.badge {
  background: teal;
  padding: 10px;
  margin-right: 5px;
  position: relative;
  left: -10px;
  border-radius: 4px 0px 0px 4px;
}

.description {

}

/* optional parameter - show highlighted */
.items li.selected {
  color:#039be5;
  background-color: #CFD8DC;
}
2 Wildcard Route and Redirecting Routes (Dealing with unavailable-non-configured route [Page not found])
- User can type/enter any unavailable-non-configured route/URL and can get many erros in console, like
http://localhost:5000/tryError:(Cannot match any routes, URL segment 'try'...) - To deal/handle any unwanted path or unavailable routes we must need to create a new component named
page not found componentOR404 componentandadd 'wildcard **'route Wildcard **routes or any paths with parameters (employees/1 or routes/parameters)must come lastinapp-routing.module.tsrouter configuration as router tries to match the paths from top to bottom- In
app-routing.module.tsroute must be configured in order:most specific at the tpo to list important/specific at the bottom - Default Route: While using
wildcard **routes we also need to providedefault route like '{ path: '', component:DepartmentListComponent}' OR '{ path: '', redirectTo:'departments', pathMatch:'full'}'
Steps:
- Create a new component for page not found:
ng g c wildcard-pagenotfoundwith a instructional markup:404 page not found! - In
app-routing.module.tsat the bottom/last add a new wildcard route:{ path: '**', component: WildcardPagenotfoundComponent }
Syntax & Example: wildcard-pagenotfound.component.html
<p>
  404 page not found! <br/>
  Path/URL not available!! <br/>
  <strong>Try Again!!!</strong>
</p>
Syntax & Example: app-routing.module.ts
import { NgModule } from '@angular/core';
import { Routes, RouterModule } from '@angular/router';

import { DepartmentListComponent } from './components/department-list/department-list.component';
import { EmployeeListComponent } from './components/employee-list/employee-list.component';
import { HomeComponent } from './components/home/home.component';
import { ProductListComponent } from './components/product-list/product-list.component';
import { WildcardPagenotfoundComponent } from './components/wildcard-pagenotfound/wildcard-pagenotfound.component';

const routes: Routes = [
  // default path
  // { path: '', component:DepartmentListComponent},
  { path: 'home', component: HomeComponent },
  { path: '', redirectTo: 'home', pathMatch: 'full' },
  { path: 'departments', component: DepartmentListComponent },
  { path: 'employees', component: EmployeeListComponent },
  { path: 'products', component: ProductListComponent },
  { path: '**', component: WildcardPagenotfoundComponent }
];

@NgModule({
  imports: [RouterModule.forRoot(routes)],
  exports: [RouterModule]
})
export class AppRoutingModule { }

// to store all routing component and avoid importing/writing duplicate list of components in app.routing.module / app.module.
// create an array of all routing components export it then imports it in app.module.ts
export const RoutingComponents = [
  DepartmentListComponent,
  EmployeeListComponent,
  HomeComponent,
  ProductListComponent,
  WildcardPagenotfoundComponent,
]
Image - Output - wildcard-route / Page not found!
Image - Output - wildcard-route / Page not found!
- In this section will learn to pass and read route parameters, as given below:
- In
app-routing.module.tscreatedepartments/:idpath route parameters for items under department list component - In
department-list.component.tsclass file create a array of departments object - In
department-list.component.htmlview file iterate/*ngFor through departments array and pass departments id as a route parameter- on click of the department list item, it will take to
department-details.component page with selected department id, at the same time browser location path will be displayed aslocalhost:5000/department:2 (selected department id ) - To navigate from code/links/buttons we need
router service as a dependency
- on click of the department list item, it will take to
- Create and use a new component to show details:
department-details.component.ts- read the departments id passed as a parameter and show the route view accordinglyactivatedRoute.snapshot.paramMap.get()is used to read the routes/parameters passed
Syntax & Example: department-list.component.ts
import { Component, OnInit } from '@angular/core';
import { Router } from '@angular/router';

@Component({
  selector: 'app-department-list',
  templateUrl: './department-list.component.html',
  styleUrls: ['./department-list.component.css']
})
export class DepartmentListComponent implements OnInit {
  public departments = [
    { 'id': 1, 'name': 'JavaScript' },
    { 'id': 2, 'name': 'Angular' },
    { 'id': 3, 'name': 'NodeJS' },
    { 'id': 4, 'name': 'ReactJS' },
    { 'id': 5, 'name': 'VueJs' },
  ]

  constructor(private router: Router) { }

  ngOnInit() {

  }

  onLinkSelect(curDepartment) {
    console.log('onLinkSelect curDepartment');
    // navigate ( path, route parameter)
    this.router.navigate(['departments', curDepartment.id]);
  }

}
Syntax & Example: department-list.component.html
<div>
  <h3>Department list:</h3>

  <ul class="items">
    Click on department to see more details:
    <!-- on link click call function/method to navigate -->
    <li *ngFor="let department of departments" (click)="onLinkSelect(department)">
      <span class="badge">{{department.id}}</span>
      <span class="description">{{department.name}}</span>
    </li>
  </ul>

</div>
Syntax & Example: app-routing.module
import { NgModule } from '@angular/core';
import { Routes, RouterModule } from '@angular/router';

import { DepartmentDetailsComponent } from './components/department-details/department-details.component';
import { DepartmentListComponent } from './components/department-list/department-list.component';
import { EmployeeListComponent } from './components/employee-list/employee-list.component';
import { HomeComponent } from './components/home/home.component';
import { ProductListComponent } from './components/product-list/product-list.component';
import { WildcardPagenotfoundComponent } from './components/wildcard-pagenotfound/wildcard-pagenotfound.component';

const routes: Routes = [
  // default path
  // { path: '', component:DepartmentListComponent},
  { path: 'home', component: HomeComponent },
  { path: '', redirectTo: 'home', pathMatch: 'full' },
  { path: 'departments', component: DepartmentListComponent },
  { path: 'departments/:id', component: DepartmentDetailsComponent },
  { path: 'employees', component: EmployeeListComponent },
  { path: 'products', component: ProductListComponent },
  { path: '**', component: WildcardPagenotfoundComponent }
];

@NgModule({
  imports: [RouterModule.forRoot(routes)],
  exports: [RouterModule]
})
export class AppRoutingModule { }

// to store all routing component and avoid importing/writing duplicate list of components in app.routing.module / app.module.
// create an array of all routing components export it then imports it in app.module.ts
export const RoutingComponents = [
  DepartmentDetailsComponent,
  DepartmentListComponent,
  EmployeeListComponent,
  HomeComponent,
  ProductListComponent,
  WildcardPagenotfoundComponent,
]
Syntax & Example: department-details.component.ts
import { Component, OnInit } from '@angular/core';
import { ActivatedRoute } from '@angular/router';

@Component({
  selector: 'app-department-details',
  templateUrl: './department-details.component.html',
  styleUrls: ['./department-details.component.css']
})
export class DepartmentDetailsComponent implements OnInit {
  // to hold the currently passed id parameter
  public selectedDepartmentId;

  constructor(private activatedRoute: ActivatedRoute) { }

  ngOnInit() {
    // read the route parameter

    // snapshot approach
    console.log(this.activatedRoute.snapshot.paramMap);
    let routeParamId = parseInt(this.activatedRoute.snapshot.paramMap.get('id'));
    this.selectedDepartmentId = routeParamId;
  }

}
Syntax & Example: department-details.component.html
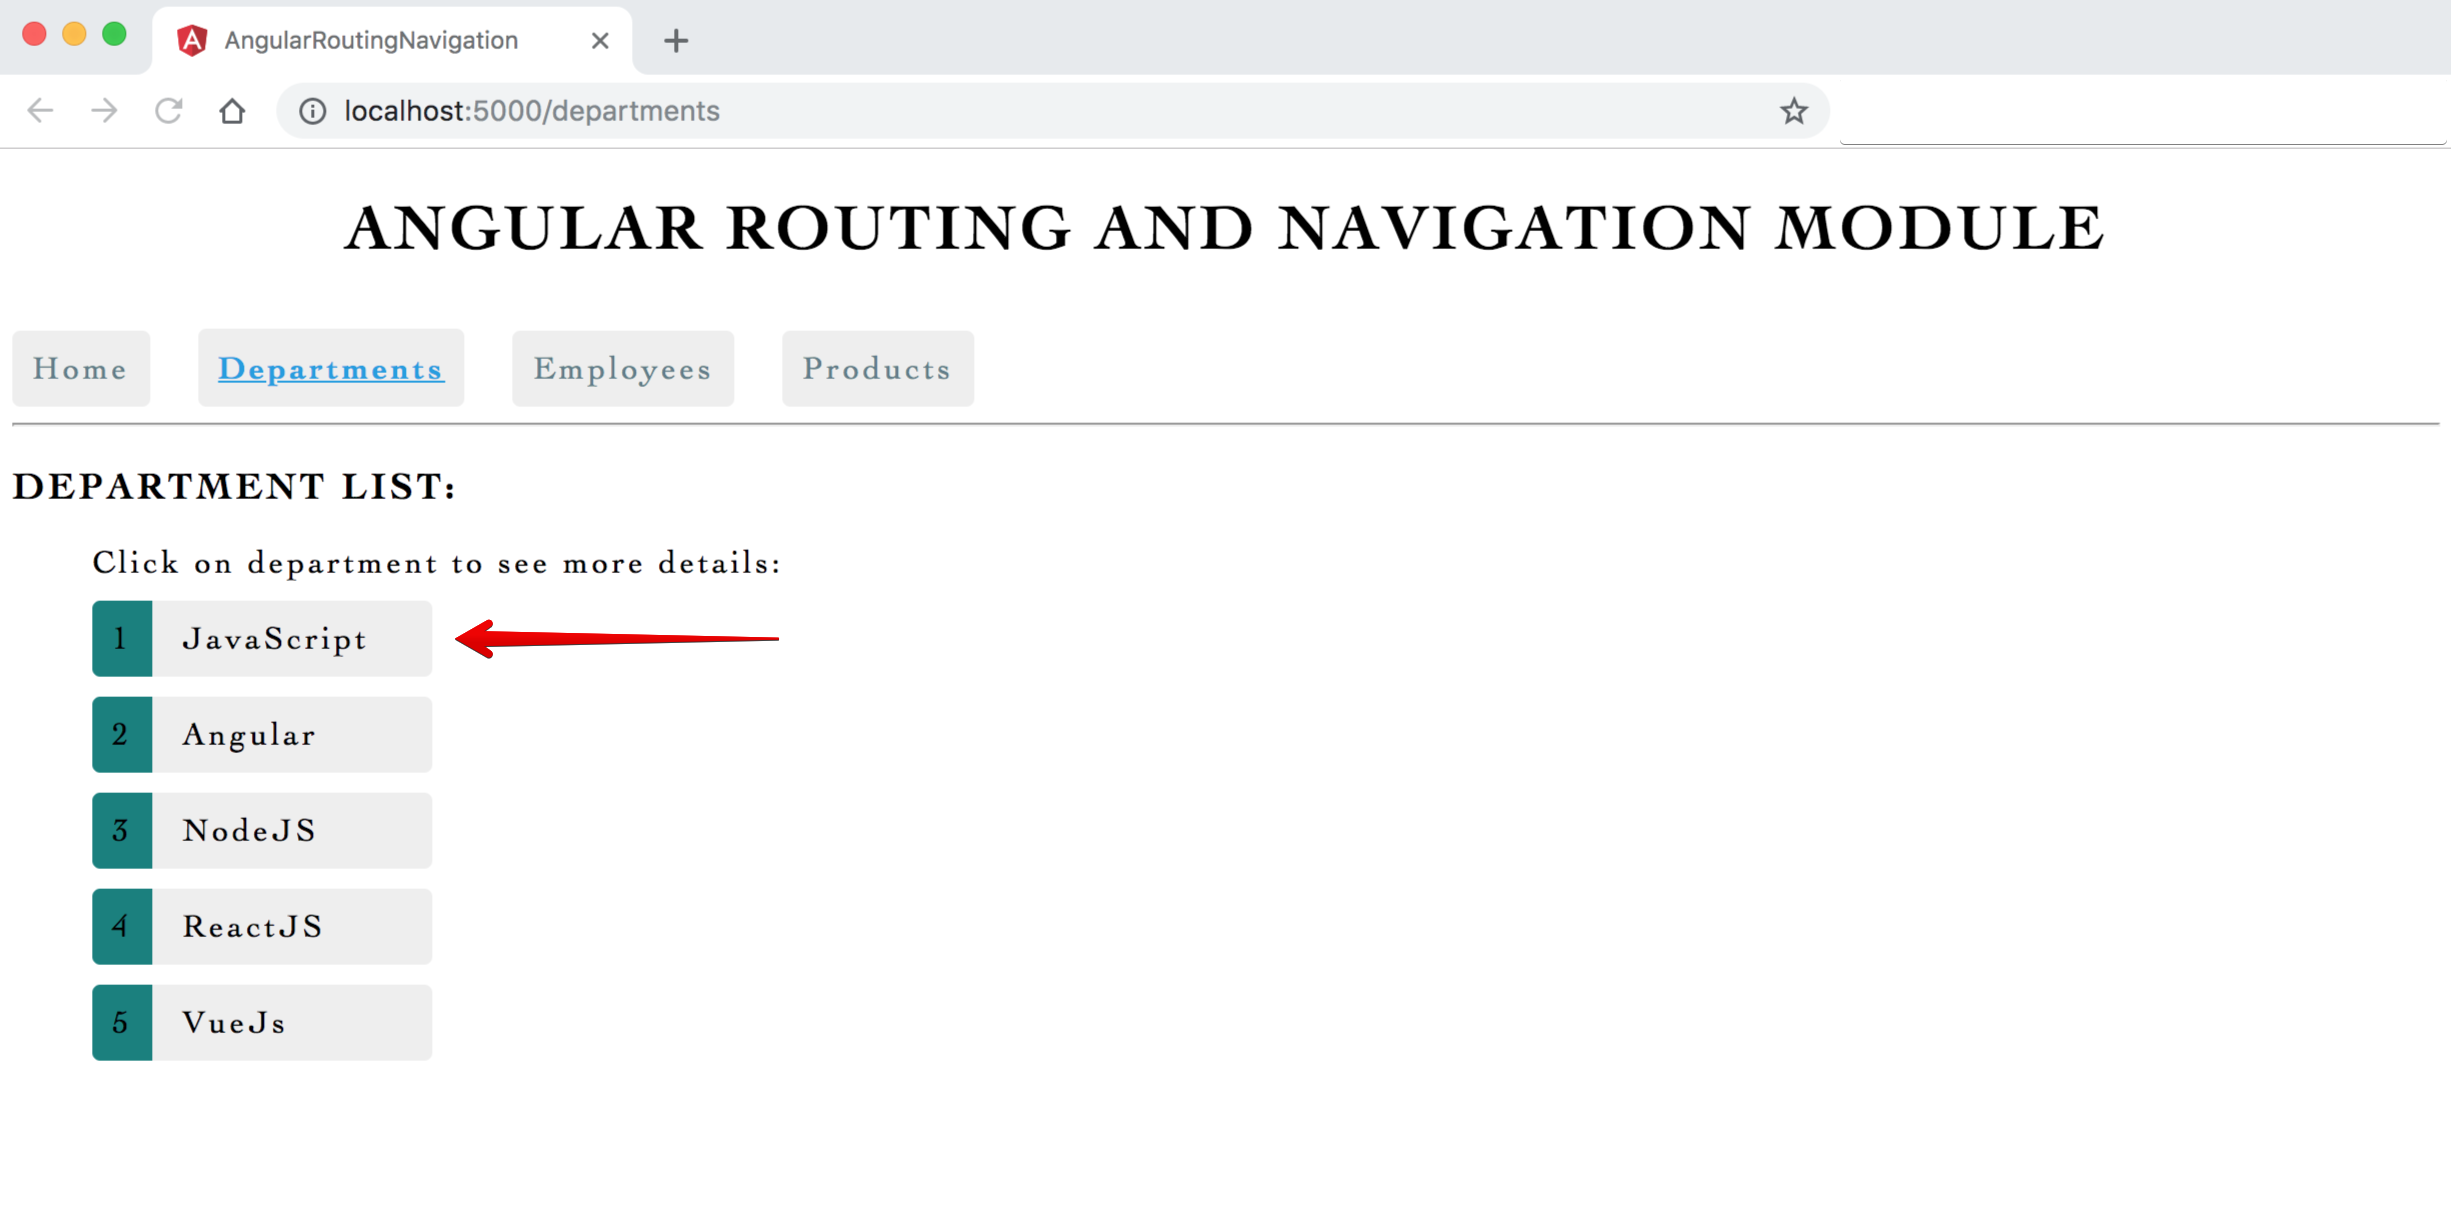
<h3>Selected Deparment Details ID : {{ selectedDepartmentId }} </h3>Image - Output - Route Parameters Department List
Image - Output - Route Parameters Department Clicked/Selected
- Using the
activatedRoute.snapshotgot some drawback like: when will navigate back next / previous next from child component(details component to list component)snapshot approach does not work- In department-details.component.html add links Previous & Next to see rest of departments with click handler
<a (click)="goPrevious()">Back </a> - In
department-details.component.tscreate a handlergoPrevious()&goNext()with required logic - If you will observe the drawback here is on Previous & Next button clicks,
only url updates/changing but view/template not changing (ngOnInit does not get call) - To overcome activatedRoute.snapshot problems will use
paramMap Observable with subscribe
- In department-details.component.html add links Previous & Next to see rest of departments with click handler
Syntax & Example: department-details.component.html
<h3>Selected Deparment Details ID : {{ selectedDepartmentId }} </h3>
<br />
<a (click)="goPrevious()" class="link-sub">Previous</a>
<a (click)="goNext()" class="link-sub">Next</a>Syntax & Example: department-details.component.ts
import { Component, OnInit } from '@angular/core';
import { ActivatedRoute, Router, ParamMap } from '@angular/router';

@Component({
  selector: 'app-department-details',
  templateUrl: './department-details.component.html',
  styleUrls: ['./department-details.component.css']
})
export class DepartmentDetailsComponent implements OnInit {
  // to hold the currently passed id parameter
  public selectedDepartmentId;

  constructor(private activatedRoute: ActivatedRoute, private router: Router) { }

  ngOnInit() {
    // read the route parameter

    // snapshot approach
    // console.log(this.activatedRoute.snapshot.paramMap);
    // let routeParamId = parseInt(this.activatedRoute.snapshot.paramMap.get('id'));
    // this.selectedDepartmentId = routeParamId;

    // paramMap Observable approach
    this.activatedRoute.paramMap.subscribe((params: ParamMap) => {
      let id = parseInt(params.get('id')); // let id = Number(params.get('id'))
      this.selectedDepartmentId = id;
    })
  }

  goPrevious() {
    let previousId = this.selectedDepartmentId - 1;
    this.router.navigate(['/departments', previousId]);
  }

  goNext() {
    let nextId = this.selectedDepartmentId + 1;
    this.router.navigate(['/departments', nextId]);
  }

}
Image - Output - Route Parameters Previous ID
Image - Output - Route Parameters Next ID
Image - Output - Route Parameters Observables Next ID
- By using
Back button in department-details.component.htmlwe mustnavigate back to department-list.component.htmland show clicked department in selected state`- In department-details.component add
Backbutton:<button click="goToDepartments()">Back </button> - In
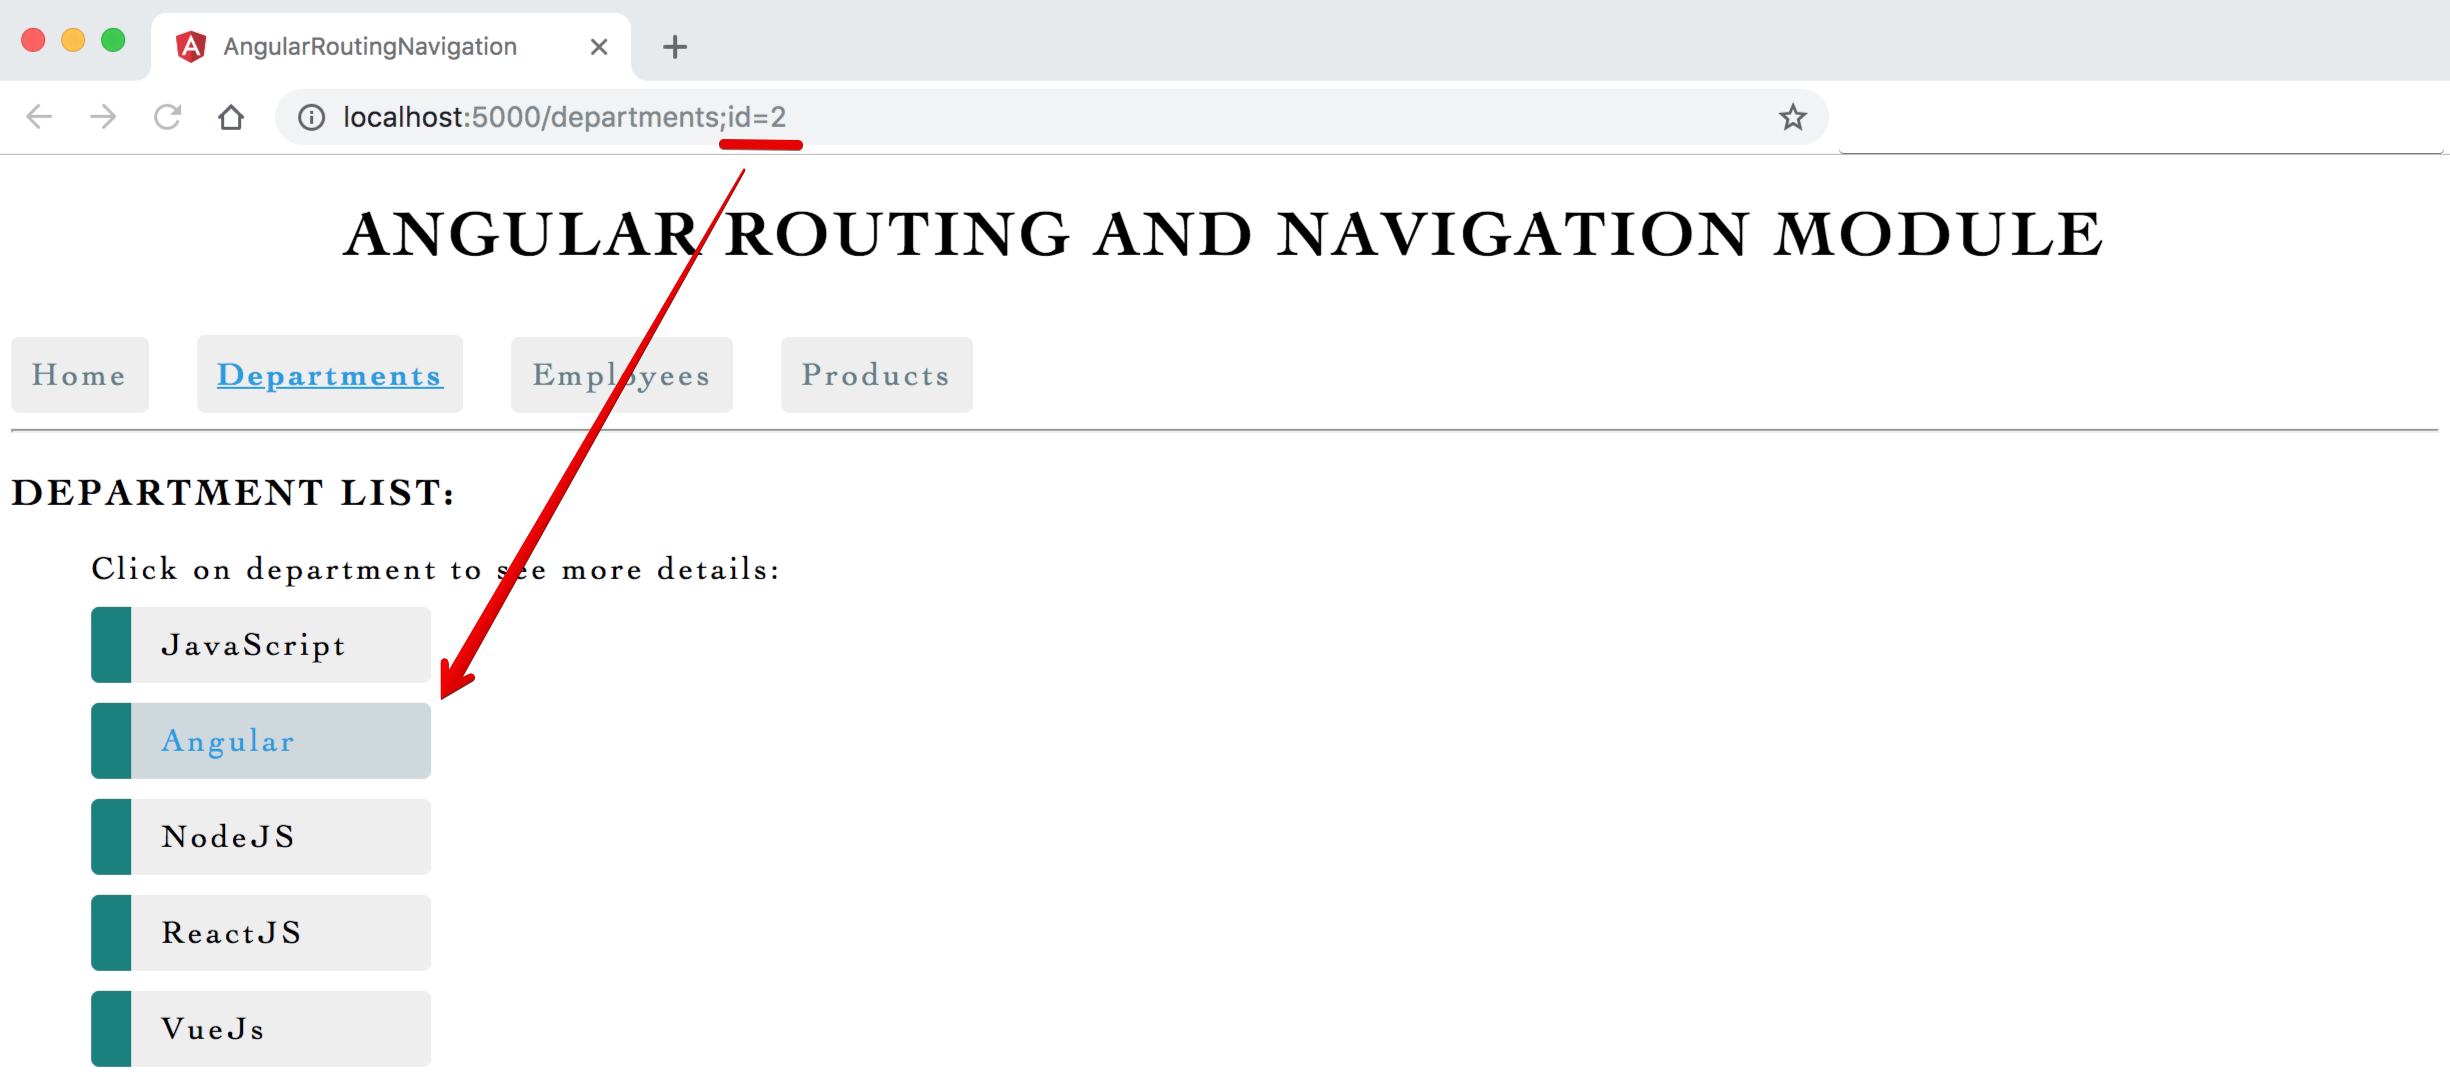
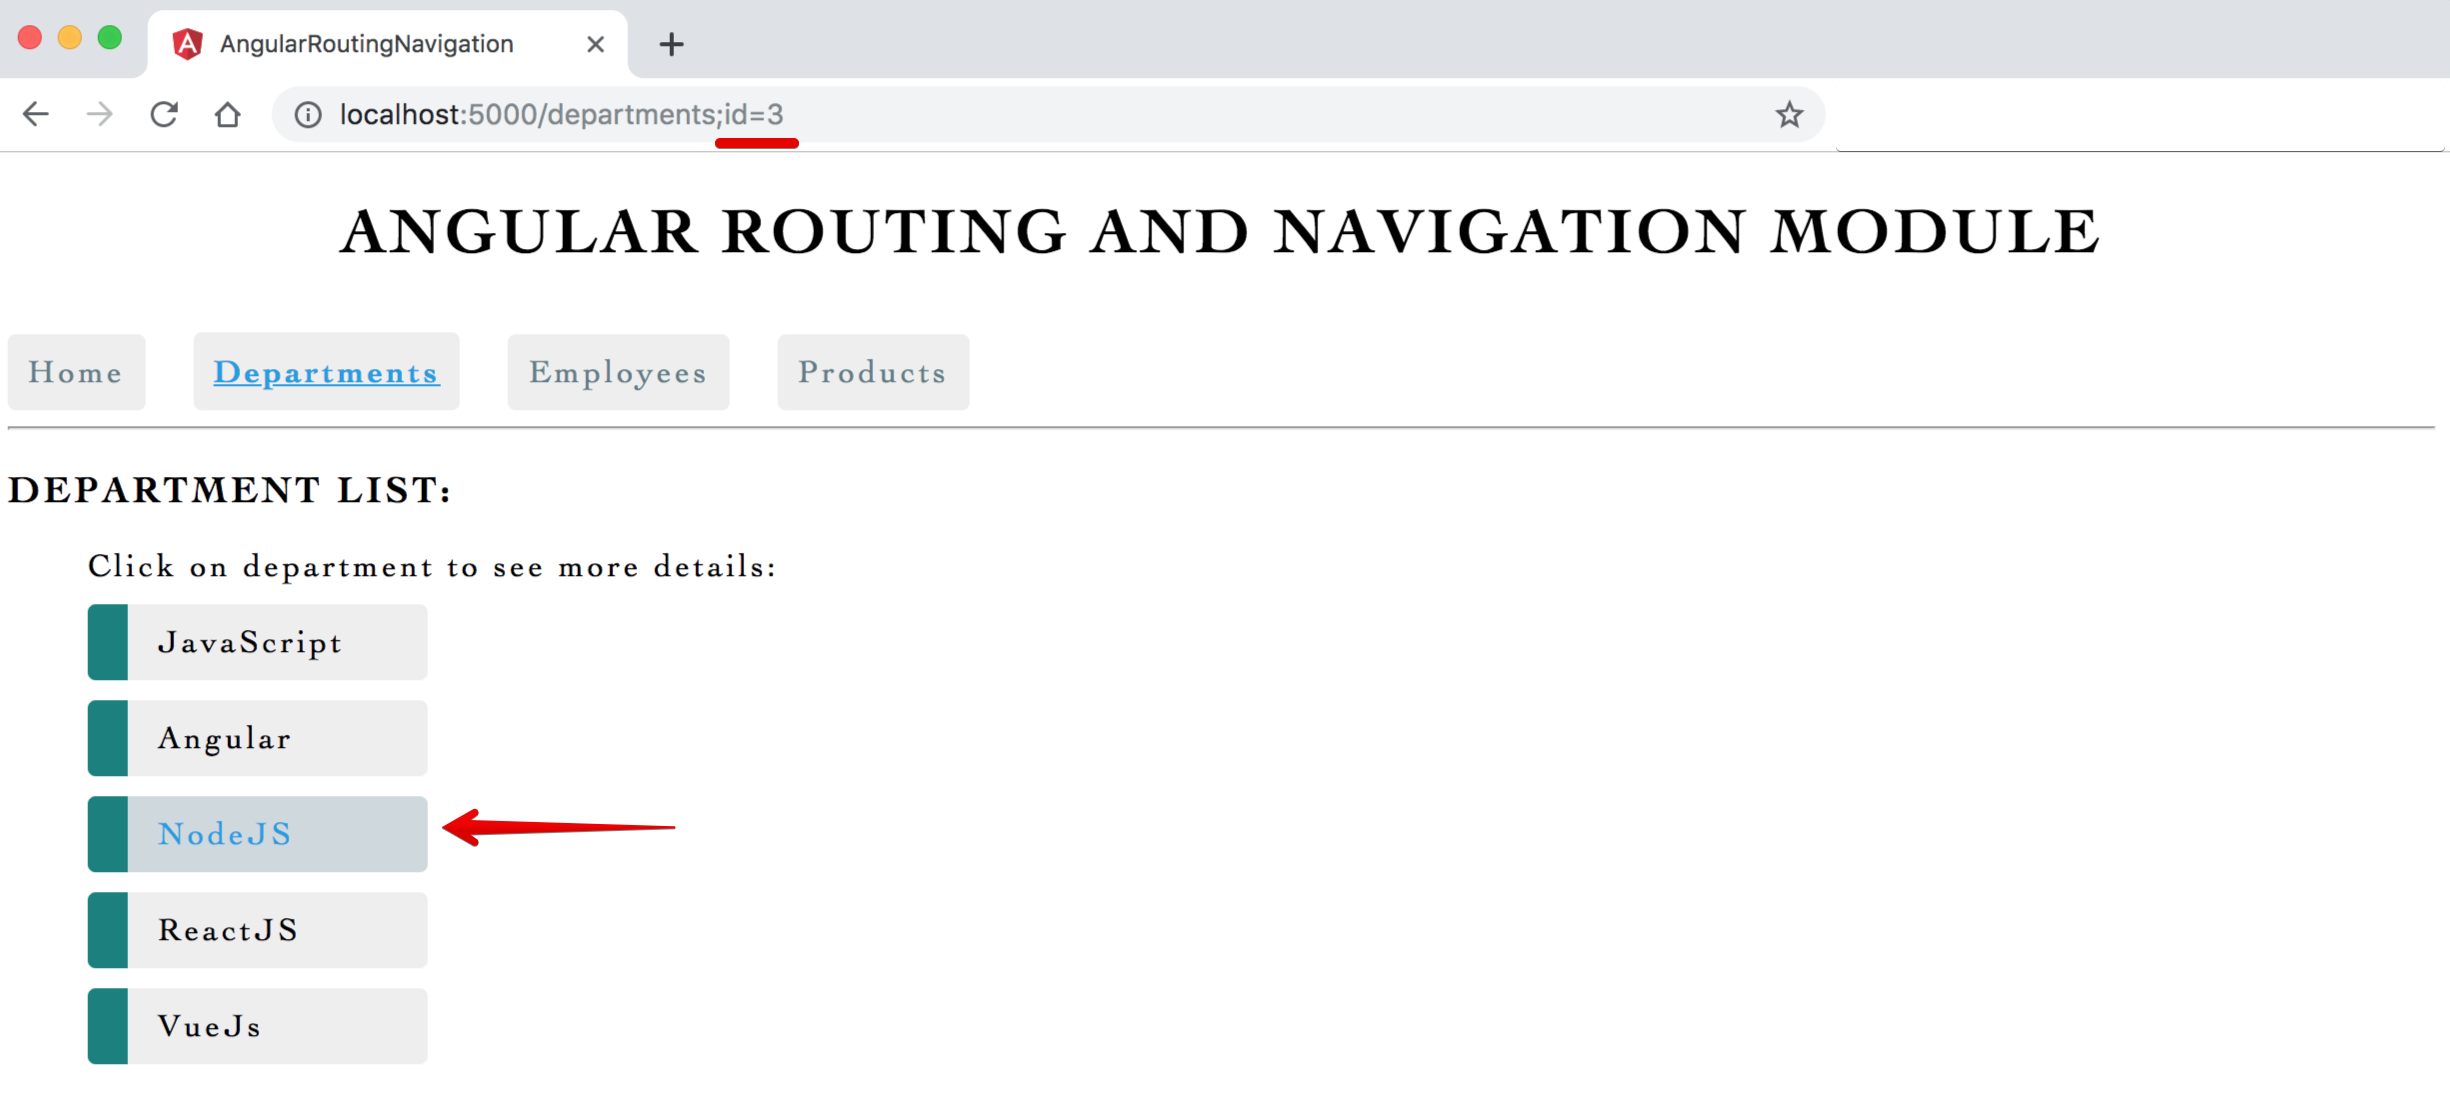
department-details.component.tscreate a handlergoToDepartments()with required logic, // Use Back button to go to main list page and highlight the link by passing optional parameters with departments details, when back it shows in urlhttp://localhost:5000/departments;id=4 - In
department-list.component.tsadd required login inngOnInit()life cycle hook to read the passed optional parameter and to highlight clicked department button
- In department-details.component add
Syntax & Example: department-details.component.html
<!-- // back button - method to handle optional parameters and show current clicked department highlighted -->
<button (click)="goToDepartments()" class="button-sub">Back</button>
Syntax & Example: department-details.component.ts
// back button - method to handle optional parameters and show current department highlighted
goToDepartments() {
  console.log('goToDepartments clicked');
  let currentSelectedId = this.selectedDepartmentId ? this.selectedDepartmentId : null
  //sending optional parameter - used for some logic
  //this.router.navigate(["/departments", { id: currentSelectedId, test: 'test-param-value' }])

  // relative path, links parameter array - {key:value}, {relativeTo property}
  // we can pass multiple parameters as per our requirements
  // this.router.navigate(['../', { id: currentSelectedId, name: 'Hello'  }]);
  this.router.navigate(['../', { id: currentSelectedId }]);
}
Syntax & Example: department-list.component.ts
ngOnInit() {
  this.activatedRoute.paramMap.subscribe((params: ParamMap) => {
    let id = parseInt(params.get('id')); // let id = Number(params.get('id'))
    this.selectedDepartmentId = id;
  })
}

/* on department click */
onLinkSelect(curDepartment) {
  console.log('onLinkSelect curDepartment');
  // navigate ( path, route parameter)
  // this.router.navigate(['departments', curDepartment.id]);

  // relative path, links parameter array, relativeTo property
  this.router.navigate([curDepartment.id]);
}

// to compare/match current route clicked and optional parameter
isSelectedRouteMatchOptionalParam(curDepartment) {
  return curDepartment.id === this.selectedDepartmentId;
}
Syntax & Example: styles.css
/* optional parameter - show highlighted */
.items li.selected {
  color:#039be5;
  background-color: #CFD8DC;
}
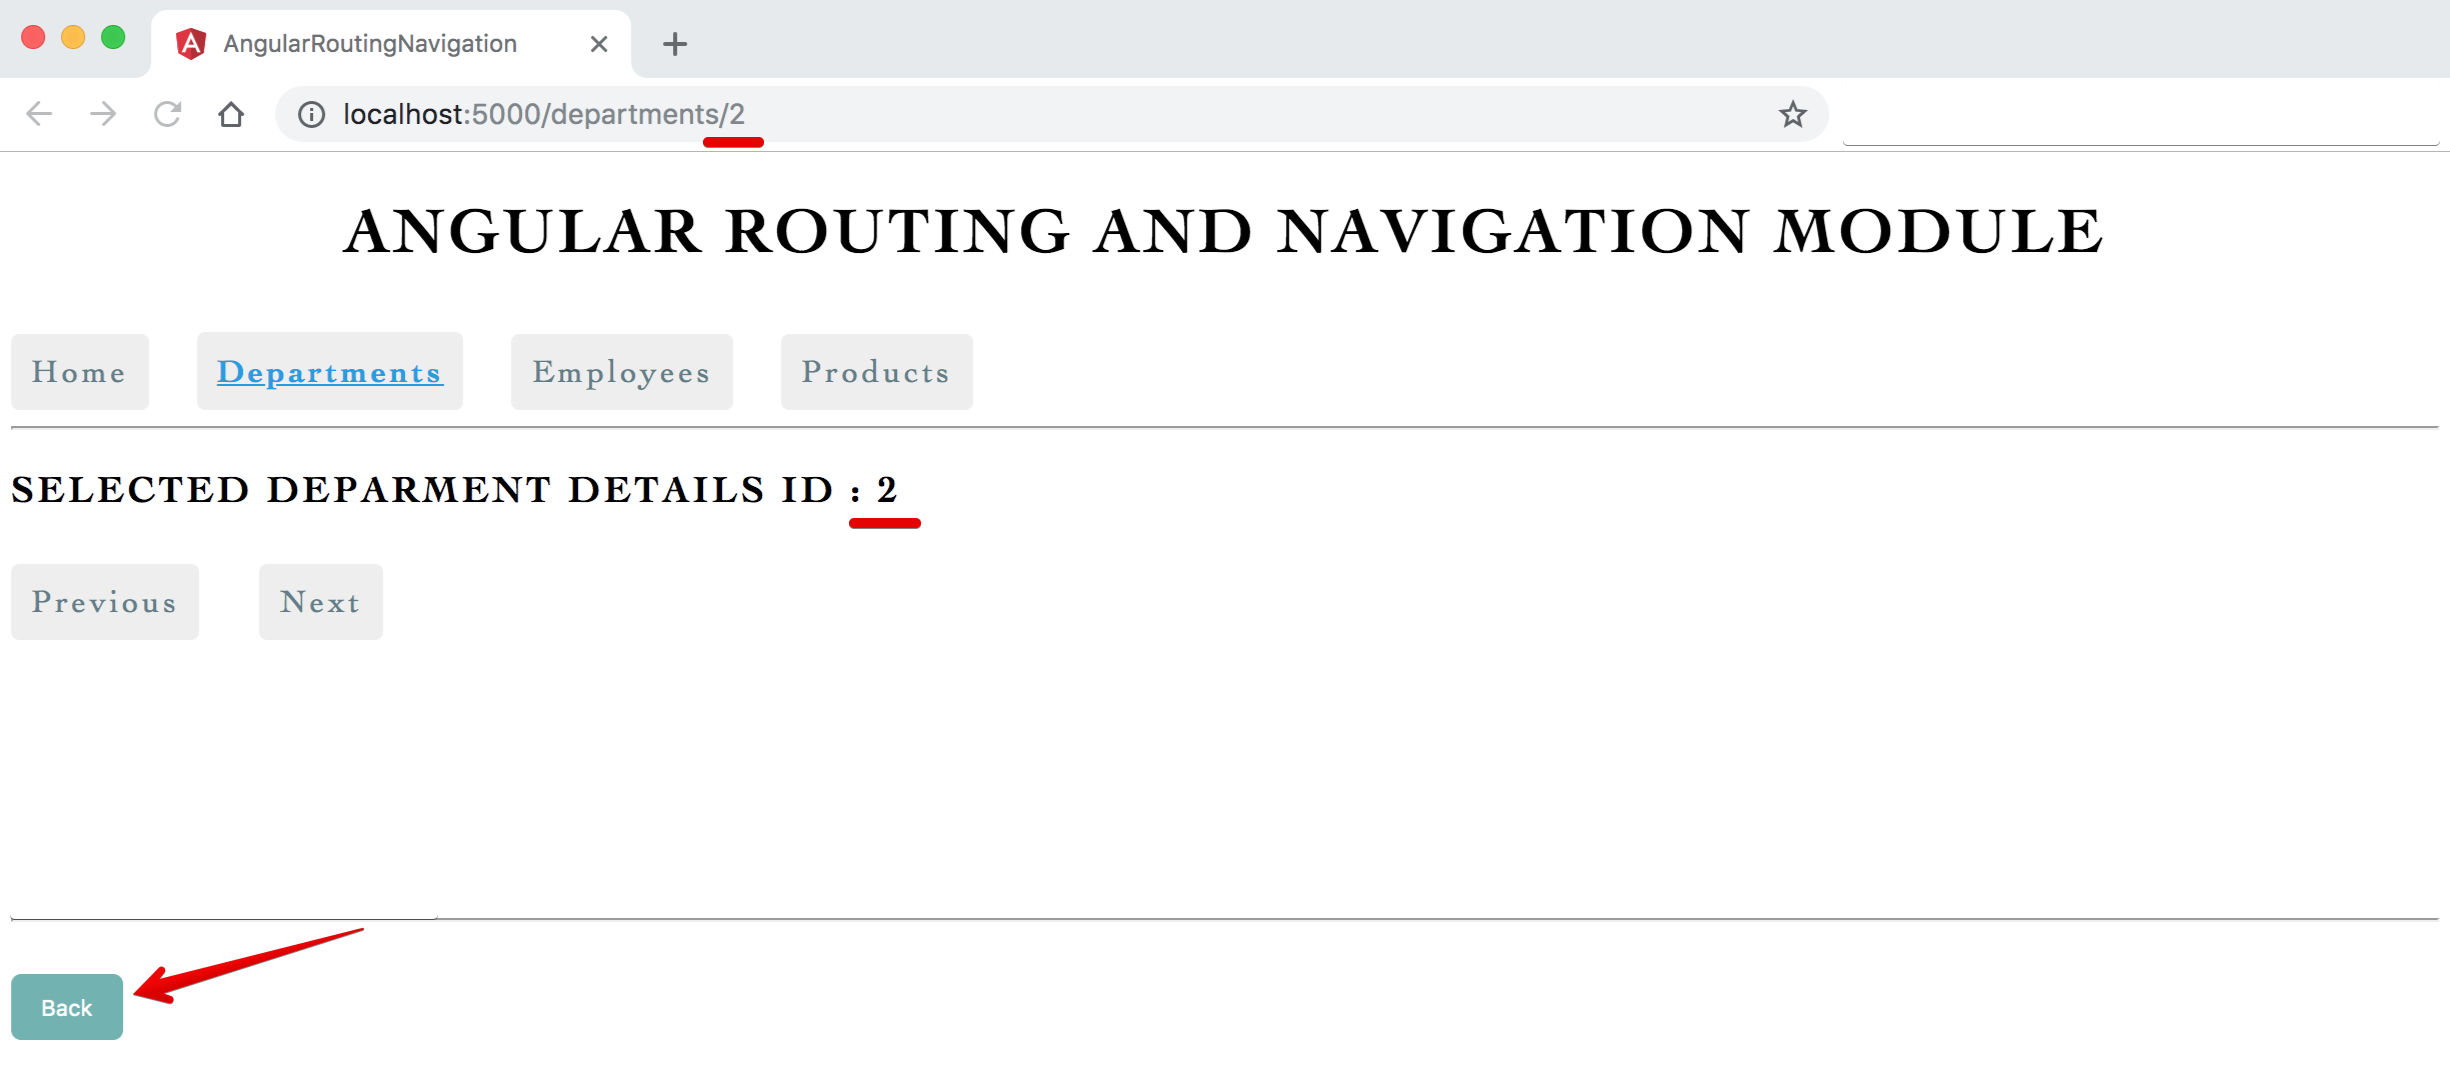
Image - Output - Optional Route Parameters Back
Image - Output - Optional Route Parameters Selected List
Absolute pathstarts withforward slash /(paths like/nameare absolute/fixed path)Absolute/Fixed paths are not flexibleas if file/route name changes we need to make change at all occurrences/places in an application- Its advisable to use relative path/navigation with
relativeToproperty
Syntax & Example: department-list.component.ts
/* on department click */
onLinkSelect(curDepartment) {
  console.log('onLinkSelect curDepartment');
  // navigate ( path, route parameter)
  // this.router.navigate(['departments', curDepartment.id]);

  // relative path, links parameter array, relativeTo property
  this.router.navigate([curDepartment.id], { relativeTo: this.activatedRoute }); // to the current route  append the department id and navigate to that URL
}
Syntax & Example: department-details.component.ts
// back button - method to handle optional parameters and show current department highlighted
goToDepartments() {
  console.log('goToDepartments clicked');
  let currentSelectedId = this.selectedDepartmentId ? this.selectedDepartmentId : null
  //sending optional parameter - used for some logic
  //this.router.navigate(["/departments", { id: currentSelectedId, test: 'test-param-value' }])

  // relative path, links parameter array - {key:value}, {relativeTo property}
  // we can pass multiple parameters as per our requirements
  // this.router.navigate(['../', { id: currentSelectedId, name: 'Hello'  }]);
  this.router.navigate(['../', { id: currentSelectedId }], { relativeTo: this.activatedRoute });  // to the current route  append the department id and navigate to that URL
}- In application, some routes/path/links/pages viewed only within other routes - in such scenario we can create and use child routes in app-routing.module.ts
- Like inside department-details component we need to show links/pages like: Overview, Contact, Pictures etc.
- Create child components with angular cli command:
department-overview- ng g c department-overviewdepartment-contact- ng g c department-contact
- Change/add app-routing.module.ts with
childrenproperty - Inside
parent component department-detailscreate<router-outlet>as a container area for loading pages, also create buttonsoverviewandcontactto navigate to component/pages/route<button (click)="showOverview()">Overview</button>
Syntax & Example: app-routing.module.ts
import { NgModule } from '@angular/core';
import { Routes, RouterModule } from '@angular/router';

import { DepartmentContactComponent } from './components/department-contact/department-contact.component';
import { DepartmentDetailsComponent } from './components/department-details/department-details.component';
import { DepartmentListComponent } from './components/department-list/department-list.component';
import { DepartmentOverviewComponent } from './components/department-overview/department-overview.component';
import { EmployeeListComponent } from './components/employee-list/employee-list.component';
import { HomeComponent } from './components/home/home.component';
import { ProductListComponent } from './components/product-list/product-list.component';
import { WildcardPagenotfoundComponent } from './components/wildcard-pagenotfound/wildcard-pagenotfound.component';

const routes: Routes = [
  // default path
  // { path: '', component:DepartmentListComponent},
  { path: 'home', component: HomeComponent },
  { path: '', redirectTo: 'home', pathMatch: 'full' },
  { path: 'departments', component: DepartmentListComponent },
  {
    path: 'departments/:id', component: DepartmentDetailsComponent,
    children: [
      { path: 'overview', component: DepartmentOverviewComponent },
      { path: 'contact', component: DepartmentContactComponent },
    ]
  },
  { path: 'employees', component: EmployeeListComponent },
  { path: 'products', component: ProductListComponent },
  { path: '**', component: WildcardPagenotfoundComponent }
];

@NgModule({
  imports: [RouterModule.forRoot(routes)],
  exports: [RouterModule]
})
export class AppRoutingModule { }

// to store all routing component and avoid importing/writing duplicate list of components in app.routing.module / app.module.
// create an array of all routing components export it then import it in app.module.ts
export const RoutingComponents = [
  DepartmentContactComponent,
  DepartmentDetailsComponent,
  DepartmentListComponent,
  DepartmentOverviewComponent,
  EmployeeListComponent,
  HomeComponent,
  ProductListComponent,
  WildcardPagenotfoundComponent,
]
Syntax & Example: department-details.component.html
<h3>Selected Deparment Details ID : {{ selectedDepartmentId }} </h3>
<br />
<a (click)="goPrevious()" class="link-sub">Previous</a>
<a (click)="goNext()" class="link-sub">Next</a>
<button (click)="showOverview()">Overview </button>
<button (click)="showContact()">Contact</button>
<router-outlet></router-outlet>
<br /> <br />
<hr />
<br />
<!-- // back button - method to handle optional parameters and show current clicked department highlighted -->
<button (click)="goToDepartments()" class="button-sub">Back</button>Syntax & Example: department-details.component.ts
import { Component, OnInit } from '@angular/core';
import { ActivatedRoute, Router, ParamMap } from '@angular/router';

@Component({
  selector: 'app-department-details',
  templateUrl: './department-details.component.html',
  styleUrls: ['./department-details.component.css']
})
export class DepartmentDetailsComponent implements OnInit {

  // to hold the currently passed id parameter
  public selectedDepartmentId;

  constructor(private activatedRoute: ActivatedRoute, private router: Router) { }

  ngOnInit() {
    // read the route parameter

    // snapshot approach
    // console.log(this.activatedRoute.snapshot.paramMap);
    // let routeParamId = parseInt(this.activatedRoute.snapshot.paramMap.get('id'));
    // this.selectedDepartmentId = routeParamId;

    // paramMap Observable approach
    this.activatedRoute.paramMap.subscribe((params: ParamMap) => {
      let id = parseInt(params.get('id')); // let id = Number(params.get('id'))
      this.selectedDepartmentId = id;
    })
  }

  /* Previous/Back button click */
  goPrevious() {
    let previousId = this.selectedDepartmentId - 1;
    this.router.navigate(['/departments', previousId]);
  }

  /* Next button click */
  goNext() {
    let nextId = this.selectedDepartmentId + 1;
    this.router.navigate(['/departments', nextId]);
  }

  // back button - method to handle optional parameters and show current department highlighted
  goToDepartments() {
    console.log('goToDepartments clicked');
    let currentSelectedId = this.selectedDepartmentId ? this.selectedDepartmentId : null
    //sending optional parameter - used for some logic
    //this.router.navigate(["/departments", { id: currentSelectedId, test: 'test-param-value' }])

    // relative path, links parameter array - {key:value}, {relativeTo property}
    // we can pass multiple parameters as per our requirements
    // this.router.navigate(['../', { id: currentSelectedId, name: 'Hello'  }]);
    this.router.navigate(['../', { id: currentSelectedId }], { relativeTo: this.activatedRoute });  // to the current route  append the department id and navigate to that URL
  }

  /* on overview button click */
  showOverview() {
    this.router.navigate(['overview'], { relativeTo: this.activatedRoute })
  }

  /* on contact button click */
  showContact() {
    this.router.navigate(['contact'], { relativeTo: this.activatedRoute })
  }

}
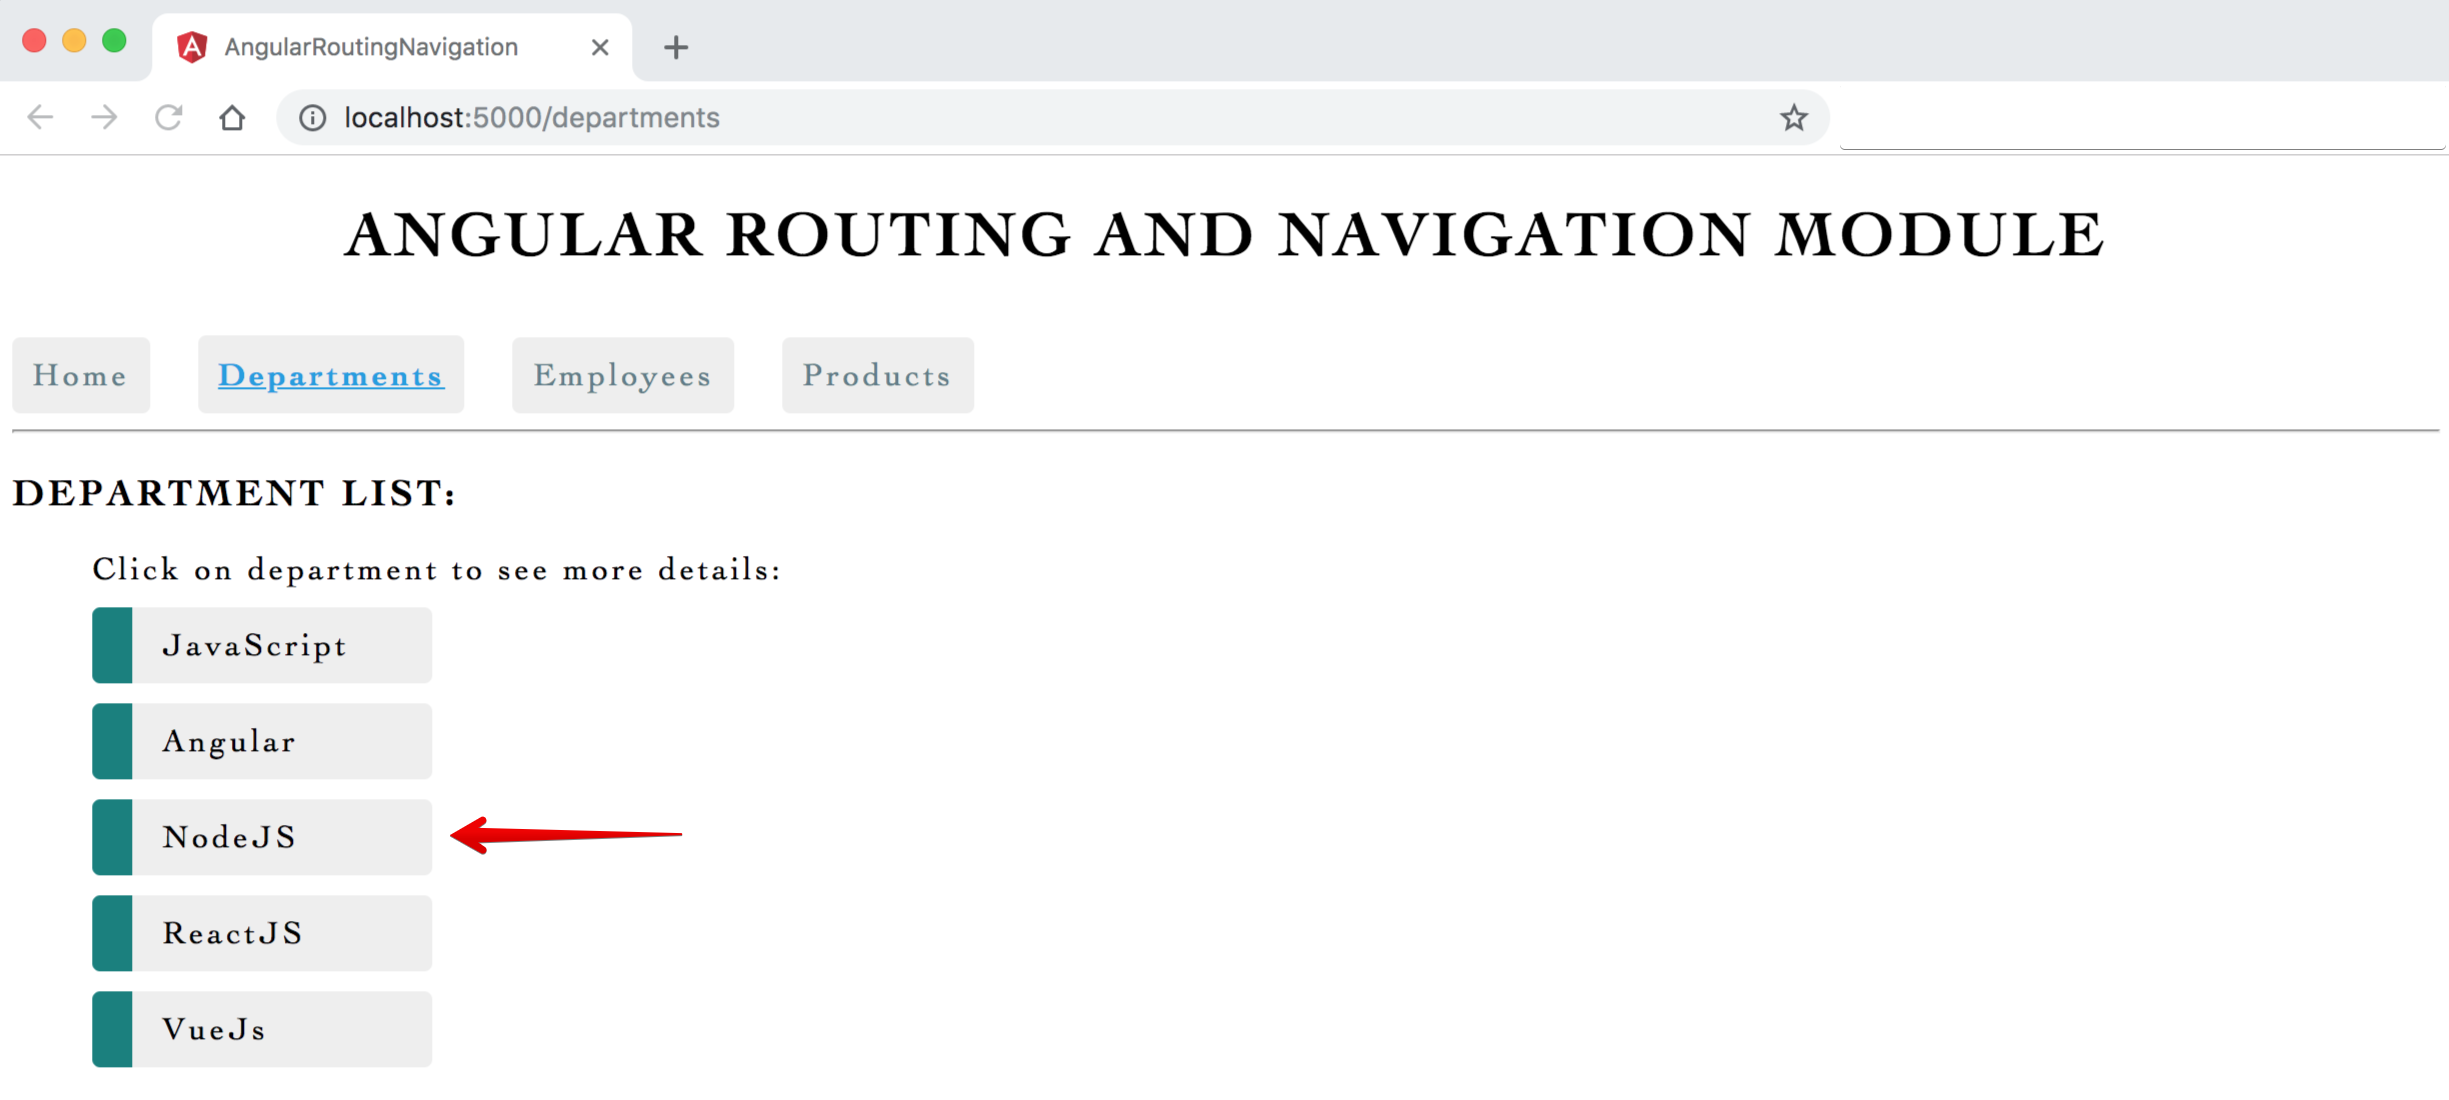
Image - Output - Department List
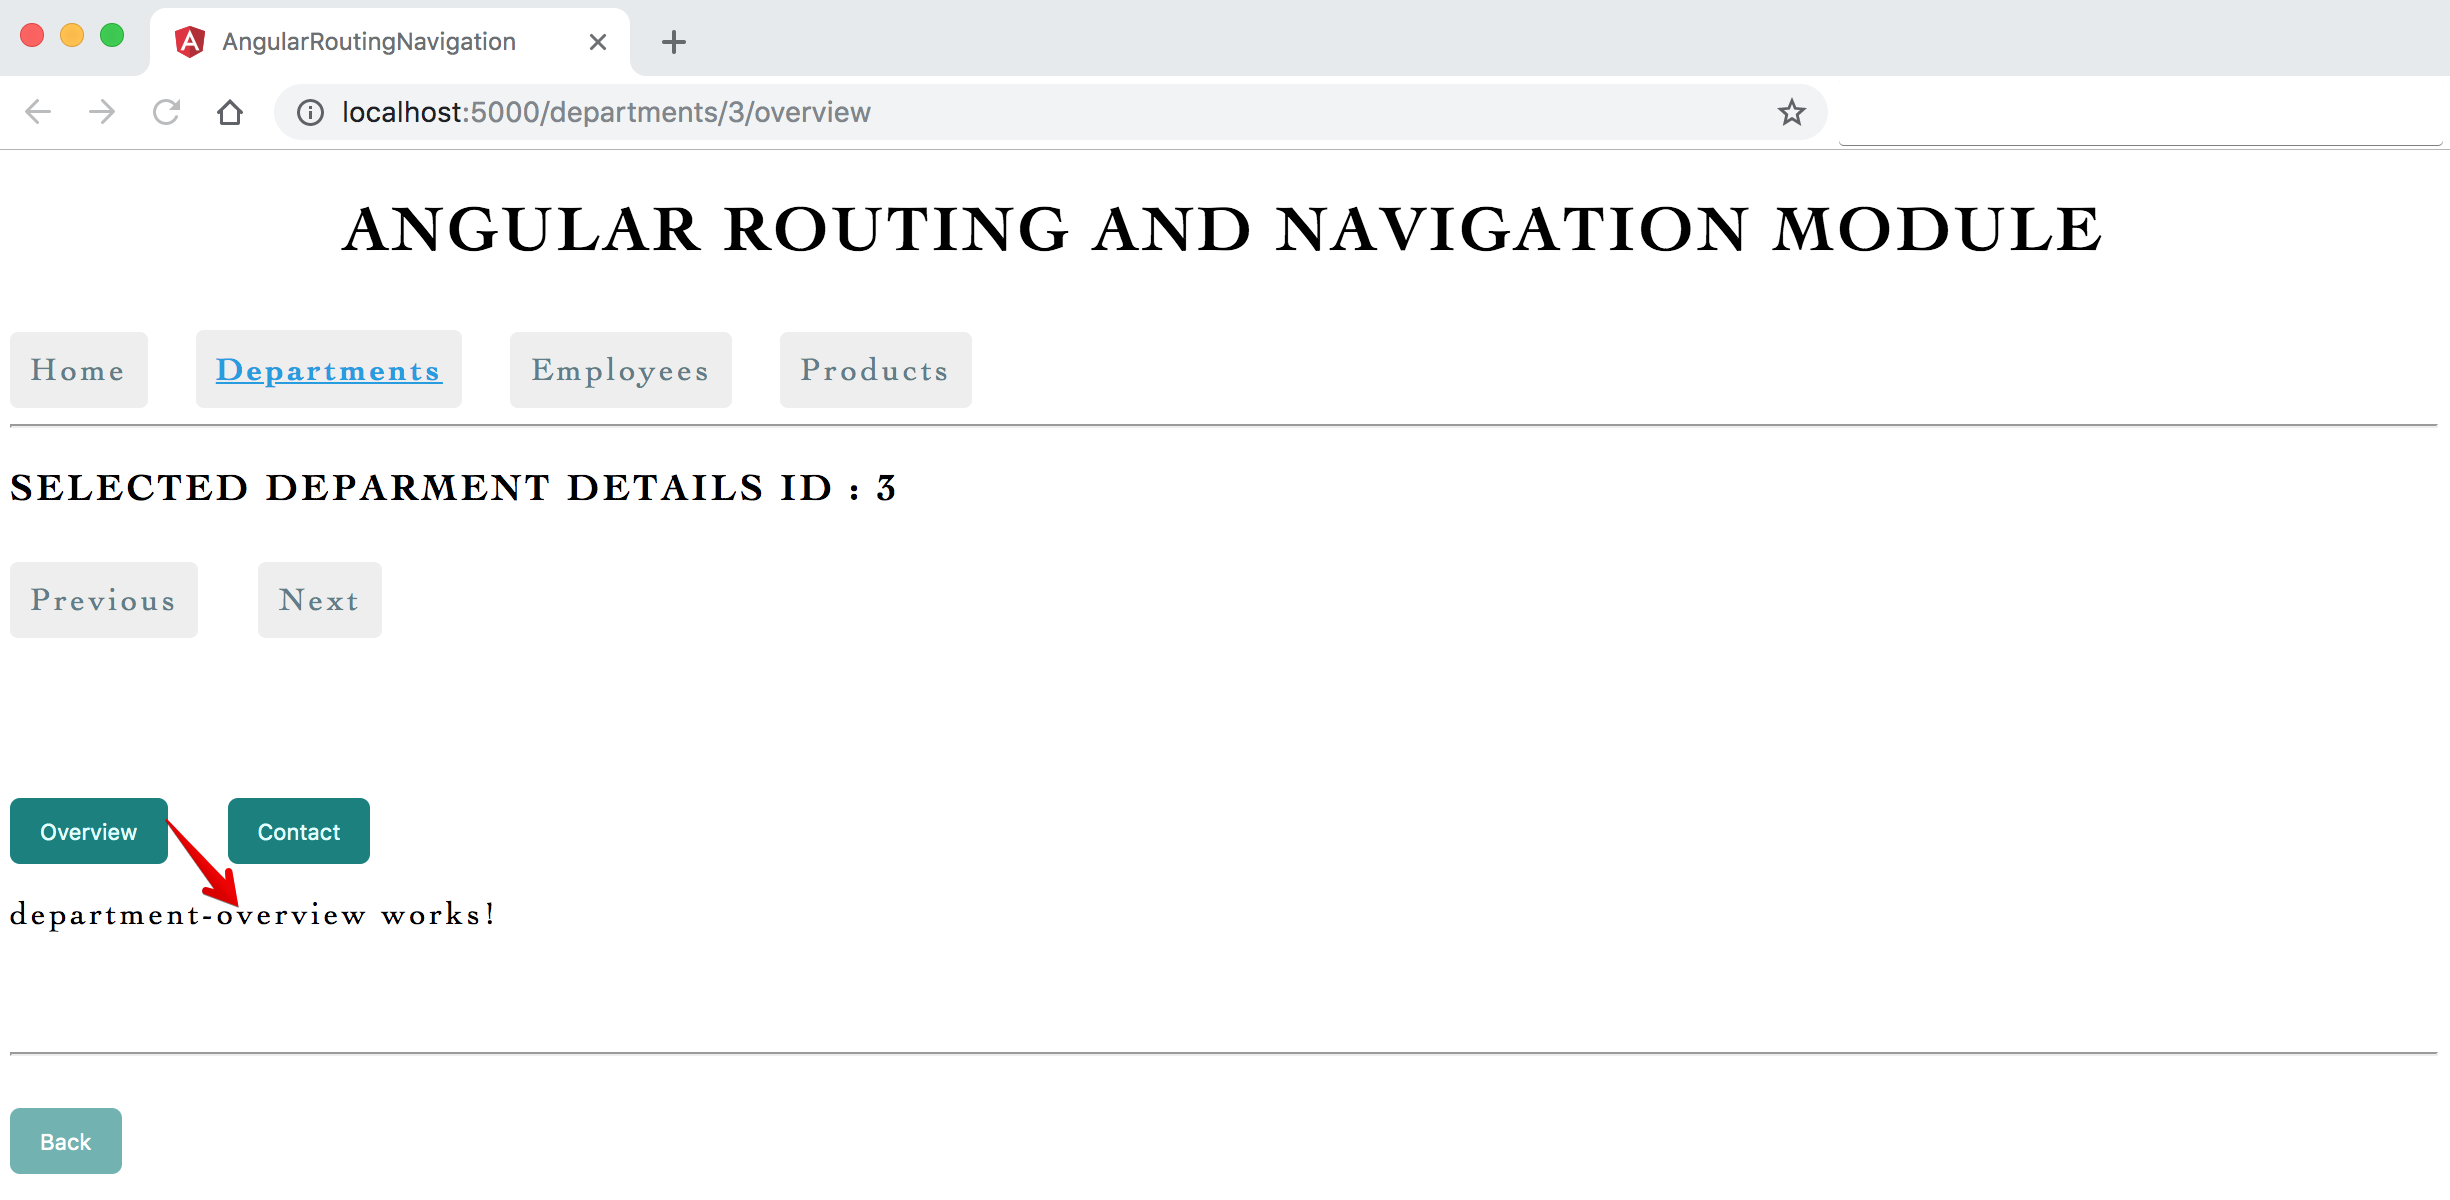
Image - Output - Child Route Department Overview
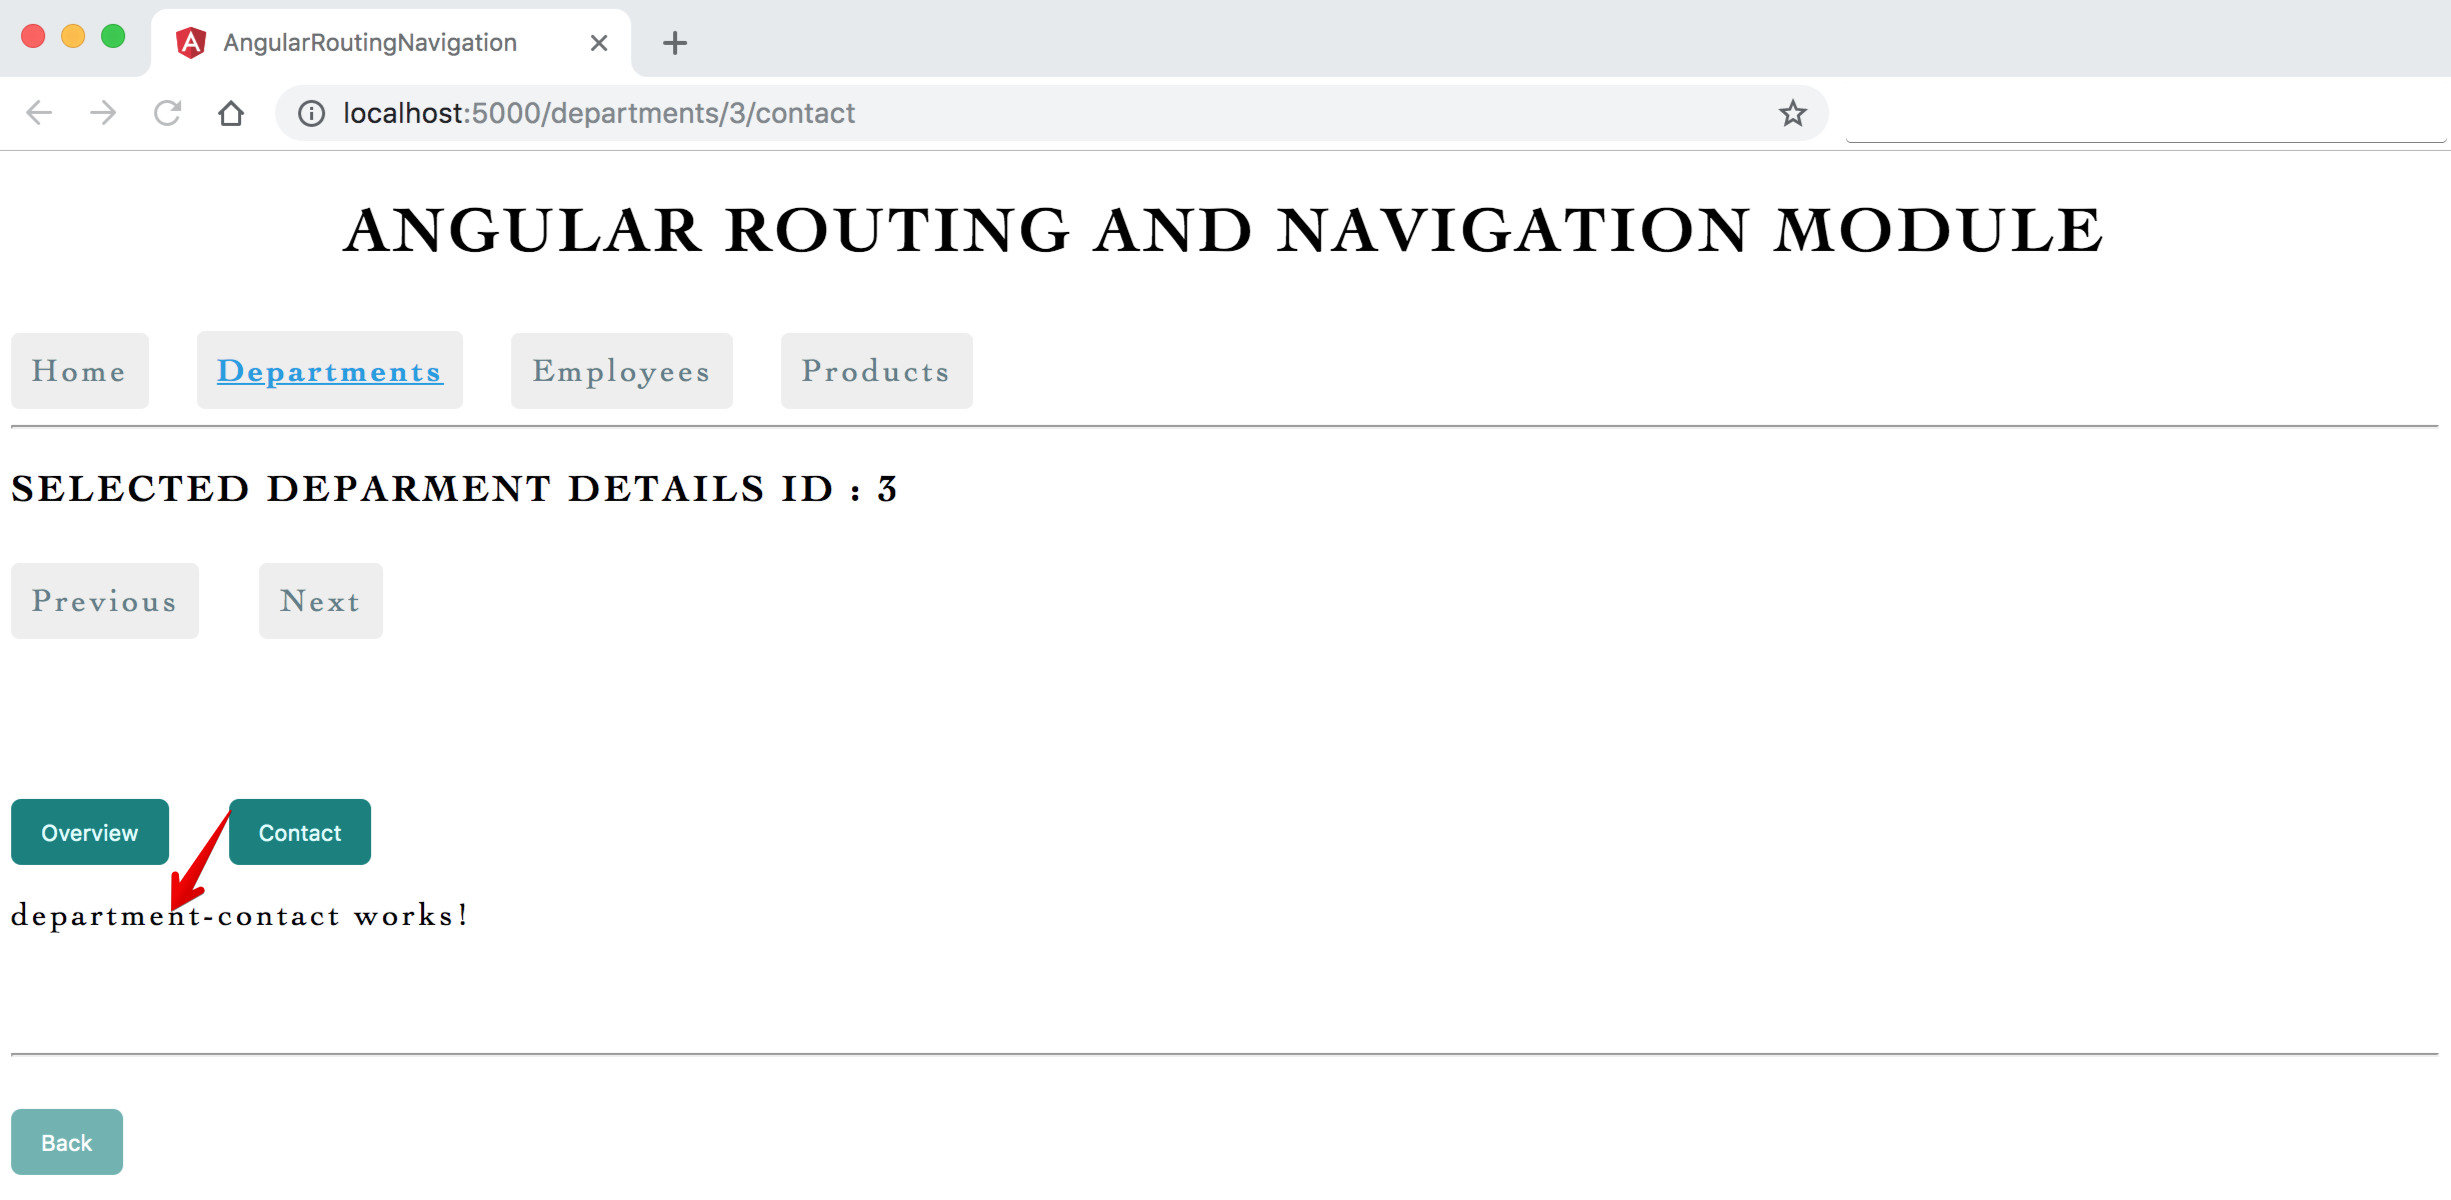
Image - Output - Child Route Department Contact
Image - Output - Optional Route Parameter Show Selected Department highlighted

