This repository includes a collection of Ansible playbooks and instructions to provisions a Single Node OpenShift cluster (SNO) on Linux KVM on IBM Cloud using the Red Hat Assisted Installer Service.
The playbooks provision a KVM host, a SNO guest and a helper guest that provides DNS and DHCP to the SNO guest. Outside of the KVM host the SNO instance is made accessible via HaProxy running on the KVM host. The following diagram shows the resulting architecture.
 Figure 1. Architecture
By using a developer subscription of OpenShift and a KVM host with a free OS, this allows you to spin up a temporary environment for running OpenShift for just the hourly cost of the KVM host VSI.
The Ansible playbooks utilized here are wrapped in a docker container for portability.
Note: All input files (parameters to the playbooks) and output files (generated by the playbooks) are mounted to your local file system. This allows you to rerun the container without losing state.
| VM/VSI | VCPU | RAM | Primary Disk | Secondary Disk | OS | Notes |
|---|---|---|---|---|---|---|
| KVM VSI | 16 | 64Gb | 100Gb | 600GB | Rocky Linux 8.7 | Second disk is used for VM guest storage |
| SNO KVM Guest | 8 | 32Gb | 120GB | 250GB | CoreOS | Second disk is used for PVC storage |
The source code for the Ansible playbooks and the Dockerfile for building the image used to run them are available in the companion repo Spin up a Single Node OpenShift Cluster on IBM Cloud - Build .
Note: This is provided for "power users" of the playbooks who might want to go beyond the setting of exposed parameters and delve into (and possibly modify) the Ansible code .
The following prerequisites are required:
i. Install either a recent podman or docker version capable of running x86-64 container images on your local machine.
ii. Install the command line Git client if you don't already have it installed.
iii. Clone this repo
   git clone https://github.com/djccarew/sno-on-ibm-cloud-vpc-ansible-scripts.git
   cd sno-on-ibm-cloud-vpc-ansible-scripts
i. If you already have an API Key for your IBM Cloud account, go to ii. To generate an API Key see the instructions here. Save the generated API key for Step 2.
ii. If you have an existing OpenShift subscription skip to step iii. If not you can get a free Developer one here
iii. Once you have a subscription, download the pull secret here.
Note: make sure you use the
Downloadoption and not thecopyoption. Thecopyoption removes the double quotes, which will be considered invalid JSON and cause the playbooks to fail.
iv. Make sure the downloaded file is called pull-secret.txt and copy it into the auth sub-folder of the root directory of your local copy of this GitHub repo.
v. Go to to the OpenShift Cluster Manager API Token page here .
vi. Copy the token to the clipboard and paste into a temporary file . You'll need the token for Step 2.
i. Create your parameter file by running the following in the same terminal window that you used to clone this GH repo. .
cp params/all.example params/all.yml
ii. Edit the file params/all.yml and set the appropriate values.
Note: The table below gives more details about the required and optional parameters.
| Parameter | Type | Description | Required | Default Value |
|---|---|---|---|---|
| ic_api_key | String | The api key described in Step 1 | Yes | None |
| rh_api_token | String | The api token described in Step 1 | Yes | None |
| name_prefix | String | The prefix used for all IBM Cloud resources provisioned by the playbooks. Suffixes will be added to indicate the type of resource. For example mynameprefix-vpc for a VPC instance and mynameprefix-vsi for a Virtual Server instance etc. |
Yes | None |
| region | String | Short name of IBM Cloud region where VPC resources will be created . e.g. us-south, us-east, eu-gb, jp-tok, au-syd etc | Yes | None |
| zone | String | Short name of IBM Cloud zone with selected region . It is the region short name with a numeric suffix. e.g. us-east-2 or eu-de-1 etc | Yes | None |
| resource_group_name | String | Name of existing IBM Cloud resource group in which VPC resources will be created. | Yes | None |
| sno_cluster_name | String | Name of OpenShift cluster to be used by the Assisted Installer API | Yes | None |
| sno_domain_name | String | Name of OpenShift cluster domain name to be used by the Assisted Installer API . The format should be a valid domain e.g. example.com but it does not have to resolveable via public DNS servers |
Yes | None |
| sno_version | String | OpenShift version to install. Valid values are "4.10" and "4.11" | No | "4.11" |
| setup_odf | Boolean | When set to True a second hard drive will be added to the SNO VM and the ODF LVM Operator wiil be installed. This provides dynamic PVC capability to workloads running on your SNO cluster | No | True |
i. Run the following command to start the container with the Ansible playbooks. The script will find and run podman or docker if either is in your PATH. If you have both, then podman will run.
./launch.sh
Note: If you have customized the Dockerfile and Ansible code in the companion repo Spin up a Single Node OpenShift Cluster on IBM Cloud - Build use the following command instead.
./launch.sh [your custom image name]
ii. Run the following command from the container command prompt to validate the parameters
ansible-playbook validate_parms.yml
You should see an output message that ends with the following
TASK [Success message] *************************************************************************************************************************************************************************************
ok: [localhost] => {
    "msg": "Parameter validation successful"
}
Note: If you get validation errors, fix the offending parameter(s) and rerun the validation playbook.
i. Run the following from the container prompt
ansible-playbook quickstart.yml
Note: In our testing the end to end process from this point takes around 30-45 minutes although your mileage may vary depending on network speed IBM Cloud region etc.
ii. Monitor the progress
The following are some suggestions for monitoring the progress of the install.
-
Progress is displayed by Ansible via the terminal. The longest task is monitoring the Assisted Installer once the install of the cluster has been kicked off. Your screen will look like the following when that task starts to run:
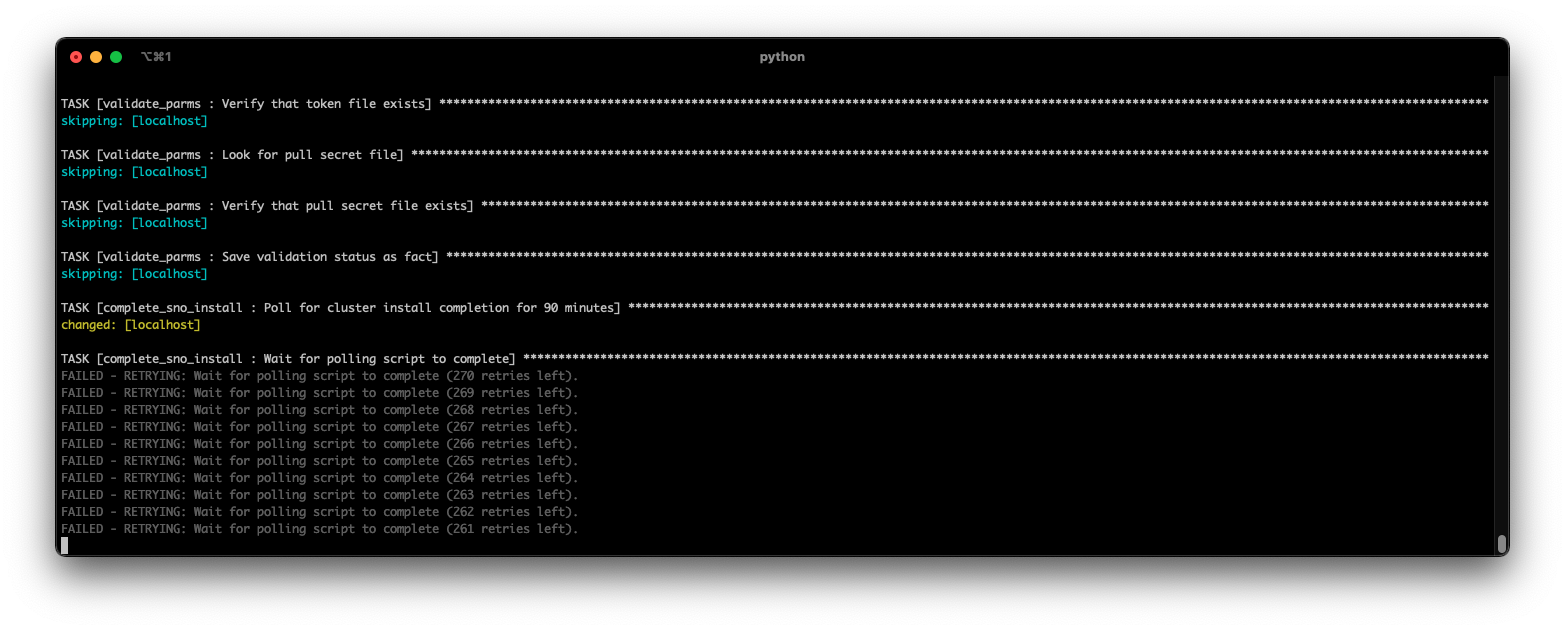 Figure 2. Polling the Assisted Installer
 -
Once the Assisted Installer monitoring task shown above starts, you can monitor the install progress via the Assisted Installer portal to see more granular progress updates by doing the following:
-
Login in to the Assisted Installer portal here :
-
Select the corresponding cluster:
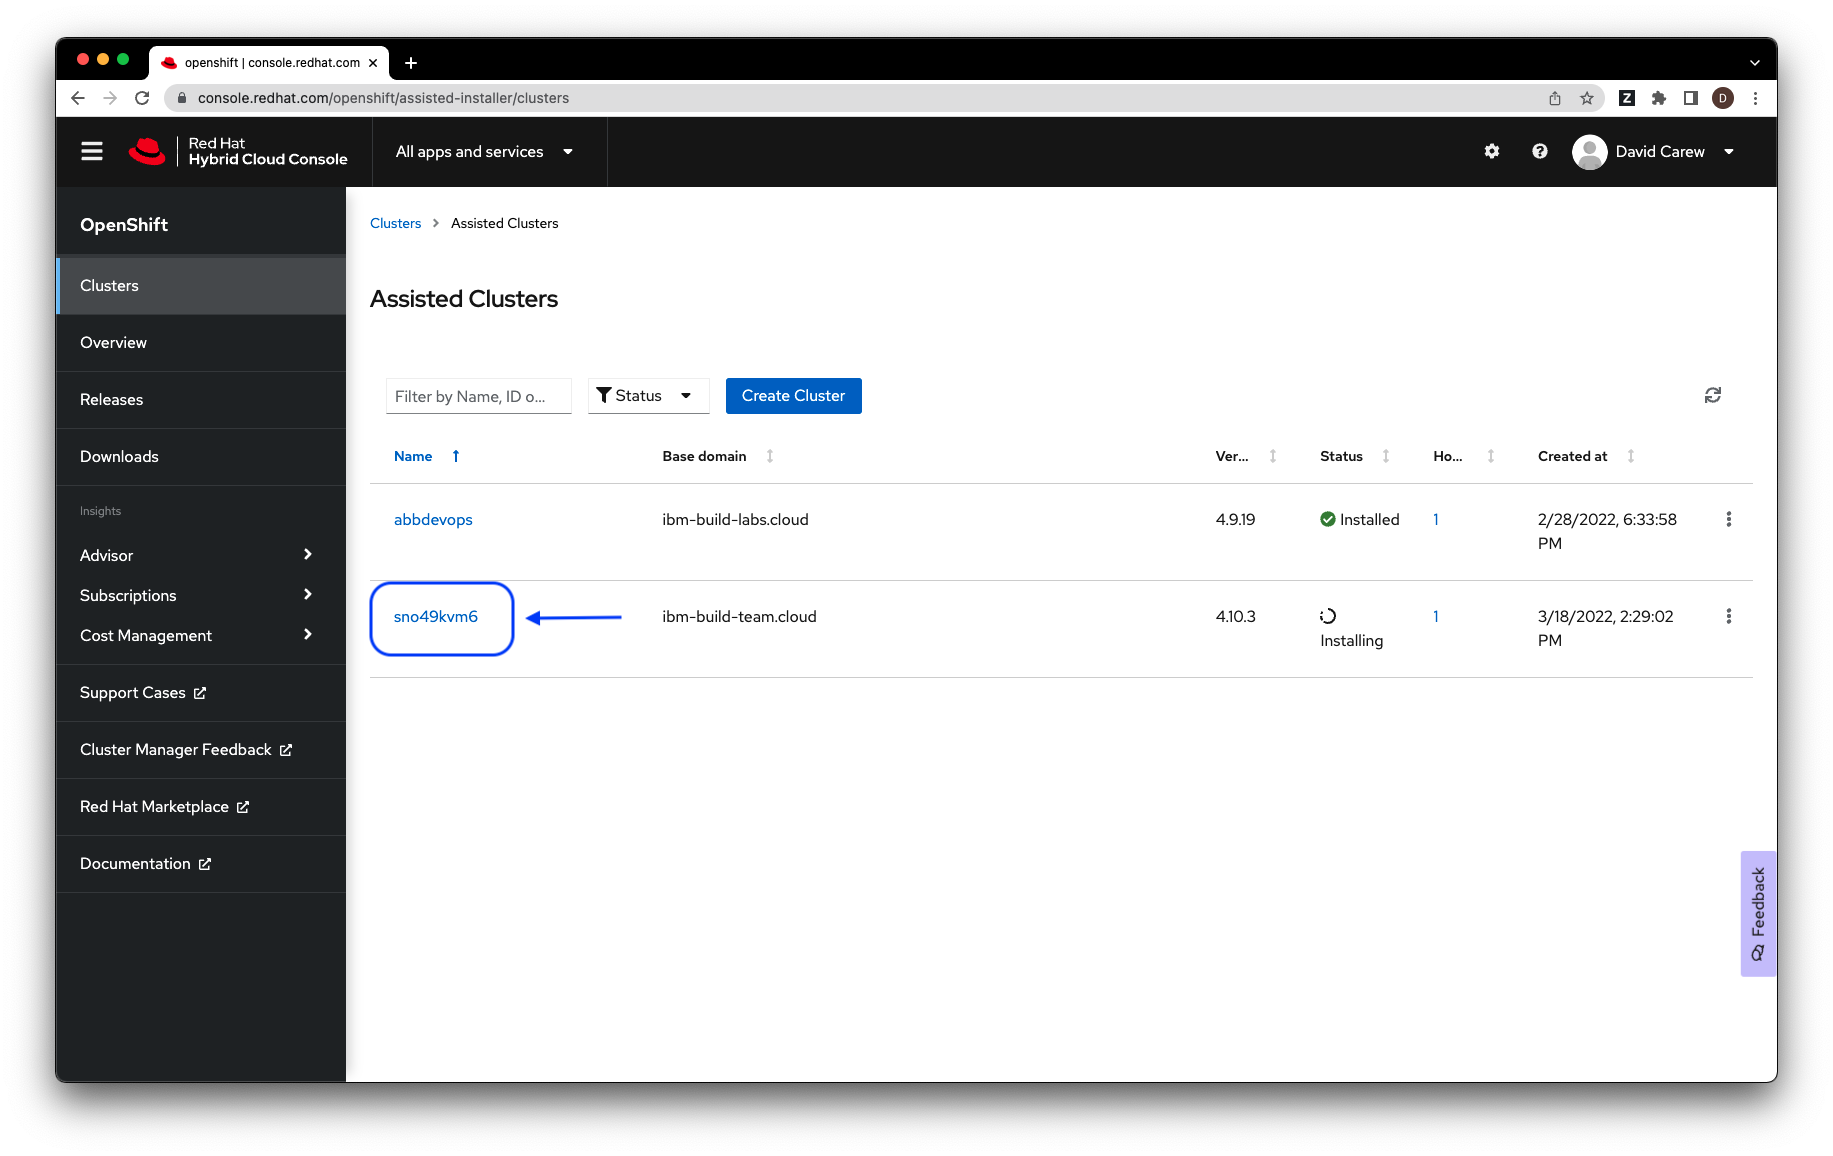 Figure 3. Your clusters
- View the progress. The overall install progress is shown at the right of the screen.
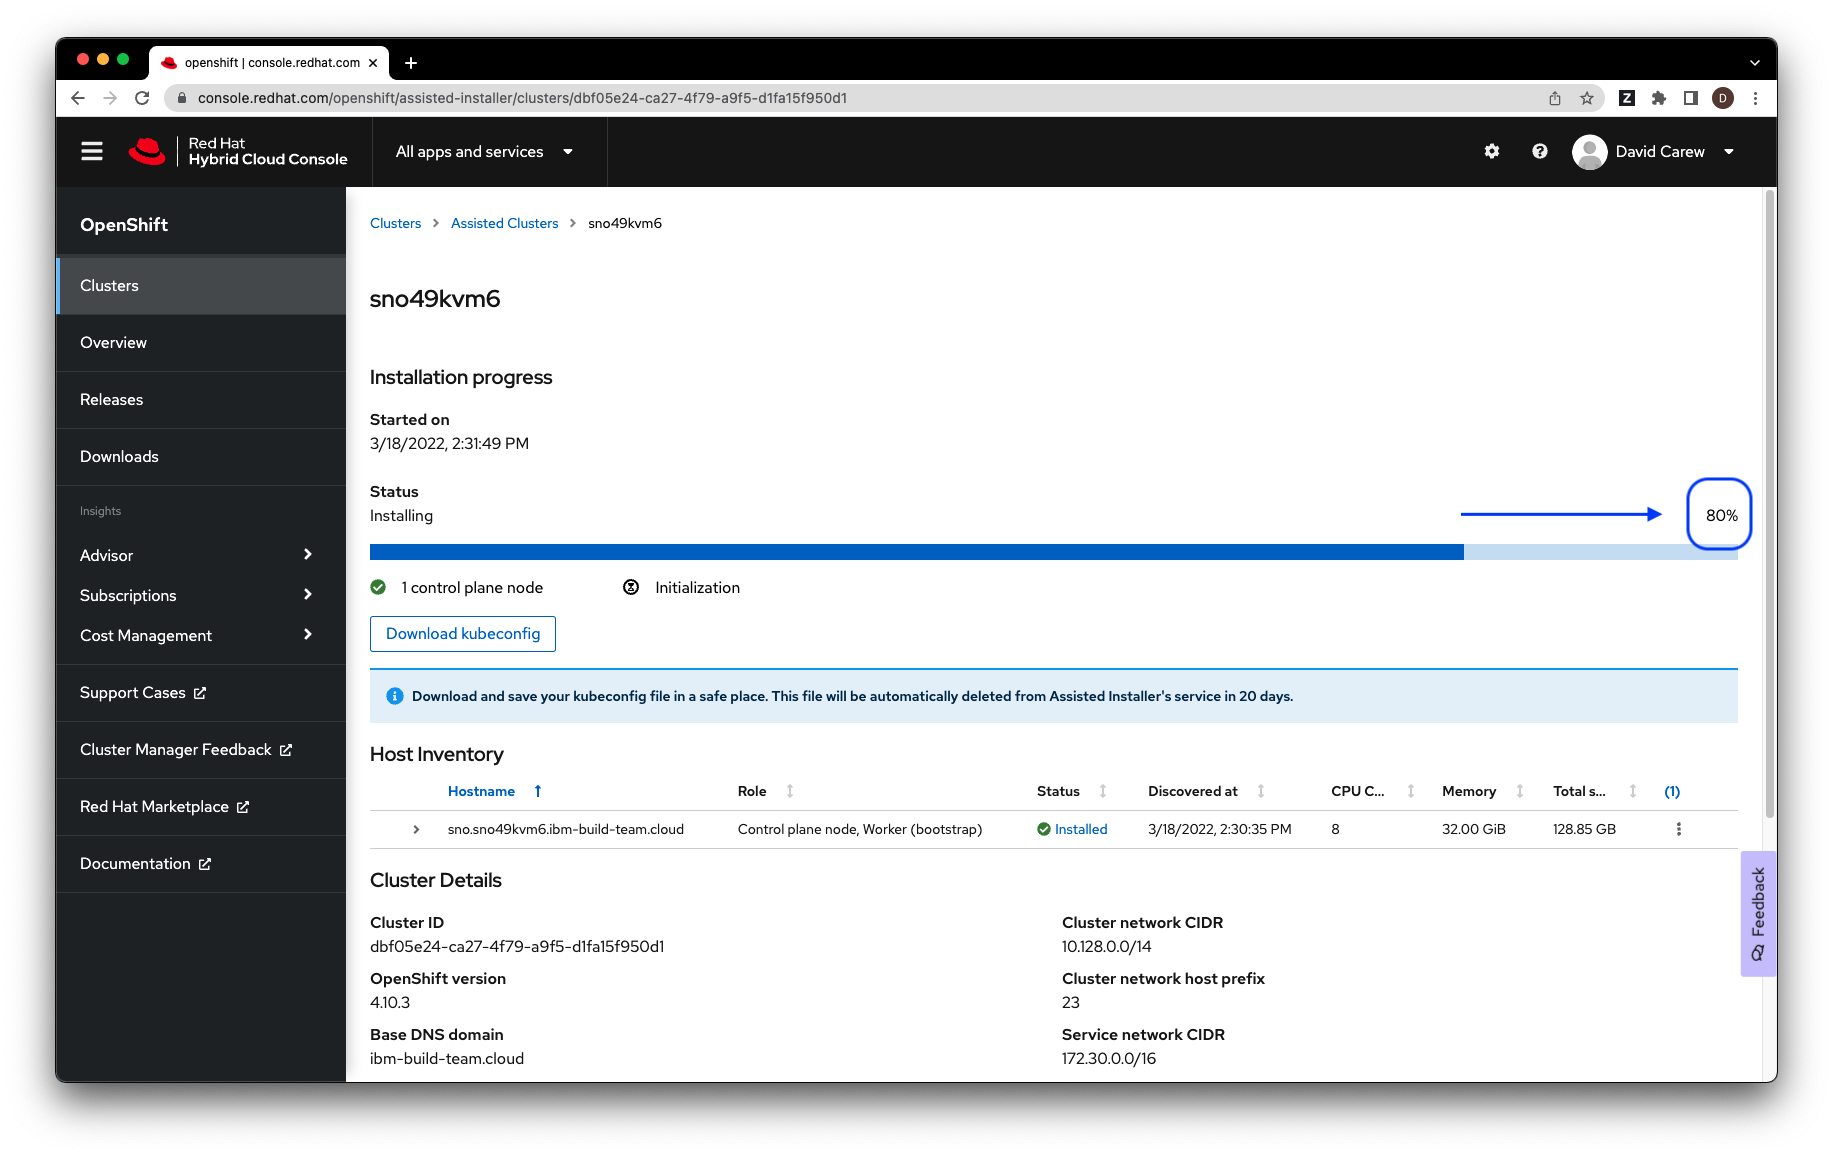 Figure 4. Install progress
 -


iii. Wait for playbook termination
When the playbook completes the install the terminal window will look like the following.
 Figure 5. Access info
To access the KVM host from your local machine setup you need to do the following first:
i. Add the contents of the file auth/[your cluster name].hosts to your local /etc/hosts file
ii. Run the ssh command shown in the output of your terminal following successful termination of the install
iii. Run the following command to set a password for the kvmadmin user
sudo passwd kvmadmin
iv. Access the Cockpit UI for the KVM host using the URL in the output of of your terminal following successful termination of the install. Login in with the user kvmadmin and the password you just set
i. Open the file auth/[your cluster name]-kubeadmin.json to see your cluster credentials
ii. For browser access go to the URL https://console-openshift-console.apps.[your cluster name].[your cluster domain] and login with your cluster credentials.
iii. Access your SNO cluster via SSH with the following command:
ssh -i auth/[your cluster name]-remote-id_rsa core@sno.[your cluster name].[your cluster domain] -p 8022
iv. For access via oc run the following command and provide your cluster credentials when prompted
oc login api.[your cluster name].[your cluster domain]:6443
If you set the setup_odf parameter in your parameter file to True your SNO VM will have been created with an extra unformatted 250Gb disk . You can set this up to be dynamically allocated to your OpenShift workloads with the ODF LVM Operator.
i. Follow the instructions here to install the ODF LVM Operator and to create an ODF LVM Storage Cluster using the OpenShift console
ii. Verify that the pods in the openshift-storage project are running successfully.
 Figure 6. ODF LVM Pods
iii. Navigate to Storage->Storage Classes and verify that a default storage class called odf-lvm-vg1 was created
 Figure 7. Default Storage Class
If you get a timeout error, rerunning the following command will often work.
ansible-playbook quickstart.yaml
Note: The Ansible playbooks are idempotent and will skip over completed tasks allowing you to retry an offending task without repeating any completed tasks.
As long as you still have the same params/all.yml file that you used to install the cluster, you can remove the cluster and all it's components by running the following playbooks from the container prompt:
ansible-playbook teardown_kvm_host.ymlNote: Uninistalling will remove ALL IBM Cloud resources created, including the VPC, subnets, VSI, SSH keys etc