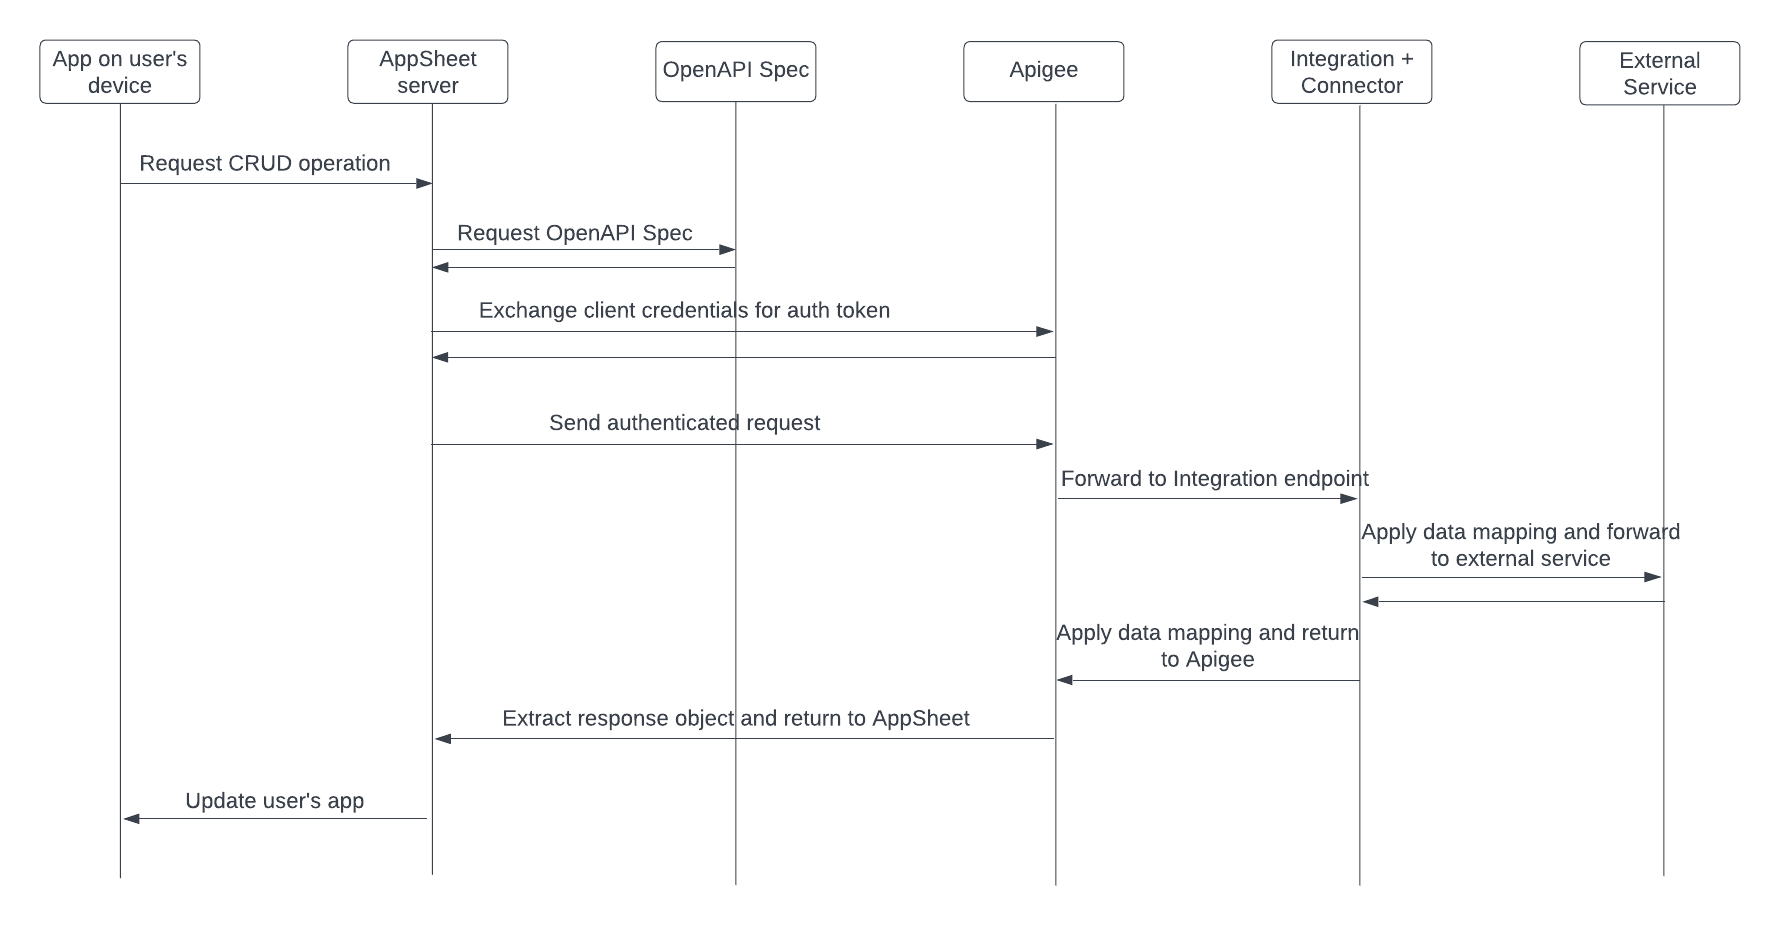
This document describes how to use the Connectors platform as a data source in AppSheet. The following sequence diagram shows the whole process. The sections of this document describe each step. Check out my YouTube channel for a recorded overview of the process.
The recommended soundtrack for this solution is “Ain’t No Mountain High Enough”
GCP Integration Connectors are a set of pre-built connectors designed to provide seamless integration between Google Cloud Platform (GCP) and various enterprise applications, such as SAP, Oracle, and ServiceNow. As an AppSheet data source, Connectors simplify the configuration of two-way communication between AppSheet apps and any supported external service.
In the context of AppSheet, you can think of Connectors as a translator. Both AppSheet and the external service expect API communication in a specific format. Connectors standardize the request and response format between supported services. The app creator can then configure a single mapping with the Connectors platform and use it to integrate with any of the supported services.
See the Integration Connectors reference for a list of supported service
In this solution, Apigee is providing middleware to manage authentication and route requests to the correct integration endpoint. This documentation is based on features available in Apigee X. However, the overall solution could be adapted to work on Apigee Edge as well.
See the product documenation for additional configuration details.
Apigee creates a reverse proxy, which just means Apigee is providing an API endpoint in front of your target endpoint. Kind of like a tinyurl in front of a long url. However, in the case of Apigee, additional policies are applied before the request is routed to the target endpoint.
The overall purpose of Apigee is to
- Manage authentication with AppSheet via OAuth client credentials
- Separately manage authentication with Application Integration platform via attached service account
- Extract details from the request sent by AppSheet
- Use the exctracted details to transform the request into the format required by Application Integration
Click here for an example proxy that can be imported to Apigee
The policies that are applied depend on the type of request and are detailed in the following sections.
- Verify OAuth token
- Remove OAuth token from header
- Generate Google API auth token using attached service account
- Attach Google API auth token to header
- Reformat response before returning to AppSheet
- Add Integration trigger_id to payload
- Extract record ID from path parameter
- Add Integration trigger_id and record ID to payload
- Add Integration trigger_id and record details to payload
- Extract record ID from path parameter
- Add Integration trigger_i, record ID, and records details to payload
- Extract record ID from path parameter
- Add Integration trigger_id and record ID to payload
The OpenAPI spec defines the reverse proxy built in Apigee. It is also a required input when creating the API data source in AppSheet. The OpenAPI specification (OAS) defines a standard, language-agnostic interface to HTTP APIs.
The primary components of the spec are as follows
- Server url: the base path of the Apigee proxy
- Paths: the path suffixes that can be appended to the base path (e.g. /issues/{issue_id})
- Methods: supported HTTP methods (e.g. GET, POST, etc)
- Security: type (e.g. client credentials) and url to request token
- Parameters: format of the API response
The OpenAPI spec must be hosted such that AppSheet can send a request to the url and receive the spec in the response payload. You can use Apigee to host the spec by adding it to an AssignMessage policy.
Example files
AppSheet uses the OAuth client credentials grant type to authenticate with Apigee. In this process, Apigee serves as the identity provider (IdP). The process is described in the documentation page, Implementing the client credentials grant type. The high level steps are as follows:
- Create an Apigee proxy to generate an OAuth token. Note the proxy endpoint. Click here for an example proxy that can be imported to Apigee.
- Specify the endpoint to request an OAuth token in the OpenAPI spec
- In Apigee, create an API product with access to the reverse proxy
- In Apigee, create an app with access to the API product. The app generates a client ID and client secret that can be provided to AppSheet when adding the API data source.
The connection to the Application Integration platform requires a Google API authentication token. An auth token can be generated for a service account. AppSheet does not have a built-in method to generate an auth token based on a service account, but Apigee does.
The steps below describe how to create a service account with the correct permissions and attach it to an Apigee proxy.
- Create a service account in the same GCP project where the Apigee X runtime is depoloyed
- Add the service account from step 1 as a principal in the IAM setting for the GCP project where the Application Integration instance is configured.
- Add the role 'Application Integration Invoker'
- When you deploy the Apigee reverse proxy, enter the service account address (e.g. my-sa@project_name.iam.gserviceaccount.com) in the Service Account box
The Application Integration platform connects Apigee to the target data source via an Integration Connector.
See the Integration Connectors reference for a list of supported services.
The connector provides connectivity to a specific data source. The APIs for each data source have different requirements for the request and response format. The connectors provide a standardized interface by abstracting the unique requirements. This enables you to create an integration design pattern that can be reused with any of the supported Connectors.
The following steps describe the process to create a connection
- Follow the 'Create a connection' steps to get started.
- Select the target service for service-specific directions
- Follow the steps for your specific service to create a connection
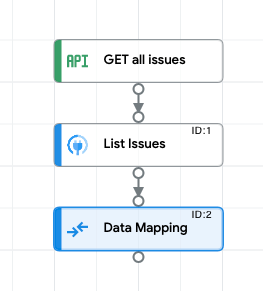
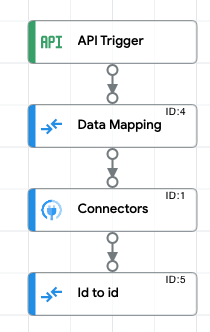
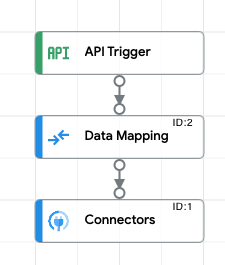
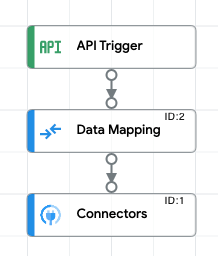
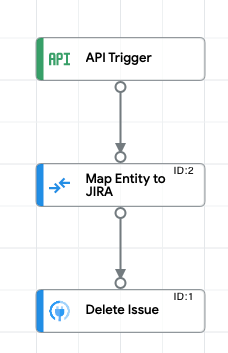
The integration consists of three components:
- API Trigger
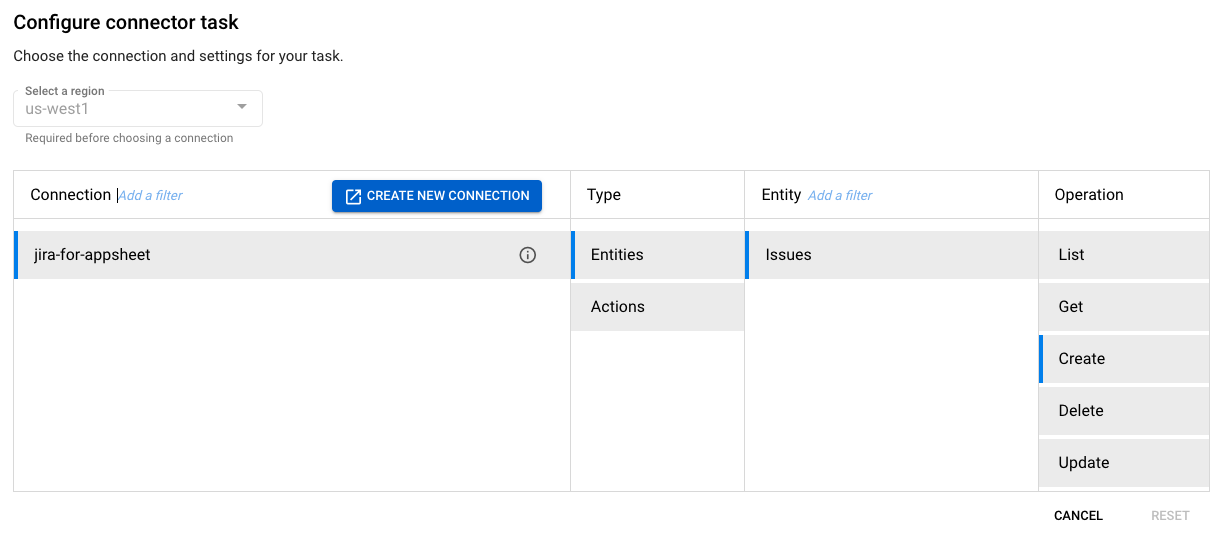
- Connector task
- Data mapping
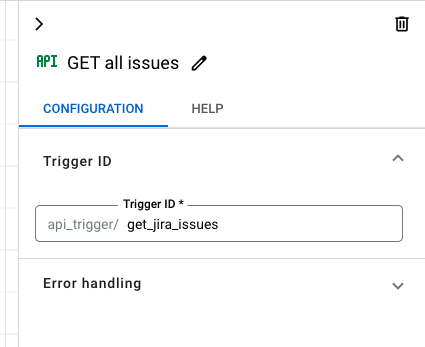
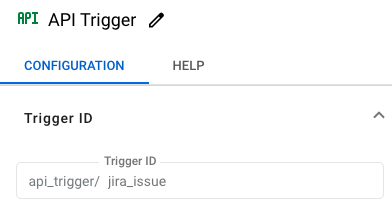
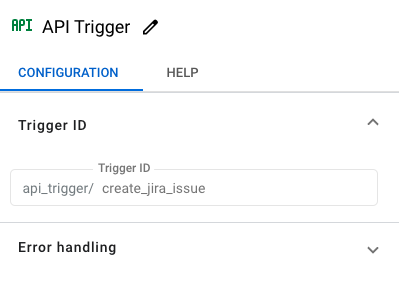
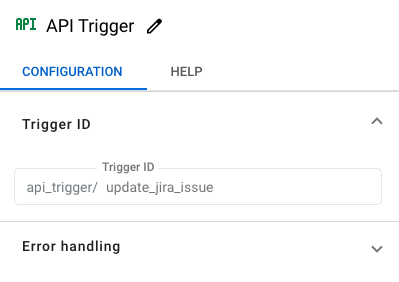
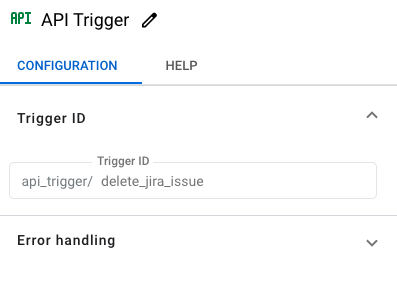
The API Trigger provides a trigger ID so that the Integration can be executed by an API call. Each function should be organized into its own integration with its own API Trigger. To have full CRUD functionality, you need the following integrations
- Fetch all records
- Fetch specific record
- Create new record
- Update existing record
- Delete existing record
Use the API documentation to determine the format for the Integration API's url and request body. The Integration Details section has detailed examples.
The API documentation has a side bar that allows you to test your Integration as well. This is an easier and faster way to ensure everything is working before configuring Apigee.
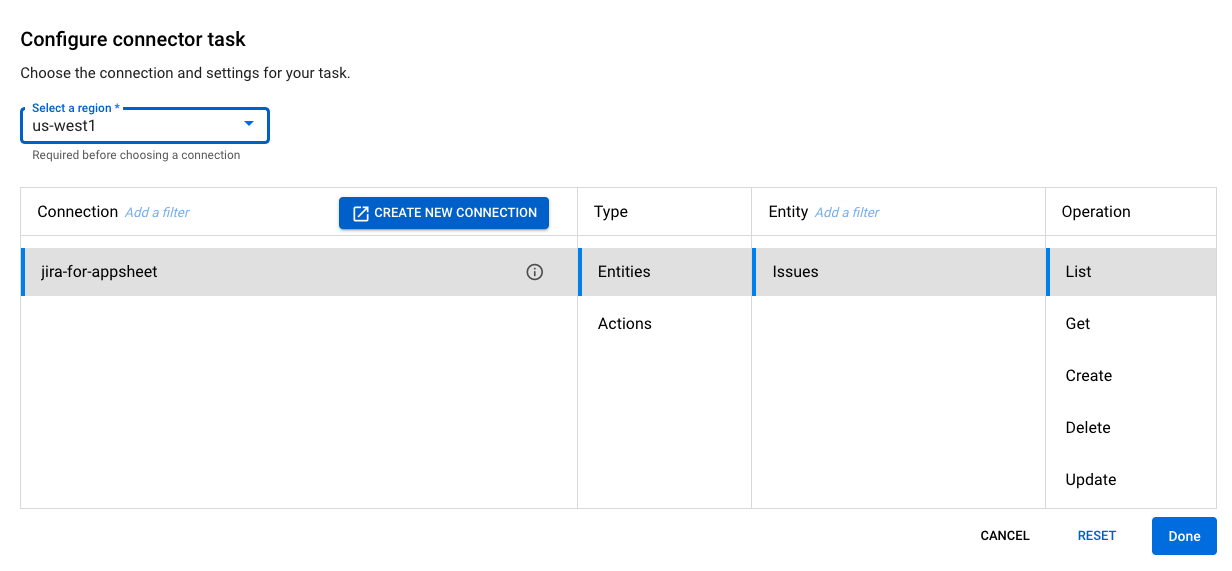
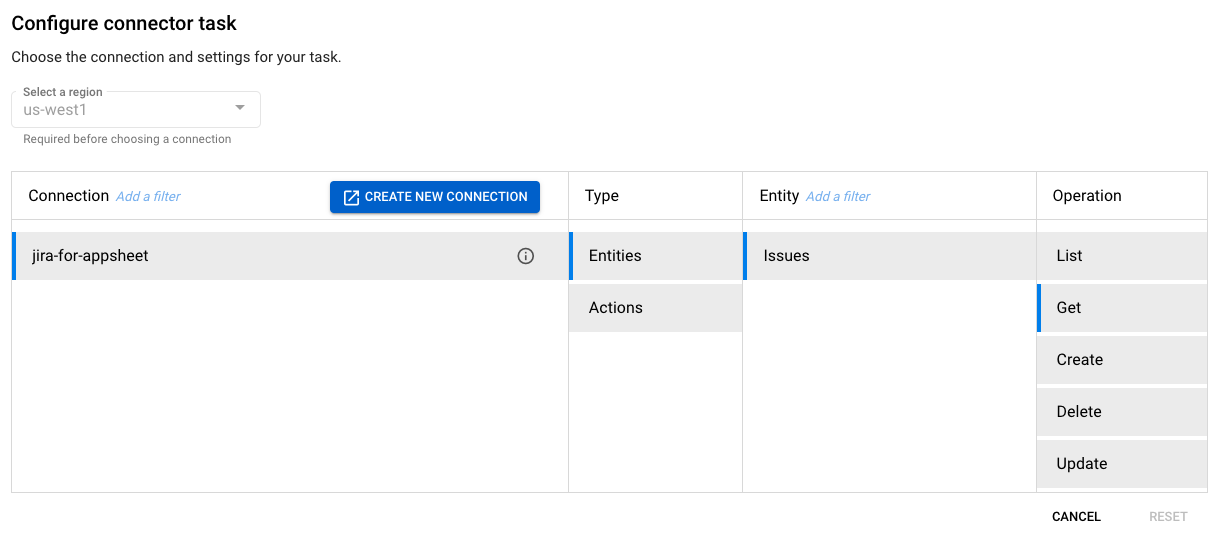
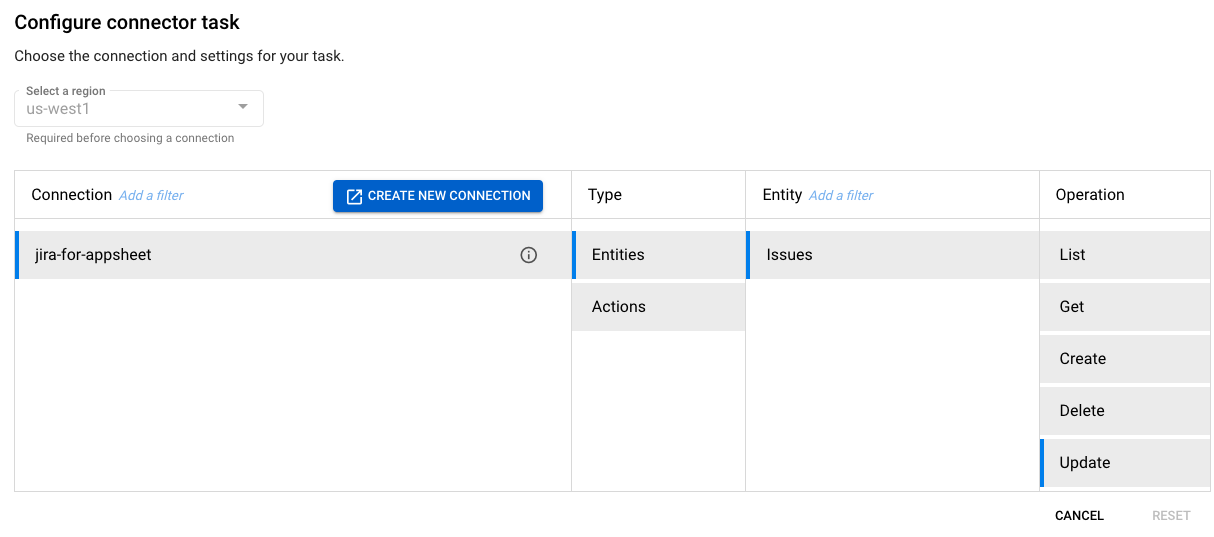
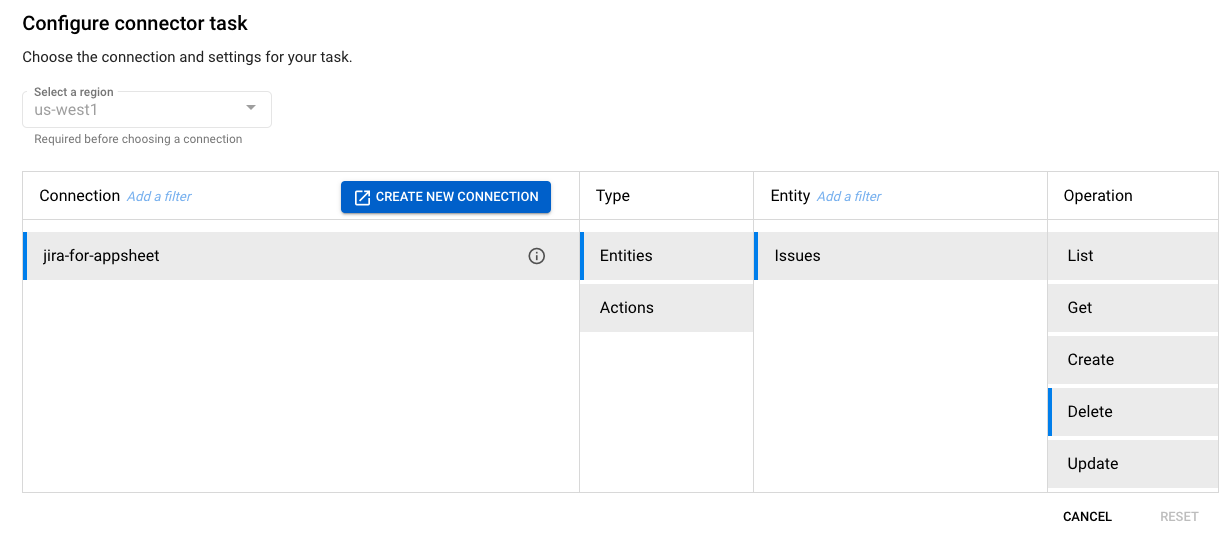
The connector tasks performs the requested operation on the connected service. Commonly supported operations are: List, Get, Create, Delete, and Update.
The data mapping task is used at two points in the integration
- Map the input variables received in the request payload to the input variables expected by the Connector.
- Map the Connector response into the format expected by AppSheet
This section provides screenshots for all the Integration components.
Screenshot of full integration
Screenshot of API trigger
Screenshot of Connector
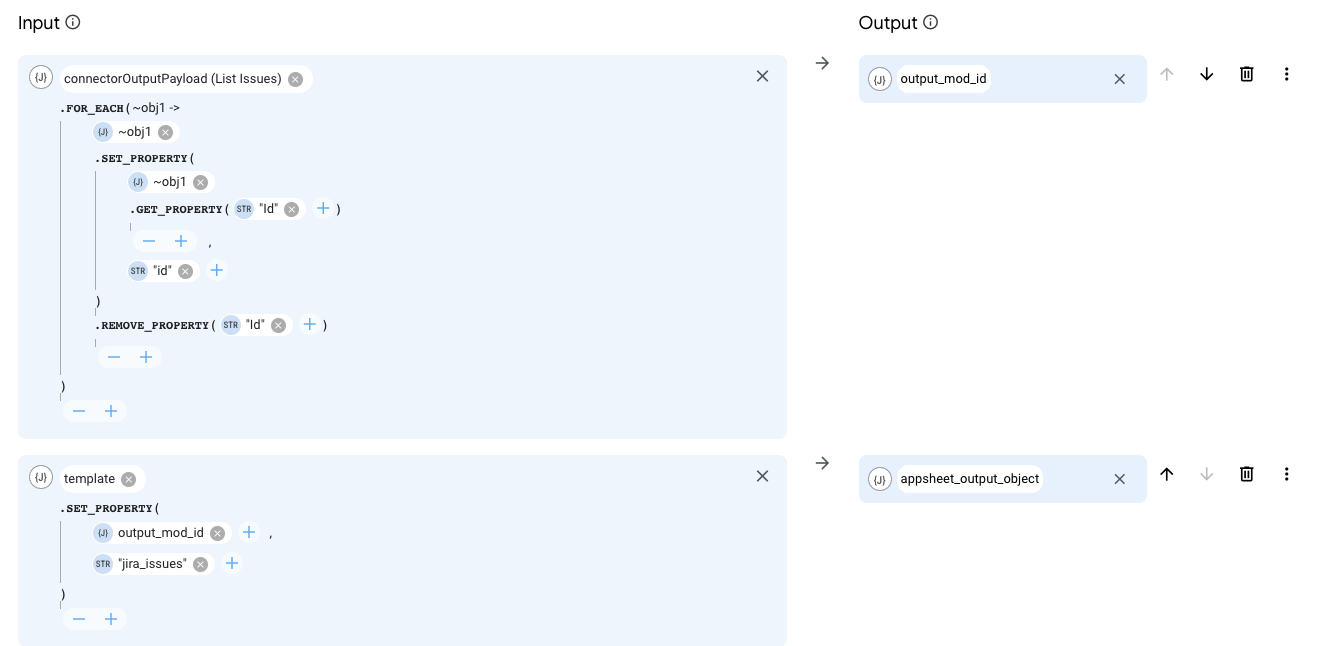
Screenshot of Data Mapping
<Set> block of AssignMessage policy in Apigee
  <Set>
    <Payload contentType="application/json">{"trigger_id":"api_trigger/get_jira_issues"}</Payload>
    <Verb>POST</Verb>
  </Set>
Screenshot of full integration
Screenshot of API trigger
Screenshot of Data Mapping 1
Screenshot of Connector
Screenshot of Data Mapping 2
<Set> block of AssignMessage policy in Apigee
  <Set>
    <Verb>POST</Verb>
    <Payload contentType="application/json">
            {
                "triggerId": "api_trigger/jira_issue",
                "inputParameters": {
                    "issueId": {"stringValue": "{path_params.issue_id}"}
                }
            }
        </Payload>
    <Verb>POST</Verb>
  </Set>
Screenshot of full integration
Screenshot of API trigger
Screenshot of Data Mapping
Screenshot of Connector
<Set> block of AssignMessage policy in Apigee
  <Set>
    <Payload contentType="application/json">
            {
                "trigger_id":"api_trigger/create_jira_issue",
                "inputParameters": {
                    "issueObject": {"jsonValue": '{request.content}'}
                }
            }
        </Payload>
    <Verb>POST</Verb>
  </Set>
Screenshot of full integration
Screenshot of API trigger
Screenshot of Data Mapping
Screenshot of Connector
<Set> block of AssignMessage policy in Apigee
  <Set>
    <Verb>POST</Verb>
    <Payload contentType="application/json">
            {
                "triggerId": "api_trigger/update_jira_issue",
                "inputParameters": {
                    "issueId": {"stringValue": "{path_params.issue_id}"},
                    "issueObject": {"jsonValue": '{request.content}'}
                }
            }
        </Payload>
    <Verb>POST</Verb>
  </Set>
Screenshot of full integration
Screenshot of API trigger
Screenshot of Data Mapping
Screenshot of Connector
<Set> block of AssignMessage policy in Apigee
  <Set>
    <Verb>POST</Verb>
    <Payload contentType="application/json">
            {
                "triggerId": "api_trigger/delete_jira_issue",
                "inputParameters": {
                    "issueId": {"stringValue": "{path_params.issue_id}"}
                }
            }
        </Payload>
    <Verb>POST</Verb>
  </Set>
The previous sections describe how to create API proxy for the target API. The target API is the data source you want to connect to (e.g. SAP, Snowflake, Cloud SQL). The API proxy is middleware that translates between the required formats of AppSheet and the target.
With the middleware in place, the AppSheet app is quite simple. This section describes how to configure the data source and how to use the data source to build a useful app.
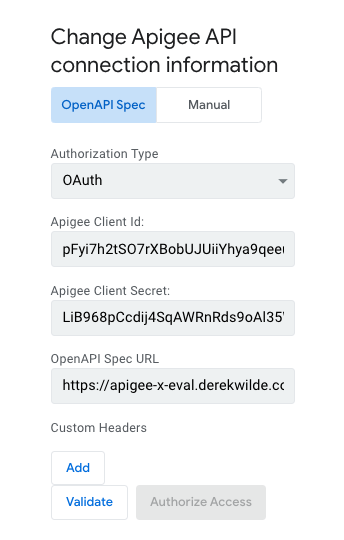
The following steps describe how to connect AppSheet to your API proxy. See the product documenation for full details.
- Open Account settings > Sources
- Click '+ New Data Source'
- Provide a name for the new data source and select 'Apigee'
- Select OpenAPI Spec
- Set 'Authorization Type' to 'OAuth'
- Set 'Apigee Client Id' and 'Apigee Client Secret' to the values provided by Apigee when creating the app.
- Set 'OpenAPI Spec URL' to the address where your spec is hosted. You can test this by pasting it into a browser. The browser should display your spec as a page of text.
- The example does not use any custom headers
- Click 'Validate' then 'Authorize Access'
You can now use the data source in any of your AppSheet apps.
Follow the AppSheet design process to create app connected to your API data source. Start by ensuring the basic CRUD (create, read, update, delete) operations work as expected.
Special callout for AppSheet Chat apps Now that you've done all the work to create an API data source, you can benefit from all the no-code features within AppSheet. For example, an AppSheet Chat app allows you to interact with your API data source directly in Google Chat.
Using AppSheet, the IT team can configure an API data source and share it with a team. Business users can use that data source to create apps, manage processes, and send interactive notifications in gmail and chat. Check out a few customer stories to see how other companies are using AppSheet.
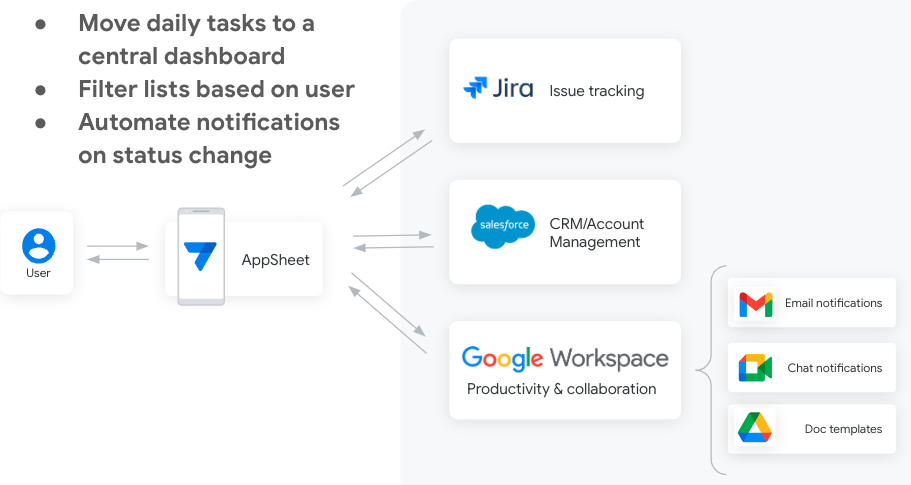
Use API data sources to consolidate information and processes across multiple data sources. Here's an example of how AppSheet can be used to pull data from multiple systems into a single dashboard. Employees no longer need to switch between multiple apps to perform common processes like updating Salesforce records or approving Jira tickets.
