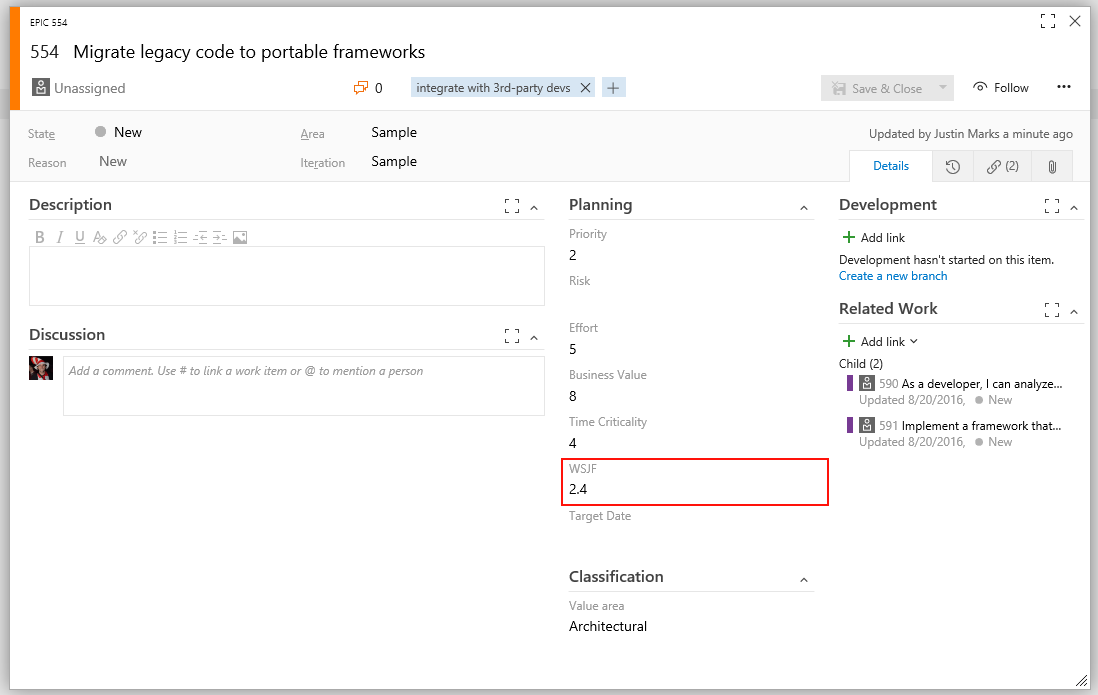
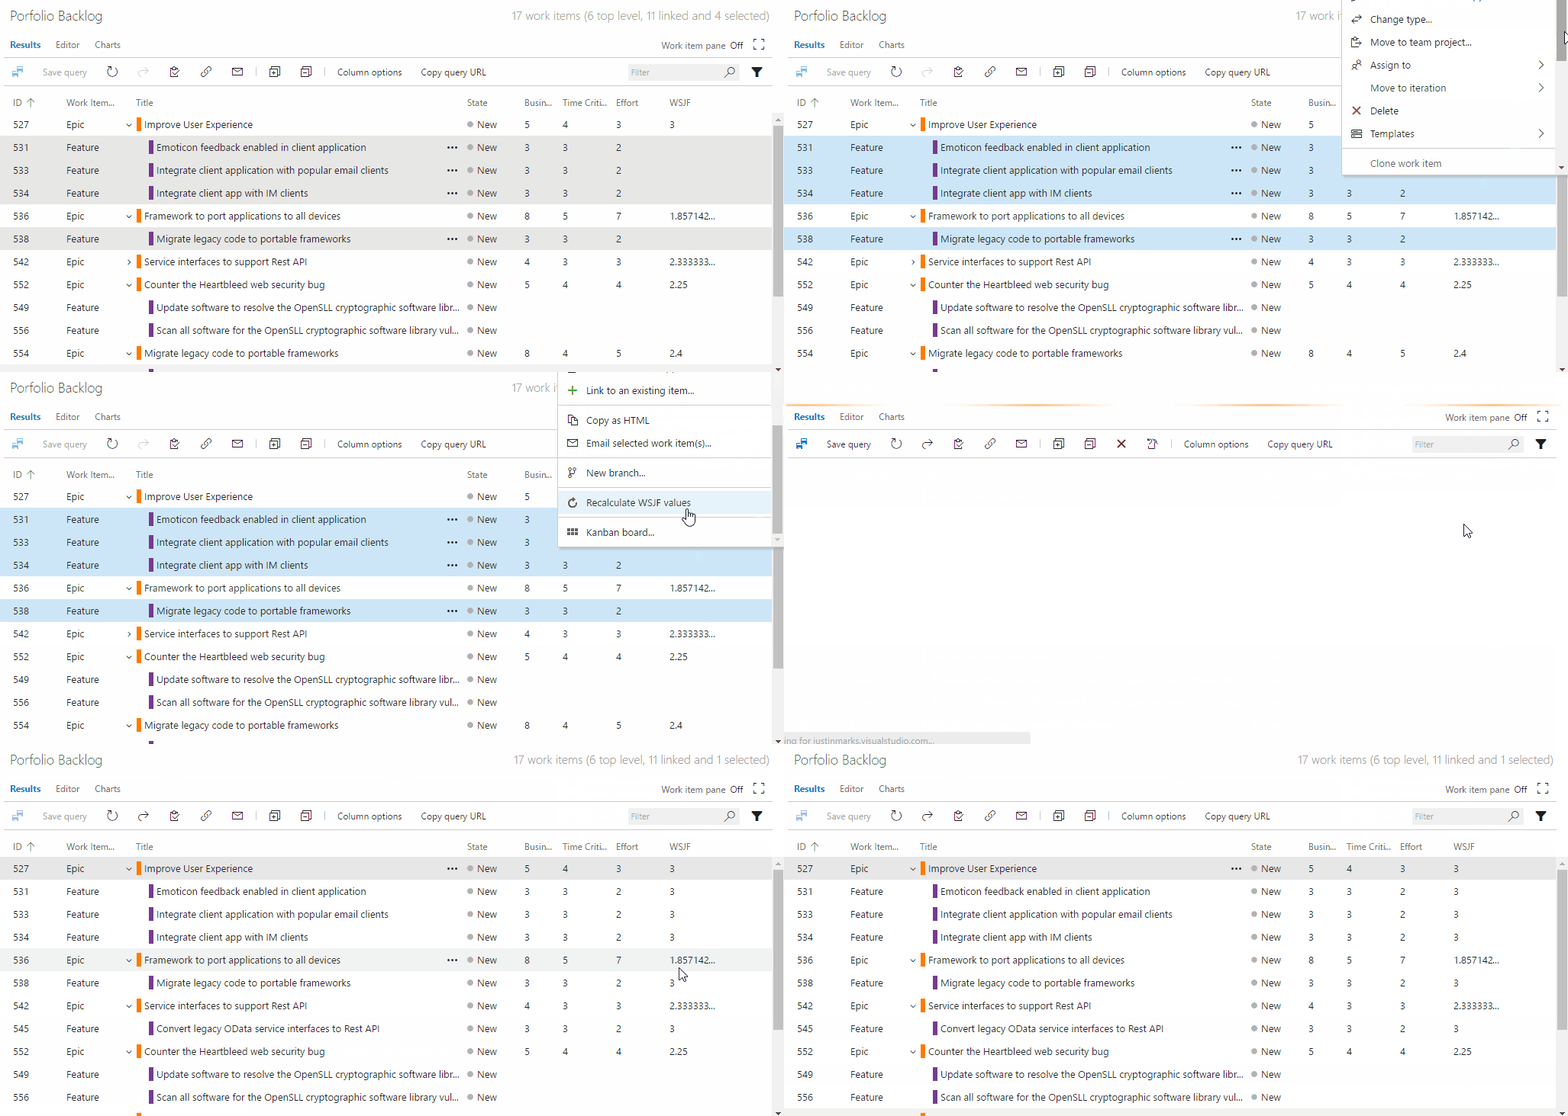
WSJF enables a calculated field for computing and storing WSJF on your work items.
The Scaled Agile Framework defines WSJF (Weighted Shortest Job First) as a calculation of cost of delay vs. job size which can help teams prioritize their portfolio backlogs with the items contributing the highest ROI.
Three values are used to calculate WSJF:
- Business Value
- Time Criticality
- Job Size
- The first thing you need is to create the field that will store the WSJF values. Create a custom decimal field through the process hub and add it to the work items you want to display WSJF data on.
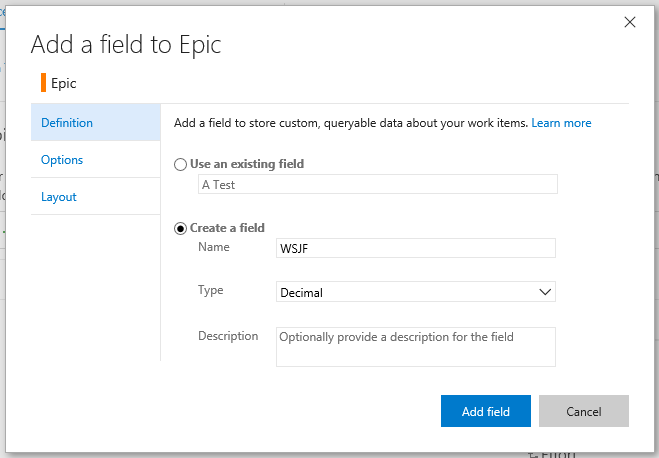
NOTE: If you're using TFS onprem, you need to use witadmin to Create a custom decimal field
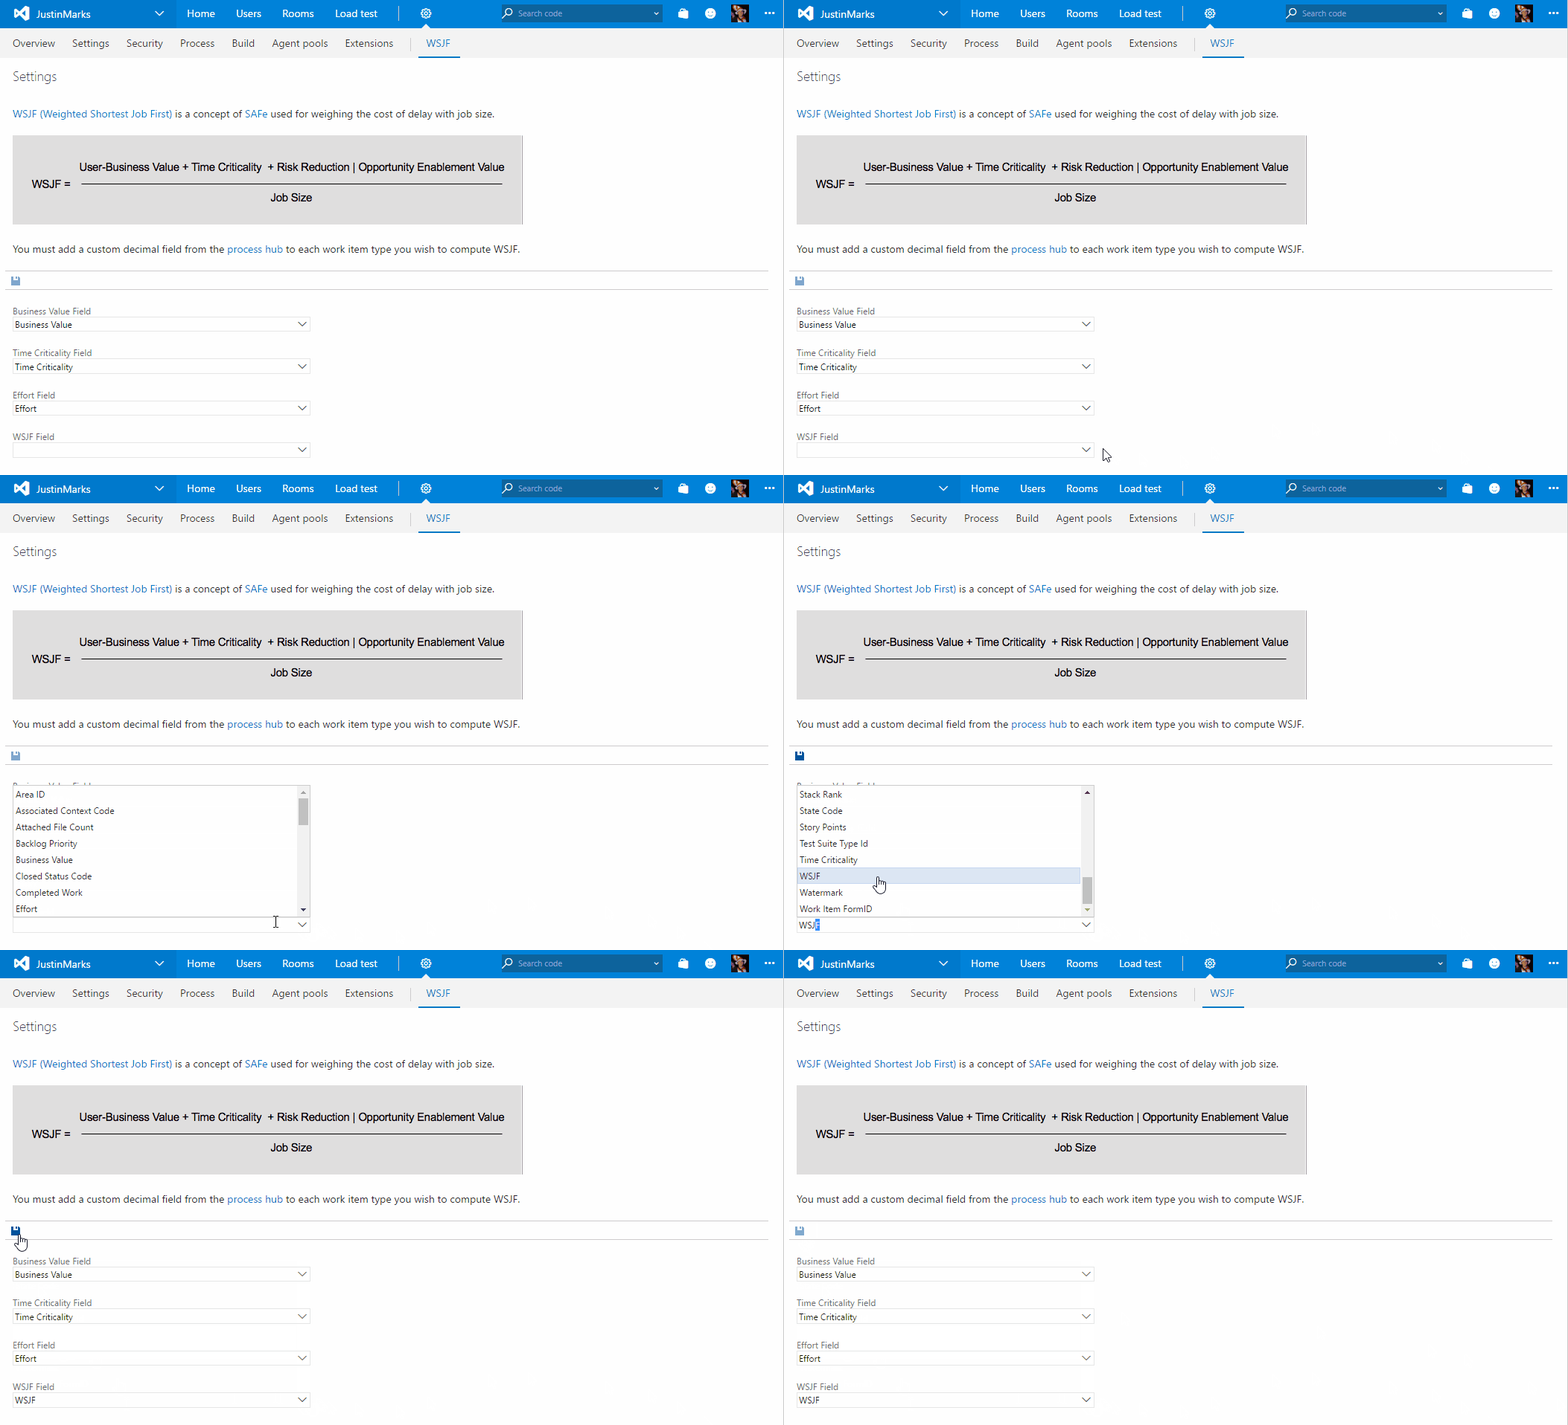
- Navigate to the "WSJF" hub on the collection settings admin experience. From here, you must specify the fields that will be used for Business Value, Time Criticality, Job Size and WSJF. The first three are defaulted to the fields provided out of the box by Microsoft but can be changed to custom fields if you prefer.

- WSJF is automatically updated when form is loaded.
- WSJF is automatically updated when the Business Value, Time Criticality, or Effort fields are updated.
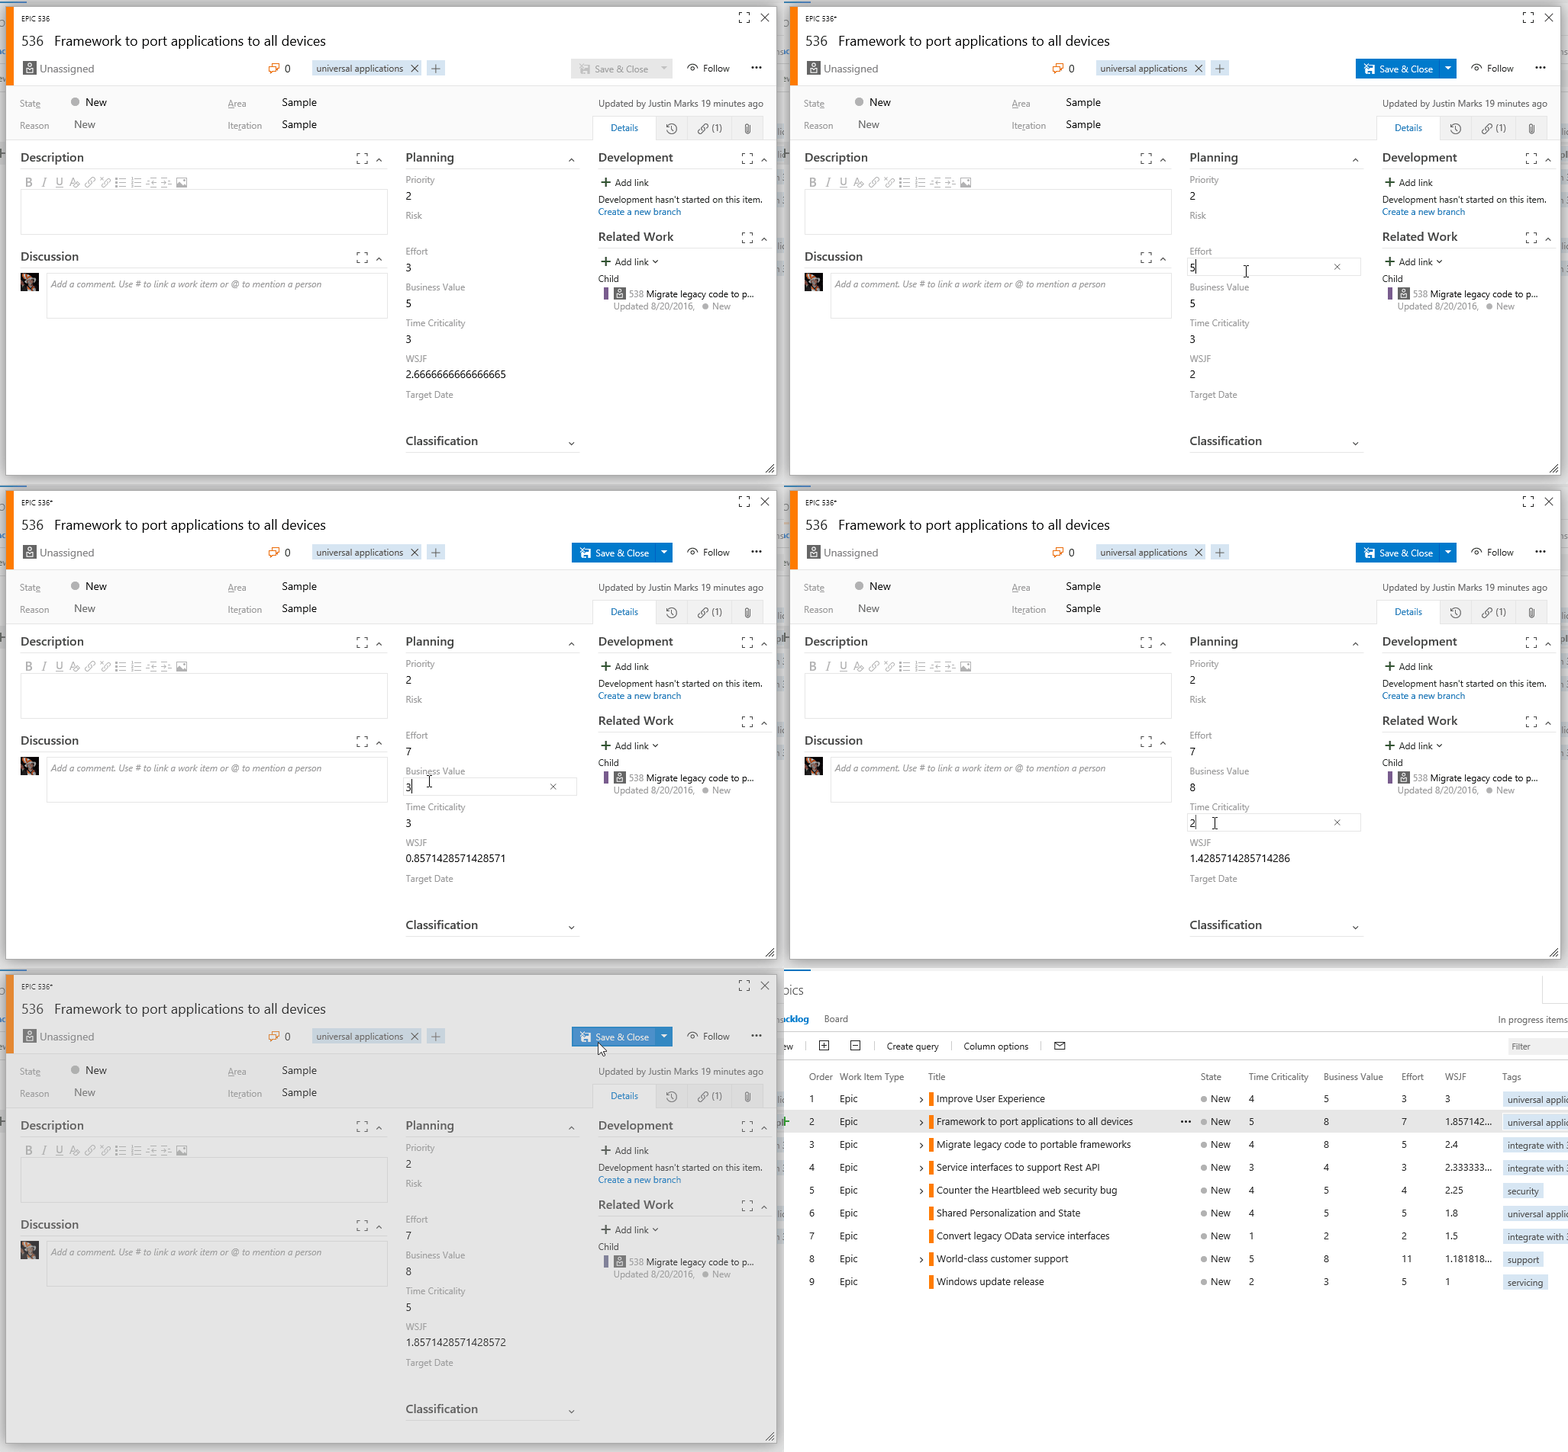
Because this extension requires the new work item form, it is only supported on VSTS and the next version of TFS (Dev15-RC1).
This is an example for using relatively modern web dev technologies to build a VSTS (https://www.visualstudio.com) extension. In contrast to my other seed project and example (https://github.com/cschleiden/vsts-extension-ts-seed-simple and https://github.com/cschleiden/vsts-extension-tags-mru) which focused on simplicity, this sample aims to be more complete. It supports:
- Code written in Typescript/Styling defined using SASS
- Publishing a dev version of an extension and a production one, without changing the manifest
- Webpack for watching and building files during development, and for building optimized bundles for production
- Unit tests of the core logic using mocha/chai
- React for rendering a complex UI with user interation
This extension uses webpack for bundling, webpack-dev-server for watching files and serving bundles during development, mocha, chai for writing unit tests, and karma as a test runner.
Two bundles are defined for webpack, one for the main dialog, one for the extension context menu registration.
All actions can be triggered using npm scripts (npm run <target>), no additional task runner required.
You need
- node/npm
then just clone and execute npm install.
-
Run
npm run publish:devto publish the current extension manifest to the marketplace as a private extension with a suffix of-devadded to the extension id. This package will use a baseUri ofhttps://localhost:8080. -
Run
npm run devto start a webpack developmen server that watches all source files. Tests live next to product code and use a.tests.tssuffix instead of only.ts. -
To run a single test pass execute
npm run test, to keep watching tests and build/execute as you develop executenpm run dev:test.
- Run
npm run publish:releaseto compile all modules into bundles, package them into a .vsix, and publish as a public extension to the VSTS marketplace.
