This project consists of 2 main branches: allure_integration and report_portal_integration. The branch report_portal_integration is also a master.
- REST Assured
- Selenide
- TestNG
- Cucumber 4
- Log4j2
Basic parameters are in src/main/resources/config.properties
As you may noticed you have 2 options here: Allure and ReportPortal
Allure reporting implemented through native Allure listener that allows to add all the needed steps and screenshots in following way:
SelenideLogger.addListener("AllureSelenide", new AllureSelenide().enableLogs(LogType.DRIVER, Level.ALL));
SelenideLogger.addListener("AllureSelenide", new AllureSelenide().screenshots(true).savePageSource(false));
That means we can see the steps of Selenide wrapped into Cucumber steps with attached screenshots and stacktrace in case of test failure.
Used dependencies:
        <dependency>
            <groupId>io.qameta.allure</groupId>
            <artifactId>allure-java-commons</artifactId>
            <version>${allure.basic.version}</version>
        </dependency>

        <dependency>
            <groupId>io.qameta.allure</groupId>
            <artifactId>allure-cucumber4-jvm</artifactId>
            <version>${allure.basic.version}</version>
        </dependency>

        <dependency>
            <groupId>io.qameta.allure</groupId>
            <artifactId>allure-selenide</artifactId>
            <version>${allure.basic.version}</version>
        </dependency>

        <dependency>
            <groupId>org.aspectj</groupId>
            <artifactId>aspectjweaver</artifactId>
            <version>${aspectj.version}</version>
        </dependency>
        <allure.basic.version>2.13.1</allure.basic.version>
        <aspectj.version>1.9.5</aspectj.version>
The ways you can get pretty Allure Report may vary depending on your needs:
- Jenkins allure plugin. This plugin as being added as the post build step in your job and attaches the report to the every job run results.
- Allure command line tool installed on your server. This tool can generate report from your allure-results folder in your jenkins job space to any specified allure-report folder on your hard drive. But this way you will get results only for your last test run and will be able to see the .html file through any webserver like nginx.
- Make sure your volumes in docker-compose are shared well. Only this way nginx will see what is going on in jenkins workspace folder in real time. If you share volures without using volumes_from nginx will see static data in jenkins folder created when junkins container had just started. What you should use:
services: jenkins: volumes: - /var/jenkins_home/workspace/allure-report nginx: volumes_from: - jenkins:ro- You will need to install Custom Tools plugin for Allure CommandLine execution
- Go to Global Tool Configuration and add custom tool
- Fill Name field
- Install automatically
- Label field leave empty
- Put Download URL entirely
- You should set Subdirectory value so that it contains full path to the binary after unzipping. For Allure CommandLine it should be ../allure_2.13.1/bin
- Then Go to your job configuration to the Build Environment section and choose there Install Custom Tools. Only that way your custom tool become available for the job.
- Building full Allure Report with test run history. This is a little bit tricky way also with limited history size. It includes the previous step, but instead of building allure-report from job run allure-results you will have to copy the contents of this folder to any common allure-results via executing bash script as jenkins job bost build step and only then generate allure-report.
- Install Post Build Task Plugin.
- To copy allure-results folder to the common folder you have to set OR in Post Build Task and execute following command (this command works only for the first time, and after that it can't update directory contents any more):
cp -r /var/jenkins_home/workspace/sample_job_2/allure-results /var/jenkins_home/workspace/allure-results- To copy allure-results folder contents to the common folder (this command works only when allure-results folder already exists in destination):
cp -p -f -r /var/jenkins_home/workspace/sample_job_2/allure-results/* /var/jenkins_home/workspace/allure-results- And finally execute Allure Command Line command to generate report into any directory you want:
allure generate --clean /...path.../allure-results -o /...path.../allure-report- Now you just should specify the root folder for your webserver the same as /...path.../allure-report and if you don't have any issues with volumes sharing in Docker your webserver will show the generated report (after you reload its container, of course
docker container exec container84h4name35342here nginx -s reload)
- Due to possible performance issues in future I consider an option to update allure-java-commons and allure-generator libraries to support mongoDB. Any help is appreciated.
Unlike Allure, RP is a stand alone tool raised on the separate server and collecting data through the sockets into its inbuilt Postgress DB.
The only dependency used for this integration to log cucumber steps:
       <dependency>
           <groupId>com.epam.reportportal</groupId>
           <artifactId>agent-java-cucumber4</artifactId>
           <version>${rp.cucumber.version}</version>
       </dependency>
All other data is being attached into cucumber steps via listener:
public class SelenideListener implements LogEventListener {
    protected static final Logger LOGGER = LogManager.getLogger(SelenideListener.class);

    @Override
    public void afterEvent(LogEvent logEvent) {
        String logStr = logEvent.getElement() + " : " + logEvent.getSubject() + " : " + logEvent.getStatus();
        // Logging into console
        LOGGER.info(logStr);
        // Logging into Report Portal
        if(logEvent.getStatus().equals(LogEvent.EventStatus.FAIL)) {
            ReportPortal.emitLog(logStr, "INFO", new Date(), Screenshots.takeScreenShotAsFile());
        } else {
            ReportPortal.emitLog(logStr, "INFO", new Date());
        }
    }

    @Override
    public void beforeEvent(LogEvent logEvent) {

    }
}
Of course you have to include this listener to your SelenideConfiguration. Keep in mind that SelenideListener will be added to the current thread only.
        @BeforeMethod
        public void methodSpecificConfiguration() {
            //SelenideLogger is setting listener to current thread only
            SelenideLogger.addListener(LISTENER_NAME, new SelenideListener());
        }

        @AfterMethod
        public void methodSpecificConfigurationCleanUp() {
            //SelenideLogger is deleting listener from current thread just to make sure we don't have redundant listener instances
            SelenideLogger.removeListener(LISTENER_NAME);
        }
To send any data to the RP server there is a configuration file (src/test/resources/reportportal.properties) containing server IP, access token and some other required fileds.
To enable VNC in selenoid browser containers you should create a proper browsers.json file:
    {
    	"firefox": {
    		"default": "47.0",
    		"versions": {
    			"47.0": {
    				"image": "selenoid/vnc:firefox_47.0",
    				"port": "4444",
    				"path": "/wd/hub",
    				"tmpfs": {"/tmp":"size=512m"}
    			}
    		}
    	},
    	"chrome": {
    		"default": "87.0",
    		"versions": {
    			"87.0": {
    				"image": "selenoid/vnc:chrome_87.0",
    				"port": "4444",
    				"tmpfs": {"/tmp":"size=512m"}
    			}
    		}
    	}
    }
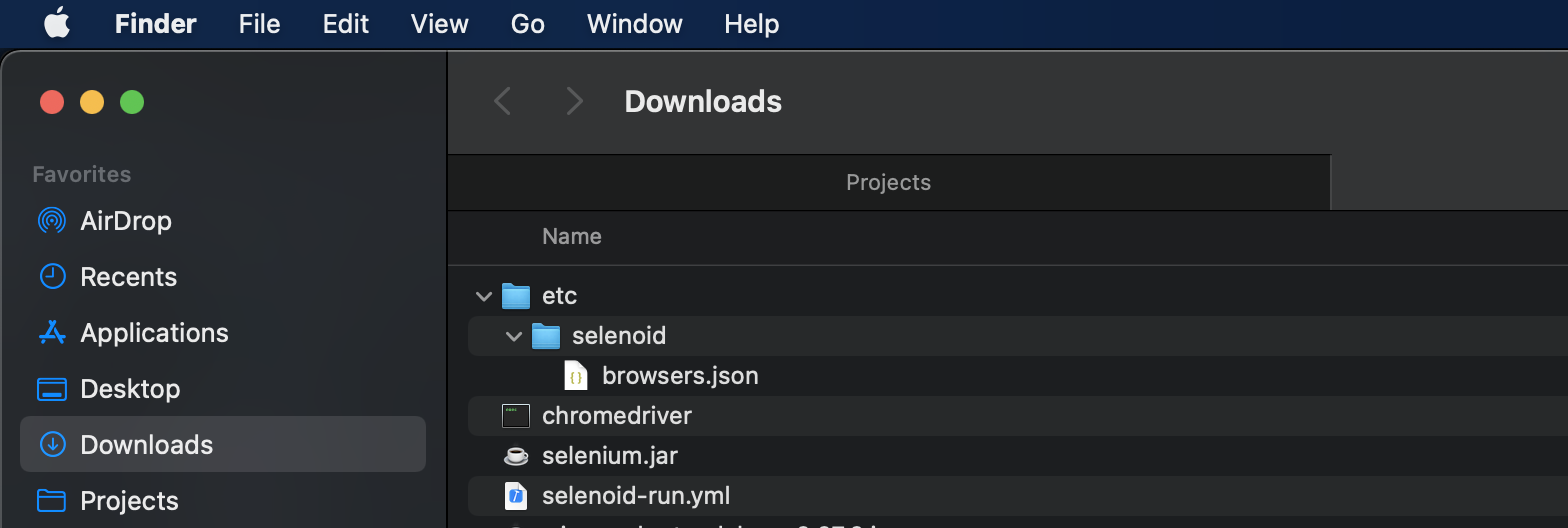
and put it somewhere selenoid will be able to see it. By default on MacOS correct folder is being generated here:
so you can just put this file there or use official selenoid documentation to set the correct browsers.json path.
Also before selenoid/vnc:firefox_47.0 or selenoid/vnc:chrome_87.0 become available in selenoid_ui you have to pull these images to the Docker that you are using to run you Selenoid:
docker pull selenoid/vnc:firefox_47.0
Make sure you have enabled enableVNC: true capability to see the video. Right now it's being enabled in CustomCapabilitiesProvider.java by default. In plans to move it to config.properties.
