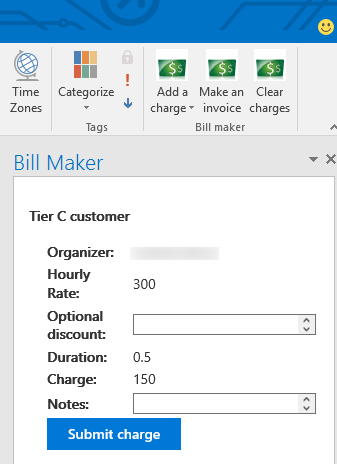
This Outlook add-in demonstrates how to implement three types of command buttons: a button with a drop-down menu (each of which launches a task pane), a button that launches a task pane, and a button that runs a function that uses no task pane UI. The app appears when you open an existing appointment or meeting and allows you to create and send invoices to clients with whom you've met. This sample currently runs only with the Outlook 2016 desktop client.
The Add a charge button contains a three-option drop-down menu that allows you to apply charges for three different tiers of customers. The Make an invoice button generates an invoice out of all of the saved charges, and the Clear changes button clears all charges for the current customer.
- npm, Node Package Manager, is required to install dev dependencies.
- Bower is required to install front-end dependencies.
- Gulp is used as a task runner, including serving the application on a development server.
- Clone this repository.
- Run
npm installfrom your local repository to install both npm and Bower dependencies. - Run
gulp serve-staticfrom your local repository to start development server. - Go to mail.office365.com and sign in with your Microsoft Office 365 account.
- Click the gear icon for the Settings menu on the nav bar, and then choose Manage add-ins.
- Click the plus (+) icon, and then choose Add from a file.
- Browse to this repository folder and choose manifest.xml.
- Then complete the wizard (Next, Install, OK) to make the add-in available on your Office 365 account.
- Finally, you'll have to open the app in a browser and trust the certificate for
localhost:8443. The add-in won't run if your computer doesn't trust it.
- After installing the add-in, open the Outlook 2016 client desktop application.
- Choose a calendar meeting.
- You'll be able to add charges and make invoices for the person who created the meeting.
We'd love to get your feedback about this sample. You can send your questions and suggestions to us in the Issues section of this repository.
- Yeoman generator - Yeoman generator for building Microsoft Office-related projects (including add-ins). This project was built using it.
- Office UI Fabric - The front-end framework for building experiences for Office 365. This project uses it to get an Office "look and feel."
- dev.office.com - Find documentation, samples, and other helpful information relevant to Office development.
Copyright (c) 2015 Microsoft. All rights reserved.
