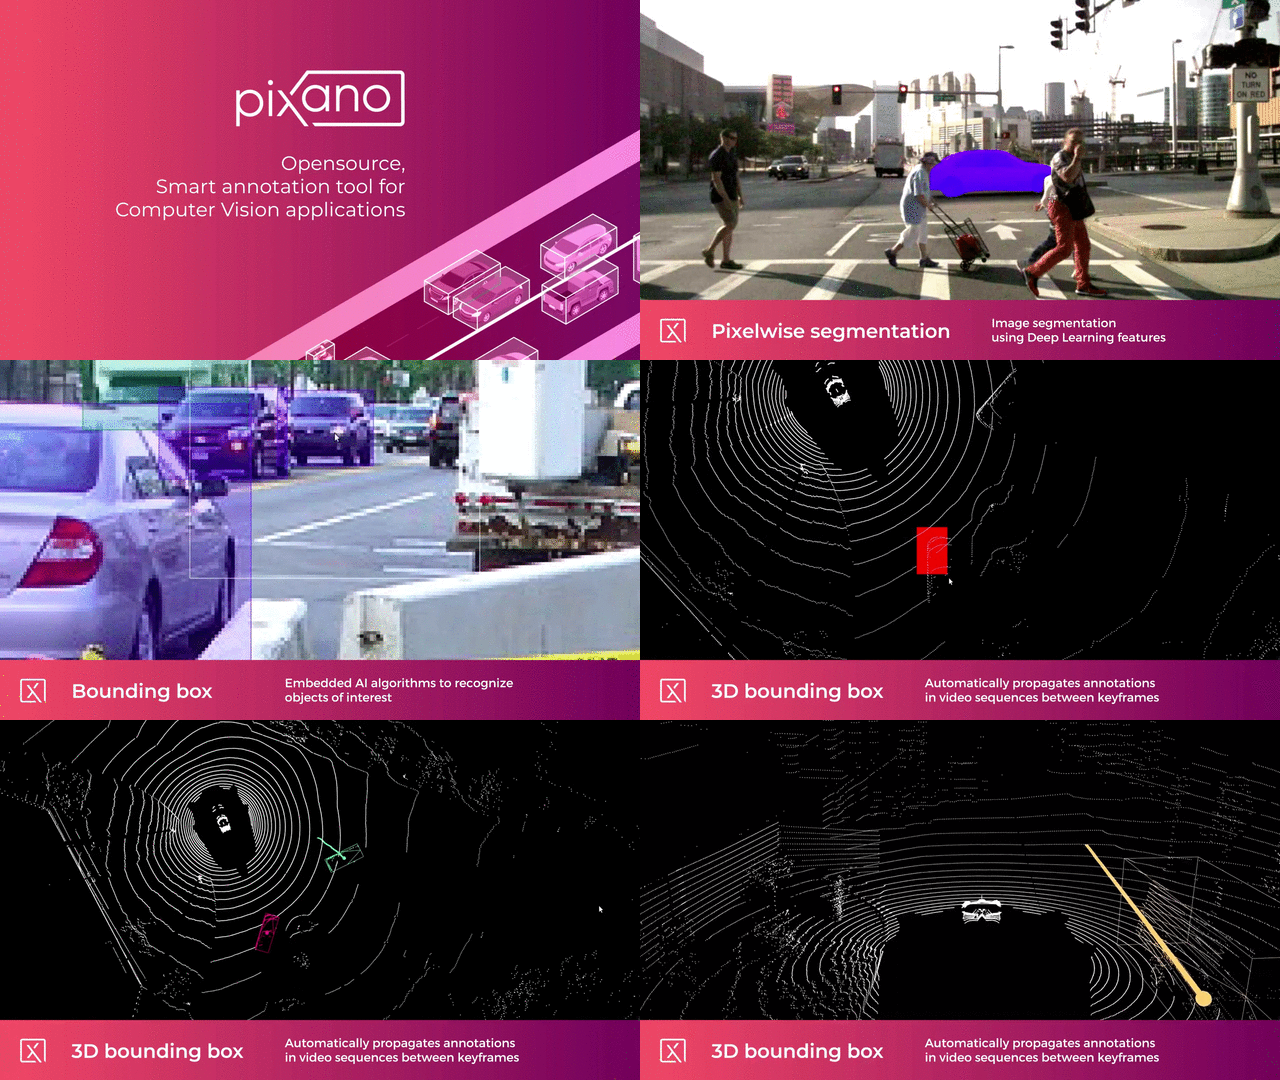
Pixano is a web-based smart-annotation tool for computer vision applications. The modules are driven by artificial intelligence, which assists the human user with annotation tasks and accelerate the annotation process. Try some of our features online!
Pixano Elements - Library of web components dedicated to data annotation tasks.
Have a look to our online demos !
Beside Pixano elements, a complete and ready-to-use annotation application is available at https://github.com/pixano/pixano-app.
IMPORTANT: The Pixano Web Components are a work in progress and subject to major changes until 1.0 release.
Automatic build tests on Ubuntu (latest) and node version 10, 12, 14.
- Components overview
- Requirements
- Build and run the overall demo
- Documentation
- How to contribute ?
- Change log
- License
The Pixano Elements are divided into packages. Each package can be installed independantly from NPM using the following command:
npm install @pixano/graphics-2d
Each package can contain multiple web components which are grouped by affinity.
Pixano requires WebGL to be activated in your browser. If you see the following error in you console WebGL unsupported in this browser, please activate it.
For development, you will only need Node.js installed in your environement.
For a fresh install, please follow our guide to install it on your system:
If the installation was successful, you should be able to run the following command:
node --version
# v10.19.0

npm --version
# 6.10.0An online serverless demo is available on our dedicated website.
If you want to build the latests version, it's easy:
git clone https://github.com/pixano/pixano-elements.git
cd pixano-elements
npm run deps
npm run build
npx serve demo
📚 Check out the TypeDoc documentation. Each package's usage and API is also documented:
You can also try the demos on our website.
To create a new component, check our tutorial.
Please follow our coding guidelines for your contributions.
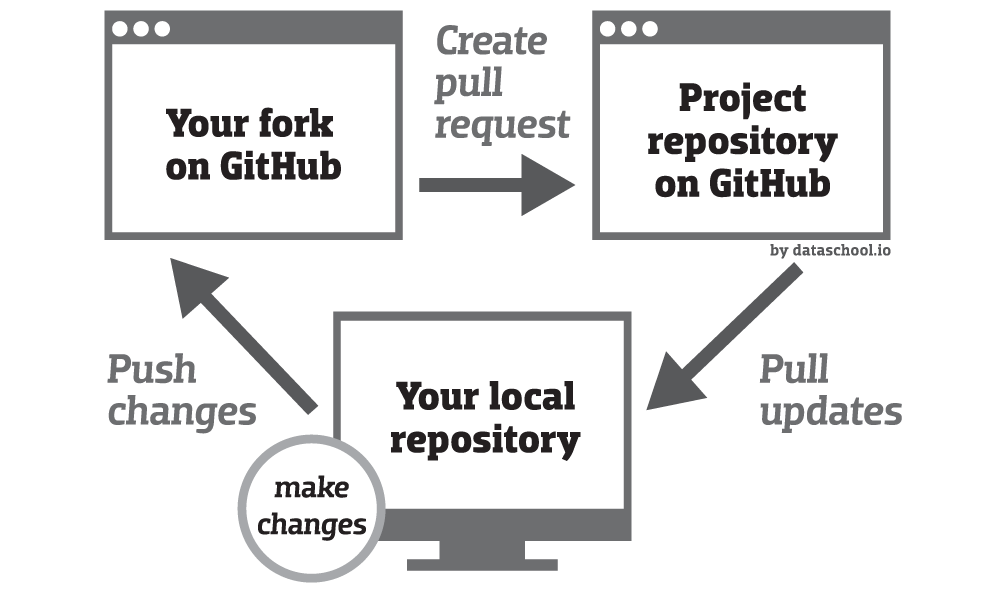
The contribution process follows this well-known diagram :
-
Fork this project
Click on the Fork button
-
Clone the fork on your local machine
	git clone git@github.com:$YOURLOGIN/pixano-elements.git
	# OR
	git clone https://github.com/$YOURLOGIN/pixano-elements.git
	# go to code
cd pixano-elements- Add the original repository as a remote called upstream
	git remote add upstream git@github.com:pixano/pixano-elements.git
	# OR
git remote add upstream https://github.com/pixano/pixano-elements.git- Install dependencies and build the project
cd pixano-elements
npm run deps
npm run build- Run the demo locally:
npx serve demo- Check that you are on the right branch and pull upstream changes into your local repository if necessary
	git checkout master
	git pull upstream master
	#If needed: merge
#If needed: git push origin master- Create a new branch to work on
git checkout -b $MY_BRANCH_NAME-
Implement/fix your feature, comment your code.
-
Test your modifications locally using the serverless-demo
	npm run build
	npx serve demo
This demo takes your local modifications into account, thanks to a bootstrap step.
If you modified the dependencies, you better clean the project before rebuilding:
	npm run clearall
	npm run deps
	npm run build
npx serve demo- Add or change the documentation as needed.
- Commit your modifications using meaningfull comments.
- Push your branch to your fork
git push origin $MY_BRANCH_NAME-
On github, open a pull request from your fork in the correct branch.
A green button "Compare & pull request" should appear. If not, click on branches button (https://github.com/$YOURLOGIN/pixano-elements/branches) and then click the "New pull request" button corresponding to your contribution branch.
-
Complete the merge request message with a meaningfull title and a comprehensive comment: describe how your work is changing Pixano and what modules are impacted. You could use something like:
	## pxn-$IMPACTED_PLUGIN
	* file: modifications...
	* file: modifications...
	* ...
	## pxn-$OTHER_IMPACTED_PLUGIN
	* ...

	Co-authored-by: ...
- click on "Create pull request" => automatic verifications are made by github
Nice work ! Thank you for contributing to Pixano !
Pixano is released under the CeCILL-C license, a free software license adapted to both international and French legal matters that is fully compatible with the FSF's GNU/LGPL license.


