Part of an unnamed group of projects consisting of different apps that interact with Arduino components
4 Bar Drum Pattern Manager, Beat-Maker, similar to the FL Studio Channel Rec interface, but with arduino components By pressing on a 4x4 button grid, you can select the beats on which a specific drum sound will play, and then you can switch the sound or print out the entire pattern
Demonstrational video, but wait for the kicks to start
All the needed components for this group of projects can be found in the Arduino Uno R3 KIT with 24 components
- Arduino Uno
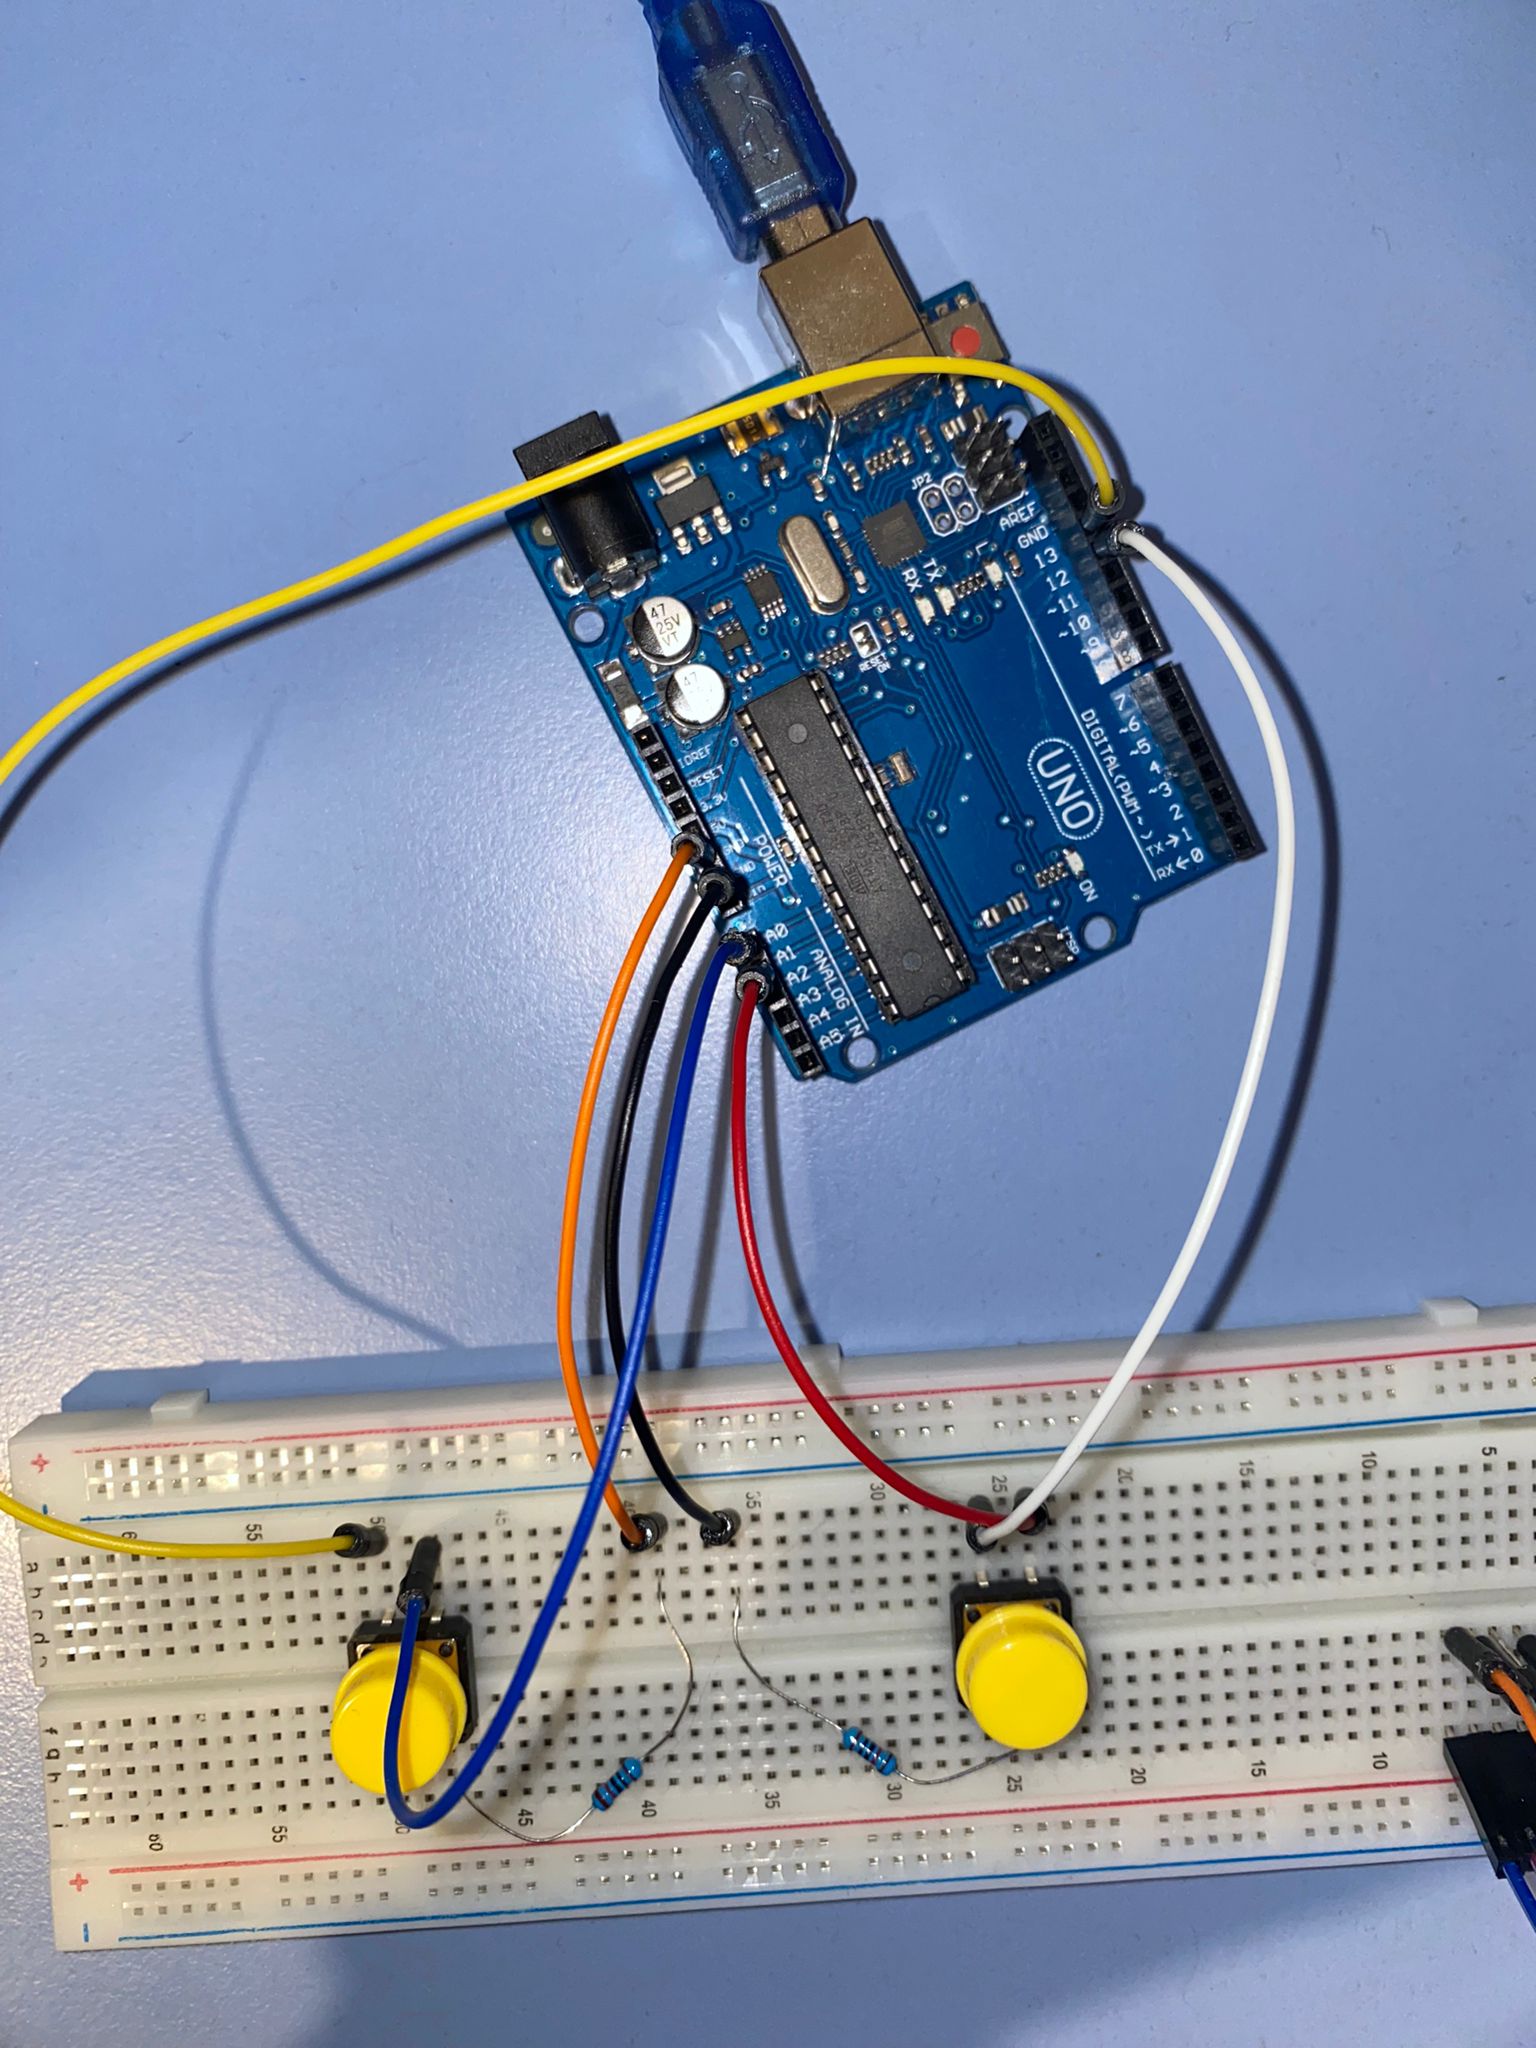
- 2 Tact Buttons
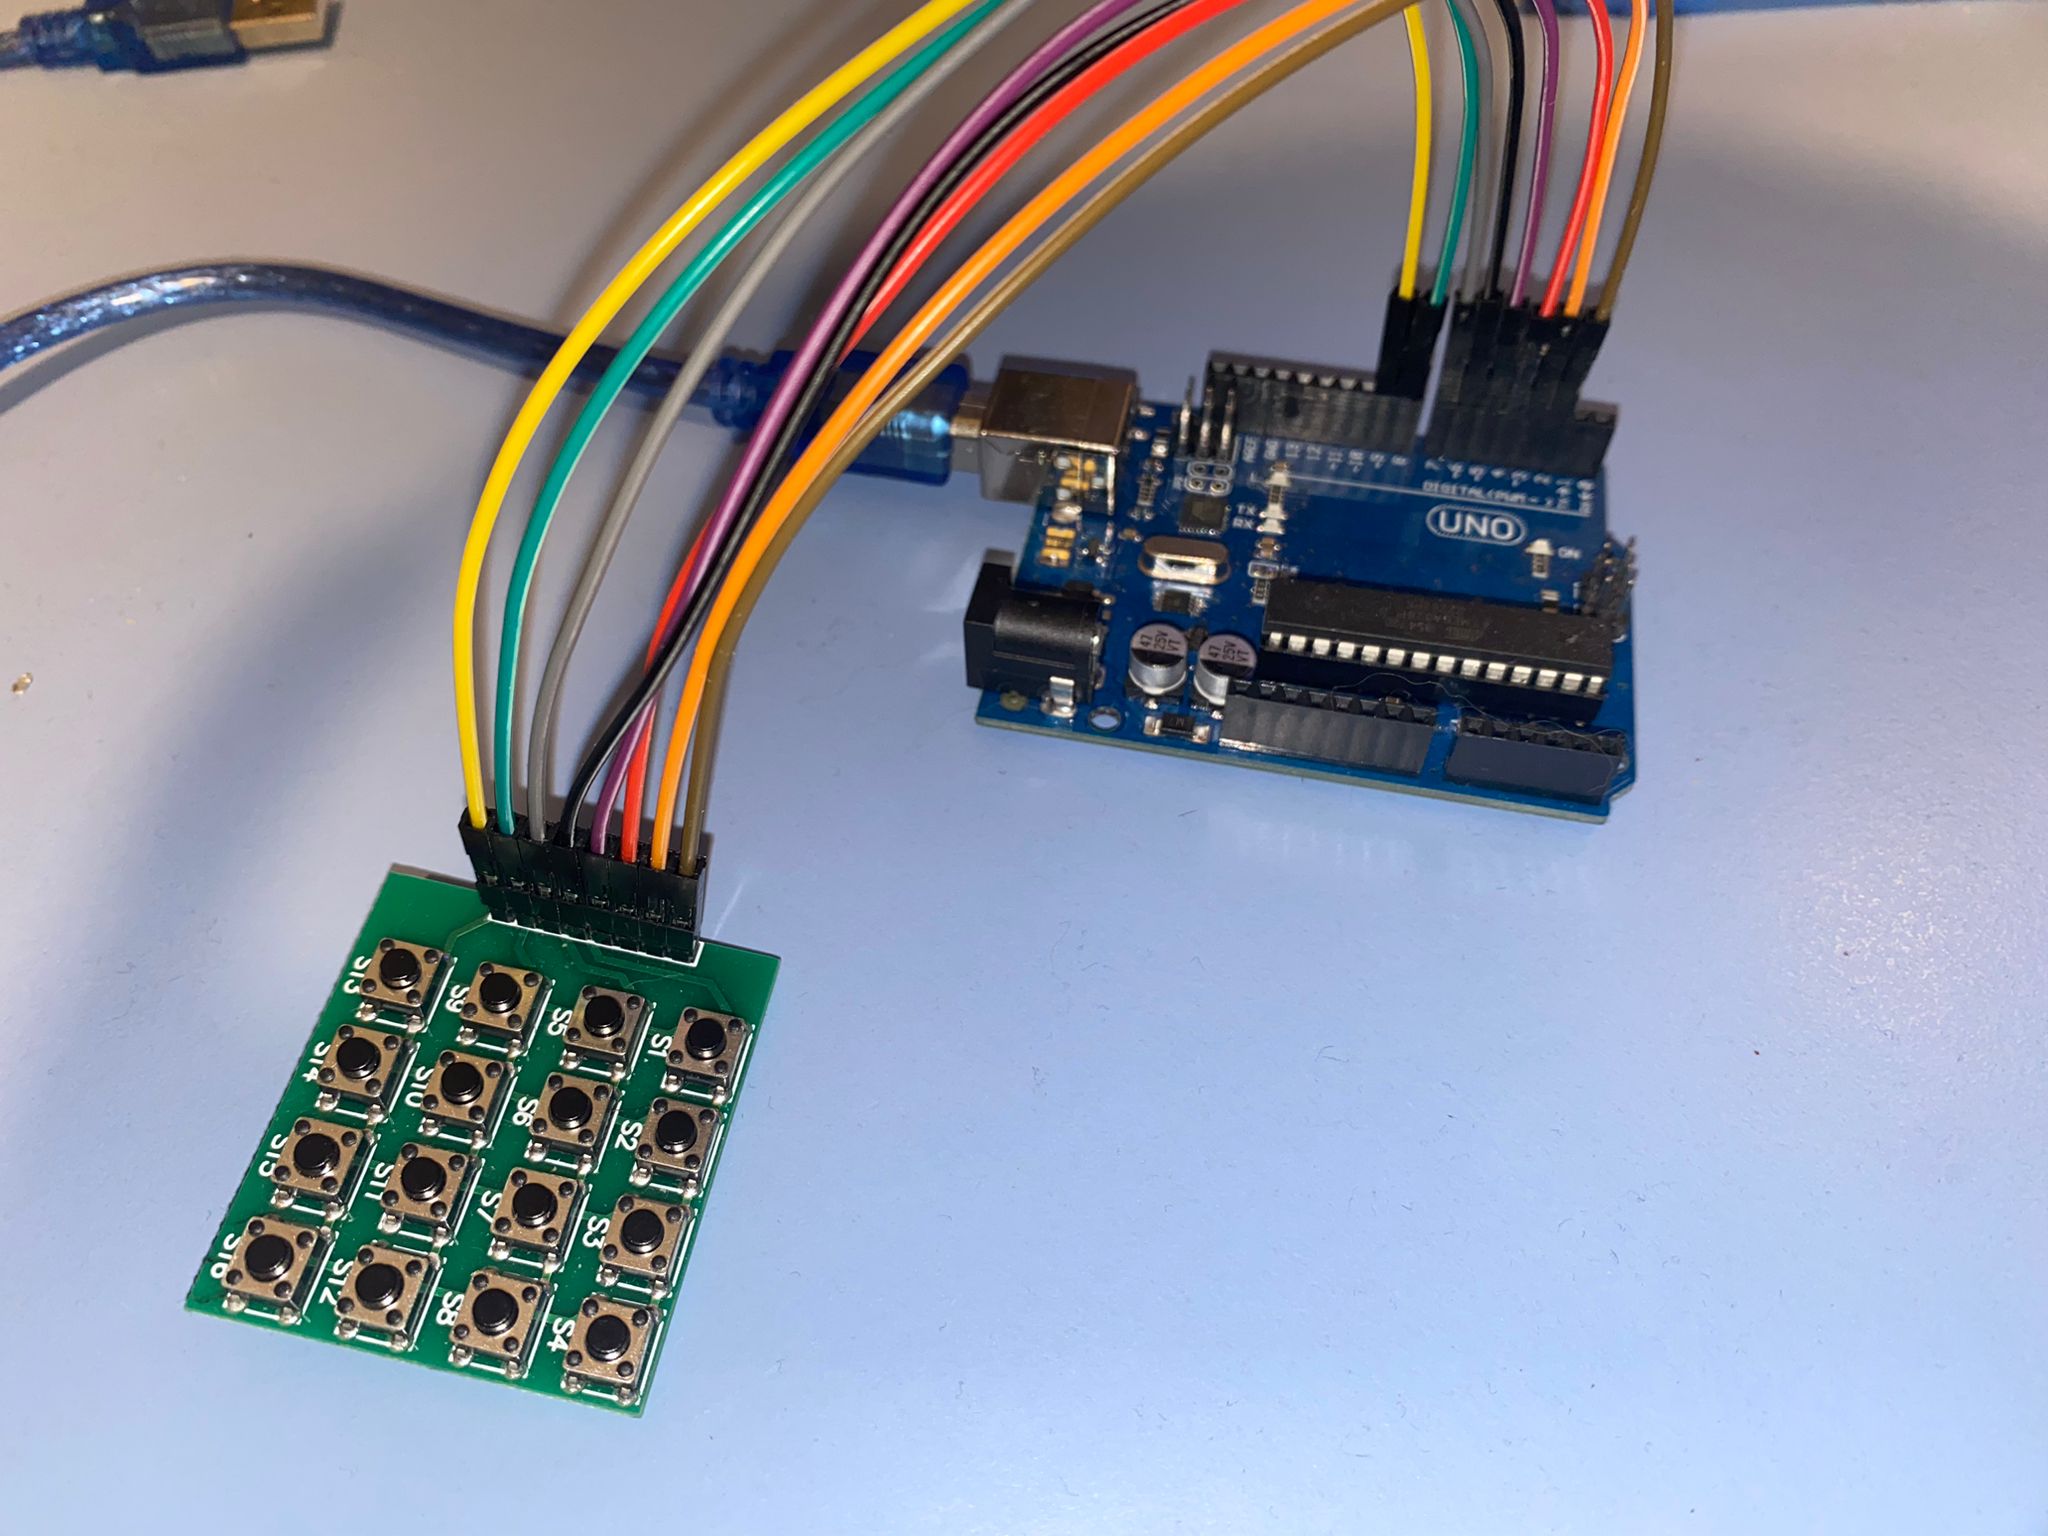
- 4x4 Button Grid
- LCD 1602
- the Arduino is provided the .ino, then it returns messages through the COM3 port (in my case) and the .py reads it and plays sounds
- you upload the .ino through the Arduino IDE
- with the Serial Monitor and Serial Plotter closed, run the .py and jam on the grid!
You might need to change the lcd address(0x27 in my case) in the .ino, depending on your display's address
// I2C INITIALISATION
LiquidCrystal_I2C lcd(0x27, 16, 2);
The LCD is 16x2, and has a 8051 microcontroller on its back
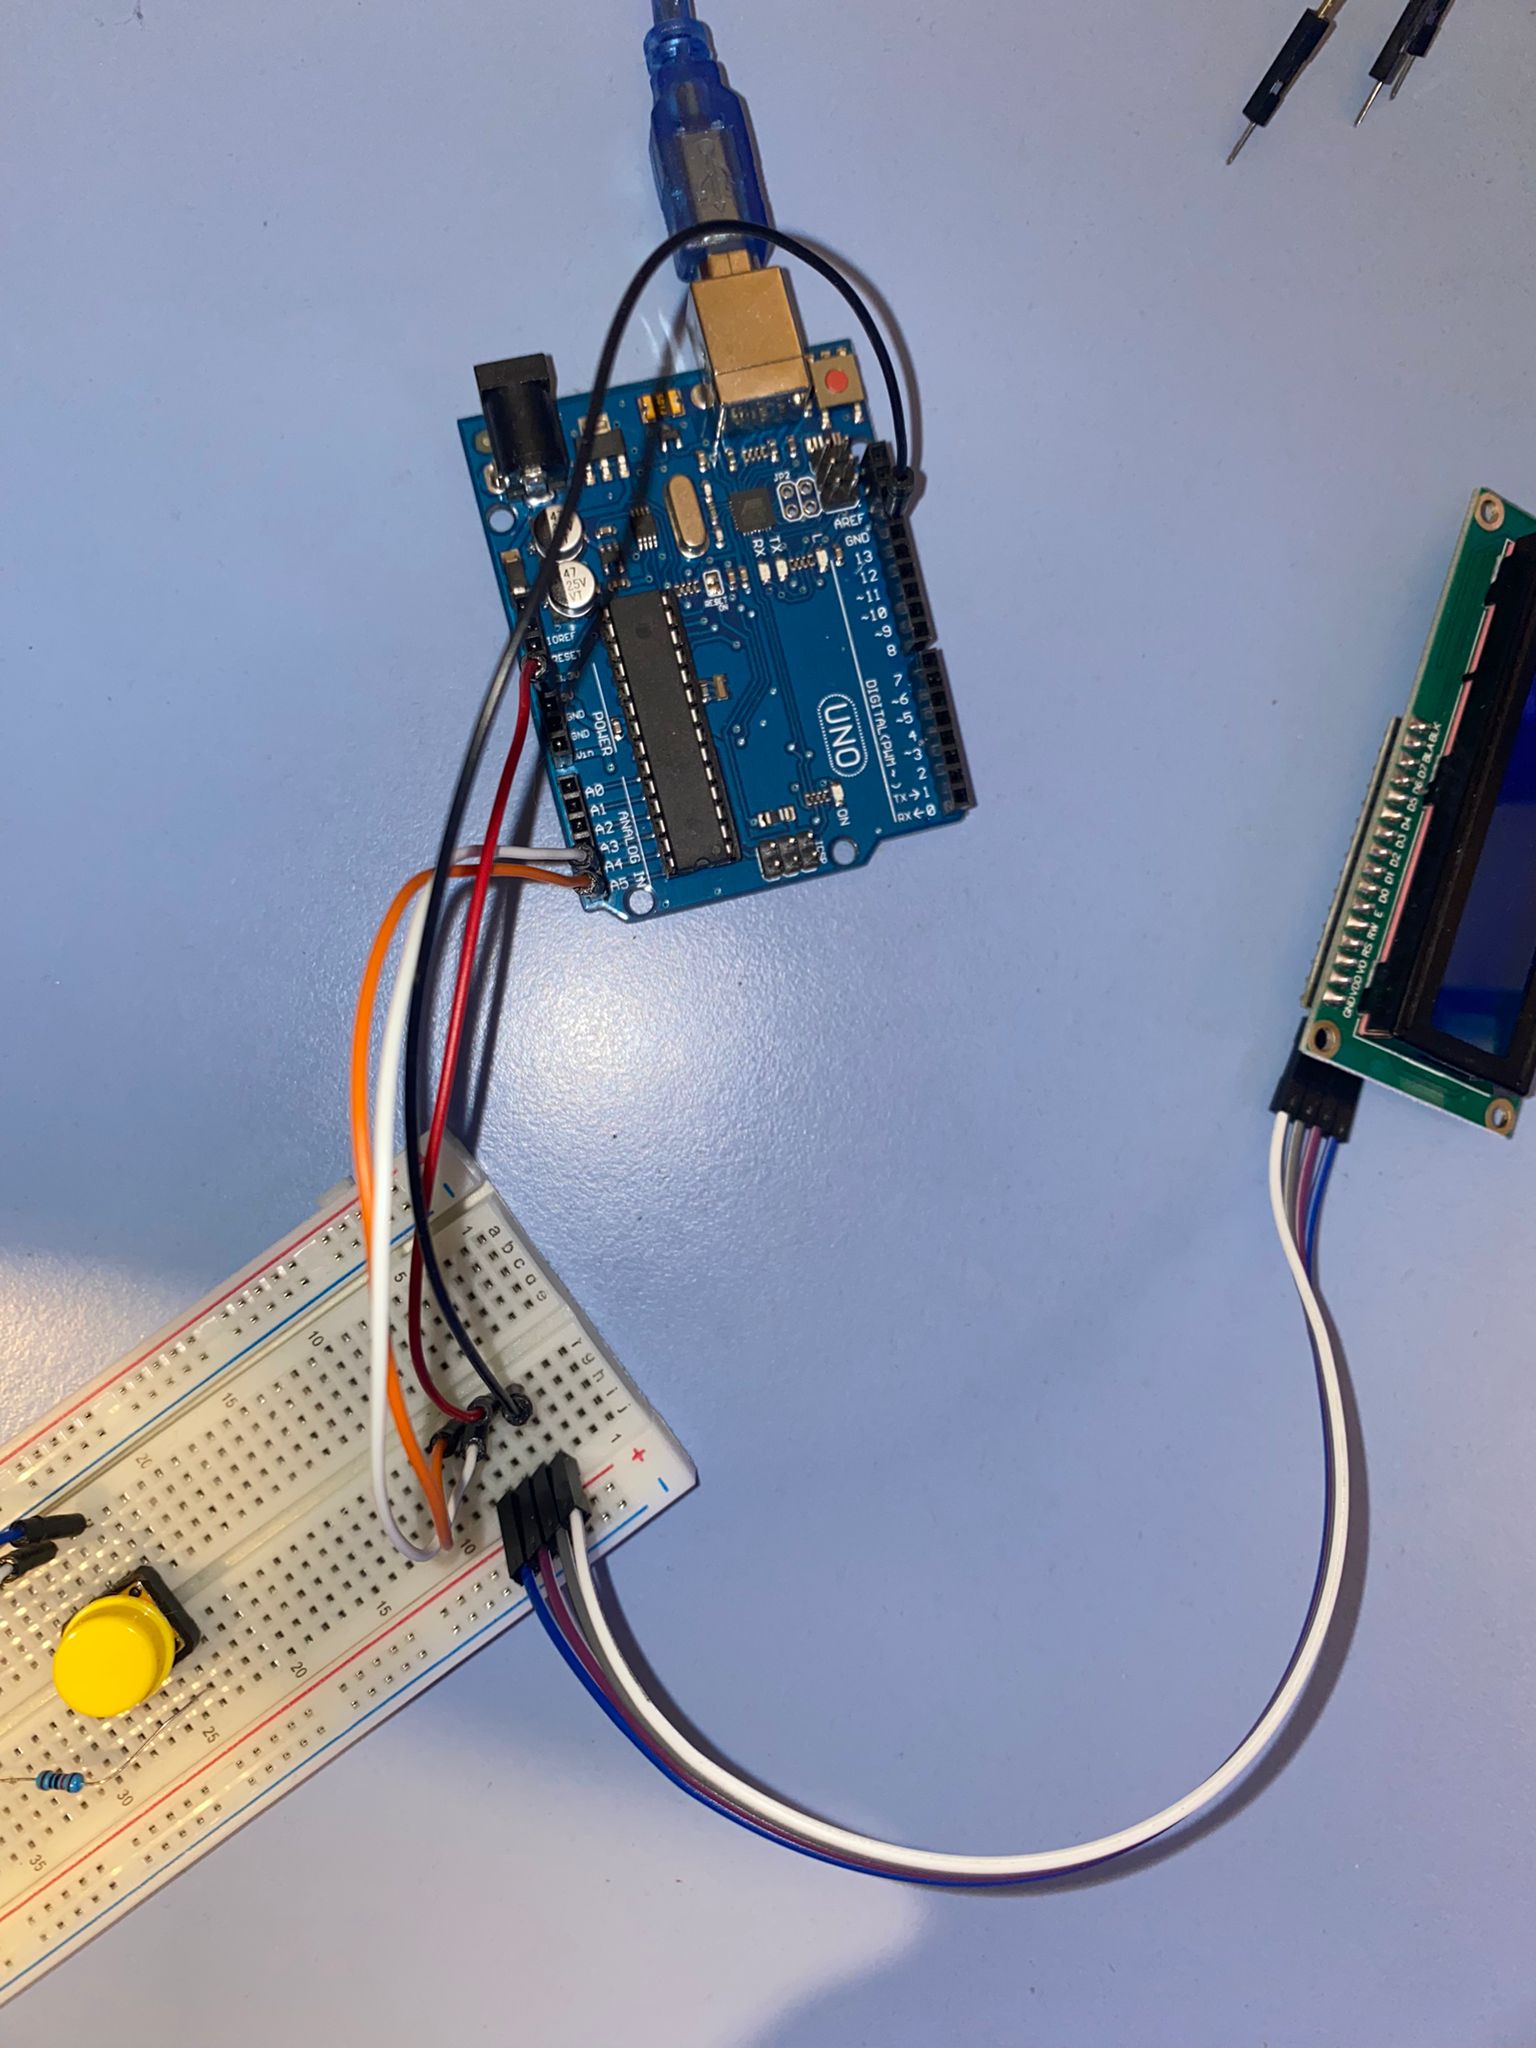
| LCD | Arduino |
|---|---|
| GND | GND |
| VCC | 5V |
| SDA | A4 |
| SCL | A5 |
The connections can be seen clearly in the image. From left to right, the cables are connected to digital pins from 9 to 2
How the connections are made can also be observed in this pard of the soundpad.ino script
#define changeSoundInput A0
#define printBeatInput A1
#define changeSoundOutput 13
#define printBeatOutput 12
B1 - button on the left, that switches the sound
B2 - button on the right, that prints the pattern of the beat
Each one of them has a pull down resistor connected to the ground
B1 gets its input from A0 and its output goes to 13
B2 gets its input from A1 and its output goes to 12
If you want to add, change or remove sounds, you will use config.json
config.json
{
    "port": "COM3",
    "sounds": ["KICK", "HIHAT", "CLAP", "SNARE", "OPENHAT"],
    "paths": ["Pierre_Kick.wav", "Pierre_Hat.wav", "Basic_Clap.wav", "Pierre_Snare.wav", "Open_Hat.wav"]
}
- port is the port used to communicate with the Arduino
- sounds are the names of the sounds, that will appear on the lcd screen and on the terminal
- paths are the file names of the sounds, that MUST be placed the sounds folder
THE SOUNDS AND THE PATHS IN THE CONFIG.JSON HAVE TO BE IN THE SAME ORDER


