Live document detection library. Returns either a URI of the captured image, allowing you to easily store it or use it as you wish !
Features:
- Live detection
- Perspective correction and image crop
- Flash
- Easy to use base64 image
In MainApplication.java, add this Line import com.documentscanner.DocumentScannerPackage; at the top of file,
@Override
protected  List<ReactPackage> getPackages() {
return Arrays.<ReactPackage>asList(
   new  MainReactPackage(),
   new  DocumentScannerPackage() <--- this  line,
   ...
   );
}include ':react-native-document-scanner'
project(':react-native-document-scanner').projectDir = new File(rootProject.projectDir, '../node_modules/react-native-document-scanner/android')include ':openCVLibrary310'
project(':openCVLibrary310').projectDir = new File(rootProject.projectDir,'../node_modules/react-native-document-scanner/android/openCVLibrary310')Change manifest header to avoid "Manifest merger error". After you add xmlns:tools="http://schemas.android.com/tools" should look like this:
<manifest xmlns:android="http://schemas.android.com/apk/res/android" package="com.<yourAppName>" xmlns:tools="http://schemas.android.com/tools">
Add tools:replace="android:allowBackup" in <application tag. It should look like this:
<application tools:replace="android:allowBackup" android:name=".MainApplication" android:label="@string/app_name" android:icon="@mipmap/ic_launcher" android:allowBackup="false" android:theme="@style/AppTheme">
Add Camera permissions request:
<uses-permission android:name="android.permission.CAMERA" />
- Get the component ref
<DocumentScanner ref={(ref) => this.scanner = ref} />
- Then
this.scanner.capture();| Prop | Params | Type | Description |
|---|---|---|---|
| onPictureTaken | data | object | Returns an image in a object { path: ('imageUri')} |
| onProcessing | data | object | Returns an object `{processing: (true |
The images are saved in Documents folder.
- Pass overlay color dynamically
- Pass contrast and brightness to preview
- Use front cam
- Use base64
Inspired in android project
- https://github.com/ctodobom/OpenNoteScanner
- https://github.com/Michaelvilleneuve/react-native-document-scanner
- https://github.com/andreluisjunqueira/react-native-documentscanner-android
Live document detection library. Returns either a URI or a base64 encoded string of the captured image, allowing you to easily store it or use it as you wish !
Features :
- Live detection
- Perspective correction and crop of the image
- Live camera filters (brightness, saturation, contrast)
- Flash
- Easy to use base64 image
Can be easily plugged with react-native-perspective-image-cropper
Use version >=1.4.1 if you are using react-native 0.48+
$ npm install react-native-document-scanner --save
$ react-native link react-native-document-scanner
Edit the info.plist file in XCode and add the following permission : NSCameraUsageDescription
Remember, this library uses your device camera, you can't run it on a simulator.
If you want to use Cocoapods insteads of react-native link, add the following to your Podfile
pod 'RNPdfScanner', :path => '../node_modules/react-native-document-scanner/ios'
import React,{ Component } from 'react';
import { View, Image } from 'react-native';

import DocumentScanner from 'react-native-document-scanner';

class YourComponent extends Component {
  render() {
    return (
      <View>
        <DocumentScanner
          useBase64
          saveInAppDocument={false}
          onPictureTaken={data => this.setState({
            image: data.croppedImage,
            initialImage: data.initialImage,
            rectangleCoordinates: data.rectangleCoordinates,
          })}
          overlayColor="rgba(255,130,0, 0.7)"
          enableTorch={false}
          brightness={0.3}
          saturation={1}
          contrast={1.1}
          quality={0.5}
          onRectangleDetect={({ stableCounter, lastDetectionType }) => this.setState({ stableCounter, lastDetectionType })}
          detectionCountBeforeCapture={5}
          detectionRefreshRateInMS={50}
        />
        <Image source={{ uri: `data:image/jpeg;base64,${this.state.image}`}} resizeMode="contain" />
      </View>
    );
  }
}| Prop | Default | Type | Description |
|---|---|---|---|
| overlayColor | none |
string |
Color of the detected rectangle : rgba recommended |
| detectionCountBeforeCapture | 5 |
integer |
Number of correct rectangle to detect before capture |
| detectionRefreshRateInMS | 50 |
integer |
Time between two rectangle detection attempt |
| enableTorch | false |
bool |
Allows to active or deactivate flash during document detection |
| useFrontCam | false |
bool |
Allows you to switch between front and back camera |
| brightness | 0 |
float |
Increase or decrease camera brightness. Normal as default. |
| saturation | 1 |
float |
Increase or decrease camera saturation. Set 0 for black & white |
| contrast | 1 |
float |
Increase or decrease camera contrast. Normal as default |
| quality | 0.8 |
float |
Image compression. Reduces both image size and quality |
| useBase64 | false |
bool |
If base64 representation should be passed instead of image uri's |
| saveInAppDocument | false |
bool |
If should save in app document in case of not using base 64 |
| captureMultiple | false |
bool |
Keeps the scanner on after a successful capture |
| noGrayScale | false | bool |
Currently this module saves pictures only in gray scale, this property adds the option to disable gray scale (only android) |
| manualOnly | false | bool |
if true, auto-detect is disabled (only android) |
- First get component ref
<DocumentScanner ref={(ref) => this.scanner = ref} />- Then call :
this.scanner.capture();| Props | Params | Type | Description |
|---|---|---|---|
| onRectangleDetect | { stableCounter, lastDetectionType } |
object |
See below |
The returned object includes the following keys :
stableCounter
Number of correctly formated rectangle found (this number triggers capture once it goes above detectionCountBeforeCapture)
lastDetectionType
Enum (0, 1 or 2) corresponding to the type of rectangle found 0. Correctly formated rectangle
- Wrong perspective, bad angle
- Too far
| Prop | Params | Type | Description |
|---|---|---|---|
| onPictureTaken | data |
object |
Returns the captured image in an object { croppedImage: ('URI or BASE64 string'), initialImage: 'URI or BASE64 string', rectangleCoordinates: 'object of coordinates' } |
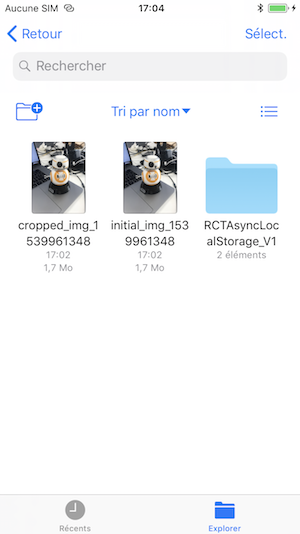
If you want to use saveInAppDocument options, then don't forget to add those raws in .plist :
<key>LSSupportsOpeningDocumentsInPlace</key>
<true/>- In XCode, in the project navigator, right click
Libraries➜Add Files to [your project's name] - Go to
node_modules➜react-native-pdf-scannerand addRNPdfScanner.xcodeproj - In XCode, in the project navigator, select your project. Add
libRNPdfScanner.ato your project'sBuild Phases➜Link Binary With Libraries - Run your project (
Cmd+R)<


