| target: | https://casefoam.readthedocs.io/en/latest/?badge=latest |
|---|---|
| alt: | Documentation Status |
This module is a addition to PyFoam and can automatically setup OpenFOAM
cases with varying conditions.
In order to use the Python module you need the PyFoam package.
install the package after cloning the repository with:
  $ pip install .

or via pypi by executing:
$ pip install casefoamFor a full documentation change into doc and build the documentation for example as html.
$ cd doc/
$ make html
$ firefox build/html/index.htmlCaseFoam offers two main features: the easy generation of parameter studies and the analysis of these. In the example, we want to change the intial height of the column and perform a grid study for the damBreak test case:
The first step is the generation of the cases. We want to generate three column heights where each case has three grids with a differnt cell size.
cat genCases.py:

import casefoam

baseCase = 'damBreak'
caseStructure = [['height_02', 'height_03', 'height_04'],
                ['grid1', 'grid2', 'grid3']
                ]

def update_grid(a,b,c,d,e):
    return {
        'system/blockMeshDict': {'#!stringManipulation': {'varA': '%s' %a,
                                                          'varB': '%s' %b,
                                                          'varC': '%s' %c,
                                                          'varD': '%s' %d,
                                                          'varE': '%s' %e
                                                          }
                                }
    }

def update_height(height):
    return {
        'system/setFieldsDict': {'#!stringManipulation':
                                {'var_height': '%s' %height}}
    }

caseData = {
    'height_02': update_height(0.2),
    'height_03': update_height(0.3),
    'height_04': update_height(0.4),
    'grid1': update_grid(23,8,19,42,4),
    'grid2': update_grid(23*2,8*2,19*2,42*2,4*2),
    'grid3': update_grid(23*3,8*3,19*3,42*3,4*3)
}

# generate cases
casefoam.mkCases(baseCase, caseStructure, caseData, hierarchy='tree',writeDir='Cases')
There a three different options how the cases can be manipulated:
- replacing a string inside the specified files
- executing a bash script
- by specifying a dictionary
for details please see the user manual.
The script is executed by:
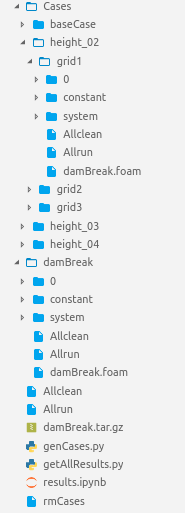
python genCases.pyThis will the generate the following structure:
The cases can be started by running the newly created Allrun script
./AllrunThree functions are avaiable for the postProcessing:
- time_series
- positional_field
- posField_to_timeSeries
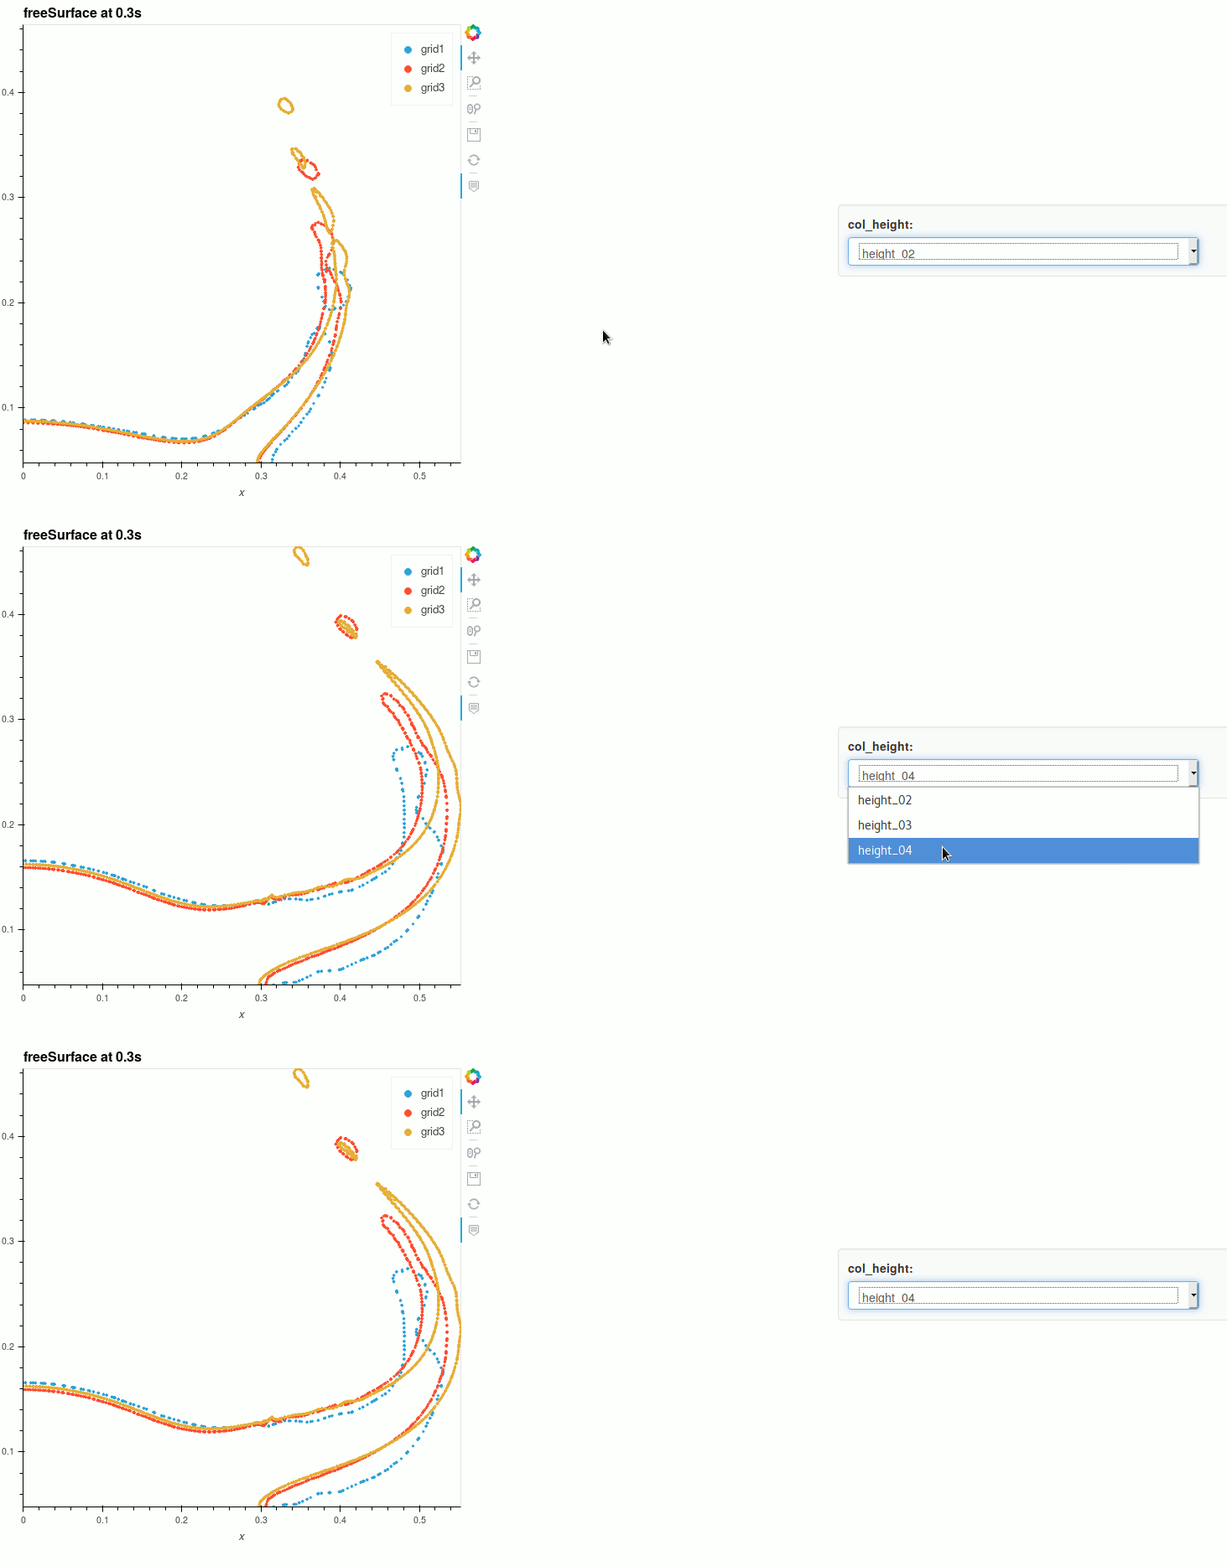
For the damBreak test case we want to plot the freesurface position at a given time. For that, we use the positional_field function and get a pandas dataframe which we plot with holoviews
import casefoam
import matplotlib.pyplot as plt
import pandas as pd
import holoviews as hv
hv.extension('bokeh')

caseStructure = [['height_02', 'height_03', 'height_04'],
                ['grid1', 'grid2', 'grid3']]
baseCase = 'Cases'
surfaceDir = 'freeSurface'
surface = casefoam.positional_field(surfaceDir,'U_freeSurface.raw',0.3,caseStructure,baseCase)
surface.columns = ['x','y','z','Ux','Uy','Uz','col_height','res']
surface_ds = hv.Dataset(surface, [ 'col_height','res'], ['x','y','z','Ux','Uy','Uz'])
holoviews is optimized for the use for the jupyter notebooks. The %%opts arguments are used to modify the layout of the plot. holoviews renders an interactive plot which can be exported as html:
%%opts Scatter [width=600,height=600,title='freeSurface at 0.3s',tools=['hover']]
%%opts (muted_alpha=0.0)
surface_ds.to(hv.Scatter,'x','y').overlay('res')

