

Setting up a software engineering computer
can take a long time. ⏳
We need to streamline the process
so that we can start work as quickly as possible. 🏁
This doc outlines all the steps we take to setup
our typical system. 💻
If you find it helpful, please ⭐ the repo to let us know. Thanks.
This repo contains the tools we use.
If you have a tool or setup step you think we should include/use, please open an issue to let us know! 🙏
Note: The intention is not to include every fancy script, tip and trick under the sun, this is about basic setup and getting going when you're new and already have a steep learning curve!
-
People who are
newto software engineering.
Particularly people who have learnt online using inbuilt browser-based editors and tools (often the case in online courses) and have not set up their own environment before. -
People @dwyl who have just got a new computer and need to set it up as quickly as possible so they can get work done.
Note: @dwyl we use a specific technology stack that includes PostgreSQL and Elixir Installing most of this software is optional, but it does make you more effective so we highly recommend it.
This repo includes some recommendations of things we favour and use @dwyl.
Ensure you have a decent internet connection when setting up your machine, several gigabytes will be downloaded.
Note: if you lack a good internet connection, simply skip downloading the browser(s) and other larger Apps. But we are assuming that if you are reading this, you have access to decent bandwidth to be a Developer/Engineer. Please, share your experience if not! We are very curious to hear from bandwidth-constrained people! 🙏 We would like to formulate a "Low Cost / Bandwidth" version of this doc for use on a Raspberry Pi or other lower cost computer. We could even create a pre-built SD card with everything required. 💭
The reason the word "browsers" is plural is simple: having multiple web browsers allows you to segment your use of each one for a specific purpose. e.g:
Safari- the default browser on Mac. Keep it "stock" (no plugins/themes), use it for UAT testing web apps to know what they will look & feel like to people who own Macs but don't bother to download a different browser. Safari is good for personal things too as it has good privacy and speed.Google Chrome: google.com/chrome The baseline for web development. Great Dev Tools, profiling etc.Firefox: mozilla.org/firefox We use Firefox for testing our Web apps because it has the best support for Web Standards. It's fast, free and surfaces potential bugs in our code better than other browsers.
In addition to these there are many other browsers you can install/use, for example:
Brave: brave.com/download Based on Chrome but with built-in ad-blocker. Use Brave to watch YouTube lectures/tutorials without Ads.Google Chrome Canary: google.com/chrome/canary/ Chrome but with all latest features.Firefox Developer Edition: mozilla.org/firefox/developer/ Useful for debugging and testing web apps. We have it installed as a backup browser for when we need to test multiple clients concurrently.Microsoft Edge: microsoft.com/edge Based on Google Chrome but with a few Microsoft enhancements.
As noted in #9 we have several web browsers installed and use them for specific purposes:

Given that Microsoft now owns GitHub
and can read everything we do on the platform
(both public and private...)
we use Edge for all our GitHub
interactions (e.g. reading notifications, responding to issues/questions, etc.)
Edge is our "GitHub browser".
You are free to come up with your own system, but having multiple browsers and segmenting your use can mean you have fewer tabs in your "work" browser and can easily separate any personal stuff.
We use Git and
Github
exclusively for our version control
and to share our work with the world.
Understanding the
difference between the two
is also helpful.
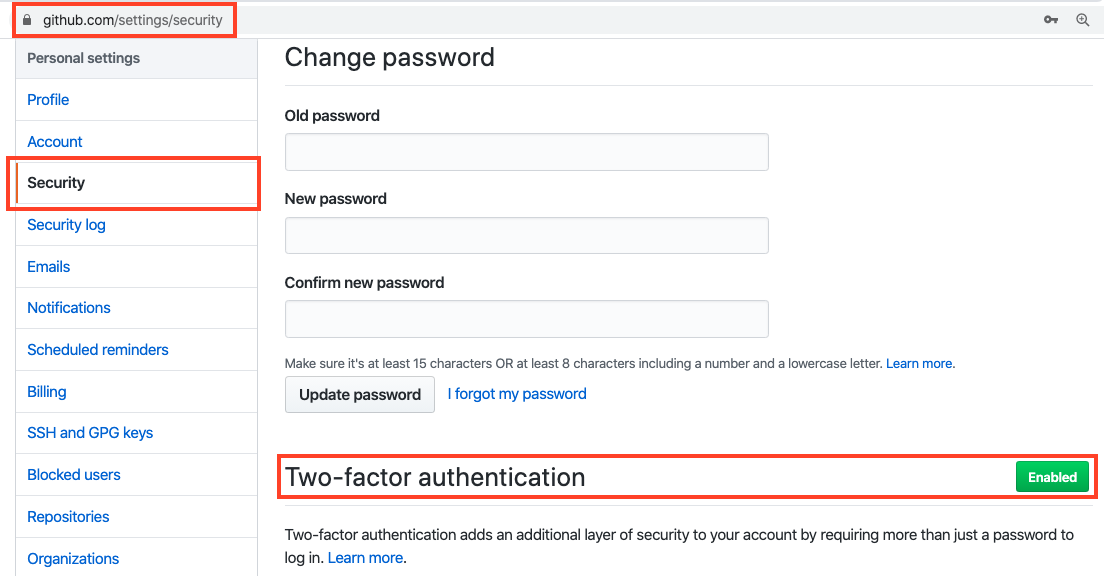
If you don't already have a GitHub account, sign up for one: github.com/join
2FA protects your Github account and also any organisations you are a member of from malicious intent.
Next steps? If you want to
contribute to dwyl projects,
you can easily do so without
knowing any of our
tech stack.
Simply use the
App
and open issues whenever you have questions!
Follow the official set up Git guide to get it working on your computer.
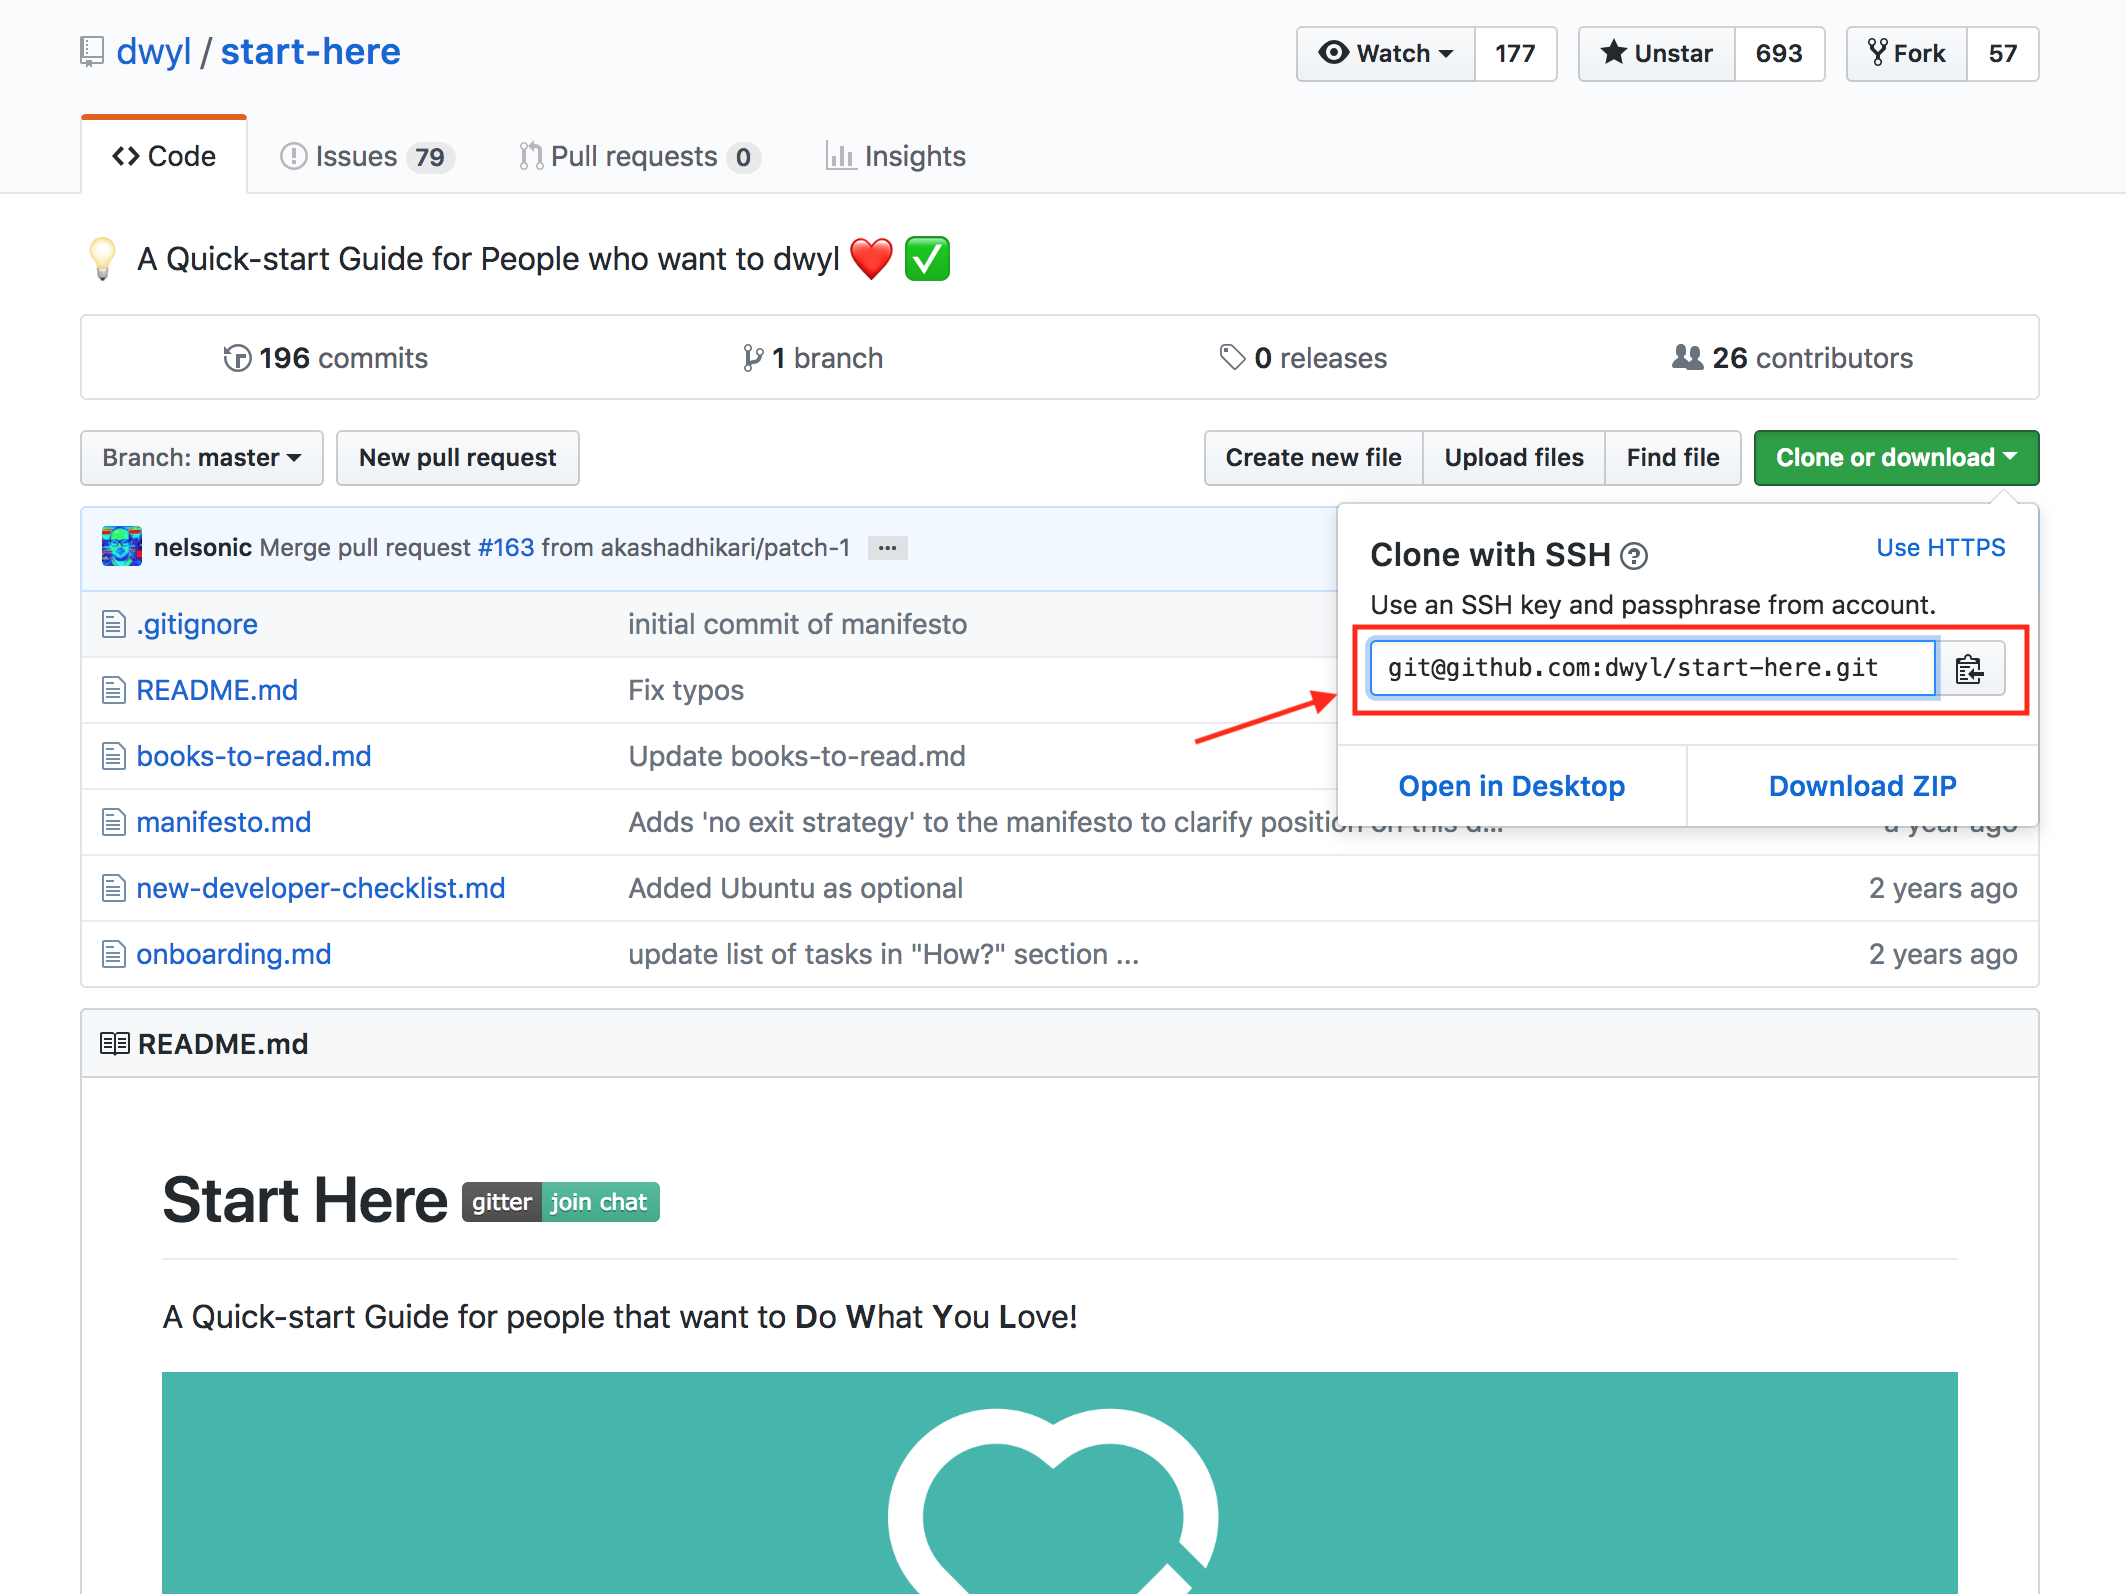
Setup ssh authentication as it is more secure and means you _won't have to type in your password every time you push to GitHub.
Note: This also means that when you clone a repo, you'll need to use the SSH clone URL (thanks @tsop14 for the screenshot!)
There are many resources online: start-here#git
Although Git has a desktop client, we recommend that you learn to use it on the command line. This is much faster in the long run and will serve you well when you need to understand how things work.
This section is specific to Mac computers. Skip it if you are using Linux or Windows.
We find PostgresApp to be the easiest way to manage PostgreSQL on Mac. It gives us a basic graphical user interface (GUI) and menu bar icon that informs us of the status of the DB.
Download: https://postgresapp.com/
Postgres https://www.pgadmin.org/
Rectangle is window manager/tiler for Mac, it gives you keyboard shortcuts for moving/organising your Apps/Windows: rectangleapp.com

Note: Rectangle will request/require "accessibility" permissions to control your windows. This is normal.
Using Rectangle is fastest via the keyboard shortcuts:

You can add your own shortcuts if you prefer. We haven't found the need to yet.
If you are setting up a Mac, you will need to install homebrew brew.sh, the package manager that will download and manage several other open source software packages.
Install with the following command in your terminal:
/bin/bash -c "$(curl -fsSL https://raw.githubusercontent.com/Homebrew/install/HEAD/install.sh)"The default terminal emulator on Mac is OK for basic tasks...
We find that
iTerm
is considerably better UX.
e.g: iTerm allows screen splitting:

As with Web Browsers, it doesn't hurt to have more than one Terminal on your Mac.
Download: https://iterm2.com
There are many themes which you may have heard of (like Oh My Zsh) that aim to add some functionality and shortcuts to your terminal. We don't recommend you use any terminal themes when you're starting out because they are a distraction from the content/code you are crafting.
However, once you know what you're doing in the terminal, you can consider enhancing your terminal with themes. There are many to choose from: iterm2colorschemes.com
The following applies to all people regardless of their operating system (Linux, Mac & Windows)
It's your choice which text editor you use,
but you will inevitably need (at least) one editor.
At the time of writing,
@dwyl we use
Atom
(Open Source, Electron/NodeJS based editor).
There are a wide range of text editors and integrated development environment (IDEs) available.
We tend to use:
- Atom: https://atom.io Open Source and has many plugins for language and framework support. Download and install it even if you only use it as a "backup" editor. VSCodium https://vscodium.com the Open Source version of VS Code. All Plugins work as expected but no Tracking from Microsoft.
- VS Code: https://code.visualstudio.com as a backup or read-only viewer when we are working on multiple projects concurrently.
- Sublime Text: sublimetext.com - fast and free-ish (you will be reminded to purchase a license ... but the license is perpetual not annual!)
Set up soft tabs (indentation)
You can usually set this up in the Preferences or Settings
of your favourite text editor
so you never have to think about it again
(example below for Atom):

- Set up a guide (or line) to show on your page at the 80 character mark so you know when you go past 80 characters (or columns) on a single line
- Useful for readability, particularly in code snippets where you would otherwise end up with a scroll bar
- You should also be able to set this up in your favourite text editor's Preferences (example below again on Atom editor - note, I also like to set up my editor to soft wrap at this line length so I can read other people's code more easily)

First of all you need to create a Github Account and then create a new repository, name it as you wish.
Now you have a link to your repository and instructions to how to create a new repository in the command line.
Now go to Atom and press cmd+SHIFT+P and you enter Github:clone and then paste your link.
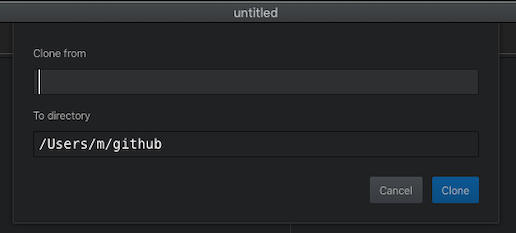
A couple a seconds later you have your repository on the left side of the screen.

The next thing to do is authorize Github for atom so go to github.atom.io/login.
Just make the login with your information and copy the GitHub token after having your GitHub token copied go to Atom to the GitHub tab in the right lower corner and you will see a login just paste your token there and now you are connected to GitHub.
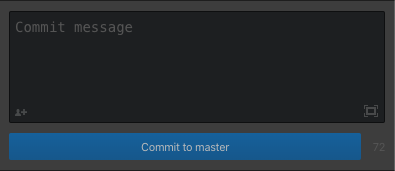
So now if you create a file and edit with your own text you can upload the file to GitHub by going to the git tab and Stage the changes in your file you have to give a commit message the first time you edit the file. Then click on Commit to master.
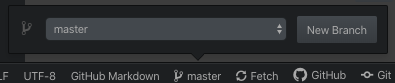
Now click on master and then on new branch and call it whatever you want then click on publish. You will have to enter your credentials again to validate those changes.
If you go on your created repository and press F5 you should see those changes.
Install at least a linter in your editor.
Each person's most used shortcuts will vary of course, but here are some of the things we suggest learn the keyboard shortcuts for:
- Select the current word (usually
cmd + D) - Delete current line (usually
ctrl + shift + K) - Indenting a line or a whole block of code at once
- Column editing
- Moving a line or block of code up and down the page
- Changing the syntax highlighting when required
- Toggle between the different views (e.g. hide/show the file tree view to gain more screen real estate)
This section is specific to Linux computers. Skip it if you are using Mac or Windows.
It's your choice which text editor you use, but you will inevitably need (at least) one editor. At the time of writing, @lnxwizard we use Visual Studio Code (aka VS Code).
Vim is a free and open-source, screen-based text editor program. It is an improved clone of Bill Joy's vi. Vim's author, Bram Moolenaar, derived Vim from a port of the Stevie editor for Amiga and released a version to the public in 1991. Vim is designed for use both from a command-line interface and as a standalone application in a graphical user interface. Vim comes pre-installed on some Linux distributions.
Arch Linux, Manjaro:
sudo pacman -S vimDebian, Ubuntu, Linux Mint:
sudo apt install vimCentOS, Fedora, RHEL:
sudo dnf install vimOpenSuse:
sudo zypper install vimNeovim is a project that seeks to aggressively refactor Vim in order to:
- Simplify maintenance and encourage contributions
- Split the work between multiple developers
- Enable advanced UIs without modifications to the core
- Maximize extensibility
Arch Linux, Manjaro:
sudo pacman -S neovimDebian, Ubuntu, Linux Mint:
sudo apt-get install neovimFedora:
sudo dnf install -y neovim python3-neovimCentOS, RHEL:
yum install -y https://dl.fedoraproject.org/pub/epel/epel-release-latest-8.noarch.rpm
yum install -y neovim python3-neovim
OpenSuse:
sudo zypper in neovimVisual Studio Code, also commonly referred to as VS Code, is a source-code editor made by Microsoft with the Electron Framework, for Windows, Linux and macOS. Features include support for debugging, syntax highlighting, intelligent code completion, snippets, code refactoring, and embedded Git. Users can change the theme, keyboard shortcuts, preferences, and install extensions that add functionality.
Arch Linux, Manjaro:
sudo pacman -S codeDebian, Ubuntu, Linux Mint:
sudo apt install codeCentOS, RHEL, Fedora:
sudo dnf install codeSystem Fetch, is very useful tools for extracting essential details on your Linux system OS.
screenfetch is a "Bash Screenshot Information Tool". This handy Bash script can be used to generate one of those nifty terminal theme information + ASCII distribution logos you see in everyone's screenshots nowadays. It will auto-detect your distribution and display an ASCII version of that distribution's logo and some valuable information to the right. There are options to specify no ASCII art, colors, taking a screenshot upon displaying info, and even customizing the screenshot command! This script is very easy to add to and can easily be extended. It’s very easy to use. Simply run the following command in terminal:
Usage:
screenfetchArch Linux, Manjaro:
sudo pacman -S screenfetch Debian, Ubuntu, Linux Mint:
sudo apt install screenfetch Fedora:
sudo dnf install screenfetchNeofetch is a system information tool written in the Bash shell scripting language. On the left side is always a logo of the distribution, rendered in ASCII art. Unlike a system monitor, the tool only features a static display of the computer's basic hardware and software configurations and their versions, typically operating system, the host (namely the technical name of the machine), uptime, package managers, the shell, display resolution, desktop environment, window manager, themes and icons, the computer terminal, CPU, GPU, and RAM. Neofetch can also display images on the terminal with w3m-img in place of the ASCII logo art. Neofetch hasn't been updated and appears to be inactive since about December 9th, 2021. It’s very easy to use. Simply run the following command in terminal:
Usage:
neofetchArch Linux, Manjaro:
sudo pacman -S neofetch Debian, Ubuntu, Linux Mint:
sudo apt install neofetch Fedora:
sudo dnf install neofetch