Early automatically generates and maintains verified and validated unit tests.
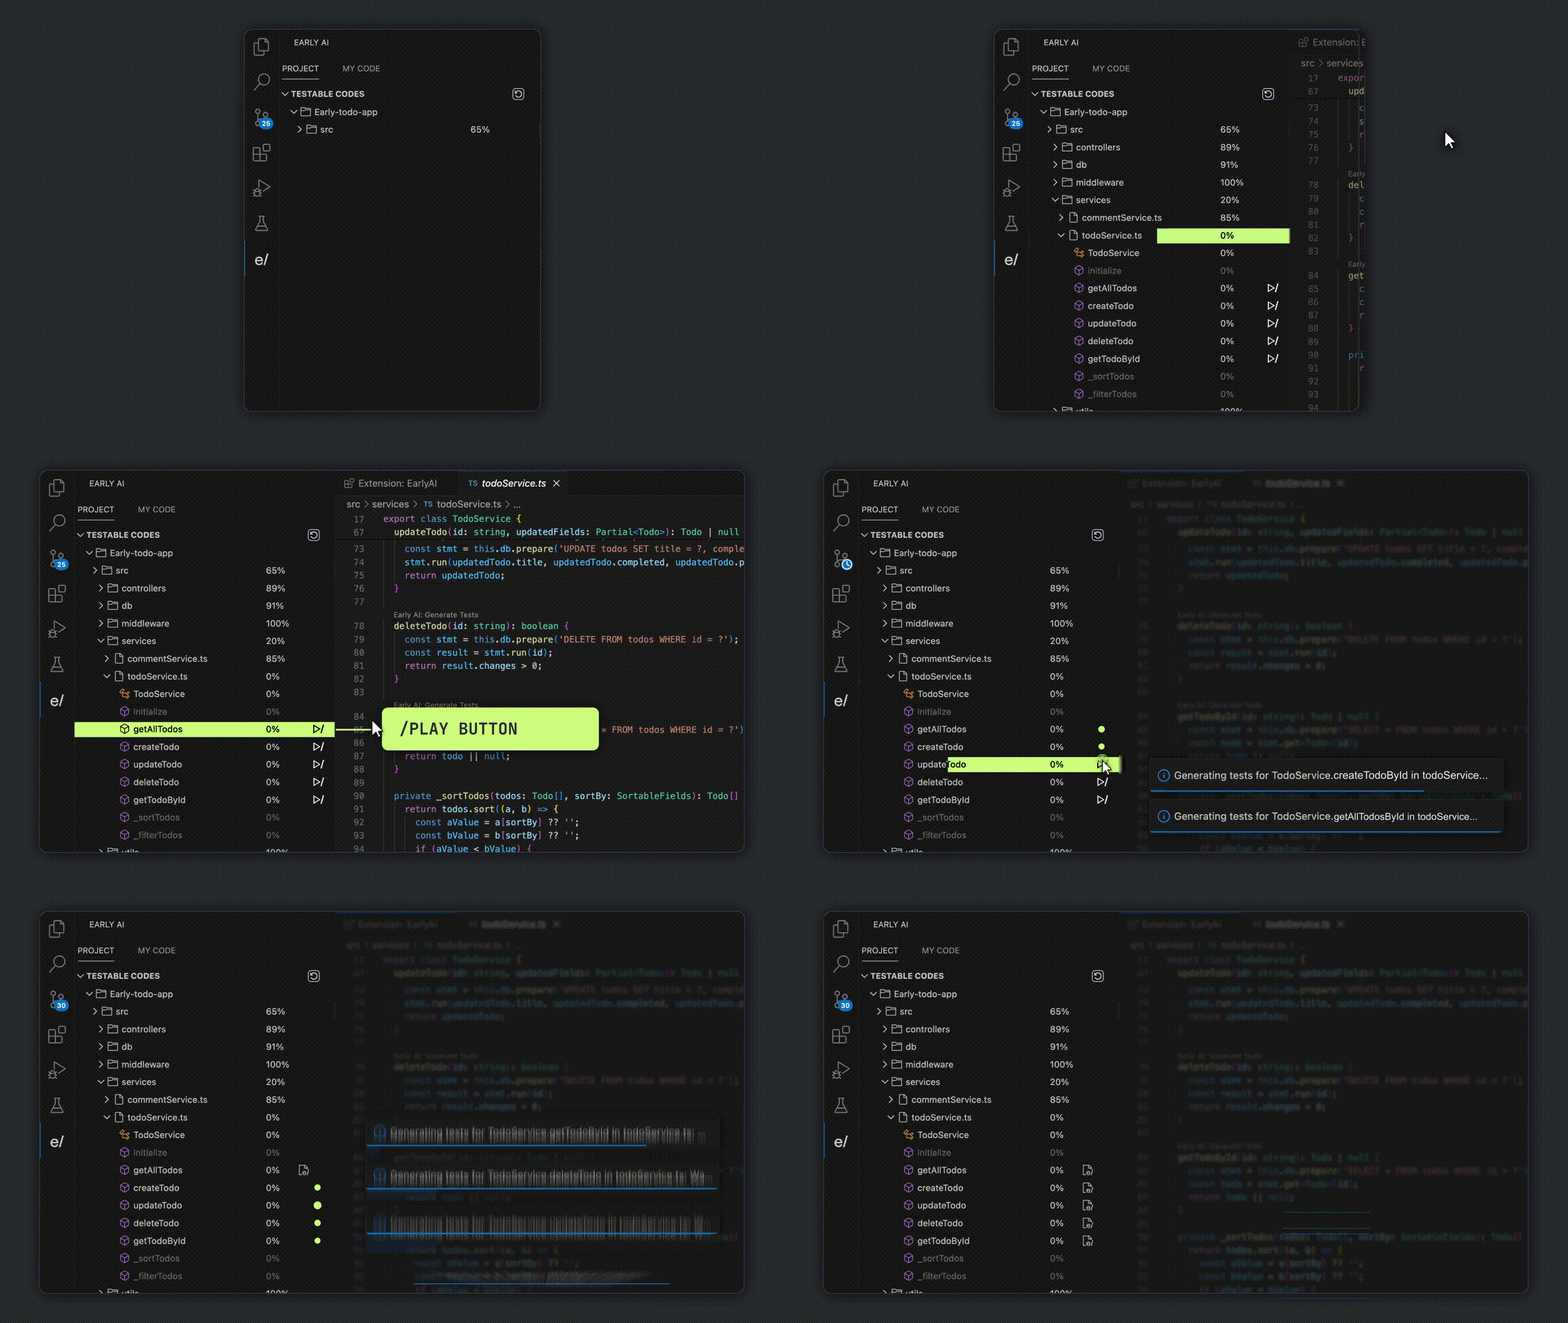
Generate working tests with a click of a button

Easily generate tests without leaving your IDE. Use Code Lens or context menu.

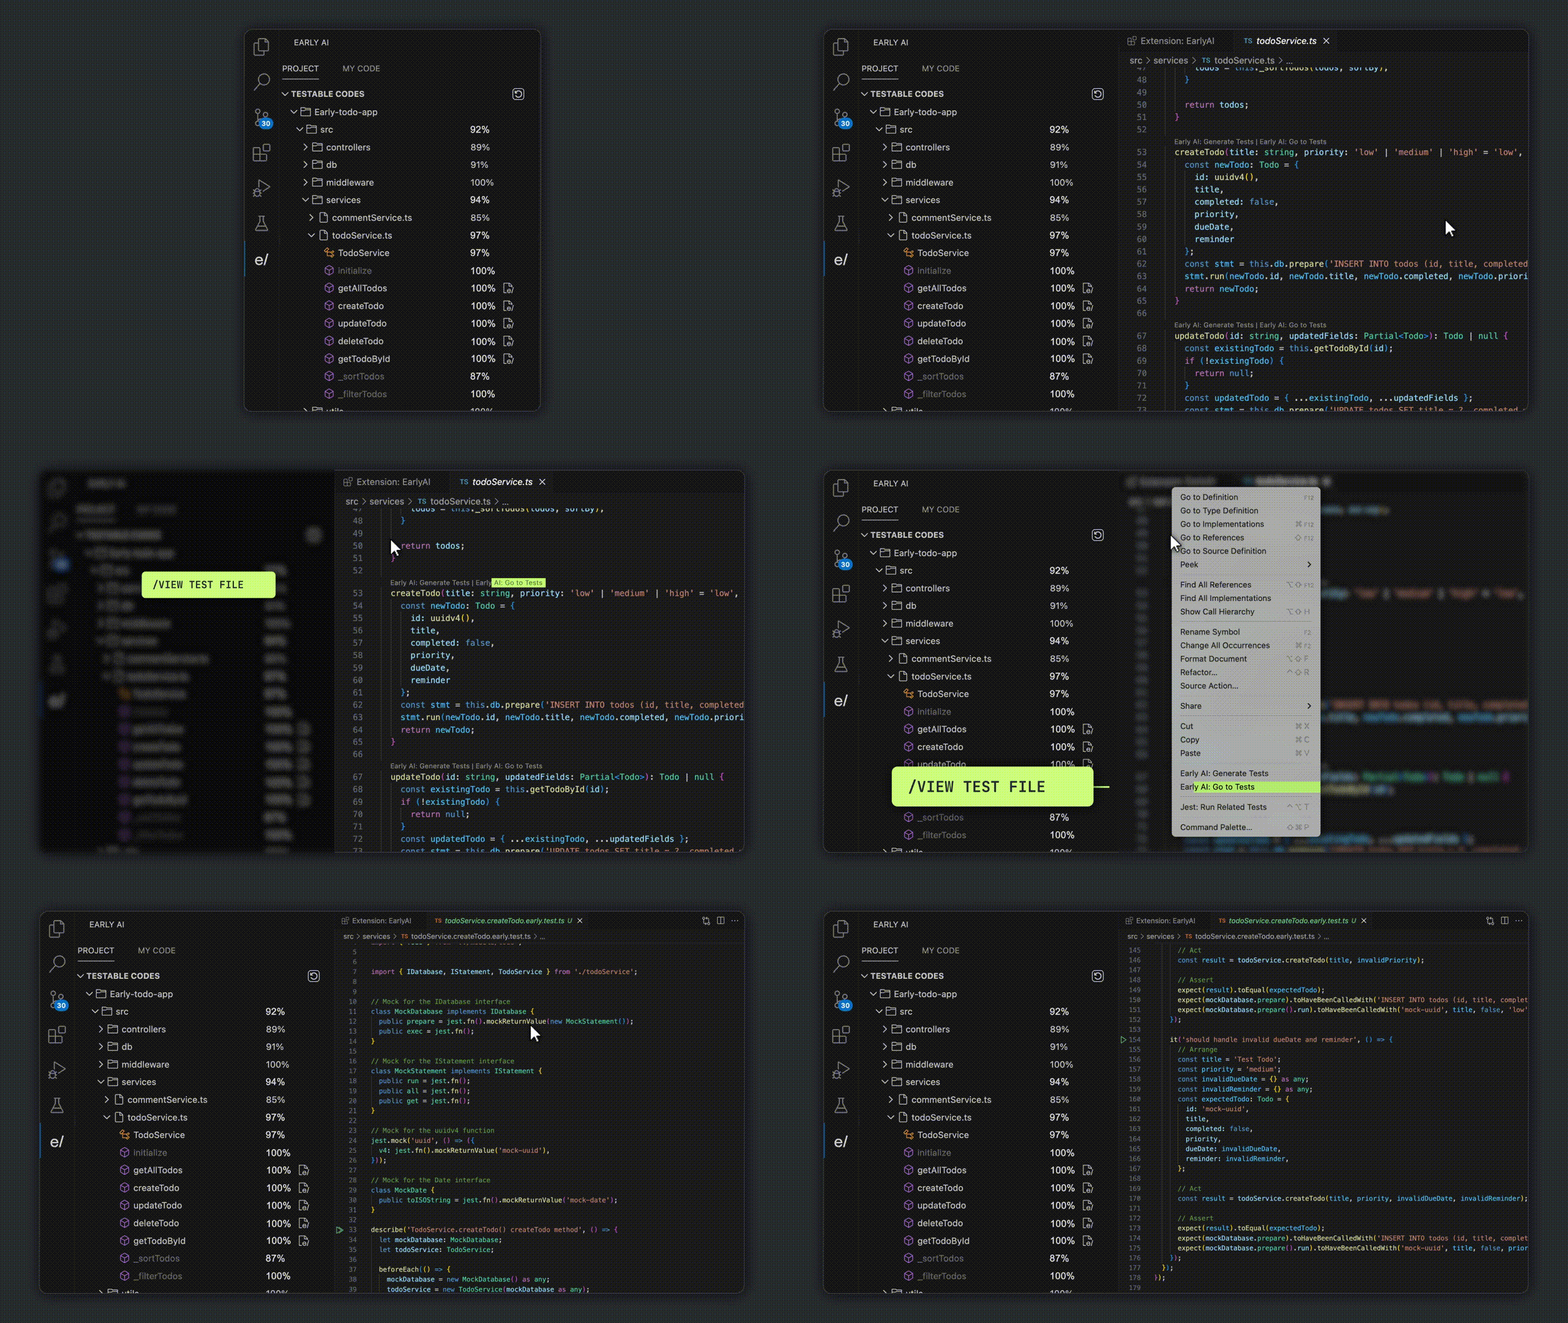
Easily navigate to the newly generated tests, review or make them better.

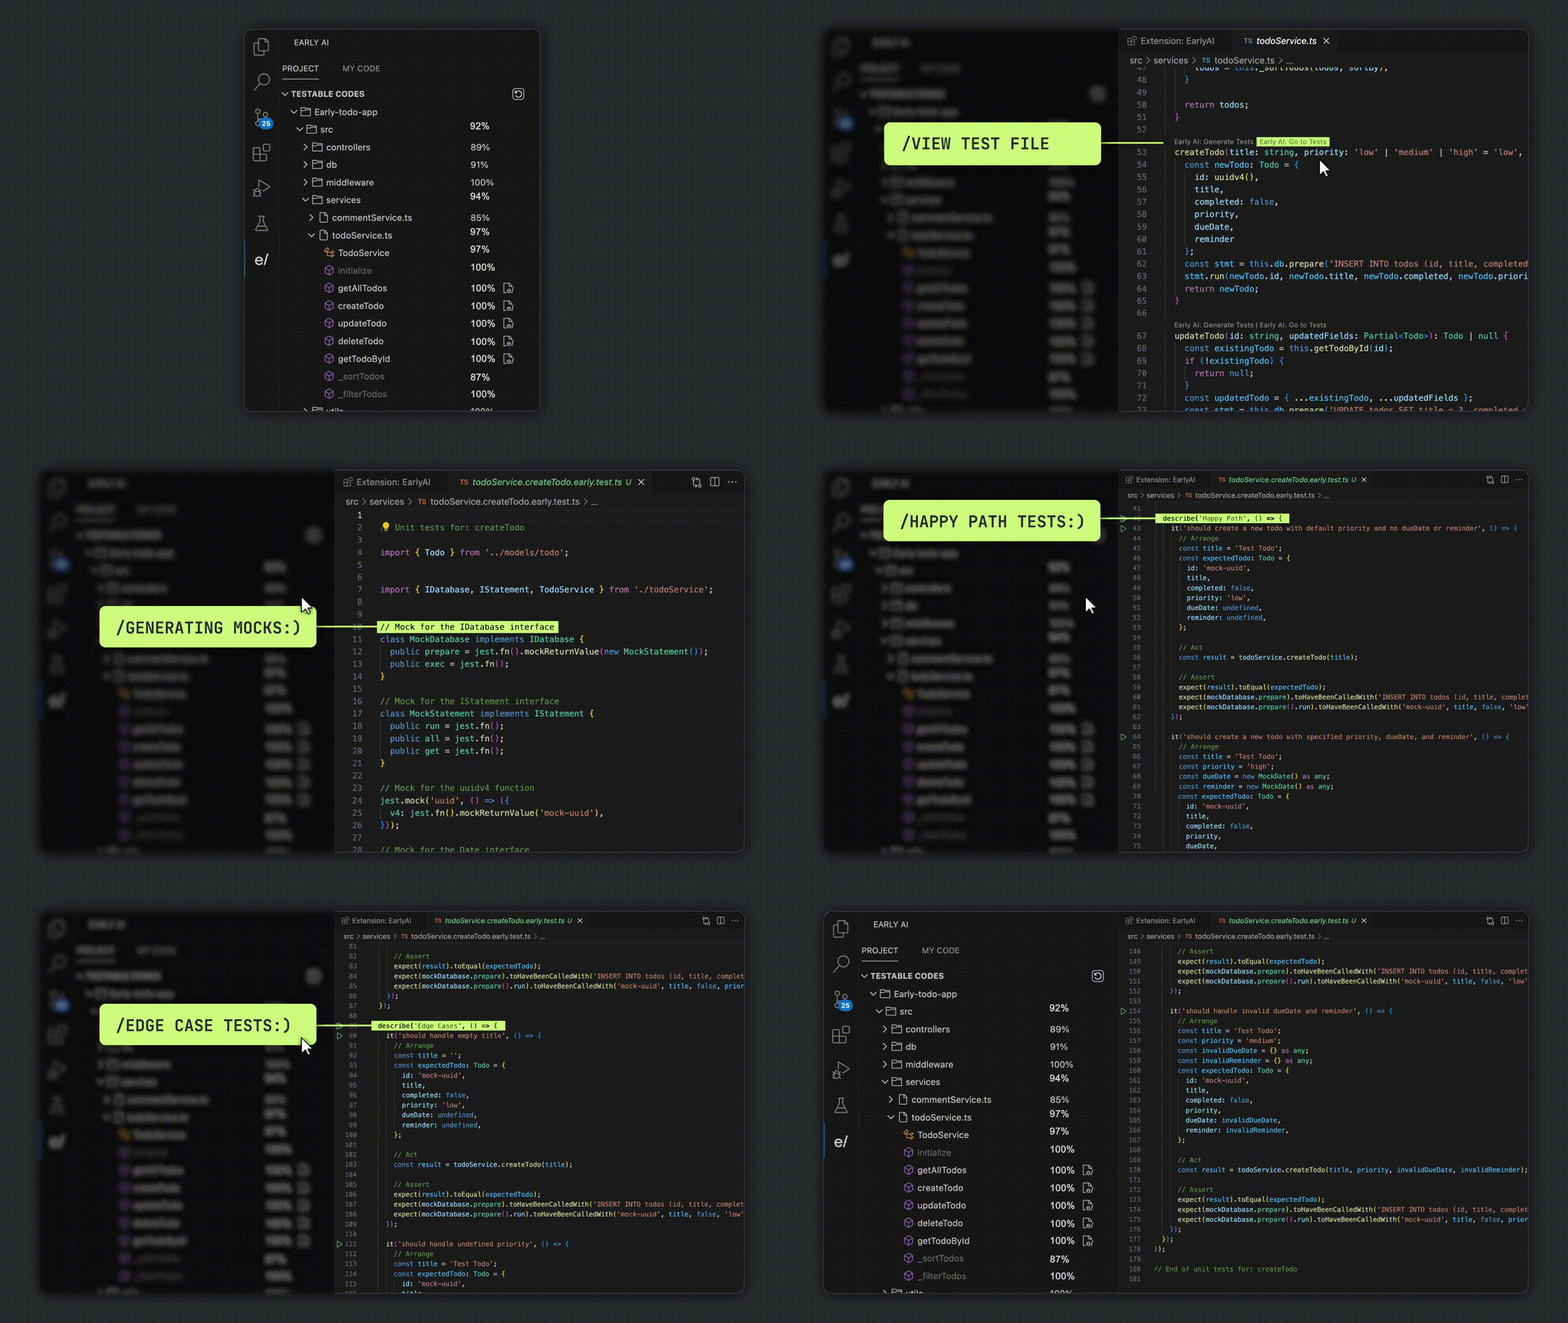
Generate high-quality tests that include mocks and cover various scenarios such as happy paths and edge cases. Green tests enhance coverage, while red tests may identify potential bugs.
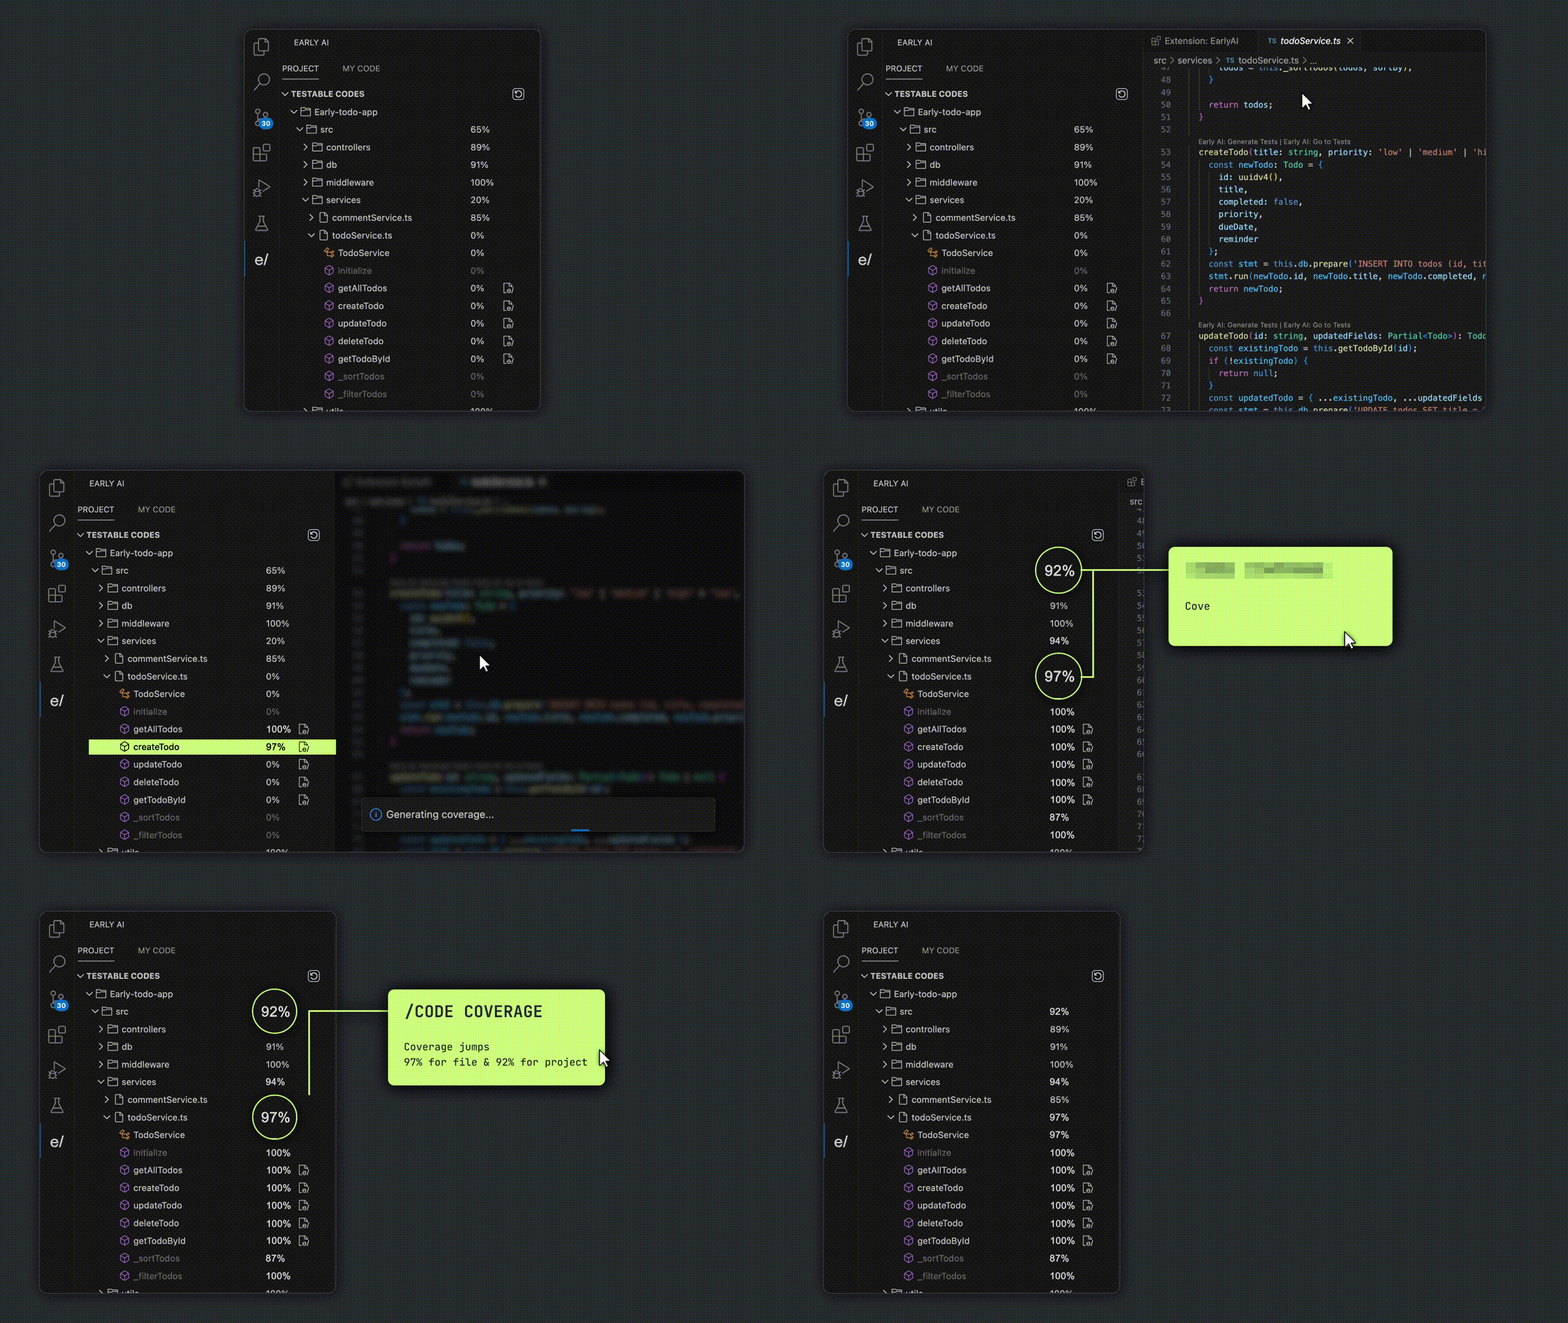
See the impact of tests on your code coverage, ensuring your work makes a difference.

Visit our sample app in github
- vsCode
- TypeScript
- Prerequisites For an easy initial setup, we recommend you go through our sample Todo-app in github first.
Before installing the extension, ensure you have the following prerequisites installed:
- VSCode (Version 1.88 and later)
- NodeJS
- Jest
- TypeScript
- ts-jest
You can install Jest and TypeScript typings via npm:
npm install --save-dev jest @types/jest ts-jest
Supported Test Frameworks
- Jest: This extension is currently optimized for generating unit tests with Jest.
Installation
- Search for EarlyAI on the Visual Studio Marketplace via the IDE or the Web and Install Early's extension
- Ensure that your project is set up with NodeJS and Jest.
- Configuration (Jest related) You are ready to go if you have Jest configured and the above prerequisites installed! If not, please continue reading below for further setup instructions.
Configure Jest in your project to integrate with the extension. Below is an example of a typical Jest configuration suitable for TypeScript projects: Filename is “jest.config.ts” and resides in the project's root folder.
import type { Config } from '@jest/types';
const config: Config.InitialOptions = {
  preset: 'ts-jest',
  testEnvironment: 'node',
  rootDir: 'src',
  testRegex: '.*\\.test\\.ts$',
  moduleNameMapper: {
    "^@src/(.*)$": "<rootDir>/$1"
  },
  collectCoverageFrom: ["./**/*.(t|j)s"]
};
export default config;
Important Configuration Parameters:
- testEnvironment: Specifies the environment in which the tests are executed
- testRegex: make sure you have 'test" in the regex. for example if you currently have 'spec' you need to change it to something like
testRegex: ".*\\.(test)|(spec)\\.ts$"};
- ModuleNameMapper: If you have path aliases in tsconfig.json, identify them under compilerOptions.paths. Then, add matching regex patterns to moduleNameMapper in your Jest config to mirror the aliases, using to map them to their corresponding directories, like this: Ensure your Jest configuration is properly set up to work with TypeScript and the paths align with your project structure.
