Compatible with Enedis Linky meters in "Historic" mode, and "Blue" meters.
This is a fork of etrinh software whose original design can be bought here
This fork uses Raspberry RP2040 with a 64M-bit Serial Flash Memory and has a USB B Micro port to update the firmware.
The firmware has been refactored to split classes into their own files and adapt it to the rp2040. It also leverages the latest version (as of 01/12/22) of KNX Library and in particular it's support for RP2040.
- Activatable RealTime mode for real-time consumption monitoring/display.
- History of total Consumption (Current Year, Current Month, Today, Last Year, Last Month, Yesterday) (an external KNX Clock participant is required to provide accurate date and time).
- ETS5 configurable.
- Bus powered (10mA).
- Connect the device to the TeleInfo terminals (I1 I2) on the energy meter (No polarity).
- Connect the device to the KNX bus.
- To activate the device Programming Mode, click the "PROG / HRST".
- Configure device in ETS.
- To reset History, press the History Reset "PROG / HRST" Button more than 4 seconds.
- In case of over-current warning, the message "Depassement" (Group Object 43) is repeated every 10 seconds on the bus.
- Led Blinking (0.5s On/1.5s Off): TeleInfo data are receiving - Device is working properly.
- Led Continuously On: The device is in programming mode (it will automatically switch off after a delay of 15 minutes or a new press on the "PROG / HRST" button).
- Led Blinking (0.5s On/0.5s Off): The History is erased (happens when the "PROG / HRST" Button is pressed during more than 4 seconds).
- Led Off: The device is not receiving TeleInfo data, or is not configured with ETS5, or is not connected to the KNX Bus.
All "Consumption" Group Objects (from GO 7 to GO 24):
- Can be read to get the consumption index difference from the beginning and ending of the specified period.
- Can be written by the consumption index at the beginning of the corresponding period. It allows to specifically initialize the history from data provided by your energy provider. It is advised to set these indexes before affecting monitoring participants to these Group Objects.
Click here to download ETS5 product database (identified as KNX Association).
The Firmware can be uploaded directly through the USB port. On MacOS The firmware upload can be done by uncommenting this line in platform.io:
;upload_port = /Volumes/RPI-RP2/
This leverages the rp2040 embedded boot firmware. If the drive does not show pushing the reset button on the main board (SW3) while plugging in the usb should make it appear. Once the firmware has been uploaded once, the serial port should become available.
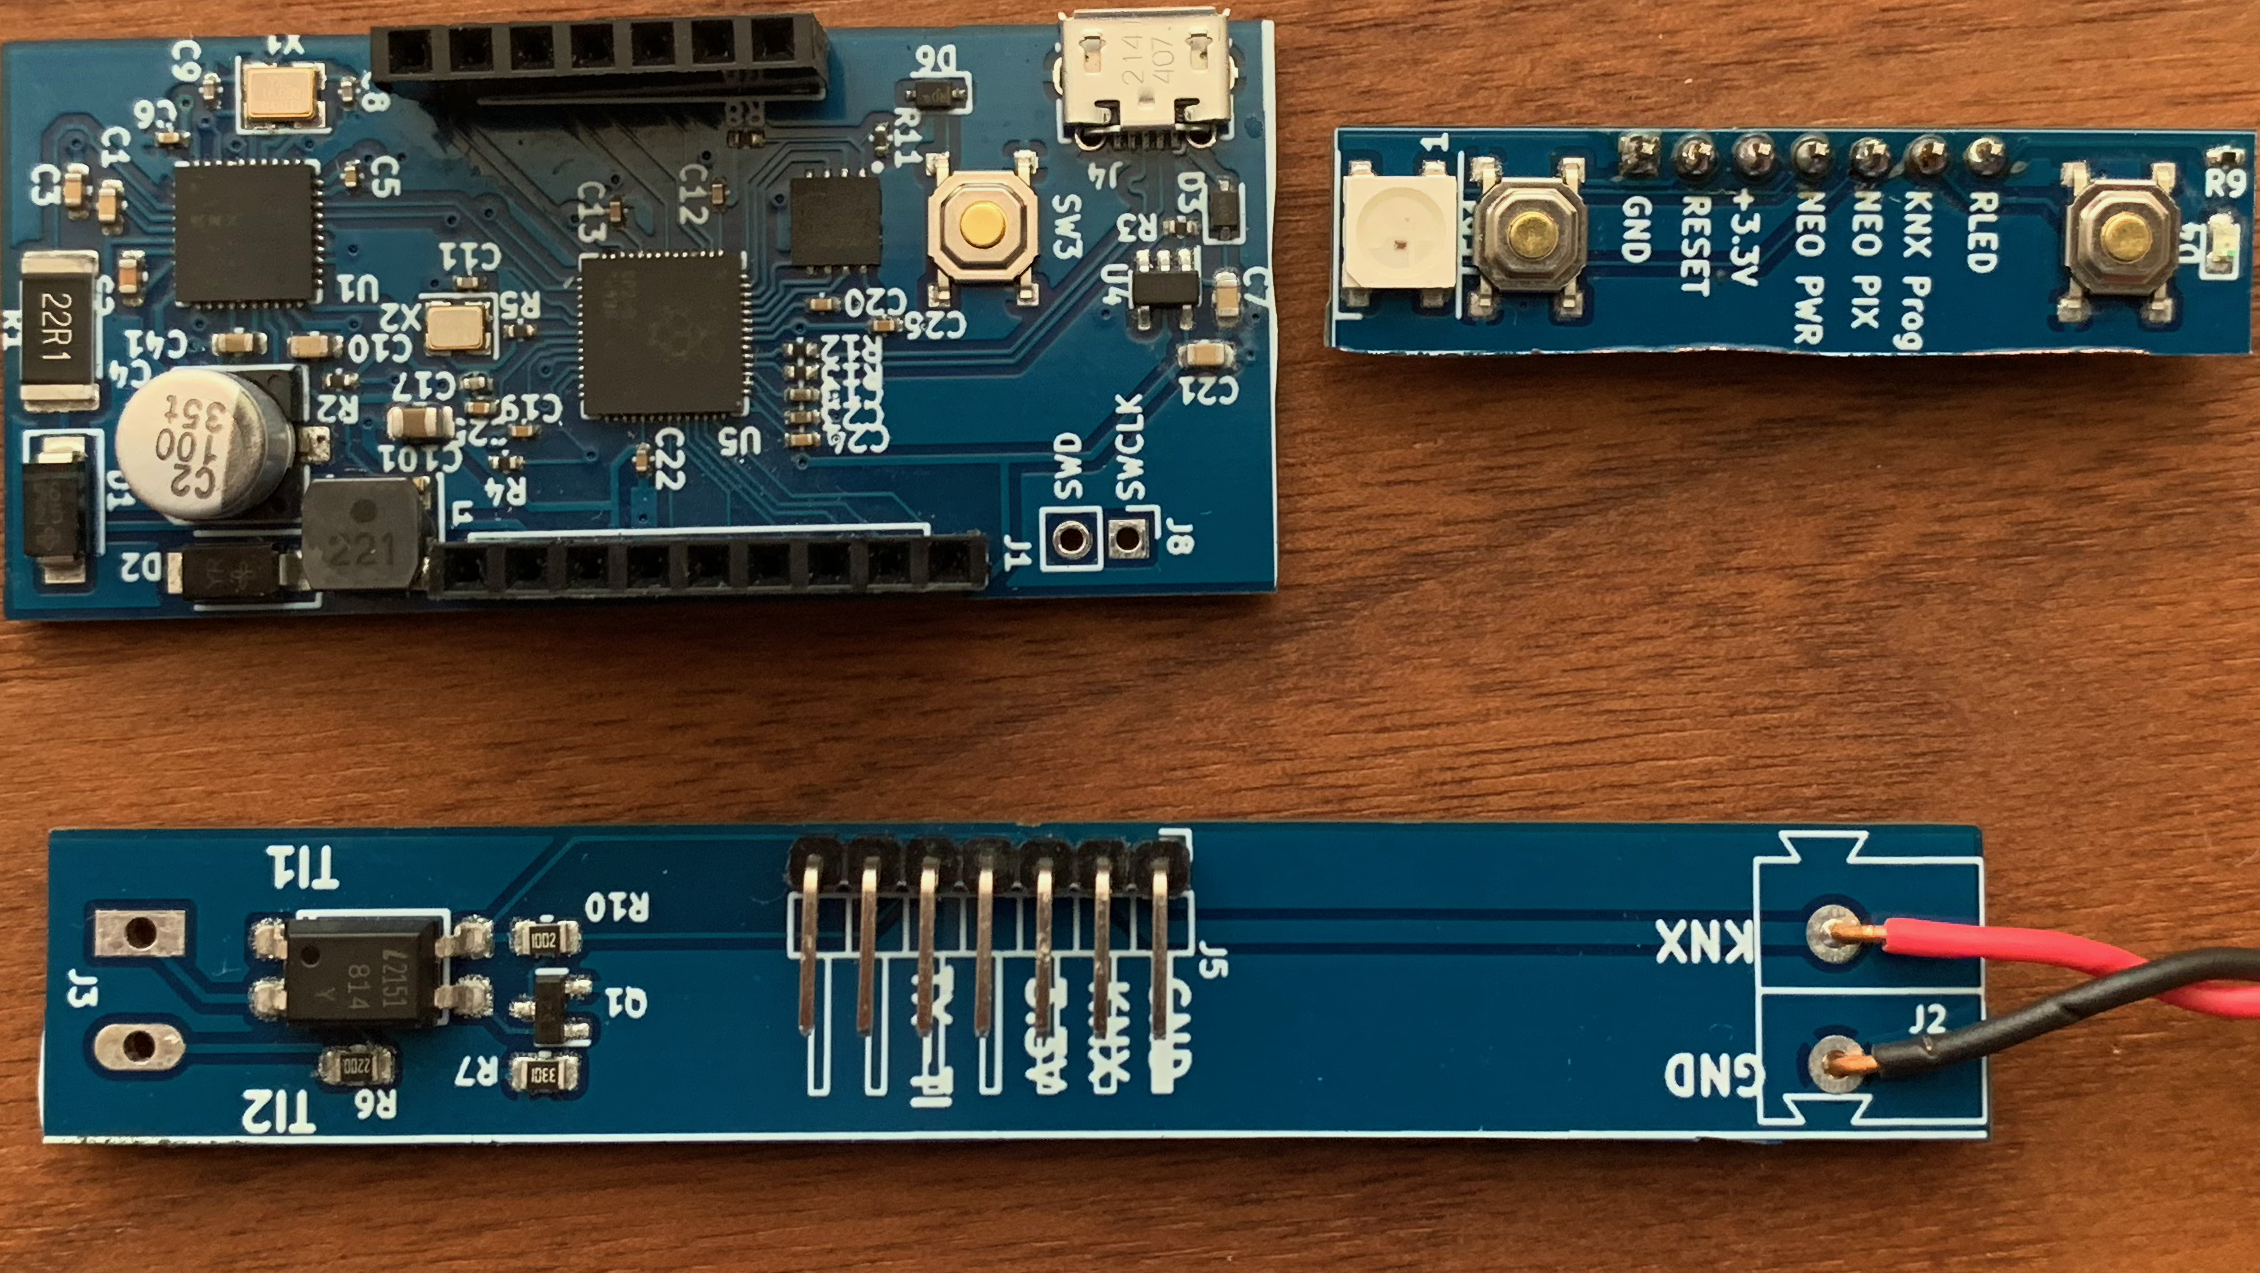
The hardware is build from a set of open source designs Adafruit ItsyBitsy rp2040 Nano BCU PiTInfo cobbled together on a board that needs to be cut in three parts and assembled.
The folder hardware contain the kicad files and the gerber/bom/cpl files that can be sent to JLCPCB. The fabrication output is a board
The board then needs to be cut in three parts.
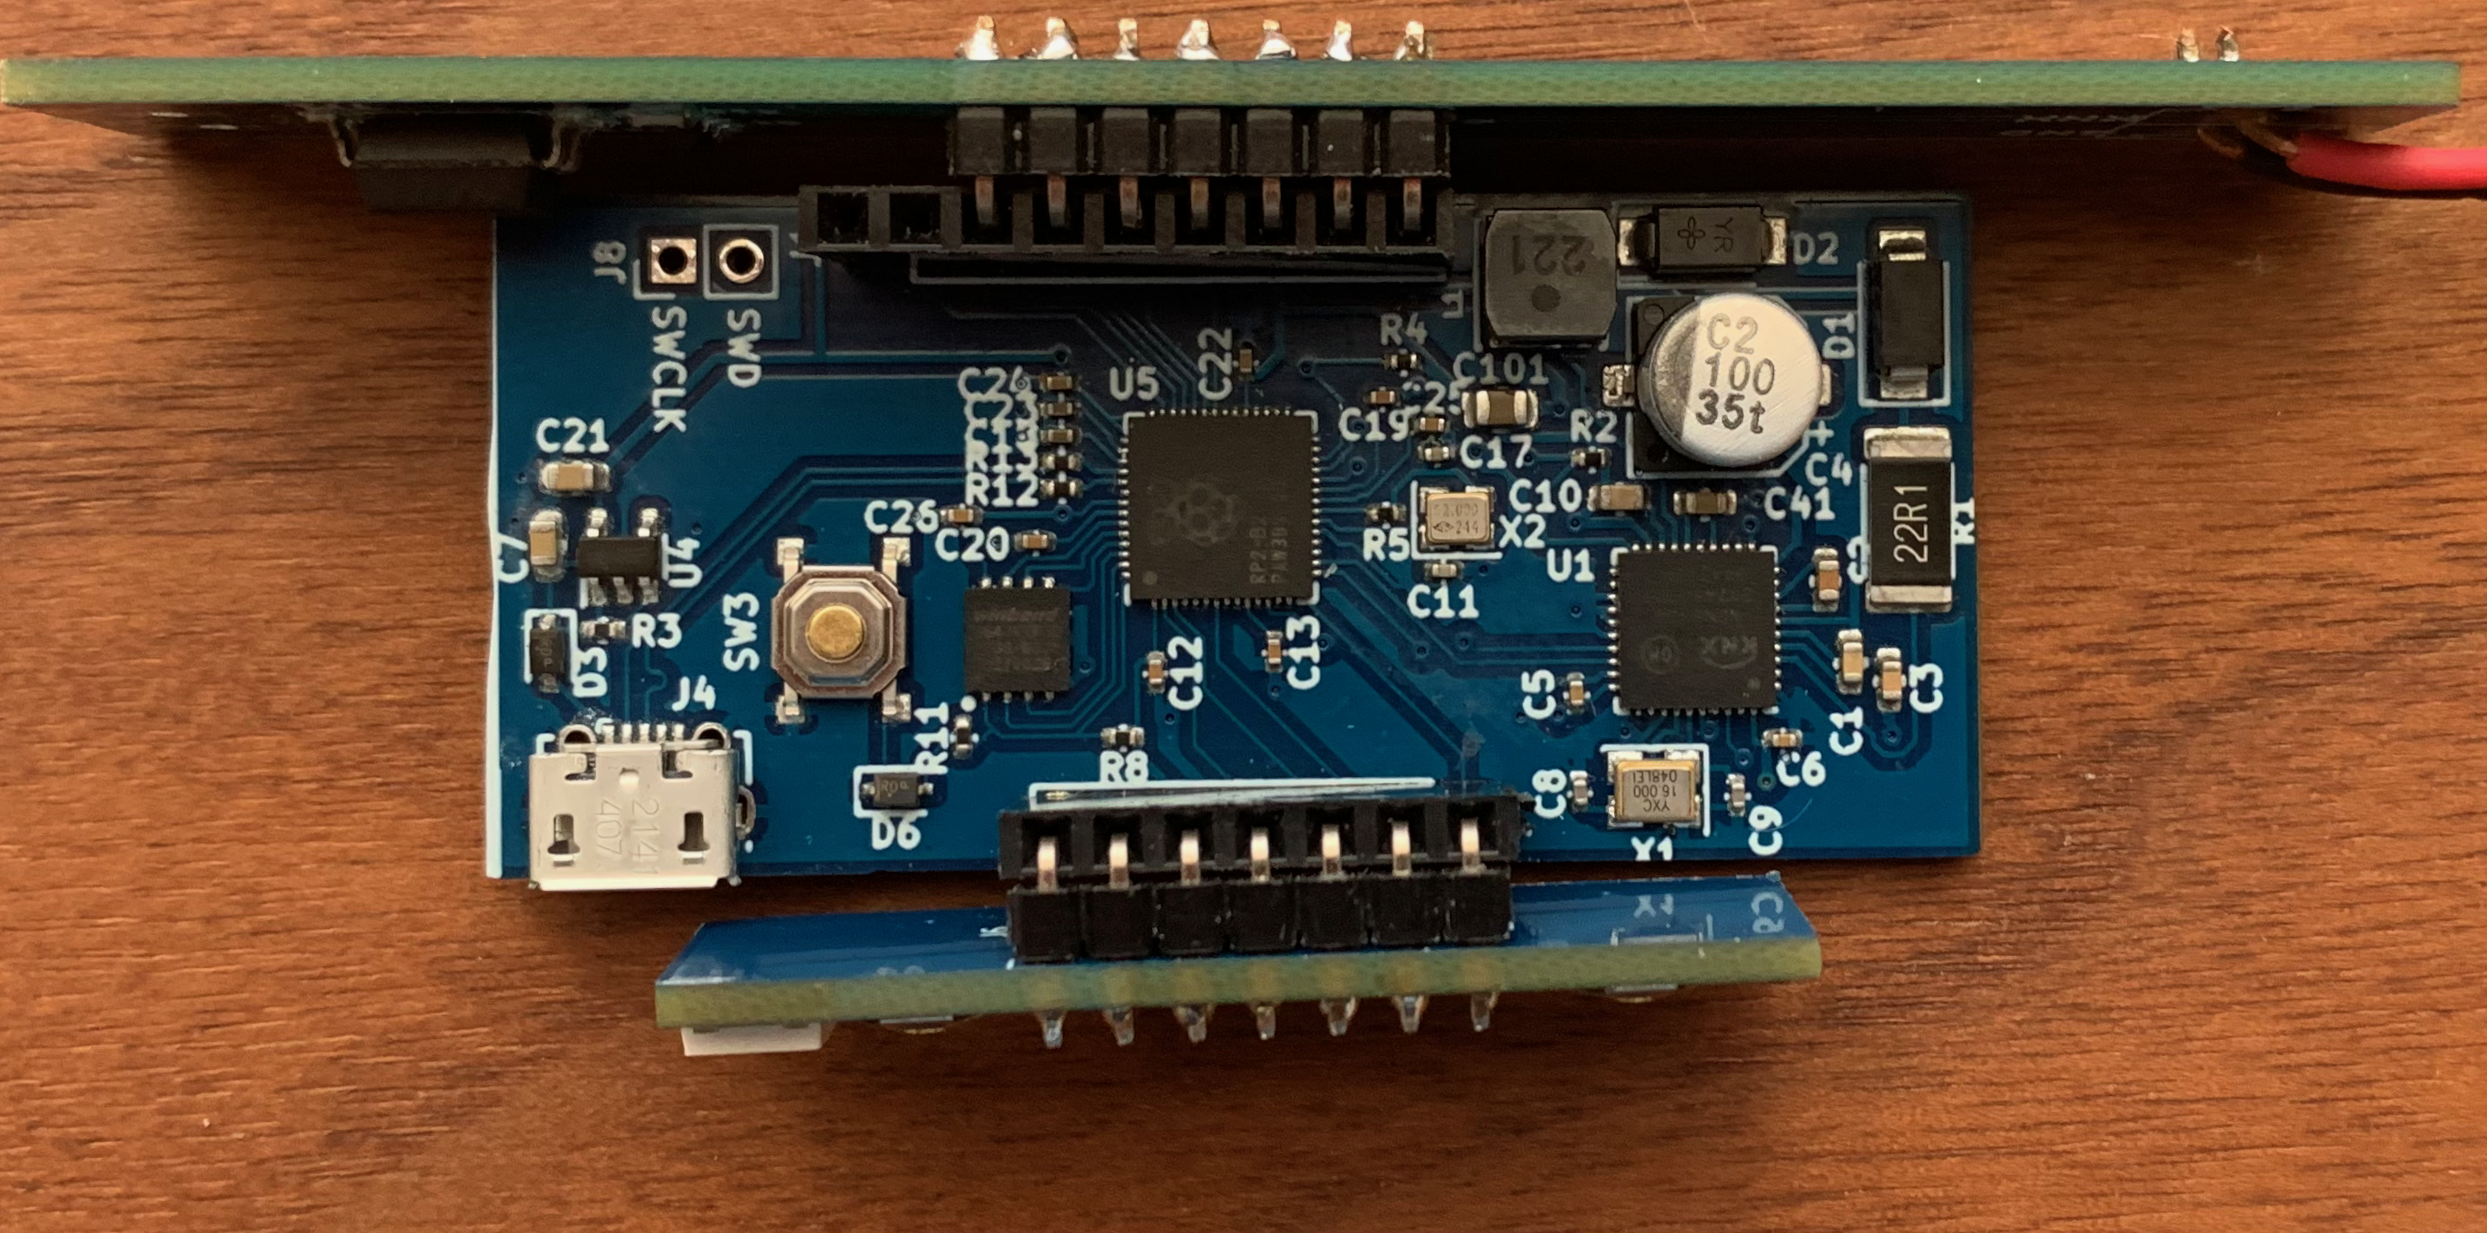
The assembly should be fairly self explanatory with teh silk screen. There are two unsused pins on the main board reserver for future use.
Once assembled the board looks like this
And fits into a DIN Rail Box Size 1 from RS PRO. This can be ordered here.
The NeoPixel on the top board is not used by this application and is not powered by the firmware.


