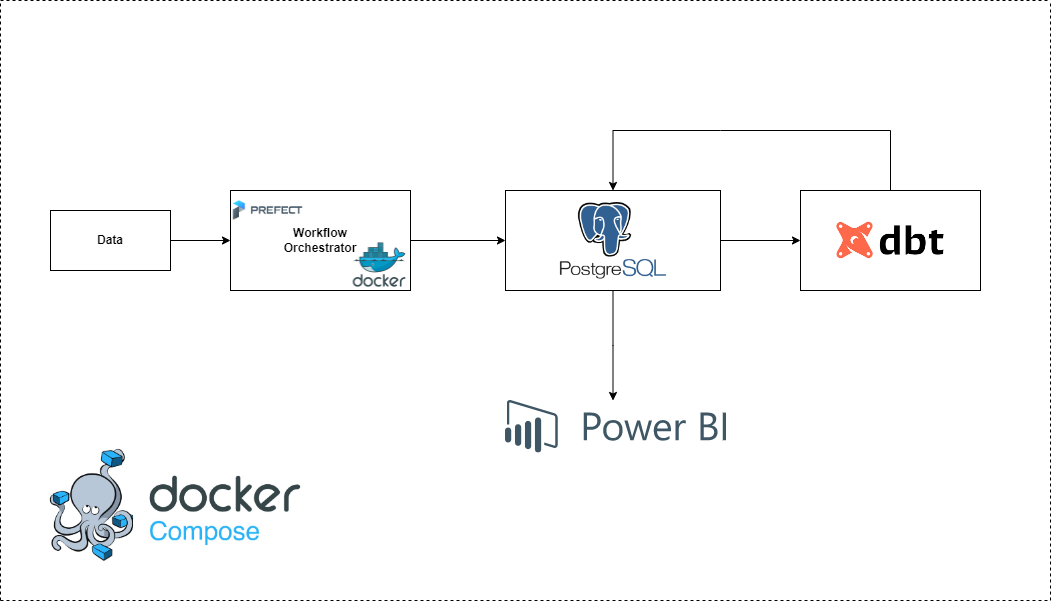
Final Project for the Data Engineering Zoomcamp hosted by DataTalksClub.
- Cloud
- What is Terraform?
- Create a project in GCP
- Install Google Cloud SDK
- Make sure that all is working well using the command
- Add Rol to your service account
- Look for API's and enable
IAM Service Account Credentials API - Refresh service-account's auth-token for this season
- Creating GCP Infrastucture with Terraform
- Initialize state file (.tfstate)
- Check changes to new infra plan
- Terraform files
- Overview of terraform commands
- Terraform commands
- Problem Description
- Run the project
- Local
- Orchestration
- Data Warehousing
- DBT
- Power BI
First at all, I'll work with a batch pipeline (the data will be updated day by day). I was looking for some climate data and I've chosen this one.
- Python
- GCP (Google Cloud Plattform) /PostgreSQL
- Prefect
- DBT
- Power BI
- Terraform
I've used all my GCP credits, so I decided to work using a local enviroment. Go to Local.
- Terraform is an open-source infrastructure as code software tool created by HashiCorp. Users define and provide data center infrastructure using a declarative configuration language known as HashiCorp Configuration Language, or optionally JSON.
- Create a project in GCP
- I will called it
dtc-de - Go to IAM and create a service account (assign the viewer role)
- Create a key for the account service
Follow the instructions from here
gcloud -v- Storage Admin
- Storage Object Admin
- Big Query Admin
gcloud auth application-default loginWatch more here
terraform init
terraform plan -var="project="
  terraform {
    required_version = ">= 1.0"
    backend "local" {}  # Can change from "local" to "gcs" (for google) or "s3" (for aws), if you would like to preserve your tf-state online
    required_providers {
      google = {
        source  = "hashicorp/google"
      }
    }
  }
We have to specified the required_version. Backend "local" means that we'll save our configuration in a tf-state file in our local computer.
We define a provider here:
  provider "google" {
    project = var.project
    region  = var.region
    zone    = var.zone
  }
And then a resource, in this case we'll use a storage bucket
  resource "google_storage_bucket" "bucket" {
    name          = "dtc-de-bucket"
    location      = var.region
    storage_class = "REGIONAL"
    force_destroy = true
}This file contains all the variables that we'll use in our main.tf file
  variable "project" {
    type        = string
    description = "The GCP project to use for integration tests"
  }
  variable "region" {
    type        = string
    description = "The GCP region to use for integration tests"
    default     = "us-central1"
  }
  variable "zone" {
    type        = string
    description = "The GCP zone to use for integration tests"
    default     = "us-central1-a"
}- terraform init
- terraform plan
- terraform apply
- terraform destroy
terraform initterraform plan -var="project=<your-gcp-project-id>"terraform apply -var="project=<your-gcp-project-id>"terraform destroy -var="project=<your-gcp-project-id>"I've took some climate data from Jena-Germany and analize some changes through the years (2009-2016). I would say that this data is easy to handle, but it will be ok for the project.
conda create -n venv python=3.9conda activate venvpip install -r requirements.txtdocker-compose up -dpython src/ingest-data.pydbt builddbt testsThen you will be able to see the data going to localhost:8080 (pgadmin) and the view that we have created with dbt.
I'll create a script that upload the data in postgres (this postgres db will be created using docker)
Compose is a tool for defining and running multi-container Docker applications. With Compose, you use a YAML file to configure your application’s services. Then, with a single command, you create and start all the services from your configuration.
In this docker-compose file we have two images, one of them is for postgres and the other is for pgadmin.
In order to have these images, you need to install them.
docker pull postgresdocker pull dpage/pgadmin4docker imagesdocker-compose up -ddocker psdocker-compose downThis dockerfile will upload the data directly from url to postgres (using docker-compose file to create postgres db).
docker build -t climate_ingest:v001 .docker run climate_ingest:v001 `
--user=root `
--password=root `
--host=pgdatabase `
--port=5432 `
--db=climate_data `
--table_name=jena_climate `
--url='https://test-esteban-270101.s3.us-east-1.amazonaws.com/jena_climate_2009_2016.csv'Directly using python
python src/upload-data.py `
      --user=root `
      --password=root `
      --host=localhost `
      --port=5432 `
      --db=climate_data `
      --table_name=jena_climate `
      --url='https://test-esteban-270101.s3.us-east-1.amazonaws.com/jena_climate_2009_2016.csv'
Now we have the data inside the db.
I'll use prefect==2.7.7
pip install prefect==2.7.7In order to use prefect. I'll create a script called ingest-data.py.
Basically, in this script I have created some flows and tasks in order to transform the data and ingest it to postgres (docker-compose file).
python src/ingest-data.pyprefect orion startImport the connector
from prefect_sqlalchemy import SqlAlchemyConnectorNow follow these steps:
- Select a block name
- Select SyncDriver and choose
postgresql + psycopg2 - Put the db name
- Insert the username, password, host and the port.
Call the block in the code:
@task(log_prints = True, retries = 3)
def load_data(table_name, df):
    connection_block = SqlAlchemyConnector.load("data-engineering-camp-postgres-connector")
    with connection_block.get_connection(begin = False) as engine:
        df.head(n=0).to_sql(name=table_name, con=engine, if_exists='replace')
df.to_sql(name=table_name, con=engine, if_exists='append')python src/ingest-data.pyprefect deployment build ./src/ingest-data.py:main_flow -n "Ingest Data ETL"
prefect deployment apply main_flow-deployment.yaml
prefect agent start -q 'default'
Go to the UI and click "Quick Run" to your deployment, after that you can start the agent. Your workflow should run.
You can schedule this deployment. For instance, you can use cronjobs or intervals.
In this case our data which is defined as jena climate could be partitioned by date. We don't have another categorical variable for clustering.
CREATE TABLE jena_climate_partitioned (
    index bigint,
    date_time date,
    "p (mbar)" float,
    "T (degC)" float,
    "Tpot (K)" float,
    "Tdew (degC)" float,
    "rh (%)" float,
    "VPmax (mbar)" float,
    "VPact (mbar)" float,
    "VPdef (mbar)" float,
    "sh (g/kg)" float,
    "H2OC (mmol/mol)" float,
    "rho (g/m**3)" float,
    "wv (m/s)" float,
    "max. wv (m/s)" float,
    "wd (deg)" float
) PARTITION BY RANGE (date_time);
Next, you can create the partitions themselves using the CREATE TABLE ... PARTITION OF statement. This statement creates a new child table that is a partition of the parent partitioned table.
CREATE TABLE jena_climate_partitioned_2009_2016
PARTITION OF jena_climate_partitioned
FOR VALUES FROM ('2009-01-01') TO ('2016-12-31');
INSERT INTO jena_climate_partitioned
SELECT * FROM jena_climate;@task(log_prints = True, retries = 3)
def create_partitioned_table(table_name):
connection_block = SqlAlchemyConnector.load("data-engineering-camp-postgres-connector")
with connection_block.get_connection(begin = False) as engine:
engine.execute(f"CREATE TABLE {table_name} ("
"index bigint,"
"date_time date,"
"\"p (mbar)\" float,"
"\"T (degC)\" float,"
"\"Tpot (K)\" float,"
"\"Tdew (degC)\" float,"
"\"rh (%)\" float,"
"\"VPmax (mbar)\" float,"
"\"VPact (mbar)\" float,"
"\"VPdef (mbar)\" float,"
"\"sh (g/kg)\" float,"
"\"H2OC (mmol/mol)\" float,"
"\"rho (g/m**3)\" float,"
"\"wv (m/s)\" float,"
"\"max. wv (m/s)\" float,"
"\"wd (deg)\" float"
") PARTITION BY RANGE (date_time);")
## Create child partitioned table
with connection_block.get_connection(begin = False) as engine:
engine.execute(f"CREATE TABLE {table_name}_2009_2016 "
f"PARTITION OF {table_name} "
"FOR VALUES FROM ('2009-01-01') TO ('2016-12-31');")
## Insert the data from original table to the partitioned data
with connection_block.get_connection(begin = False) as engine:
engine.execute(f"INSERT INTO {table_name} "
f"SELECT * FROM jena_climate;")pip install dbt-postgres==1.4.6dbt init climate_dbtUse the following command to access to the file
code ~/.dbt/profiles.ymlAdd the following code:
climate_dbt:
  target: dev
  outputs:
    dev:
      type: postgres
      threads: 1
      host: localhost
      port: 5432
      user: root
      pass: root
      dbname: climate_data
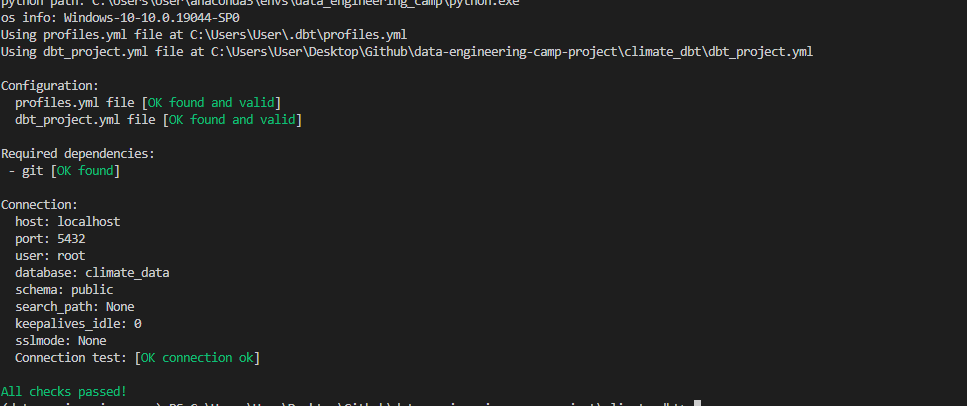
schema: publicdbt debug I'll create a model called climate_data_model.sql. Before this you should create an schema a and define your tables and databases, for example:
version: 2

sources:
  - name: staging
    database: climate_data
    schema: public

    tables:
      - name: jena_climate
      - name: jena_climate_partitioned
Then you should be able to create your dbt model. For intance, could be something like this:
{{ config(materialized='table') }}
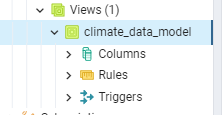
select * from climate_data.jena_climatedbt runNow go to your pgadmin and see if the view was created.
You can create tests for your models. For instance, you can test if the model has the same number of columns that the source table. You can create a file called schema.yml in the models folder. Then you can add the following code:
models:
    - name: climate_data_model
      description: >
        View that collects all the data from a the partitioned table.
      columns:
        - name: index
          description: Index of the table.
          tests:
            - unique:
                severity: warn
            - not_null:
                severity: warn
        - name: date_time
          description: Date of the record.
          tests:
            - unique:
                severity: warn
            - not_null:
                severity: warn
        - name: p (mbar)
          description: Pressure in mbar.
          tests:
            - unique:
                severity: warn
            - not_null:
                severity: warn
        - name: T (degC)
          description: Temperature in Celsius.
          tests:
            - unique:
                severity: warn
            - not_null:
                severity: warn
        - name: Tpot (K)
          description: Temperature in Kelvin.
          tests:
            - unique:
                severity: warn
            - not_null:
                severity: warn
        - name: Tdew (degC)
          description: Temperature in Celsius.
          tests:
            - unique:
                severity: warn
            - not_null:
                severity: warn
        - name: rh (%)
          description: Relative humidity in percentage.
          tests:
            - unique:
                severity: warn
            - not_null:
                severity: warn
        - name: VPmax (mbar)
          description: Maximum water vapor pressure in mbar.
          tests:
            - unique:
                severity: warn
            - not_null:
                severity: warn
        - name: VPact (mbar)
          description: Actual water vapor pressure in mbar.
          tests:
            - unique:
                severity: warn
            - not_null:
                severity: warn
        - name: VPdef (mbar)
          description: Water vapor pressure deficit in mbar.
          tests:
            - unique:
                severity: warn
            - not_null:
                severity: warn
        - name: sh (g/kg)
          description: Specific humidity in g/kg.
          tests:
            - unique:
                severity: warn
            - not_null:
                severity: warn
        - name: H2OC (mmol/mol)
          description: Water vapor concentration in mmol/mol.
          tests:
            - unique:
                severity: warn
            - not_null:
                severity: warn
        - name: rho (g/m**3)
          description: Air density in g/m**3.
          tests:
            - unique:
                severity: warn
            - not_null:
                severity: warn
        - name: wv (m/s)
          description: Wind velocity in m/s.
          tests:
            - unique:
                severity: warn
            - not_null:
                severity: warn
        - name: max. wv (m/s)
          description: Maximum wind velocity in m/s.
          tests:
            - unique:
                severity: warn
            - not_null:
                severity: warn
        - name: wd (deg)
          description: Wind direction in degrees.
          tests:
            - unique:
                severity: warn
            - not_null:
                severity: warn
Then you can run the tests with the following command:
dbt testSee the documentation with
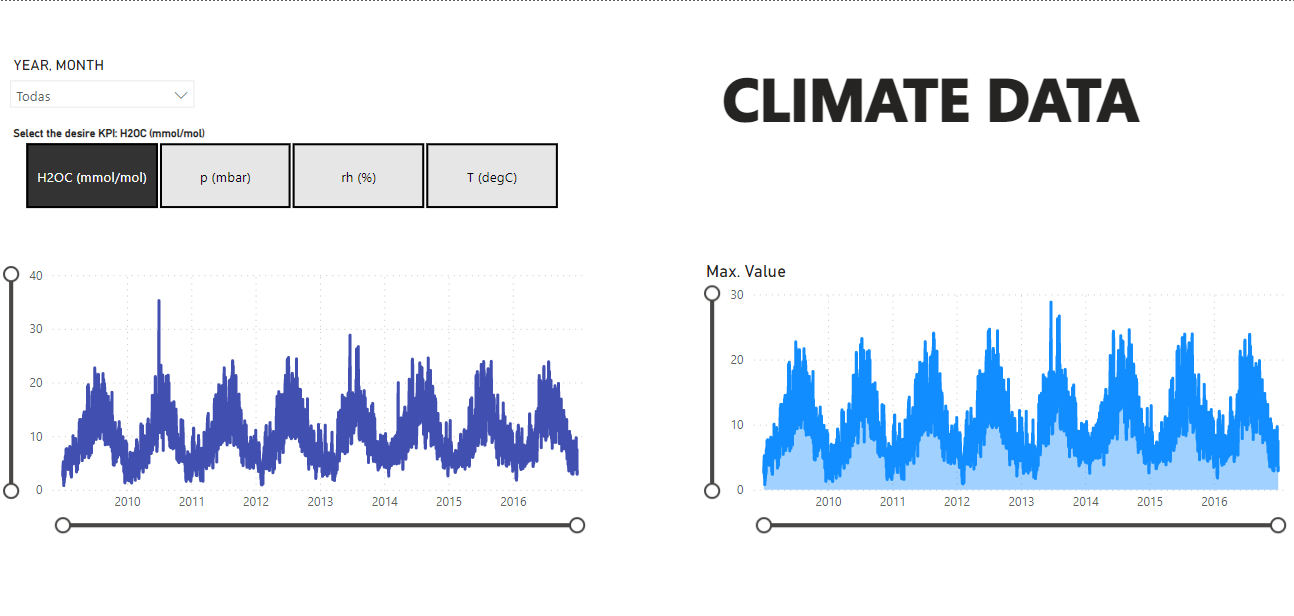
dbt docs generateI'll use PBI to show some insights from the data.
- Select
PostgreSQL DB - Put
localhost:5432as server climate_dataon database- On query put the following:
SELECT * FROM climate_data.jena_climate_partitioned- Accept
After working on Power BI I've got this simple dashboard where you can see some KPI's of the data.


