List of items required
- Arduino Nano
- Nextion NX3224T024
- 3.5mm jack headset extension cable (cable muse have 3 black rings on pin end)
- USB battery (I used an Aukey 5000mAh)
- Jumper wires and speaker wire, or any other kind of similar wire
- Pulldown resistor for hall effect sensor
- Magnet for bike spoke
- Hall effect sensor
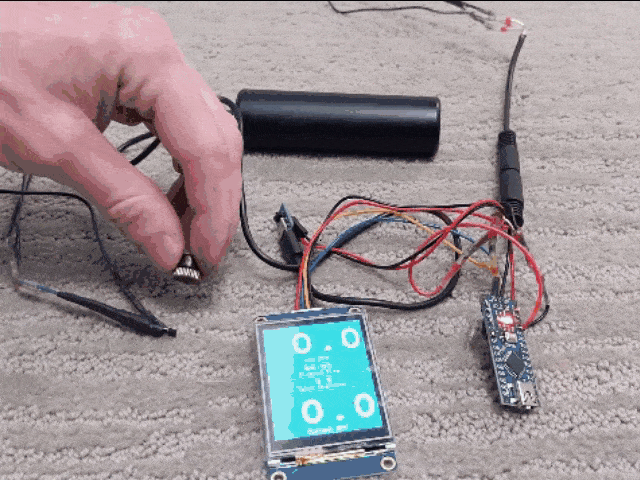
Wiring it all up First things first - measure the distance from where you want to mount the computer to where you'll place the sensor (likely on the chainstay near the outside of the wheel) and keep this in mind as you measure out the length for the sensor end of the wires.
- Arduino wires
- VIN to Nextion power supply positive
- 5V to split - 3.5mm jack socket end red wire and Nextion +
- GND to split - 3.5mm jack socket end white wire and Nextion -
- GND to Nextion power supply negative (2 wires in same GND on my build)
- TX to yellow Nextion
- RX to blue Nextion
- D2 to 3.5mm jack socket end yellow wire
- Sensor side of 3.5mm jack (pin end)
- Left most pin to split - 3.5mm jack pin end red wire (5V) and pulldown resistor
- Middle pin to 3.5mm jack pin end yellow wire
- Right most pin to split - 3.5mm jack pin end and white wire (GND) and pulldown resistor
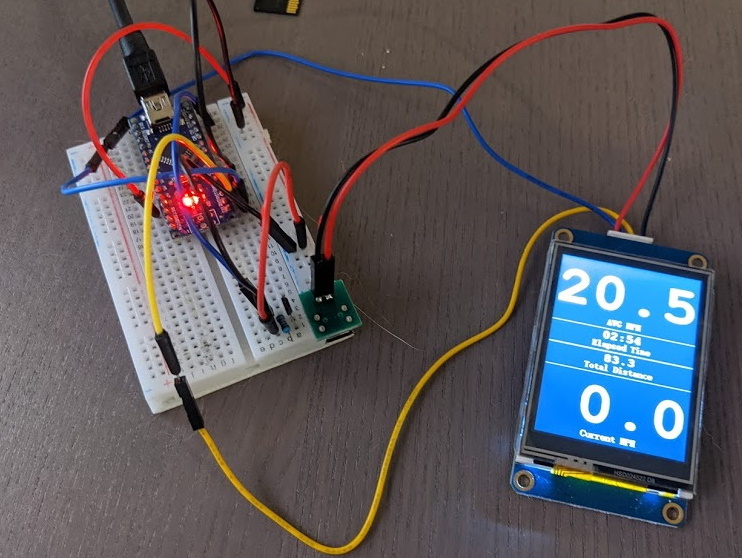
Loading the Arduino:
- Download the Nextion.H library, see "troubleshooting" below if using Arduino with only 1 serial
- Place library in necessary location
- Load the .tft file from the Nextion Screen file onto an SD card (NO OTHER FILES ON SD CARD)
- Power off Nextion, insert SD card, wait for load, power off, remove SD card
- Open the code from Arduino Code/ArduinoBikeComputer folder
- Compile the code and upload to Arduino
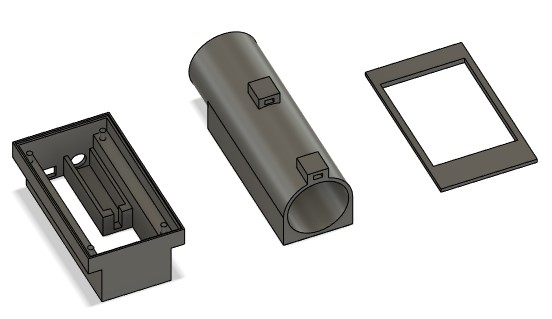
Printing the case:
Not much to say here - print the case out on a 3d printer or use a web
store to get it done. It takes a bit to cram all the wires in there, but
you can put some superglue or other around the edges to get it all to
stay together. The brackets on the bottom of the extruded cylinder are
used to tywrap the case to handlebars.
I used an Arduino Nano for this. The Nextion.h library is set up to use an Arduino with multiple serial ports by default. First build of my code I got this -
    In file included from C:\Program Files (x86)\Arduino\libraries\ITEADLIB_Arduino_Nextion-master\NexHardware.h:18:0,
        from C:\Program Files (x86)\Arduino\libraries\ITEADLIB_Arduino_Nextion-master\NexHardware.cpp:15:
    C:\Program Files (x86)\Arduino\libraries\ITEADLIB_Arduino_Nextion-master\NexHardware.cpp: In function 'bool recvRetNumber(uint32_t*, uint32_t)':
    C:\Program Files (x86)\Arduino\libraries\ITEADLIB_Arduino_Nextion-master\NexConfig.h:37:19: error: 'Serial2' was not declared in this scope
    #define nexSerial Serial2
                   ^
    C:\Program Files (x86)\Arduino\libraries\ITEADLIB_Arduino_Nextion-master\NexHardware.cpp:55:5: note: in expansion of macro 'nexSerial'
        nexSerial.setTimeout(timeout);
        ^~~~~~~~~