- Introduction
- SETUP
- Manual
- Control Panel
- Menu Bar
- How to start the photometry
- How to exit the program
- Misslenous points
- Outputs
- Disclaimer
For the surface photometry of our galaxies, we use the photometry pipeline that was originally developed to assemble the WISE Nearby Galaxy Atlas (WNGA; M. Seibert et al., in preparation). We added more flexibility to the WNGA pipeline and improved the efficiency of its user interface with providing a lot of easily accessible tools that facilitate the manual procedures required in our photometry program. In the photometry process, the galaxy light profile is derived within concentric elliptical apertures. The aperture is later repeatedly adjusted by either visual inspections, or with the aid of SExtractor and/or the galaxy isophots visualized by DS9.
The sky background is evaluated within a large annulus far from the photometry aperture. All foreground stars are initially masked automatically, however, further manual masking is required for the companion extended objects, point sources that are not automatically recognized, and other features such as diffraction spikes. In addition, the software tends to mask the blue star forming clumps in spiral arms, which are needed to be unmasked.
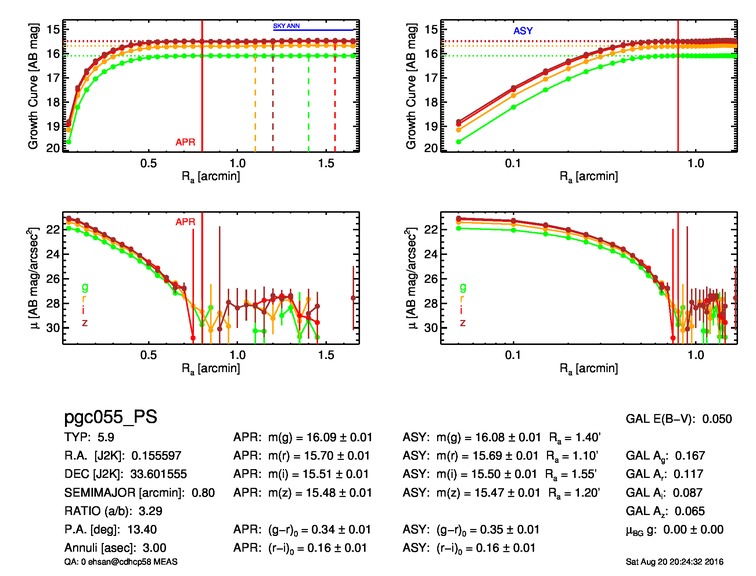
The quality of the generated light profiles and growth curves are visually inspected. If necessary, further masking/unmasking and adjustments of the aperture and the background estimation annulus are applied iteratively until the growth curve converges. At the end of each iteration, the resulting luminosity growth curve and surface brightness profile provide good insights about any abnormal changes in luminosity due to unmasked objects or poor subtraction of the sky level.
Before launching the program in IDL:
-
Set the following environment variable to point at the address where GLGA codes are stored.
export IDL_GLGAPRO='$HOME/PanStarrs/glgapro/'
This is what you may have in "glgapro" folder:
- astrolib
- bin > binary files
- coyote
- cpp > C programs (compiled binary files in bin folder)
- dust > necessary files to calculate extinction (email me to get these large files)
- extra
- documents > dcumentations and manual
- idlpro > all glga IDL clodes
- pypro > python codes
- scripts > shell scripts
- sextract > SExtractor config. files
- startup.pro
-
In IDL, define where the data-base is:
IDL> !GLGA_ROOT = '~/data_base/' -
Under ~/data_base/data/, you have your data organised by their coordinates (RA):
000D 015D 030D 045D 060D 075D 090D 105D 120D 135D 150D 165D 180D 195D 210D 225D 240D 255D 270D 285D 300D 315D 330D 345D 001D 016D 031D 046D 061D 076D 091D 106D 121D 136D 151D 166D 181D 196D 211D 226D 241D 256D 271D 286D 301D 316D 331D 346D 002D 017D 032D 047D 062D 077D 092D 107D 122D 137D 152D 167D 182D 197D 212D 227D 242D 257D 272D 287D 302D 317D 332D 347D 003D 018D 033D 048D 063D 078D 093D 108D 123D 138D 153D 168D 183D 198D 213D 228D 243D 258D 273D 288D 303D 318D 333D 348D 004D 019D 034D 049D 064D 079D 094D 109D 124D 139D 154D 169D 184D 199D 214D 229D 244D 259D 274D 289D 304D 319D 334D 349D 005D 020D 035D 050D 065D 080D 095D 110D 125D 140D 155D 170D 185D 200D 215D 230D 245D 260D 275D 290D 305D 320D 335D 350D 006D 021D 036D 051D 066D 081D 096D 111D 126D 141D 156D 171D 186D 201D 216D 231D 246D 261D 276D 291D 306D 321D 336D 351D 007D 022D 037D 052D 067D 082D 097D 112D 127D 142D 157D 172D 187D 202D 217D 232D 247D 262D 277D 292D 307D 322D 337D 352D 008D 023D 038D 053D 068D 083D 098D 113D 128D 143D 158D 173D 188D 203D 218D 233D 248D 263D 278D 293D 308D 323D 338D 353D 009D 024D 039D 054D 069D 084D 099D 114D 129D 144D 159D 174D 189D 204D 219D 234D 249D 264D 279D 294D 309D 324D 339D 354D 010D 025D 040D 055D 070D 085D 100D 115D 130D 145D 160D 175D 190D 205D 220D 235D 250D 265D 280D 295D 310D 325D 340D 355D 011D 026D 041D 056D 071D 086D 101D 116D 131D 146D 161D 176D 191D 206D 221D 236D 251D 266D 281D 296D 311D 326D 341D 356D 012D 027D 042D 057D 072D 087D 102D 117D 132D 147D 162D 177D 192D 207D 222D 237D 252D 267D 282D 297D 312D 327D 342D 357D 013D 028D 043D 058D 073D 088D 103D 118D 133D 148D 163D 178D 193D 208D 223D 238D 253D 268D 283D 298D 313D 328D 343D 358D 014D 029D 044D 059D 074D 089D 104D 119D 134D 149D 164D 179D 194D 209D 224D 239D 254D 269D 284D 299D 314D 329D 344D 359D -
Make sure you have awk, ds9 and SExtractor already installed to be able to use all the features of the program.
-
In order to use Python features, you need to have the following python libraries. Other libraries may have been also used.
- numpy
- pylab
- matplotlib
- astropy
- mpl_toolkits
- optparse
- PIL
-
Most often the provided executable files in bin folder should work on Linux systems. However you can recompile them in other systems. In glgapro folder, where Makefile exists, run the following command to regenerate executable binary files.
$ make all
You need to have cfitsio installed before running making binary files. cfitsio is a C libaray to interact with fits files in C/C++ programs.
To remove all binary files in the bin folder, you can use the following command. Be advised, this removes everything in bin folder. Please use it wisely.
$ make clean
Green: common mask, Magenta: band mask
- using masks for individual bands
- using masks for all bands
- getting bad pixels from the original image. Bad pixels must have NaN value
- using
ds9to open all fits images of the same object inside the TV - using
SExtractor to fit the ellipse to the galaxy - using
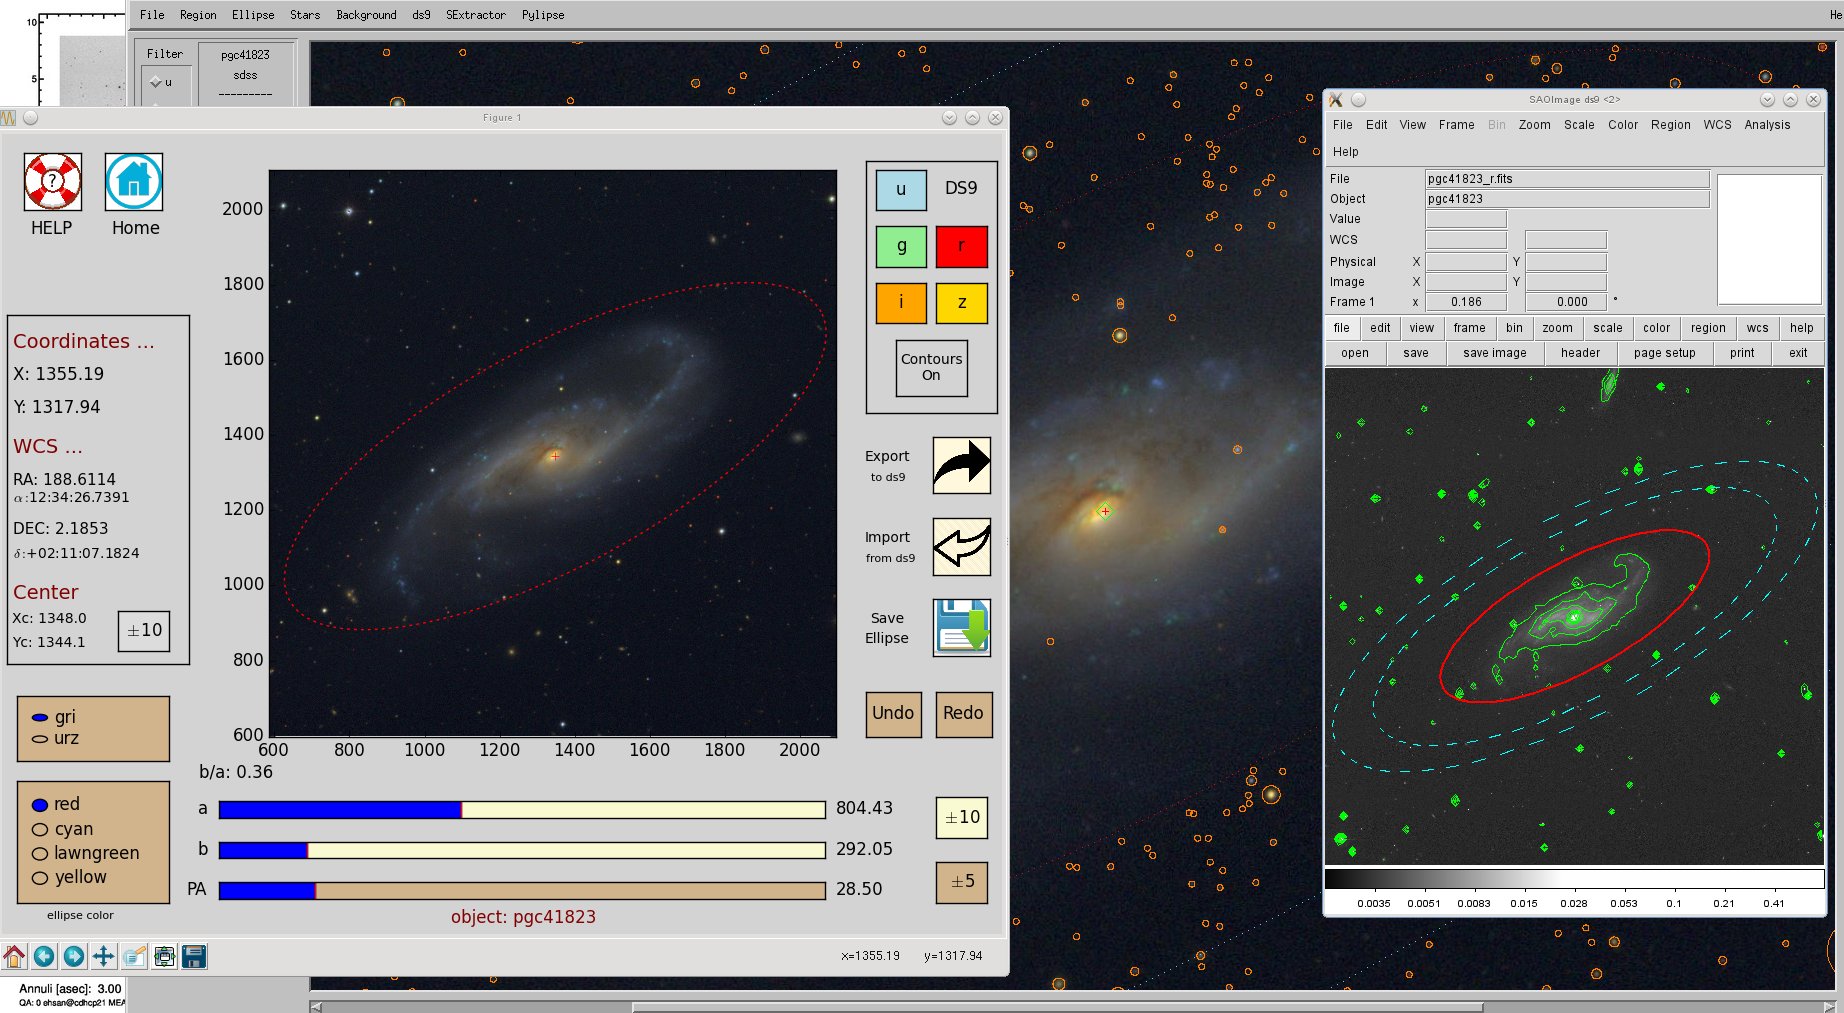
Pylipse, a python program to manually fit an ellipse over the galaxy - Pylipse also interacts with ds9. ds9 can be used as a bridge to transfer ellipse parameters between GLGA TV and Pylipse (https://github.com/ekourkchi/Pylipse)
- Mouse
- Double-click: re-centering the ellipse
- Left-Click: choosing the vertices of a Region Of Interest (ROI)
- Right-Click:
- enclosing a region of interest, when choosing a Region Of Interest (ROI)
- repeating the highly demanding actions, which are
- 'c' adding/editing centeroid
- 'd' deleting centeroids
- 'r' adding regions (masks)
- '!' removing regions (masks)
- 'b' adding background regions
-
Keyboard:
-
Note: Short keys may be the same, but having different actions, based on process you are in
-
Line-Styles and Colors:
-
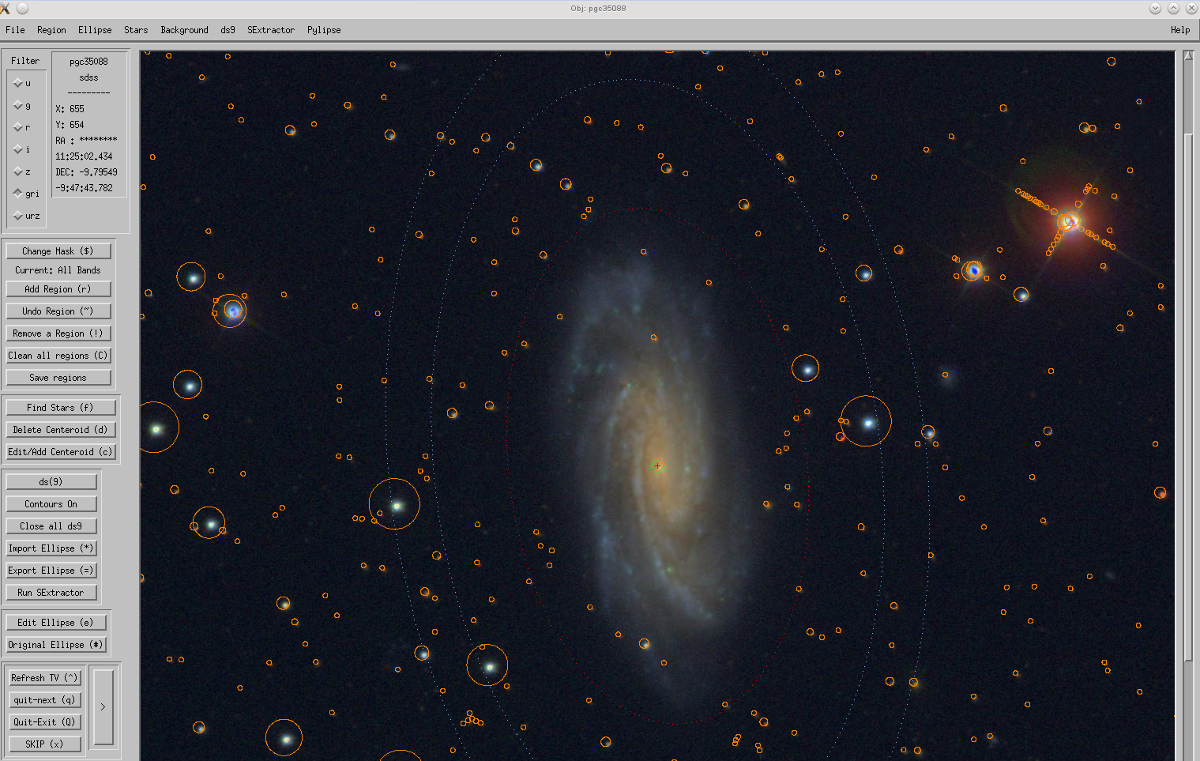
dotted red ellipse: Photometry Aperture
-
dotted sky blue ellipses: Photometry Annulus (used to estimate the background level/statistics)
-
dotted yellow ellipses: The annulus that is not used for background estimations (when background regions are in use)
-
orange circles: Already Masked point sources
-
green circles: new selected point sources
-
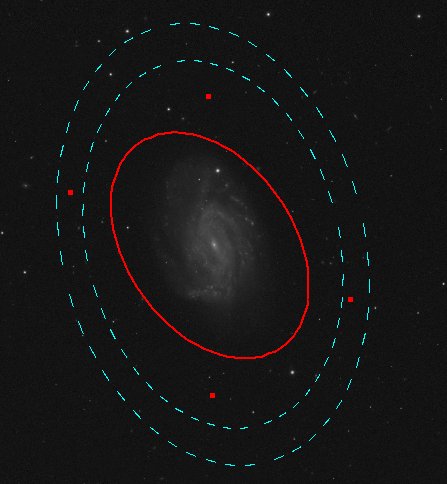
Thick dashed sky blue open regions: These are the optional regions to measure the background value. When they are defined, the elliptical annulus turns into yellow.
-
Dash-dotted peach-color open region: If defined
(Menu > SExtractor > Use-Mask), SExtractor only uses this area for measurements. It is useful when half of the image is missing and only the area around the galaxy is useful. -
Dash-dotted green open region: If defined
(Menu > SExtractor > Force-Mask), SExtractor does not filter this area for measurements. It is useful for instance when a masked spike divides a galaxy into two halves. We do not want SExtractor fits a separate ellipse for each half. -
Green filled regions: these are the masks used for all bands (i.e. common-masks)
-
Magenta filled regions: these are the masks used for each individual mask (i.e. band-masks)
-
Notes:
-
Background estimation regions are always blue
-
Ellipse aperture/annulus are displayed with dotted lines
-
SExtractor related regions are displayed with dash-dotted
-
Background related regions are displayed with dashed lines
- Filter: You can change the image band. If the JPG file does not exist but the fits file exists, GUI asks the user to generate the JPG file and displays it.
- If the JPG file cannot be found anyway, TV does not change to the switched band.
For all the buttons, you have a counterpart on the menu bar, but the opposite is not true. The letter in the parenthesis shows the short key to the same action, once you click on the image. A full set of all actions is also available on the terminal.
-
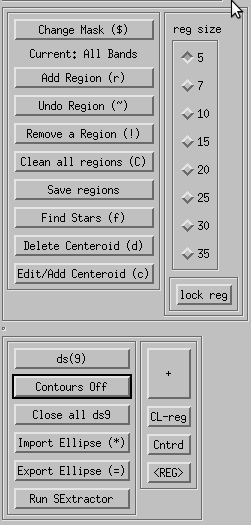
Change Mask: Generally, when drawing a new region to mask the image, it would be applied on all band, and its easier to look at the composite image (however you can still choose to look at other band and edit the common mask file). If a band is selected (and not a composite image), then you will have an opportunity to generate masks for the chosen band. The file that contains each band mask is stored separately. Under this button, you will see the status of the masking. {{{ Current: All Bands: the generated mask would be used for all bands and it is displayed with Green color. Current: 'band' : the mask is generated for the specified band, and it is displayed with Magenta color. }}}
-
Add Region: Adding a new mask, based on the status of the label above. To choose a region, left click on the images to specify the region vertices, (or simply drag your mouse while the left mouse button is pressed). Once you are done press right mouse button to enclose the region.
-
Undo Region: Removing the last added region. Currently this only works for common regions, i.e. green masks.
-
Remove a region: After clicking on this button you need to lick inside a region to remove it. This works for both band-masks and common-mask (i.e. Green and Magenta regions). If the regions does not exist (in case of any mistake), the action would be ignored.
-
Clean all regions: After user verification, it removes all the region. This works for both band-masks and common-mask (i.e. Green and Magenta regions).
-
Save region: Normally all common-regions (Green reg.) would be saved after doing the measurement. However, once can save any change before doing the measurement. This is helpful when working with big galaxies. One should note that all band-masks are stored instantly and users should not be worried about saving their pink masks. This is because, we don not expect to have a lot of masking for each individual mask.
-
Find Star: This helps to find stars and point sources by defining the proper PSF and limiting magnitude. the inputs must be entered in the terminal.
-
Delete Centeroid: Removing all the previously masked point sources inside a specified region.
9: Edit/Add Centeroid: Changing the size of the centeroids, turning them off or adding new ones. All inputs are taken from the terminal
10: ds9: Opens the fits file of the displayed image in the TV. If not band has been specified (in case of using the composite image), the use-file ('r' band for /sdss and /panstarrs) would be opened. In ds9, one can play around with the red elliptical aperture, (e.g. re-center it, or resize it). The parameter of this red aperture can be later on captured by GLGA TV and update the ellipse
11: Contours On/Off: If ds9 is open, then isophots can be displayed. This helps to locate a proper border around the galaxy. To rotate the red aperture, first select it by clicking inside it on ds9. You see four selection points around it. Press Shift-key on keyboard and choose one of the four point to rotate the ellipse by dragging the mouse. To move the ellipse, click and drag ...
12: Import Ellipse: To import the red aperture from ds9 to the TV (when ds9 is open). All ellipse information would be updated and be used for the measurement. Note: ds9 can also be used a bridge between Pylipes (i.e. the python code to modify the ellipse) and GLGA TV. However, Saving (in Pylipse) and loading (in TV: Menu > Pyliupse > Load Ellipse) is a way to import from Pylipse to GLGA TV.
13: Export Ellipse: To update the ellipse in ds9 when it's open. If you have already opened ds9, but you have edited the ellipse in the TV, use this action to export the TV ellipse to ds9. Note: ds9 can also be used a bridge between Pylipes (i.e. the python code to modify the ellipse) and GLGA TV. To export an ellipse from TV to Pylipse, you can re-open Pylipse (in TV: Menu > Pylipse > Open)
14: Run SExtractor: Running SExtractor to update the ellipse information. If SExtractor has been already run and the information exists in the data-base, the GUI asks whether to use the previous results, or run SExtractor again. Note: one can run SExtractor automatically for the entire data-base, and if there is any adjustment needed, it is possible to re-run it in the TV. In this case, TV first creates a temporary masked image (applying both band-mask and common-mask files) and then runs SExtractor. This way one can take care of any foreground/background problems that could have been already resolved. Also there are other masking options just to run SExtractor (see: menu > SExtractor)
15: Edit Ellipse: Editing the ellipse parameter in the TV. To see all the options, look at the terminal and follow the right commands. Note: if in the middle of the editing, user clicks on any button on the control-panel, the ellipse editing action would be ignored and the new command would be run.
16: Original Ellipse: Use the original ellipse paramter and update the TV
17: Refresh TV: To reload the image and all masks. For larger galaxies, reloading takes time, but it helps to see the color of the masks (in case of having both Magenta and Green masks)
18: quit-next: quit the GLGA TV and save the flags and note about the image. You can simply use the pop-up window which is synchronized with terminal. You can also use the short keys suggested in terminal. If you happen to close the pop-up window, don't worry, you can still follow-up with terminal in old-fashion. To prevent users to accidentally mess around with the important TV parameters (e.g. masks, ellipse etc.), all unnecessary actions on the control-panel would remain deactivated unless this process is cancelled. Please don't use the menu-bar when you are in the middle of quitting process. Updated ellipse parameter would be saved.
19: Quit-Exit: Exiting the TV. Updated ellipse parameter would not be saved.
20: Skip: Skipping the analysis of the current galaxy and move on to the next galaxy on the list. Updated ellipse parameter would not be saved.
21: ''>'' button: The long key to the left of quit/skip, is used to trigger a measurement event. This would shutdown the entire TV to do the optometry.
- Measure >
- run photometry
- Refresh TV
- reload the JPG image
- reload ellipse info
- reload all mask
- quit-next
- saving ellipse info
- entering flags and note
- go to the next galaxy in the list
- Skip ...
- skipping the current galaxy
- updated ellipse info would not be saved
- ask user if he/she wants to save the newly added regions
- jumping to the next galaxy in the list
- Quit
- exiting the program
- updated ellipse info would not be saved
- ask user if he/she wants to save the newly added regions
- Undo
- Remove the last added region
- Only works on common regions (all-bands, green)
- Add ...
- Add new masking regions (by left clicking to define vertices, right click to close the region)
- Works on both common and band regions (green and magenta)
- To switch between common and band regions, go to ''change mask'' option, under the same menu
- Remove one
- Remove masking regions one by one (click inside the region of interest)
- Works on both common and band regions (green and magenta)
- To switch between common and band regions, go to ''change mask'' option, under the same menu
- Clean all
- Remove all masking regions based on the current mask status
- Works on both common and band regions (green and magenta)
- To switch between common and band regions, go to ''change mask'' option, under the same menu
- Save
- Saves newly added '''common''' regions
- Change Mask
- Switch between common and band regions
- It is effective when a particular band is chosen
- Edit ...
- Edit ellipse information
- Look at terminal for the effective short key
- You need to switch back and force between TV and terminal
- Original
- Updates the ellipse info. and switched back to the original ellipse
- Refresh the TV
- Also to edit the ellipse in GLGA, you can click on the
Edit Ellipse (e)button. Then you need to look at the console you ran IDL form. You should not activate the console (by clicking on it), unless it asks you to enter a number.
-
re-size, press % on your keyboard when the GLGA window is still activated. If not, click on its title bar.
-
Then enter how much in percent you would like to change the size. Note this number can be less than or larger than 100.
-
Once you are happy with the size, press 'q' on the TV. This de-activates the "Edit Ellipse" mode.
-
When "Edit Ellipse" is still activated, you can press '<' or '>' on your keyboard. This changes the position angle of the ellipse.
-
Pressing 'h' gives you a complete help of all options in this mode.
-
Edit Ellipseis harder to work with and it is not recommended. As explained above, the best way to edit the ellipse is through communicating with ds9.
- Find ...
- Find new point sources based on the entered PSF and limiting magnitudes
- Use terminal to enter the input variables
- Delete ...
- Delete the masked point sources
- Define a region (left/right mouse clicks)
- All point sources inside the region would be removed from the point source mask
- Useful to deselect the star forming regions of spiral galaxy arms
- Edit/Add ...
- Add more point sources manually
- Edit the existing point sources, e.g. increase/decrease their sizes
- Back. Region
- Defining regions to measure the background
- When using these regions, the elliptical annulus would no longer be used
- Clear Region
- Clean the previously defined background regions and go back to the annulus background estimation
- Open
- Opens the fits imaged of the current TV band on ds9
- If TV is in the composite image mode, the main fits file (use-file) would be used
- Contours on/off
- turning on/off the contours on the ds9 image
- Import ellipse
- Imports the red elliptical aperture from ds9 to TV
- Export ellipse
- Exports the current ellipse from TV to ds9
- Close all
- Closes all open ds9 windows
- be careful this would close all ds9 windows, not necessarily those opened by GLGA TV
- On the left tool-bar, click on the ds(9) button. This would open up the galaxy image in ds9. Then click on the "Contours On" button, which turns-on the contours on the ds9 window. Also you can turn on/off contour using ds9 menu-bar under
Analysis.
- Another ds9-related window also pops out. This helps you to change the number of contours. You can also decide how much to smooth the image before finding isophots.
- Please note that, every time you change Levels and Smoothness, you need to first click on the
Generatebutton followed by a click on theApplybutton. The task is to find the rough shape of the ellipse. Then you need to move and rotate the red ellipse in order to match with what you see. Sometimes, this is not very straightforward, since galaxies are not completely elliptical. If the dashed sky-blue ellipse are annoying in this task, you can select them and delete them by pressingDeletekey on you keyboard.
- How to choose an ellipse on ds9: click inside the ellipse
- How to move it: Click inside the ellipse and drag your mouse.
- How to re-size it: Once an ellipse is selected, four points are displayed. click on them and drag your mouse.
- How to rotate it: This process is the same as resizing, just press the shift key when you drag your mouse pointer.
- Once you are happy with the ellipse in ds9, you need to import it into the GLGA TV. Click on
Import Ellipse (*)button.
-
On ds9, dragging your mouse pointer while pressing the right mouse button, you can change the image scale. This helps to see different details in the image. Be careful that the ellipse you choose, should match the visual image of the galaxy. If you see that the internal ellipse are twisted or do not have the same axis, just try to fit the ellipse with the isophots that describe the overall shape of the ellipse. We might have to compromise a little bit.
-
When you are happy with imported ellipse in GLGA, you can move decrease or increase its size easily by clicking on
+/- sings. These increase/crease the size by 10%.
- Run
- Run SExtractor on the fits images of the current band
- If TV is in the composite image mode, the main fits file (use-file) would be used
- If SExtractor has been previously run, this asks the user to either use the existing results, or re-run SExtractor
- Sometimes, masking the image helps SExtractor to fit a better ellipse
- If users chooses to re-run SExtractor, a temporary fits image would be created, which includes all the common-/band- masks and the SExtractor uses that file to extract the ellipse paramters
- Note: if the image is large, this process may take time. A large temporary file needs to be prepared for SExtractor, and SExtracting also takes time
- Segmentation
- This would display the Segmentation image that is produced by SExtractor. If this is not available, you need to run SExtractor first.
- Masked Image
- This would display the temporary masked region that has been already used in this session
- Region on
- This would turn on all the fitted ellipses by SExtractor. To see them, you need to open ds9
- Segmentation, Maksed Image, TV Image can be used in ds9 to see these regions
- Region off
- This would turn off all regions previously openned in all ds9 windows
- Use-Mask
- User can define a regions to be specifically used by SExtractor in this session
- When TV starts, all previous SExtractor regions would be deleted, so this region is only valid in the current session
- The rest of the image would be totally masked for SExtractor in the process of making the temporary file
- The un-maksed defined region, then later would be masked by common/band/centroid masks
- Force-Mask
- User can define regions to be specifically used by SExtractor in this session
- This mask would not be affected by any other common/band/centeroid masks
- For example, this is useful when a spike cuts a galaxy in to two halves and we do not want SExtractor fits two separates ellipses for one single object
- Clear-Mask
- Clear both Use-Mask and Force-Mask in the current session
- If you don't clear these masks, they would be removed on the next run, because users are expected to run SExtractor only a few times to find the proper ellipse
- Once a good ellipse is found, no more messing up with its parameters
- Open
- Opens Pylipse, a python program
- There is a complete help on how to use this program
- This can also be used stand-alone. See here: https://github.com/ekourkchi/Pylipse
- ds9 can be used as a bridge to import/export ellipse to/from this program
- To export an ellipse from TV to Pylipse, you can re-open Pylipse (Menu > Pylipse > Open)
- Load Ellipse
- Saving (in Pylipse) and loading (Menu > Pyliupse > Load Ellipse) is a way to transfer ellipse from Pylipse to GLGA TV
- Suppose you are happy with all the mask and the elliptical apertures. To run the photometry click on this button
- This close all the GLGA windows and runs the photometry automatically.
- Then GLGLA windows pop out. You will also see the image of the galaxy in different bands, as well as the surface brightness profiles.
- You can then repeat the process until you are happy with the profiles you see.
Quit--> exits the program. No change would be saved.quit-next--> Saves the photometry you just did, as well as all the information regarding to mask etc, and then it moves on to the next galaxy in the list. If you are done with the current galaxy, please check "Finished" option.- These are the options you can choose before moving on to the next galaxy
- Finished: You are done
- Uncertain: You are uncertain about the results. The image is noisy or whatever reason you'd like to write about in "QA note" text box.
- FOV: If the galaxy is larger than the Field Of View of the image you saw in the GLGA TV.
- Multiple: If you see multiple galaxies next to each other, inside the aperture, such a way you cannot mask out one of the them and perform the photometry for the desired galaxy. Sometimes the multiple galaxy faint outskirts can influence each other. Even by masking the visual parts of one galaxy we are not sure if the faint outskirt is still shedding light on the neighbor galaxy.
- Bright-star: If there is a bright star in the field that dominate some parts or the entire image. you do the best job to mask out every details, however at the end you are not sure if there is any remaining light (gradients).
- Note: Please write about everything weird you see on the image inside the
QA Note box. This helps the others to assess the problem easier.
- In the above flag window, the options are:
- Disturbed and/or distorted (confused)
- Has tail or trail: Sometimes you see very faint gaseous tail/trail coming out of the galaxy
- NOT a Spiral Galaxy: Most of the galaxy we are dealing with are supposed to spiral galaxies. But if you happen to see any elliptical galaxy, you can report it here.
- Face-on Galaxy: If you fit a circular aperture, or the galaxy seems to be too face-on to be good for TF distance measurement
- Too Faint: If the galaxy is too faint and makes it hard to fit ellipses, determining inclinations, or doing photometry
- Crowded Field: If the field is overcrowded by stars
- Needed a lot of Masking: Having tons of masks.
- Please look at the other flag specific to each band. We are only interested in only *g/r/i-*bands. This means that no worried if you could not get the photometry of u and z-bands right. Please use specific band flags if required:
- edge (not applicable)
- sn grad: If you see any gradient in the background. Either signal to noise or background level, if this gradient should have influenced the galaxy aperture.
- artifact
- missing: I'm trying my best to provide all g/r/i-band images. If something is missing report it here
- other: if you have other concerns (put a note for it)
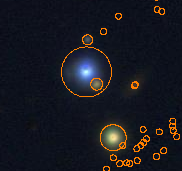
- If you see blue stars (and big stars) in general, don't only rely on the automatic psf-based masks (the orange/blue circular shapes). These stars are bigger than what you see, therefore add another manual mask around them
after adding manual mask:
-
Do not try to mask many objects outside the outer dotted elliptical aperture, it's the waste of time. Usually, if you see a bright feature that can leak into the border annulus, you should mask it, but if it's far from the aperture, leave it unmasked.
-
While you should mask any spot that is visible to your eye in the colorful image on the main TV, keep in mind that over-masking (and even using very large masks) makes the program slower. If you refresh or resize your ellipse, you have to wait longer to load all the green masks first. So it's easier to finalize your decisions about the size and orientation of the aperture before you start masking.
-
Use the first or second to the last elliptical contour to fit the best ellipse. Note that when you import your ellipse on to the color TV, your ellipse and the visual shape of the galaxy should be consistent. If they are too much different, something is wrong.
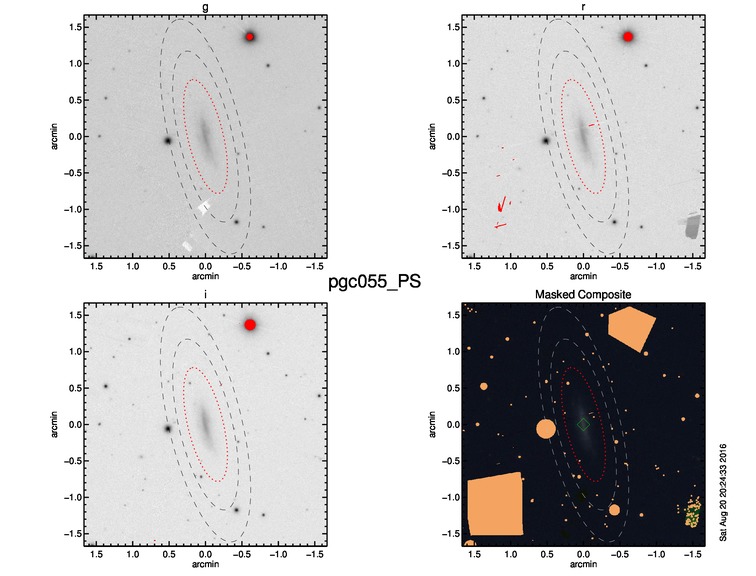
- Images have this format: __images.<pdf/jpg>
- Bad pixels would be displayed in red in output images.
- GLGA does not get any separate bad-pixel map. If there is any badpixel in the image, it should have NaN value ...
- Pan-STARRS images already include bad pixels (NaN value)
- The common-mask that is used for all bands are displayed over the composite image, in orange.
- The band mask image has this format: __images_mask.<pdf/jpg>
- If there is any band-mask designed, this would be generated. Otherwise, there would not be such file.
- Bad pixels are in red
- Band-masks are displayed in green
- - - -
- All rights reserved. The material may not be reproduced or distributed, in whole or in part, without the prior agreement
- Contact: Ehsan Kourkchi ekourkchi@gmail.com
