iOSSnapshotTestCase (previously FBSnapshotTestCase)
What it does
A "snapshot test case" takes a configured UIView or CALayer and uses the necessary UIKit or Core Animation methods to generate an image snapshot of its contents. It
compares this snapshot to a "reference image" stored in your source code
repository and fails the test if the two images don't match.
Why?
We write a lot of UI code. There are a lot of edge
cases that we want to handle correctly when you are creating UIView instances:
- What if there is more text than can fit in the space available?
- What if an image doesn't match the size of an image view?
- What should the highlighted state look like?
It's straightforward to test logic code, but less obvious how you should test views. You can do a lot of rectangle asserts, but these are hard to understand or visualize. Looking at an image diff shows you exactly what changed and how it will look to users.
iOSSnapshotTestCase was developed to make snapshot tests easy.
Installation
Step 1: Add iOSSnapshotTestCase to your project
CocoaPods
Add the following lines to your Podfile:
target "Tests" do
  use_frameworks!
  pod 'iOSSnapshotTestCase'
end
If your test target is Objective-C only use iOSSnapshotTestCase/Core instead, which doesn't contain Swift support.
Carthage
Add the following line to your Cartfile:
github "uber/ios-snapshot-test-case" ~> 6.1.0
Step 2: Setup Test Environment
Replace "Tests" with the name of your test project.
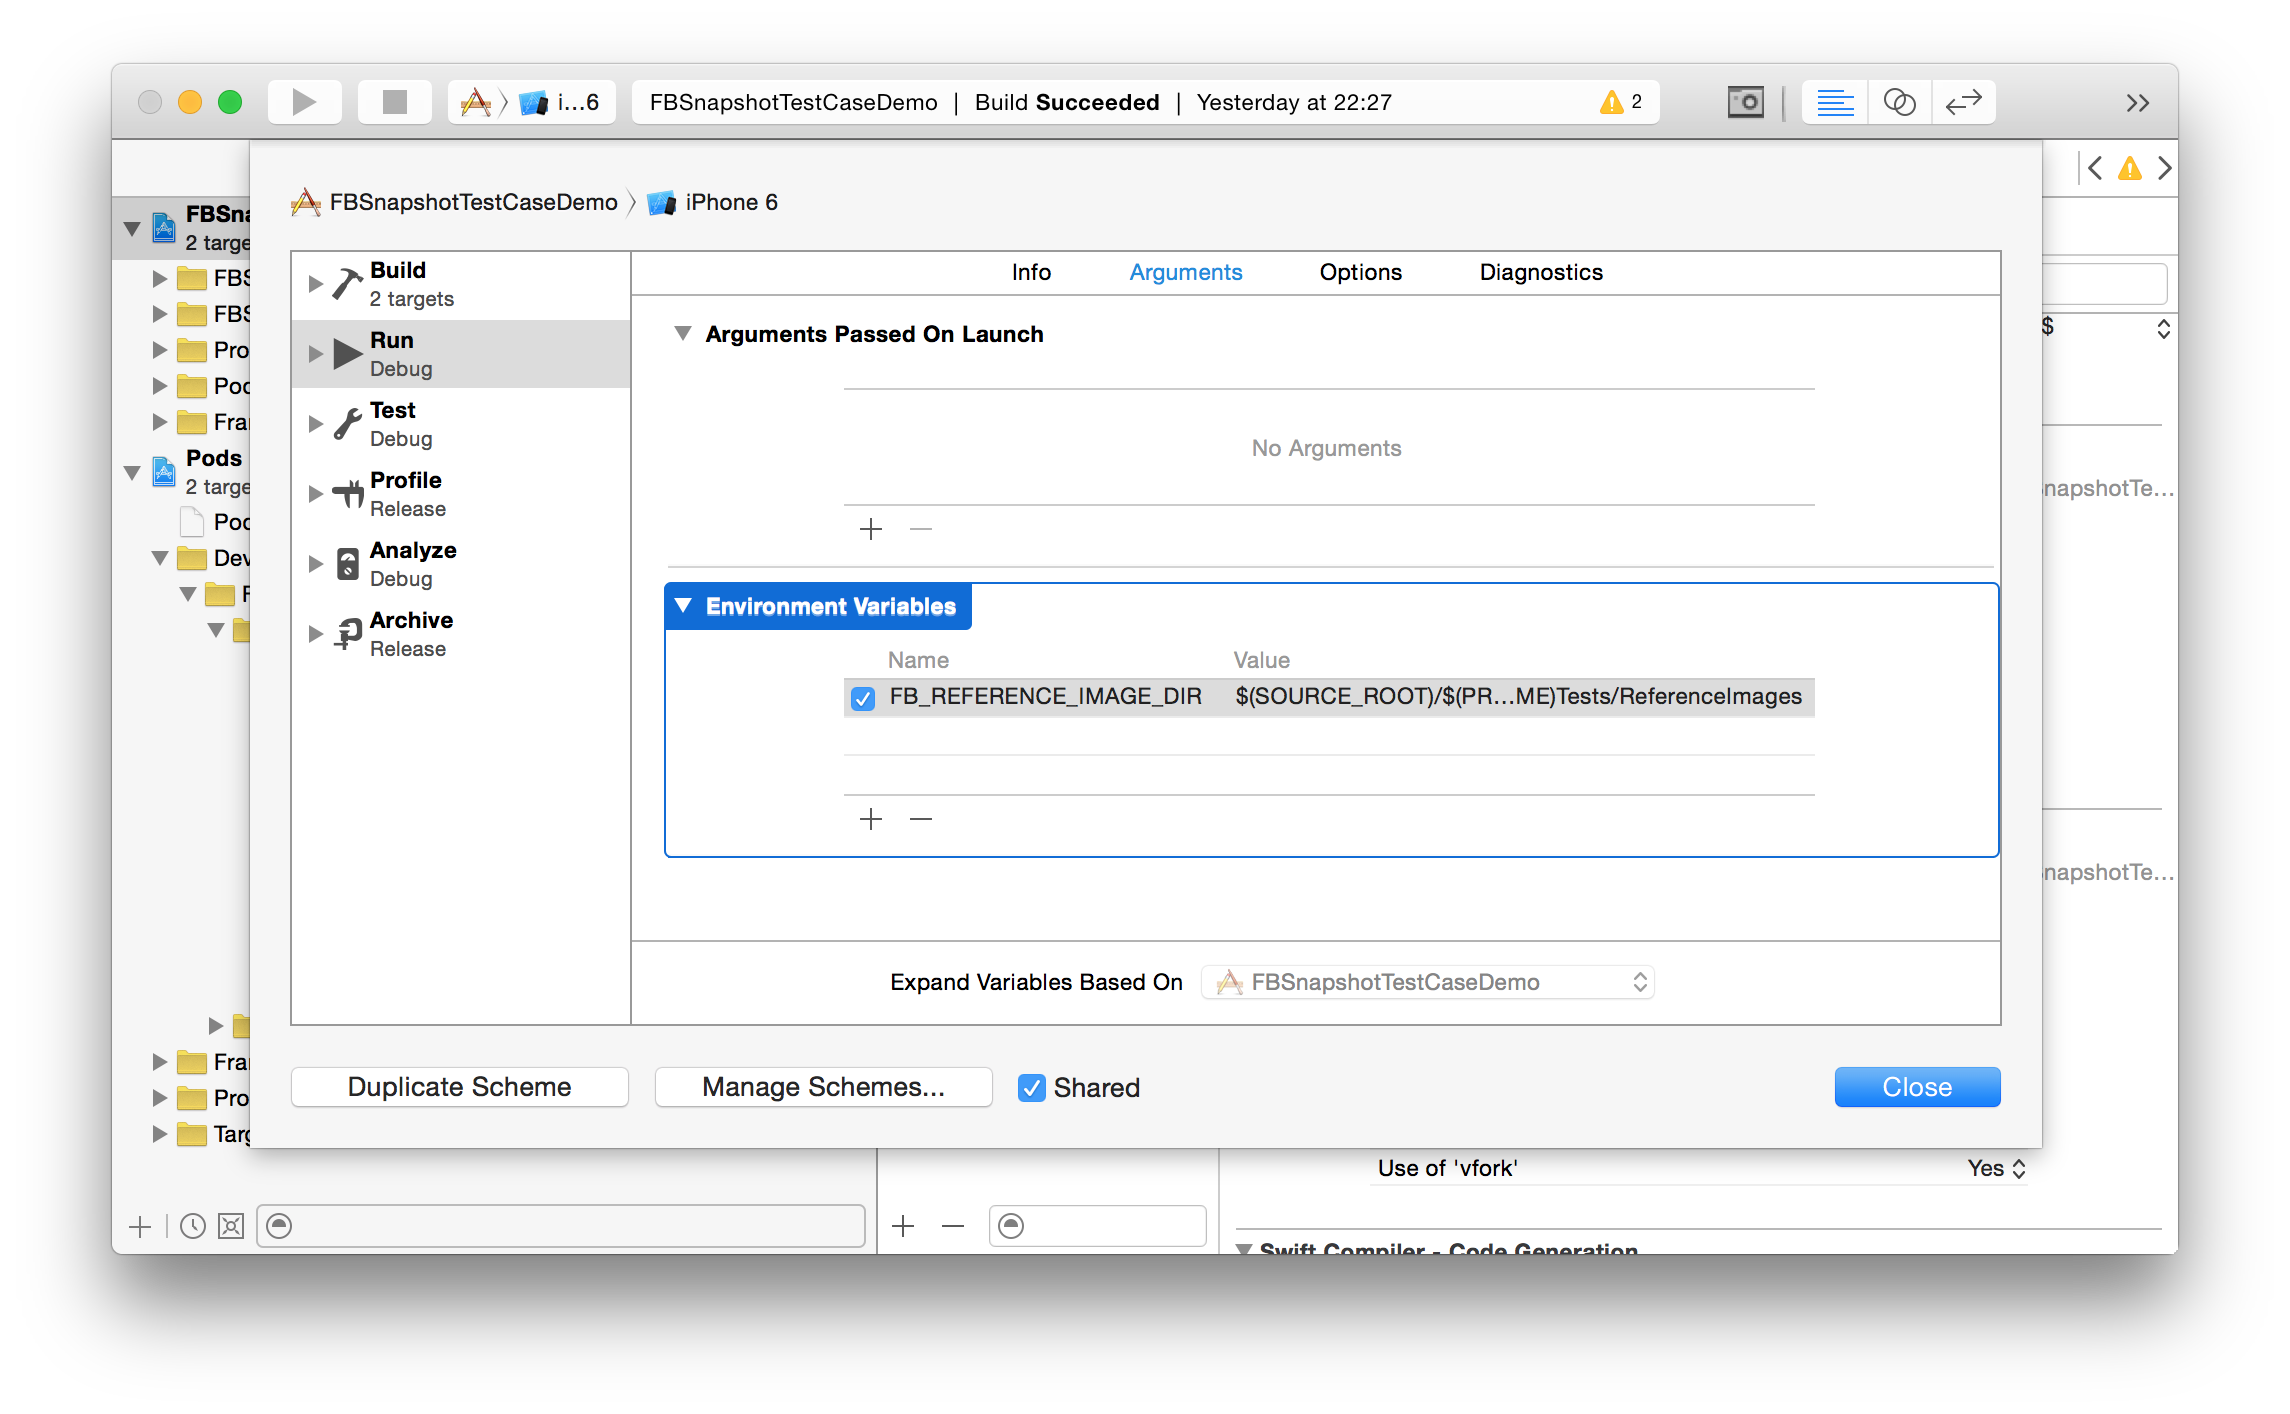
- There are three ways of setting reference image directories, the recommended one is to define
FB_REFERENCE_IMAGE_DIRas an environment variable. This should point to the directory where you want reference images to be stored. We normally use this:
| Name | Value |
|---|---|
FB_REFERENCE_IMAGE_DIR |
$(SOURCE_ROOT)/$(PROJECT_NAME)Tests/ReferenceImages |
IMAGE_DIFF_DIR |
$(SOURCE_ROOT)/$(PROJECT_NAME)Tests/FailureDiffs |
If your scheme uses test plans, add these key-value pairs to their respective configuration(s).
Define the IMAGE_DIFF_DIR to the directory where you want to store diffs of failed snapshots. There are also three ways to set failed image diff directories.
Creating a snapshot test
- Subclass
FBSnapshotTestCaseinstead ofXCTestCase. - From within your test, use
FBSnapshotVerifyView. - Run the test once with
self.recordMode = YES;in the test's-setUpmethod. (This creates the reference images on disk.) - Remove the line enabling record mode and run the test.
Features
- Automatically names reference images on disk according to test class and selector.
- Prints a descriptive error message to the console on failure. (Bonus: failure message includes a one-line command to see an image diff if you have Kaleidoscope installed.)
- Supply an optional "identifier" if you want to perform multiple snapshots in a single test method.
- Support for
CALayerviaFBSnapshotVerifyLayer. usesDrawViewHierarchyInRectto handle cases likeUIVisualEffect,UIAppearanceand Size Classes.fileNameOptionsto control appending the device model (iPhone,iPad,iPod Touch, etc), OS version, screen size and screen scale to the images (allowing to have multiple tests for the same «snapshot» for differentOSs and devices).
Notes
Your unit tests should be inside an "application" bundle, not a "logic/library" test bundle. (That is, it should be run within the Simulator so that it has access to UIKit.)
However, if you are writing snapshot tests inside a library/framework, you might want to keep your test bundle as a library test bundle without a Test Host.
Read more on this here.
Authors
iOSSnapshotTestCase was written at Facebook by
Jonathan Dann with significant contributions by
Todd Krabach.
Today it is maintained by Uber.
License
iOSSnapshotTestCase is MIT–licensed. See LICENSE.


