This repository includes a .NET/C# app, created using the .NET Aspire Starter App sample demo, that uses redis.
The repository includes all the infrastructure and configuration needed to provision the solution resources and deploy the app to Azure Container Apps using the Azure Developer CLI.
Check the resources section to find supporting videos with an overview of the project, and a step-by-step video to demo the delpoyt to Azure.
Note: The current solution uses .NET Aspire Community Toolkit Ollama integration to include and deploy a Phi-3.5 model without the need to install ollama locally.
- A Blazor Front End that uses Microsoft.Extensions.AI package to access language models to generate responses to user messages.
- The Blazor Frontend app included with the .NET Aspire Starter App template, that display a chat panel to interact with the LLM.
- Bicep files for provisioning the necessary Azure resources, including Azure Container Apps, Azure Container Registry, Azure Log Analytics, and RBAC roles.
- Using the Phi-3.5 model through Ollama running in a container.
** Work In Progress **
You have a few options for getting started with this template. The quickest way to get started is GitHub Codespaces, since it will setup all the tools for you, but you can also set it up locally.
You can run this template virtually by using GitHub Codespaces. The button will open a web-based VS Code instance in your browser:
-
Open the template (this may take several minutes):
-
Open a terminal window
-
Continue with the deploying steps
If you're not using one of the above options for opening the project, then you'll need to:
-
Make sure the following tools are installed:
- .NET 8
- Git
- Azure Developer CLI (azd)
- VS Code or Visual Studio
- If using VS Code, install the C# Dev Kit
-
Fork and Clone the current repository:
-
If you're using Visual Studio, open
the src/AspireAIBlazorChatBot.slnsolution file. If you're using VS Code, open the src folder. -
Continue with the deploying steps.
A related option is VS Code Dev Containers, which will open the project in your local VS Code using the Dev Containers extension:
-
Start Docker Desktop (install it if not already installed)
-
Open the project:
-
In the VS Code window that opens, once the project files show up (this may take several minutes), open a terminal window.
-
Continue with the deploying steps
Once you've opened the project in Codespaces, in Dev Containers, or locally, you can deploy it to Azure.
-
Sign up for a free Azure account and create an Azure Subscription.
-
Check that you have the necessary permissions:
- Your Azure account must have
Microsoft.Authorization/roleAssignments/writepermissions, such as Role Based Access Control Administrator, User Access Administrator, or Owner. If you don't have subscription-level permissions, you must be granted RBAC for an existing resource group and deploy to that existing group. - Your Azure account also needs
Microsoft.Resources/deployments/writepermissions on the subscription level.
- Your Azure account must have
From a Terminal window, open the folder with the clone of this repo. Run the following commands.
-
Login to Azure:
azd auth login
-
Init the resources for the Azure Deploy, define the environmetn name. Run the command:
azd init
-
Start the Azure Deploy process. Select the Azure Subscription and the Region (ie: East US 2). Run the command:
azd up
-
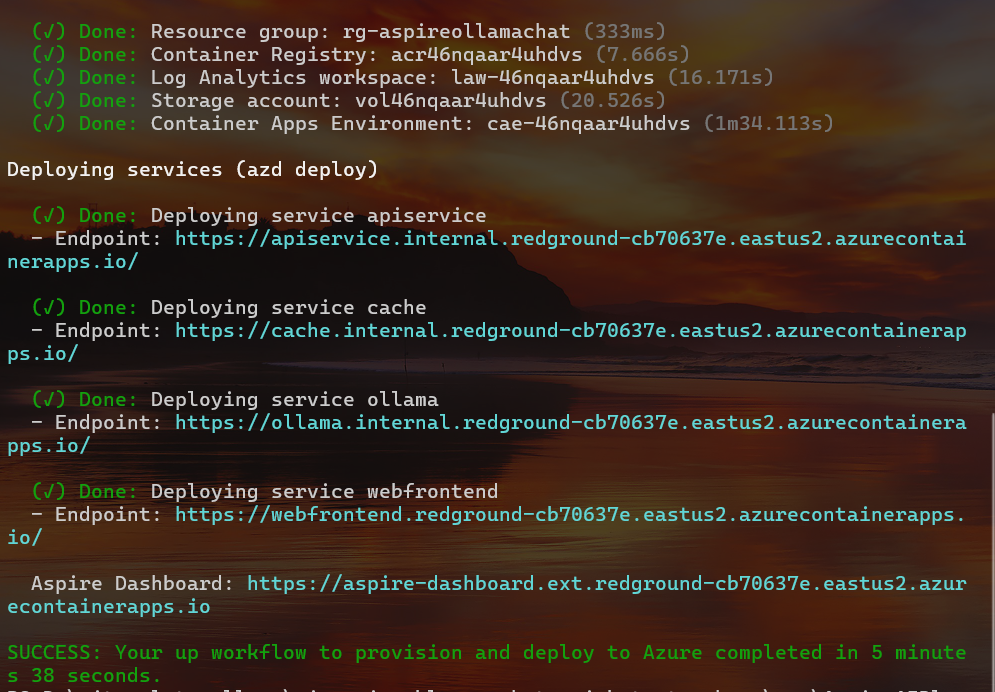
When
azd uphas finished deploying, you'll see 5 deployed URIs:- service apiservice
- service cache
- service ollama service
- service webfrontend
- Aspire Dashboard
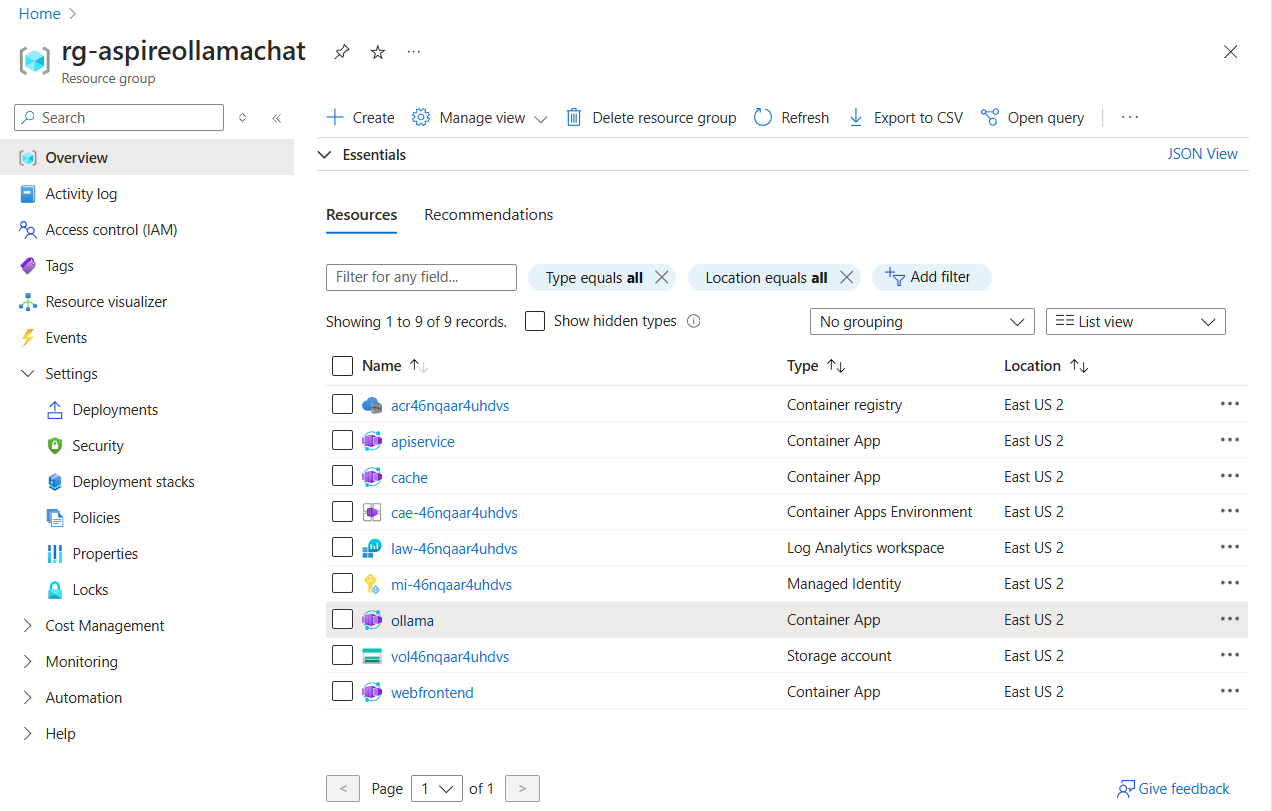
The Azure resource group now have the following services deployed:
-
Open the webfrontend service url, and click on the
Check Model Statusbutton. This will start the download of the Phi-3.5 model. After a couple of minutes, click again and once the model is downloaded, the chat will be ready to be used.
The Azure Developer CLI (azd) has been extended to support deploying .NET Aspire projects. The following steps will help you walk through the process of deploying the current .NET Aspire project to Azure Container Apps using the Azure Developer CLI.
- Explore how azd integration works with .NET Aspire projects
- Provision and deploy resources on Azure for a .NET Aspire project using azd
- Generate Bicep infrastructure and other template files using azd
From a Terminal window, open the folder with the clone of this repo. Run the following commands.
-
Navigate to the .NET Aspire AppHost project:
In Windows:
cd .\src\AspireAIBlazorChatBot.AppHost\
In Mac / Linux:
cd ./src/AspireAIBlazorChatBot.AppHost/ -
Login to Azure:
azd auth login
-
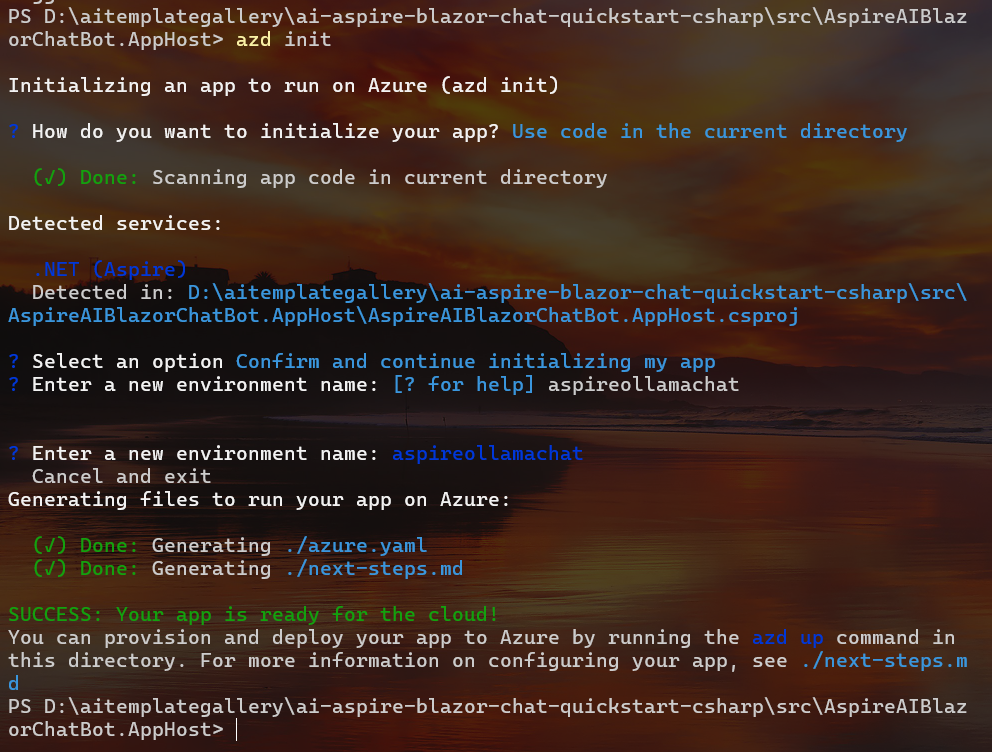
Init the resources for the Azure Deploy, and select the option to use the code in the current directory and define the name for the new environment. Run the command:
azd init
This image shows an example creating an environment named
aspireollamachat.To describe the infrastructure and application, an
azure.yamlwas added with the AppHost directory. -
Provision and deploy all the resources:
azd up
It will prompt you to select a Subscription from your Azure account, and select a location (like "East US 2"). Then it will provision the resources in your account and deploy the latest code. If you get an error or timeout with deployment, changing the location can help.
-
When
azd uphas finished deploying, you'll see 5 deployed URIs:- service apiservice
- service cache
- service ollama service
- service webfrontend
- Aspire Dashboard
The Azure resource group now have the following services deployed:
Important: The ollama service is not ready yet! Follow the next steps to complete the ollama deployment.
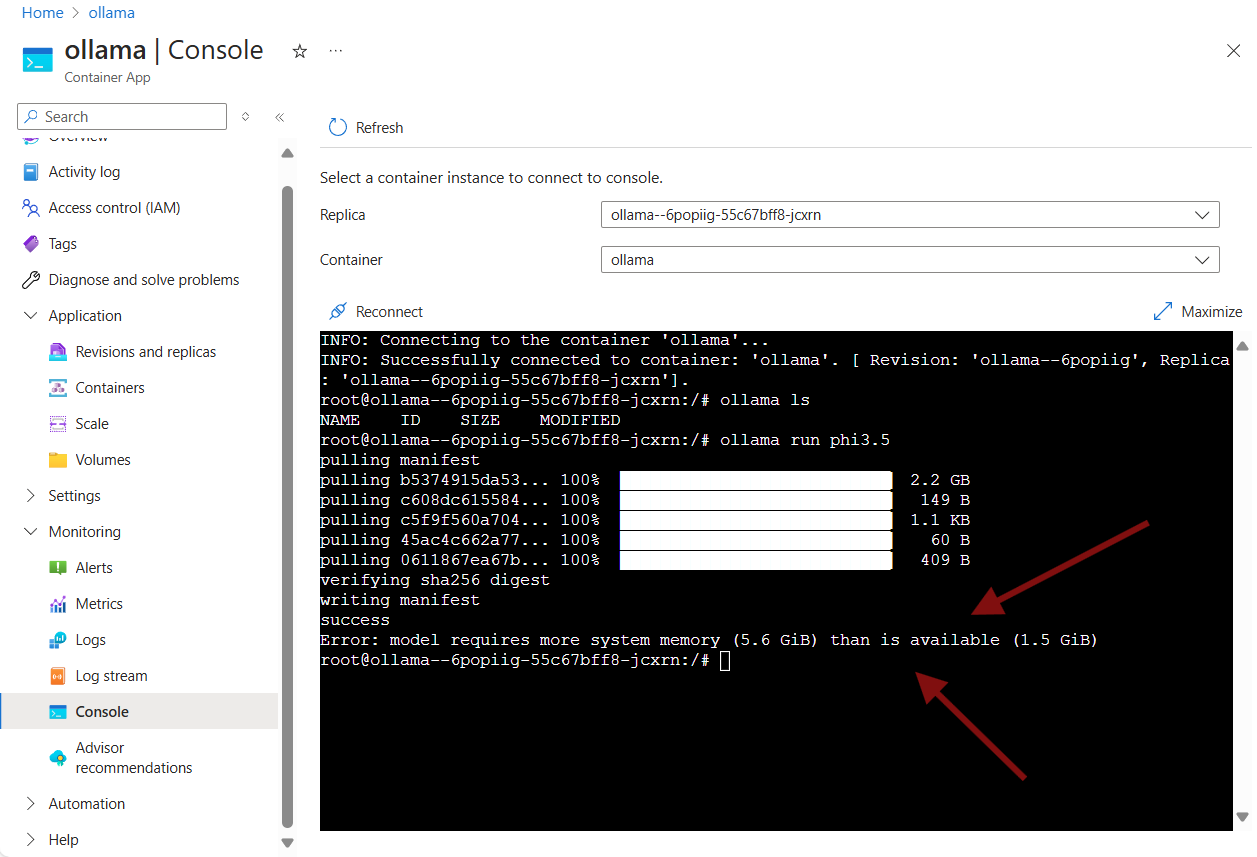
The ollama service is ready to be use, however, it does not have any model yet. When connected to the console and try to pull a model, the following error will be displayed.
Error: model requires more system memory (5.6 GiB) than is available (1.5 GiB)We need to redeploy the ollama service with more system memory assigned. To modify the infrastructure that azd uses, run azd infra synth to persist it to disk.
-
Run the command to generate the infrastructure files.
azd infra synth
-
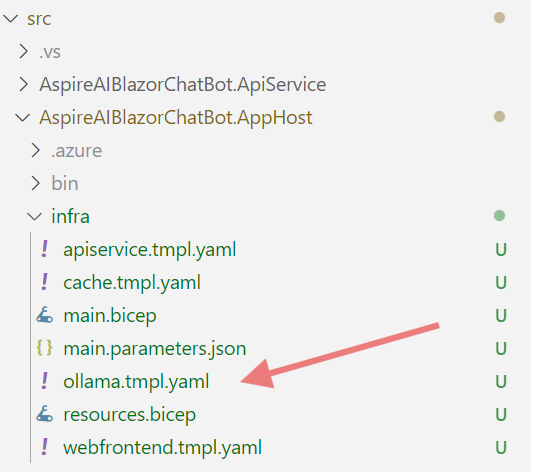
After running the command some additional directories will be created in the AppHost project directory:
- infra/            # Infrastructure as Code (bicep) files
  - main.bicep      # main deployment module
  - resources.bicep # resources shared across your application's services
In addition, for each project resource referenced by in the app host, a
containerApp.tmpl.yamlfile will be created in a directory namedmanifestsnext the project file. Each file contains the infrastructure as code for running the project on Azure Container Apps.Note: Once you have synthesized your infrastructure to disk, changes made to your App Host will not be reflected in the infrastructure. You can re-generate the infrastructure by running
azd infra synthagain. It will prompt you before overwriting files. You can pass--forceto forceazd infra synthto overwrite the files without prompting. -
Let's edit the the
ollama.tmpl.yamlfile: -
On the ollama container definition, add the necessary resources including
cpu: 3andmemory: "6.0Gi".containers: - image: {{ .Image }} name: ollama env: - name: AZURE_CLIENT_ID value: {{ .Env.MANAGED_IDENTITY_CLIENT_ID }} volumeMounts: - volumeName: ollama-aspireaiblazorchatbotapphostollamaollama mountPath: /root/.ollama resources: cpu: 3 memory: "6.0Gi"
Note: You can see a sample of the file in
.\infra\sample\ollama.tmpl.yaml. -
When you've made any changes to the ollama infrastructure code, let's redeploy the service:
azd deploy ollama
-
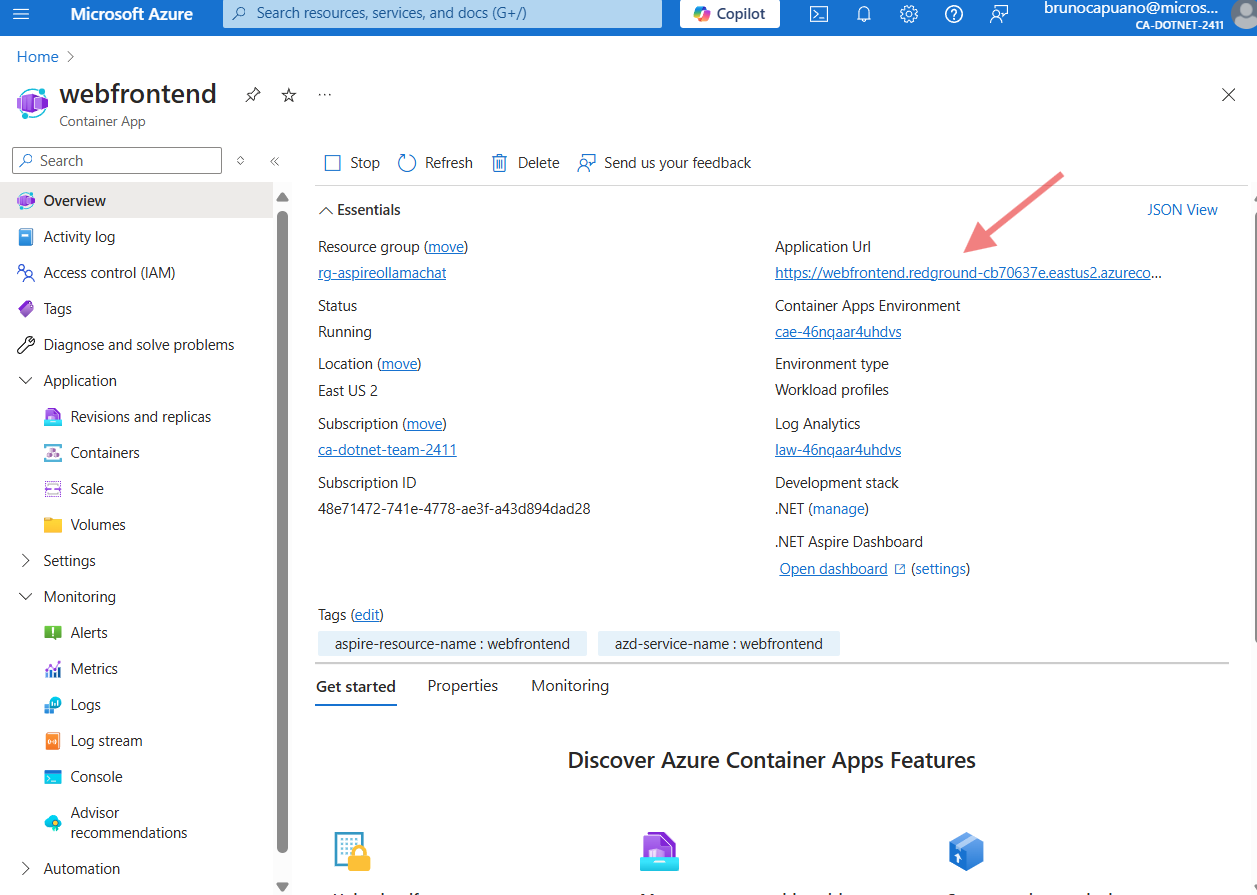
Now we can deploy the model from the chat app. Open the chat application from the published url.
In the azure portal, you can check the url from the published resource.
-
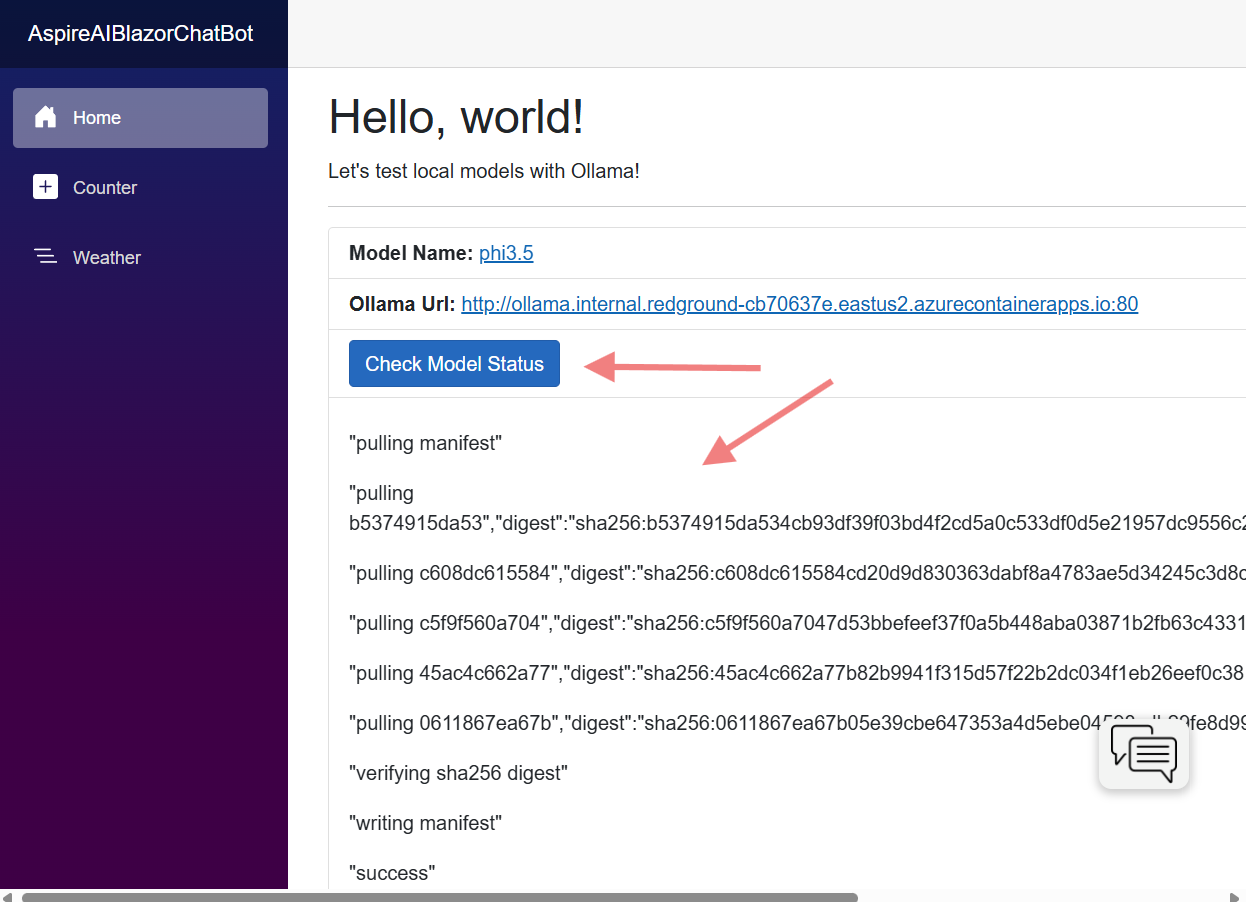
In the home page, press the
Check Model Statusbutton. This will start the model download if the model is not downloaded yet. And show the progress. This process may take a couple of minutes. -
Once the model is full downloaded, the home page should display this:
-
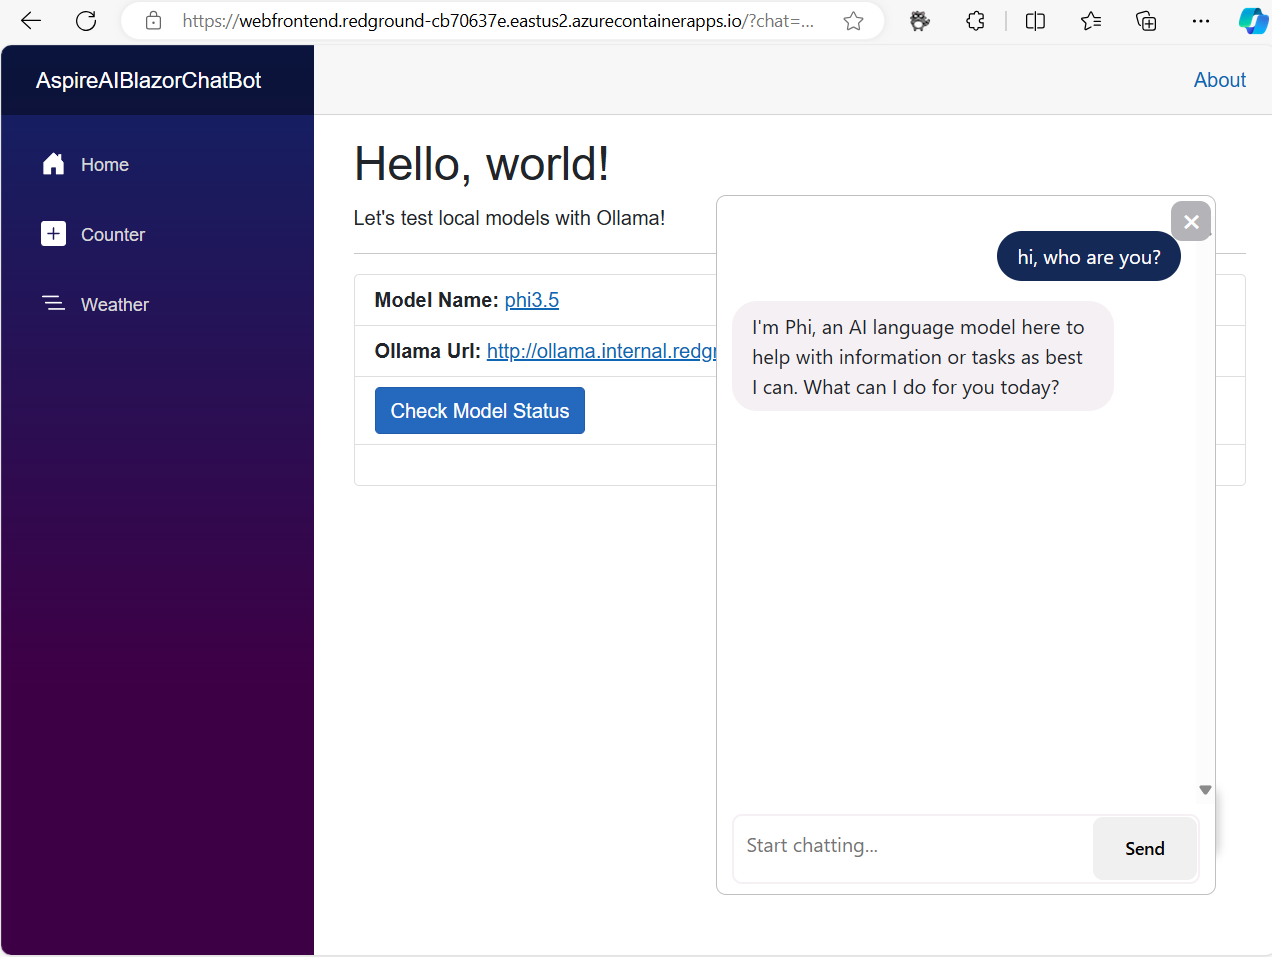
Now the chat panel should be ready to interact with the user.
-
Create a workflow pipeline file locally. The following starters are available:
-
In the AppHost project folder, run
azd pipeline config -e <environment name>to configure the deployment pipeline to connect securely to Azure. An environment name is specified here to configure the pipeline with a different environment for isolation purposes. Runazd env listandazd env setto reselect the default environment after this step.
Coming soon
Pricing varies per region and usage, so it isn't possible to predict exact costs for your usage. The majority of the Azure resources used in this infrastructure are on usage-based pricing tiers. However, Azure Container Registry has a fixed cost per registry per day.
You can try the Azure pricing calculator for the resources:
- Azure Container App: Consumption tier with 0.5 CPU, 1GiB memory/storage. Pricing is based on resource allocation, and each month allows for a certain amount of free usage. Pricing
- Azure Container Registry: Basic tier. Pricing
- Log analytics: Pay-as-you-go tier. Costs based on data ingested. Pricing
azd down.
This template is ready to use Managed Identity for authenticating to services like Azure OpenAI service.
Additionally, we have added a GitHub Action that scans the infrastructure-as-code files and generates a report containing any detected issues. To ensure continued best practices in your own repository, we recommend that anyone creating solutions based on our templates ensure that the Github secret scanning setting is enabled.
You may want to consider additional security measures, such as:
- Protecting the Azure Container Apps instance with a firewall and/or Virtual Network.
-
RAG chat with Azure AI Search + C#/.NET: A more advanced chat app that uses Azure AI Search to ground responses in domain knowledge. Includes user authentication with Microsoft Entra as well as data access controls.
-
Build an AI Chat in .NET Aspire with Ollama: Quickstart Guide!
-
Build an AI Chat in .NET Aspire with Ollama: Deploy to Azure Guide!


