1、安装数据库 新建一个数据库flow 导入数据库脚本:docs/sql/flow.sql
2、配置数据源 修改flow-admin模块下的resources配置文件application-local.properties
spring.datasource.druid.url=jdbc:mysql://localhost:3306/flow?autoReconnect=true&useUnicode=true&characterEncoding=utf8&zeroDateTimeBehavior=CONVERT_TO_NULL&useSSL=false&serverTimezone=GMT%2B8&nullCatalogMeansCurrent=true
spring.datasource.druid.username=xxxx
spring.datasource.druid.password=xxx
3、启动应用程序 flow-admin模块下的com.dragon.flow.main.FlowAdminApplication
直接运行即可
4、访问路径 http://localhost:8988/index.html 账号密码:
普通管理员:10101/888888 超级管理员:10100/888888
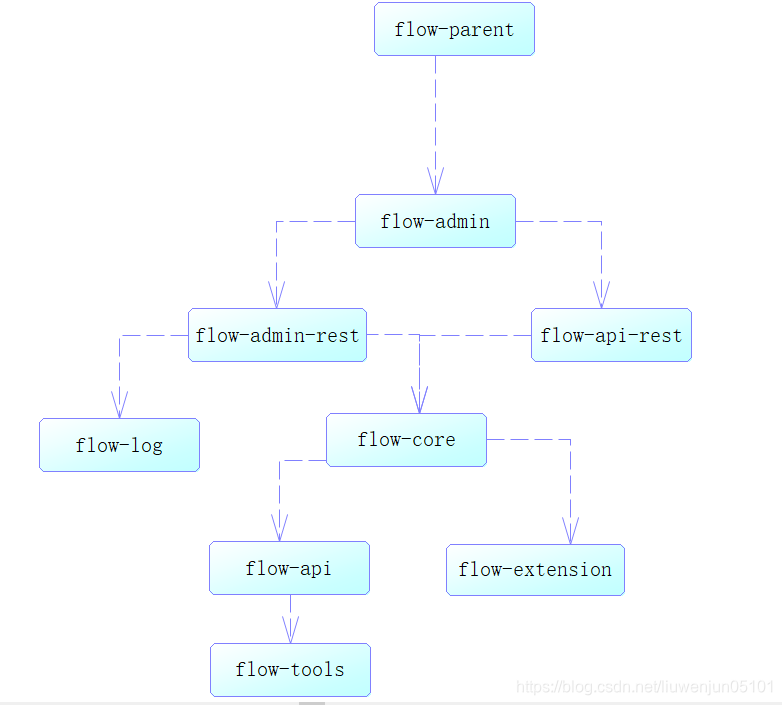
5、项目结构
6、开放接口 http://localhost:8988/swagger-ui/index.html
1、配置数据源 修改flow-front-rest模块下的resources配置文件application-local.properties
spring.datasource.druid.url=jdbc:mysql://localhost:3306/flow?autoReconnect=true&useUnicode=true&characterEncoding=utf8&zeroDateTimeBehavior=CONVERT_TO_NULL&useSSL=false&serverTimezone=GMT%2B8&nullCatalogMeansCurrent=true
spring.datasource.druid.username=xxxx
spring.datasource.druid.password=xxx
2、启动应用程序 flow-front-rest模块下的com.dragon.flow.main.FlowFrontApplication
3、访问路径 http://localhost:8990
4、登录账号密码
账号:10000到10100 密码统一:888888
https://gblfy.blog.csdn.net/article/details/117636550 镜像的密码是flow
欢迎bug反馈,需求建议,技术交流等
QQ扫码入群(群号:633168411):
如果您认为该项目对您有所帮助,则可以帮助作者购买一杯咖啡,以表示支持!
- 遵循 MIT 协议
- 请自由地享受和参与开源


