RF_Signals
This is a long-term project for my employer, iZones. They kindly gave me permission to open source a big chunk of our wireless planning software. We're a WISP (Wireless Internet Service Provider), and hope this helps other WISPs to succeed.
This project is divided into three parts:
- rf_signal_algorithms is a pure Rust port of Cloud-RF/Signal Server's algorithms. In turn, this is based upon SPLAT! by Alex Farrant and John A. Magliacane. I've retained the GPL2 license, because the parent requires it.
- terrain-cooker reads
lasfiles (LiDAR point clouds) and converts them intobheatfiles for efficient processing insidebracket-heat. - bracket-heat is a web-based planning tool to help you decide if Wireless Internet installations are likely to work.
Bracket-Heat
One of my early projects was WispTools.net, which used Longley-Rice/ITM (a lot of people thought it used Radio Mobile, but there's no connection other than similar algorithms). Bracket-Heat is a modernized version of the planner, designed for self-hosting.
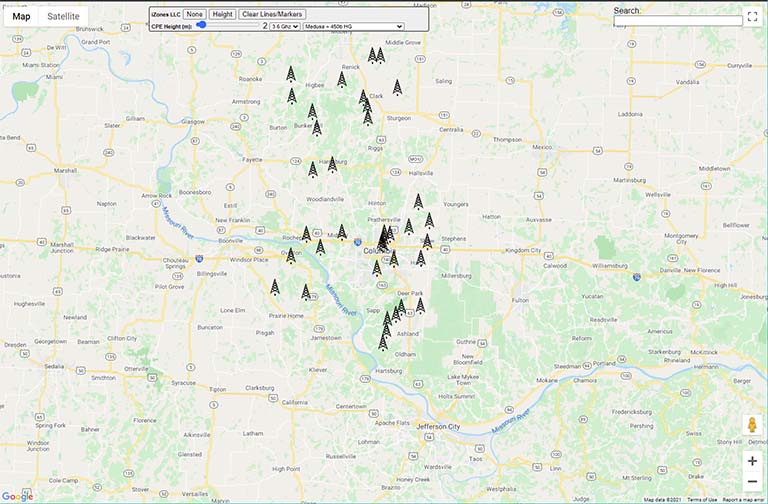
When you first open bracket-heat, you are presented with a map showing your towers:
You can enter any address into the search box, and it runs a Google reverse geolocation to find the location and zoom in:
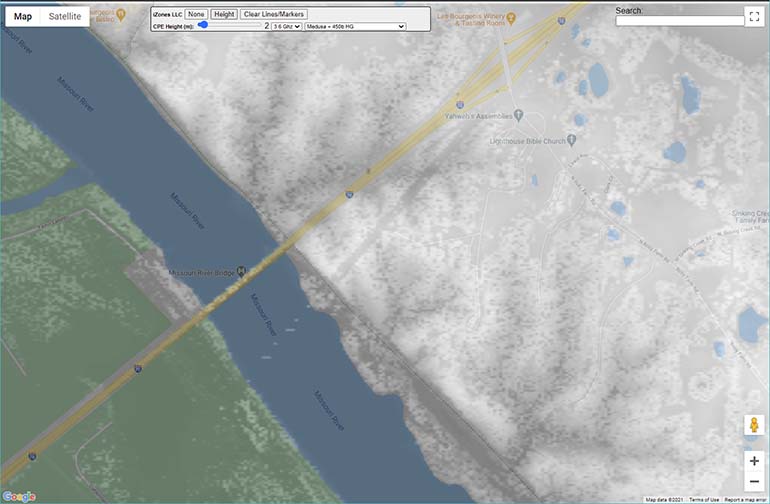
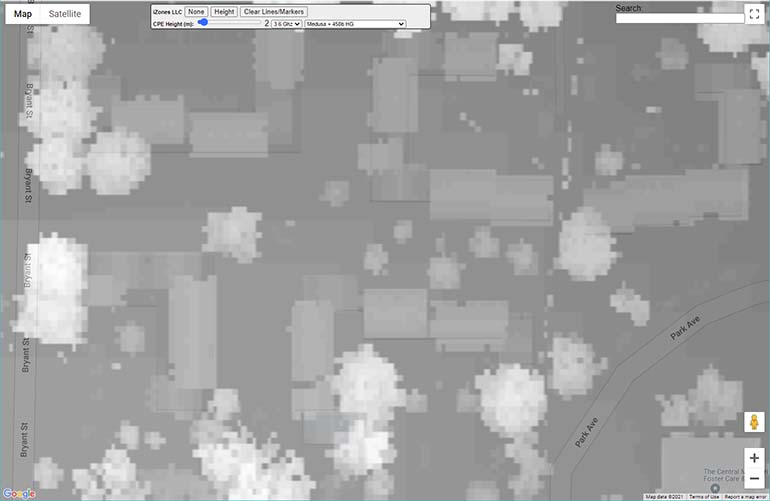
You can switch to satellite view, terrain view, etc. to help you find the location. You can click the "height" button at any time to see an overlay of your LiDAR data - great for checking that your data works, and getting an overview of the general area:
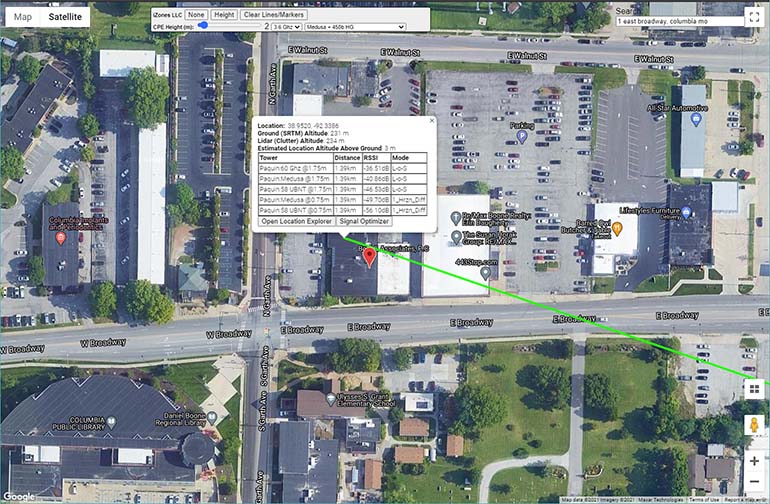
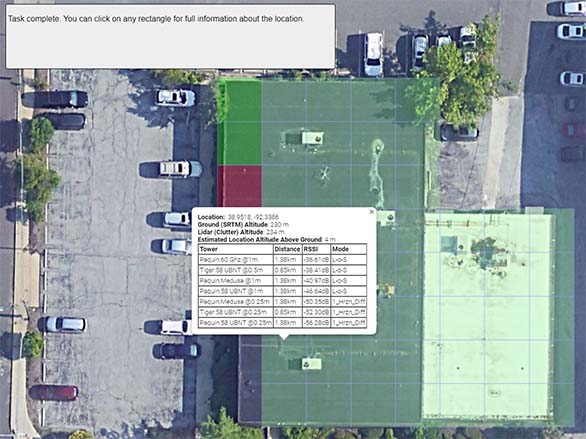
Once you've found the building, you can click on it to see a quick path/service estimate for the location:
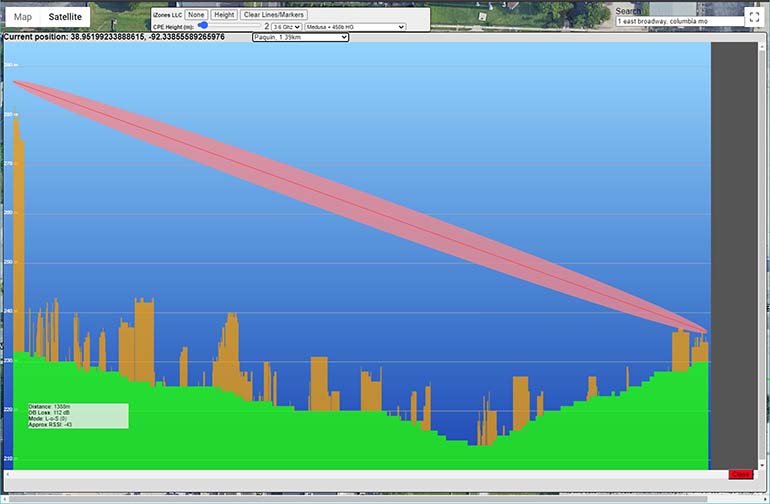
From the quick path analysis window, you can click "location explorer" to examine a detailed (1m resolution) slice of the path from your chosen point to your towers:
You can also click "signal optimizer" to use a wizard to identify your target area, block off any parts you don't want to evaluate, and display a signal estimate grid for the target location:
We've had pretty good success cutting down on failed site surveys, and finding signal where we might not have expected it, with this tool. Hopefully, it can help your WISP, also.
Ported Algorithms
This crate provides Rust implementations of a number of algorithms that are useful in wireless calculations:
- ITM3/Longley-Rice - the power behind Splat! and other functions.
- HATA with the COST123 extension.
- ECC33.
- EGLI.
- HATA.
- Plane Earth.
- SOIL.
- SUI.
Additionally, helper functions provide:
- Basic Free-Space Path Loss (FSPL) calculation.
- Fresnel size calculation.
SRTM .hgt Reader
There's also an SRTM .hgt reader. You can get these from various places for pretty much the whole planet. See Radio Mobile for details. This will eventually be in its own feature. For now, it maintains an LRU cache of height tiles and tries to find the best resolution available to answer an elevation query.
An example query:
let loc = LatLon::new(38.947775, -92.323385);
let altitude = get_altitude(&loc, "resources");
This requires the hgt files from the resources directory to function.
Porting Status
All algorithms started out in Cloud_RF's Signal Server (in C or C++) and were ported to Rust.
| Algorithm | Status |
|---|---|
| COST/HATA | Ported to Pure Rust |
| ECC33 | Ported to Pure Rust |
| EGLI | Ported to Pure Rust |
| Fresnel Zone | Pure Rust (not in original) |
| FSPL | Pure Rust |
| HATA | Ported to Pure Rust |
| ITWOM3 | Ported to Pure Rust |
| Plane Earth | Ported to Pure Rust |
| SOIL | Ported to Pure Rust |
| SUI | Ported to Pure Rust |
So how do I use this?
If you want to use this yourself, there's a few steps to get going.
Requirements
- You need a decently powerful PC to host it. We use a 12-core Xeon server with lots of storage, but it runs fine on my development laptop (i7, 12 gb RAM, 1 tb SSD). The program is mostly disk-bound (the actual calculations are pretty fast), so faster storage is good.
- You'll need to obtain
.hgtformat data for your coverage area. These are the same files used by Splat! and Radio Mobile. You can also take various DEM files and convert them to HGT tile format. It supports all three popular resolutions of hgt file. - You need LiDAR
.lasfiles for your coverage area. Your county assessor, or state land-grant university probably has them. For Missouri, I obtain them from MSDIS. You should be able to use any LiDAR file, so long as it is in LAS format, and in a cartographic projection supported by Proj. - You'll probably want to have access to Linux (or Windows Services for Linux) for converting LiDAR files. PROJ is a bear to get running in Rust on Windows.
- You need a Google Maps API key.
- Rocket requires that you run rust in
nightlymode.
Initial Setup
- Make sure you have a fully working Rust installation, along with a C++ and Clang build chain working.
- Clone this project (with
git clone) to a directory on your computer. - Setup a directory that you want to use to store
bheatfiles. - Make sure you know where you put your
hgtandlasfiles. - Modify
terrain_cooker/src/main.rs. ChangeLIDAR_PATHto the directory in which you are storing your.lasfiles. - In
terrain_cooker/src/tile_writer.rsaround line 48 change the base path to yourhgtfiles. - In
terrain_cooker/src/tile_writer.rsaround line 110 change the output directory to where you want to savebheatfiles.
(Note: this will be made configurable without recompiling soon, promise).
Cook some terrain
In your project directory, type cd terrain-cooker. Then run the conversion with cargo run --release. It will evaluate all .las files in the LIDAR folder, reading .hgt files from your heightmap directory and spit out bheat tiles. BHeat tiles start with a heightmap derived from your hgt files - and then adjust ground height and add terrain clutter heights from LiDAR files. This is an additive process: you can re-run it with new LiDAR data whenever you want, and the new data will be merged in.
Add in your Google maps key
In bracket-heat, create a file named gmap_key.txt and paste your Google Maps API key into it. I didn't want to give you mine!
Setup your WISP Information
- Change to the
bracket-heatdirectory. - Copy
resources/isp-template.rontoresources/isp.ron.
The default file looks like this:
Wisp(
    listen_port: 8000,
    name: "iZones LLC",
    center: (38.947775, -92.323385),
    map_zoom: 10,
    heat_path: "z:/bheat",

    link_budgets: [
        LinkBudget(
            name: "Medusa + 450b HG",
            xmit_eirp: 49.0,
            receive_gain: 20.0
        ),
        LinkBudget(
            name: "UBNT 120° Sector + PowerBeam 400",
            xmit_eirp: 44.0,
            receive_gain: 25.0
        ),
    ],

    towers: [
        Tower(
            name: "Paquin",
            lat: 38.947927398900426,
            lon: -92.3233740822584,
            height_meters: 55,
            max_range_km: 16.0934,
            access_points: [
                AP(
                    name: "Medusa",
                    frequency_ghz: 3.6,
                    max_range_km: 16.0934,
                    link_budget: 71,
                ),
                AP(
                    name: "58 UBNT",
                    frequency_ghz: 5.8,
                    max_range_km: 16.0934,
                    link_budget: 69,
                ),
                AP(
                    name: "60 Ghz",
                    frequency_ghz: 60.0,
                    max_range_km: 3.21869,
                    link_budget: 97,
                )
            ],
        ),
        Tower(
            name: "Biggs",
            lat: 38.798403,
            lon: -92.289524,
            height_meters: 60,
            max_range_km: 16.0934,
            access_points: [
                AP(
                    name: "Medusa",
                    frequency_ghz: 3.6,
                    max_range_km: 16.0934,
                    link_budget: 71,
                ),
                AP(
                    name: "58 UBNT",
                    frequency_ghz: 5.8,
                    max_range_km: 16.0934,
                    link_budget: 69,
                ),
                AP(
                    name: "60 Ghz",
                    frequency_ghz: 60.0,
                    max_range_km: 3.21869,
                    link_budget: 97,
                )
            ]
        )
    ]
)
Make changes as you see fit:
listen_portis the TCP port on which the webserver (Rocket) will listen.namejust changes the title bar of the app, use it to brand with your WISP.centeris the lat/lng position you want to see when you start the app.map_zoomis the zoom level at which you want to start when the app opens.heat_pathmust point at thebheatdirectory you created and populated with cooked data.link_budgetslets you define the types of radios you use, and wish to utilize when running RF calculations.towersdescribes all of your towers. It's important to addAPentries to them, describing what services are available at which location.
When you calculate the link_budget for an AP, take the transmitter's power and antenna gain and add them together. Then add the antenna gain of the CPE (NOT the power) you typically use.
Run the program
Launch the program with cargo run --release in your bracket-heat directory. Open a browser to http://localhost::<port> (<port> being whatever you set as the listen_port in your config file). If everything works, you now have an RF analysis suite.
