- What about?
- Hardware component list
- Preparing ESP
- Configuration
- LED Codes
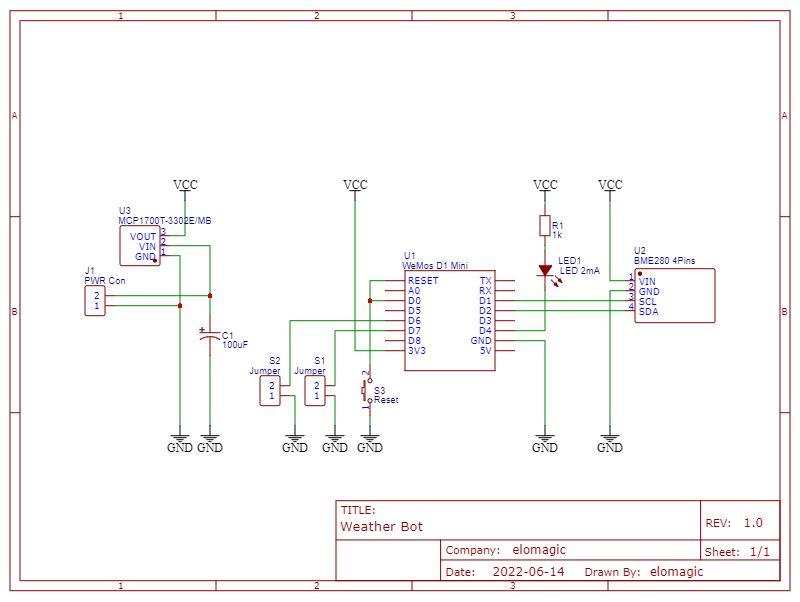
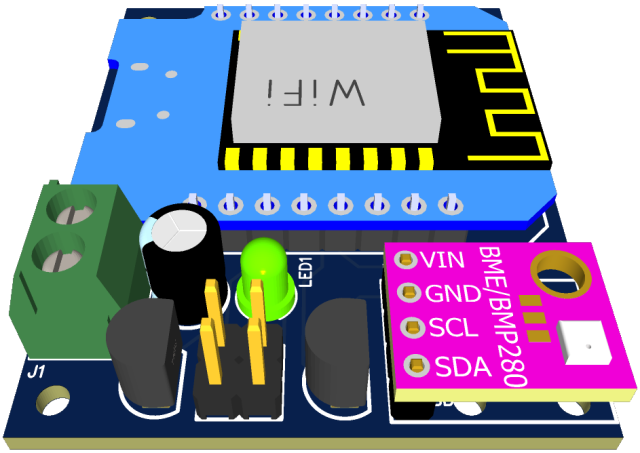
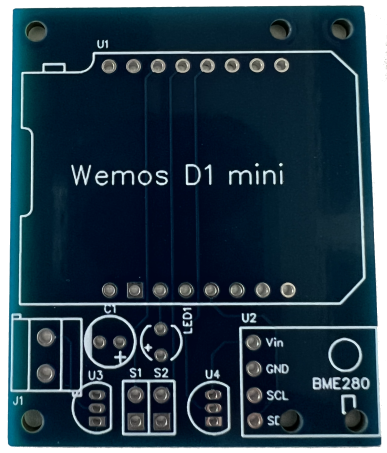
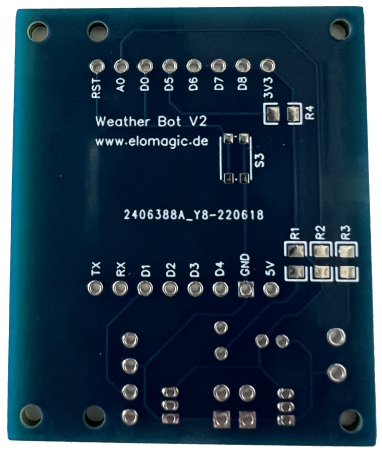
- Hardware Example
- Known issues
This project is a part of my "small" DIY project about to build up a weather station mesh.
This part deals with the weather client, which measures temperature, air pressure and humidity and transmits them to any REST server or MQTT broker.
The part with the REST server is described in another project. See here ... TODO
Cheapest and simplest solution. The client will be powered by an external USB power supply.
- ESP8266 with at least 2MB flash memory and installed MicroPython image (2MiB+ flash version > https://micropython.org/download/?port=esp8266)
- BMP280 (w/o humidity sensor) or BME (with humidity sensor)
The solution is powered by an external rechargeable battery.
In addition to the components from option A, the following components are required
- tbd.
- ...
- ...
tbd.
Before you can start by configuring your bot, you have to upload the firmware. Recommendation is, that MicroPython is successful running on your ESP.
(TODO) Install "ampy"
Upload the projects files with the following command
./build.py --port COM6 --baud 115200 build deploy
The weather bot support two configuration options.
Configuration file
# SSID of the access point
wifi.ssid=ssid
# Password of the access point
wifi.password=changeit
# IP address of this client when access point doesn't provide dynamically IP address. Usually empty
wifi.address=
# Usually empty (By default 255.255.255.0)
wifi.netmask=255.255.255.0
# Usually empty
wifi.gateway=
# Usually empty (By default 8.8.8.8)
wifi.dns=8.8.8.8
# Name of client bot (By default 'Weather-Bot')
wifi.clientName=[BOT_NAME]

# Unique identifier of this client ( Looking for a generator. See https://www.uuidgenerator.net/version4 )
sensor.uid=uuid
# Measure interval in seconds (By default 300 seconds)
sensor.measureInterval=300

# REST or MQTT URL server address.  Sample "http://192.168.150.2/rest" or "mqtt://192.168.150.2/kitchen"
server.url=http://[HOSTNAME]/rest
# Application key to authentication
server.appKey=

# Debug level  (By default debug)
logging.level=debug
# Controls logging output to the console (By default enabled, 1 = Enabled, 0 = Disabled)
logging.console.enabled=1
# Controls logging output to file on the ESP (By default disabled, 1 = Enabled, 0 = Disabled)
logging.file.enabled=0
Command to read configuration from ESP
.\Setup-Client.py read --port COM7 --file configuration.properties
Command to write configuration to ESP
.\Setup-Client.py write --port COM7 --file configuration.propertiesNote: The commands work most reliably if you execute them shortly after a bot reset!
- Power on ESP
- Connect the ESP via Wi-Fi. Look for the SSID "Weather-Bot". Password is "weather-bot".
- The configuration page appears. Configure the bot according to your needs.
The LED gives feedback on successful and faulty communication.
Please ignore the very short flash when counting. Each flash is min. half a second long
| Count | Description |
|---|---|
| 0 | Worst case. We have to investigate |
| 1 | Data successfully transmitted |
| 2 | Entering setup |
| 3 | Unable to connect to access point |
| 4 | Unable to post data to server |
| 5 | Unable to connect NTP server |
| 6 | Unexpected error |
| 7 | HTTP authentication failed |
The weather-bot support two communications protocols.
The following examples shows which data is transmitted:
POST /rest/measure HTTP/1.1
Host: weather-server.local{
// UID of the measure sensor
"sensorUid": "892ed1a5-a416-418d-b478-78d7ff744b2e",
// UNIX epoch timestamp of the measurement in seconds
"unixEpochTimestamp": "1656914554",
// Measured temperature
"temperature": "31.52",
// Unit of the measured temperature
"temperatureUnit": "°C",
// Measured pressure
"pressure": "999.49",
// Unit of the measured pressure
"pressureUnit": "hPA",
// Measured humidity in percent
"humidity": "33.8064",
// Battery voltage (Unit must be 'V')
"batteryVoltage": "3.3"
}Topic generation rule: /[Path of the URL]/[Sensor UID][Property Name]
Examples:
kitchen/892ed1a5-a416-418d-b478-78d7ff744b2e/temperaturekitchen/892ed1a5-a416-418d-b478-78d7ff744b2e/humiditygarden/17356968-d9cd-4c50-9afd-1a7fb1972a5e/humidity
- "temperature" - Measured temperature in celsius grad (°C)
- "pressure" - Measured pressures in hecto pascal (hPa)
- "humidity" - Measured humidity in percent
- "batteryVoltage" - Measured battery voltage in voltage (V)
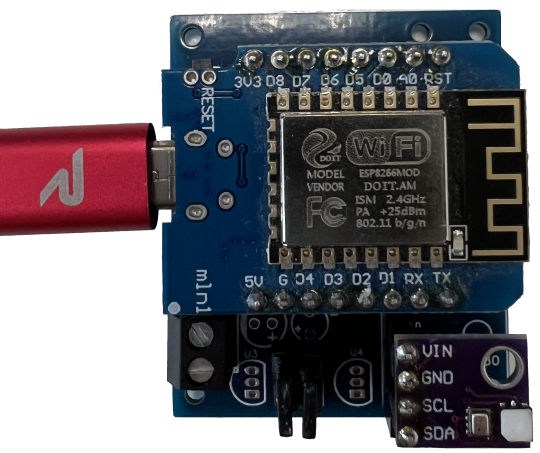
Following PCB was made with EasyEDA.
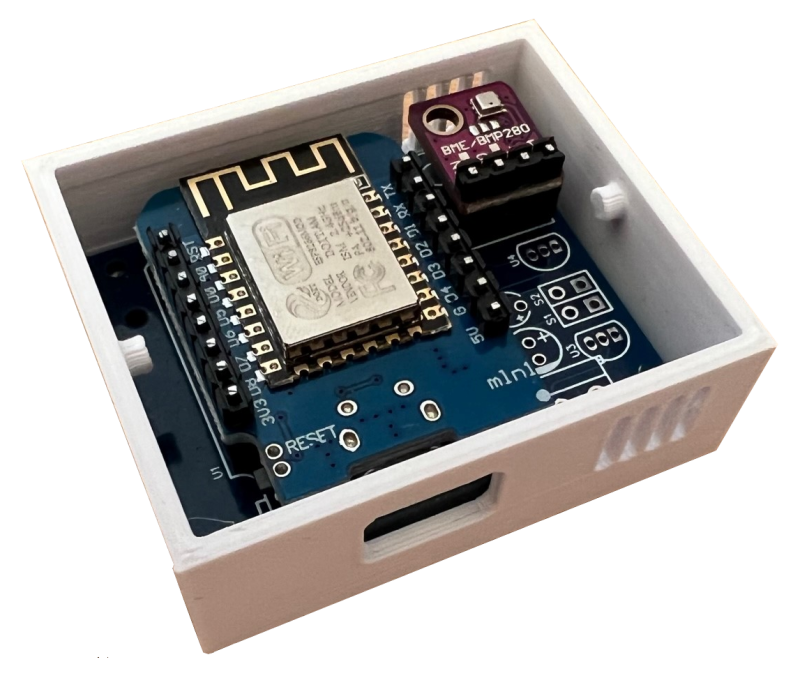
Proposal of a device case. Made with Blender.
- TLS (HTTPS) communication doesn't work
- TLS support (This will be very difficult to impossible. TLS needs a lot of memory and the ESP8266 has not enough of it.)


