iOS and Android app to help medical professionals in Region Västra Götaland, Sweden, to prescribe drugs.
It fetches data via JSON from the companion website http://reklistan.vgregion.se and stores in the app for offline usage. Built with NativeScript. The backend site which supplies the data is built with Liferay.
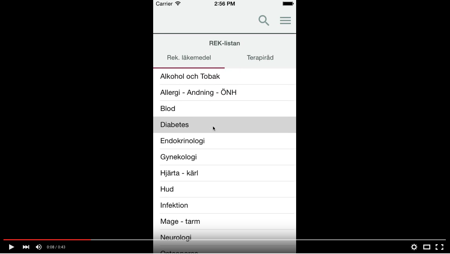
Watch video demonstration (43 seconds)
# Clone this repo
git clone https://github.com/emiloberg/oppna-program-reklistan-app.git

# Install all dependencies and prepare the project, this will run for a while.
npm install

# Follow the instructions under the heading 'Setting iOS app icons/launch images' below.
If you've already set up the project as described above, but want to rebuild the app (because source code has changed...) do:
# cd to/the/project/root

# Checkout the code

npm run prepare

# Build the app as described under 'Building the app'
First, run through Re-preparing the app as described above.
Then, bump the version number. From the root directory run:
npm run bump android <integer version code> <X.Y version name>
Then, from root/rekapp, run (after replacing the path and pwd in the command):
tns build android --release --key-store-path /path/to/keystore/file.keystore --key-store-password KEYSTORE-PWD --key-store-alias VGR --key-store-alias-password KEYSTORE-PWD
Your compiled APK will be placed in.
rekapp/platforms/android/build/outputs/apk/rekapp-release.apk
Point your web browser to https://play.google.com/apps/publish/. Log in with license account. Select REKlistan, press APK and the Beta tab. Press Upload APK for beta version. Select the newley created apk and wait a few hours for Google to process it. Then you can release it to beta/production.
First, run through Re-preparing the app as described above.
Then, bump the version number. From the root directory run:
npm run bump ios <semver version code>
Then, from the app-root/rekapp, open XCode by running
open platforms/ios/rekapp.xcodeproj/
Select Product > Archive. If the Archive option is grayed out do the following: On the top of the XCode window you have a few build buttons (Play, Stop, etc). To the right of the stop icon it says rekapp > [Some emulator]. Press the emulator (this is the build destination) and select a non-emulator. There's probably a choice called something like Generic iOS Device - select that. Now Archive should be enabled. Press it.
App will now build. Wait half a minute and a window with all archived versions will now be shown. Press Upload to App Store. It'll take a while as Apple will do an automatic validation of the package (and tell you if something's wrong).
Point your web browser to https://itunesconnect.apple.com. Select My Apps and REKlistan. To add the build as a new TestFlight (beta) version. Select TestFlight and then External Testing. Click Add build to test, select the just created build and then fill out the form.
Wait while (could be a couple of hours up to a few days!) while Apple screens the app. You're not getting a mail when they're done so you've to look in from time to time.
First time, after adding the ios platform by running tns platform add you need to add all app icons and launch images to the project. Do this by following this guide.
-
From the root of the project start xcode by running
open rekapp/platforms/ios/rekapp.xcodeproj -
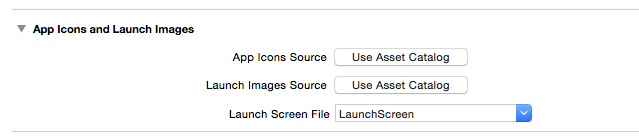
In xcode, select rekapp on the top left. Scroll down to App Icons and Launch Images, it should look like this:
-
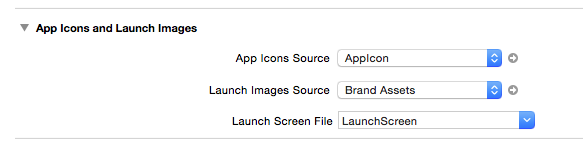
Press Use Asset Catalog next to App Icons Source. Press Migrate in the dialog. The screens should now look like this:
-
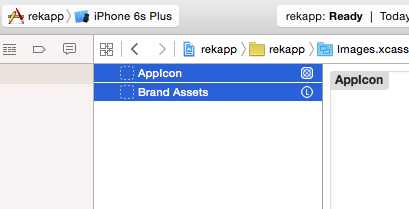
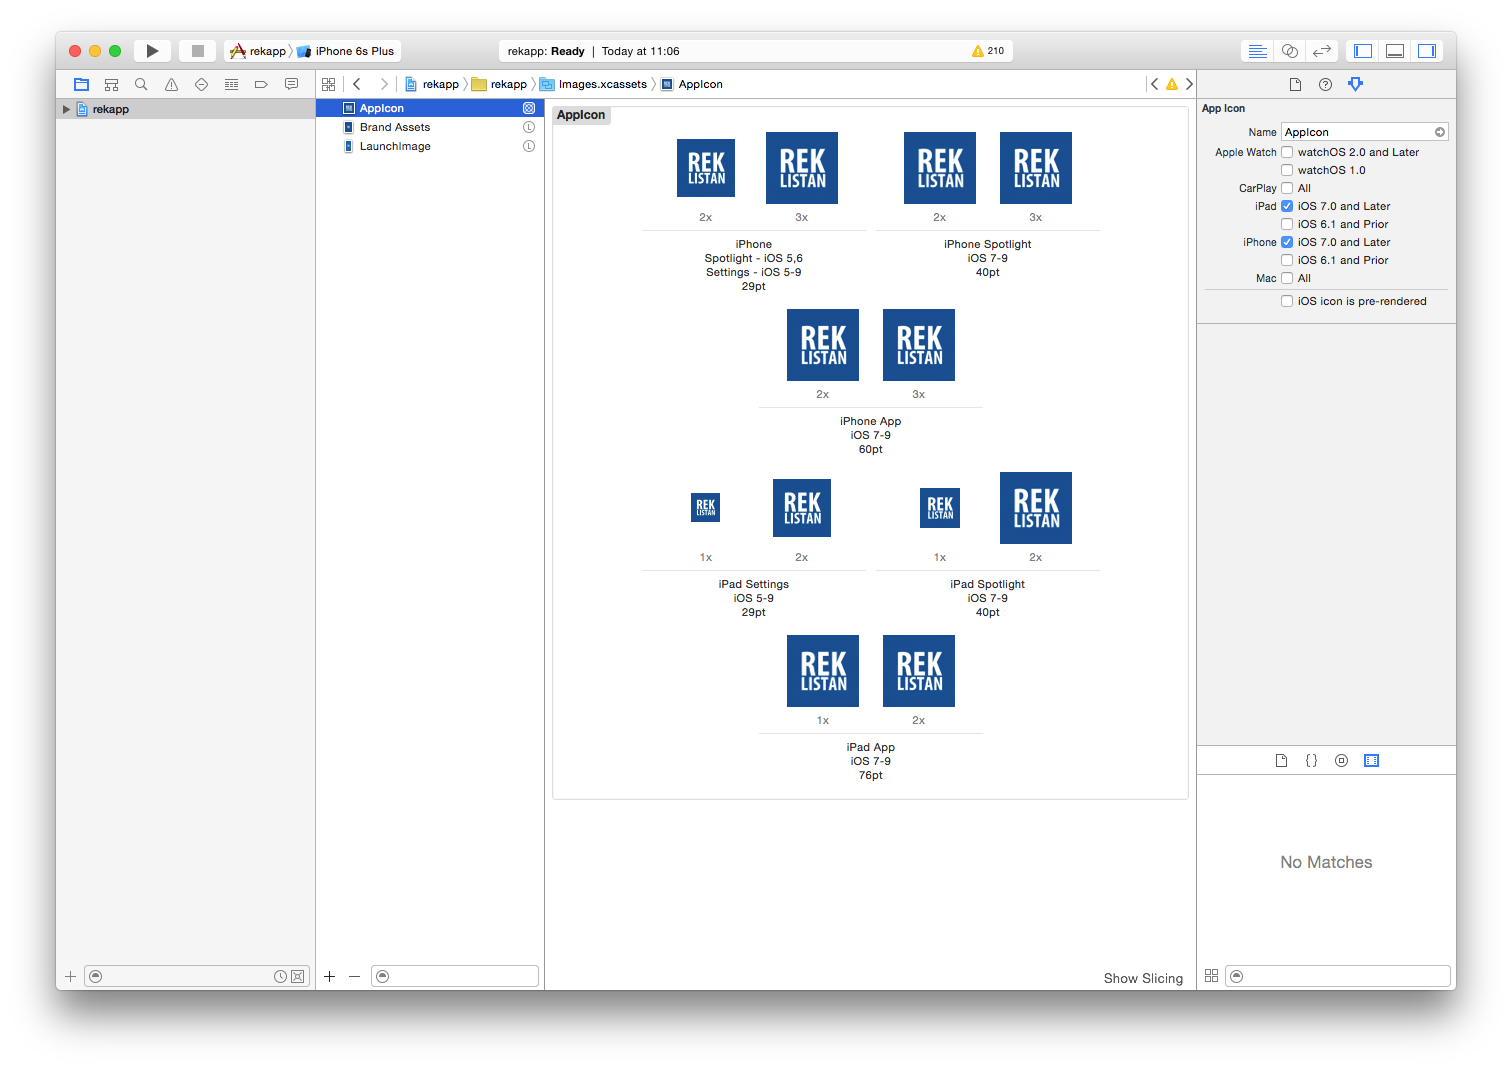
Press the little gray arrow next to App Icons Source [AppIcon].
-
On the new screen, select both AppIcon and Brand Assets, right click and select Remove Selected Items. The list should now be empty.
-
At the bottom of the screen, press the plus sign and select Import...
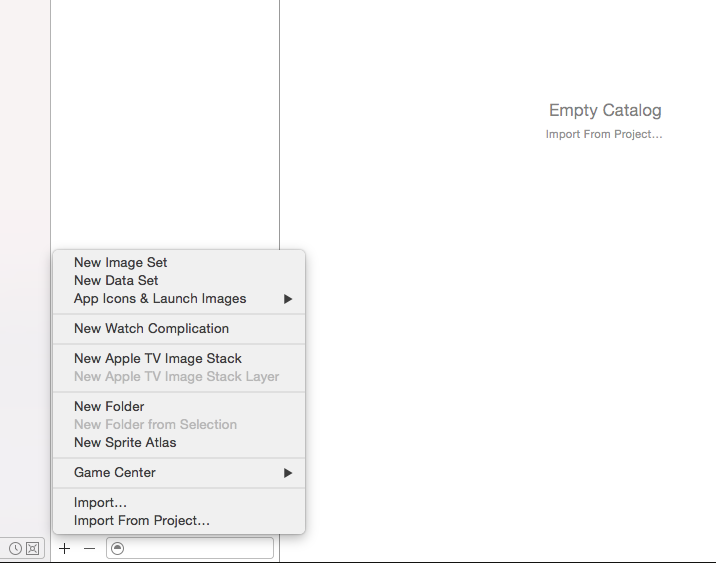
-
Select the three folders inside
resources/app-settings/Images.xcassetsand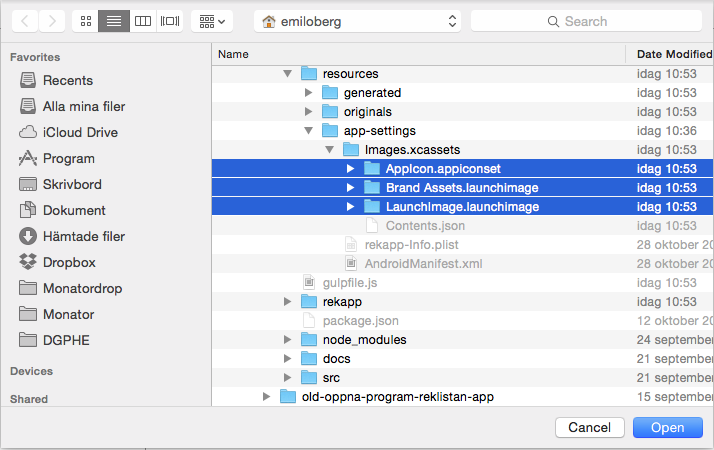
-
The screen should now look like this
-
Press rekapp in the leftmost column to return to the main screen
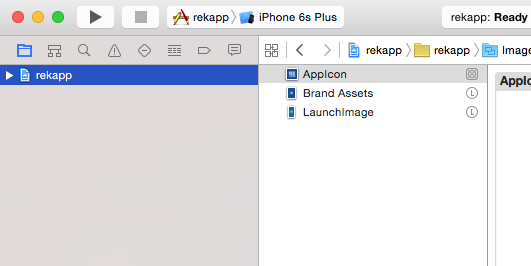
-
Scroll down to App Icons and Launch Images again. And set the 3 fields so that App Icons Source =
AppIcon, Launch Images Source =LaunchImageand clear out Laynch Screen File (it should be empty). When all done, it should look like the screenshot below.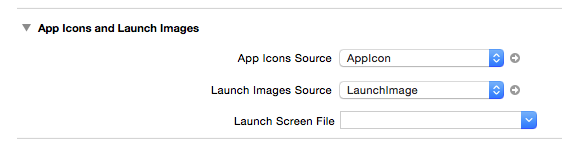
All done!
These hacks are installed automagically when npm install-ing the project. The text below if just documentation of the hacks and nothing you need to do manually.
This can be removed once NativeScript/NativeScript#1038 is released.
Currently, the WebView (used to display advices/drugs) isn't rendering correctly on older Android (probably <= 4.3).
To solve this, the file rekapp/node_modules/tns-core-modules/ui/web-view/web-view.android.js is patched at Line 71 and 83.
Where it says something like:
this._android.loadDataWithBaseURL(baseUrl, content, "text/html; charset=utf-8", "utf-8", null);
; charset=utf-8 part of the "text/html; charset=utf-8" is removed, so that it reads:
this._android.loadDataWithBaseURL(baseUrl, content, "text/html", "utf-8", null);
Same thing on line 71.
This can be removed once NativeScript/NativeScript#963 is released.
Currently the WebView isn't can't show pre-downloaded images on Android. There's an open GitHub issue which solves this.
The file rekapp/node_modules/tns-core-modules/ui/web-view/web-view.android.js is patched at Line 84.
this._android.loadData(src, "text/html; charset=utf-8", "utf-8");
is replaced with
var baseUrl = "file:///" + require("file-system").knownFolders.documents().path + '/';
this._android.loadDataWithBaseURL(baseUrl, src, "text/html", "utf-8", null);
This is a ES2015/EcmaScript 6 app. All source files lives in the src directory and gets compiled into ES5 into the /rekapp directory.
Images in vector format in src/app/images gets converted into png images of different sizes (@2x, @3x, hdpi, etc) and copied to rekapp/app/images when gulp images is run. Images, already in png format, in src/app/images-fixed just gets copied to rekapp/app/images when the same gulp task is run.
The npm install and npm run prepare commands will run a whole lot of magic to prepare the app for you. Rather then describing all magic which happens here, take a look at the root/package.json file under the scripts section.
These files are generated and will be overwritten.
If you want to change the AndroidManifest.xml/rekapp-Info.plist files, edit them in root/resources/app-settings and run tns run prepare to copy them to the right place.
If you want to change the hacks (as described above), edit them in root/resources/hacks and run tns run prepare to copy them to the right place. If you want to add/remove a hack; take a look at the internal:copy-hacks task in root/package.json.
# To start the emulator the first time
gulp startIOS

# To watch for file changes. When a file is changed
# the source is recomipled (from ES2015 to ES5) and
# changes pushed to the emulator.
gulp livesyncIOS
or run:
gulp watchFullIOS
Currently, NativeScript does unfortunately not display console.log or exception statements in the terminal when running with livesync. Therefor we still have to do full rebuilds with the watchFullIOS command to get terminal outputs.
| - gulpfile.js - Development gulp file (for recompiling, etc)
| - node_modules - Development modules
| - package.json - Development package.json
| - rekapp - The actual app.
  | - app - The actual app
  | - node_modules - App modules
  | - package.json - App package json
| - resources - Resources which are not bundled with the app
| - src - Source of the app. Files gets moved from here to 'rekapp'
- Javascript source files (ES2015) gets compiled and moved from
srctorekapp. XML and CSS files gets copied without alternation. - Javascript files in
src/thirdpartygets moved fromsrctorekappwithout compilation. - To install app dependencies, run
npm install [package] --savefrom therekappfolder. The NativeScript build process will copy them to the correct places in the app. They may be required in the normal way (let theModules = require('theModule'))
These changes are done to the iOS/Android app settings.
Edit: rekapp/platforms/android/src/main/AndroidManifest.xml and add:
<uses-permission android:name="android.permission.ACCESS_NETWORK_STATE"/>
Edit: rekapp/platforms/android/src/main/AndroidManifest.xml and change
<activity
    android:name="com.tns.NativeScriptActivity"
    android:label="@string/title_activity_kimera"
    android:configChanges="keyboardHidden|orientation|screenSize">
into
<activity
    android:name="com.tns.NativeScriptActivity"
    android:label="@string/title_activity_kimera"
    android:configChanges="keyboardHidden|orientation|screenSize"
    android:screenOrientation="sensorPortrait"
    android:theme="@android:style/Theme.NoTitleBar.Fullscreen">
Edit: rekapp/platforms/ios/rekapp/rekapp-Info.plist
To allow SSL Connections on iOS9+. Add as a child to the outermost <dict>:
<key>NSAppTransportSecurity</key>
<dict>
    <key>NSAllowsArbitraryLoads</key>
    <true/>
</dict>
To change app name, change:
	<key>CFBundleDisplayName</key>
	<string>${PRODUCT_NAME}</string>
into
	<key>CFBundleDisplayName</key>
	<string>REKlistan</string>
and then, to change allowed orientations, change:
<key>UISupportedInterfaceOrientations</key>
<array>
	<string>UIInterfaceOrientationPortrait</string>
	<string>UIInterfaceOrientationLandscapeLeft</string>
	<string>UIInterfaceOrientationLandscapeRight</string>
</array>
<key>UISupportedInterfaceOrientations~ipad</key>
<array>
	<string>UIInterfaceOrientationPortrait</string>
	<string>UIInterfaceOrientationPortraitUpsideDown</string>
	<string>UIInterfaceOrientationLandscapeLeft</string>
	<string>UIInterfaceOrientationLandscapeRight</string>
</array>
into
<key>UISupportedInterfaceOrientations</key>
<array>
	<string>UIInterfaceOrientationPortrait</string>
</array>
<key>UISupportedInterfaceOrientations~ipad</key>
<array>
	<string>UIInterfaceOrientationPortrait</string>
	<string>UIInterfaceOrientationPortraitUpsideDown</string>
</array>