Live streaming host server for multiple remote presenters. Designed to quickly spin up and down before and after streams to keep hosting costs low.
- RTMP server
- OBS Studio over web VNC
- OBS Remote
- Performance monitoring with Netdata
- Automatic HTTPS support
- Dynamic DNS with DuckDNS
- Presenters can connect to the same URL for each stream, even if the server IP changes
Create an account at DuckDNS and create a subdomain to use for the streaming server.
Go to your DNS provider and create a CNAME record to your DuckDNS subdomain (xxx.duckdns.org). Be sure to use a short TTL. You will be able to use this to access the web interface and as the RTMP destination.
git clone --recursive git@github.com:monsec/cloud-stream.git
A convenience script (install-docker.sh) is provided.
Copy the example config: cp .env.example .env.
NOTE: Username and password can not contain single quotes or characters which need to be URL-enoded
| Variable | Description |
|---|---|
| PRODUCTION | Whether this is a production server. Will enable automatic HTTPS |
| DOMAIN | The full domain name that points to this server/the DuckDNS subdomain. |
| DUCKDNS_SUBDOMAIN | DuckDNS subdomain created for this app. xxx.duckdns.org |
| DUCKDNS_TOKEN | DuckDNS token. If using the default subdomain, log in with the MonSec Google account. |
| AUTH_USER | Used to authenticate the web interface and RTMP. |
| AUTH_PASS | Used to authenticate the web interface and RTMP. |
docker-compose up -d
Open up OBS via the web interface.
Run the auto-configuration wizard with these settings
- Base (Canvas) Resolution: 1920x1080
- FPS: Prefer 60
- Service: Twitch
- Stream Key: Get your Twitch stream key
- Estimate bitrate with bandwidth test: Yes
In Settings -> Stream set the Twitch server to your AWS region.
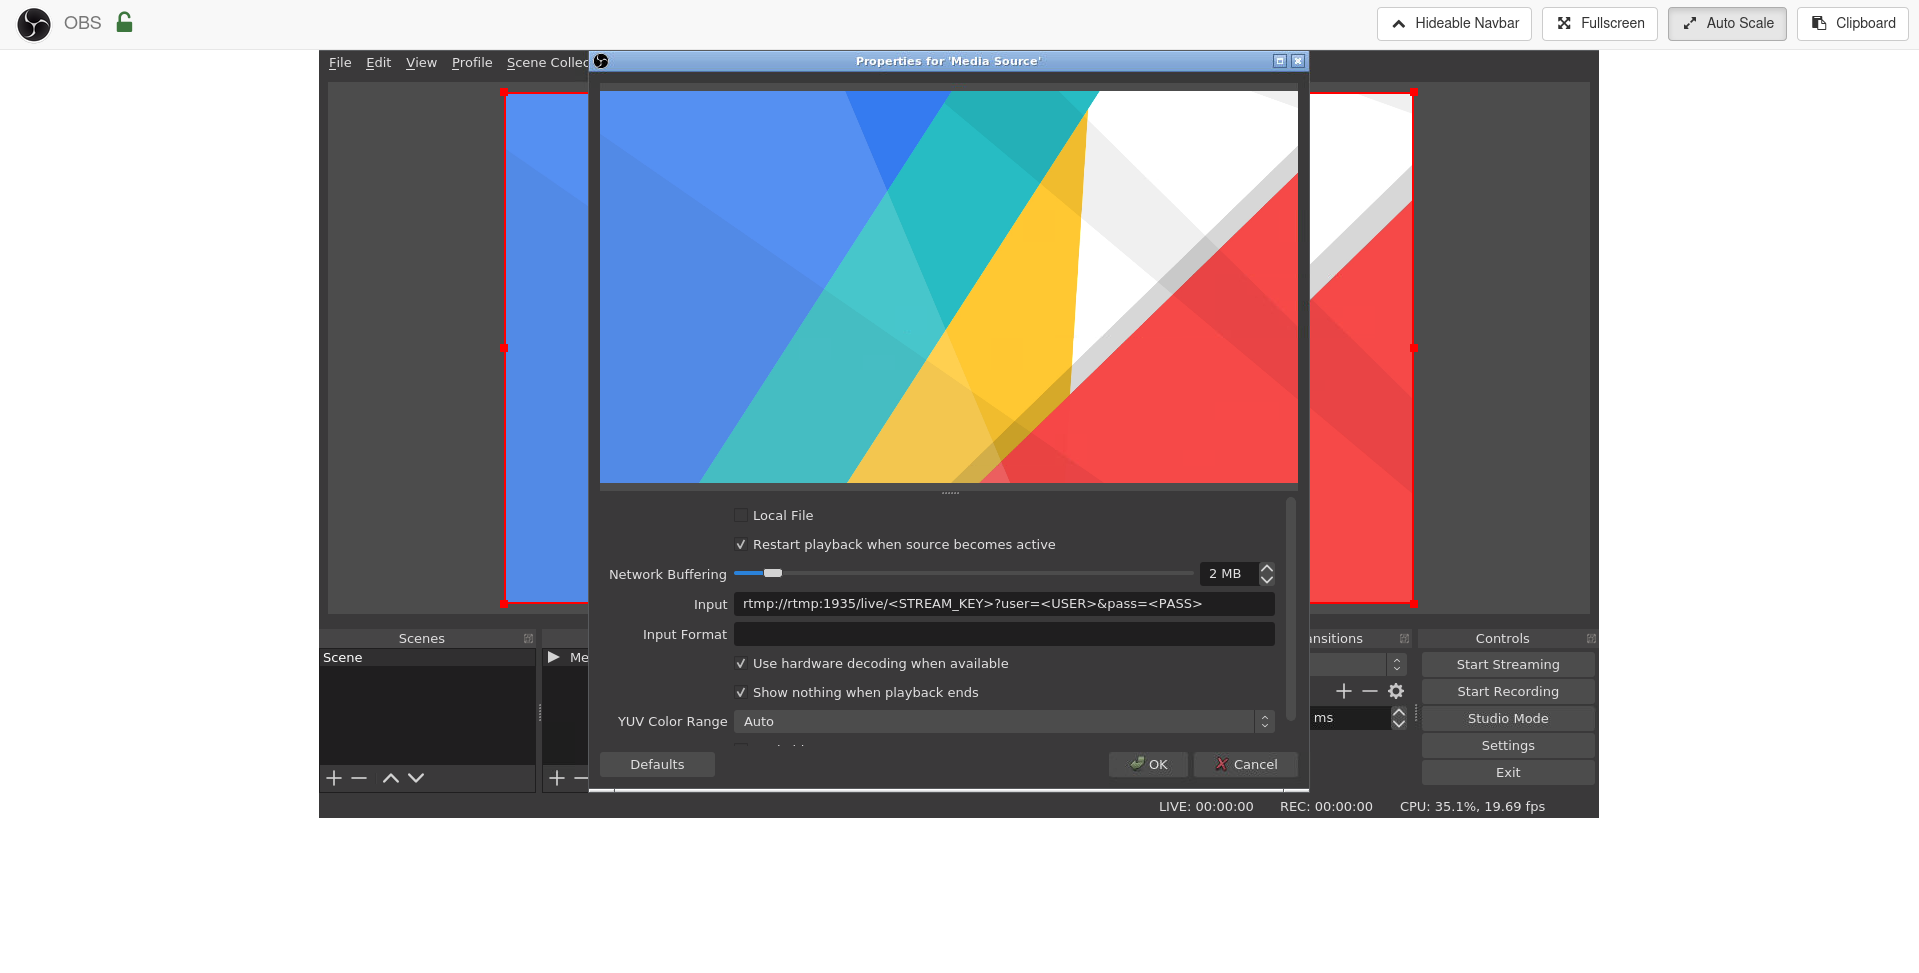
Add a media source for each presenter with the following settings. Stream key can be anything as long as it is unique to each presenter. Right-click the source and select Transform -> Fit to screen.
Feel free to add overlays as usual. Any media assets put in the config/user folder will be accessible inside the container at /config/user.
Note: Files in the user directory may have their permissions changed. If you aren't able to modify or delete the file, you may need to become superuser first.
At this point you can take a snapshot or backup of your config to speed up setup in future sessions.
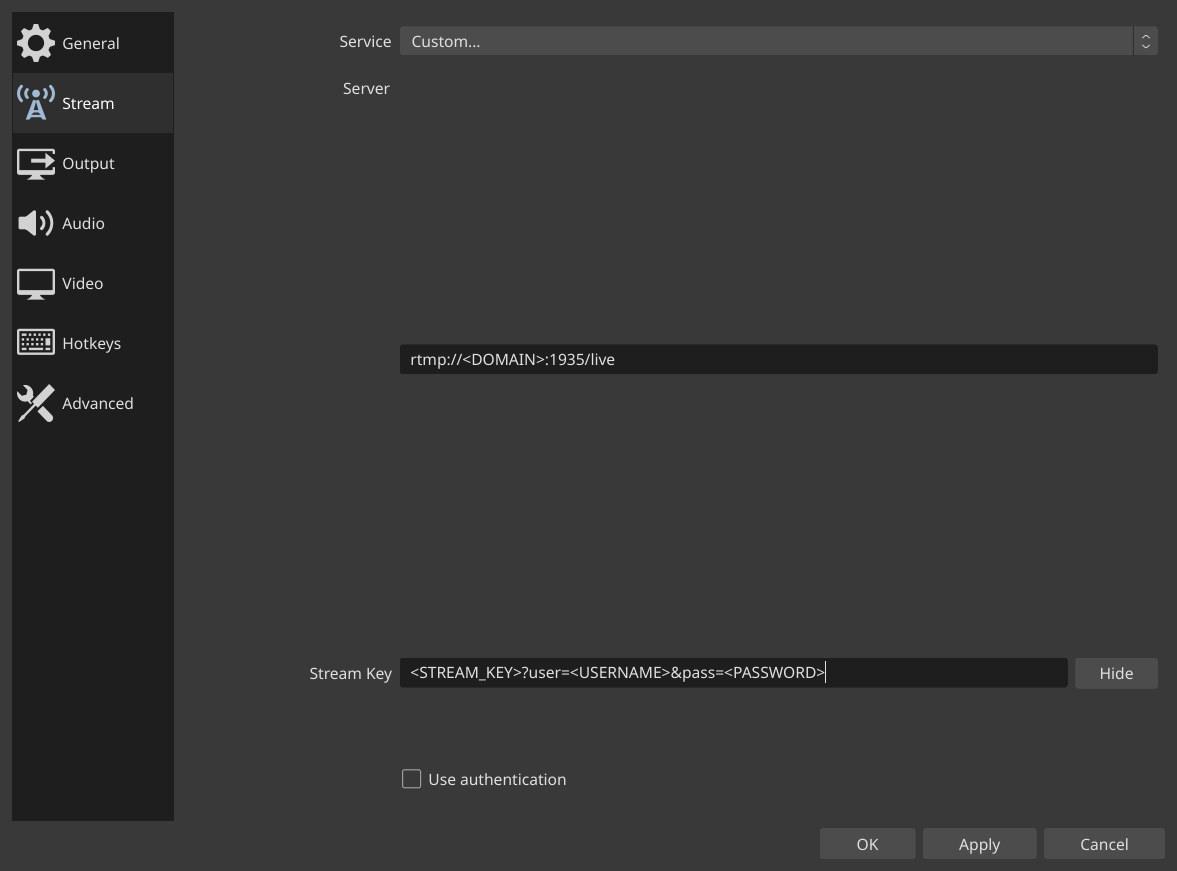
Set up OBS Studio with the following Stream settings. Stream key is the value defined in the media source above.
VLC is able to preview the raw feed by going to Media -> Open Network Stream and using the following network URL.
rtmp://<DOMAIN>:1935/live/<STREAM_KEY>?user=<USERNAME>&pass=<PASSWORD>
docker-compose down
While almost everything is designed to be disposed and recreated, there are a couple of things that need to be kept between sessions. Make sure to back up .env and the config directory, and restore them before the next run.

