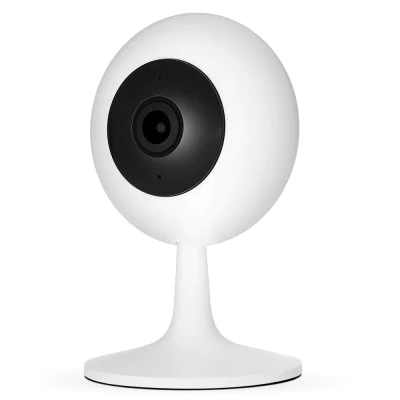
Collection of modifications for the Xiaomi Chuangmi 720p WiFi Camera
Originally forked from fang-hacks, but now mostly a place to hold a workable bootstrap
From the factory, the camera can be found and set up by the Xiaomi MiHome app. It will then show a feed and provide talkback via the app, but this can raise privacy concerns, as the information is being sent via a server in China. Below is a series of steps which enables a local RTSP stream, and removes the reliance on an external connection.
Initial setup is performed using the Xiaomi MiHome app. This may not be necessary in future releases
- Install the app on an Android/iOS device
- Set up your account
- Add a camera
- Follow the onscreen steps until your camera is successfully added
- View the camera in the app and go to settings - do not update the firmware (it can make things harder)
- Make a note of the IP address of the camera
A custom image which allows root access is required.
- Format a microSD card to FAT32
- Download tf_recovery.img
- Copy tf_recovery.img to the root directory of the SD card
- Unplug camera
- Insert SD card
- Plug in camera
- wait for about 2 minutes until lights go blue
- telnet 192.168.1.xx (camera IP as listed in the MiHome app) username: root, no password
Custom software including RTSP server, SSH and Samba. This software was developed for the Mijia 720p camera, but appears to work here as well
- Download the latest release of mijia-720p-hack.zip from https://github.com/ghoost82/mijia-720p-hack/releases/latest/ (0.95 at time of writing)
- Unplug camera
- Eject SD card from camera
- Unzip the contents of mijia-720p-hack/sdcard/ to the root directory of the SD card
- Make any required changes to mijia-720p-hack.cfg
- Insert SD card into camera
- Plug in camera
- Wait for camera light to go solid blue. This may take a couple of minutes.
Test it is working by going to http://192.168.1.xx (camera IP again) in your browser (assuming HTTP server is enabled) or using SSH to connect
If enabled the telnet server is on port 23.
Default login/password:
- login = root
- password = 1234qwer (unless you specified another password in mijia-720p-hack.cfg.cfg file)
If enabled the SSH server is on port 22.
Default login/password:
- login = root
- password = 1234qwer (unless you specified another password in mijia-720p-hack.cfg.cfg file)
If enabled the RTSP server is on port 554.
You can connect to live video stream (currently only supports 720p) on:
rtsp://your-camera-ip/live/ch00_0
For stability reasons it is recommend to disable cloud services while using RTSP.
If enabled the FTP server is on port 21.
There is no login/password required.
If enabled the MIJIA_RECORD_VIDEO directory can be accessed via CIFS.
The share is readable by everyone.
Default login/password for read/write access:
- login = root
- password = 1234qwer (unless you specified another password in mijia-720p-hack.cfg.cfg file)
Disabling the cloud services disables the following functions:
- Motion detection
- No video data or configuration with the smartphone application
- No recordings on the SD card or a remote file system
For stability reasons it is recommend to disable cloud services while using RTSP.
Any files in this repo that are not already licensed (i.e. scripts and tools but not 3rd party binaries like busybox, dropbear et.al) are licensed under CC BY-SA 3.0.
