The EDCK 4001 is a Development Kit for Everyware IoT that provides a learning enviroment and a testbed for IoT applications; it targets professional developers with an Embedded, IT or OT background.
Be careful! This version of the dashboard works only with EveryWare Cloud 4.x.

The kit is composed by:
-
An Eurotech Gateway like the Eurotech ReliaGATE 10-11 or ReliaGATE 20-25.
-
Power supply

- A Demo Board

- A PLC

Before powering up the DevKit, please verify that the serial connector from the Gateway to the PLC is plugged in the PLC Port 2 as depicted in the following image:

The Gateway configuration requires the following steps:
-
Install the latest version of ESF. You can download it from here
-
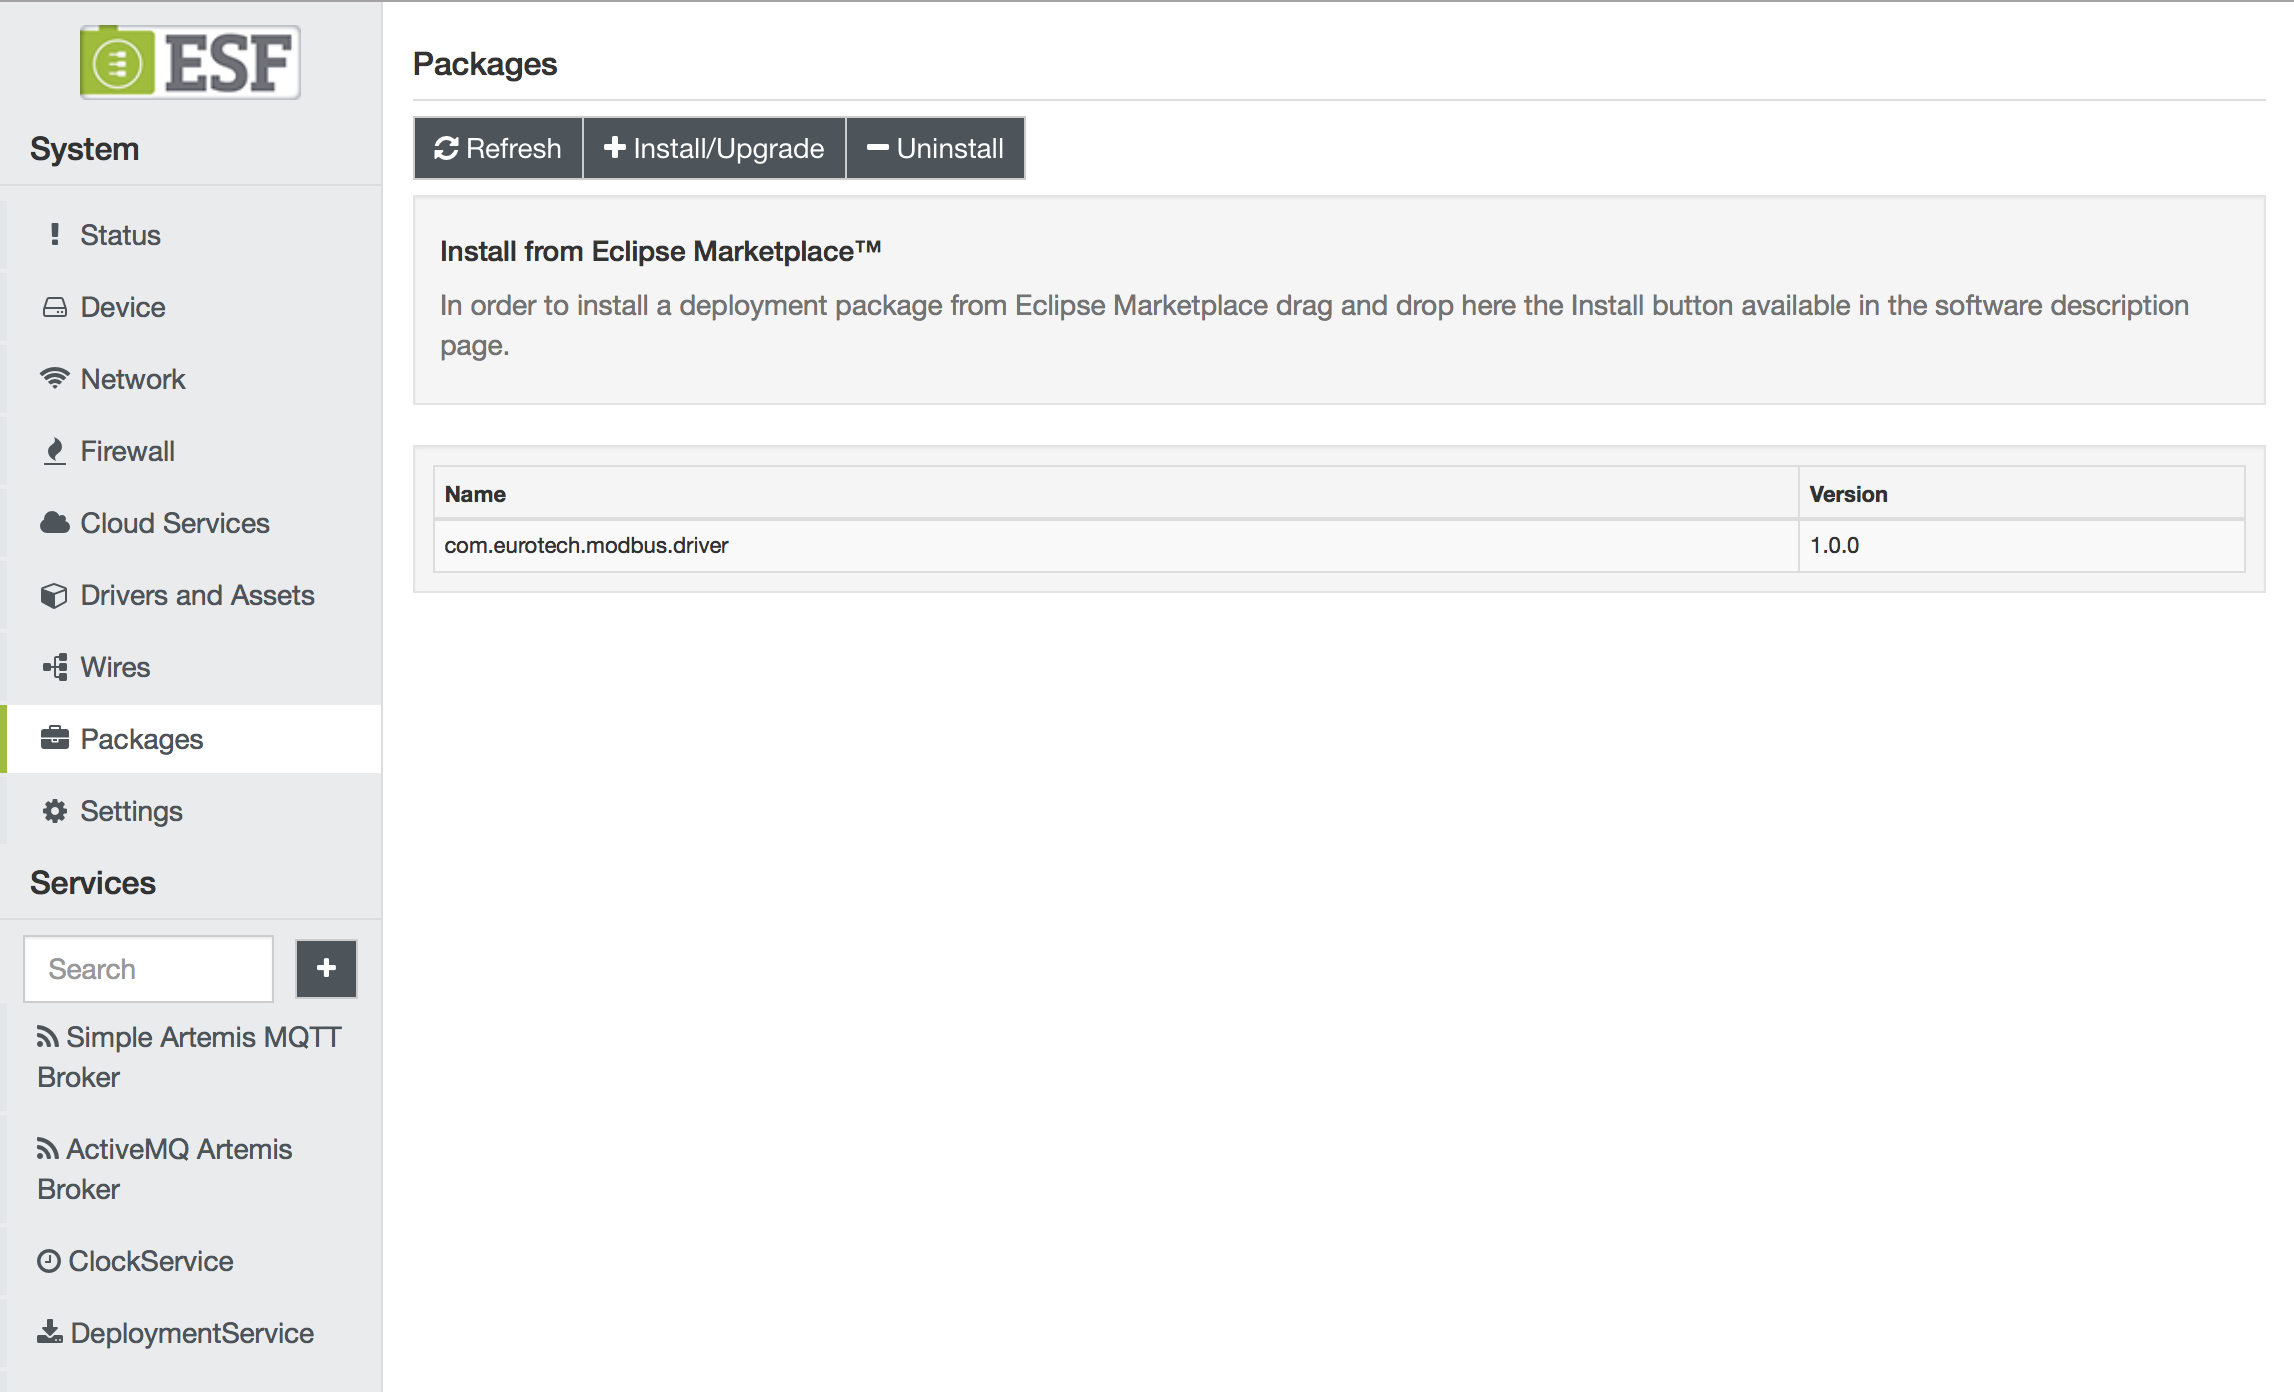
Install the Eurotech Modbus Driver. It is available at the following link. When installed, the ESF local Configuration UI should look like this:
-
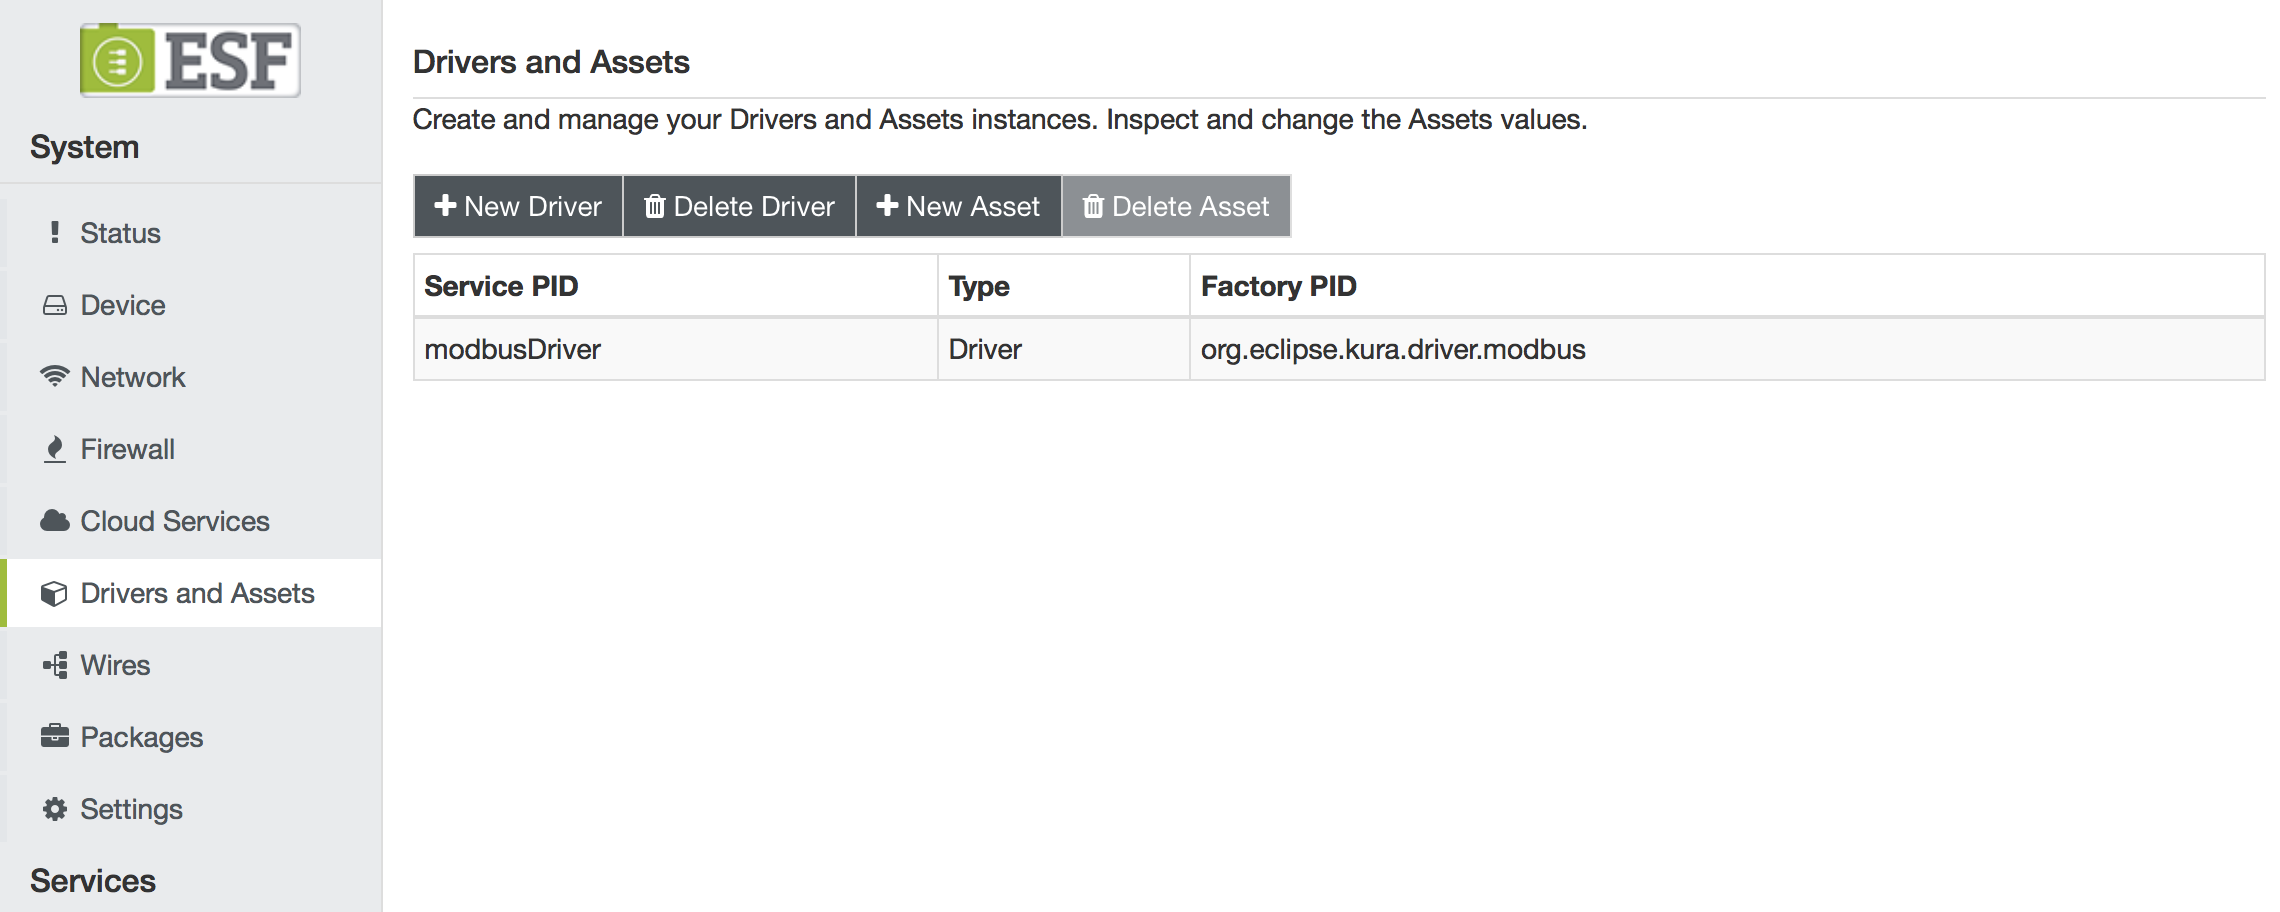
In the ESF Administrative Web UI, create a new driver instance:
- Under Drivers and Assets, click the New Driver button
- Select org.eclipse.kura.driver.modbus, type in a name, and click Apply: a new service will show up in the Drivers and Assets table.
A new Driver instance will appear:
-
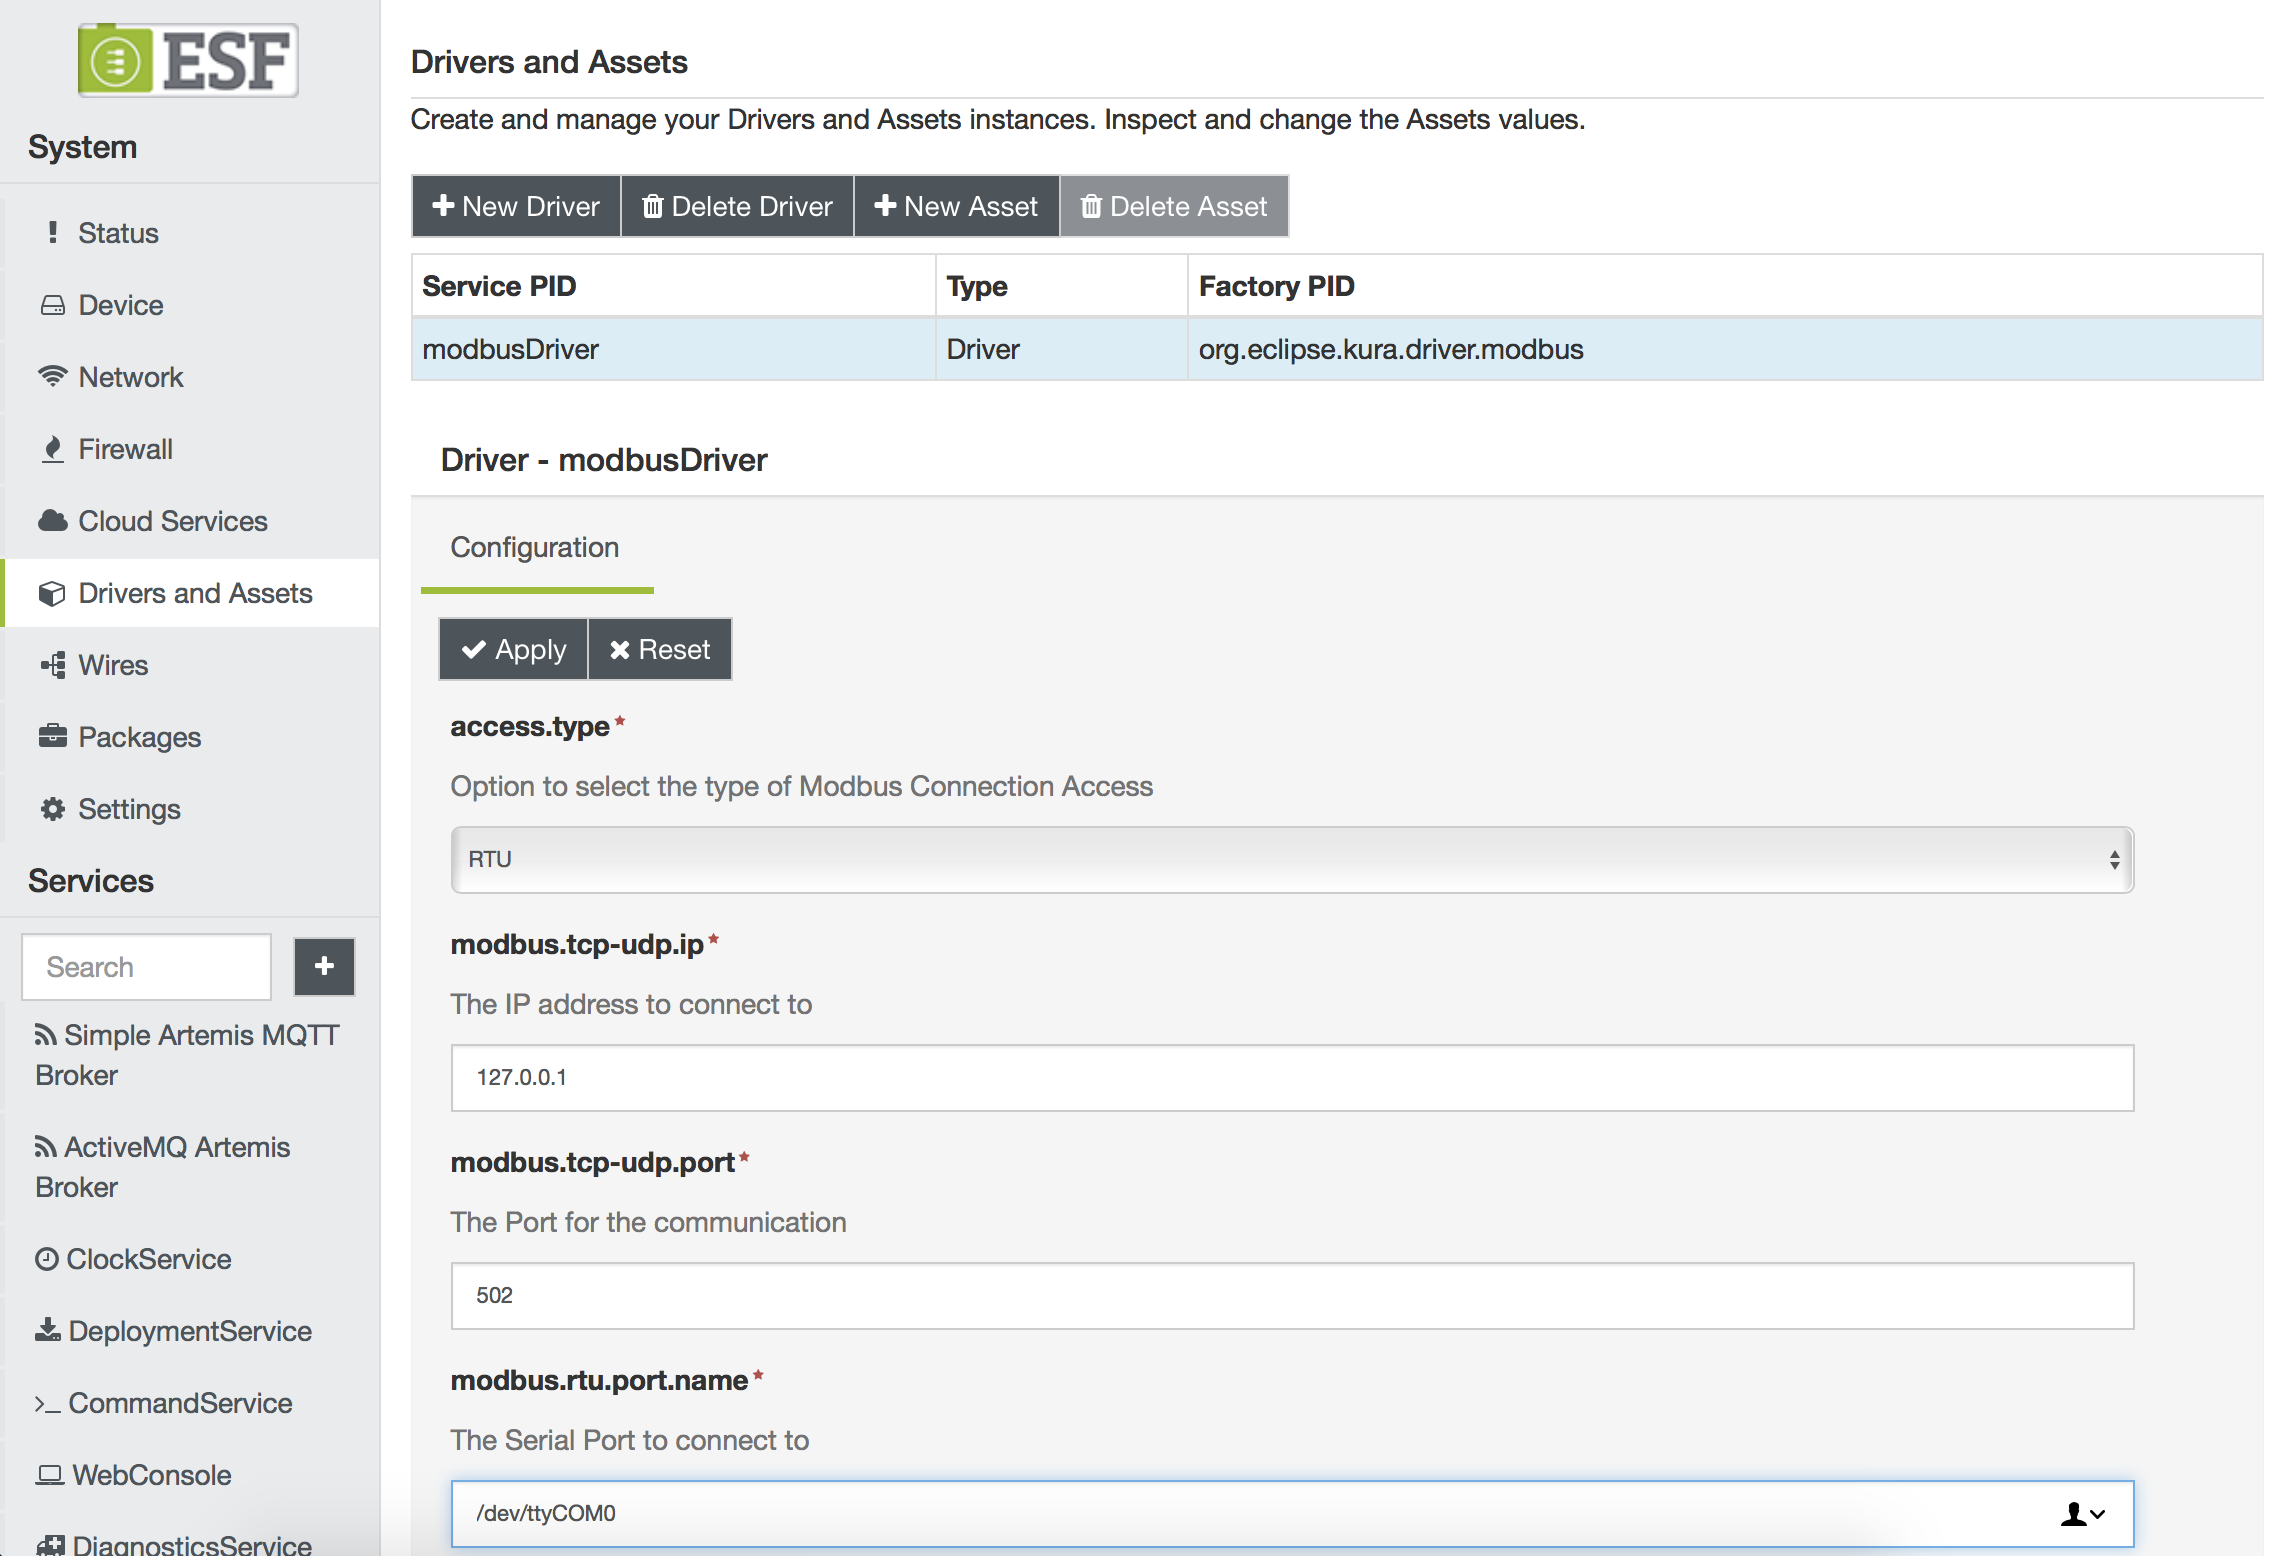
Configure the new service as follows:
- access.type: RTU
- modbus.rtu.port.name: The Serial Port to connect to. Usually set to /dev/ttyCOM0
-
Click on Wires in System
-
Add a new Timer component and configure the interval at which the Modbus slave will be sampled
-
Add a new Asset with the previously added Modbus driver
-
Configure the new Modbus asset, adding the following channels:
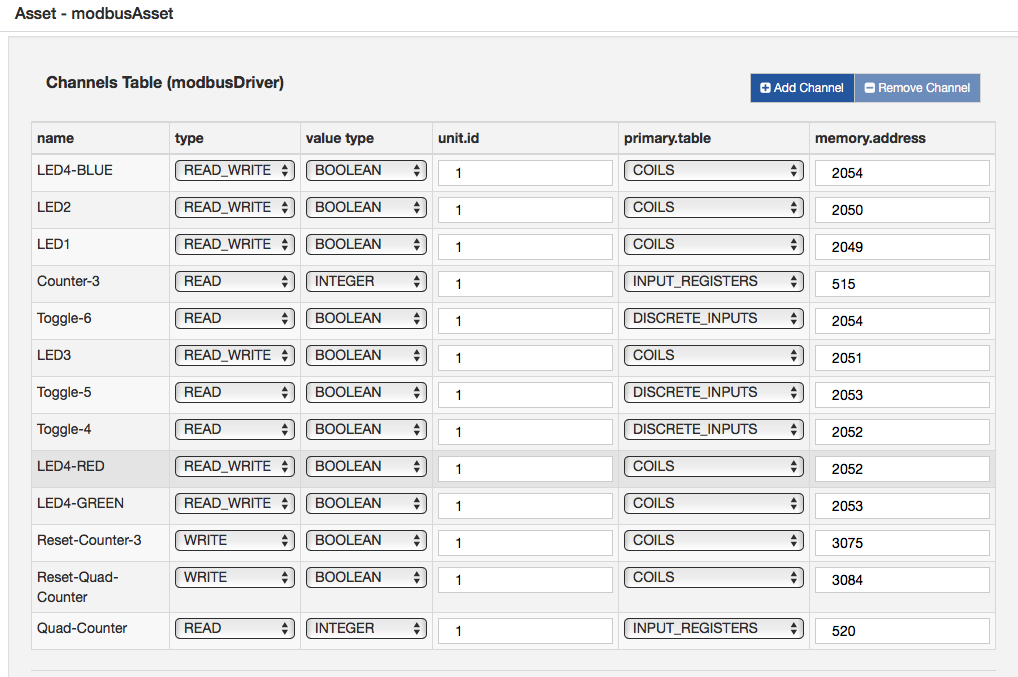
-
Add a new Publisher component and configure the chosen cloud platform stack in cloud.service.pid option
-
Add a Logger component
-
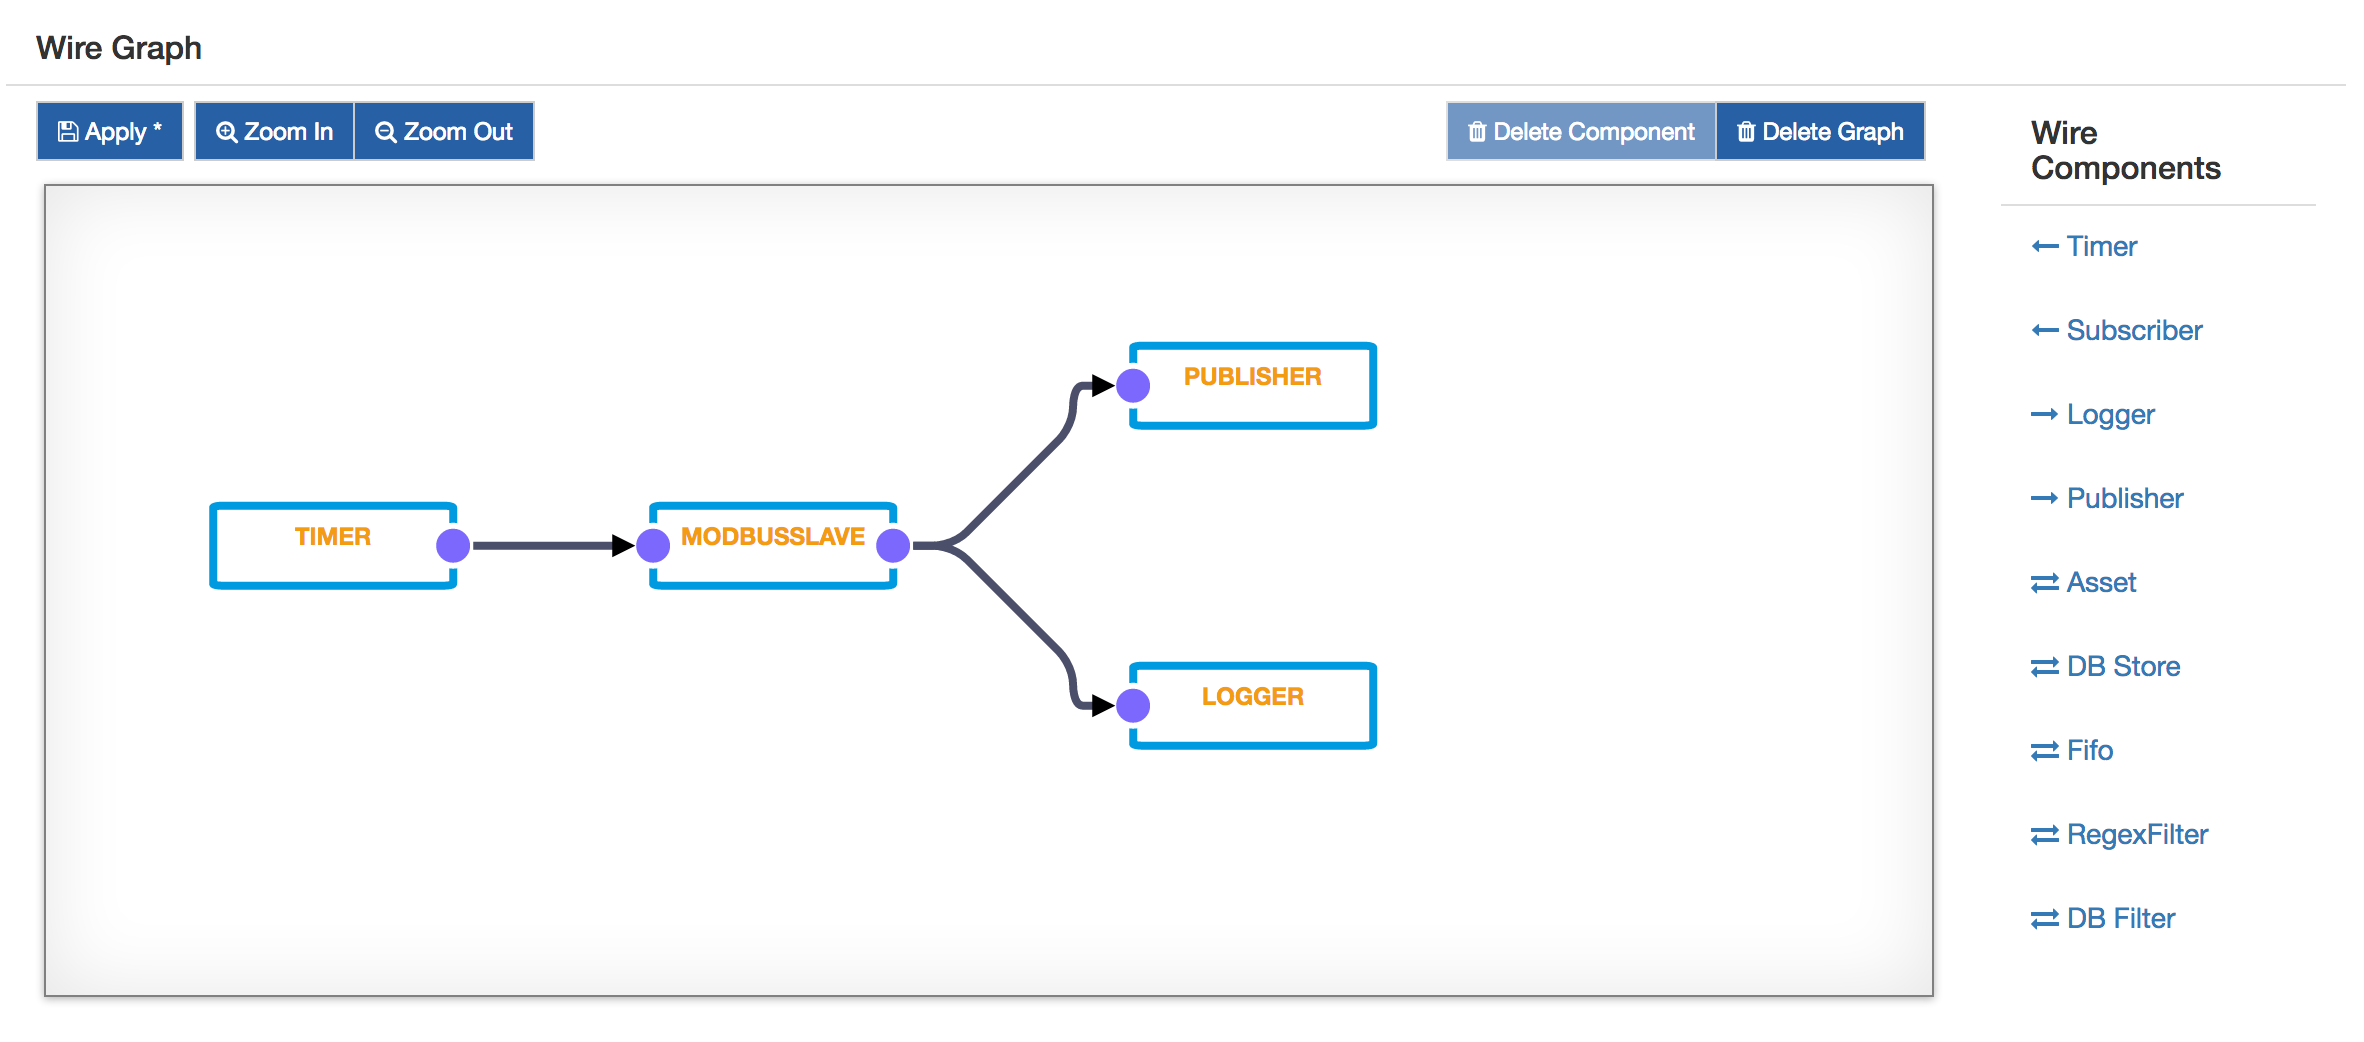
Connect the Timer to the Asset, and the Asset to the Publisher and Logger.
-
Click on Apply and check the logs and cloud platform that the data is correctly published.


A snapshot is available here When loaded, creates the all the drivers, assets and the needed wire graph for this example. A pre-requisite is to have the modbus dp installed from the Eclipse Marketplace.
The DevKit Dashboard is available in hosted version at the following URL: https://devkit-wires.everyware-cloud.com
When accessing to the dashboard locally or from the remote hosted version, the user will be prompted to login specifying:
- username;
- password;
- client id;
- asset name.

After setting the proper data, by clicking the login button,

the user will be redirected to the DevKit dashboard.

The PLC Inputs are connected to Everyware Cloud Sandbox instance using Web Sockets. They change their state depending on the user interaction with the PLC Toggles and Counters.
The LEDs displayed in the middle of the dashboard allow to perform an interaction from the dashboard to the real LEDs of the DevKit. When the user clicks on the Dashboard LEDs a REST API call is performed determining a request to the gateway and the real corresponding LED to light up.

The dashboard works with Google Chrome and Mozilla Firefox.
The dashboard is also compatible with Apple Safari, but it needs the user to select the Disable Local File Restrictions option in the Develop menu.